

How To Design Your Own Tapestry Crochet
Ever since I made my Clara Clutch pattern I've become a bit obsessed with tapestry crochet. When I set out to design the Clara Clutch I didn't know much about tapestry crochet so it was a lot of trial and error and so much frogging. Now that I have the hang of it I wanted to share everything I've learned with you.
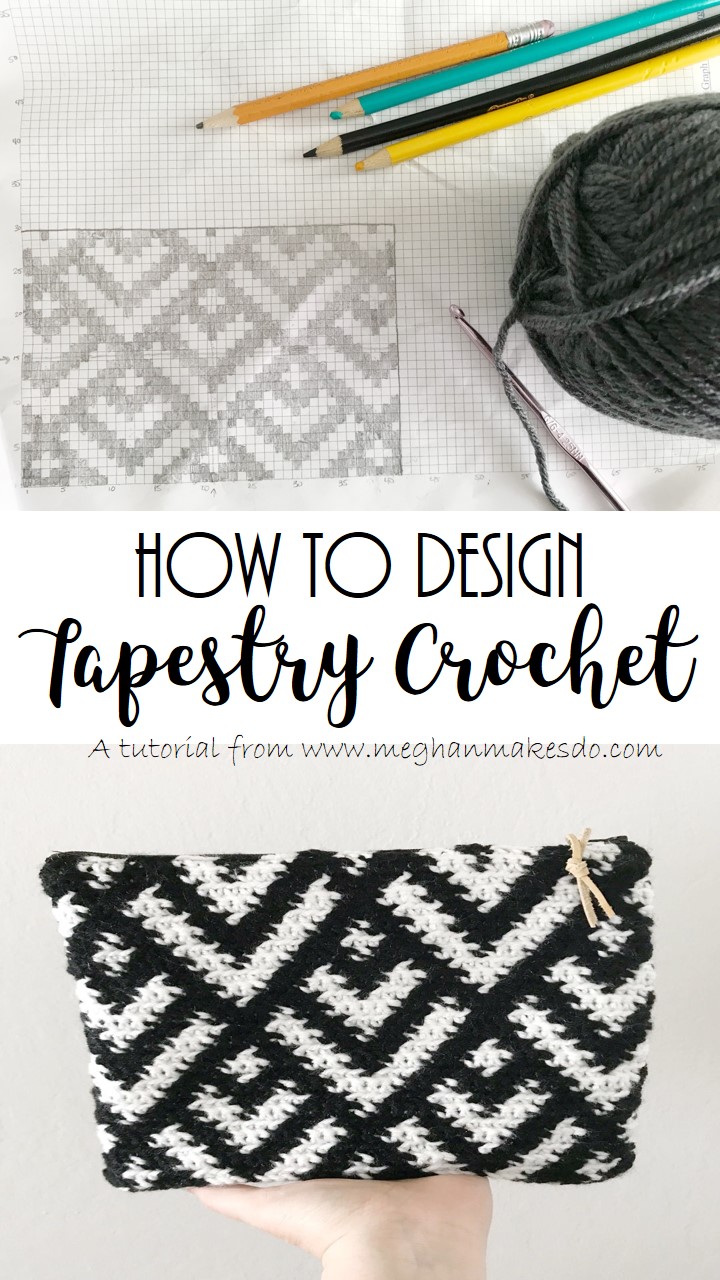
I'll try to give you all the information you will need in order to successfully design your own tapestry crochet pattern. We will cover all the basics as well as how to create a digital graph for your pattern. If you haven't tried tapestry crochet and want to learn about the technique used for tapestry crochet check out my previous blog post here.
Let's start with the materials you will need:
crochet hook (pick a size that suits the yarn you choose to use)
yarn in two or more colors (I like to used worsted weight and when I can I used the same brand and style)
Tapestry needle
graph paper (I print mine out at waterproofpaper.com)
pencil and color pencils
tape measure
calculator
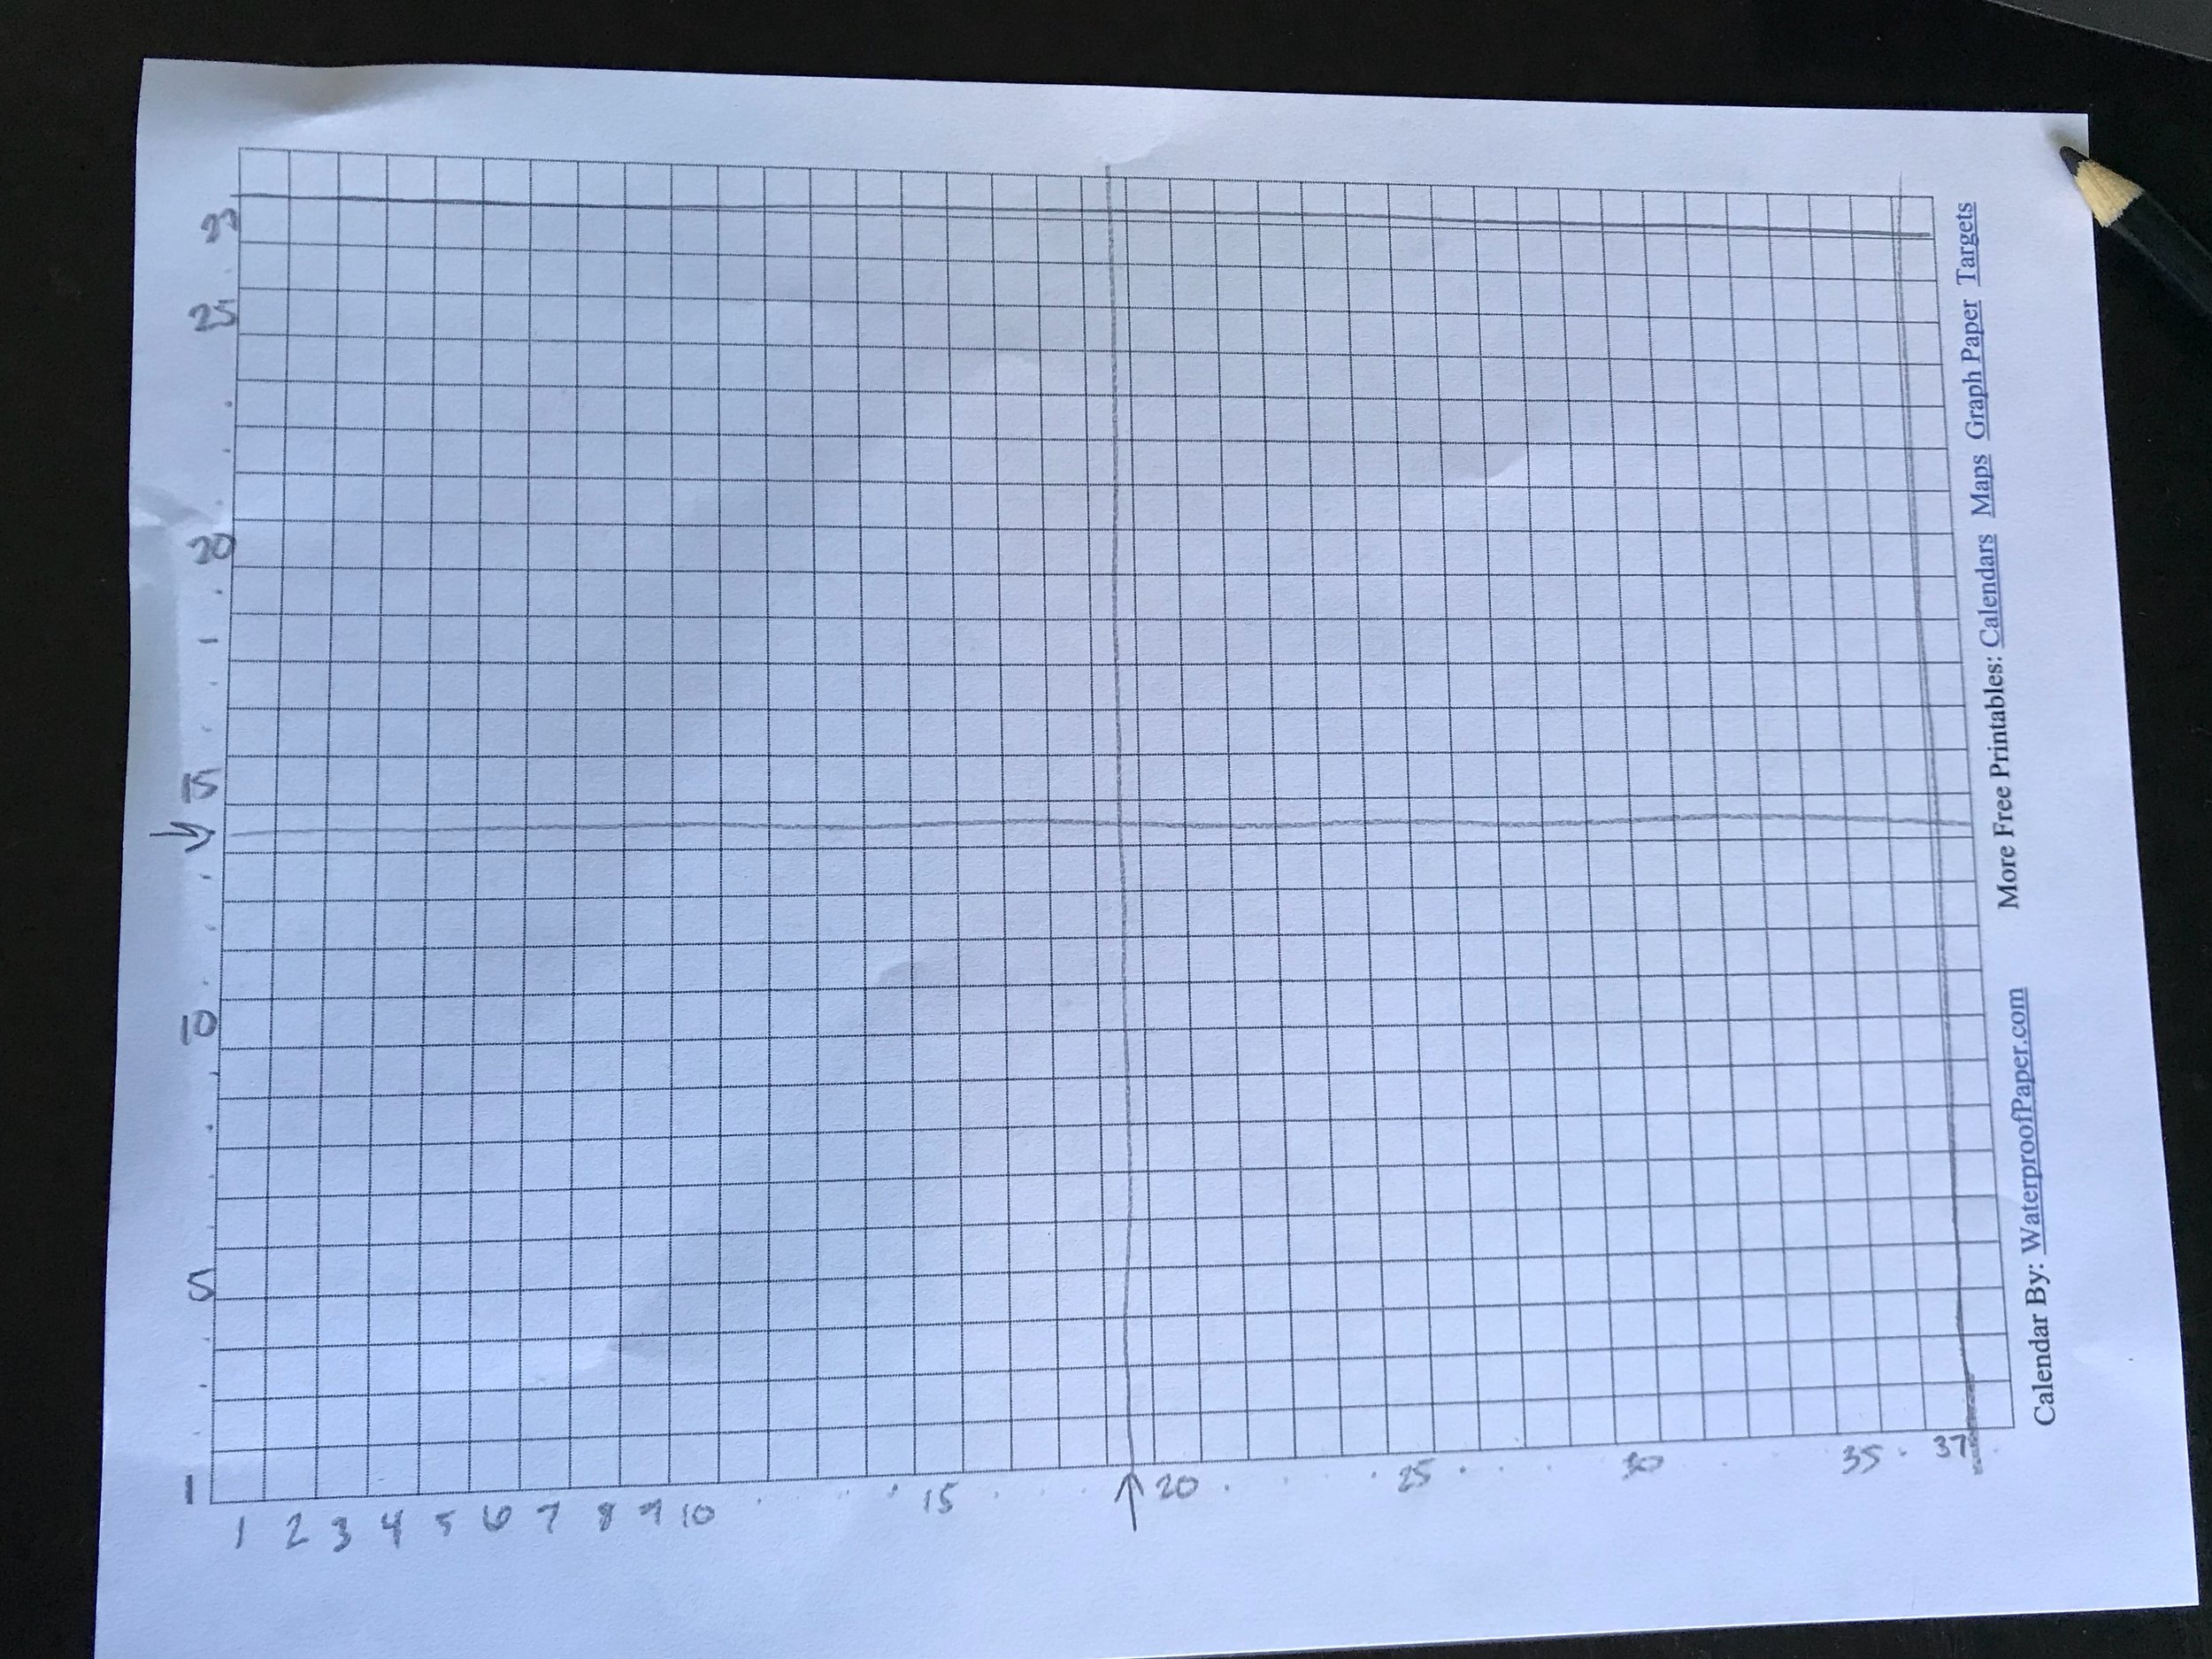
When I design a tapestry crochet piece it usually starts with a rough sketch of what I want the design to look like.

Here is my rough sketch of the design we will be making today. I tend to stick to symmetrical, geometric designs, but you can choose any style you want.
Once you have an idea of what you want it to look like you can start one of two ways. You can start with a specific size in mind and design your pattern to fit that size or you can start with a specific design and let the design determine the size once complete.
For my first attempt I let the design determine the final size of the piece.

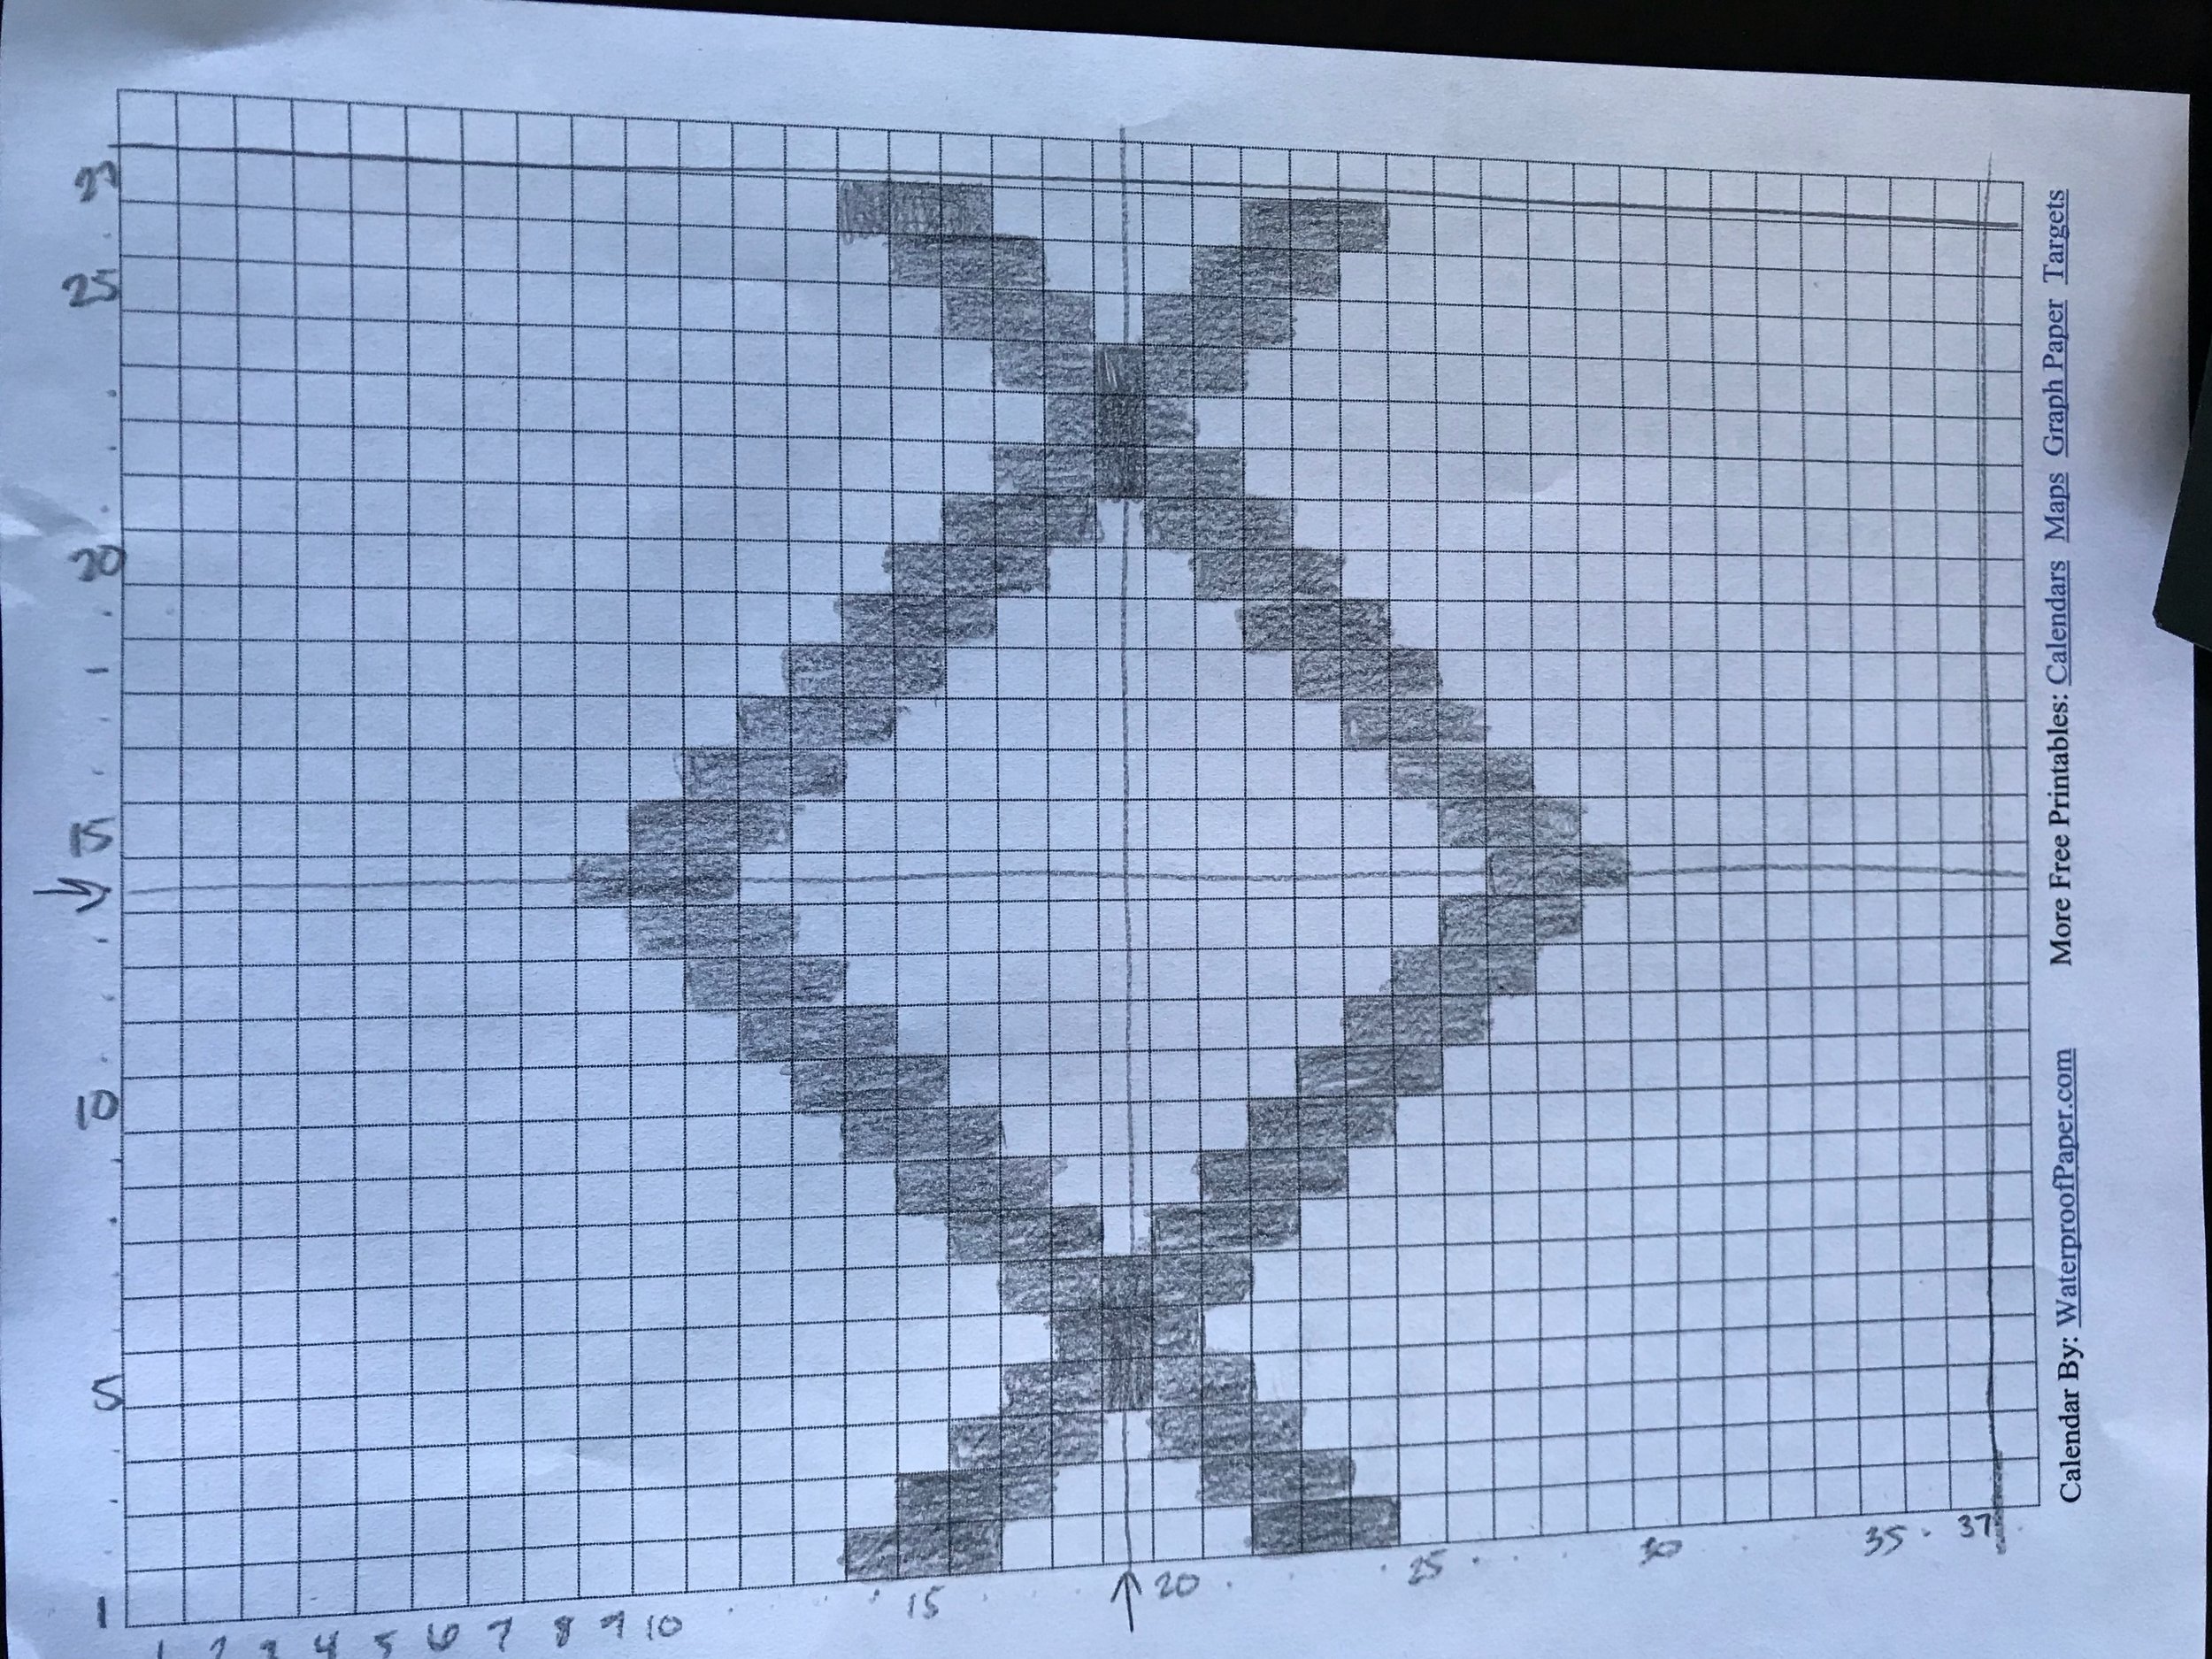
The first design was made using 1/4 inch graph paper and I created my design using the whole graph less one square on the top and bottom so I would have an odd number of squares. Note how I had to erase a bit and fix it on the bottom left corner.
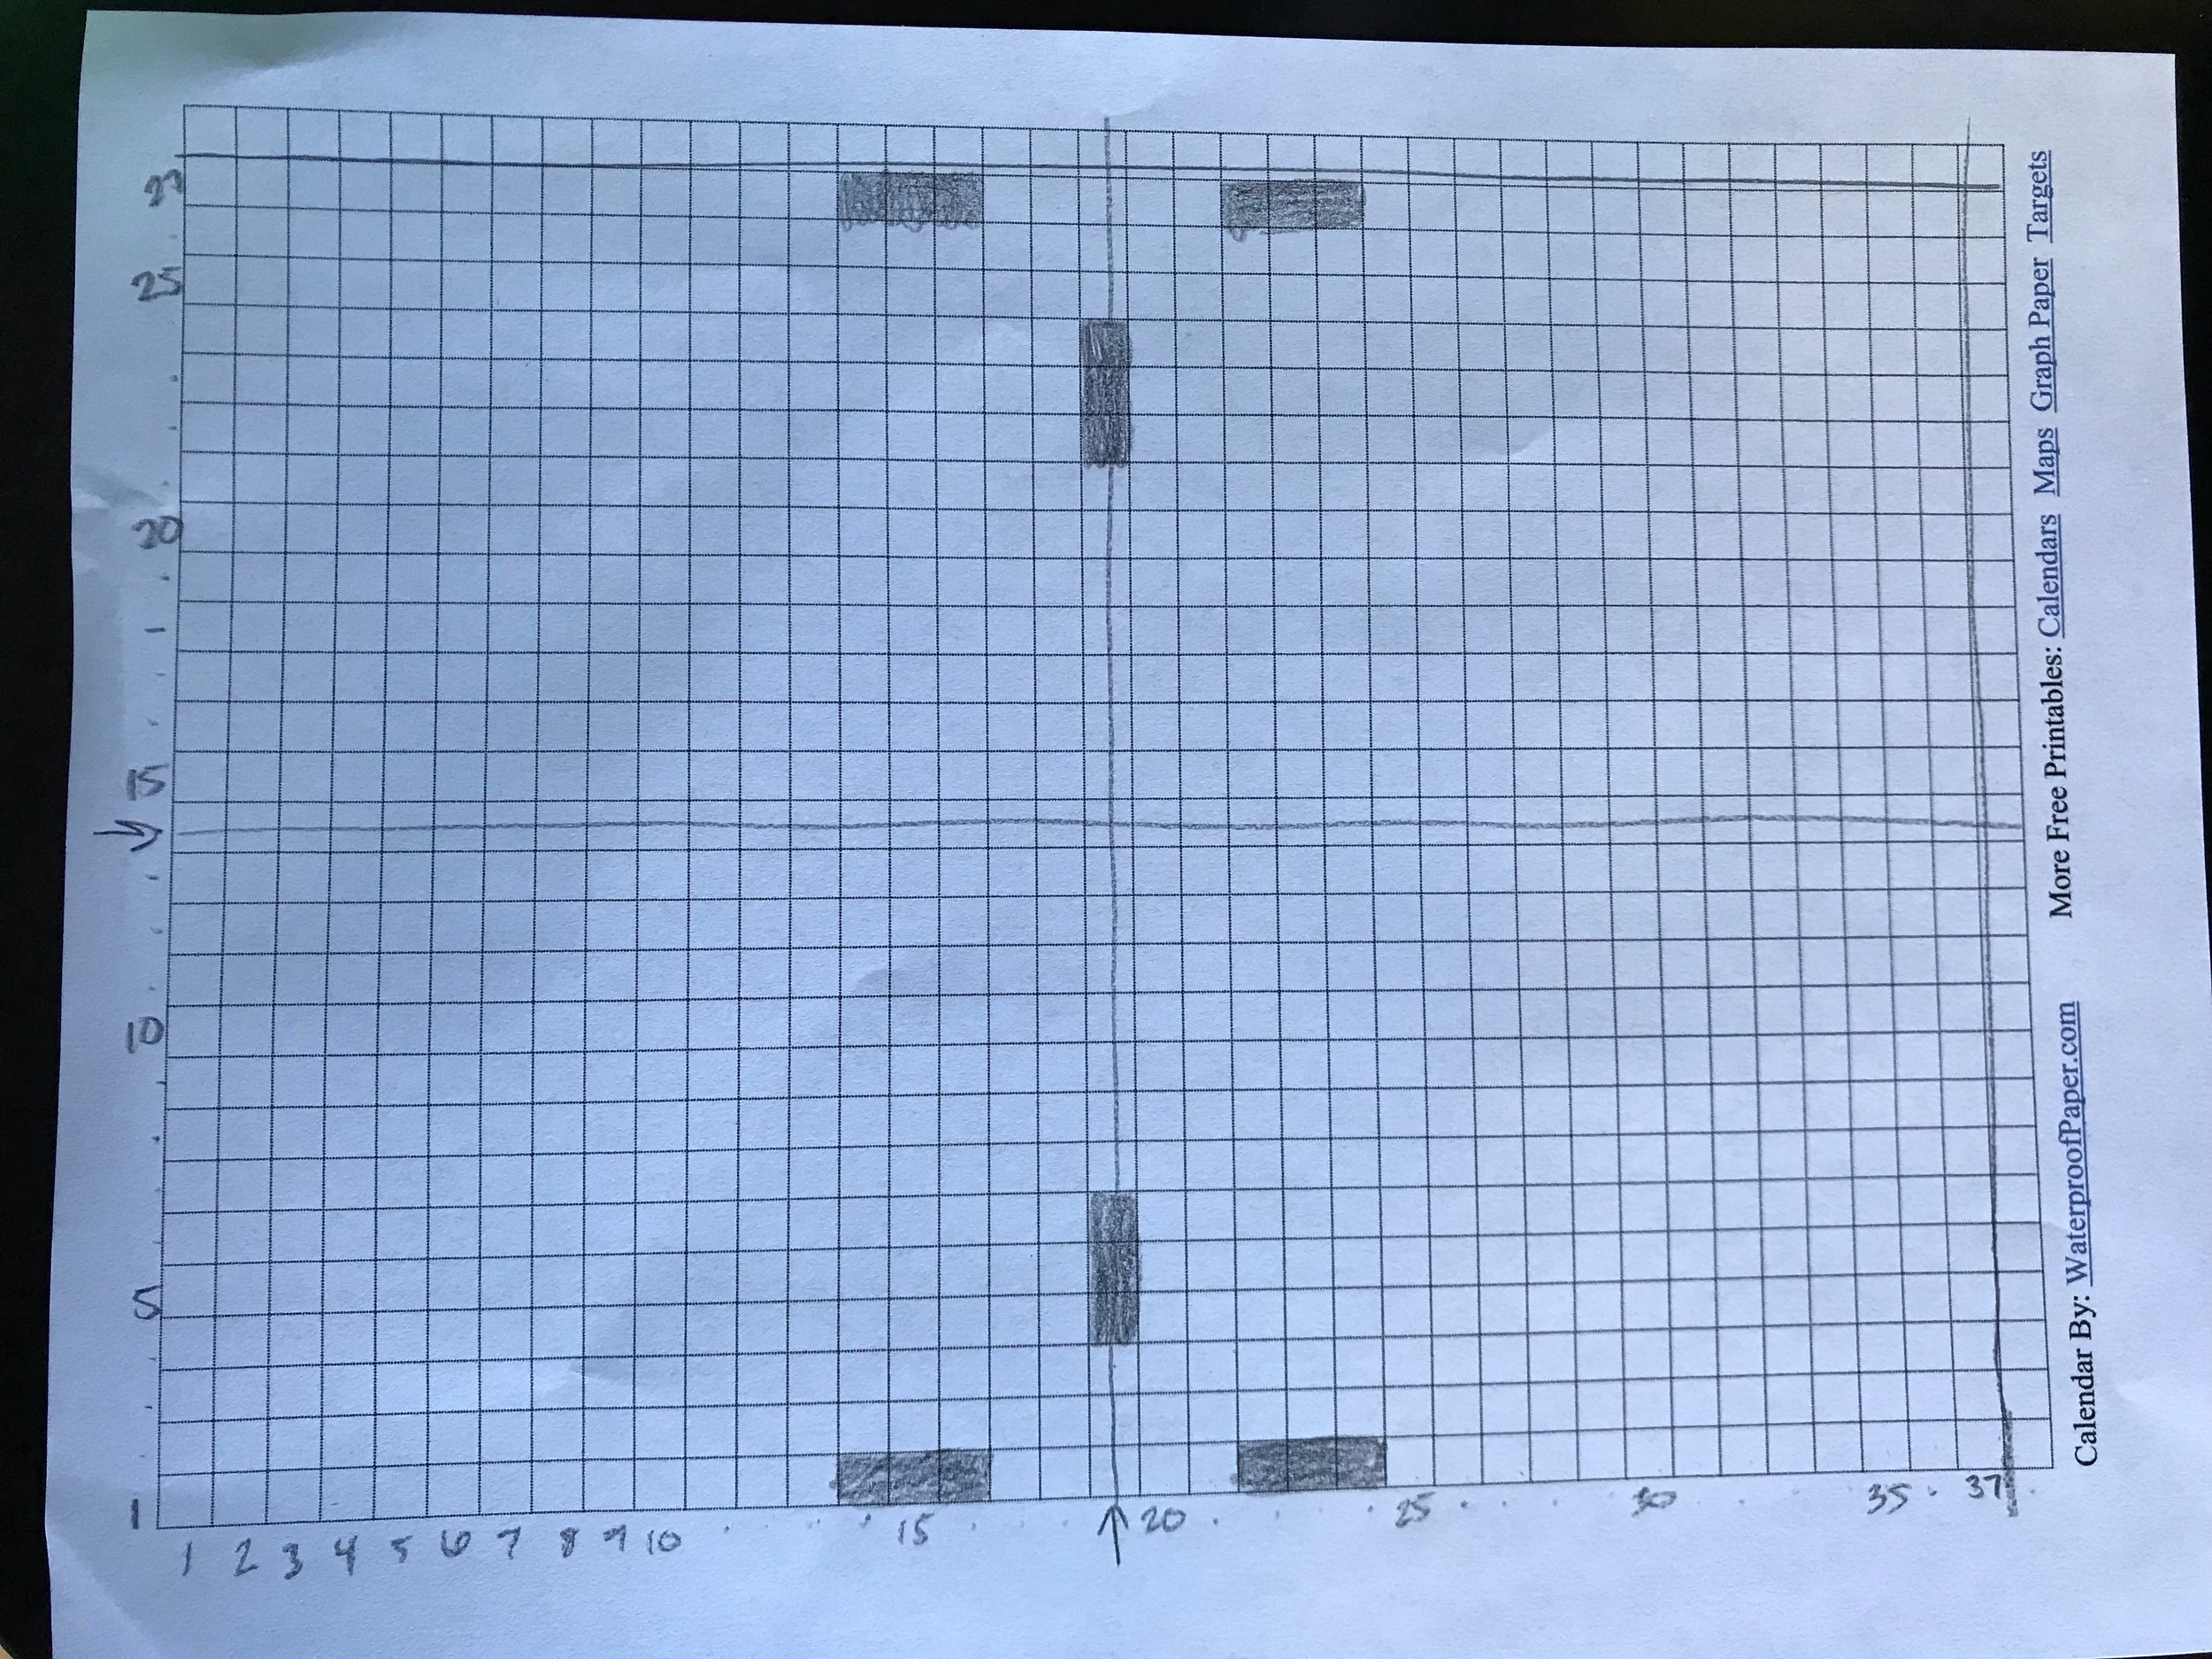
I always like to start by finding the center of my graph. The center can be found on a square or on an intersecting line.


Here is a look at the difference. Say I was making a symmetrical design with triangles in it. If I find my center on a square then my triangle will come to a point with one square (right picture). If I find my center on a line then my triangle will come to a point with two squares.
If your design is asymmetrical (such as a word graphic) then the way you find the center shouldn't matter as much. If you want the center on a line you will have an equal amount of squares for width and height. If you find the center on a square then you will have an odd number of squares for width and height.
Now that I have my center (on a square) I can start laying out my design. I started by deciding how thick I wanted my lines to be. I find that the design will look cleaner the thicker I have my lines. Here are some photos of different line widths so you can see what they will look like before creating your own.

You can see that the first X is thin and the lines get a bit distorted. The second one is more defined and the third is pretty thick. I suggest that if creating single lines or words you should always design it using at least two squares together to create a thicker more defined line.
I liked the look of the thickest X so I created my design by always having three squares together. Here you can see the process I took when creating my design. I tried to fill in the squares equally from the top and from the bottom so I knew I was getting the most symmetrical look.
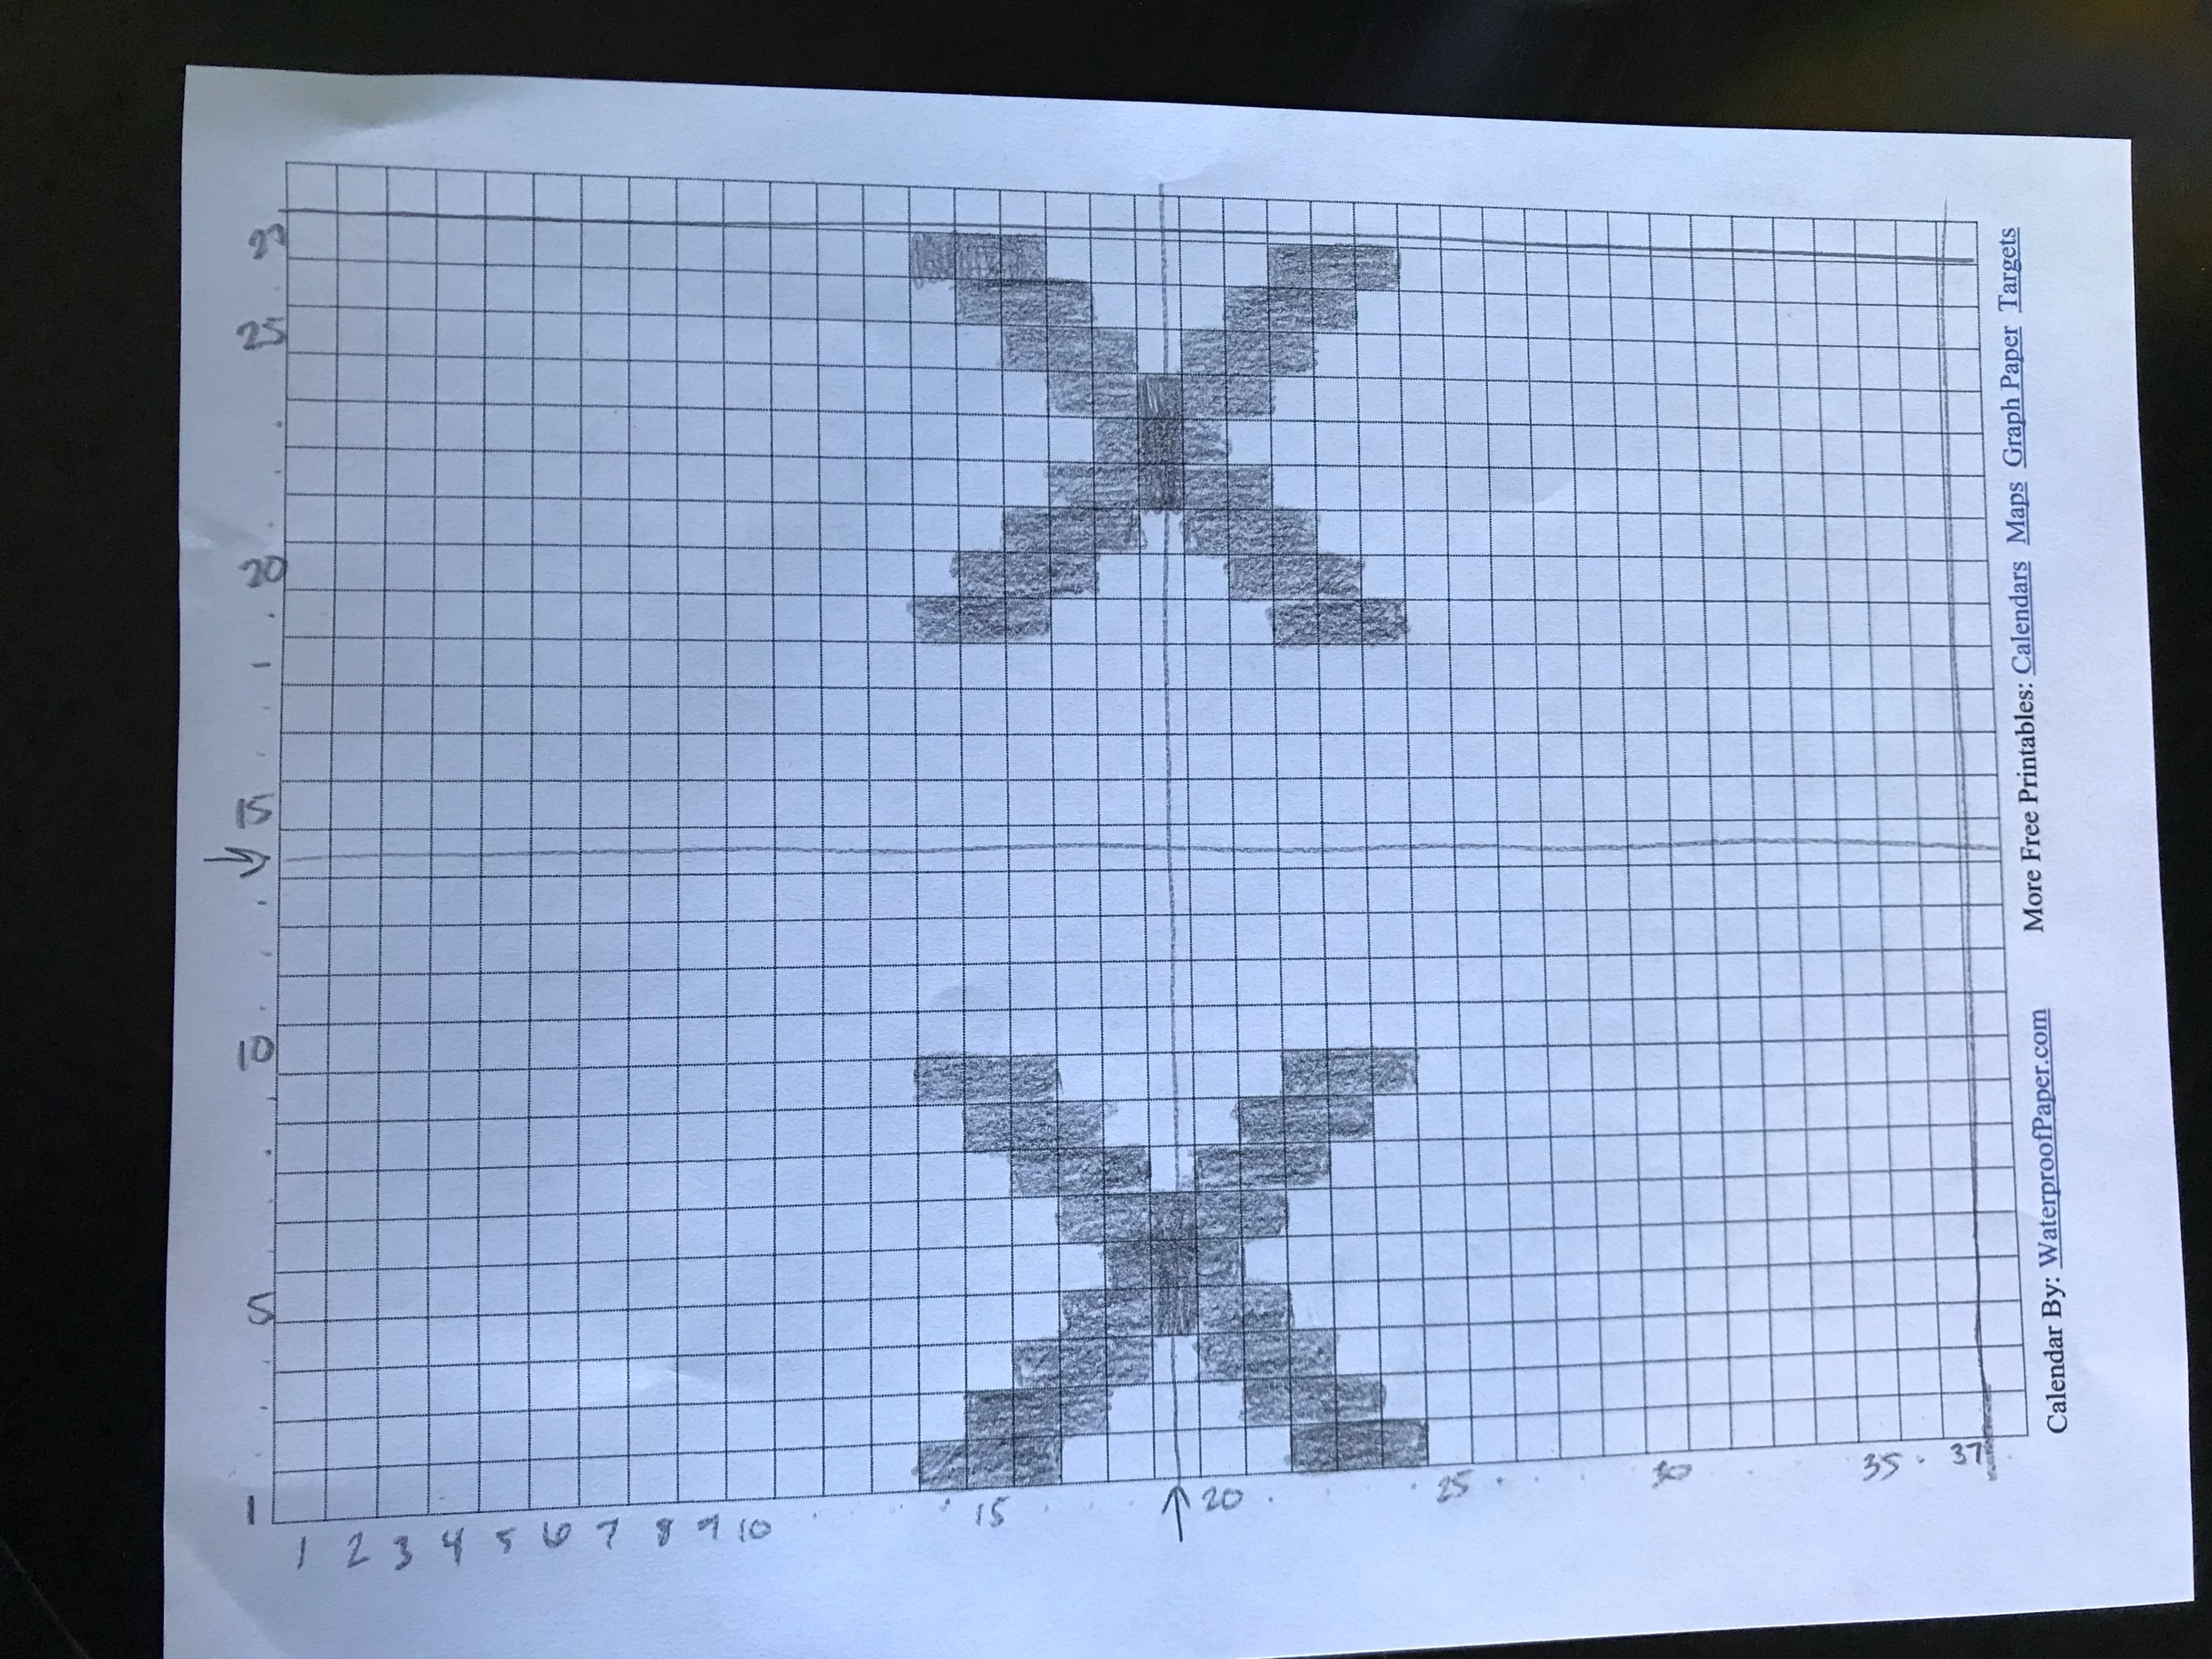

Once I had it all filled in it was time to test out my design with yarn.
I used a G(4.25mm) crochet hook and Vanna's Choice yarn in Mustard and LInen.

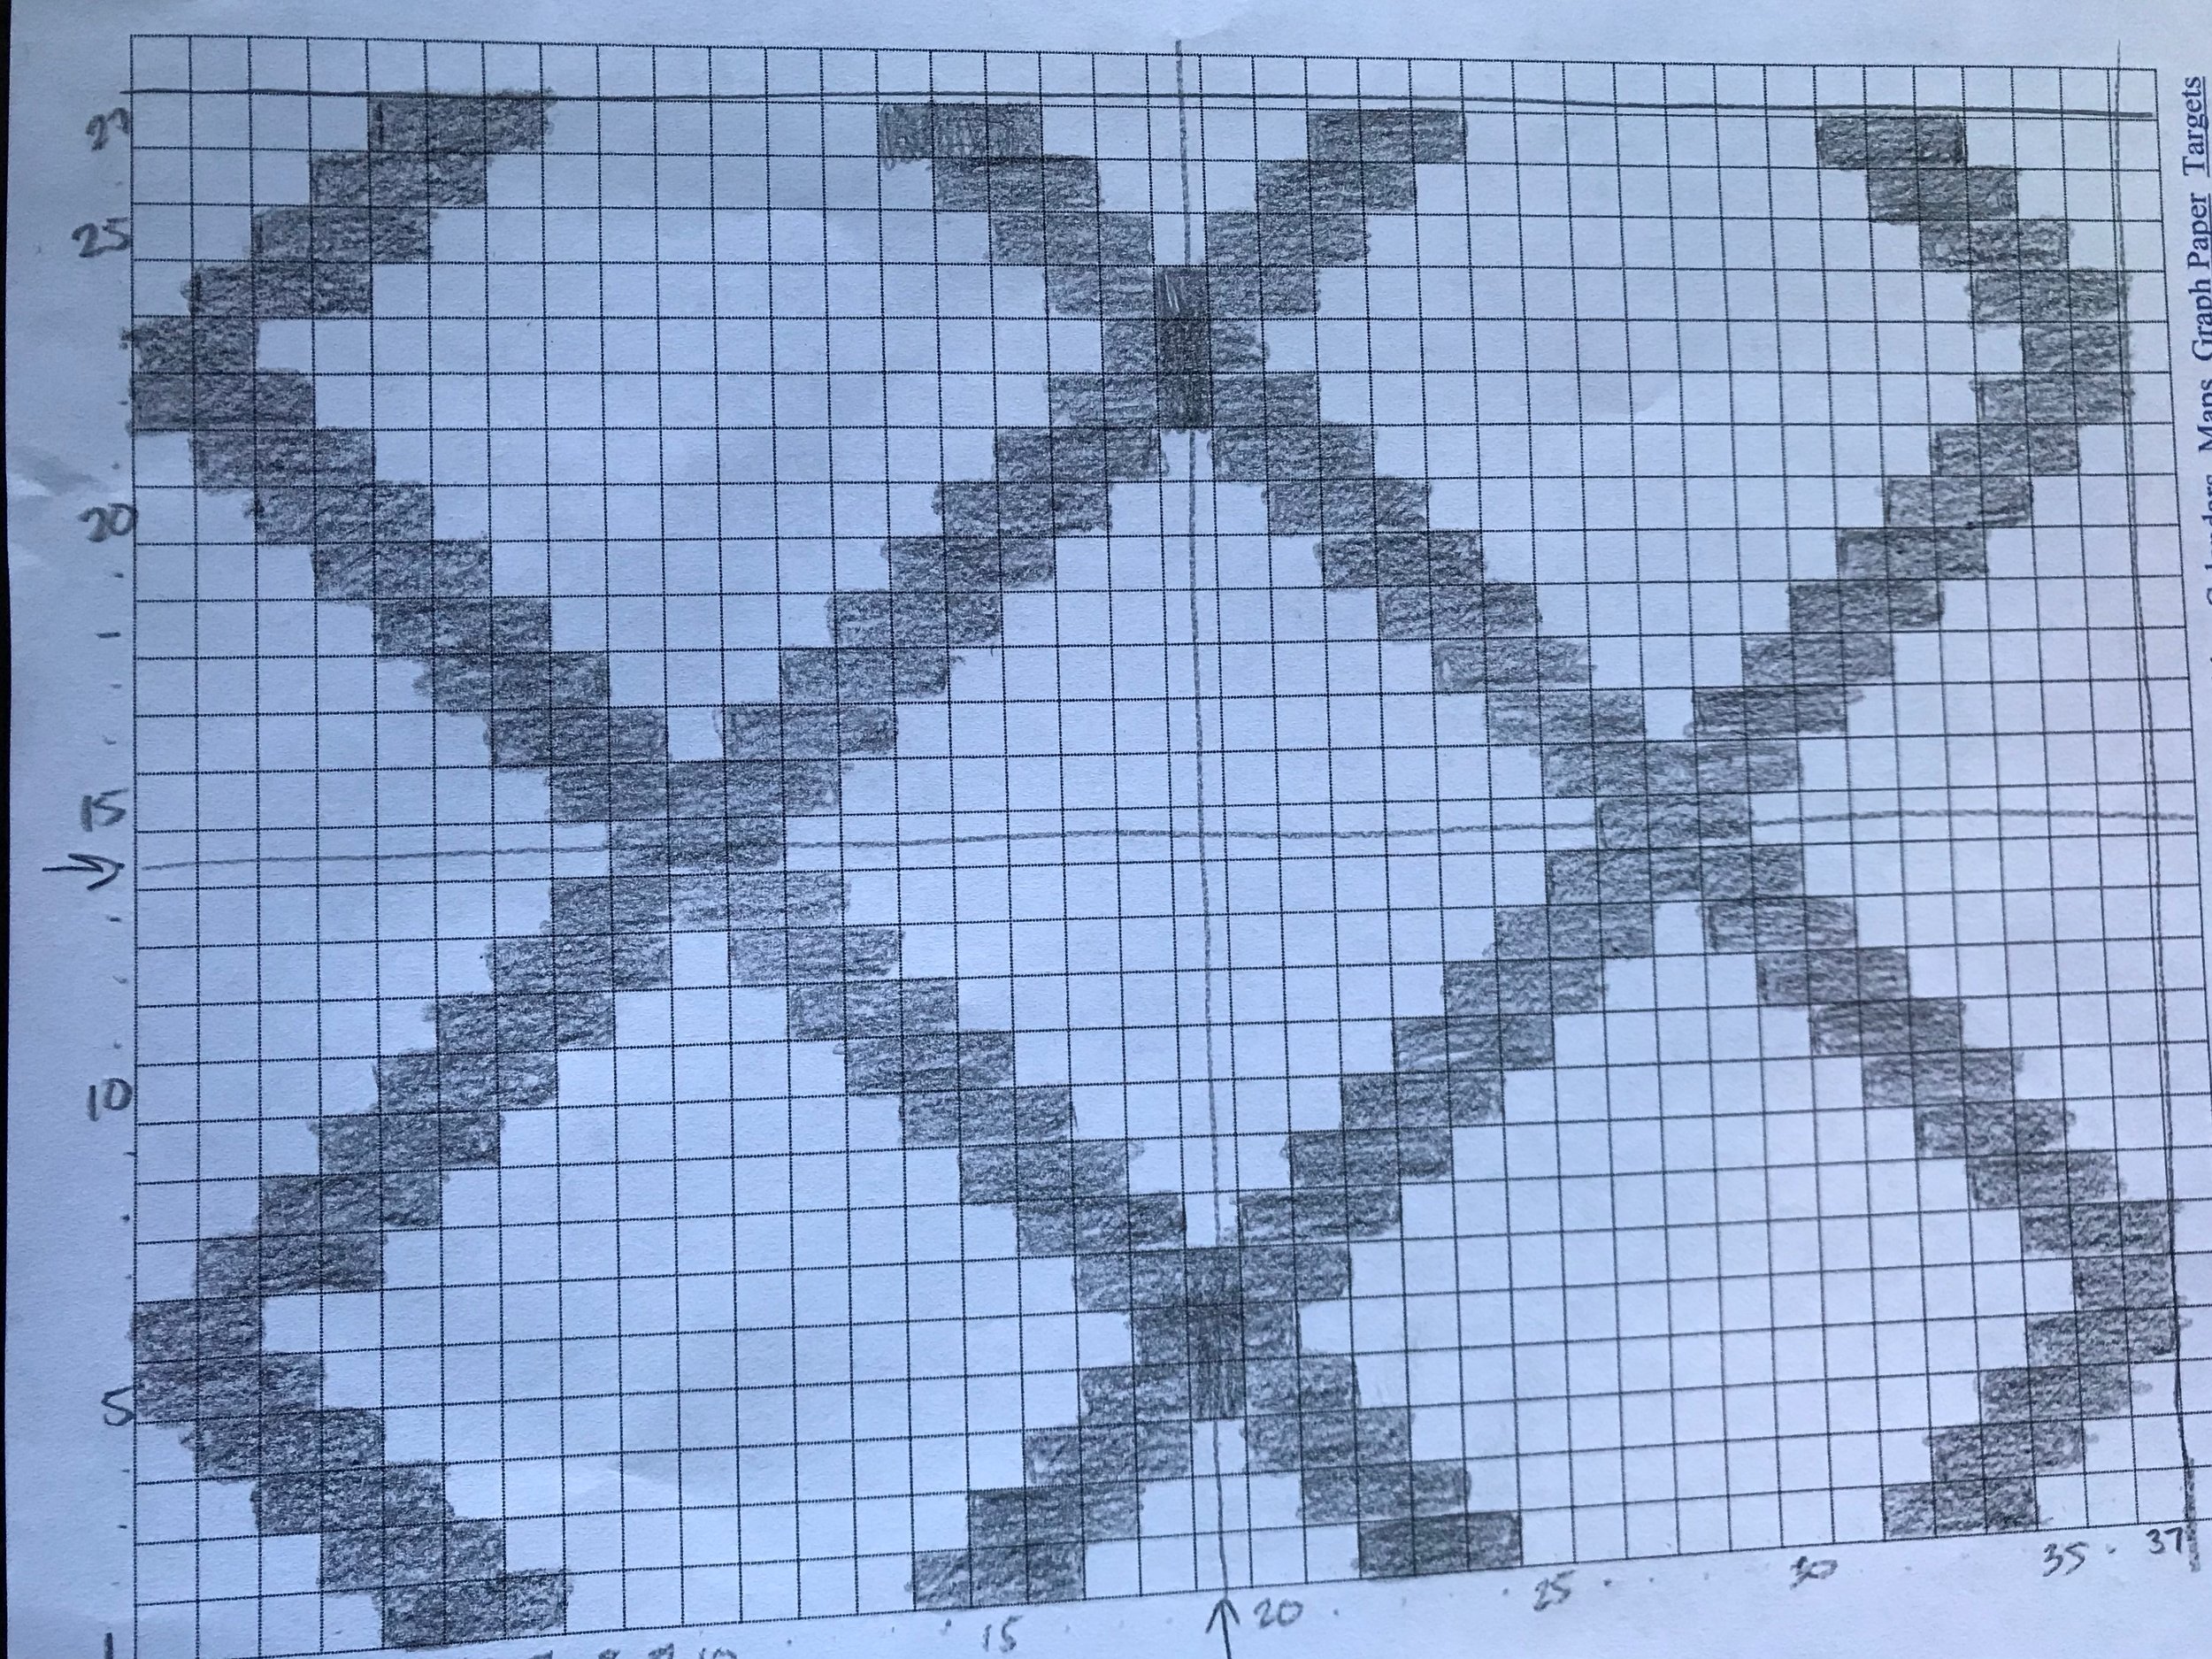
Once I had finished the panels I realized that the size was a bit too square for my liking so I decided to go back to the drawing board and try to get it to be the size I wanted. If you want your design to be a specific size then I recommend making a swatch using the tapestry crochet technique so you can then determine how many stitches and rows you will need.
I used my first panel as my swatch to determine how many stitches and how many rows it took to make a 4" by 4" square. Using my measuring tape I determined that it took 17 stitches and 15 rows. I wanted my final design to be 8" by 10" so I did some simple math to determine how many stitches and how many rows I would need.
I divided 10 by 4 and got 2.5. Then I multiplied that by the number of stitches, 17, and got 42.5. Then I divided 8 by 4 and got 2. Then I multiplied that by the number of rows from my swatch to get 32. Now I knew that my design should be 43 (rounded up) squares across by 30 squares high. Since I wanted my design to have a square as the center I ended up using 43 by 29.

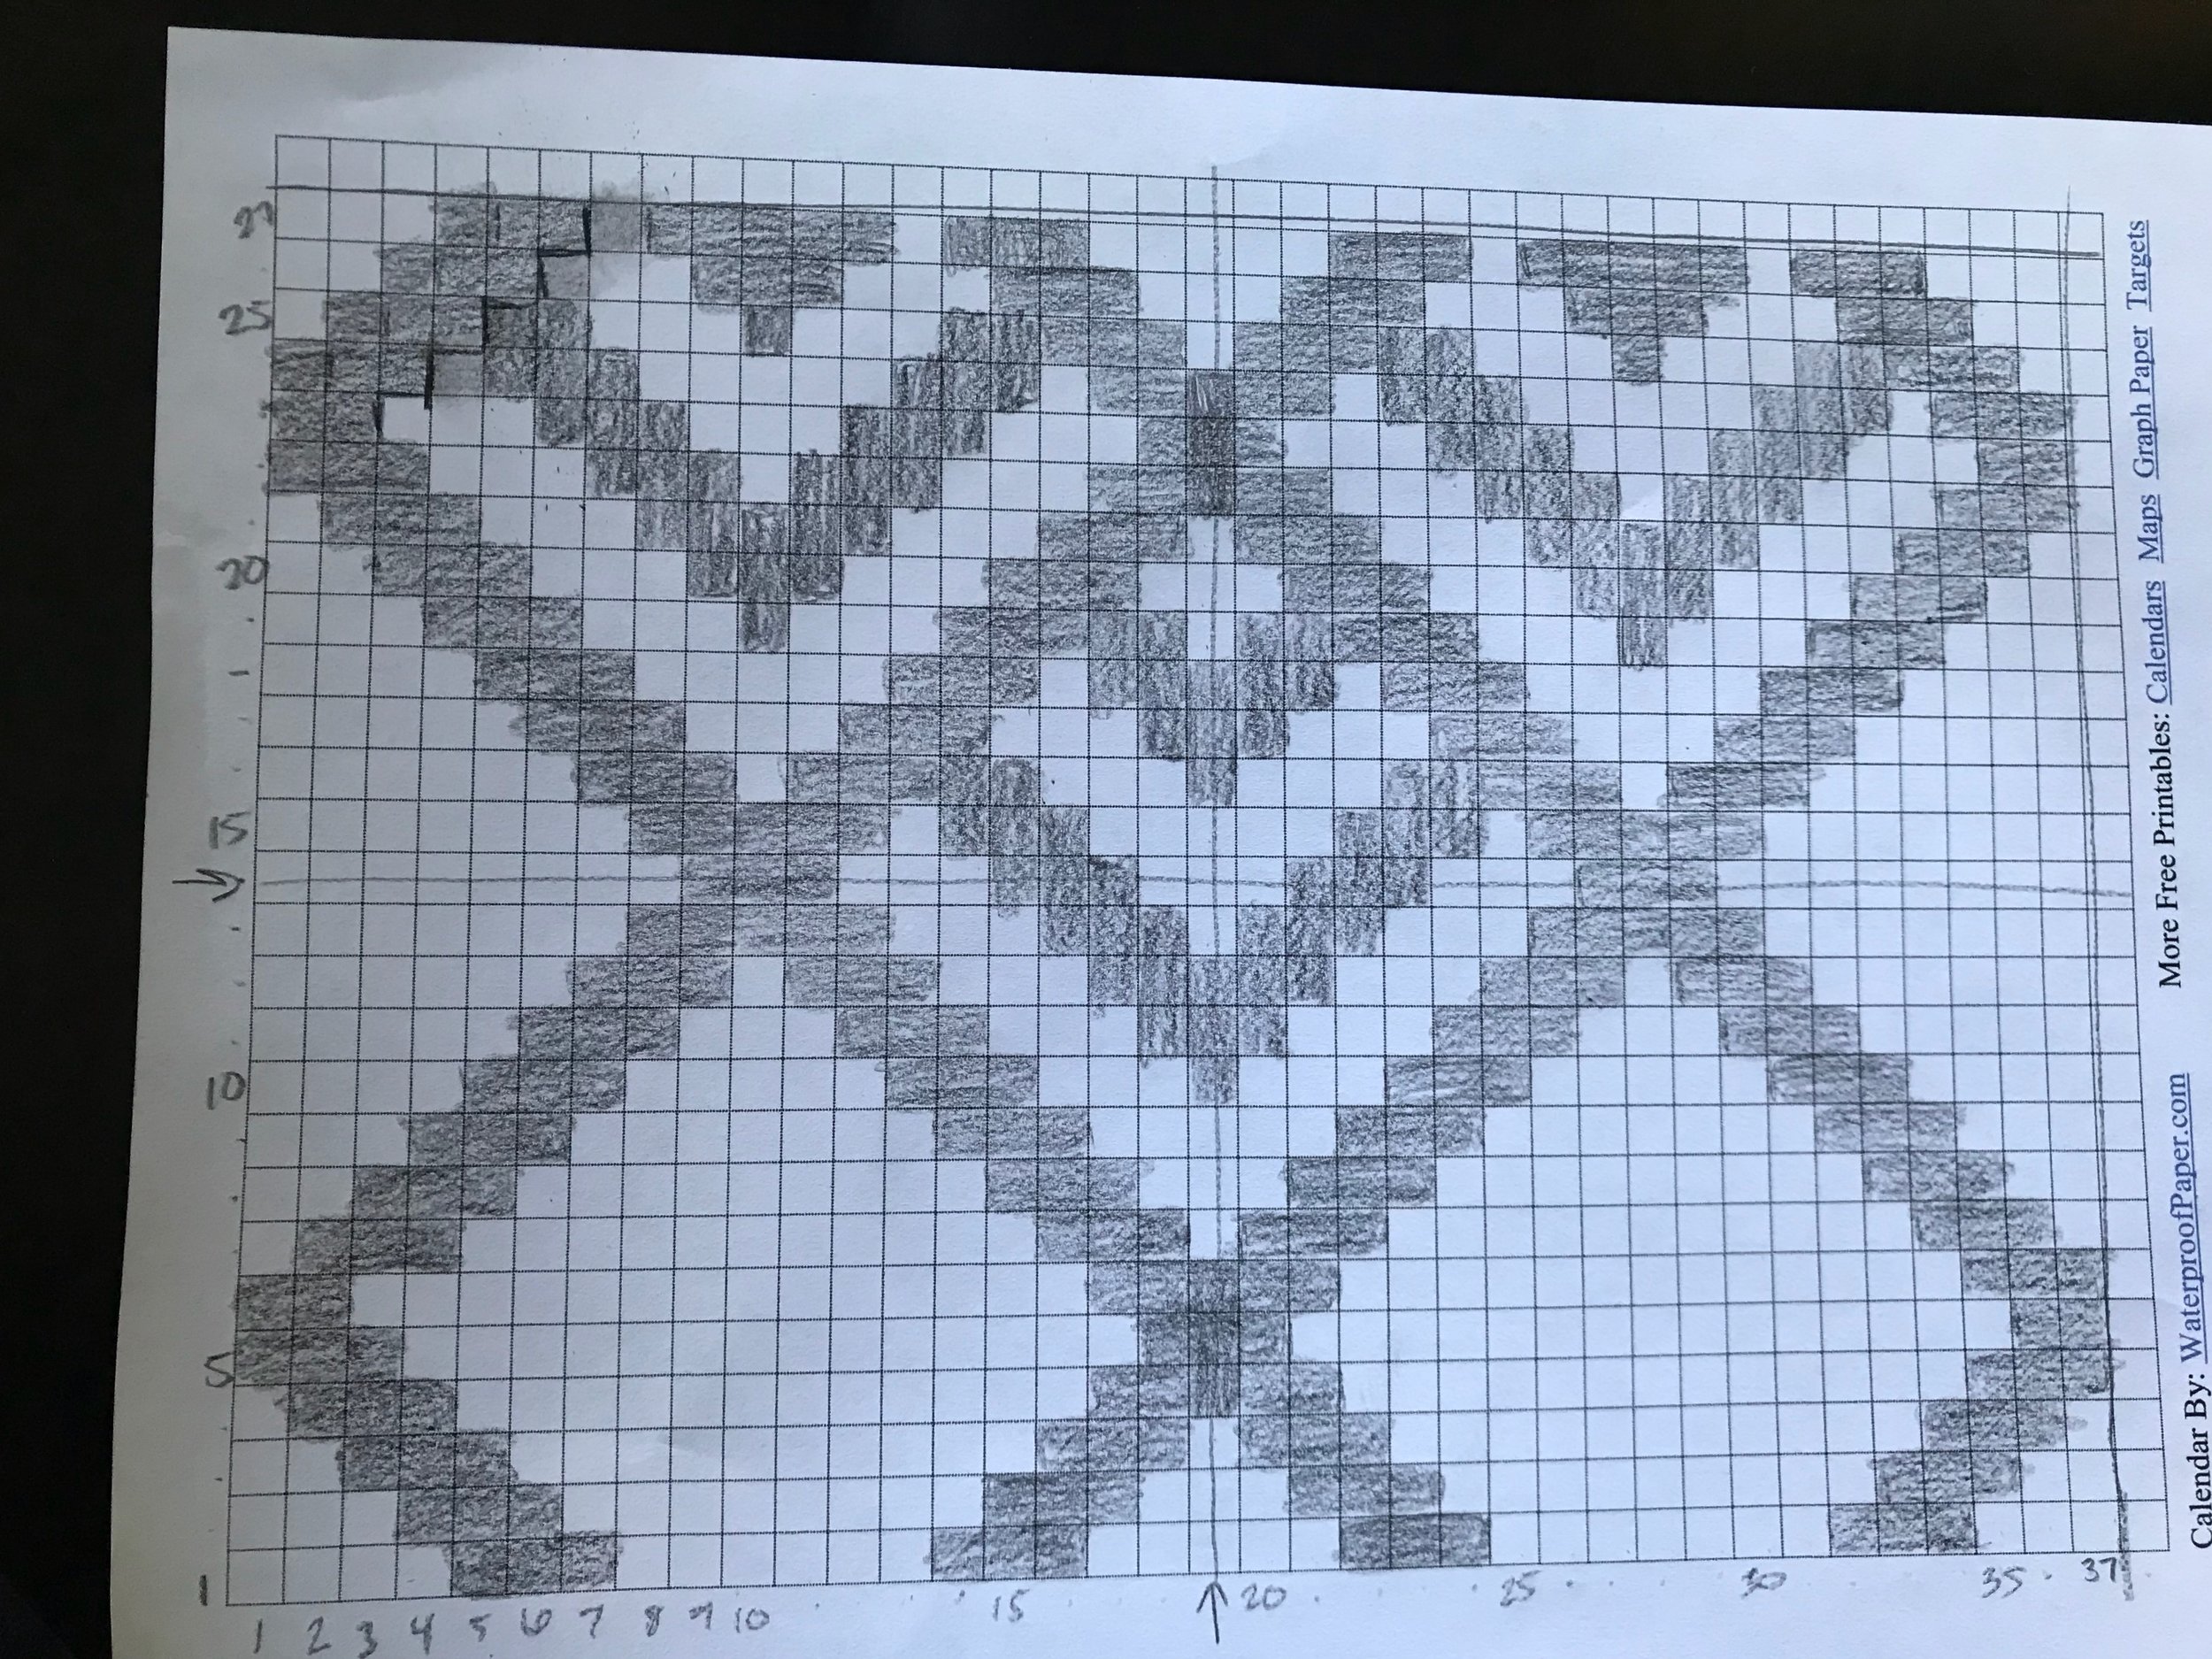
I redrew my graph on paper and then executed my design. I kept measuring the height as I went along and realized that I actually only needed 27 rows to get the 8" height I wanted. Know that you can change things as you go when designing and that sometimes your math won't match up perfectly with your finished piece.
There is a bit of trial and error when it comes to designing a pattern, especially in tapestry crochet. I suggest that if you know some of the shapes that you want to use in your design, you should create little swatches to get a feel for how they will look once crocheted. For example I drew out plus signs using various numbers of squares and then made swatches to go with each one.


Click on each image to see a larger view. Notice that although the graph is made with equal amounts of squares to make a perfect plus sign, when it is actually crocheted it is elongated and looks a bit more like a cross. By doing swatches you can see how your shapes will look and make adjustments before actually creating your finished piece. Here I decided to shorten the height of the plus sign on the graph and once crocheted, it looks more like an even plus sign.
Another thing to keep in mind when designing is that there are different techniques you can use when making a tapestry crochet piece. When crocheting in rows like I did for this design I crochet in both loops in every row, like I did in the mustard and linen panels. You can also crochet just in the back loops, or alternate one row in back loops, the next row in front loops like I did for the black and white panels. Here is an example of what those different techniques look like.
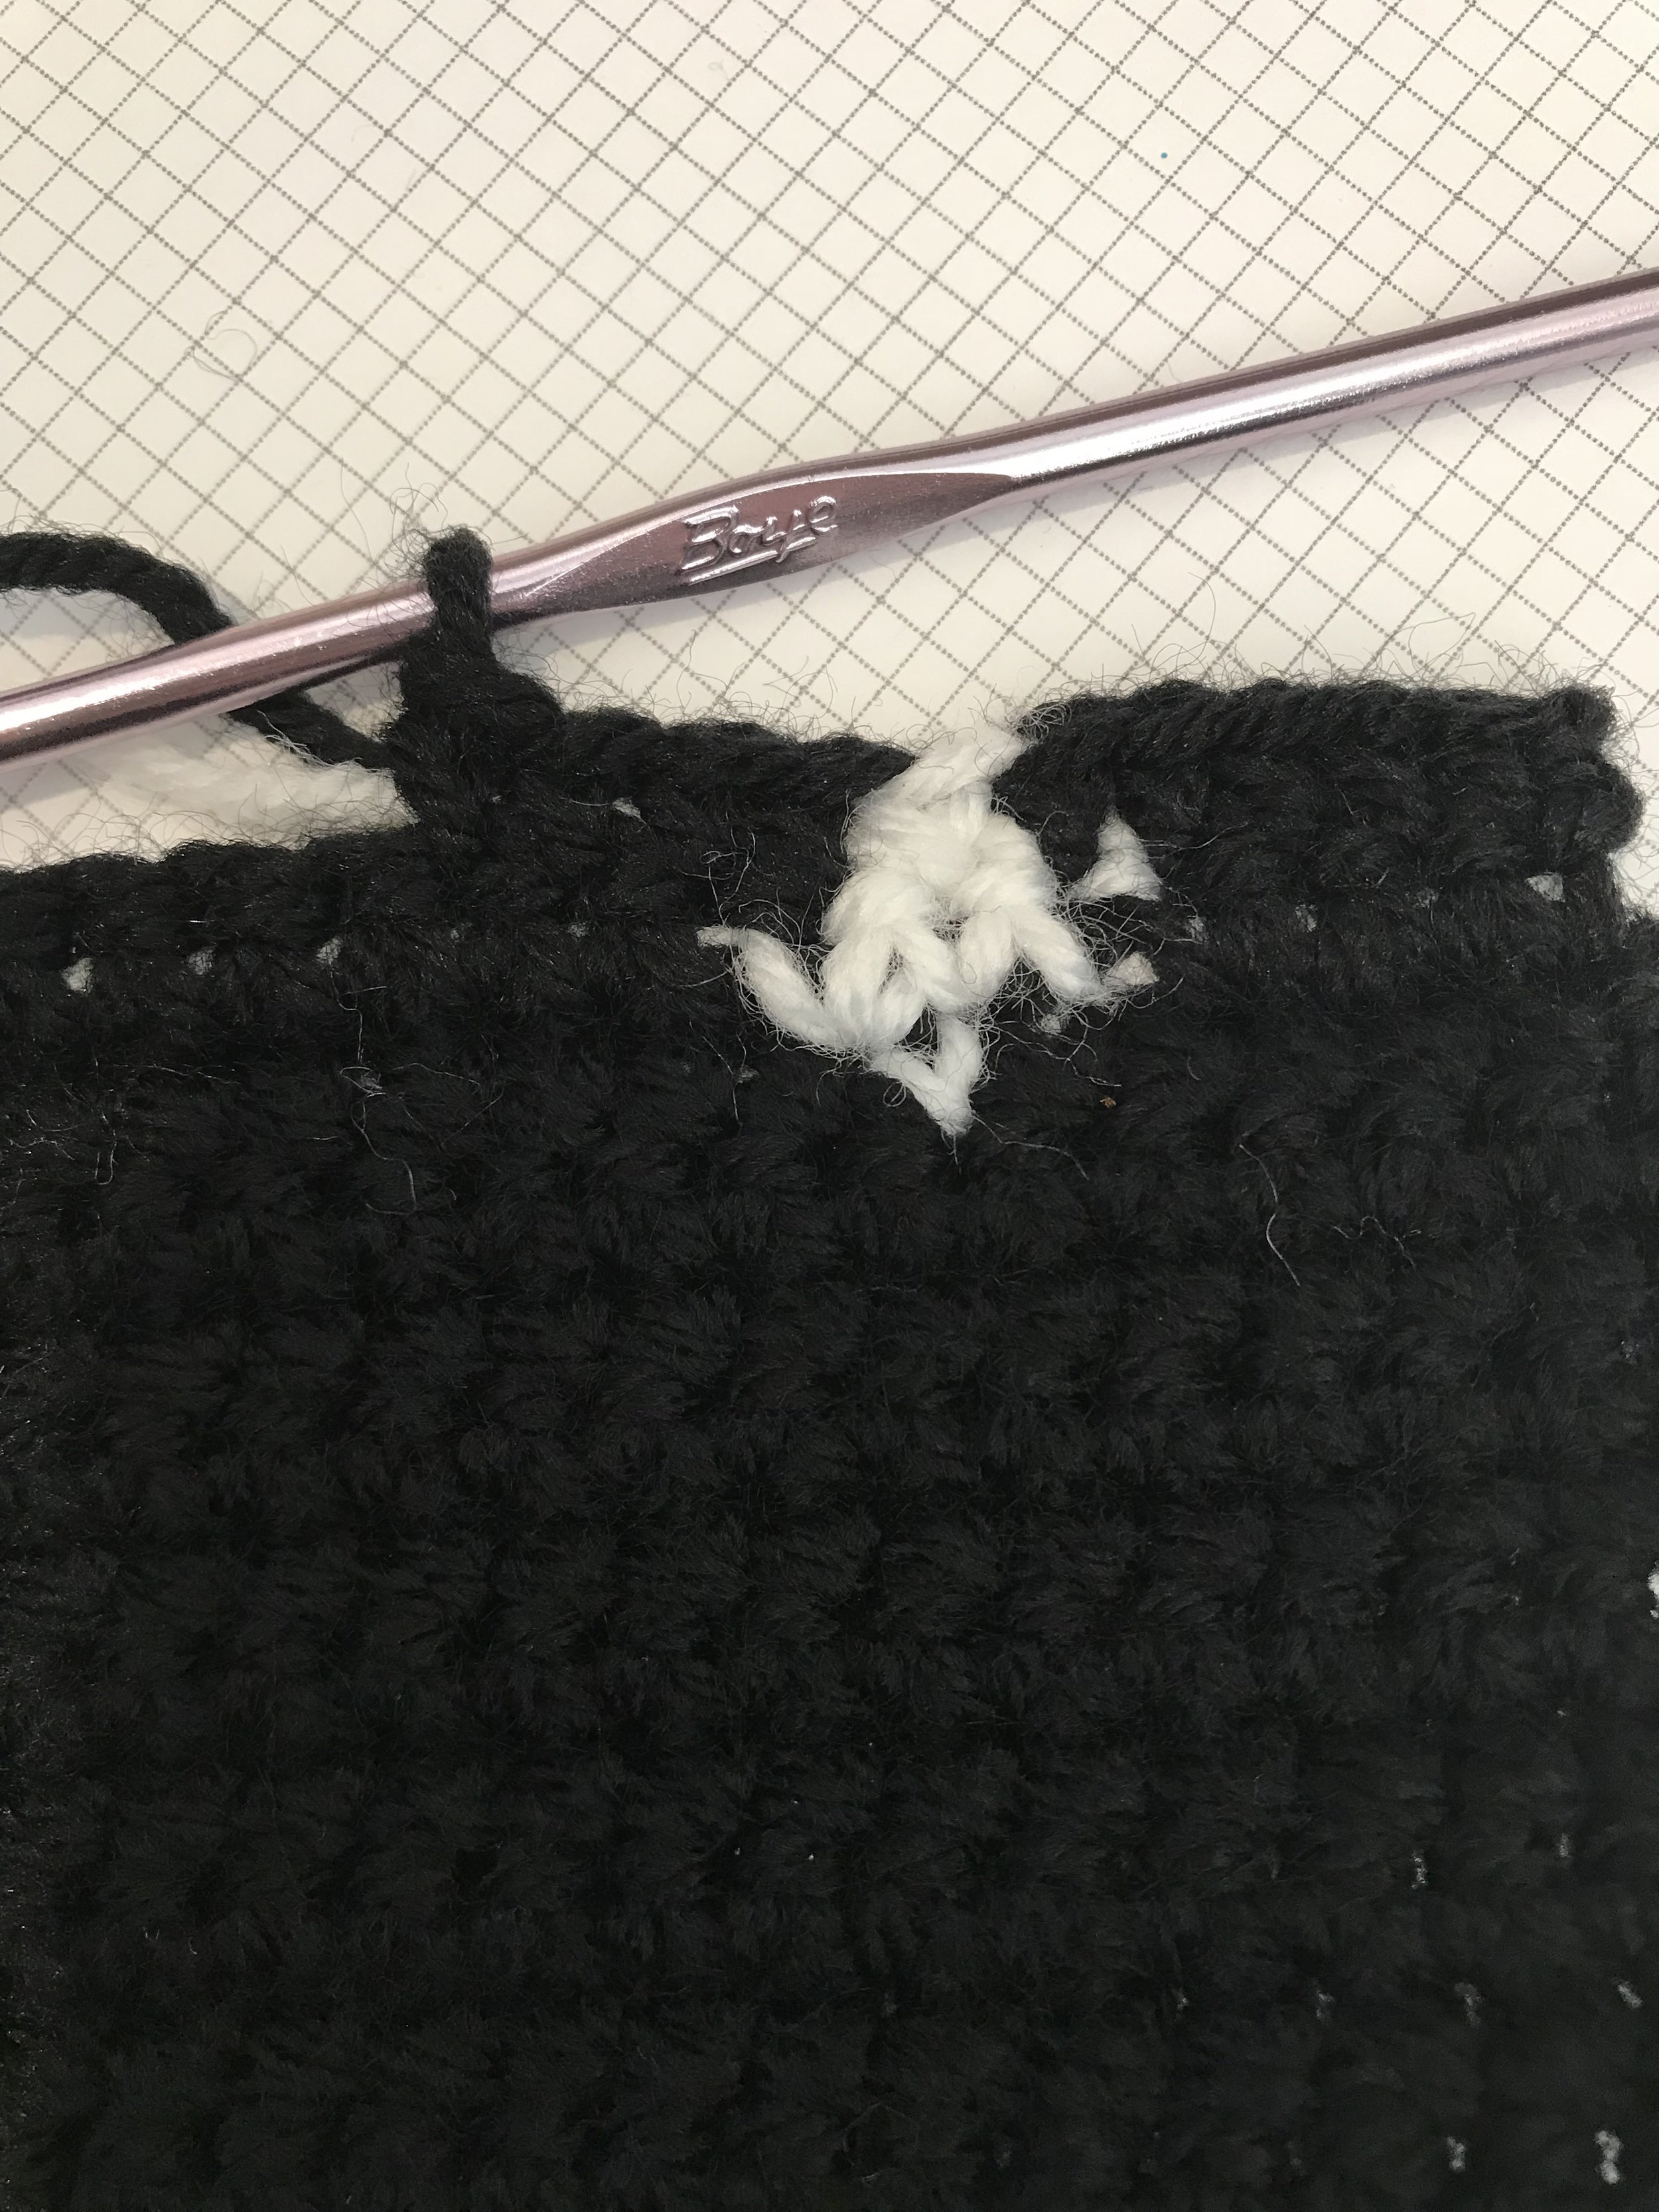
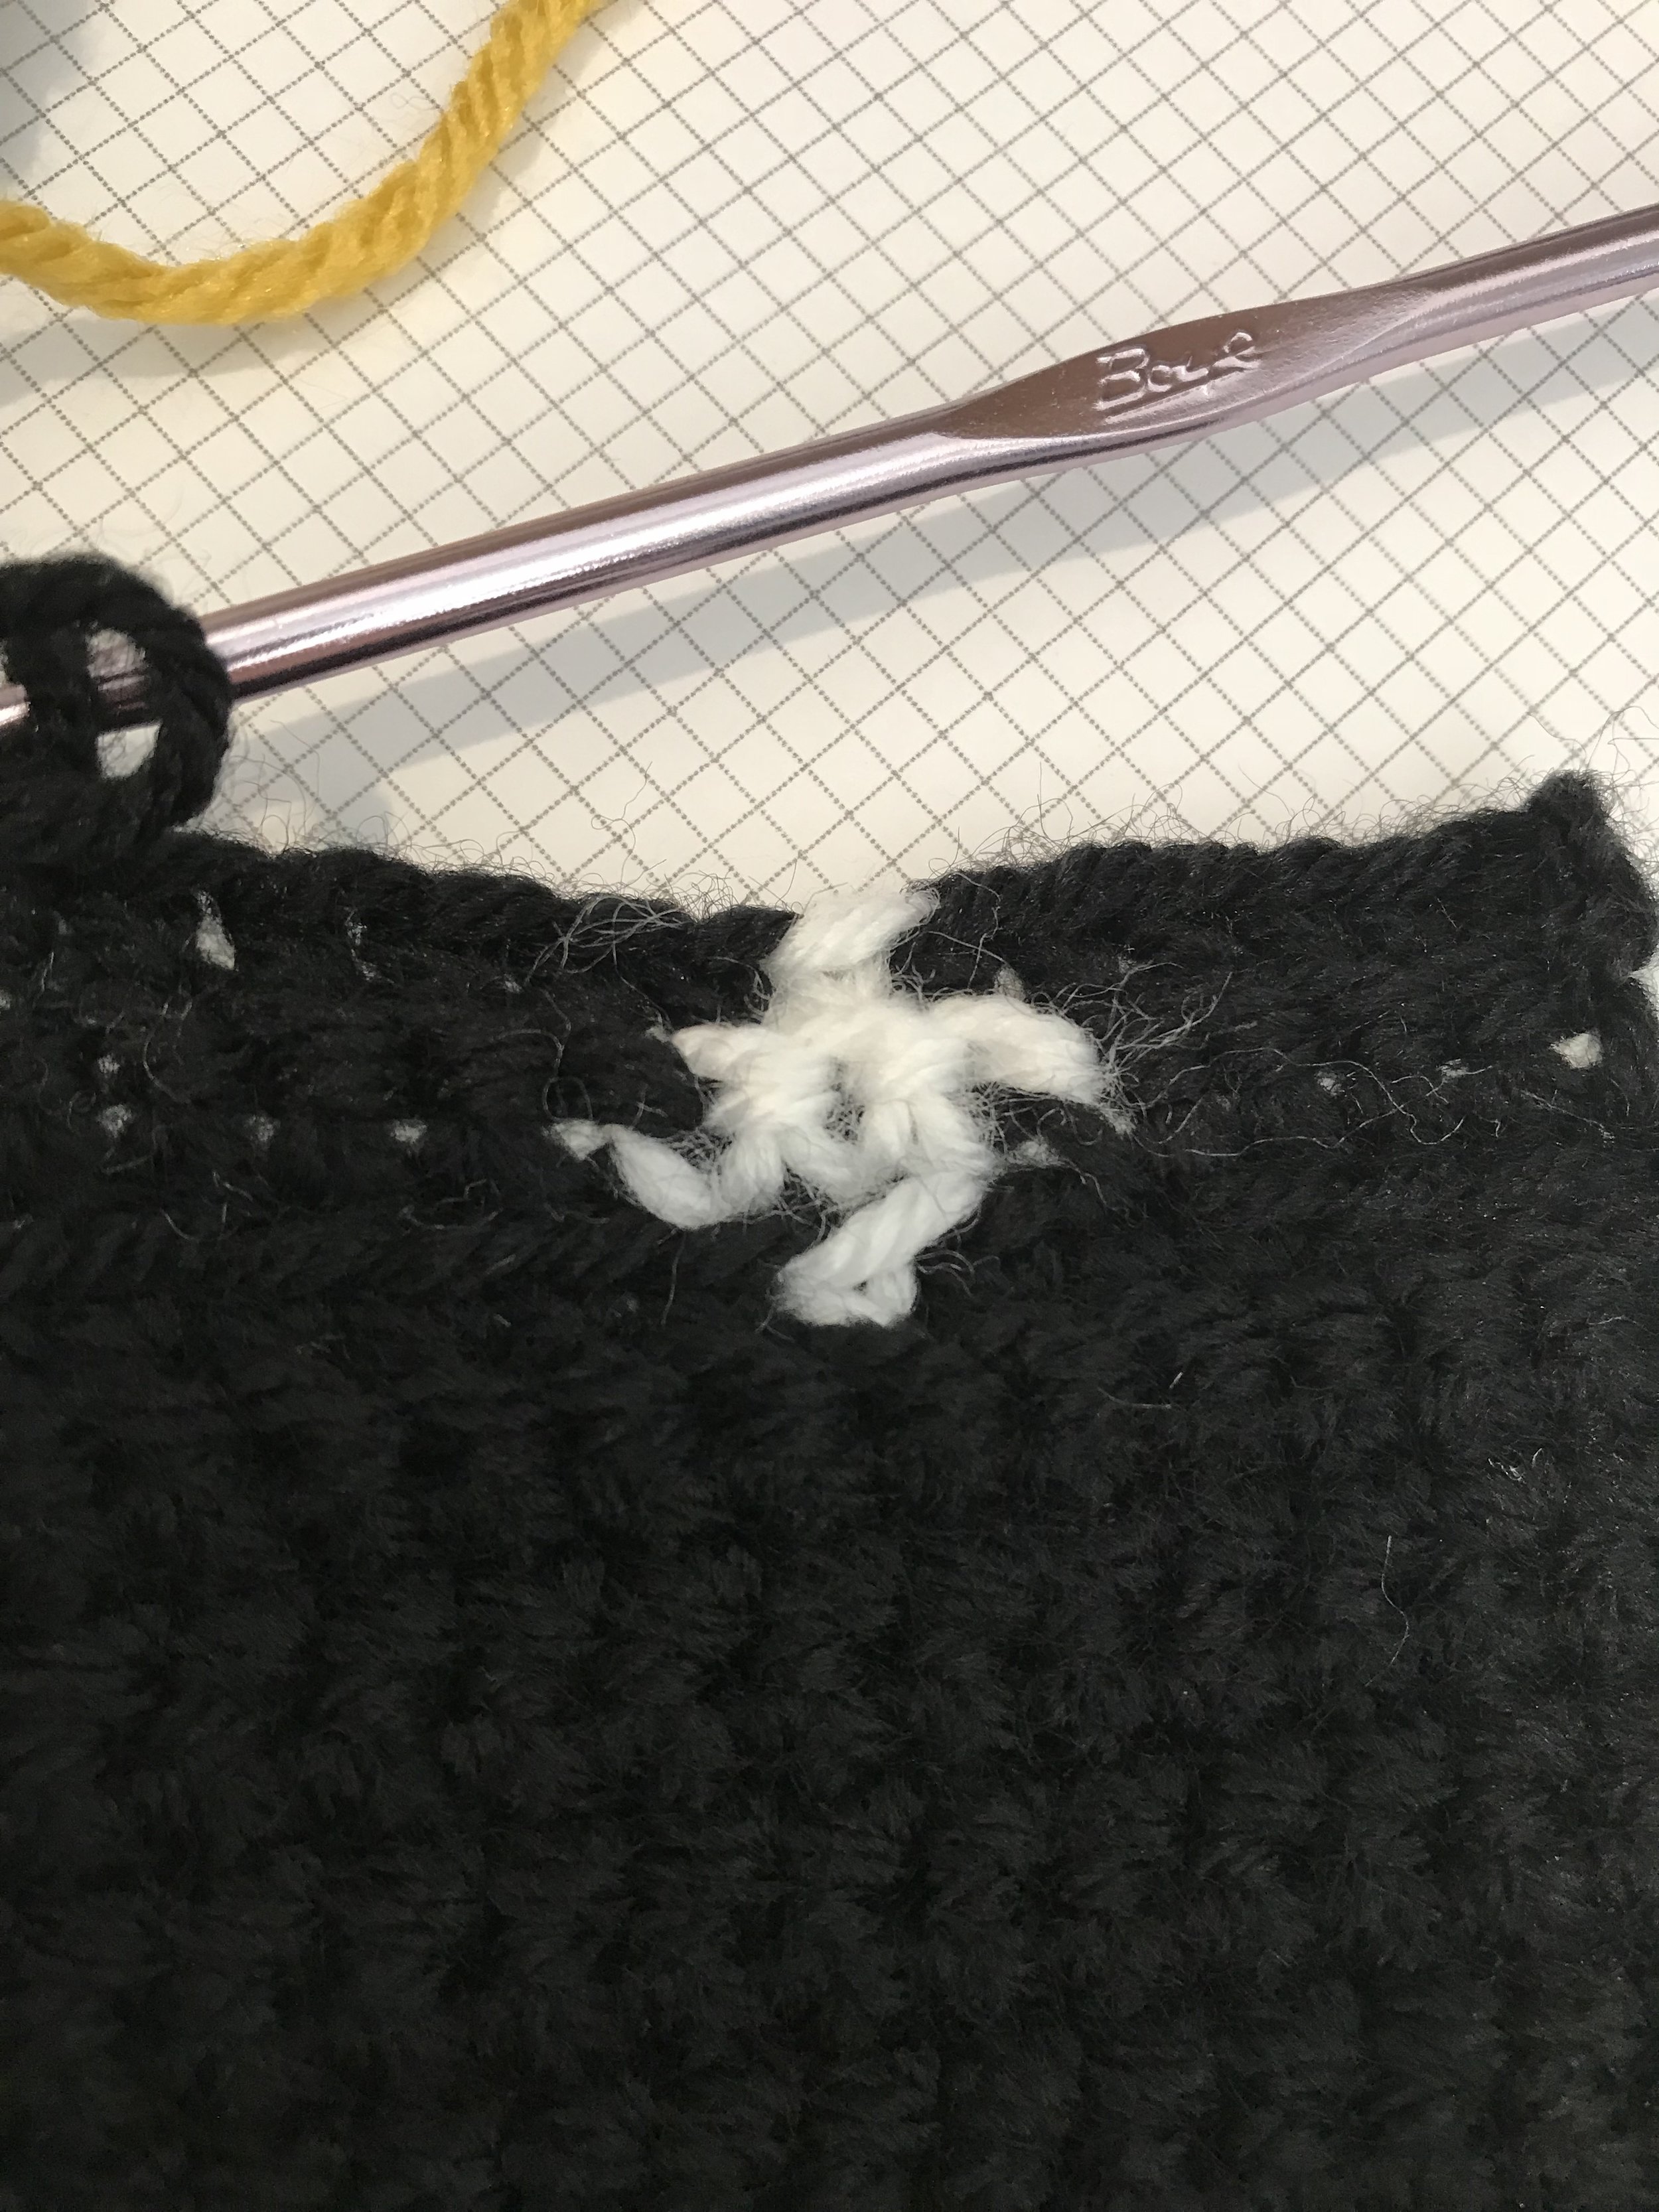

The left picture shows crocheting in both loops, the center shows alternating between FLO and BLO and the picture on the right is crocheting in BLO. The differences are a bit subtle but can make a big difference in the way certain shapes line up.
Ok, now that we have a completed design and we know it will work up great we need to be able to turn our paper graph into something digital to include with our written pattern. I've heard that there are some websites or apps out there that can do this for you, but I don't like to pay for things I don't have to. All you need are Excel and Power Point which most people already have on their computers.
Open up a new excel spreadsheet.
Select the amount of columns and rows you will need for your design. For example I selected 43 columns and 29 rows, just like my graph.
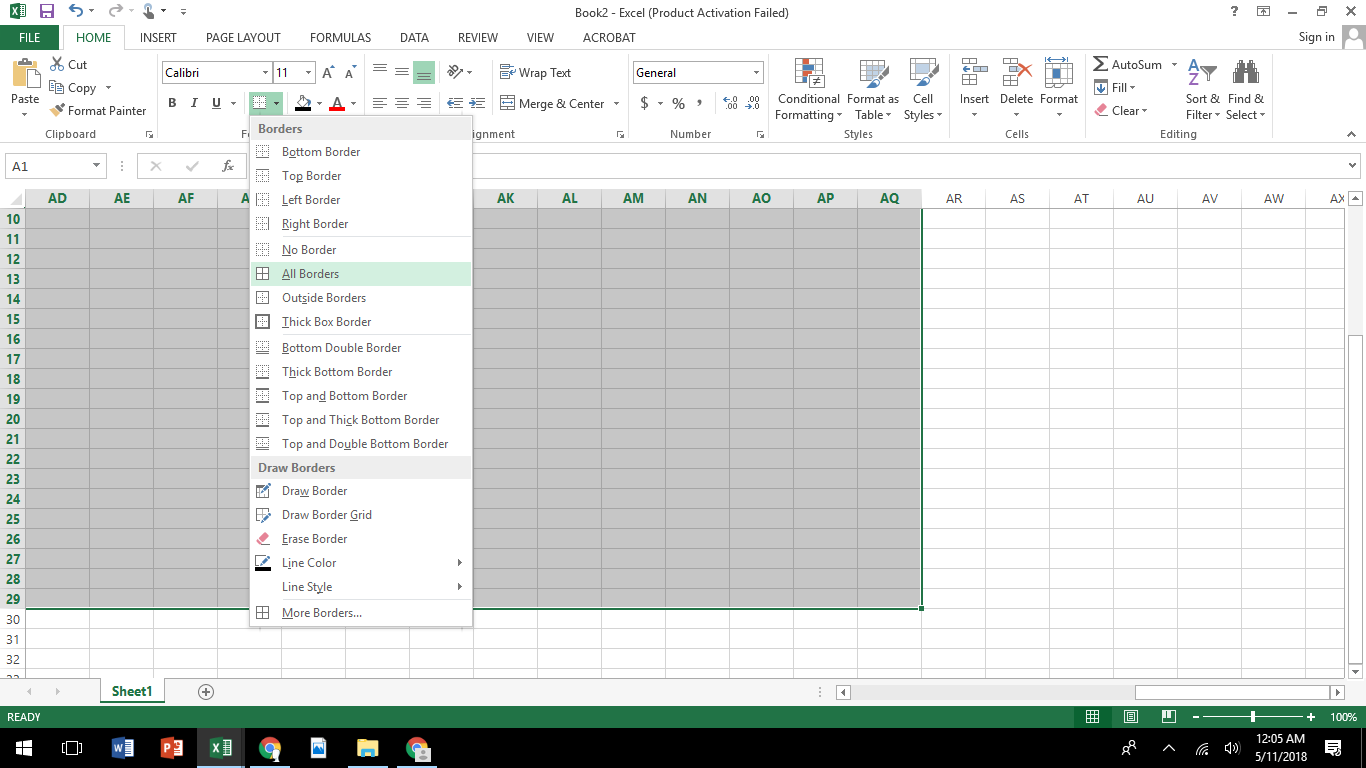
Under the HOME tab, click on the grid and select all borders.

Then deselect grid lines so you only have your graph showing.
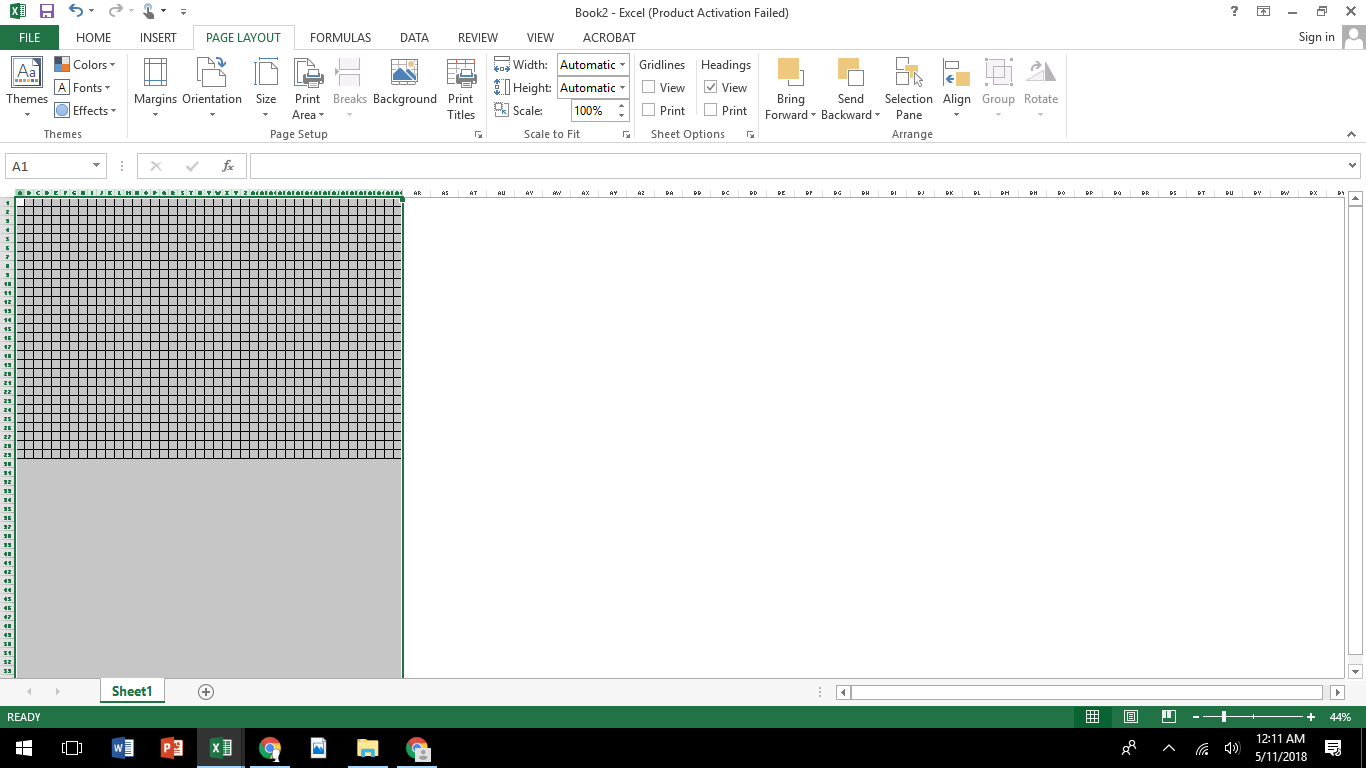
Making sure to click on the top of the column (letter A) select all columns in your graph. Then hover your mouse over any of the column dividing lines and slide the line over until you get 20 pixels. We will be using the number of pixels to determine the size of our cells.

Then select all rows and make sure they are set at 20 pixels as well. You can always change the pixel numbers later too. Just make sure that your columns and rows are set to the same number of pixels so your graph is square.

Now you can start filling in your graph. Go to the HOME tab and select a square, then fill it with a color of choice. Try to match the colors to whichever colors you used in your design. I recommend using a dark grey instead of black so that you can easily see each square.

Once you have filled in your design and double checked that it's correct it's time to save it. First save a copy as an excel file so you can go back and edit it if needed.
In order to use it in a pattern you will need to copy it as an image.
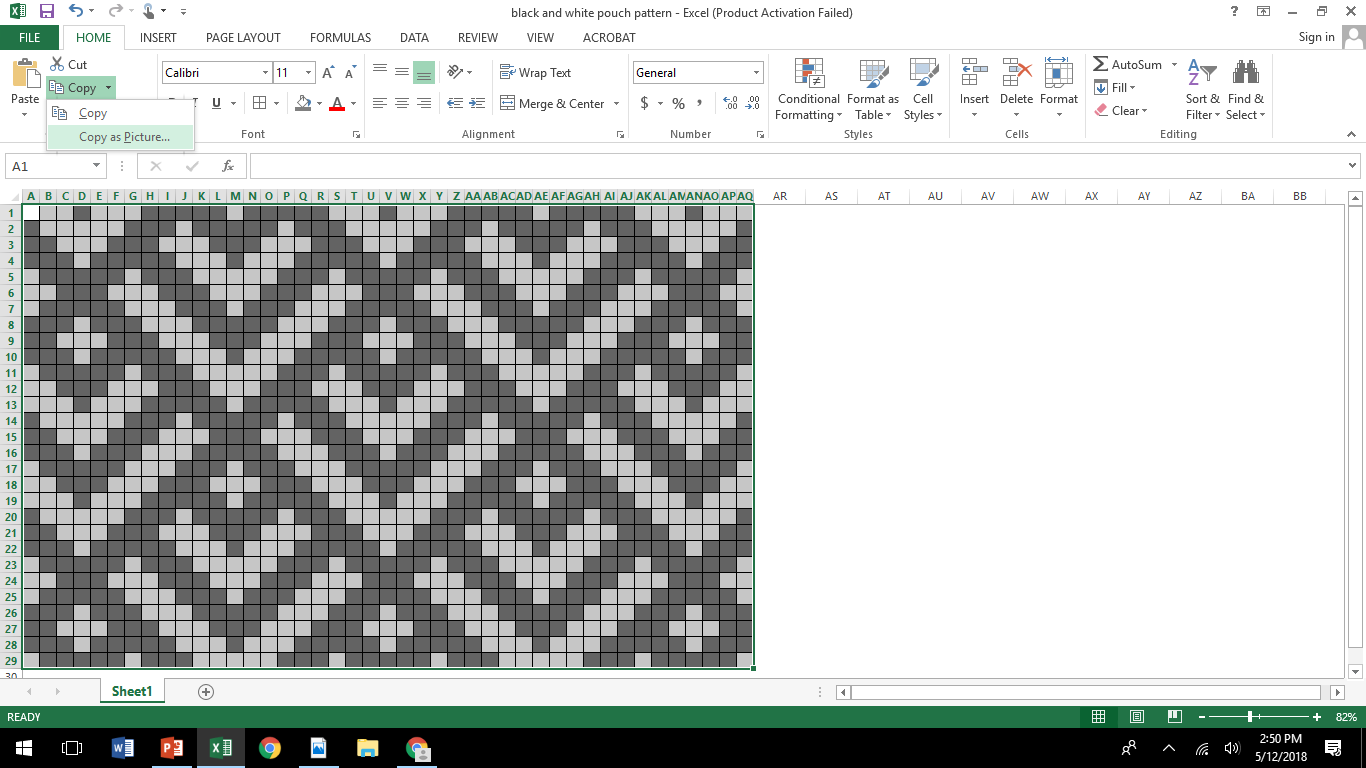
First you will need to select and highlight your design. From the HOME tab, click on copy and select "Copy as Picture..."
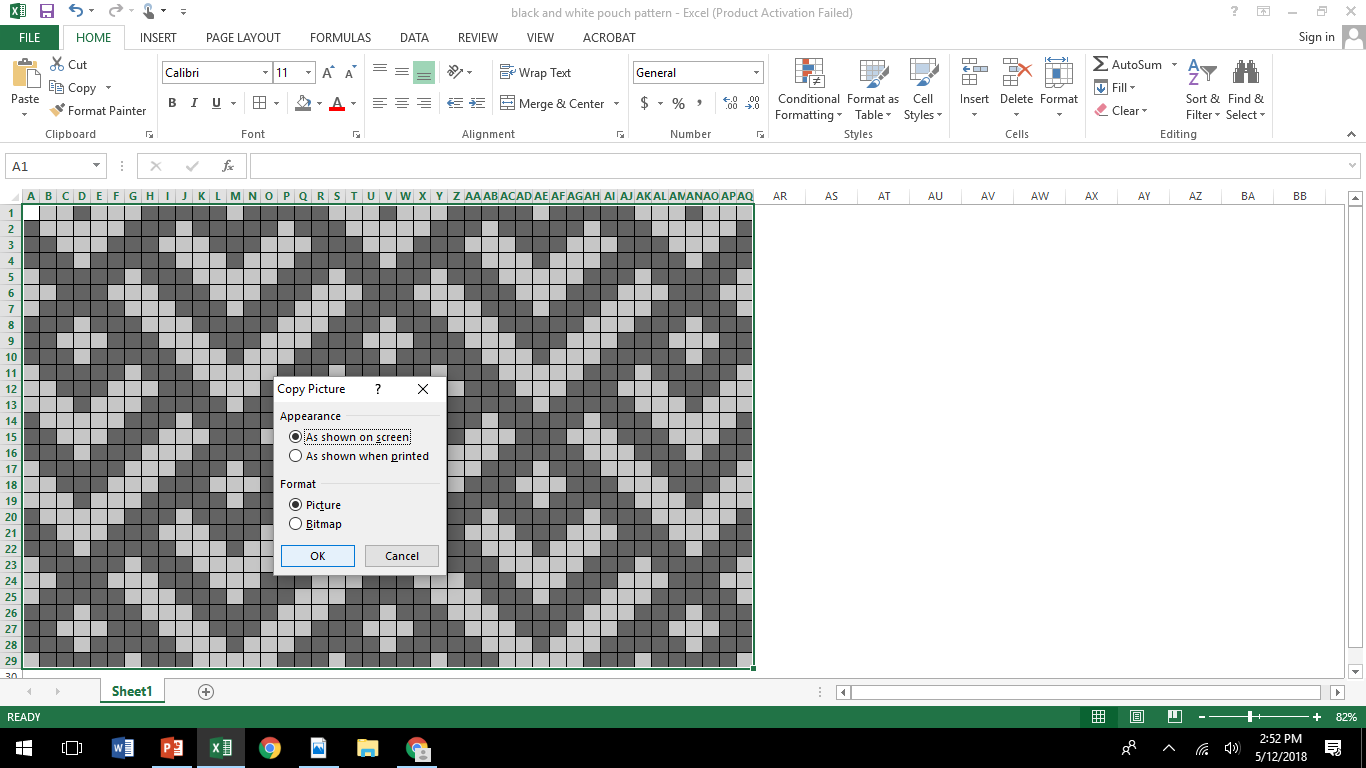
Select "As shown on screen" and "picture." Then press OK. Now your graph is copied. Next you will need to open Power Point.
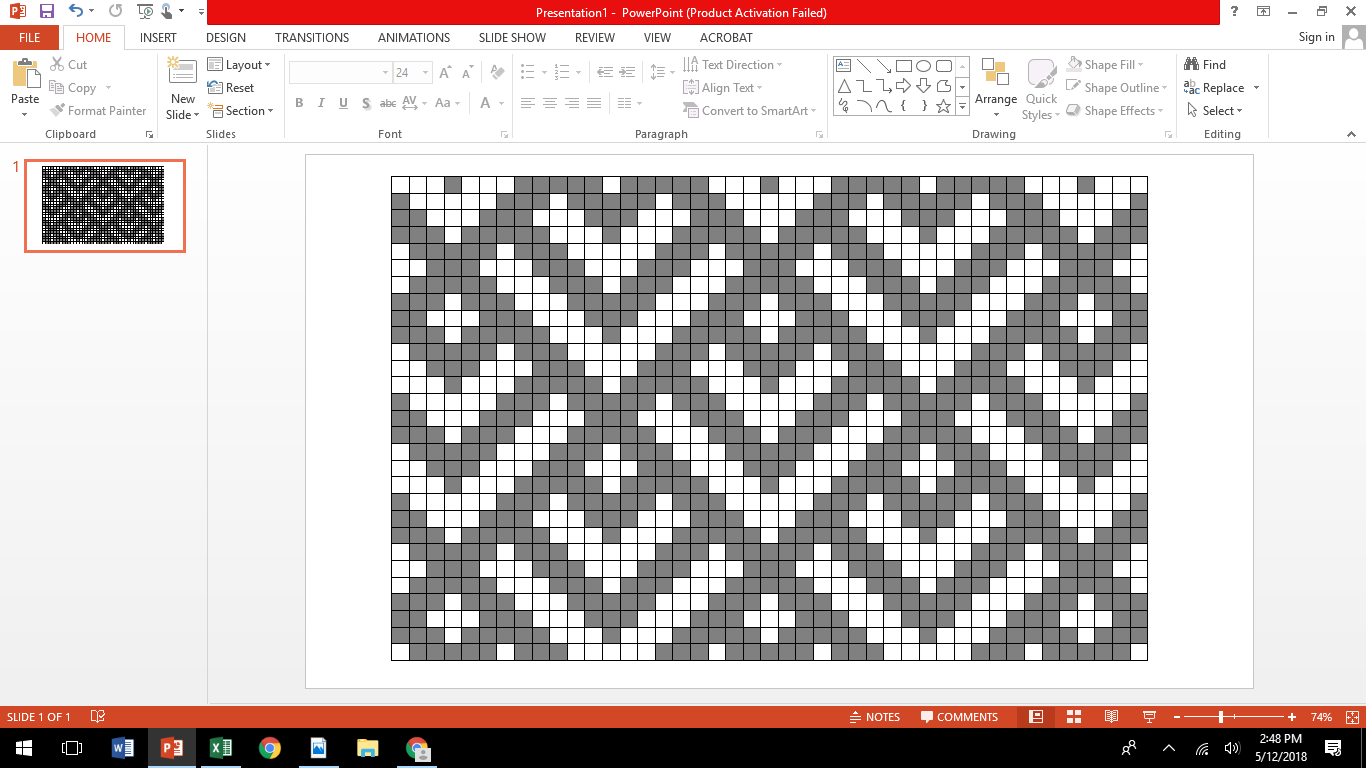
Open a blank Power Point presentation and then press Ctrl V to copy your graph over.
From here you can either turn the slide into a jpeg file to use on a website or in a word document or you can just add this slide to a written pattern if you use power point to create your patterns like I do.

If turning it into a jpeg remember to select the jpeg option when saving.

Here is the final image for my design.
Yay! We just finished designing a tapestry crochet pattern and graph. I hope you found this tutorial helpful. If you want to make this design into a fun little zippered pouch you can find the free pattern HERE or the printable PDF HERE.
If you decide to create your own tapestry crochet pattern, I'd love to see it! Tag me in your social media posts @meghanmakesdo so I can swoon over all your amazing work!
Meghan

