Loopy Trees Tutorial
Do you have some blanket yarn laying around and no clue what to do with it? Well look no further, I’ve got a super easy craft project just in time for the holidays. Make these loopy trees and add some whimsy to your winter home decor. Scroll down for the photo and video tutorial.

Anyone else feel like the holiday season sneaks up on you every year? I always have the best intentions to get a head start on season crafts and projects, but then life happens and I’m left doing things last minute. So even with there only being 10 days before Christmas, I couldn’t resist adding these loopy yarn trees to the blog.
Last weekend I was spending time with a friend and she had these adorably trees made from chenille yarn. She had gotten them at a Nordstrom Rack but when I tried to find them online I didn’t have any luck. So off to Michael’s I went because I knew they could easily become a fun DIY project. Yes, this is yet another case of “I could totally make that!” LOL.
I was able to find everything I needed super quick (at Michael’s and Joann) and then headed home to get to work.

Here is a list of all the supplies you’ll need.
One skein of Bernat Blanket Yarn Extra in the color of your choice. (One skein will make you multiple trees.)
Various sizes of styrofoam cones (I used size 3.7”X8.9” in the video, but I also picked up the 2.75”X6” and 3.8”X11.9”)
3/8” dowel rod (cut into 3-4” lengths)
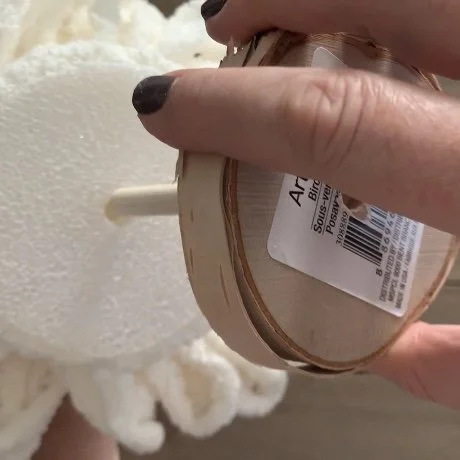
Birch base coaster (one for each tree)
gold paint (optional)
Check out the photo tutorial below or follow along with the video tutorial on my YouTube channel.
Loopy Tree Tutorial:


Start your loopy tree by wrapping the entire cone with the blanket yarn. Starting at the base of the cone and working your way up, glue the yarn in place working in one long spiral.


Now add rounds of loops around the tree starting at the bottom and adding rounds as you move up the cone. Start the first round about 2-3 inches from the base and make sure the loops are hanging off the bottom. Secure the beginning yarn and top loops in place with hot glue. Make sure to end your round with a bottom loop and secure the end to the starting yarn end.


Continue to add rounds moving about 2 inches up from the top of the previous round. Secure the last round to the very top of the cone. You will have 3-7 rounds total depending on the size of your cone.


Once you are happy with the amount of loops on your tree you will need to assemble and secure it to the base. I drilled a hole into the center of the birch coaster just big enough for the dowel to fit, then secured it with hot glue. You can also attach it with wood glue or nail it into place from the bottom side. Then using the dowel, create a hole in the bottom of the cone about 1/2” deep.


Place some hot glue into the hole and then insert the dowel to secure. Paint the star gold (optional) and let dry. Then using a bit of hot glue attach your wooden start to the top of the tree.

Repeat again and again until you have a whole forest of loopy trees. ;)
I hope you love making these trees as much as I did. If you make some, I’d love to see them. Make sure to tag me @meghanmakesdo and use #loopytrees on social media.
Happy Crafting,
Meghan