The Beauregard Bag-Free Sewing Pattern
This post contains affiliate links. If you make a purchase through one of those links I may receive a small commission. It’s an easy way to support this blog at no additional cost to you.
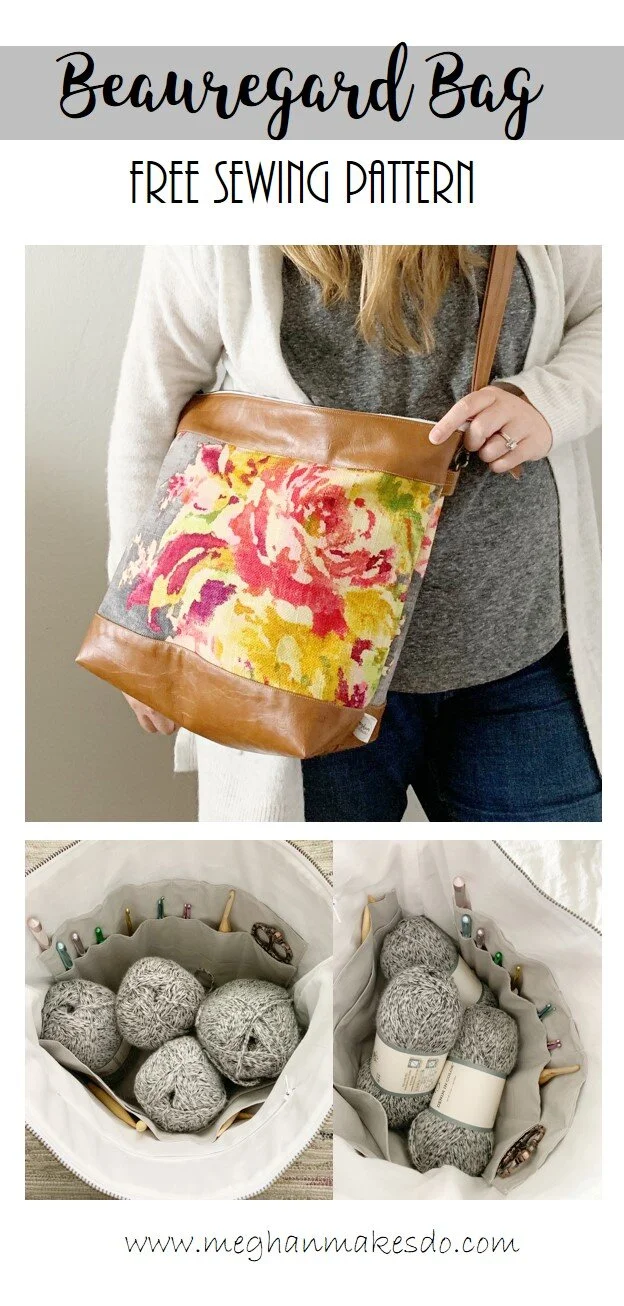
Test your sewing skills with The Beauregard Bag! This modern cross body bag is perfect for makers, but can also be customized for everyday use. Find the free pattern below or grab a digital PDF sewing pattern in my shop.

The Beauregard Bag was made with the maker in mind. I needed a catch all bag for all my crochet supplies and projects that was also easy to take on the go. The Beauregard features 16 hook/needle or pen pockets, 4 slide pockets and zippered pocket for notions. It zips closed at the top to keep all your items secure and the cross body strap makes it easy for on the go crochet or knitting.
After making and selling the finished Beauregard Bags for a year I knew I needed to bring this amazing bag to you as a free sewing pattern. It is great for intermediate sewers looking to advance their skills. Here I will walk you through every step with helpful photos for all the tricky bits.

The Beauregard Bags shown here were made with a faux leather vinyl for the exterior and straps. Note that I recommend using a heavy duty or semi-industrial sewing machine if using this type of fabric. Sewing through this type of material on a regular home sewing machine may be difficult. Feel free to substitute with thinner fabric like home decor or canvas.
The Beauregard Bag Sewing Pattern
Materials:
1/3 yard of 45” home décor fabric for exterior
1½ yards of 45” quilting cotton for lining and interior pockets
1/3 yard of 54” faux leather or sturdy upholstery fabric
½ yard of fusible fleece
18” metal zipper
10” plastic zipper for interior pocket
(2) 1” d-rings & swivel clasp sets
(1) 1” slide adjuster
Regular thread and Upholstery thread
Heavy Duty or Semi-Industrial sewing machine (if using faux leather)
Ruler, rotary cutter, tailor’s chalk, zipper foot and other basic sewing supplies
Size:
Finished size is approx. 16.5” X 12.5 ” X 5”
Notes:
1.Use ½” seam allowance through out.
2.Interior pockets are optional.
Pattern:
Cut:
Exterior Home Décor Fabric
(2)-9” X 18” (center exterior pieces)
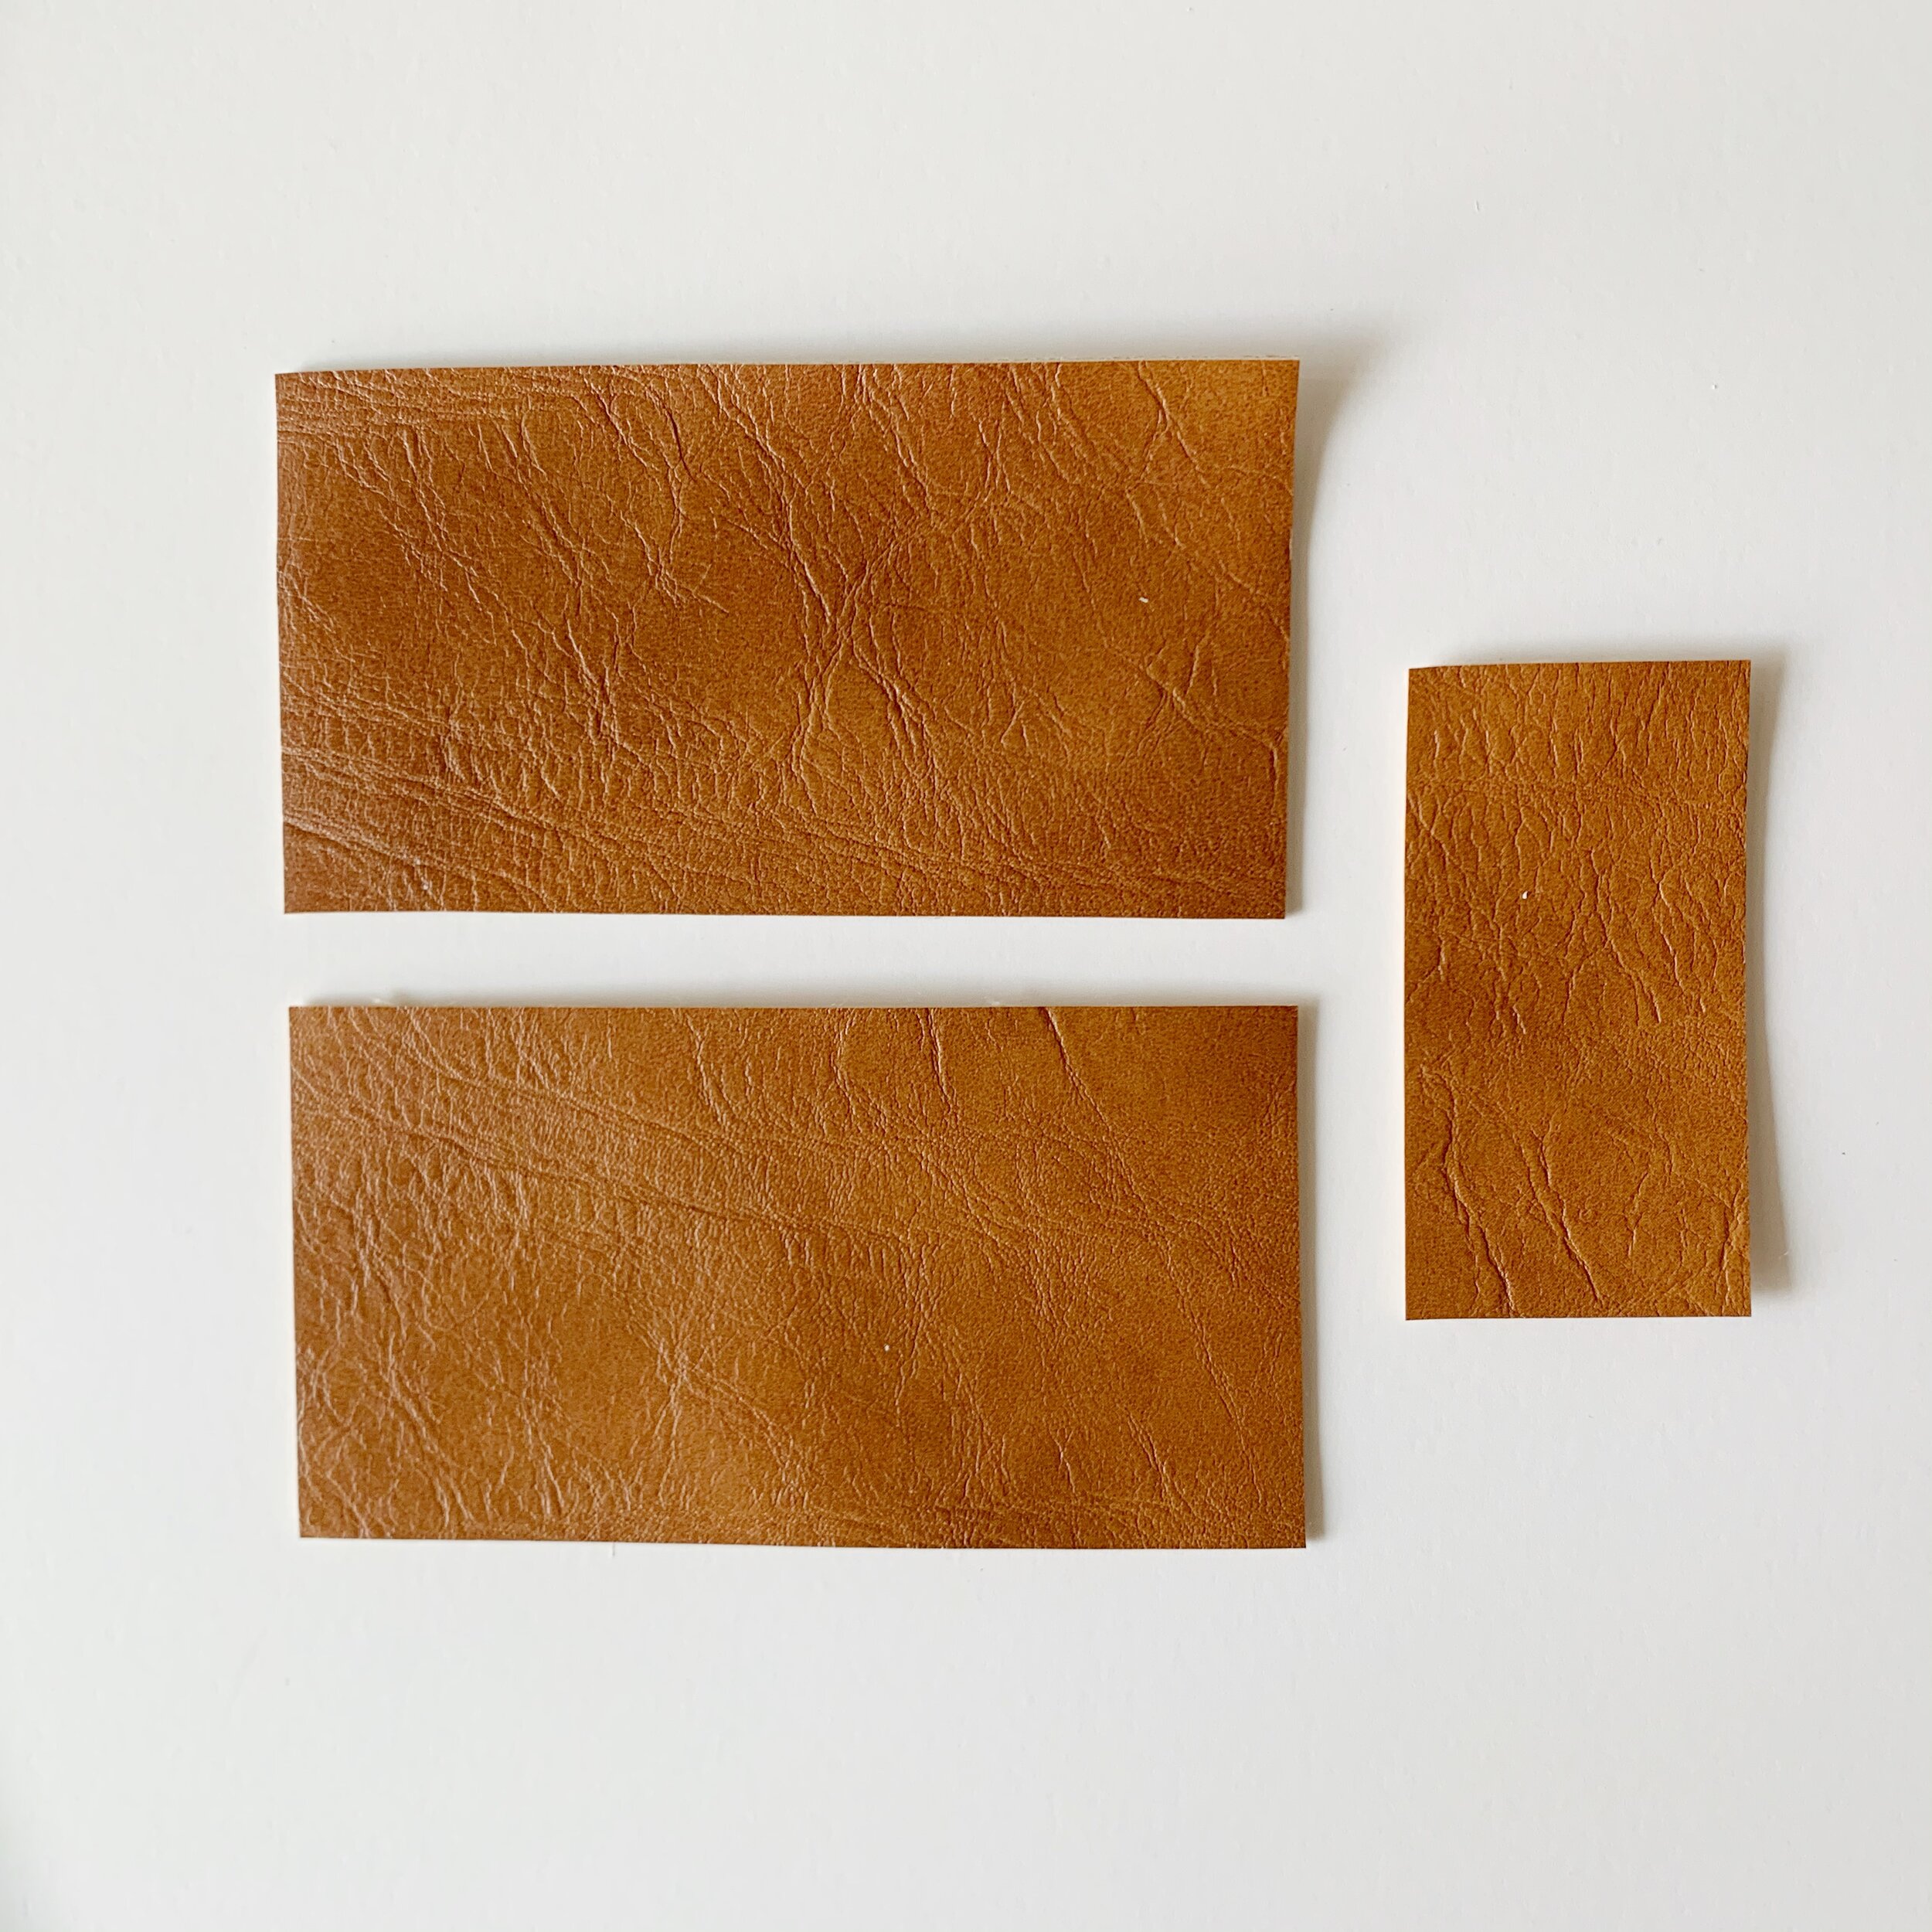
Faux Leather or Upholstery Fabric
(2)-3.5” X 18” (upper exterior pieces)
(2)-5.5” X 18” (bottom exterior pieces)
(1)-2” X 54”(strap)
(1)- 2.5” X 1.25”(zipper tab)
(2)-2” X 3” (d-ring holders)
Quilting Cotton
(2)-16” X 18” (lining pieces)
(1)-14” X 25” (hook pocket)
(1)-15” X 25” (slide pockets)
(1)- 11” X 18” (zippered pocket)
Fusible Fleece
(2)-16” X 18” (interfacing for exterior pieces)
Exterior:
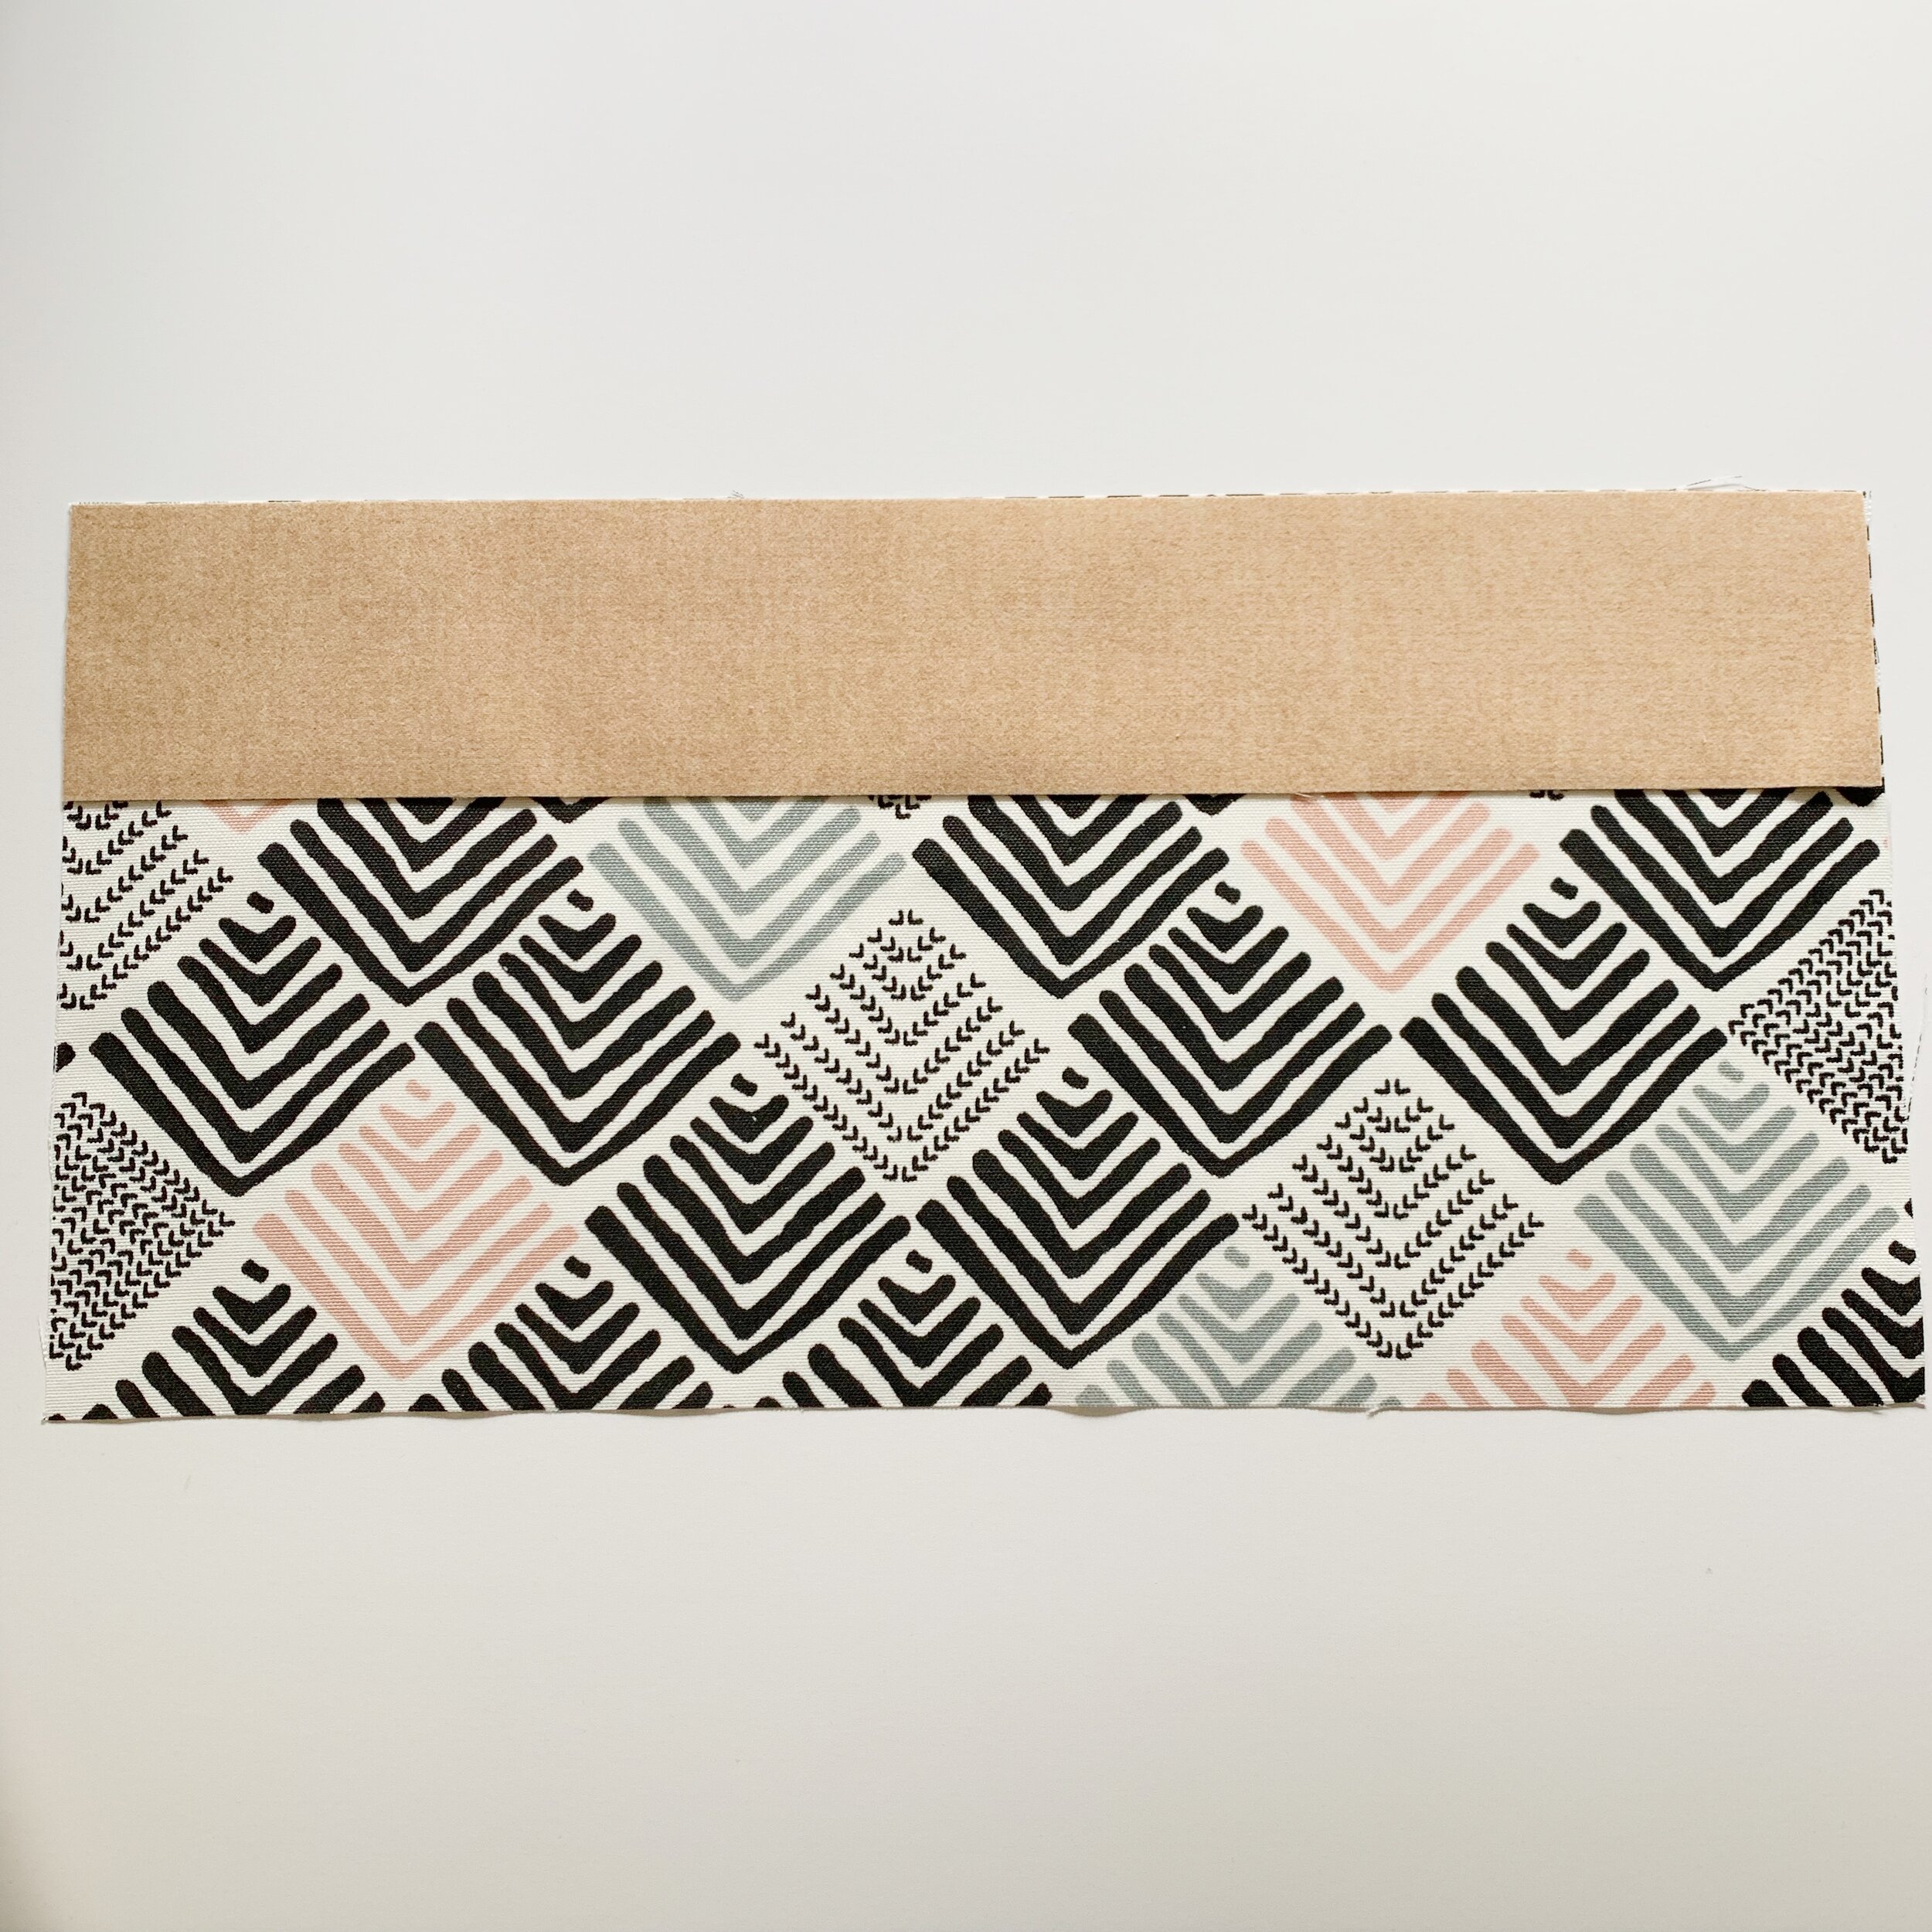
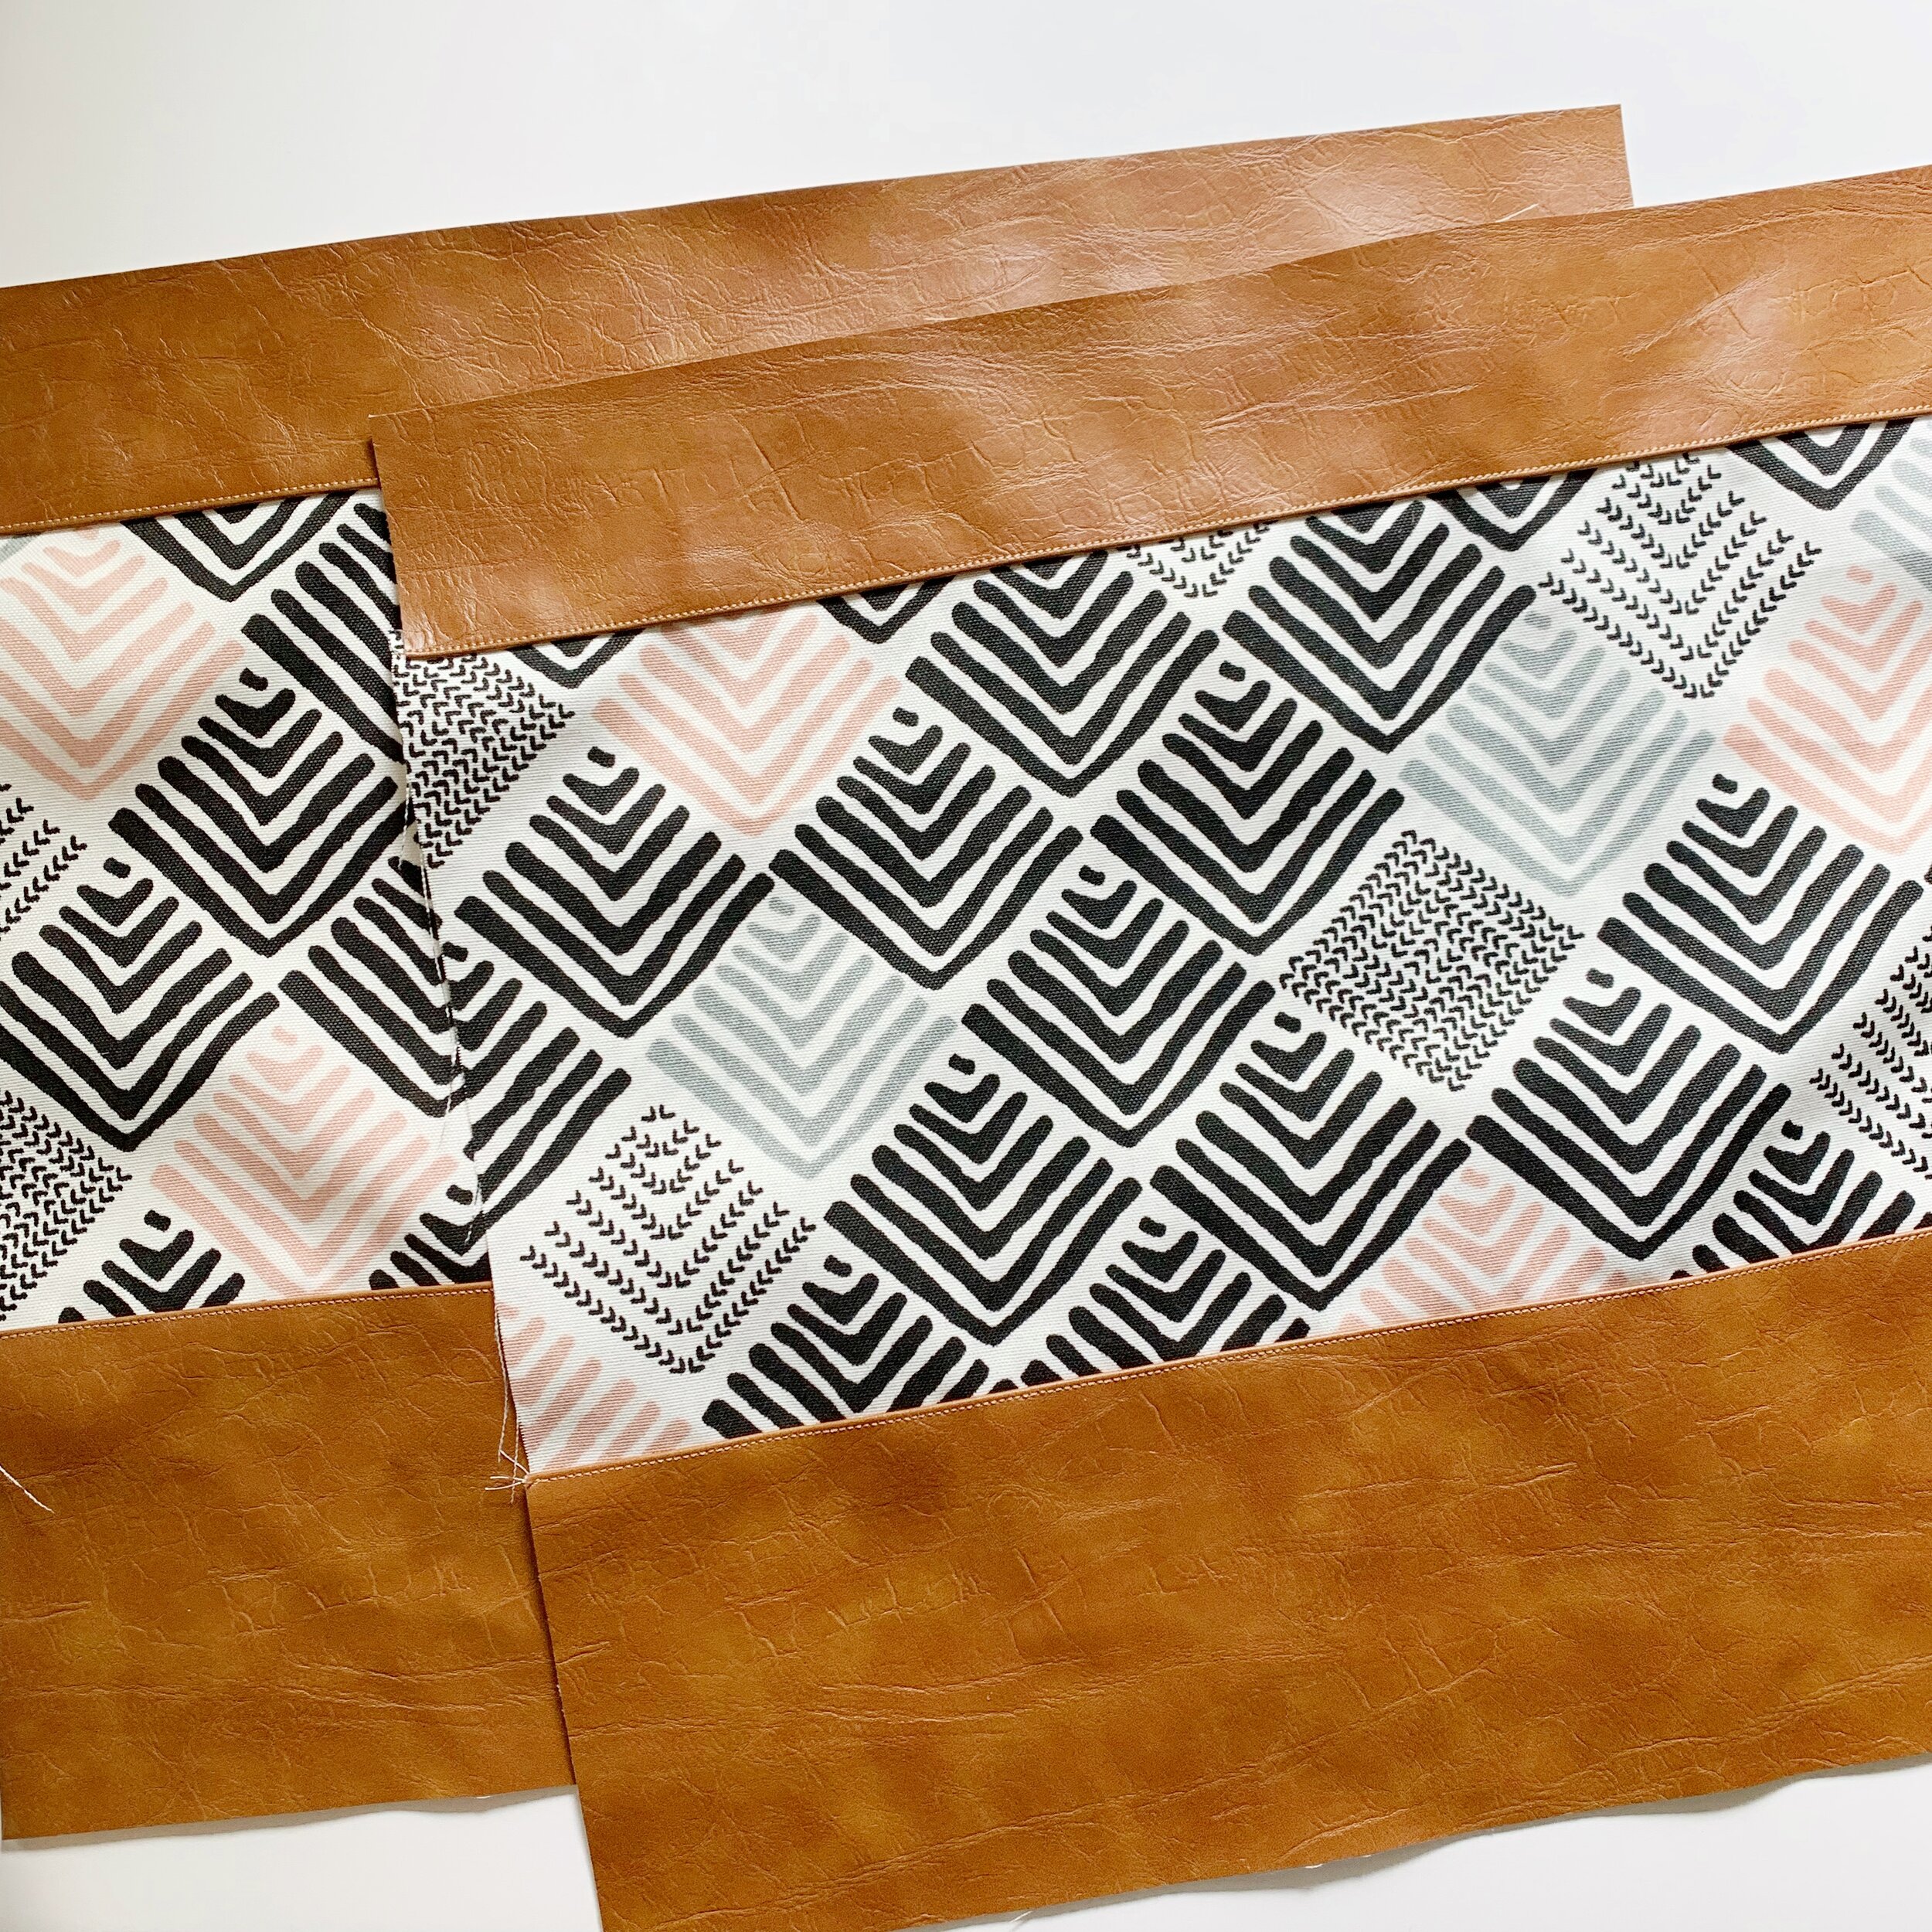
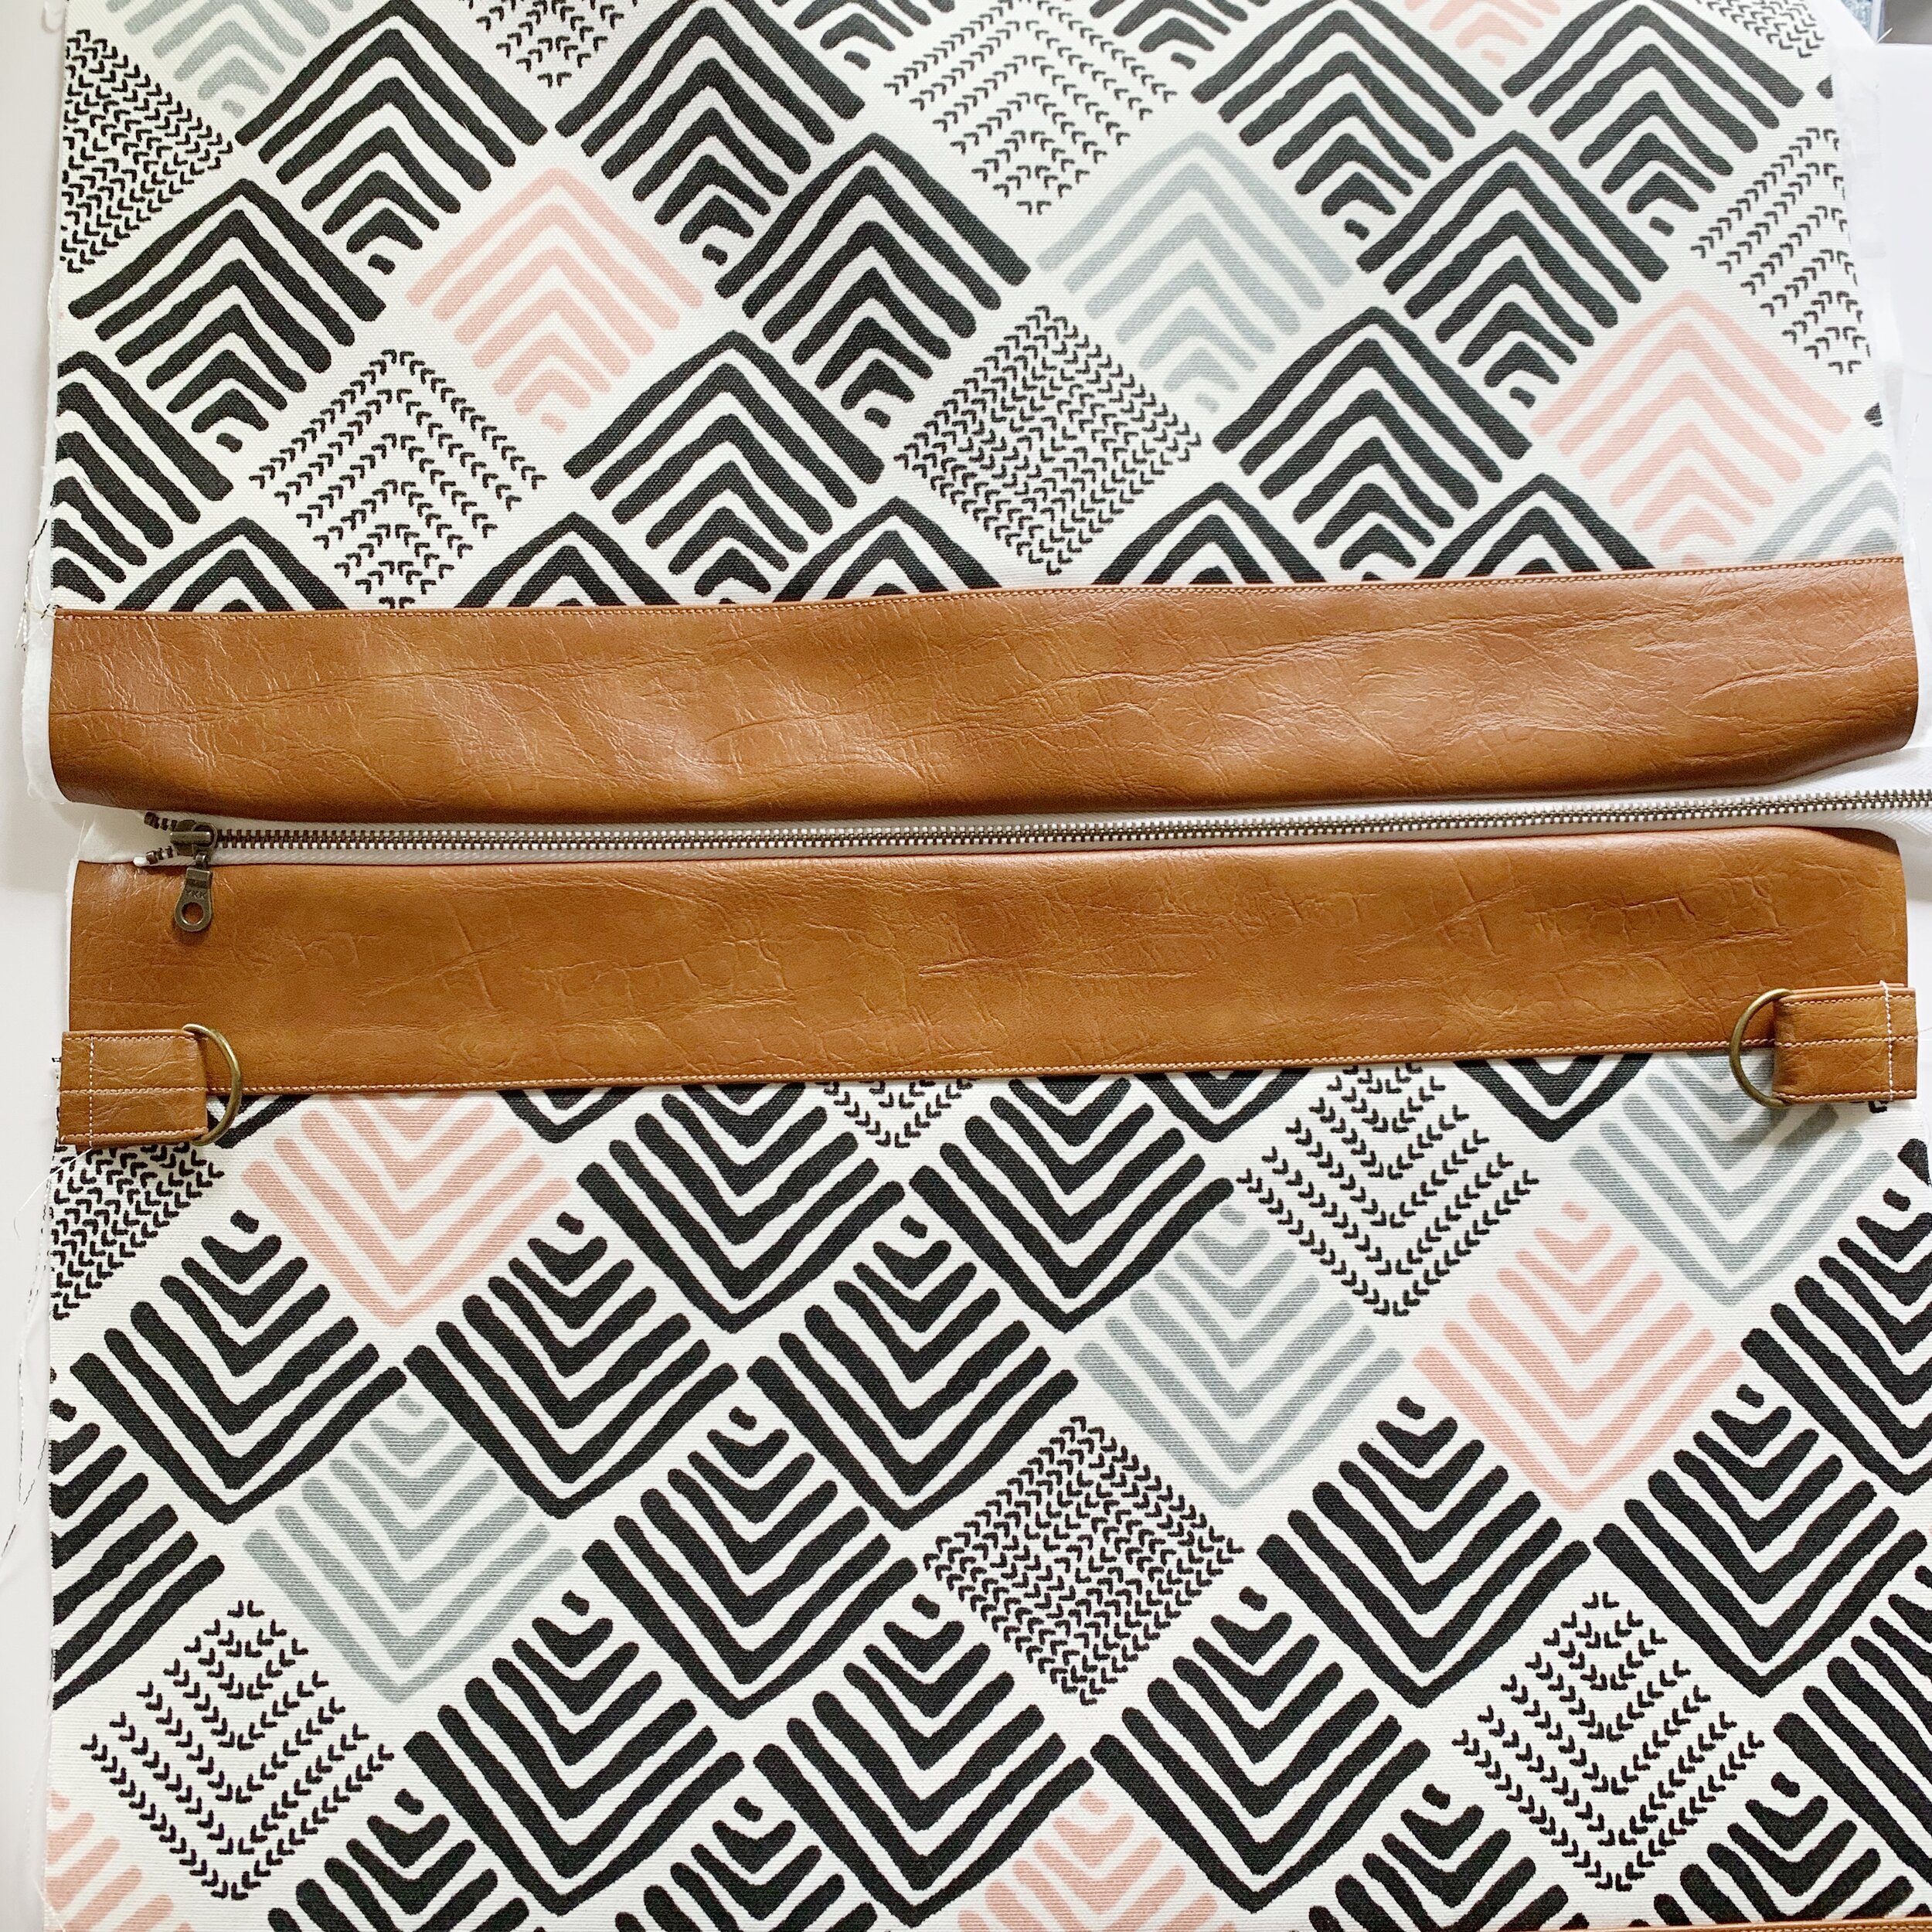
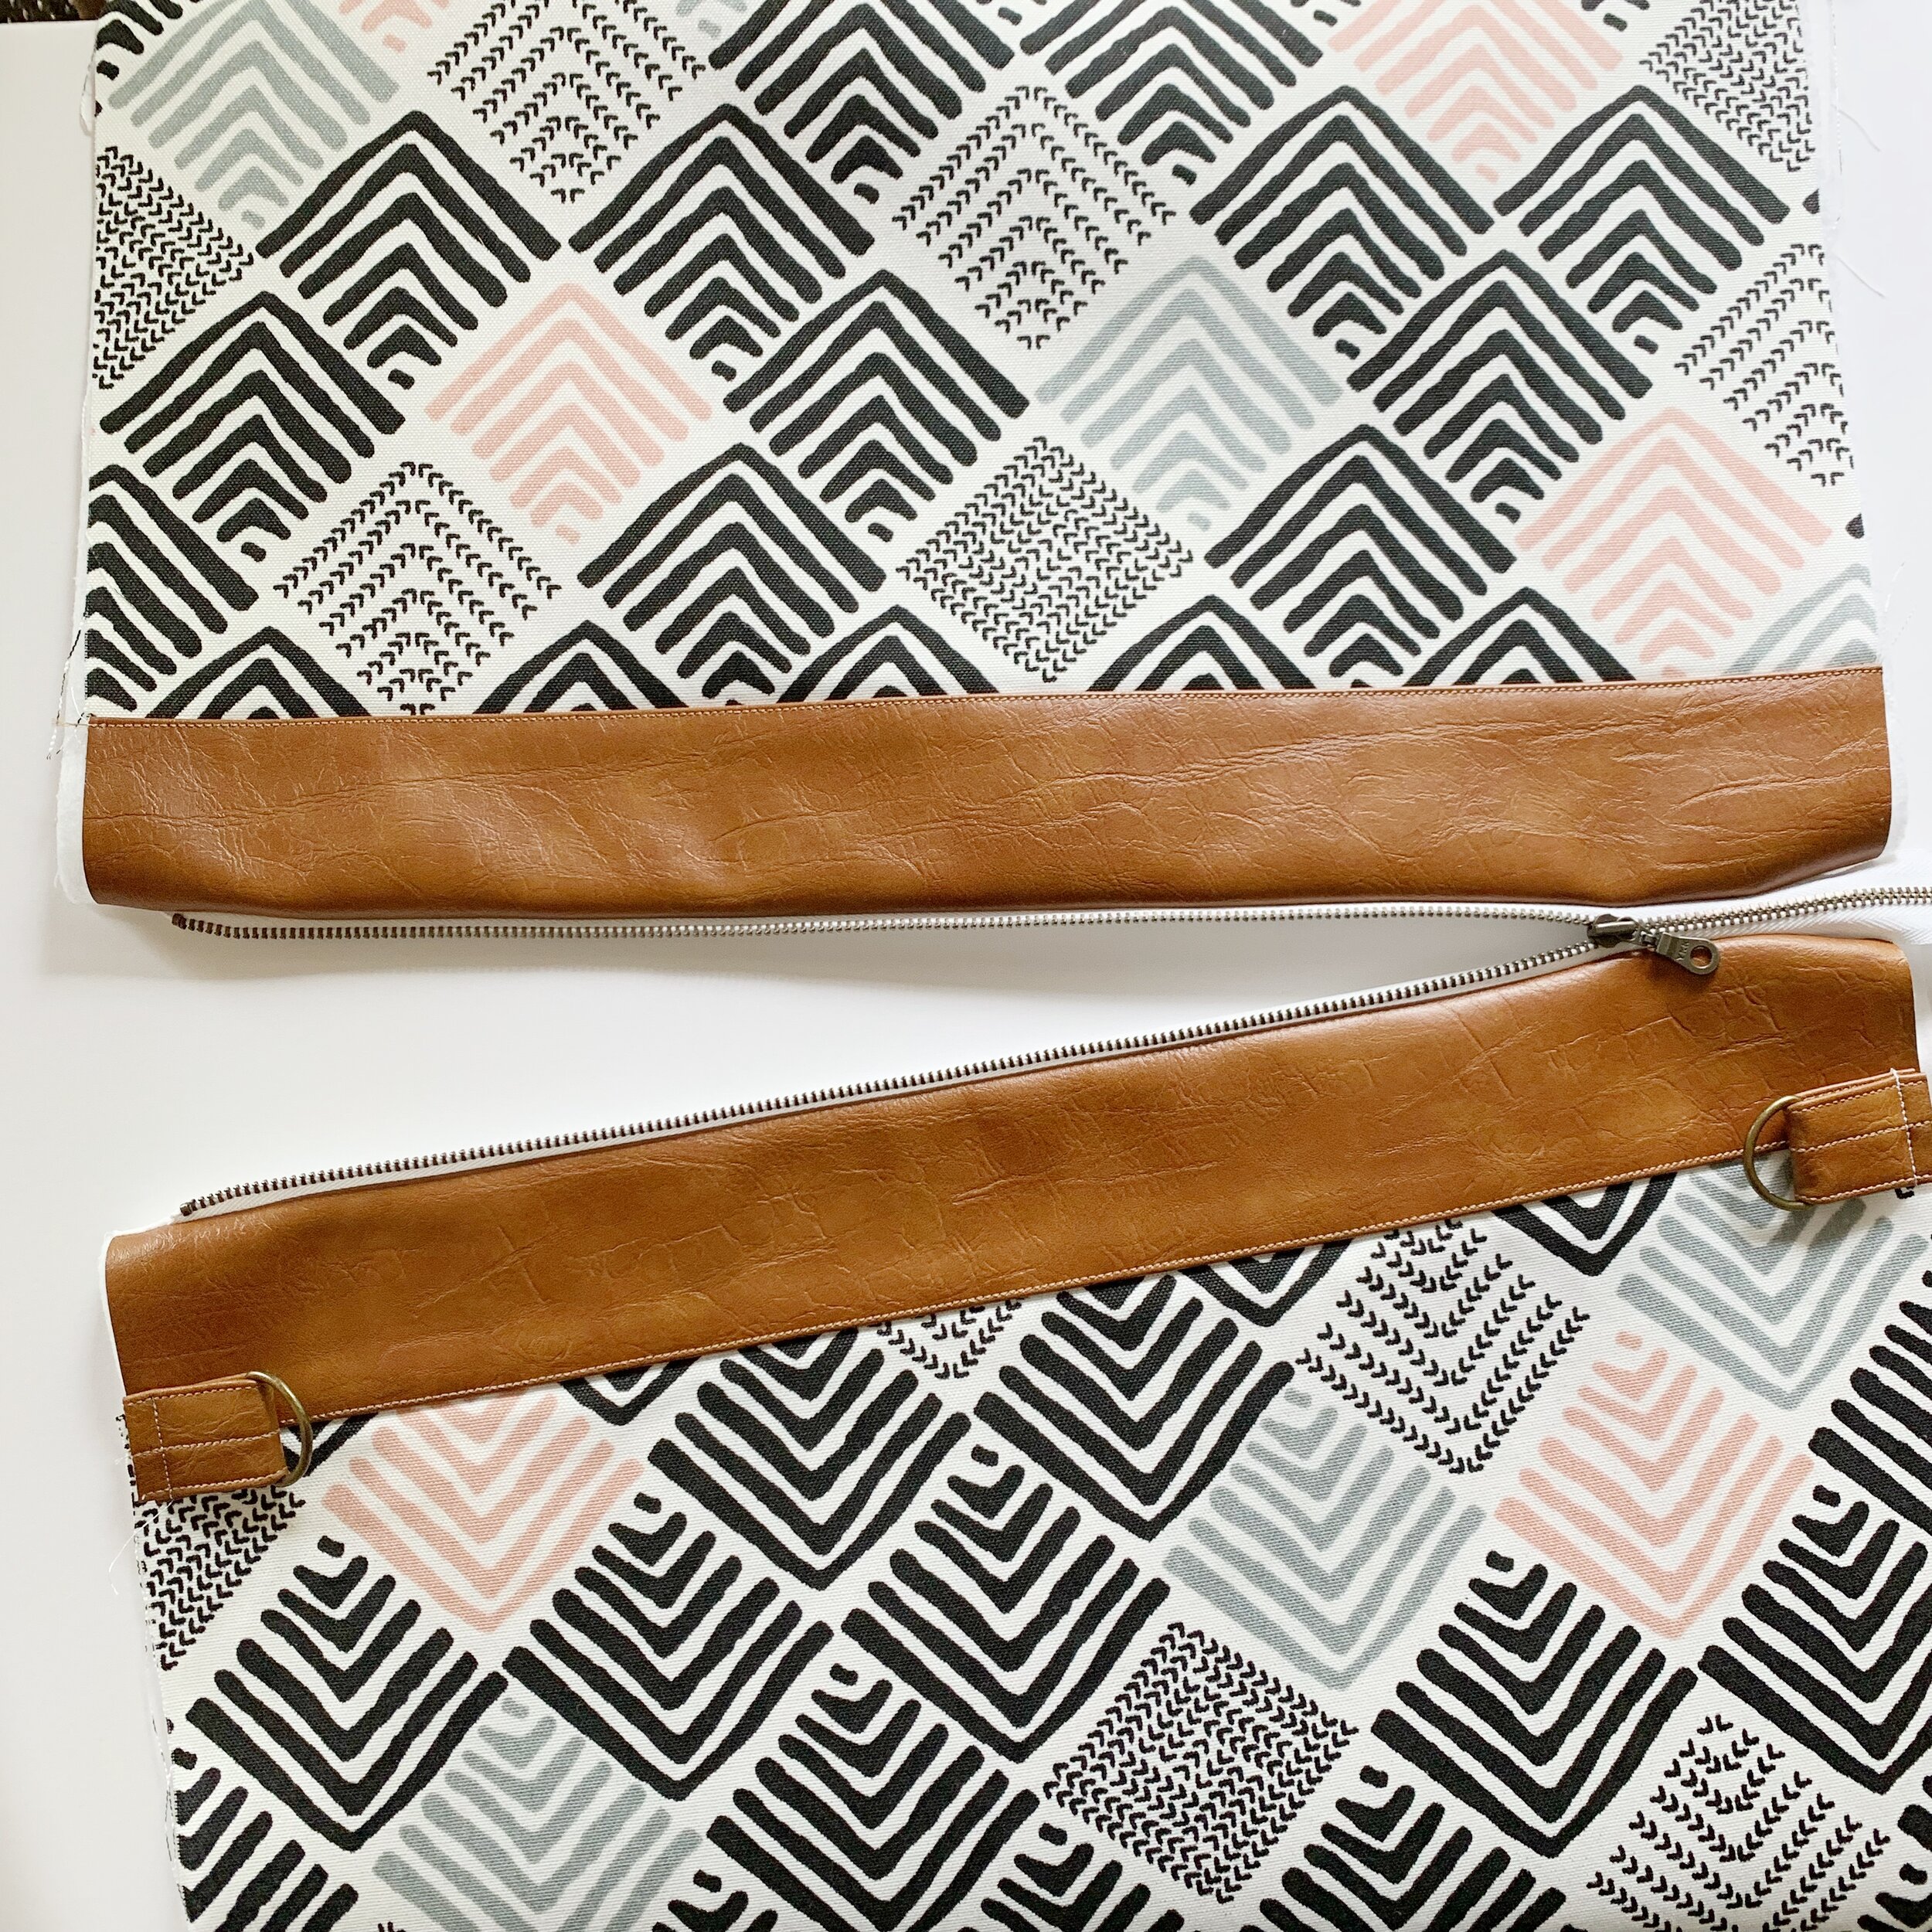
To assemble the exterior panels you will need the upper, bottom and center exterior pieces. Lay the upper pieces on top of the center pieces and sew along the top edge. Then lay the bottom pieces along the bottom of the center pieces and sew in place.
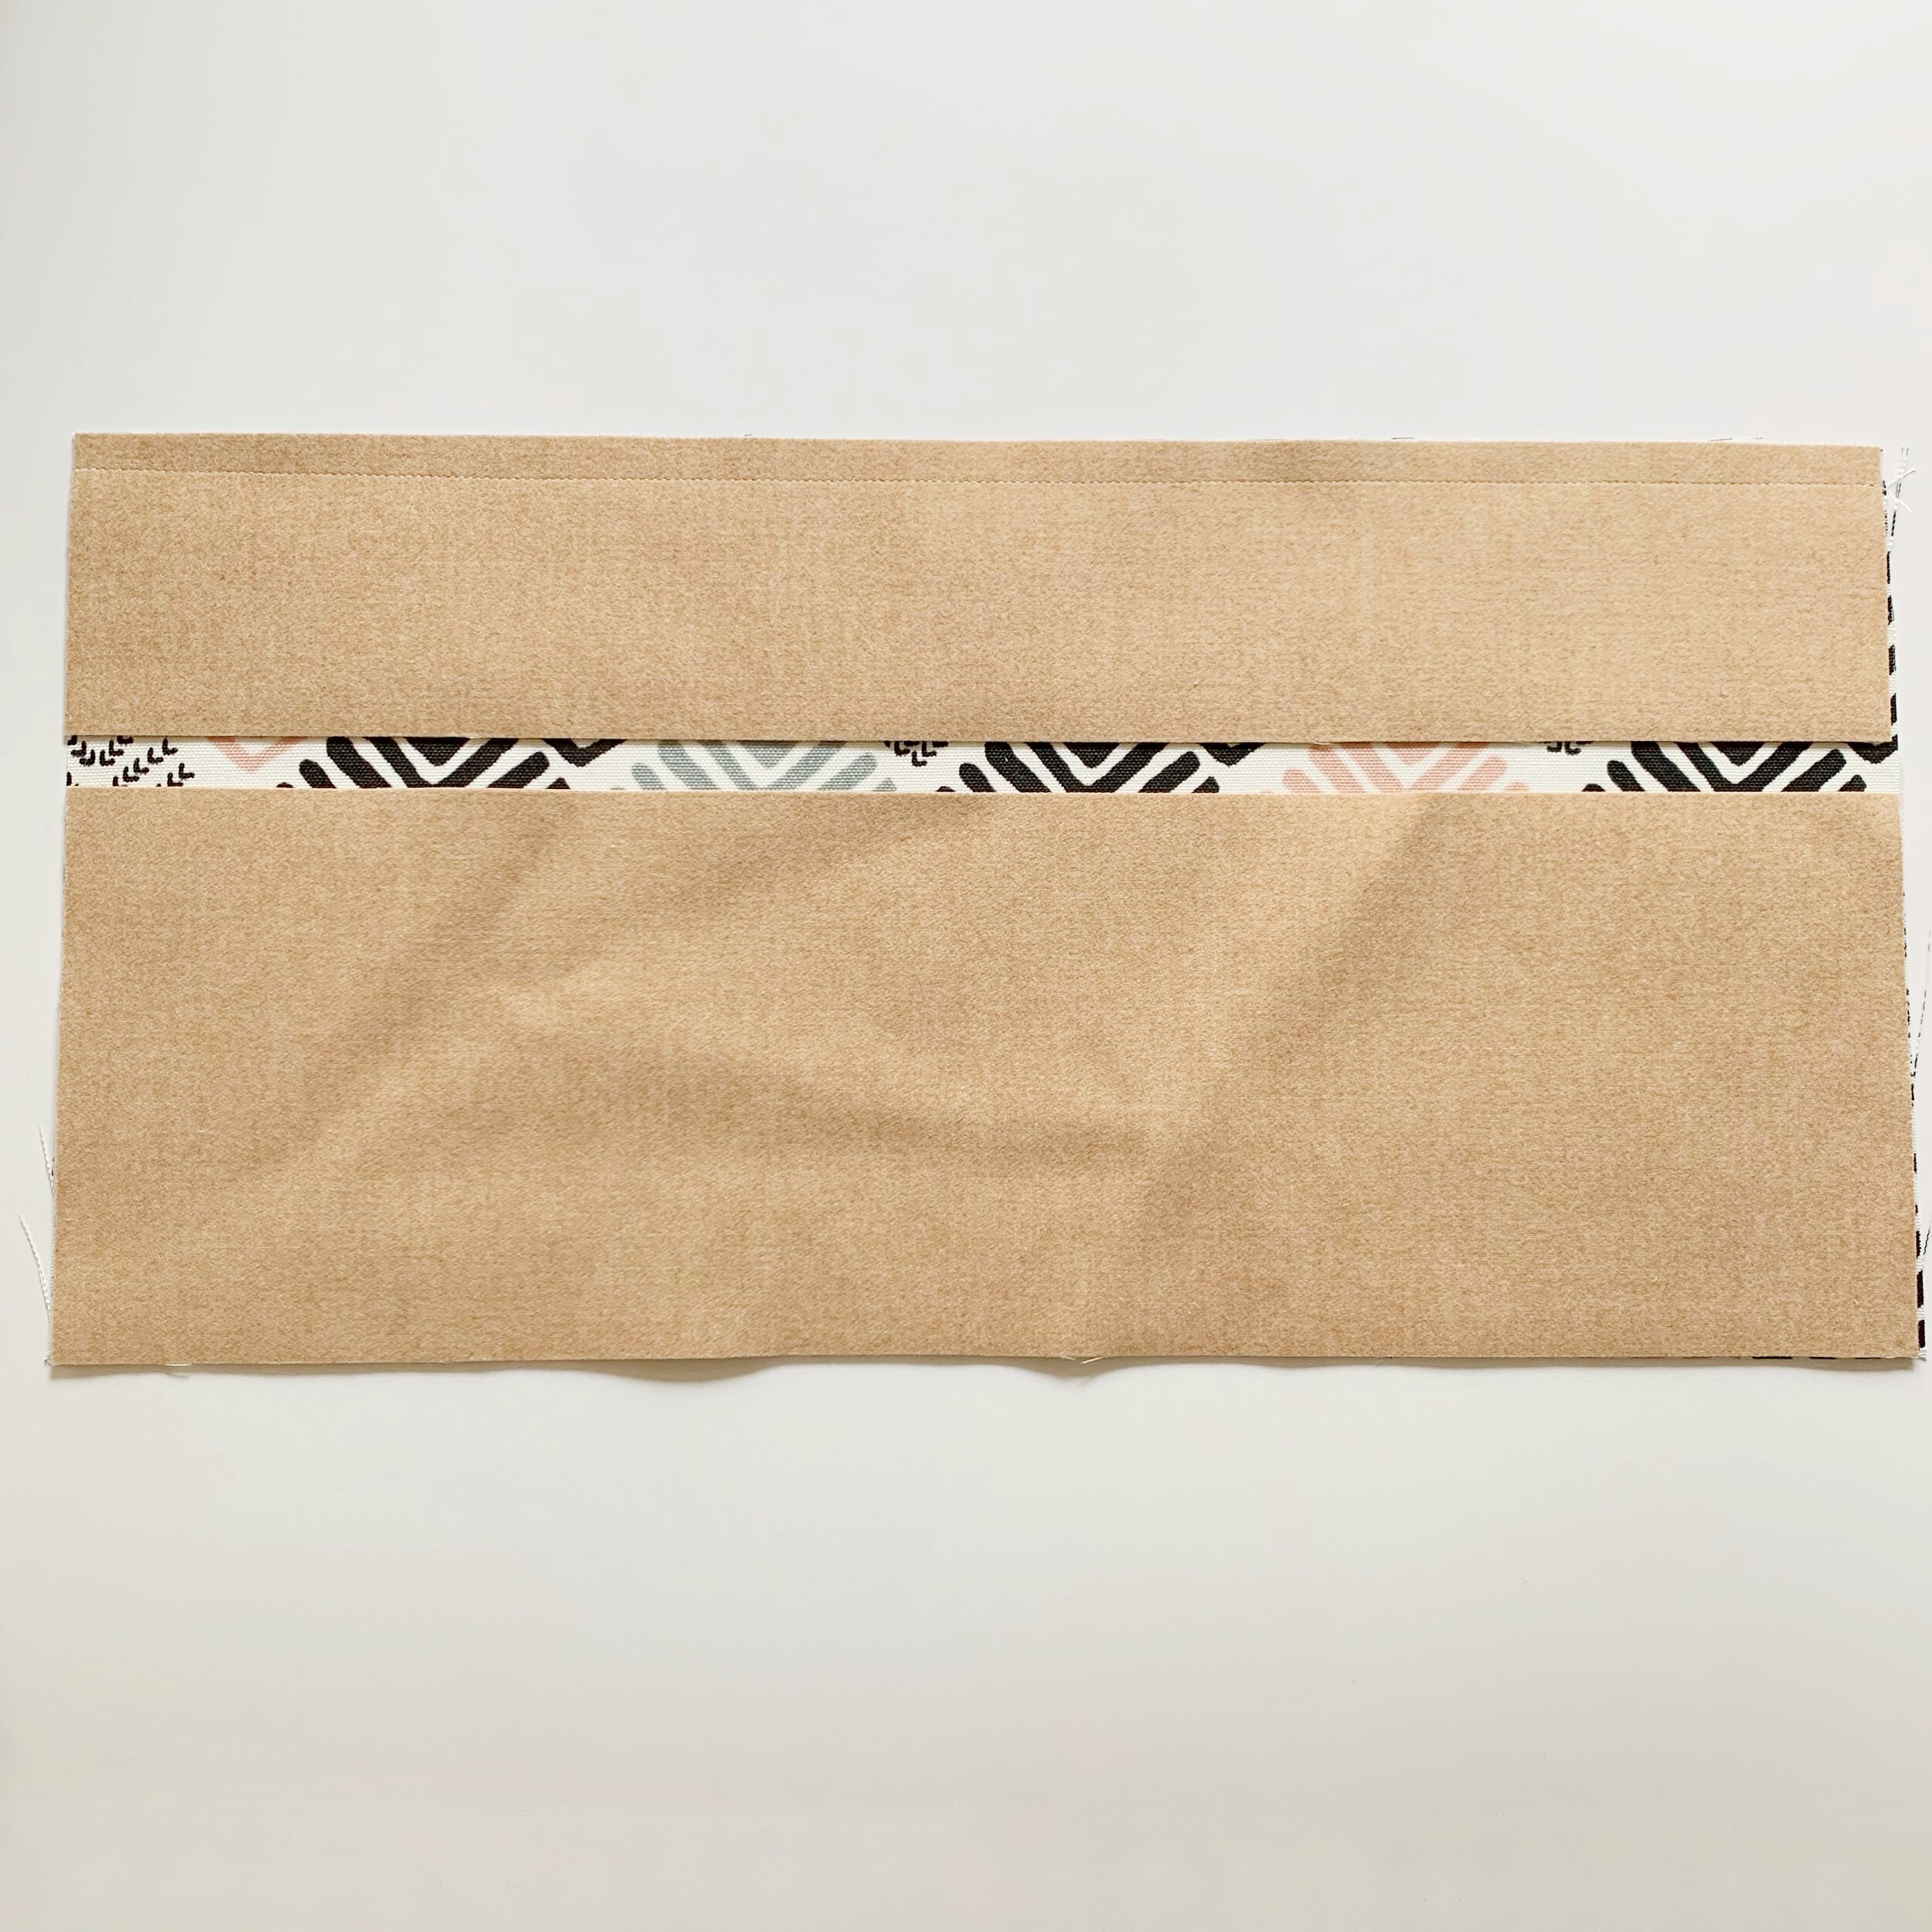
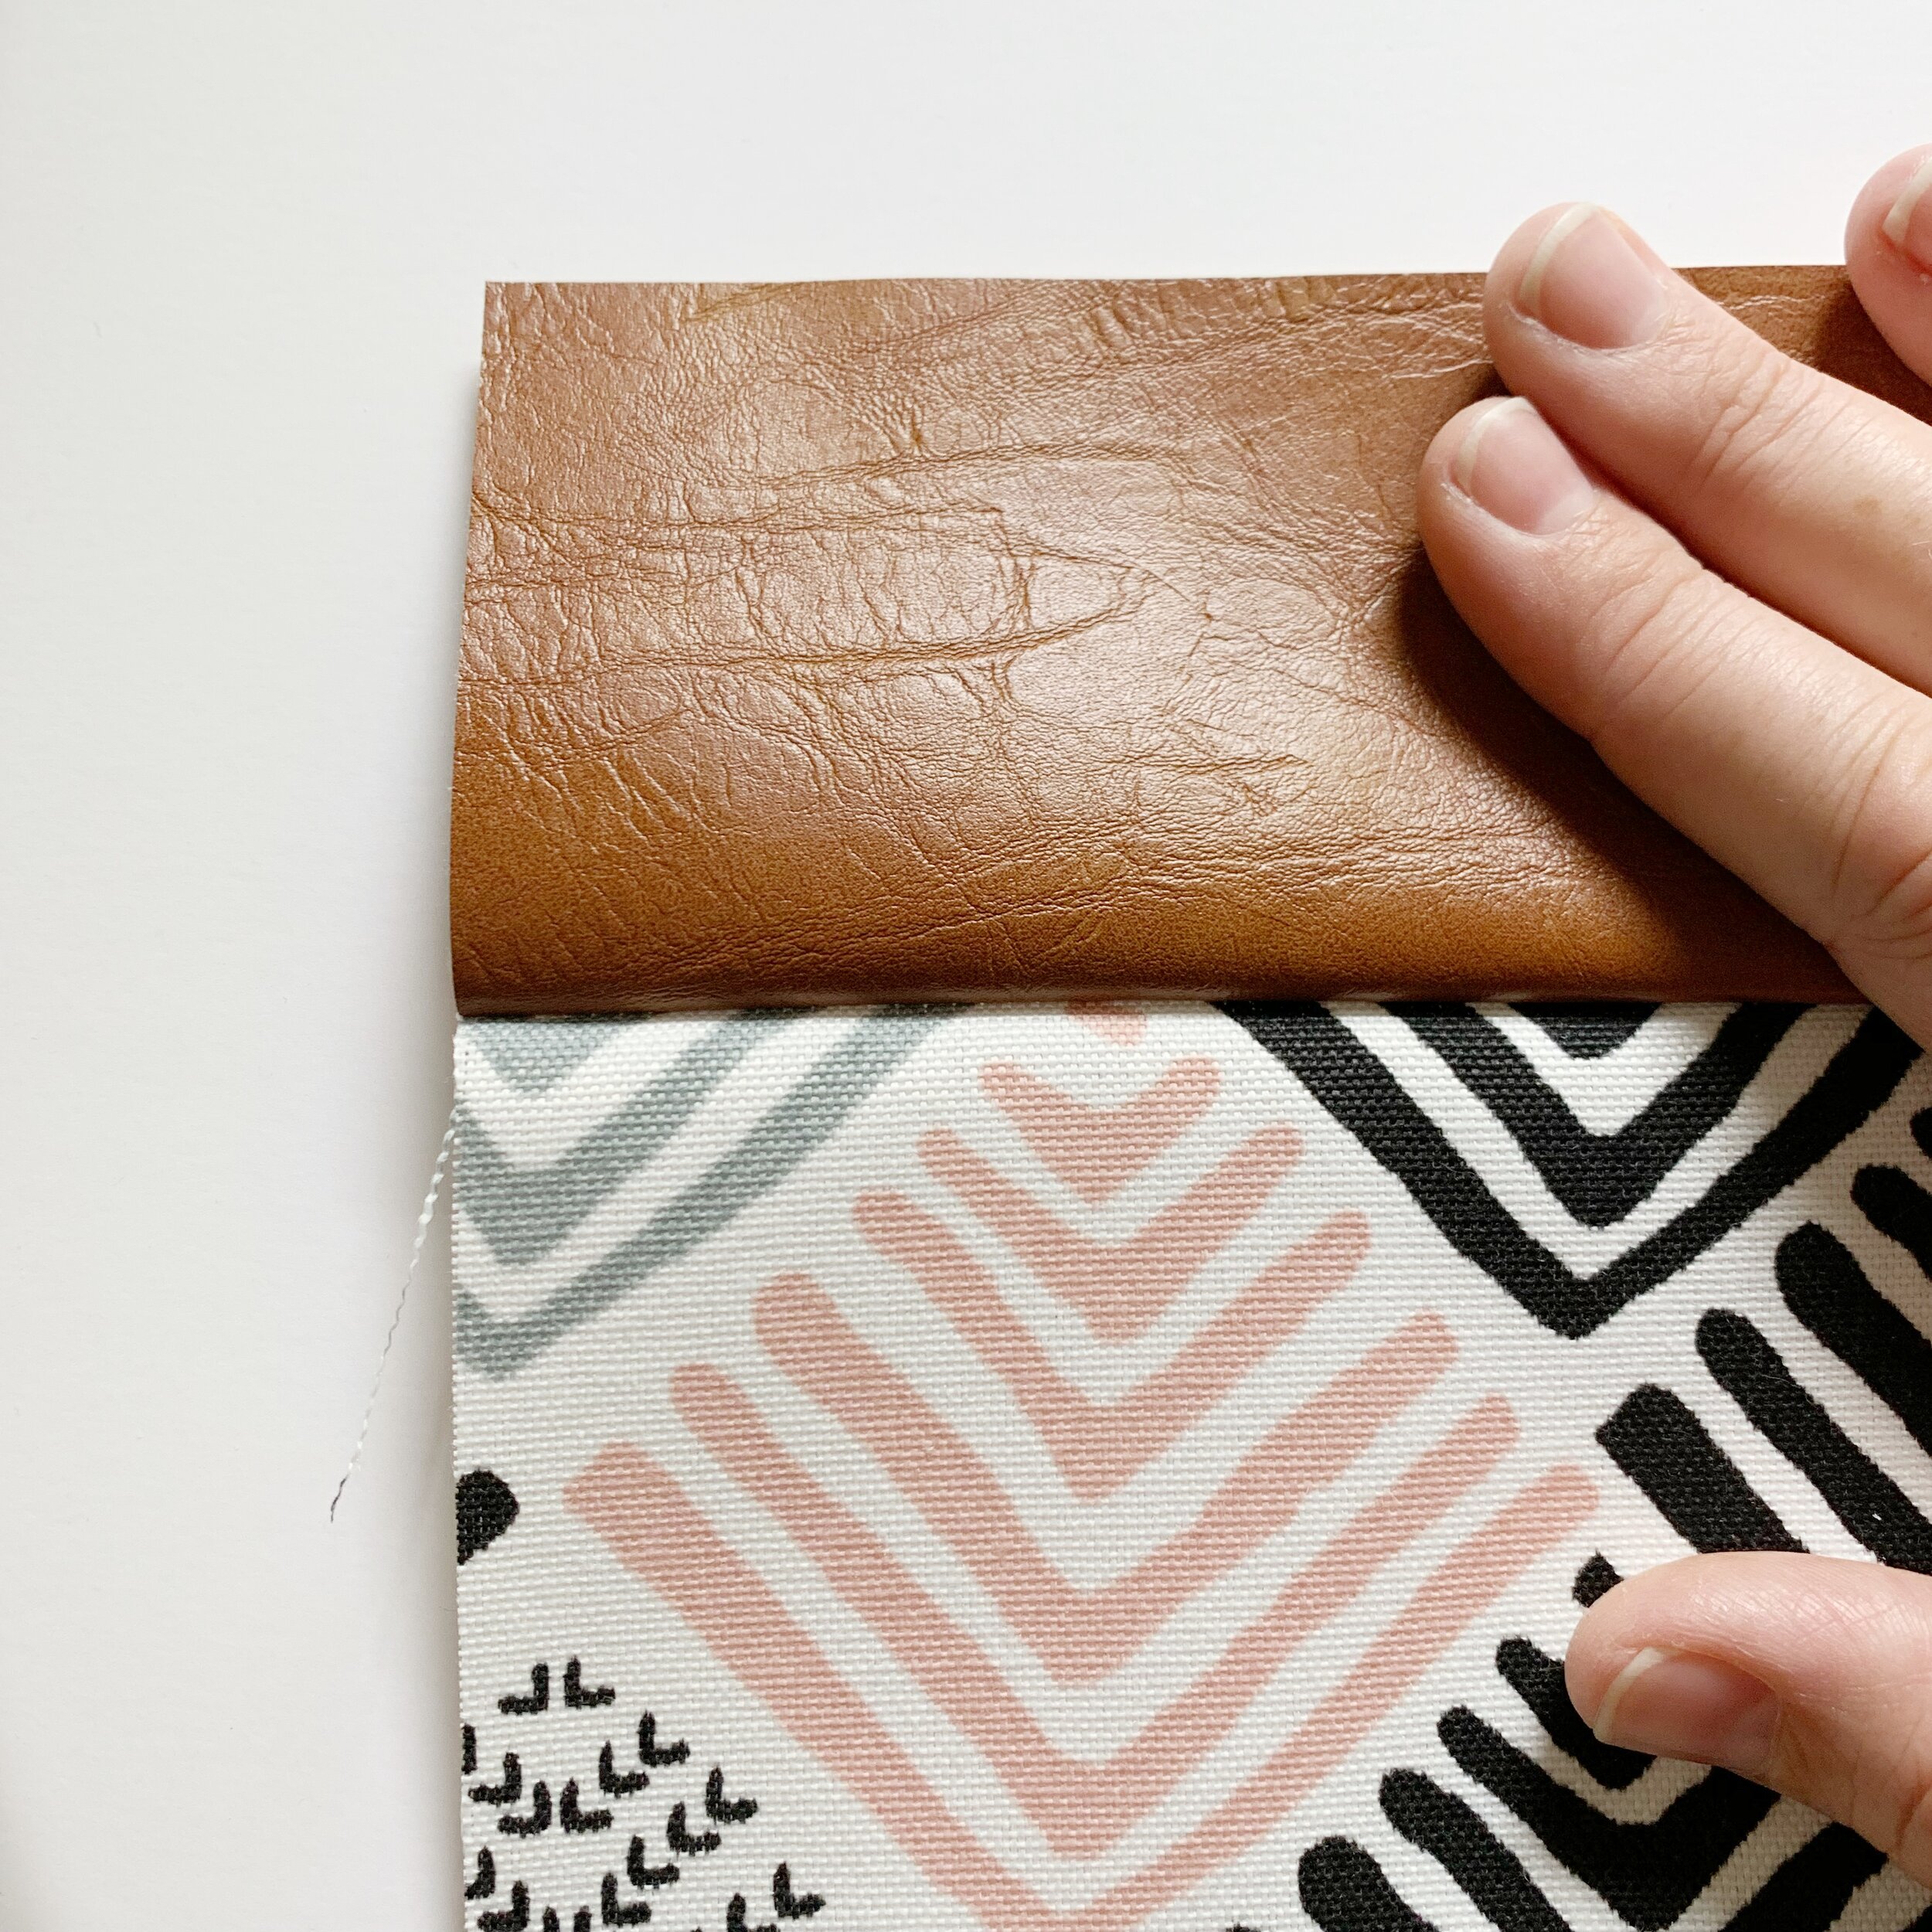
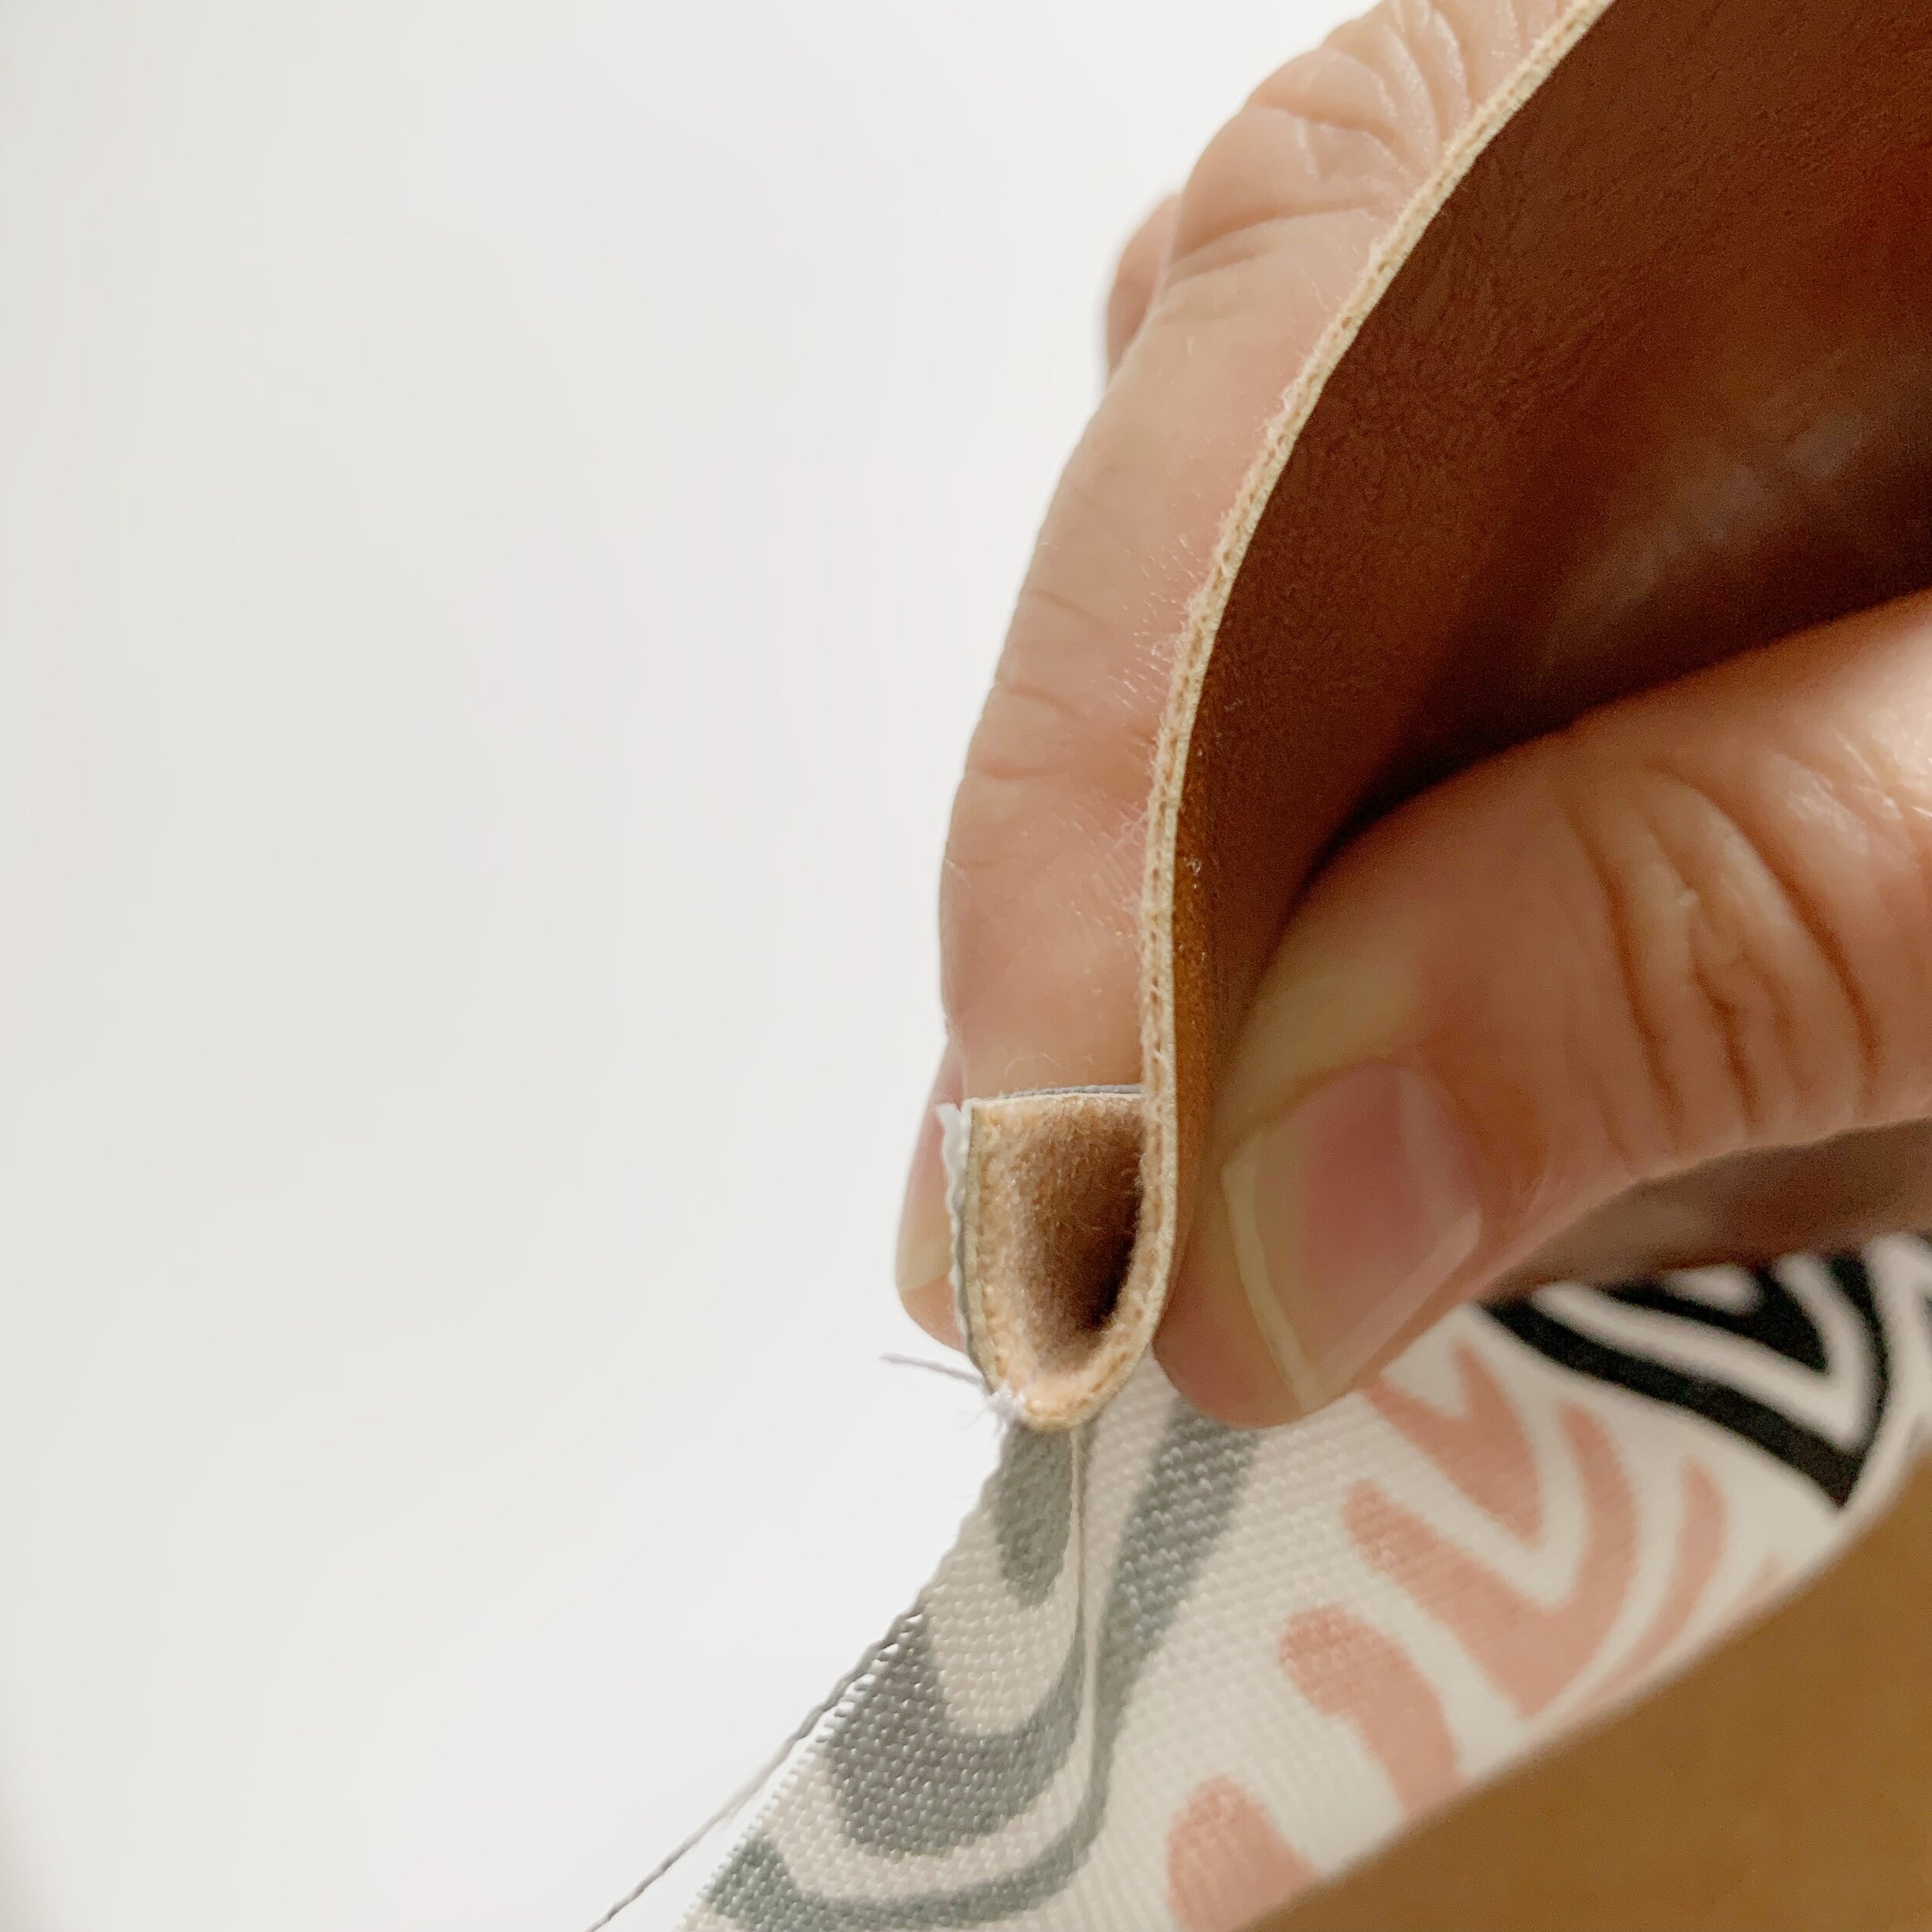
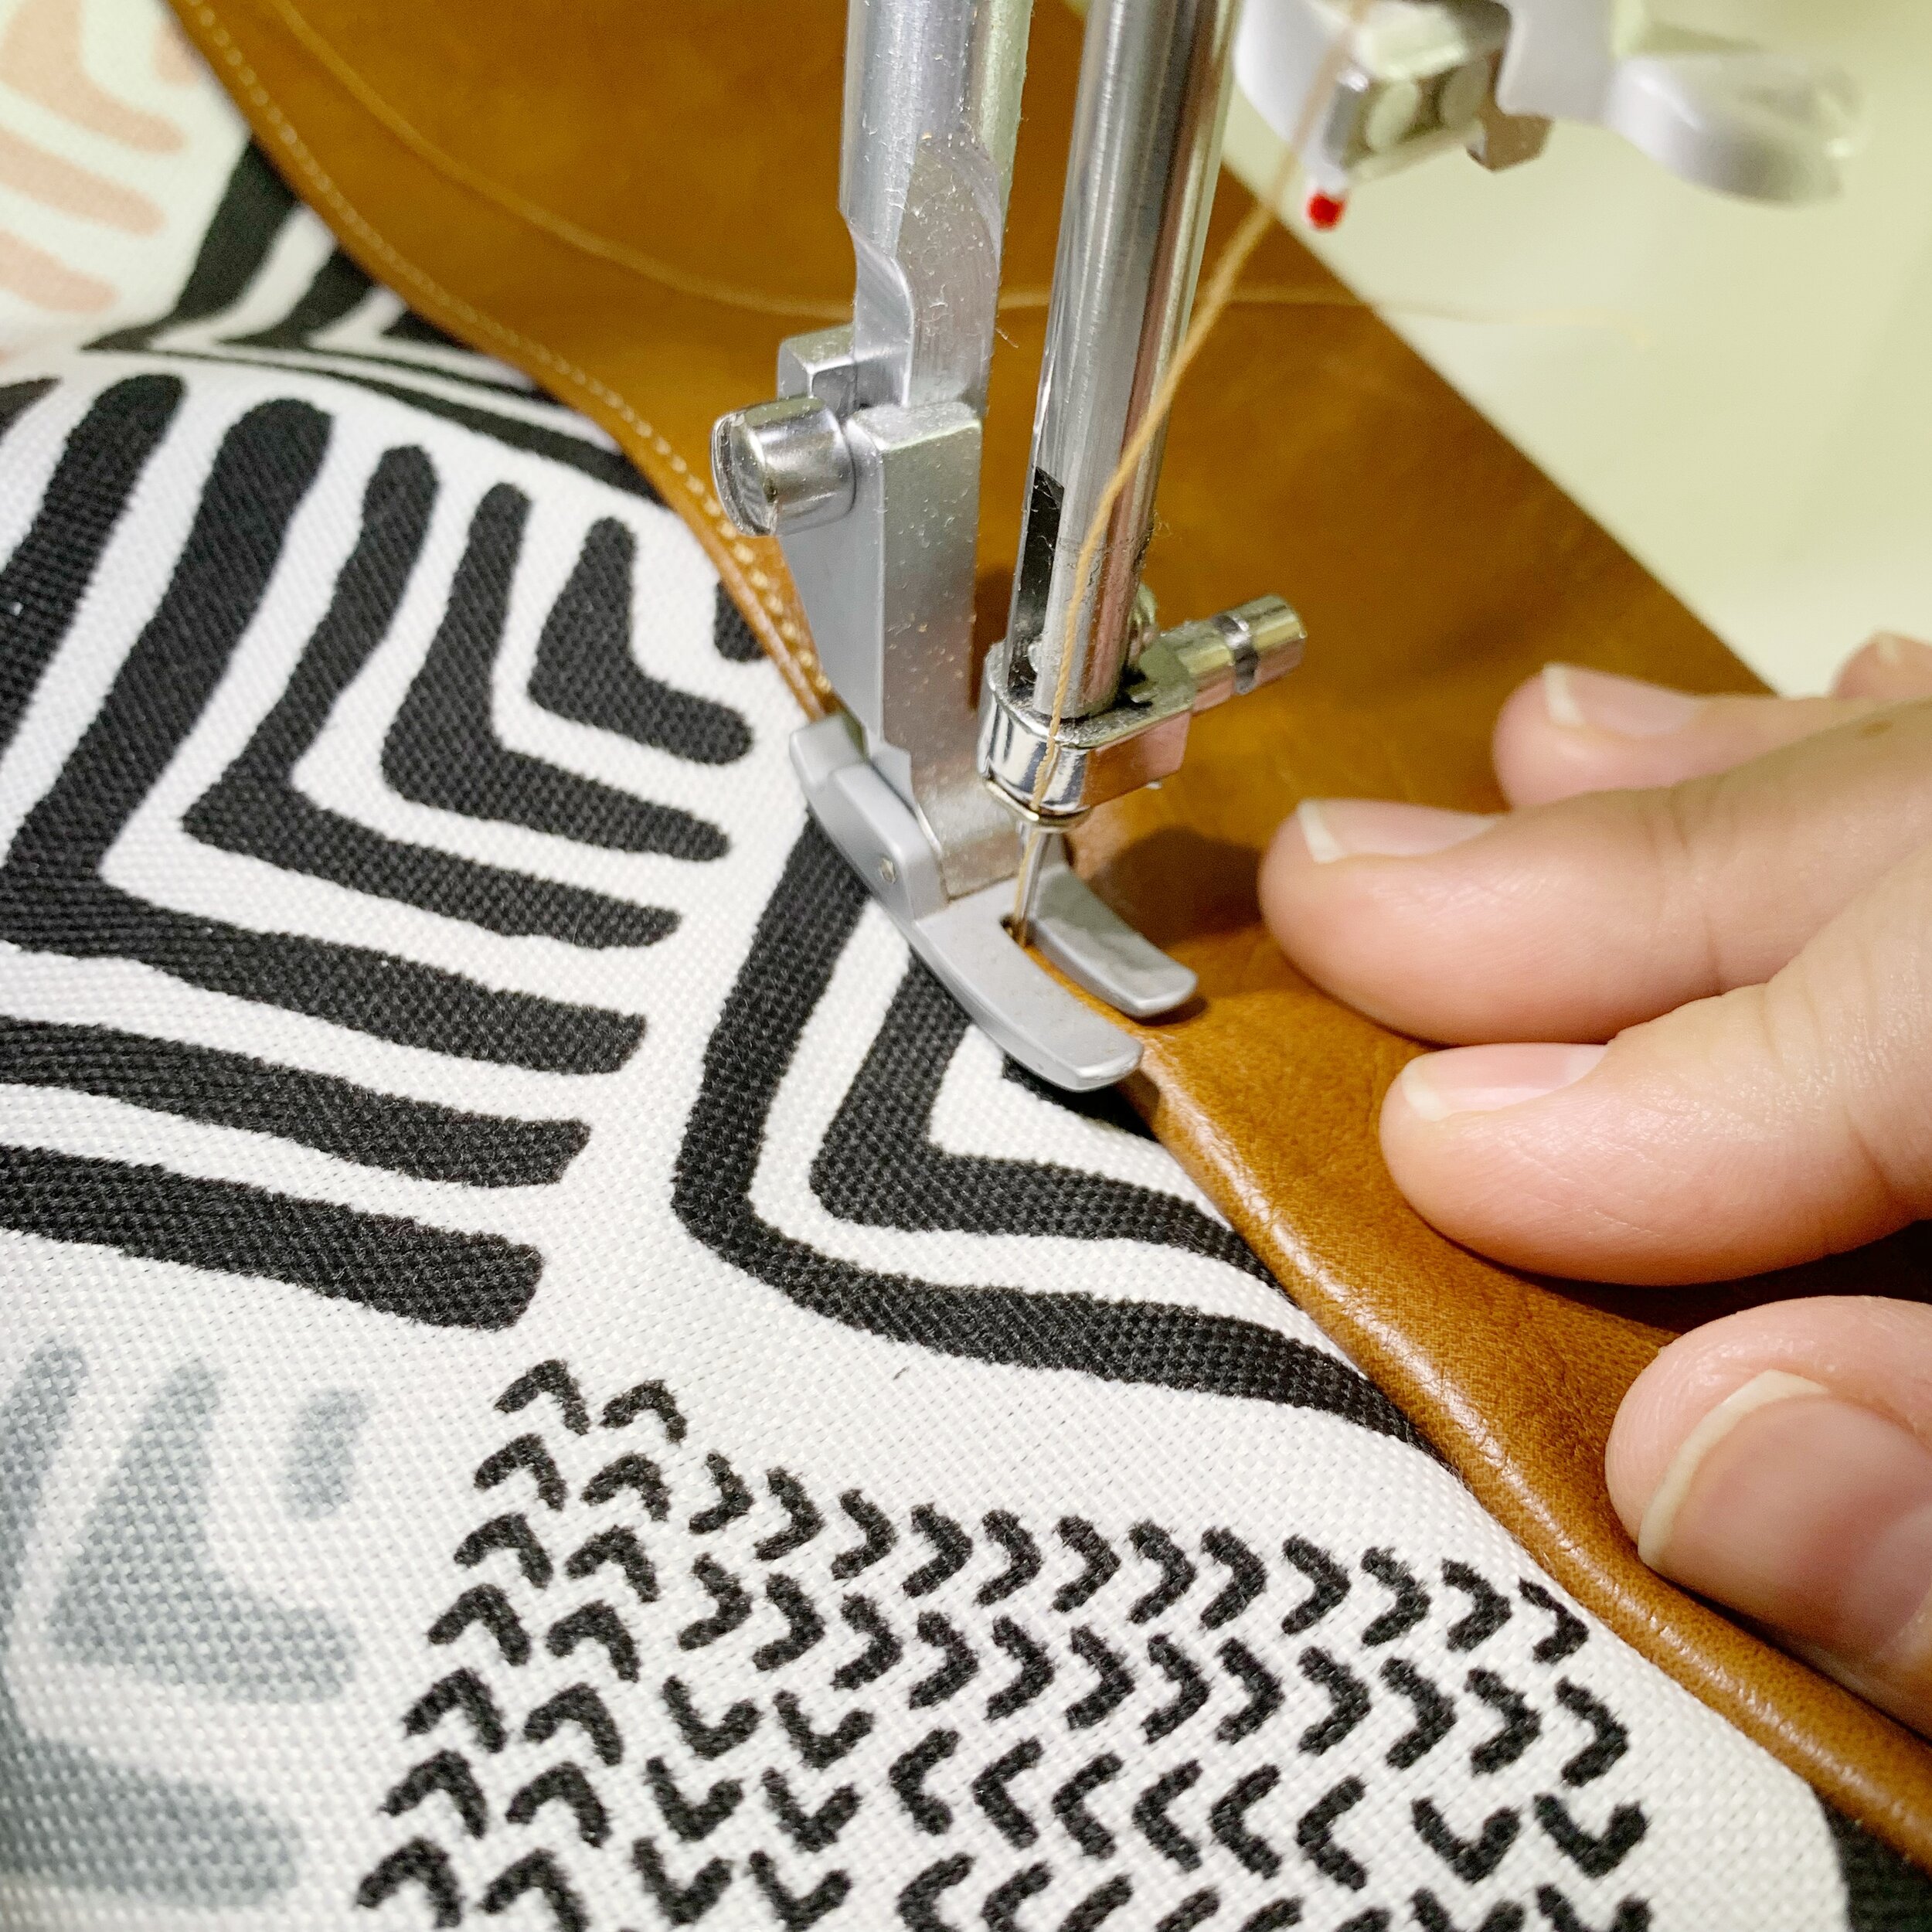
Fold upper and bottom pieces flat and then topstitch along the edges using a heavy duty sewing needle and upholstery thread.
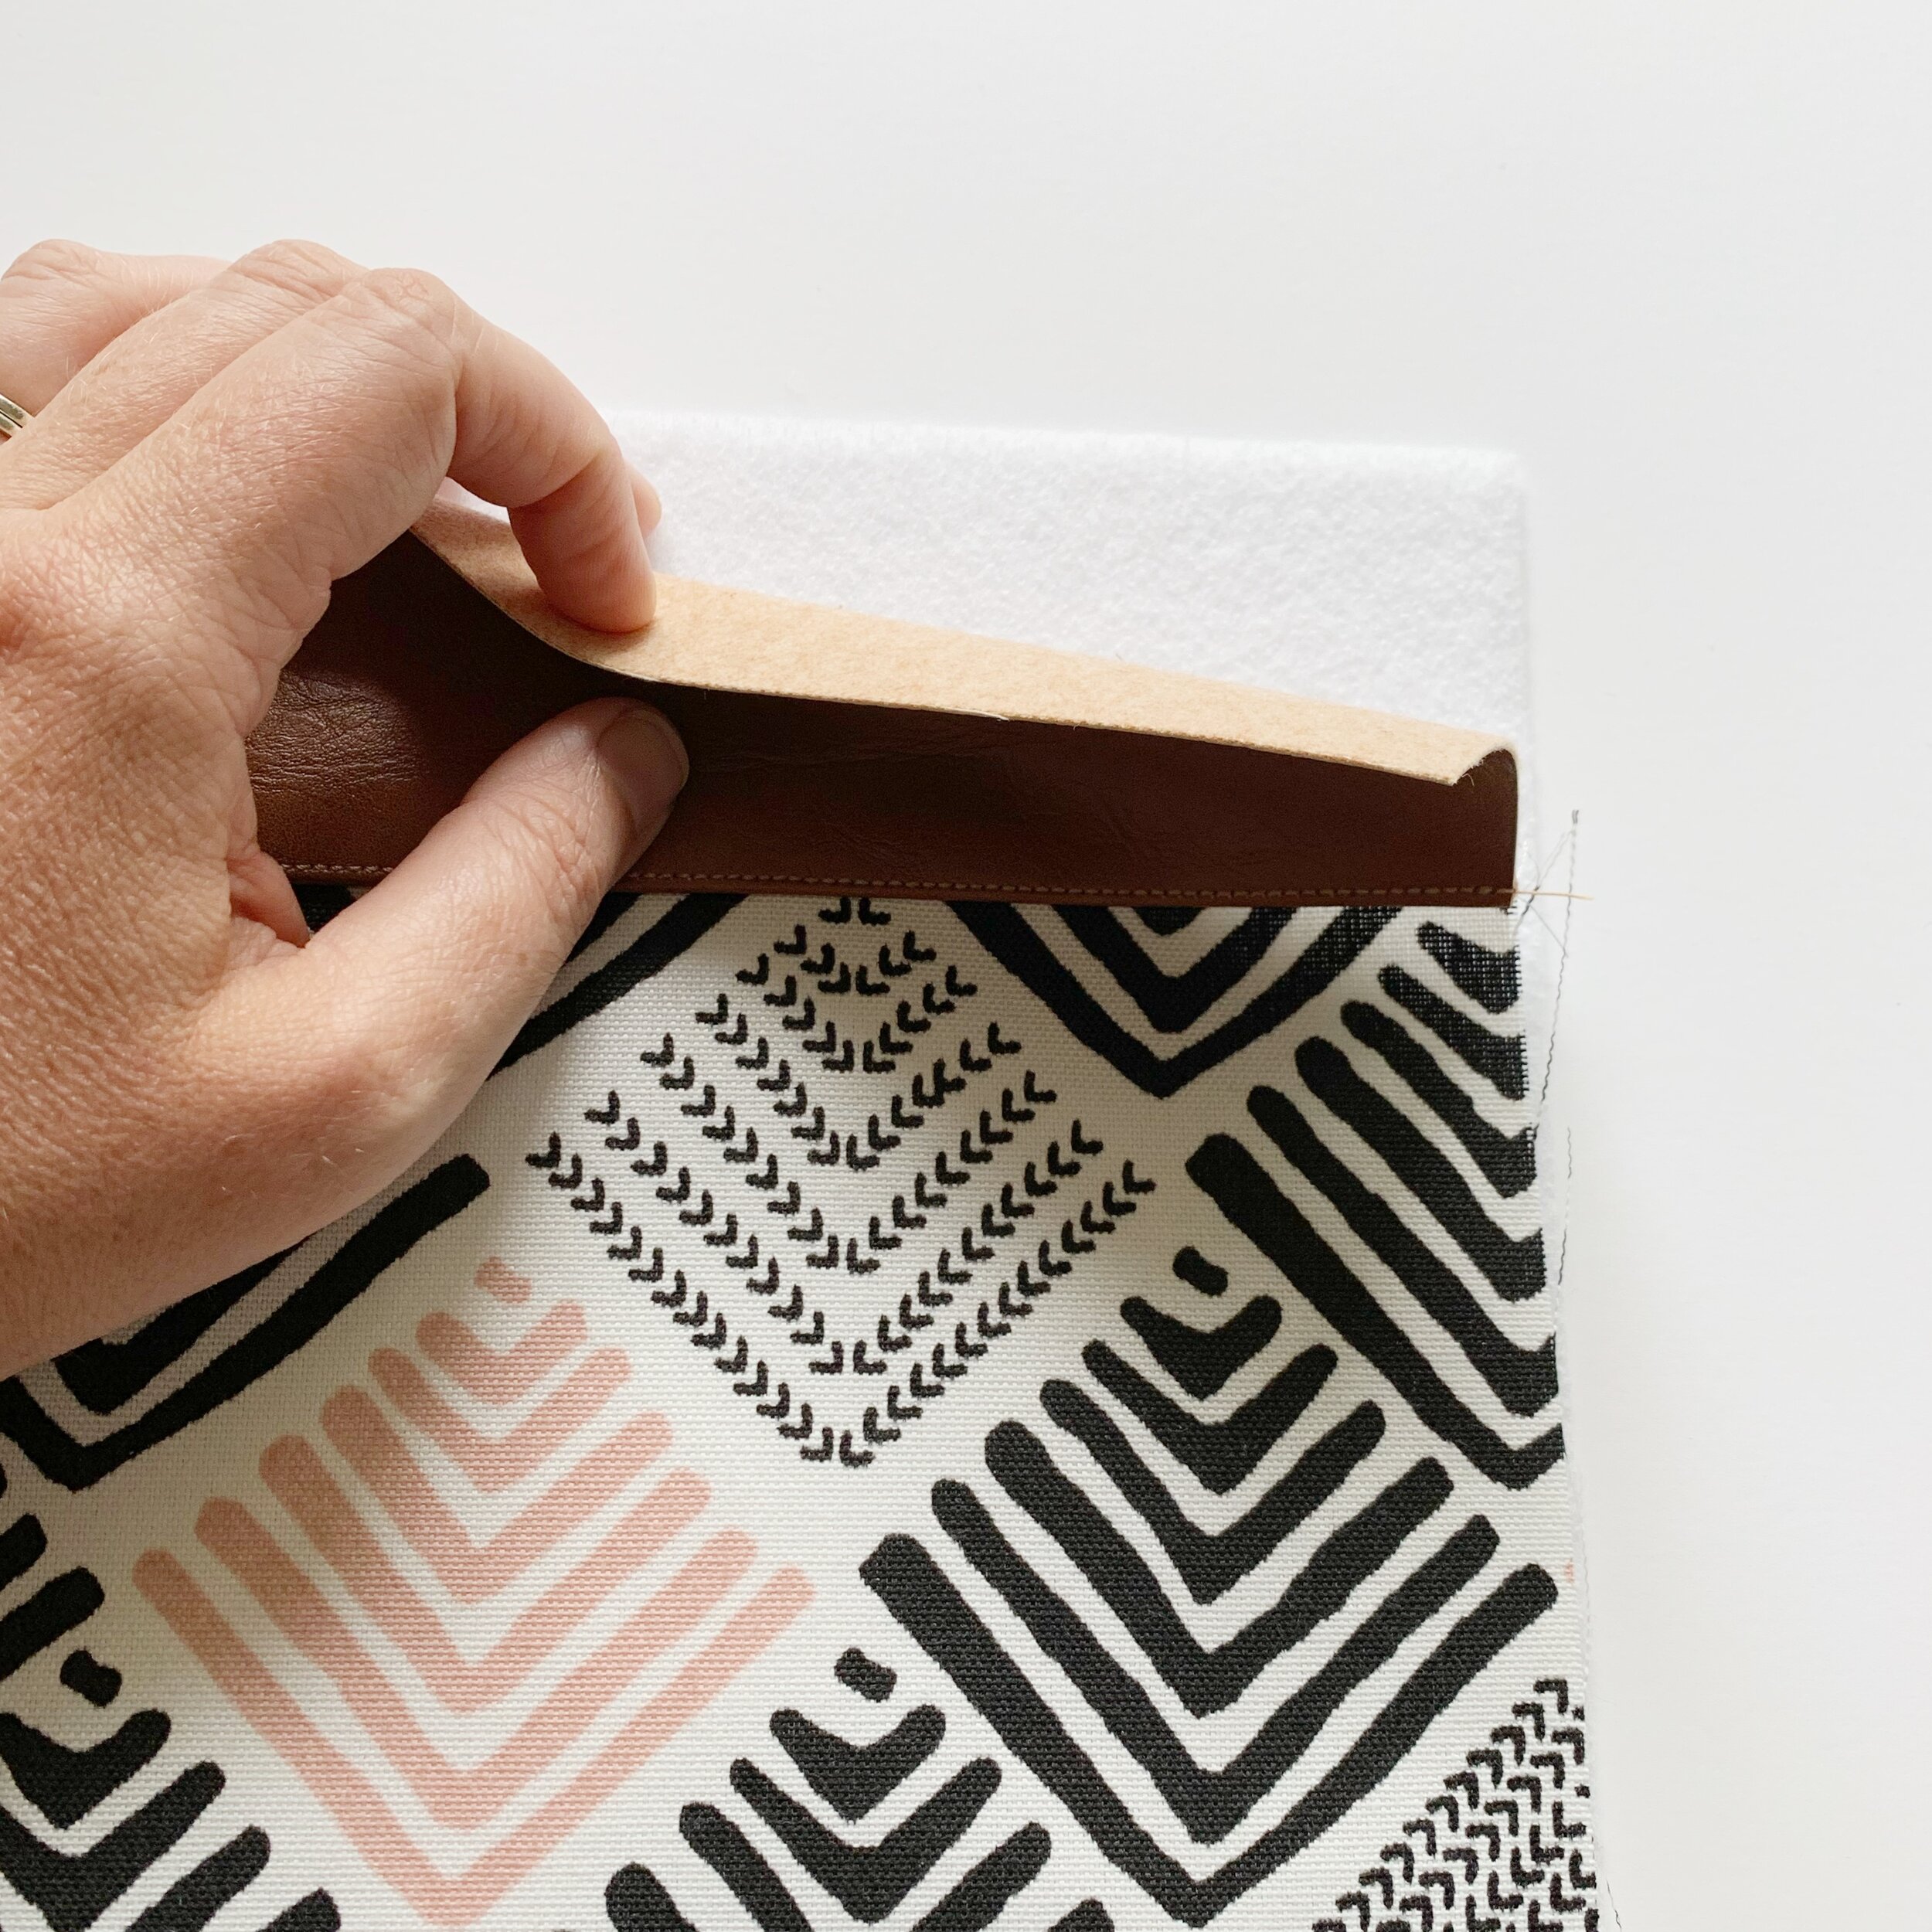
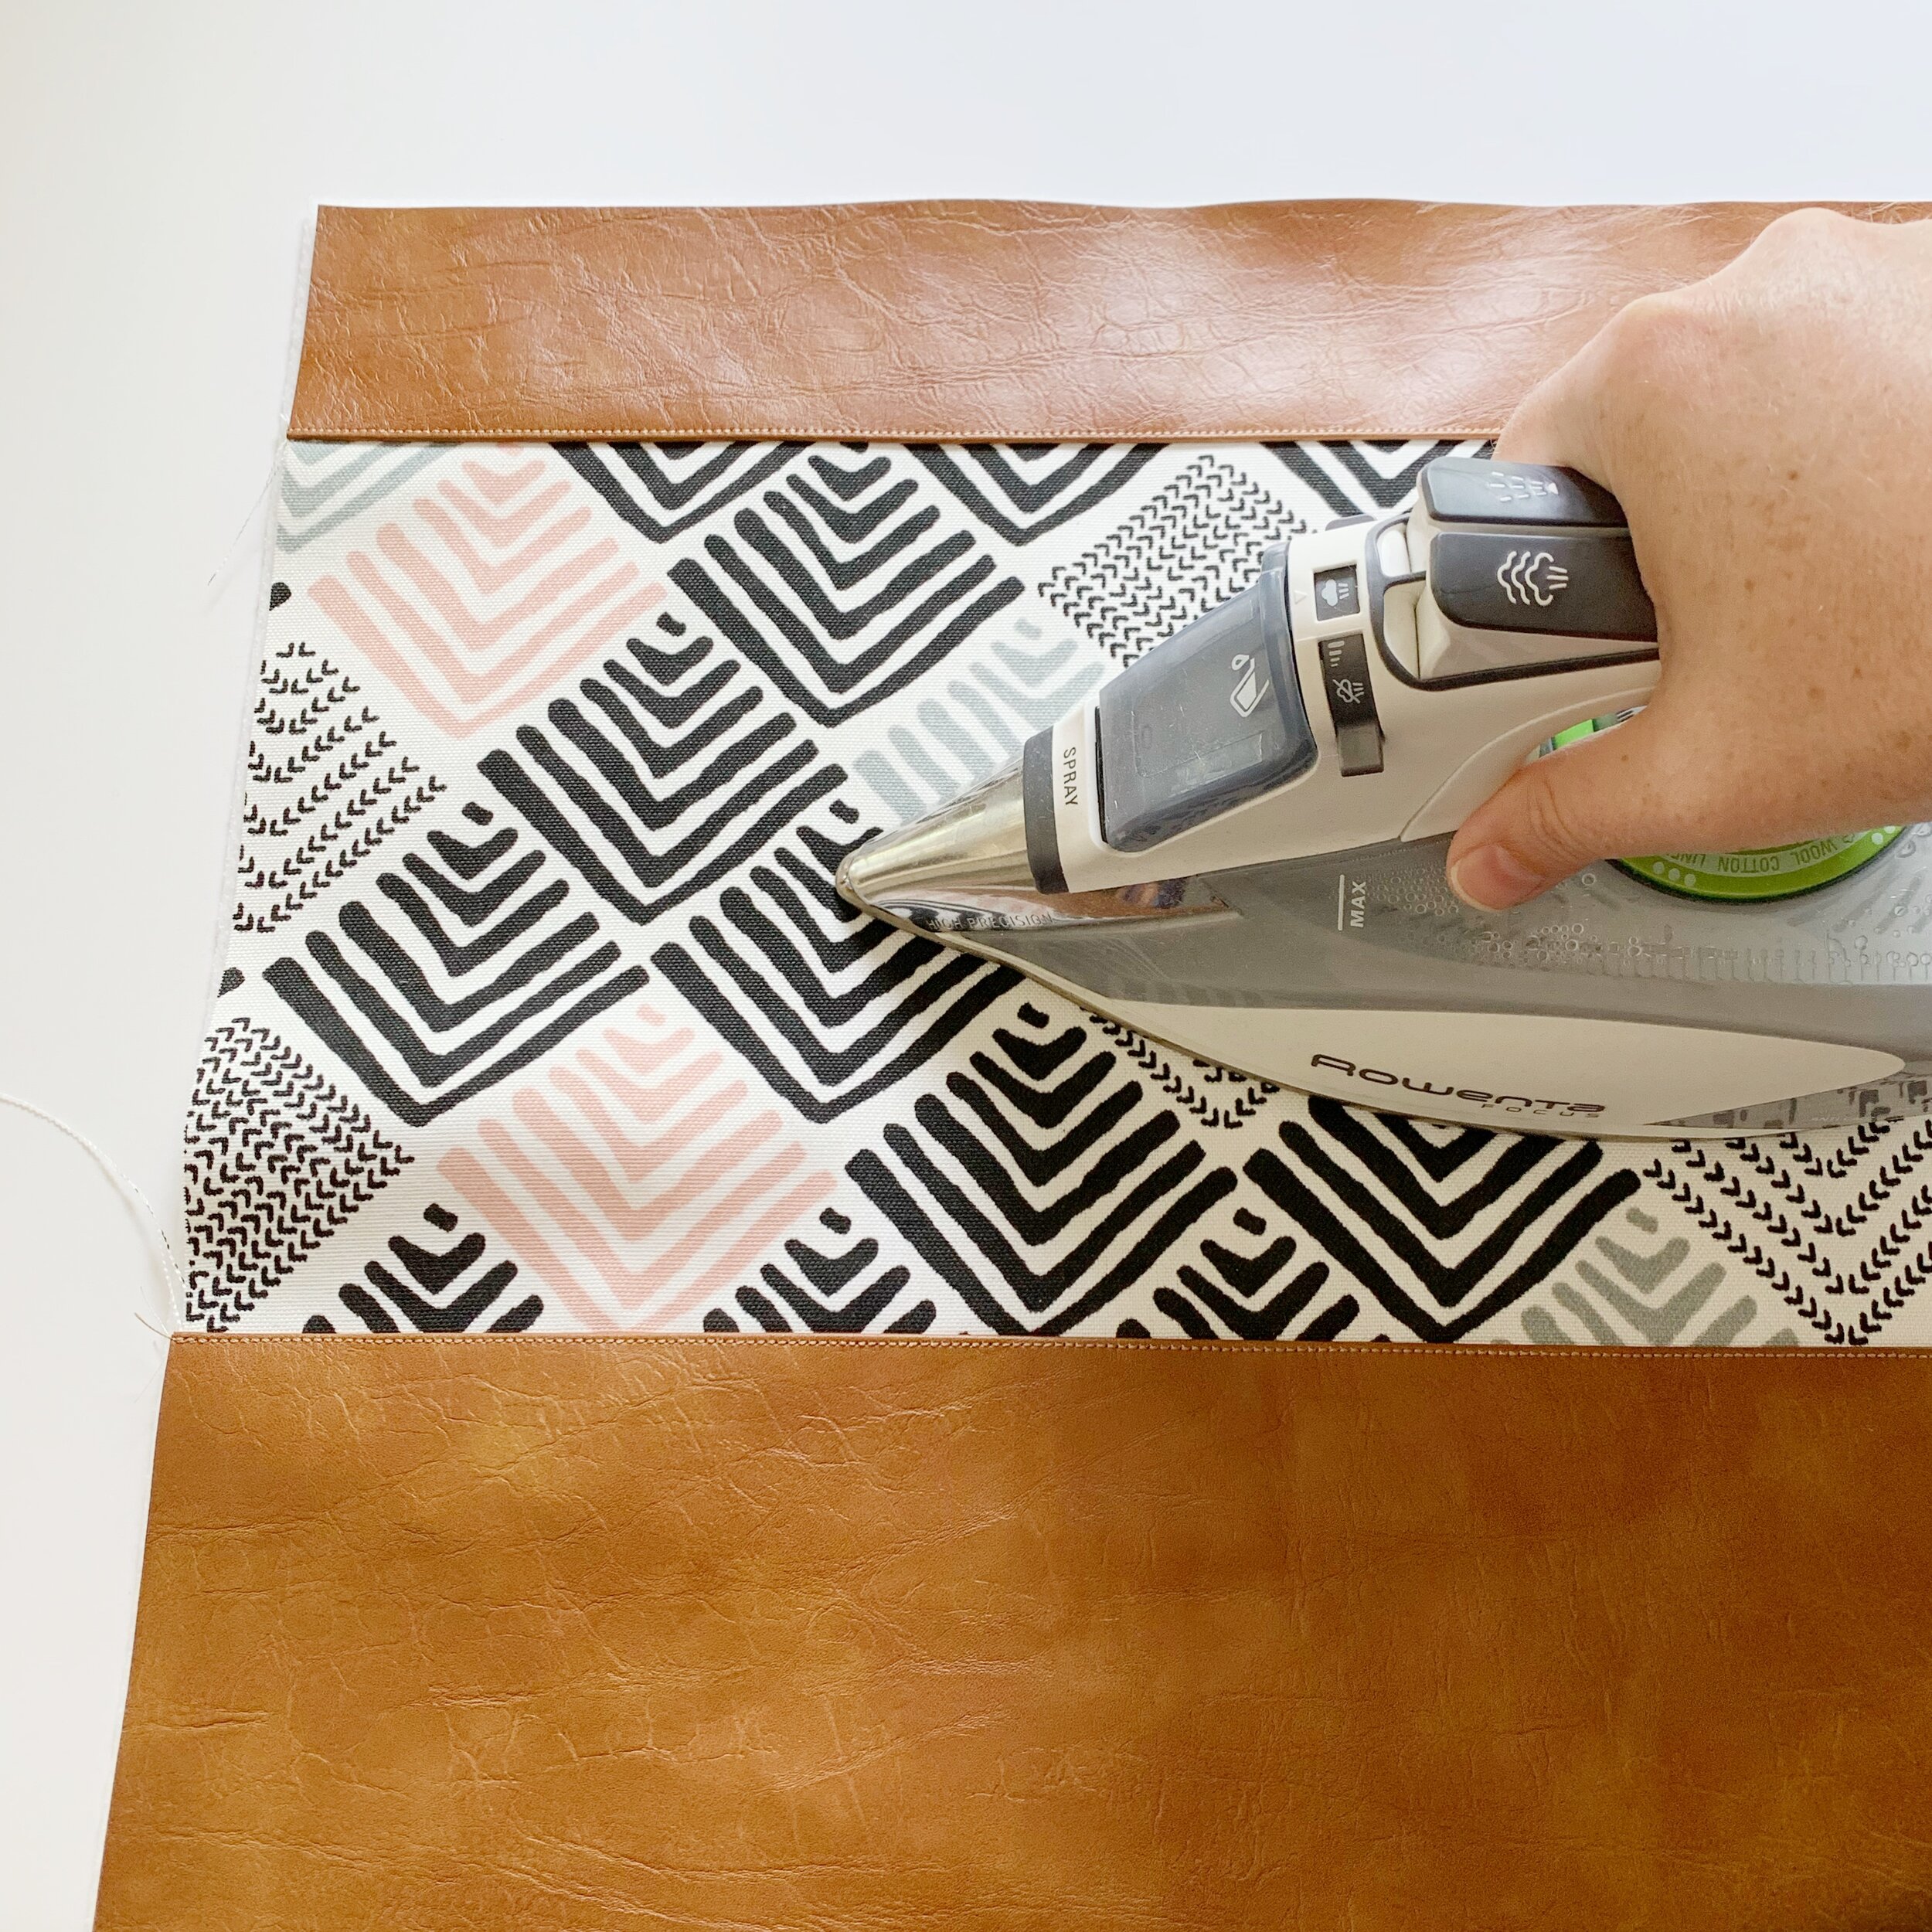
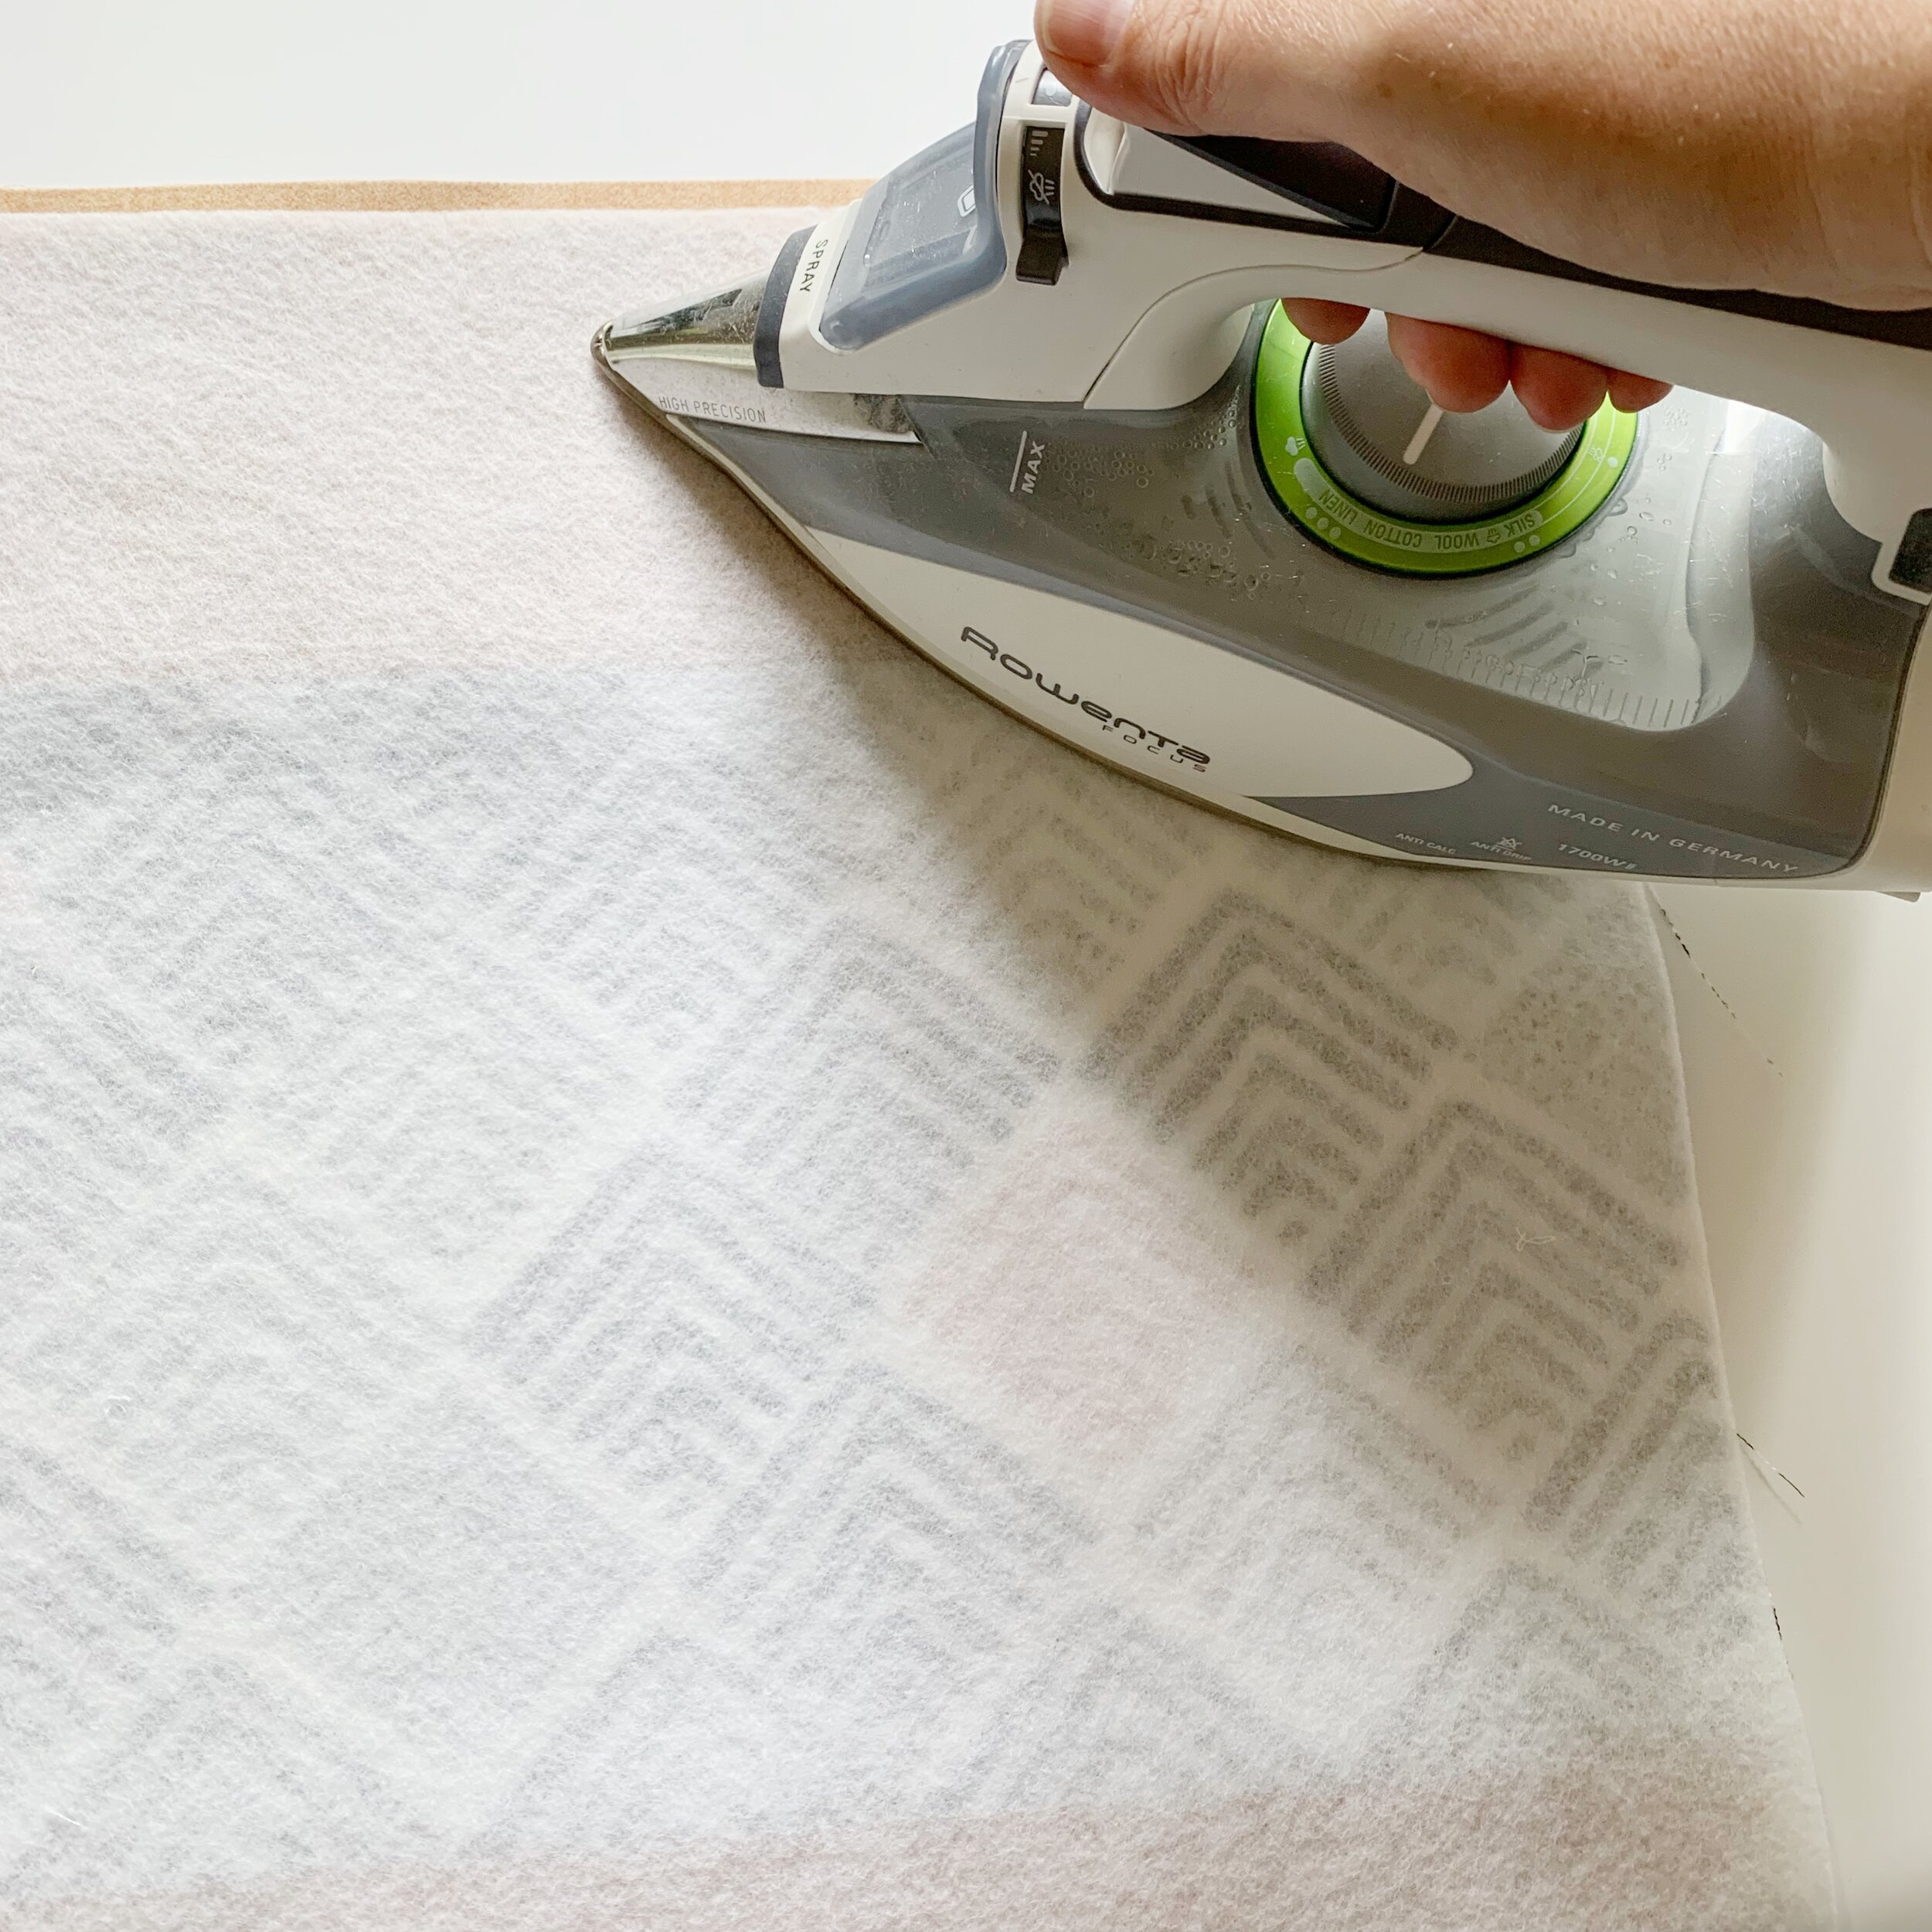
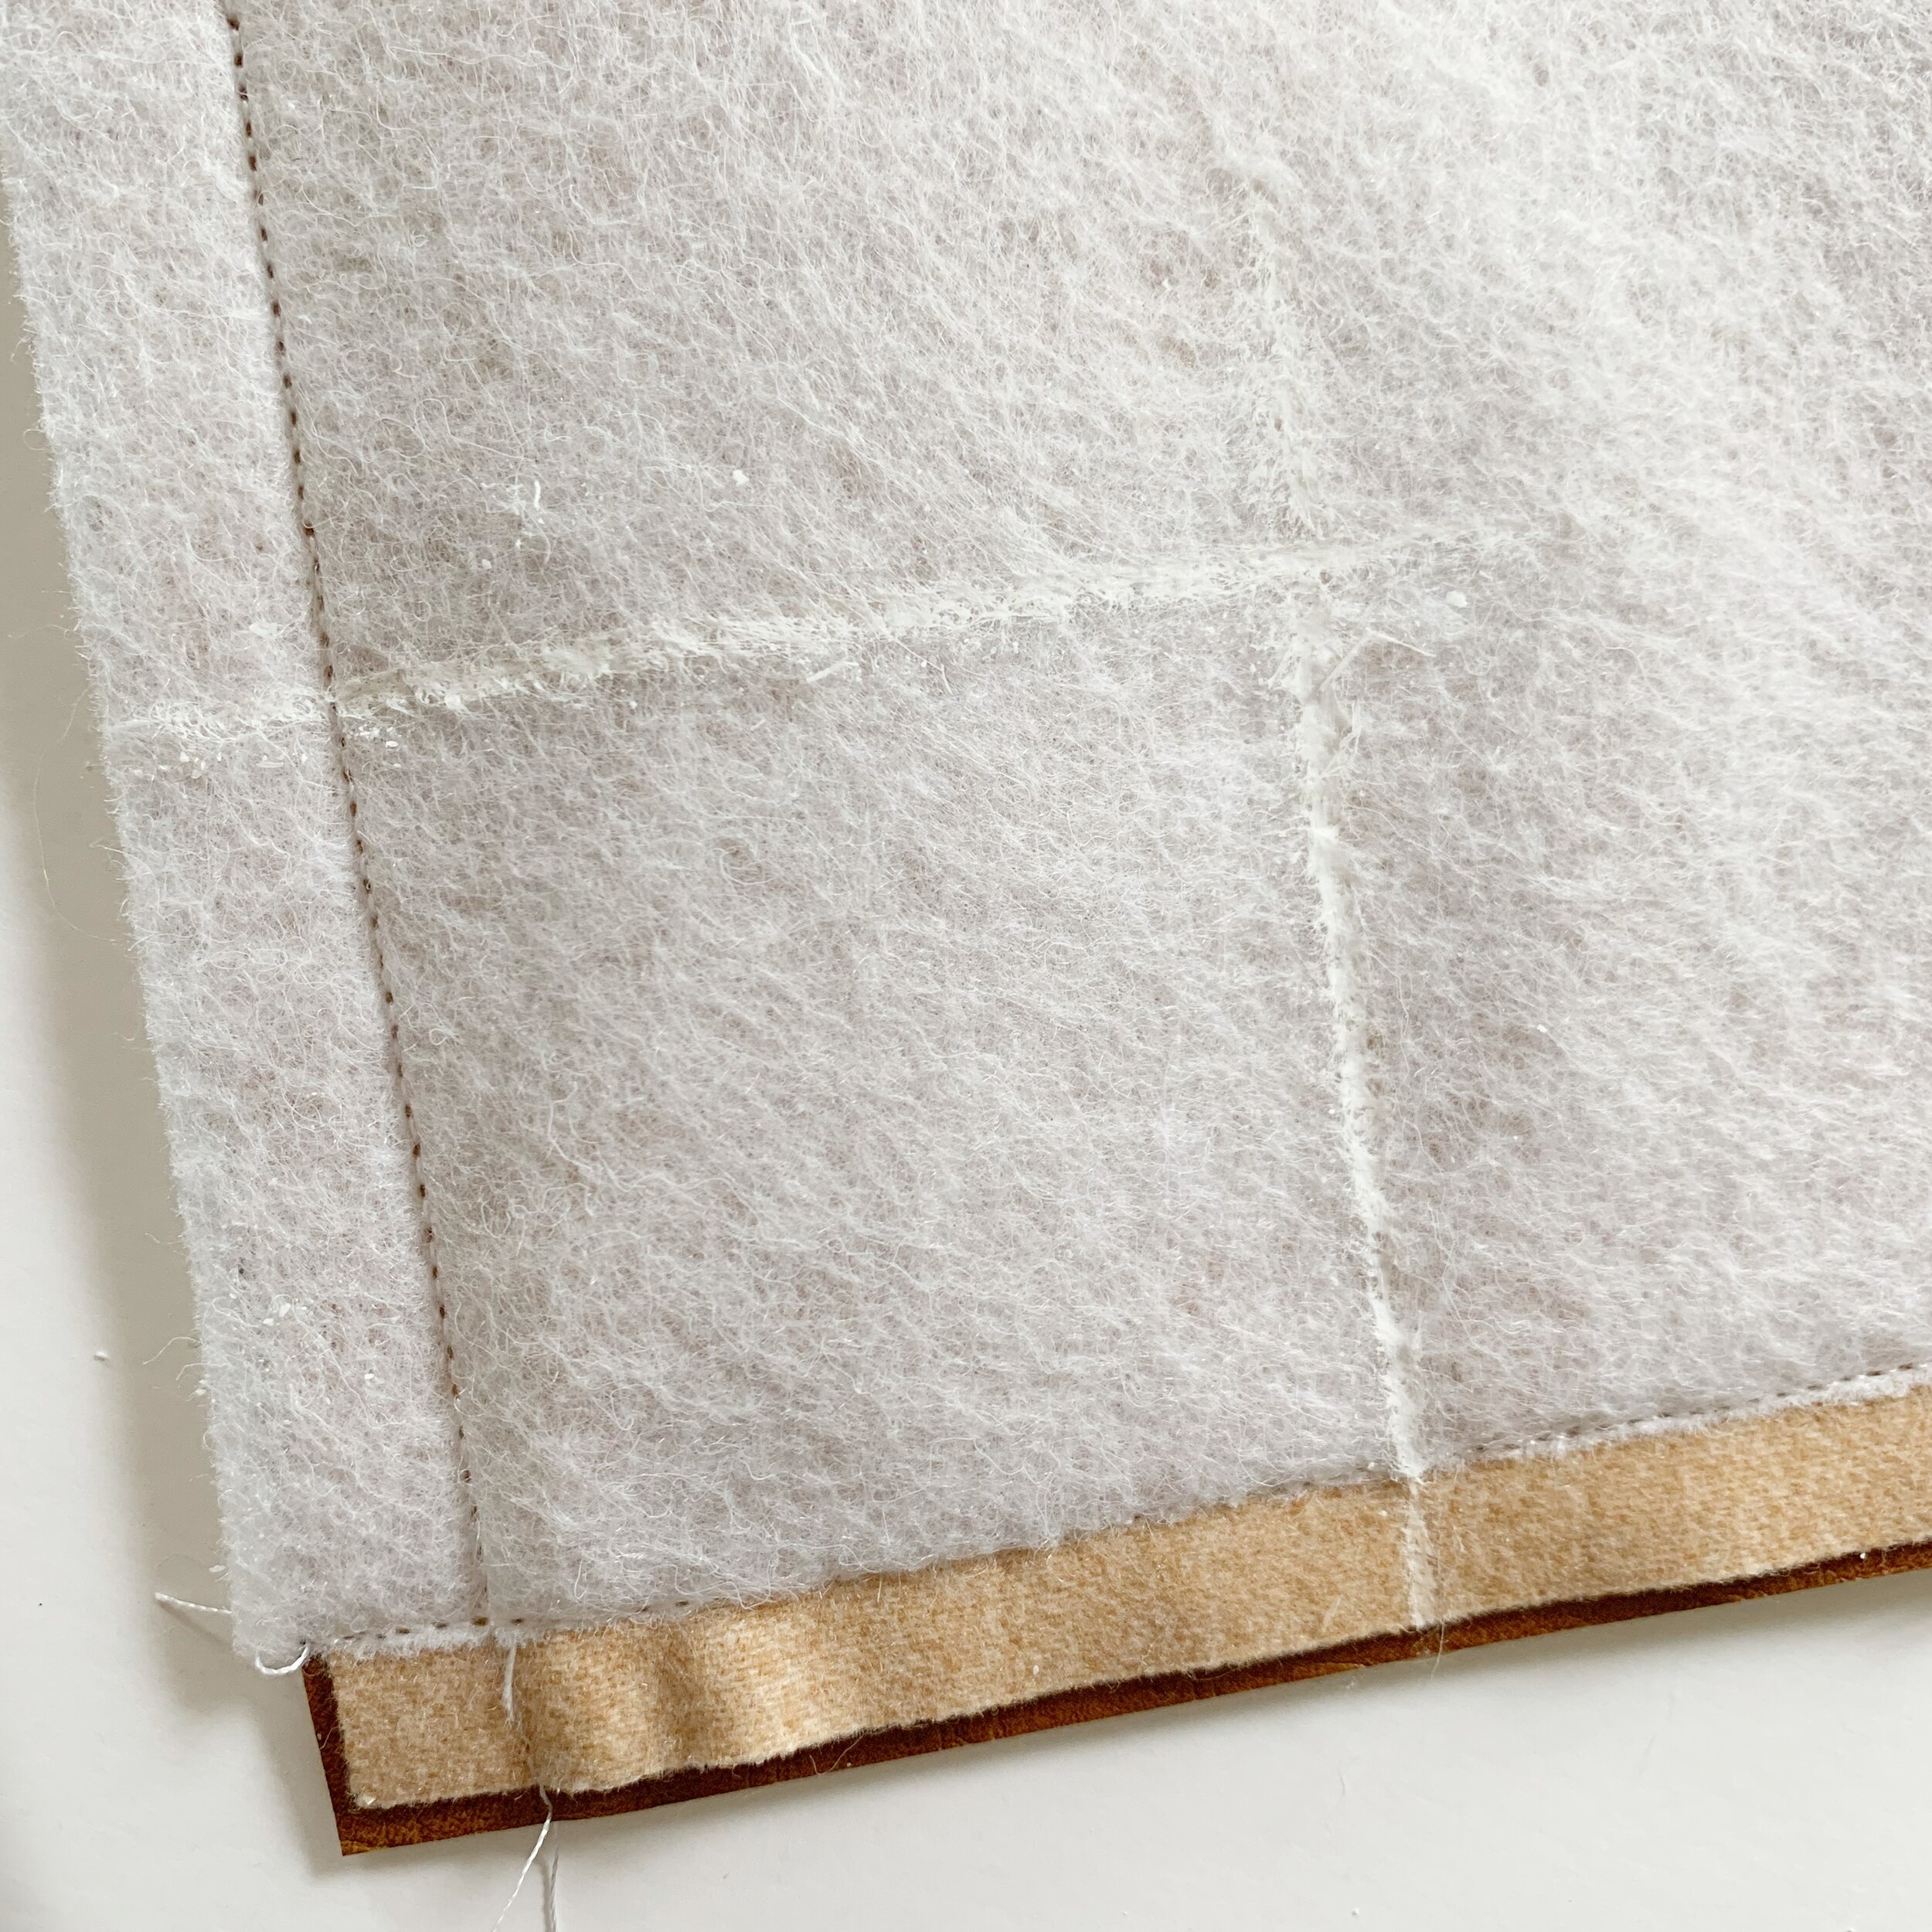
Iron the fusible fleece to the back of the exterior pieces. The fusible fleece will have a rough side, lay the wrong side of the fabric on the rough side of the fusible fleece, then iron in place. Set exterior pieces aside.
Interior:
The interior includes three pockets. A hook/needle pocket set, slide pocket set and an interior zippered pocket.
Hook Pocket:
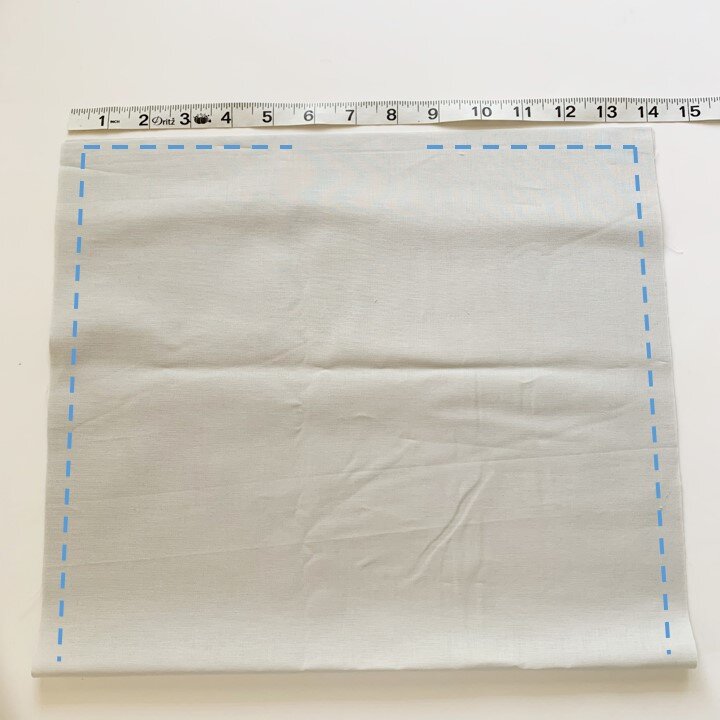
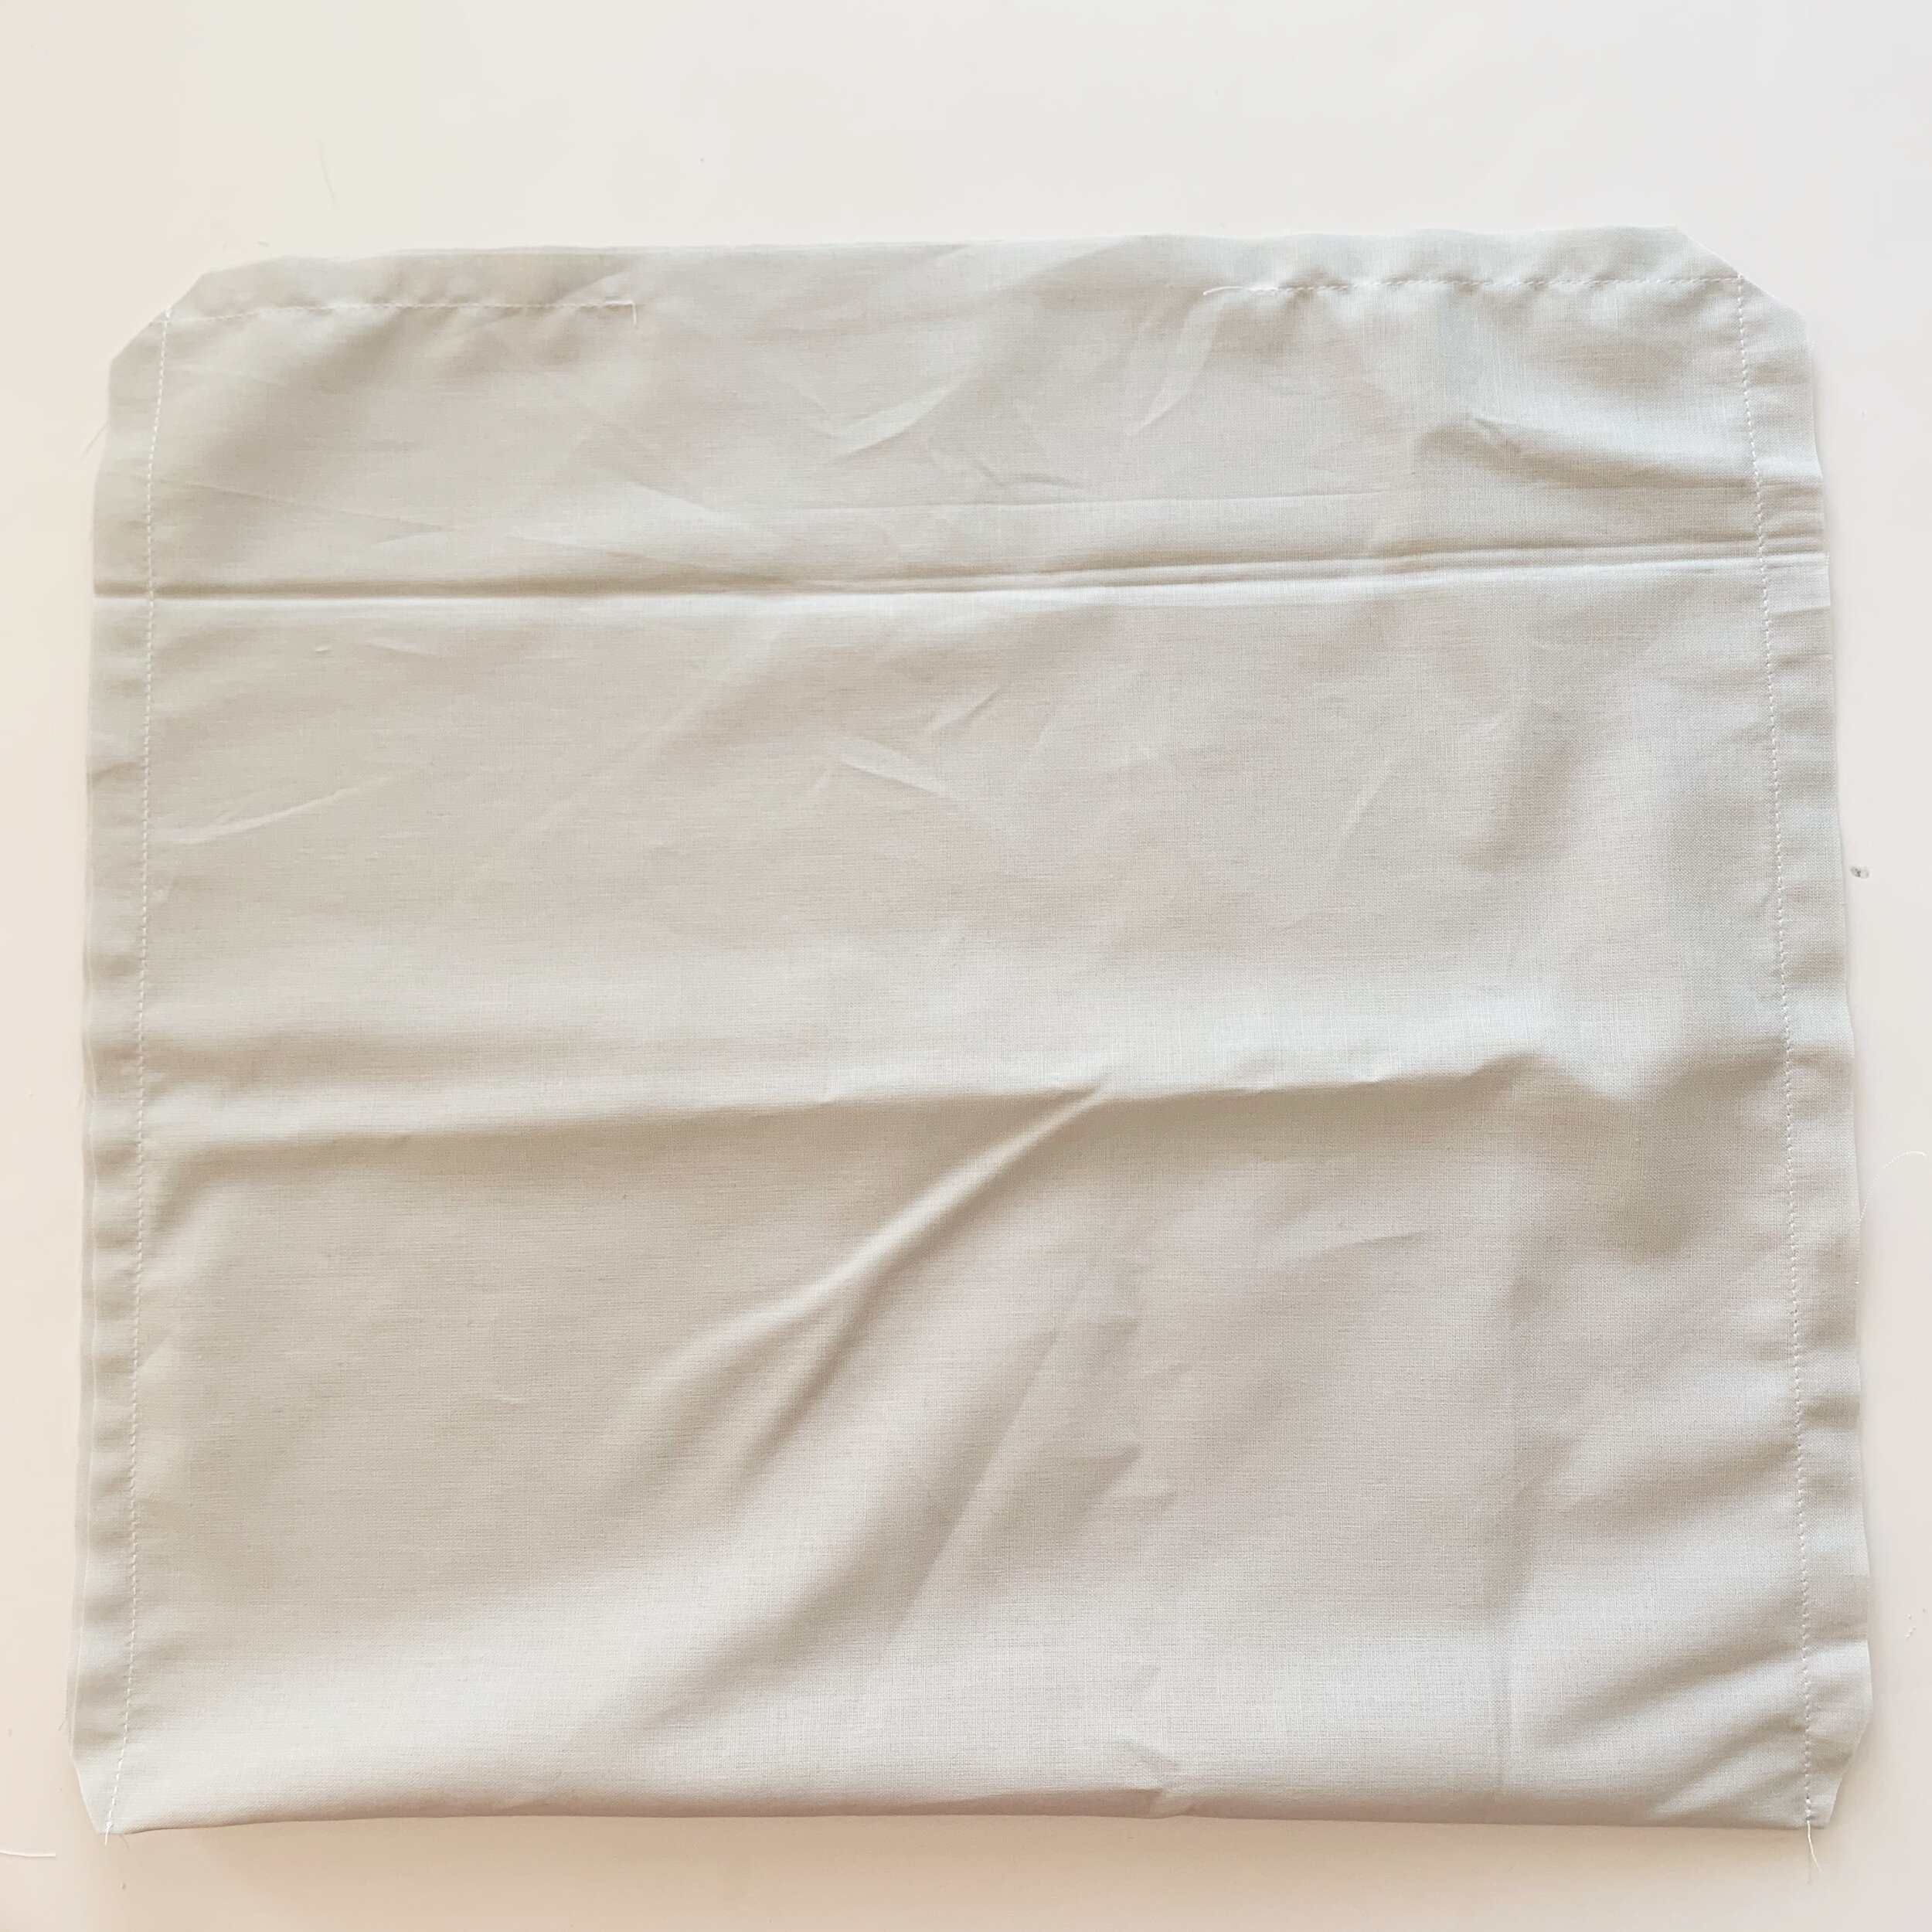
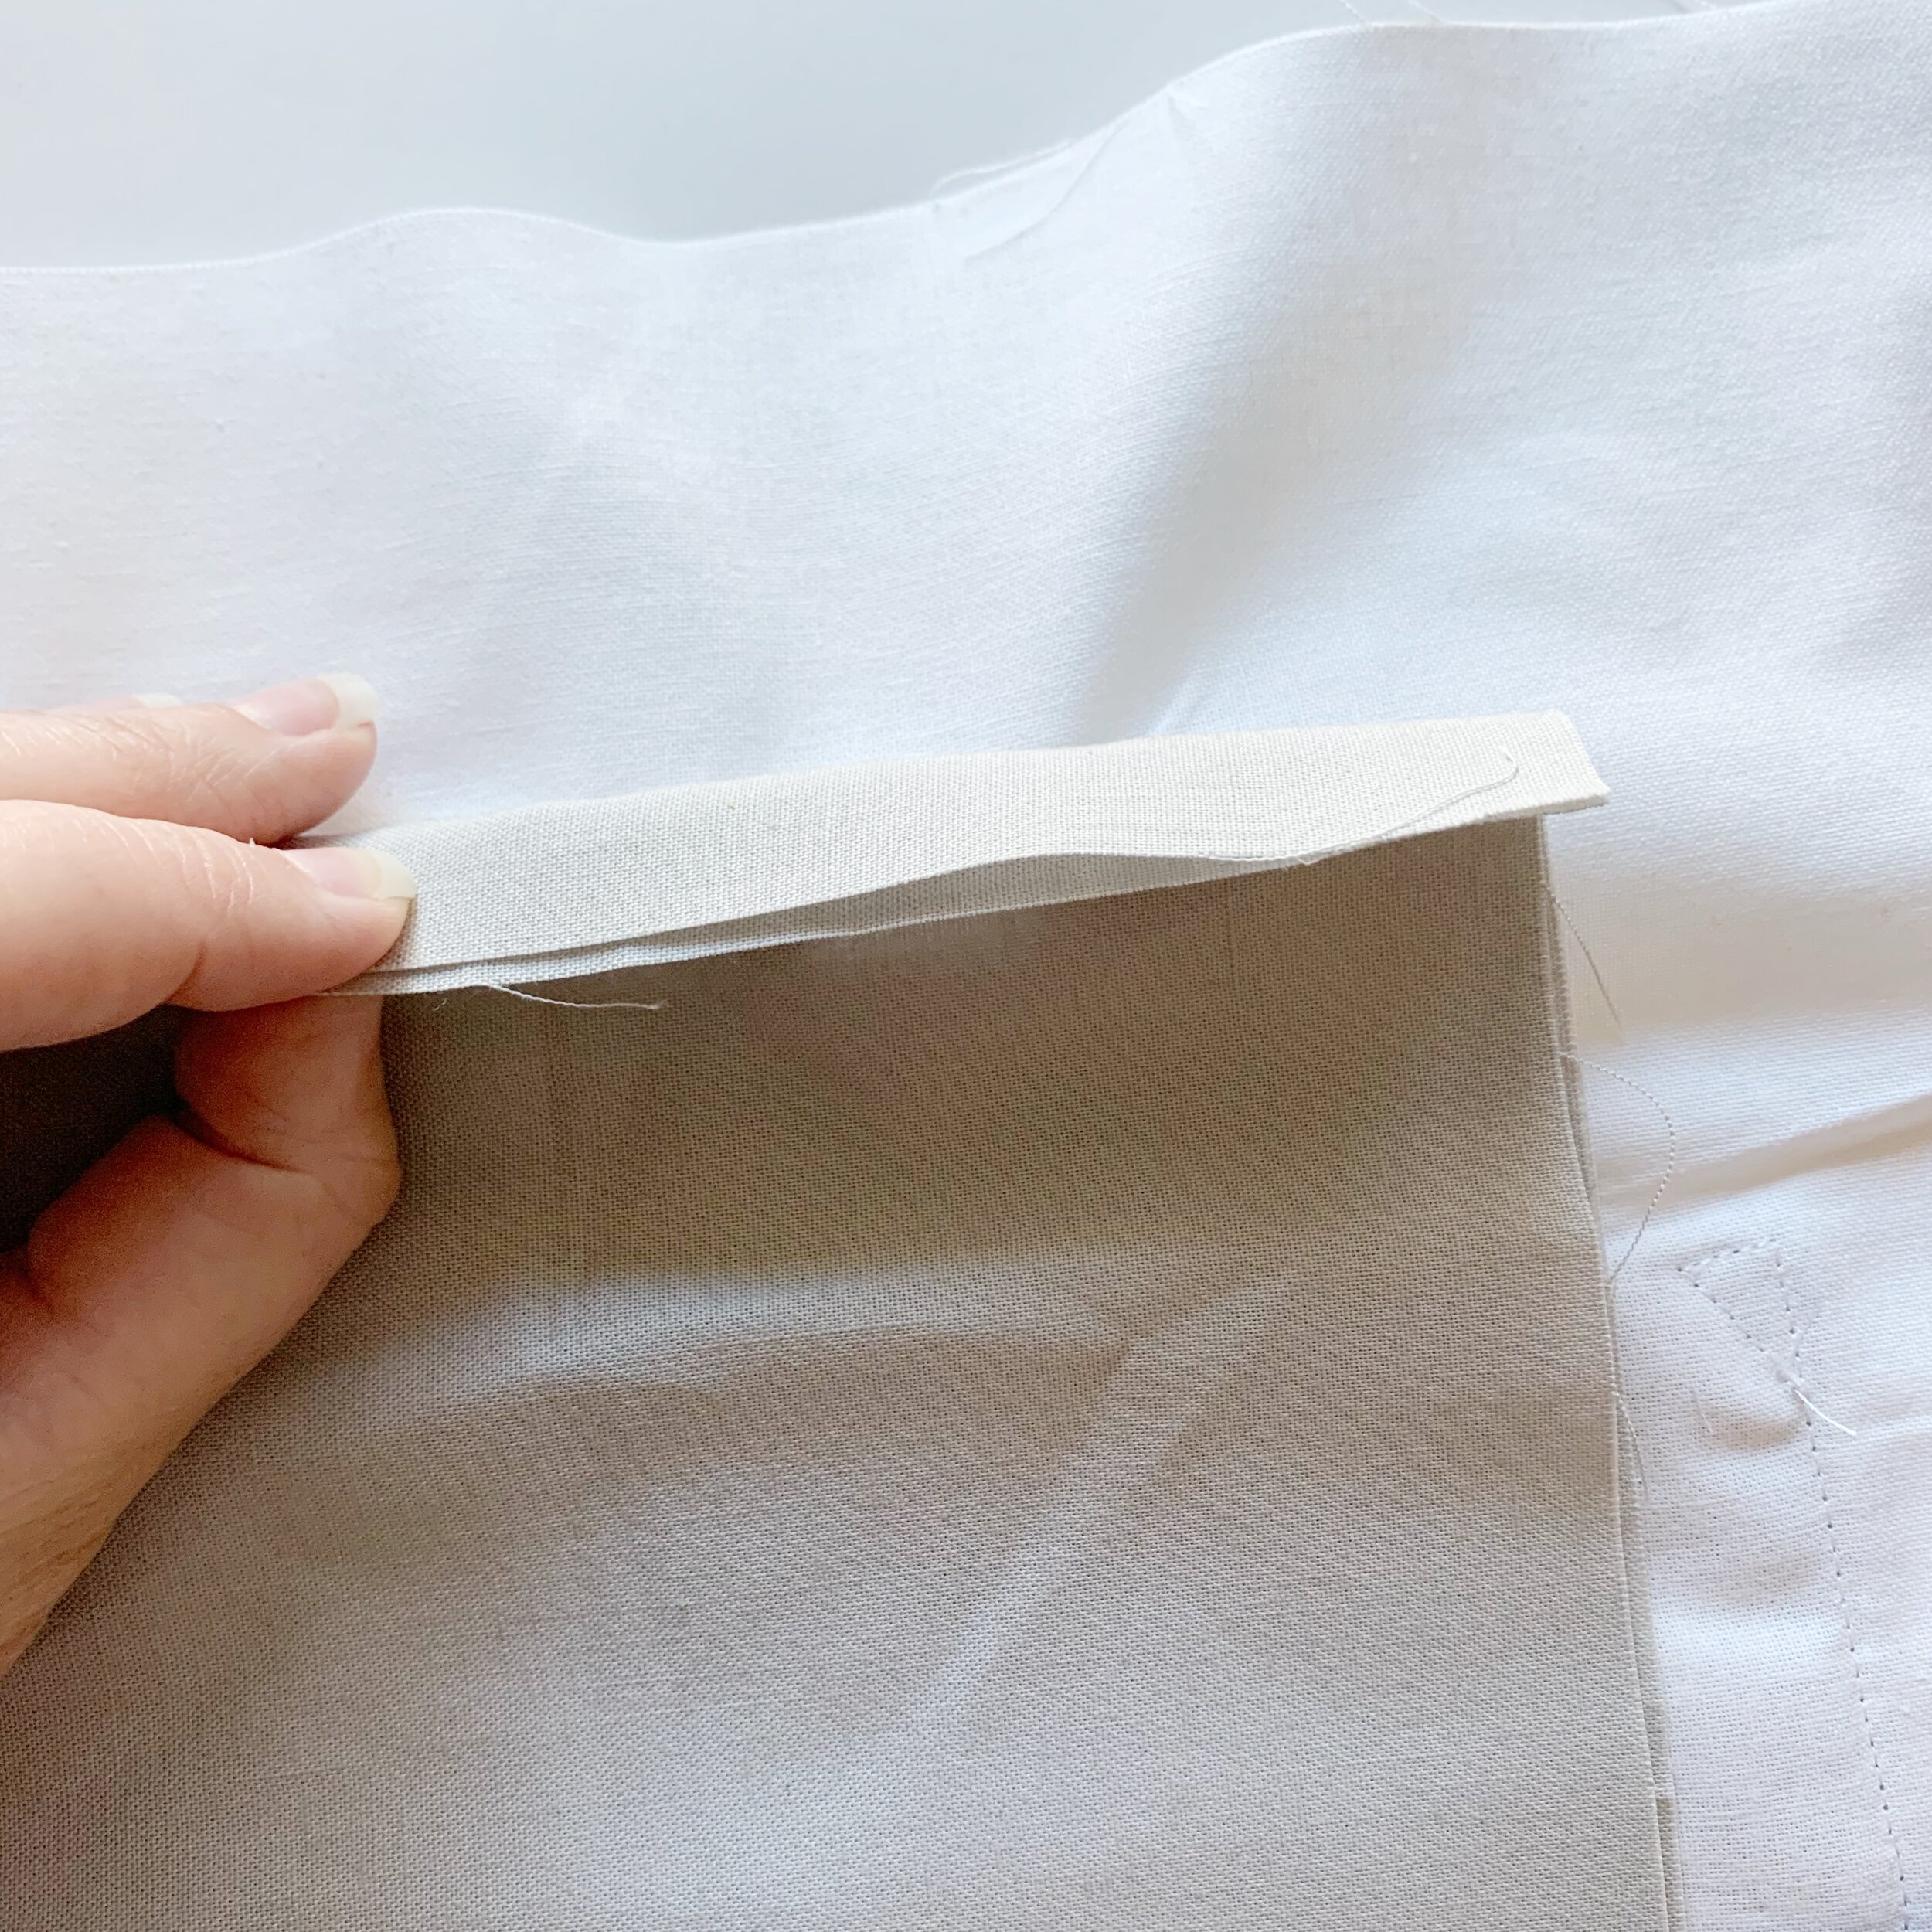
Take your 14” X 25” quilting fabric and fold it in half so the two 14” edges are together. Sew along the sides and top, leaving a small opening on the top for turning.
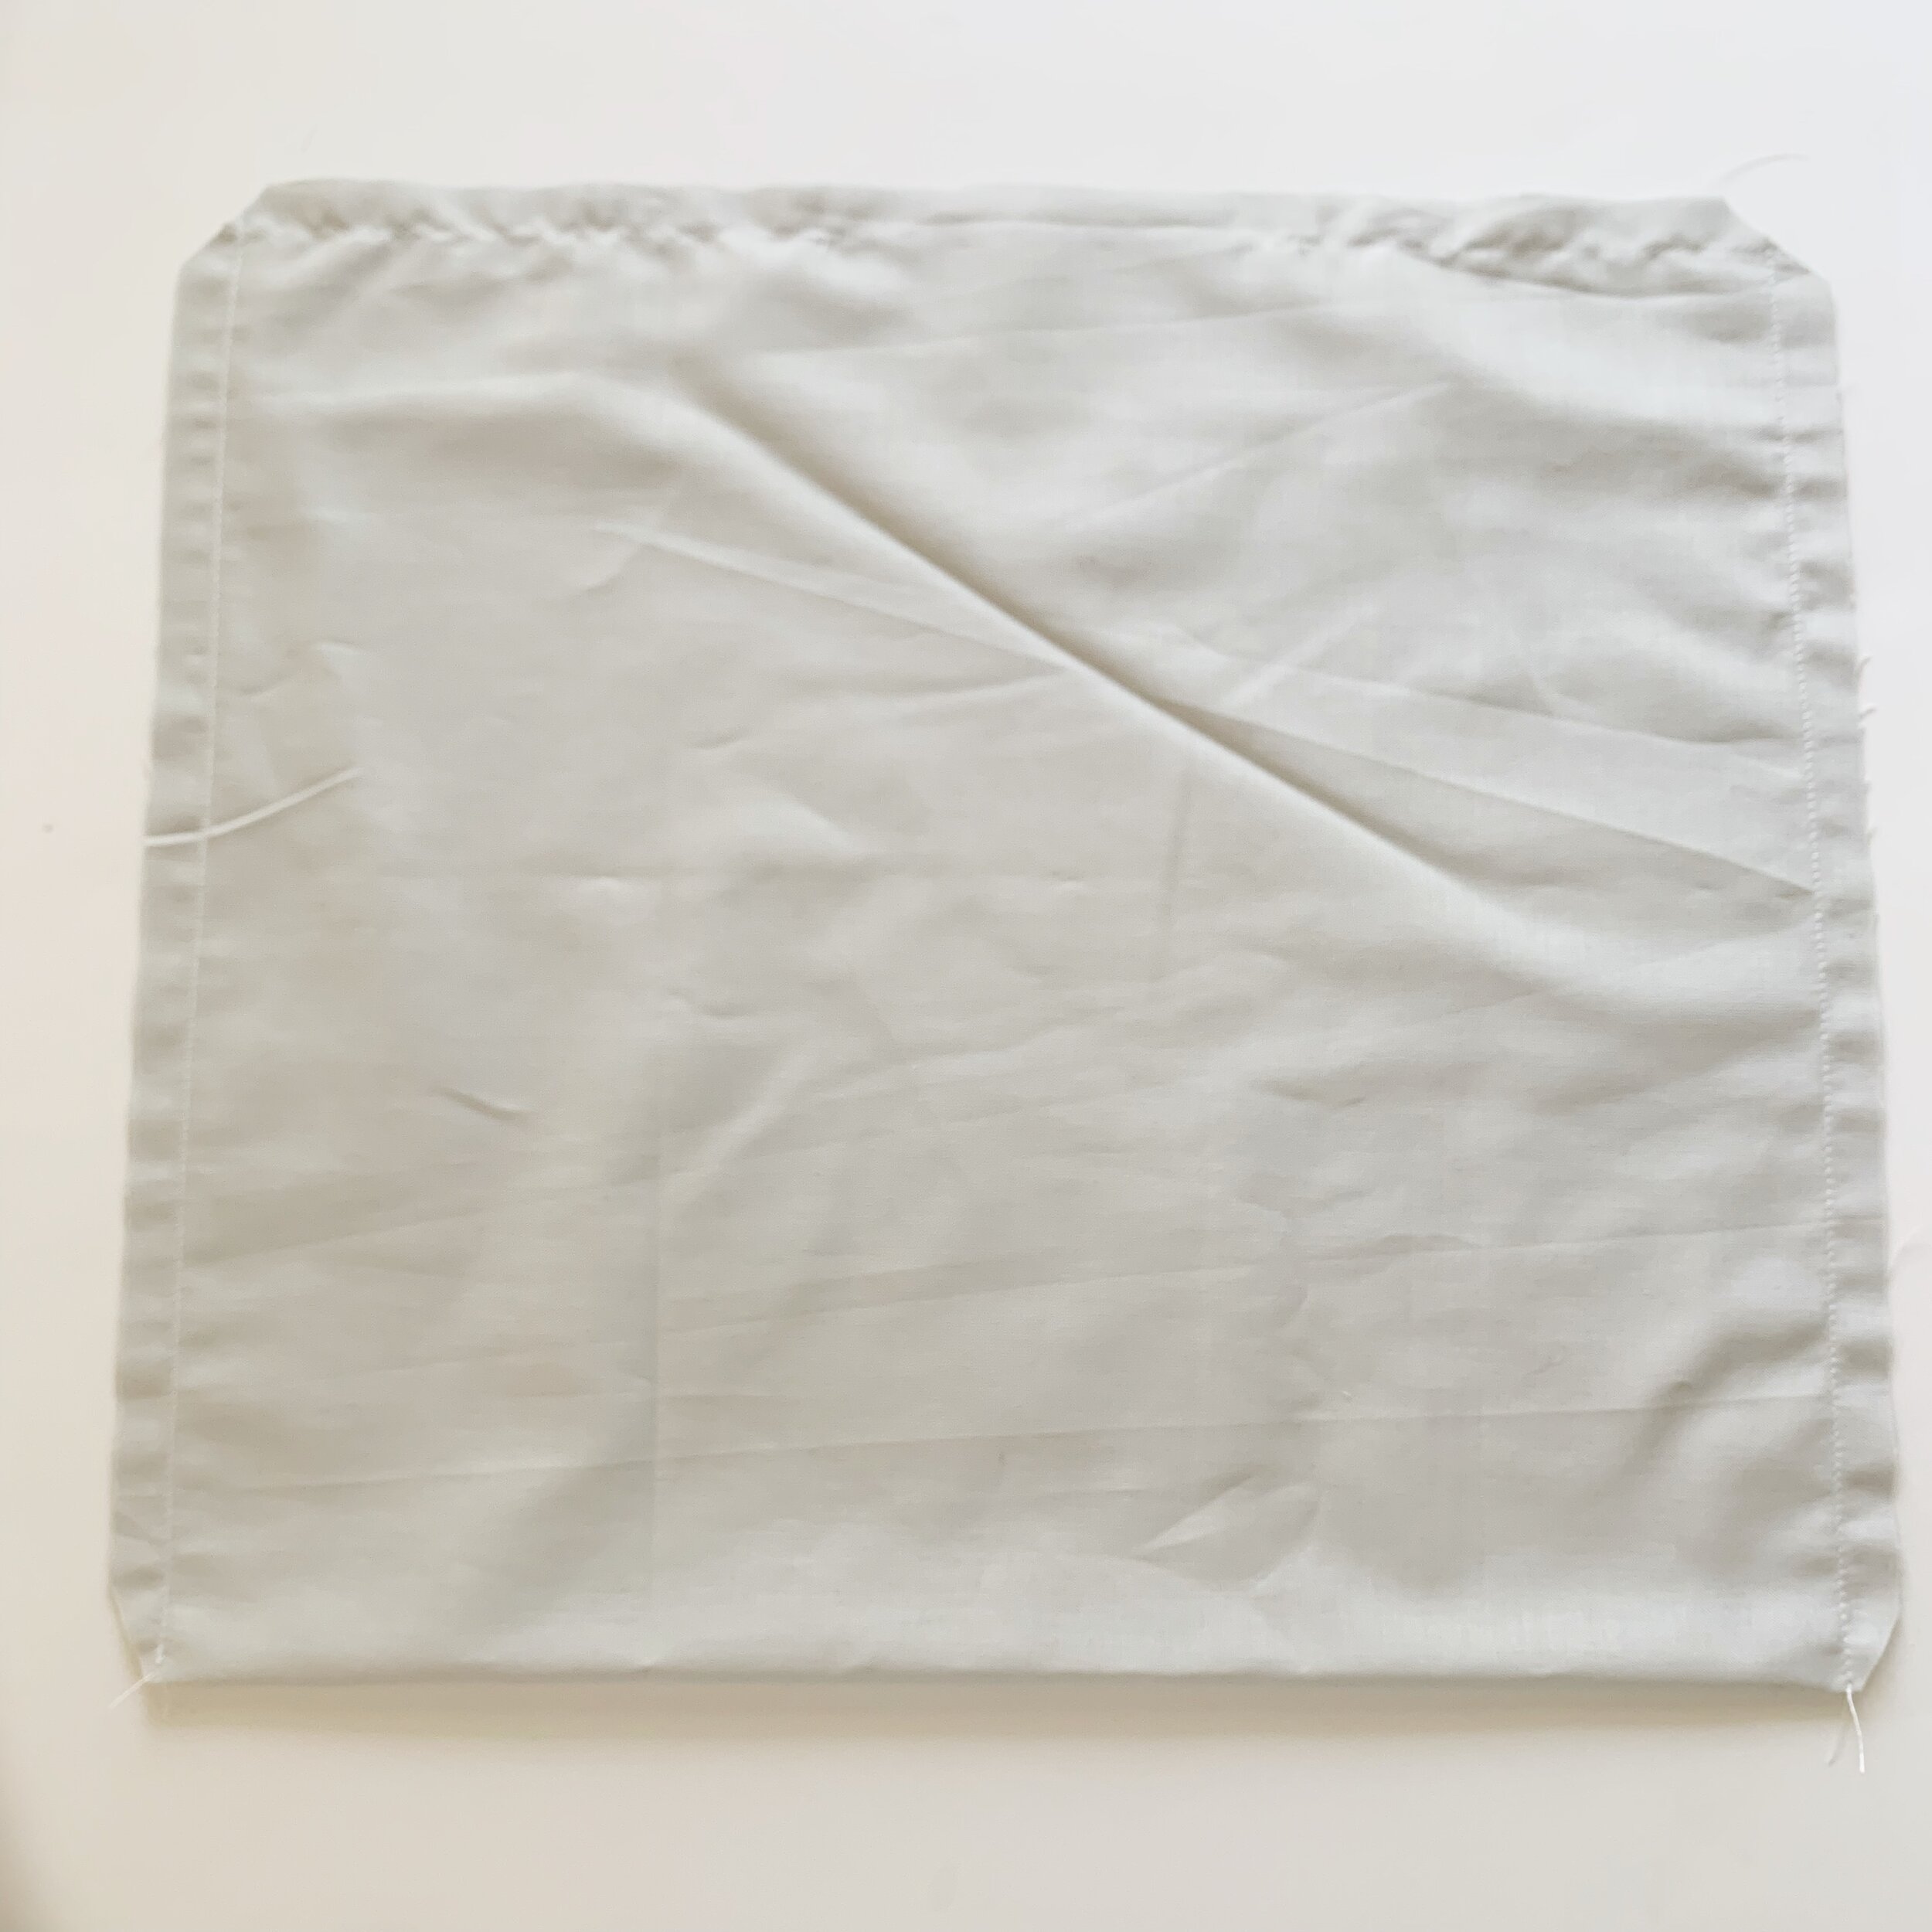
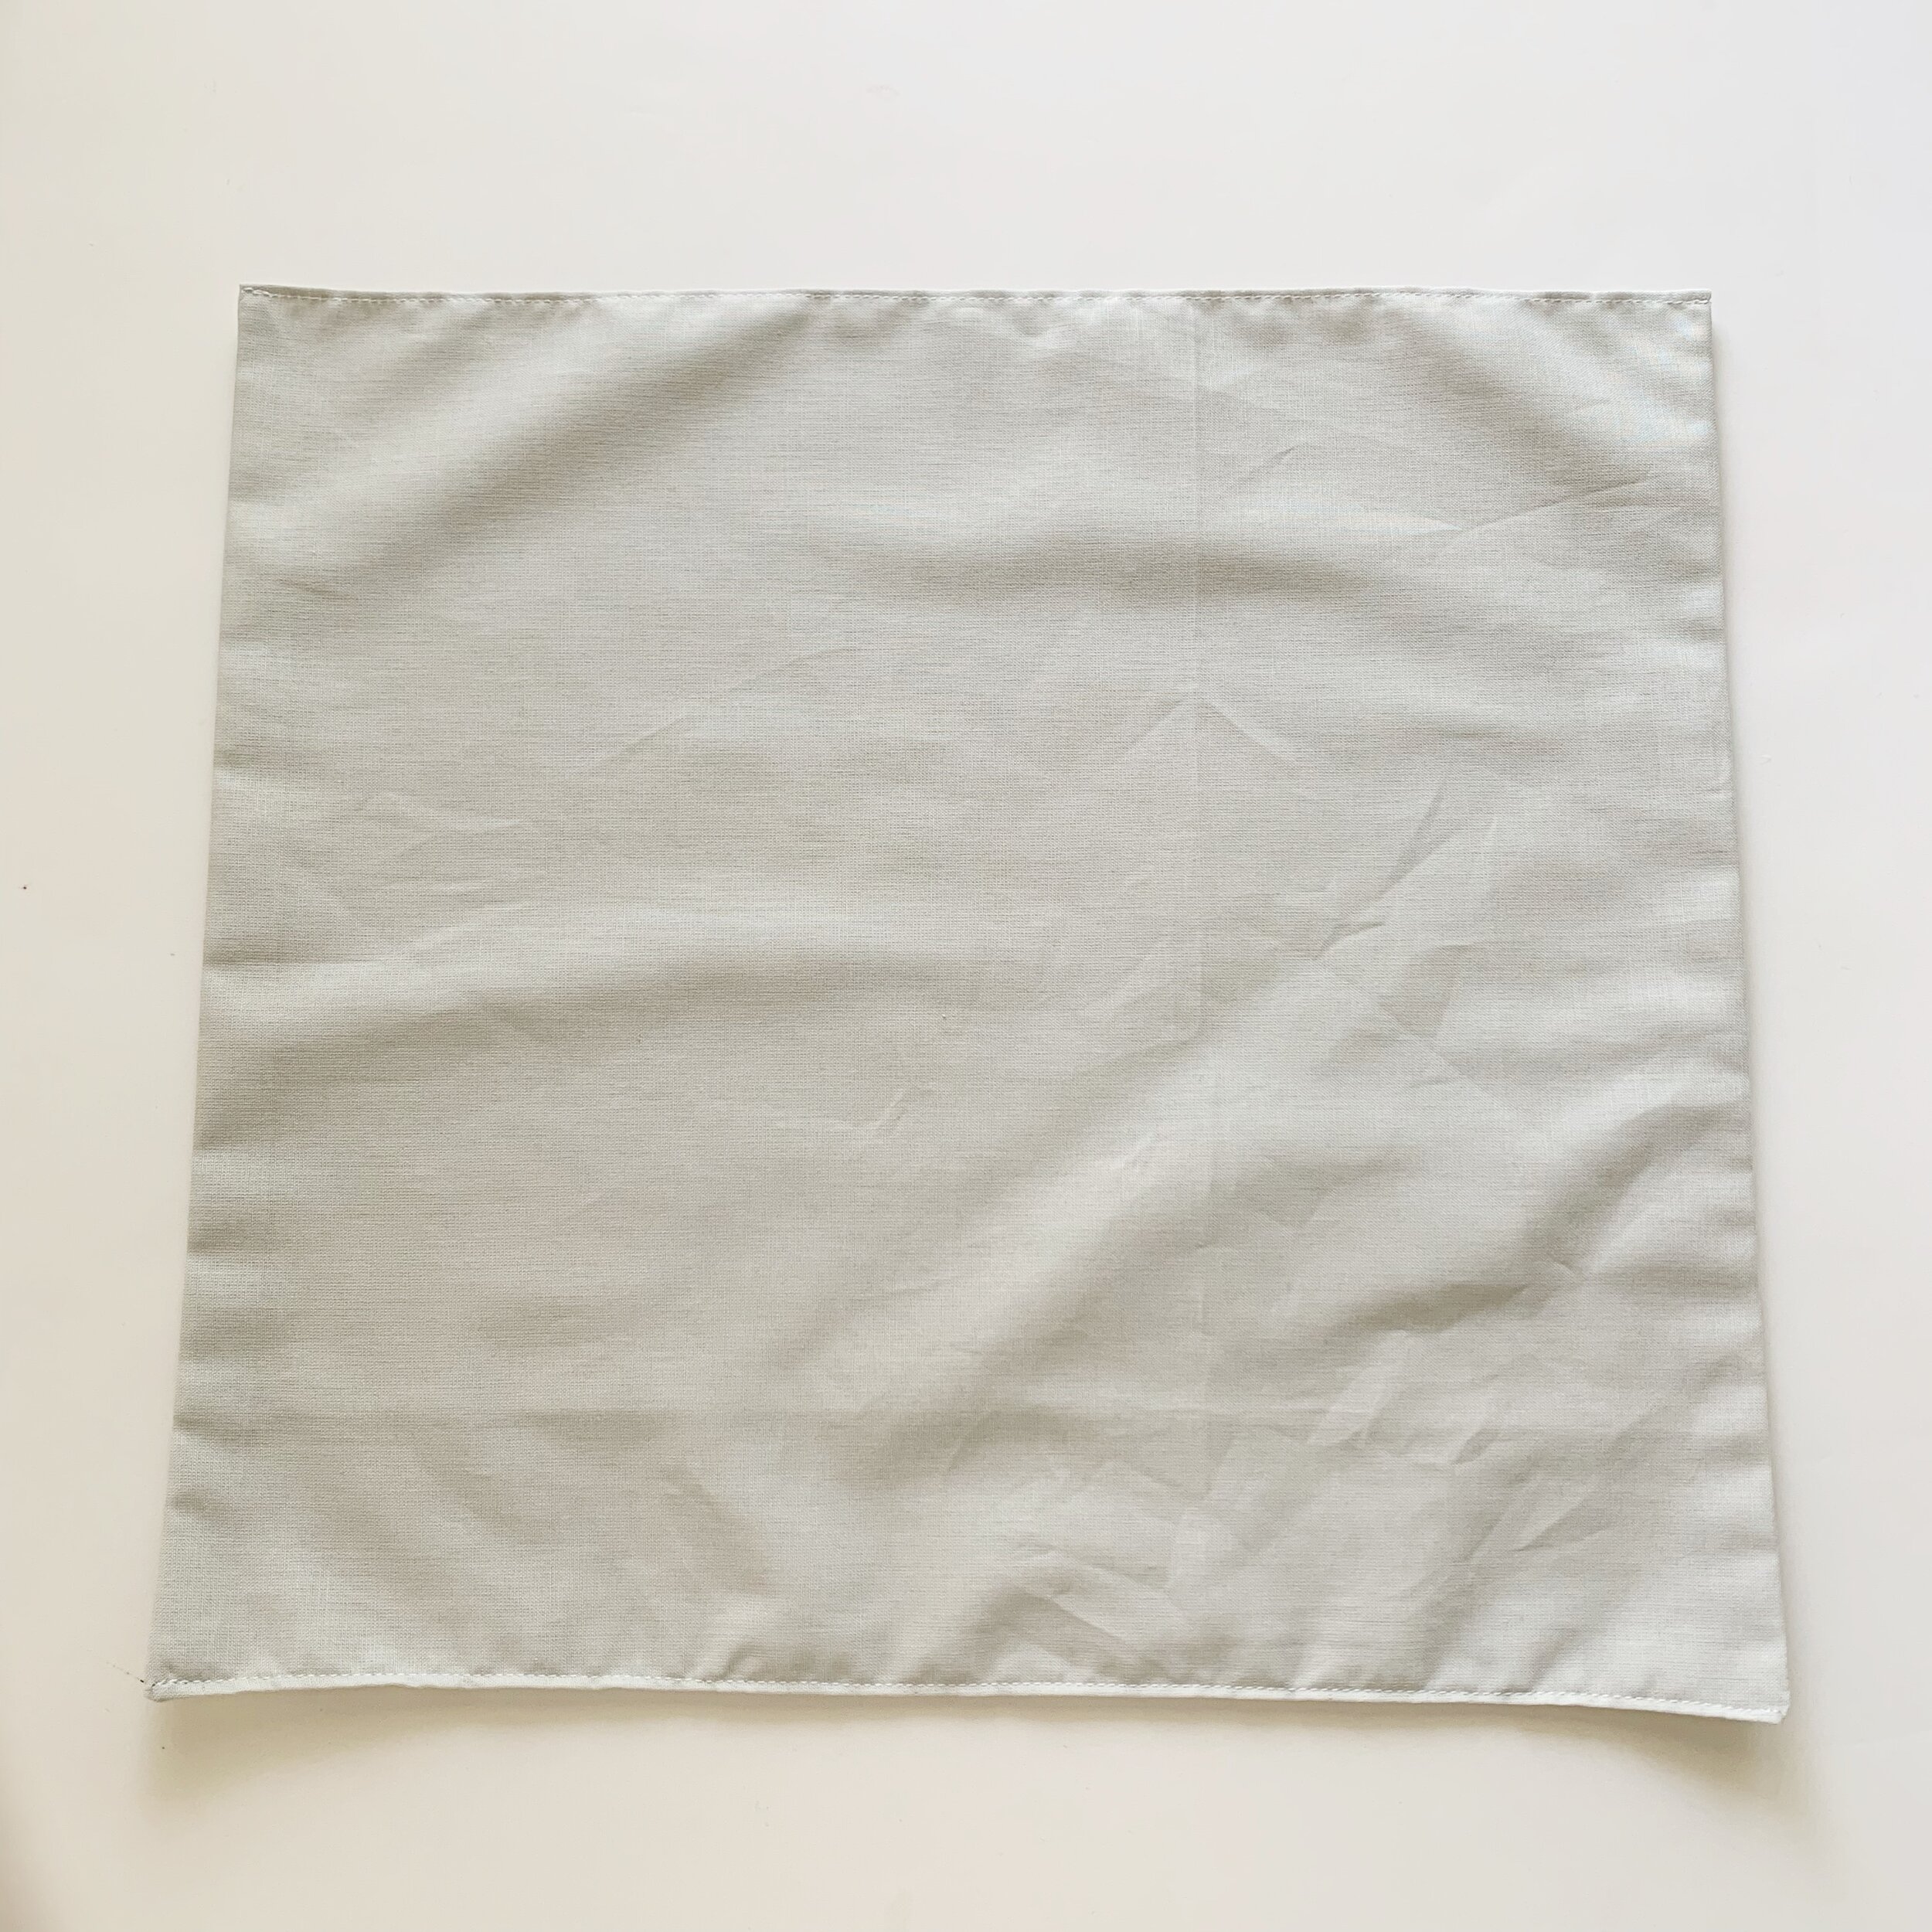
Trim corners and turn right side out. Press with an iron. Sew along the top and bottom edges, closing up the hole and creating nice clean edges.
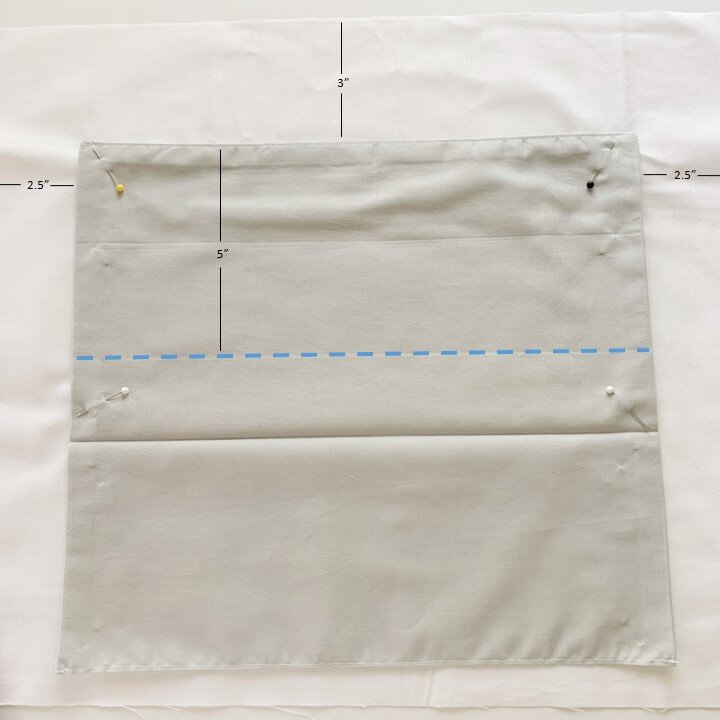
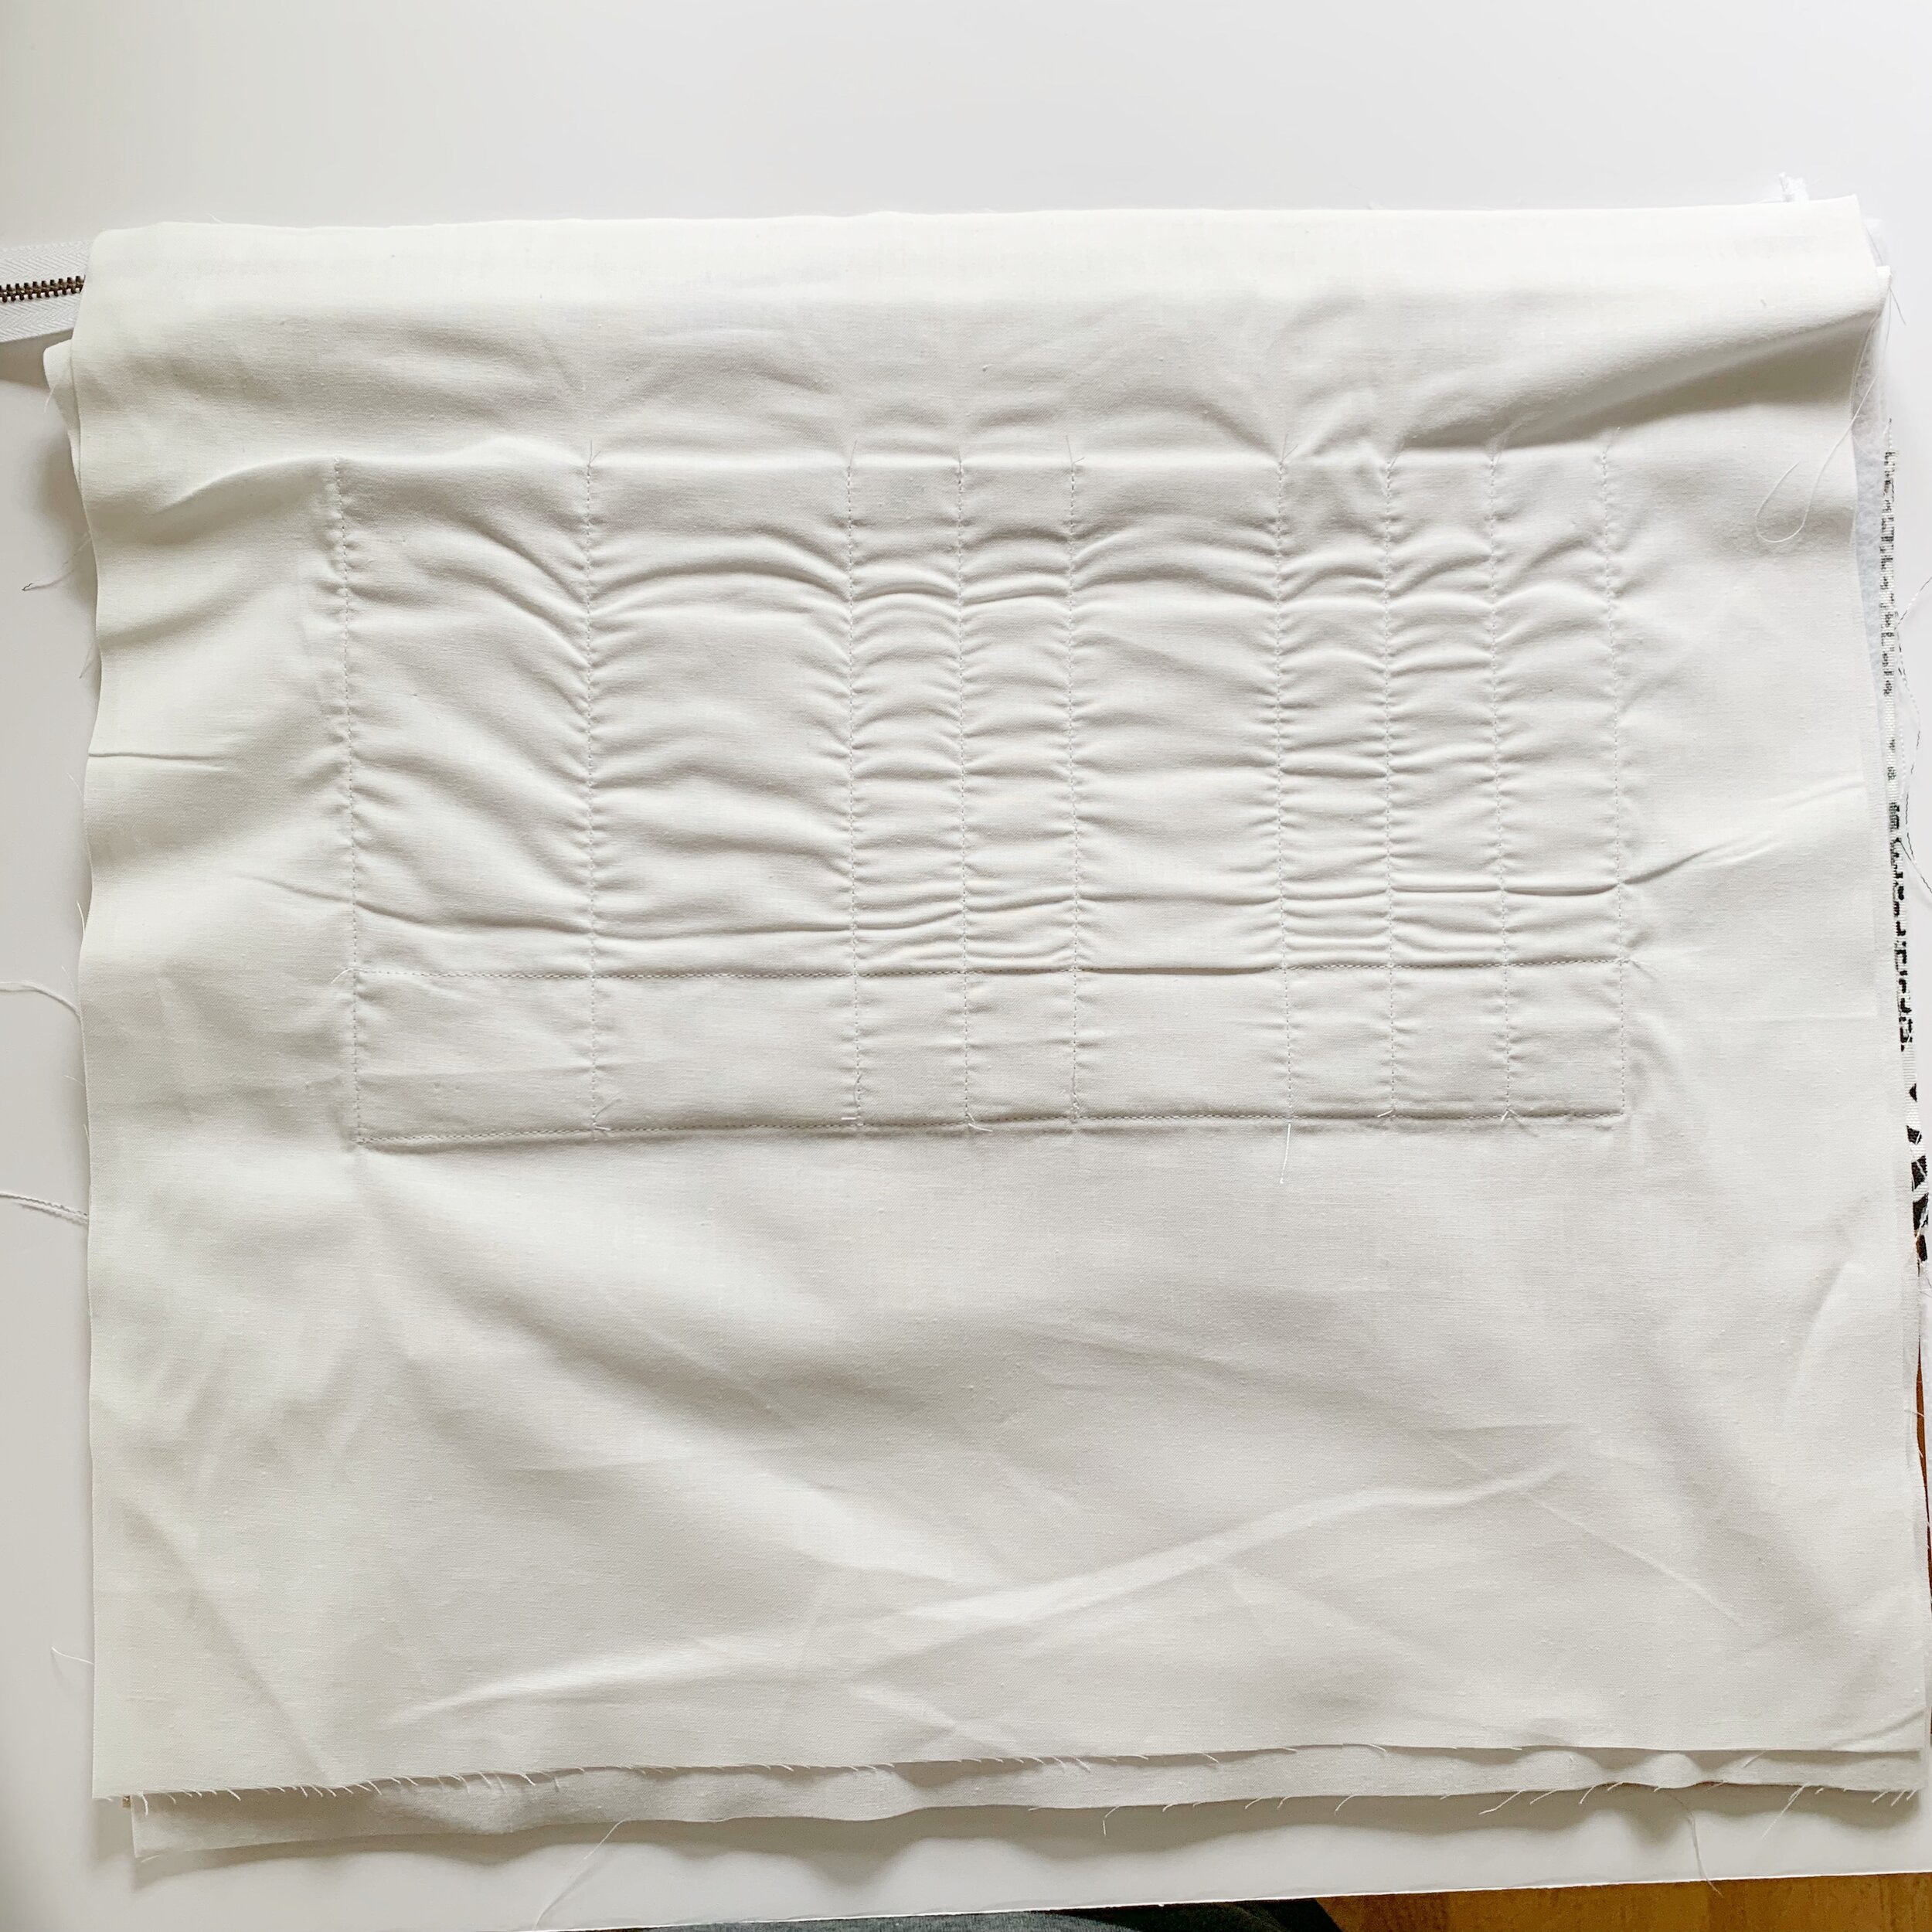
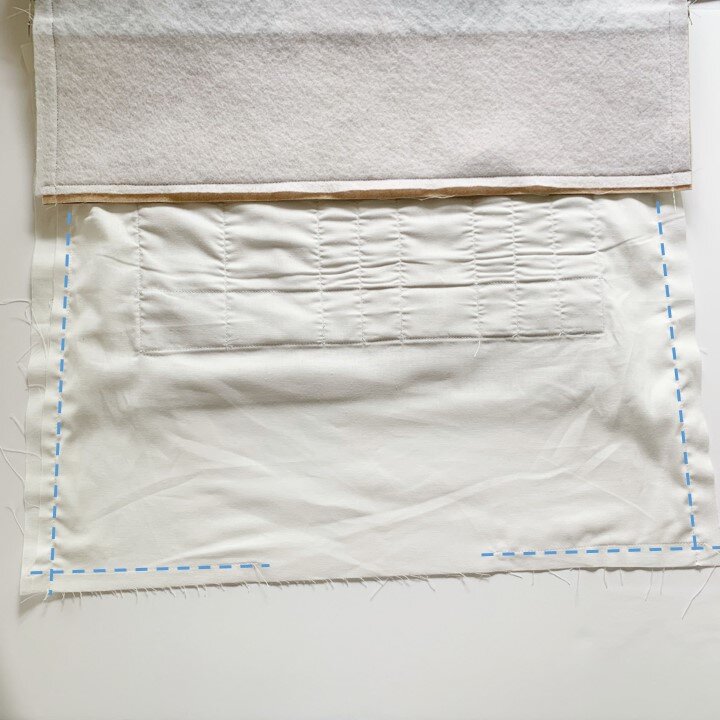
Next, lay the pocket down onto one of the lining pieces so one of the sewn edges is 3” from the top of the lining and about 2.5” from each edge of the lining. Pin in place. Using a ruler and tailor’s chalk, mark a line on the pock that is 5” down from the top. Sew the pocket to the lining along that line. This will become the bottom of the first set of hook pockets.

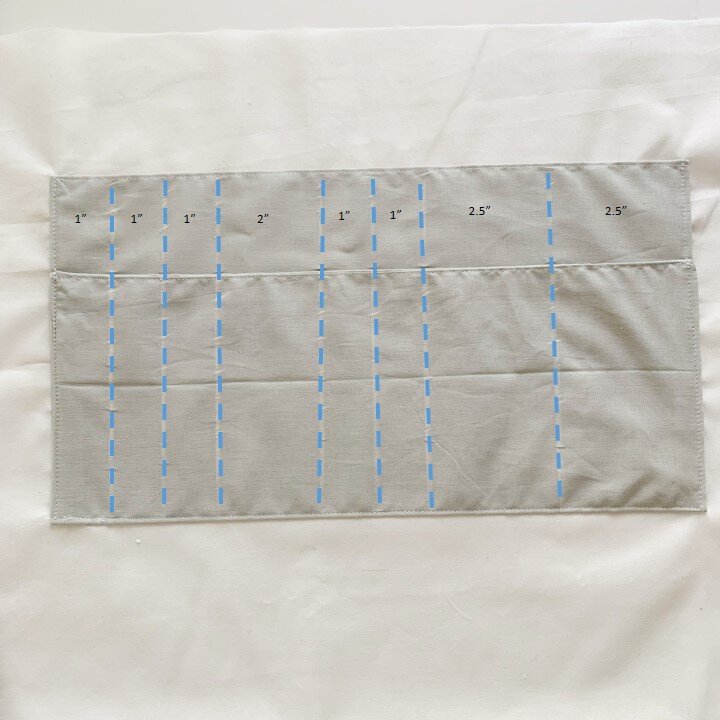
Now fold the hook pocket up so the bottom edge is about 1.5” from the top edge. Pin in place and sew along the sides and bottom to secure. Using a ruler and tailor’s chalk, mark vertical lines on the hook pocket as indicated in the photo above. From right to left, the pockets will be 1”, 1”, 1”, 2”, 1”, 1”, 2.5”, 2.5.” Then sew along those lines to create your hook pockets. Iron and set aside.
Slide Pocket:
Take your 15” X 25” quilting fabric and fold it in half so the two 15” edges are together. Sew along the sides and top, leaving a small opening on the top for turning.
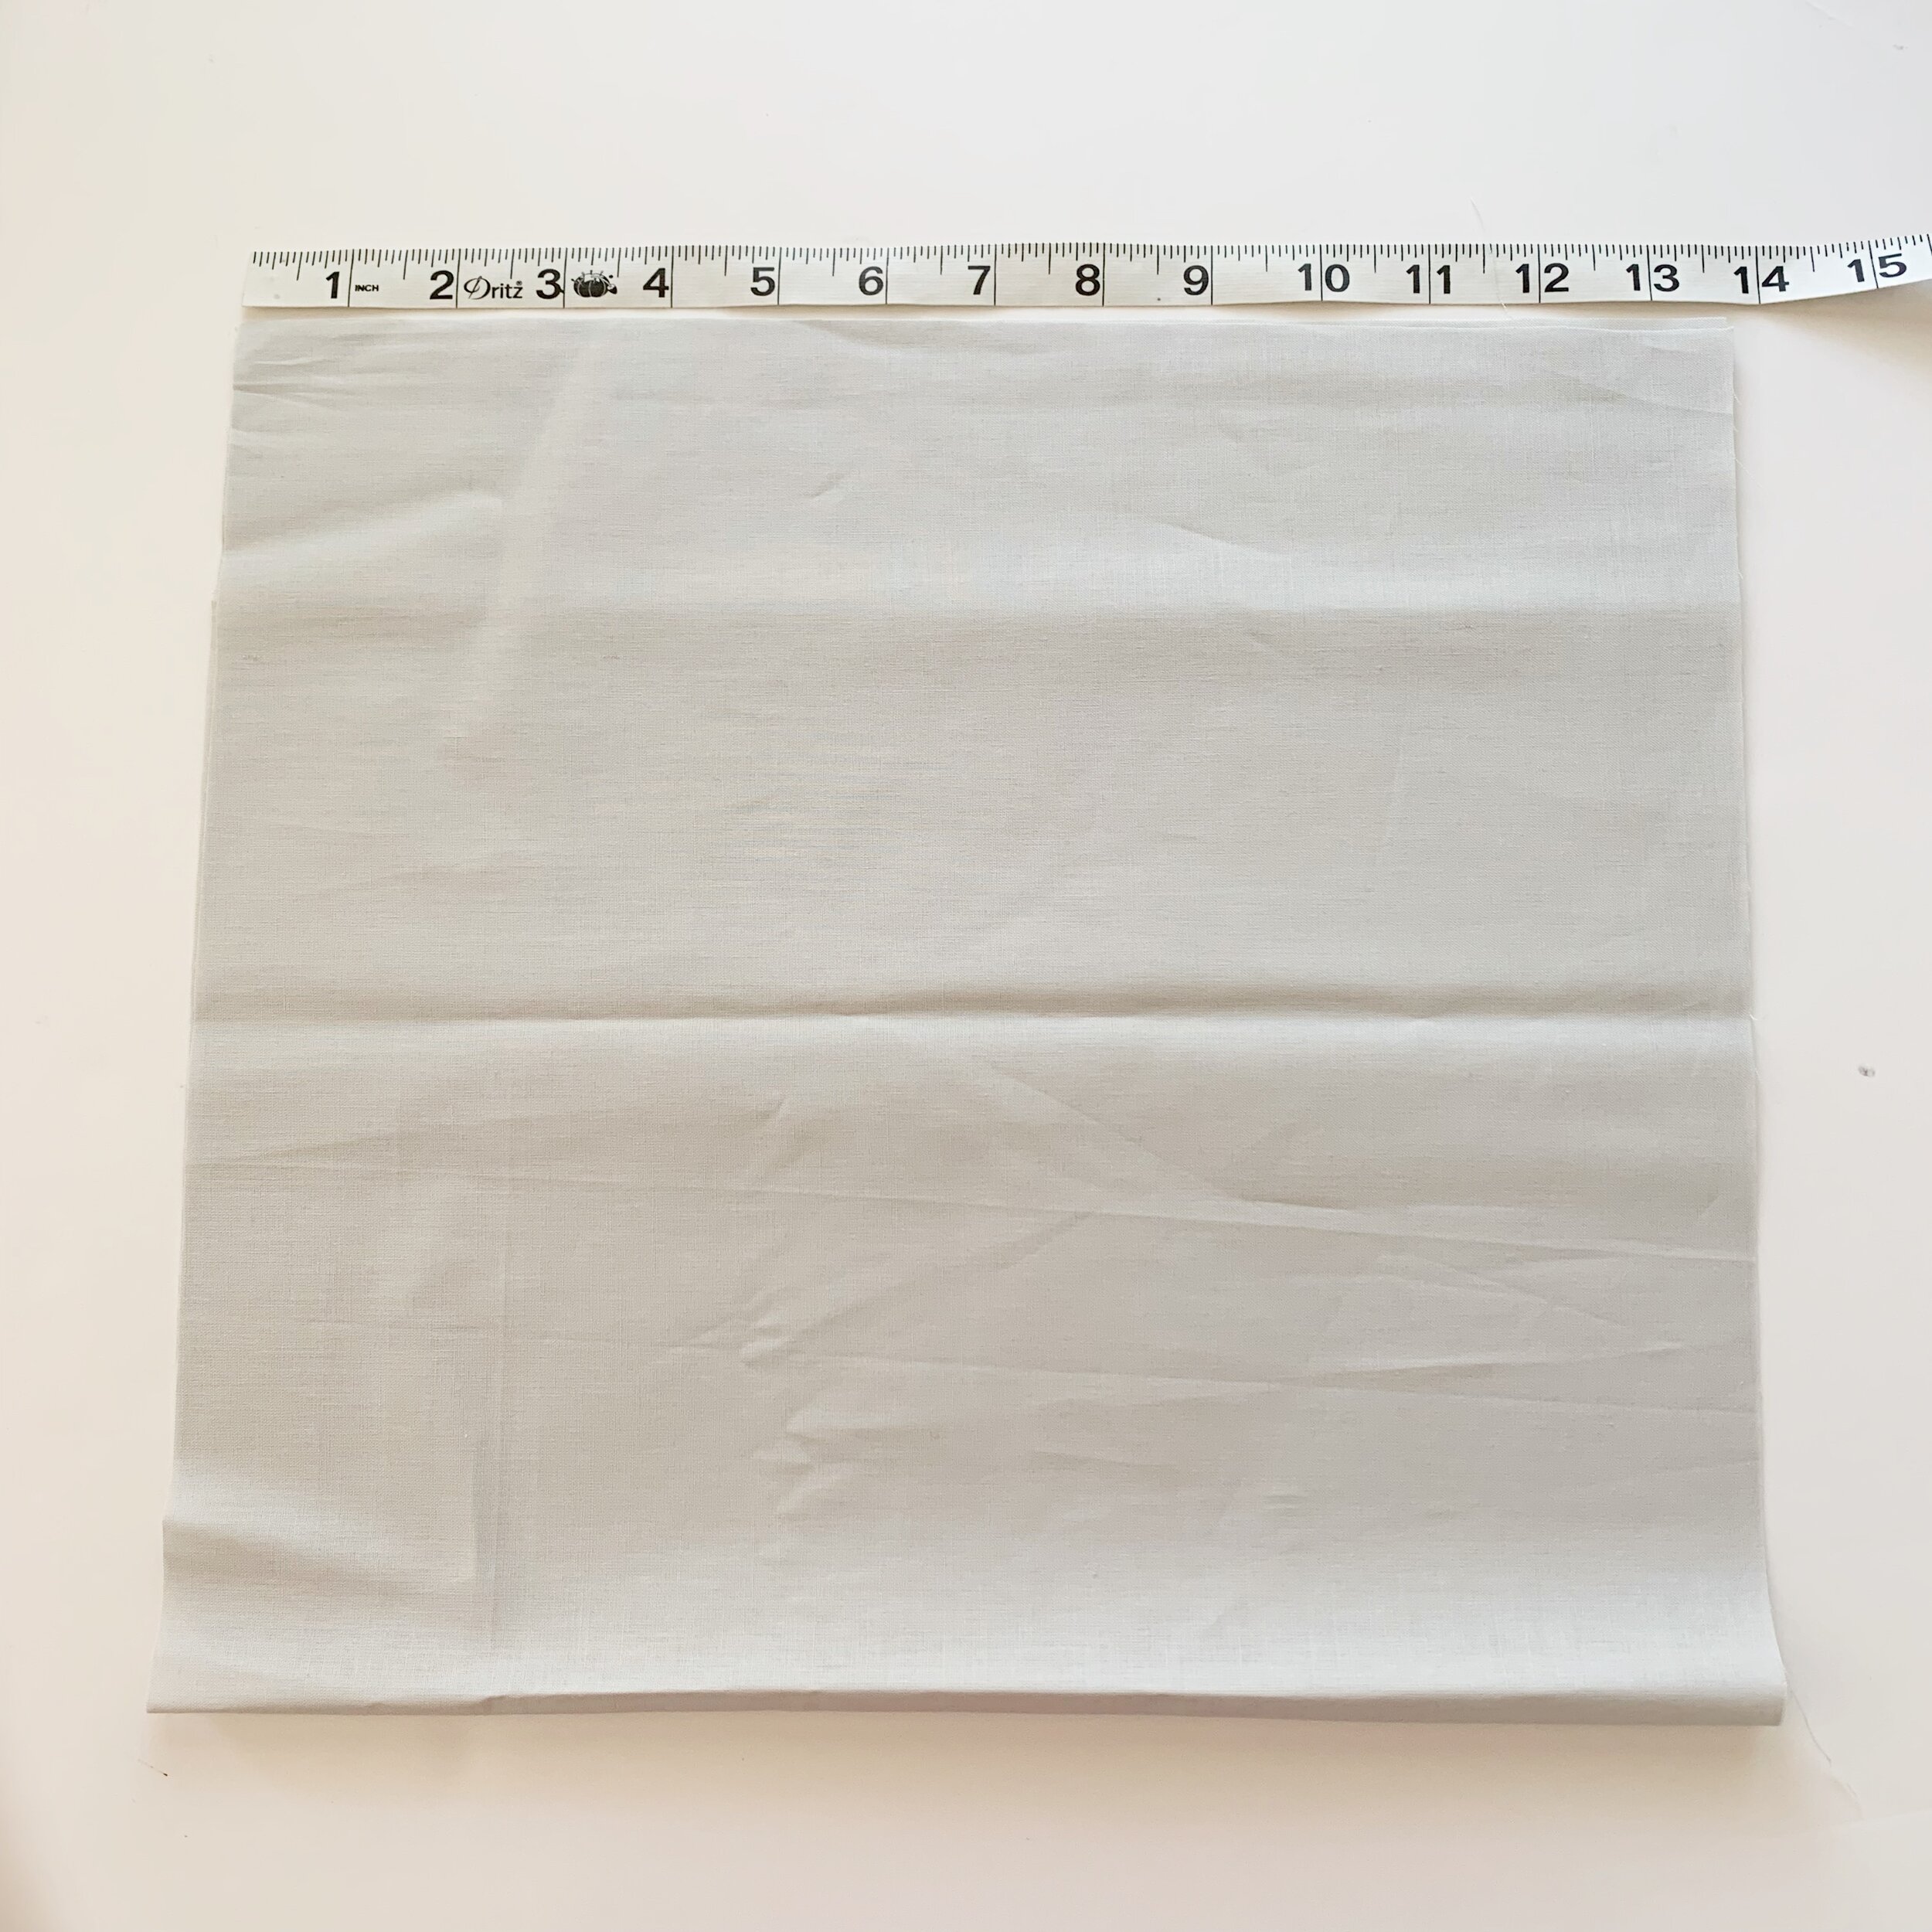
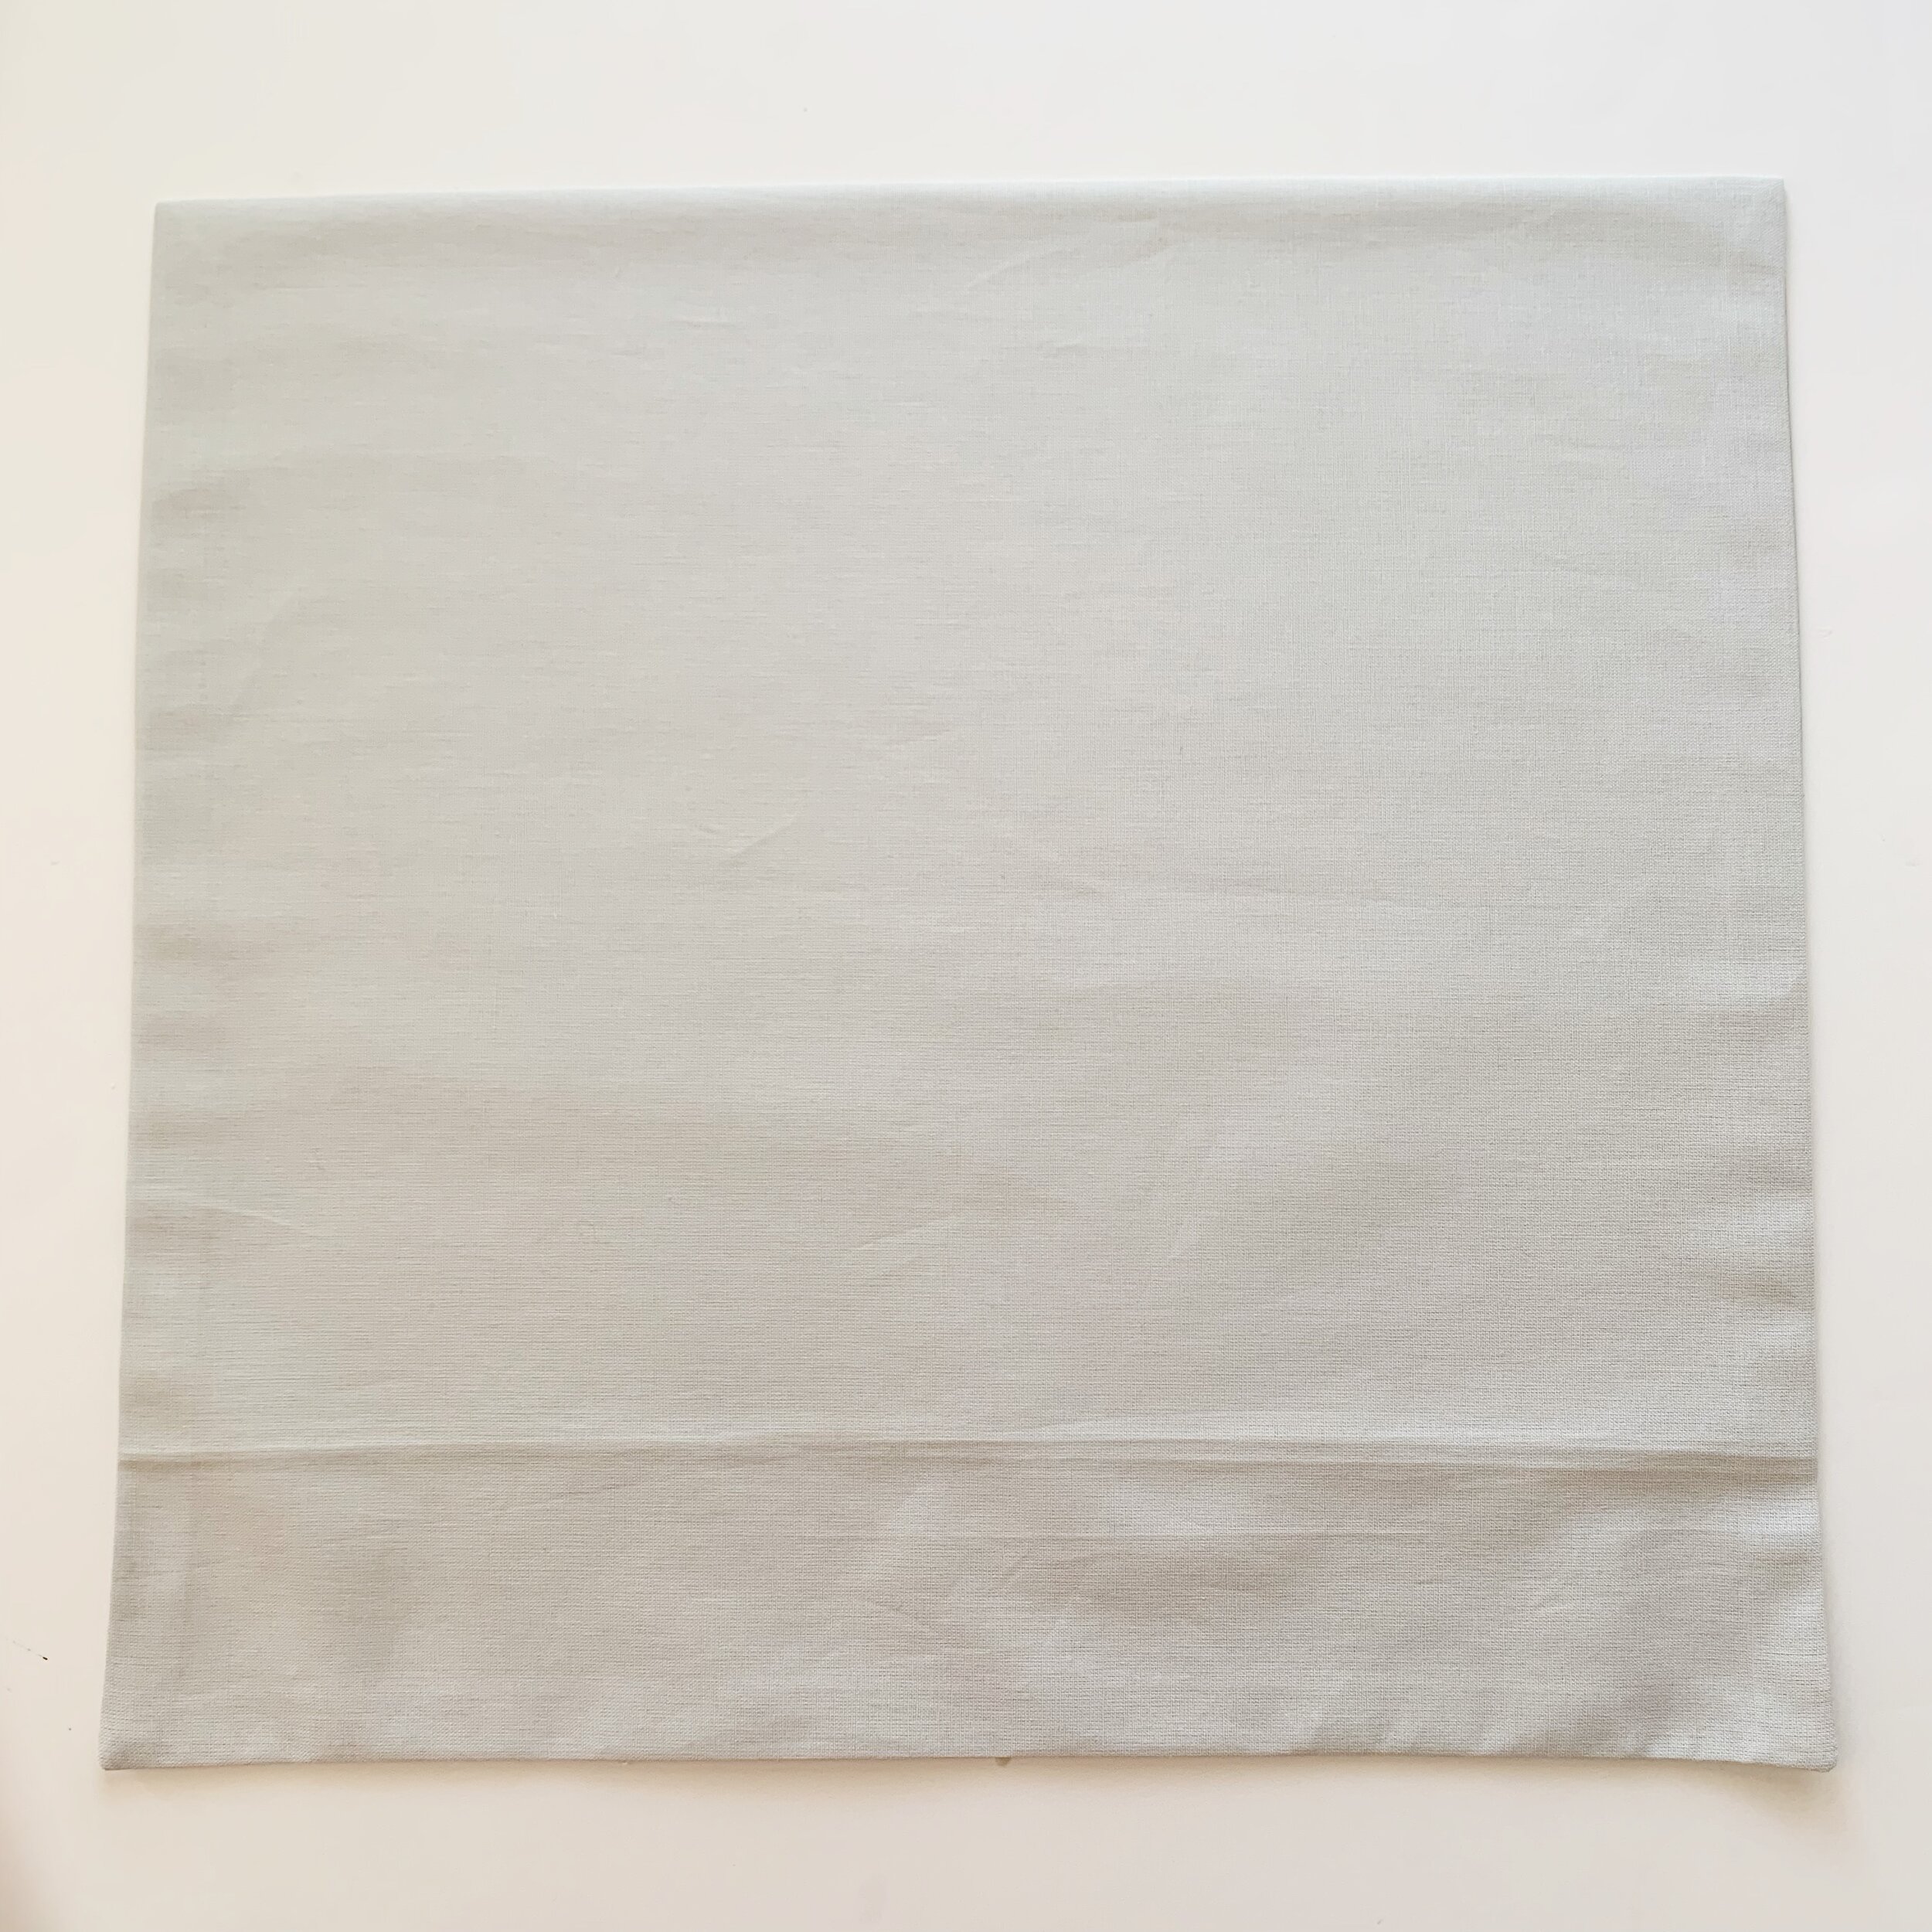
Trim corners and turn right side out. Press with an iron. Sew along the top and bottom edges, closing up the hole and creating nice clean edges.
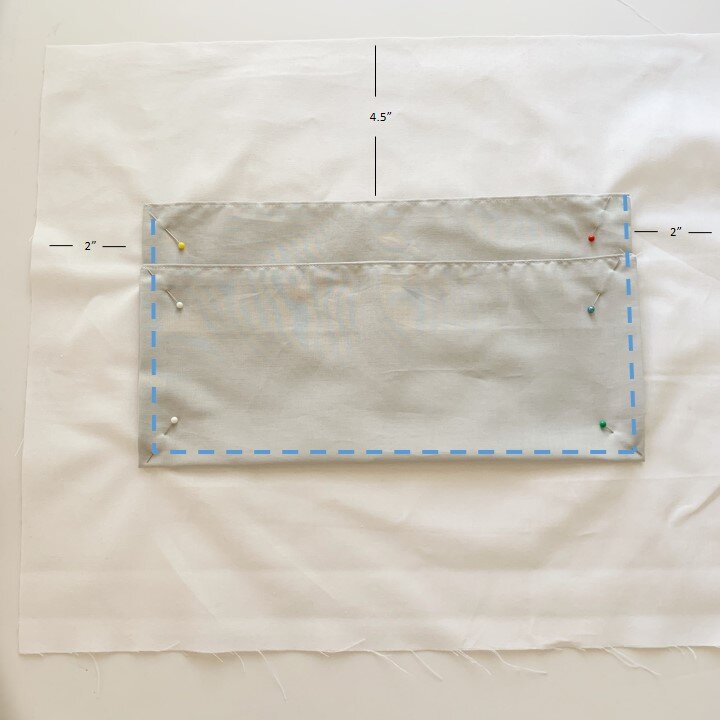
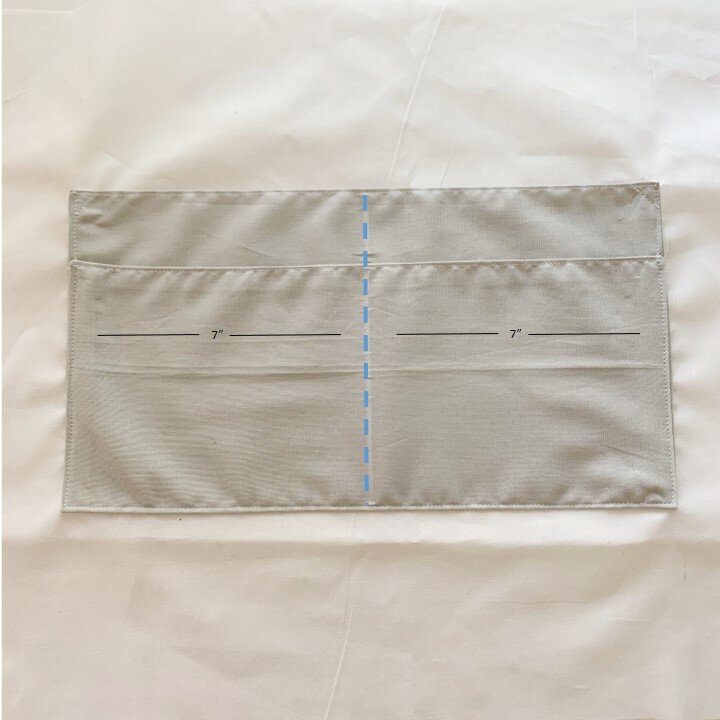
Fold bottom edge of pocket up so it is about 1.5” from the top edge. Iron fold to secure. Next, lay the slide pocket down onto the second lining piece so it is 4.5” down from the top and about 2” from each side. Pin in place and sew along sides and bottom of slide pocket, attaching it to the lining. Then make a line down the center of the pocket, approximately 7” from each edge. Sew along that line to divide the slide pocket in two.
Zipper Pocket:
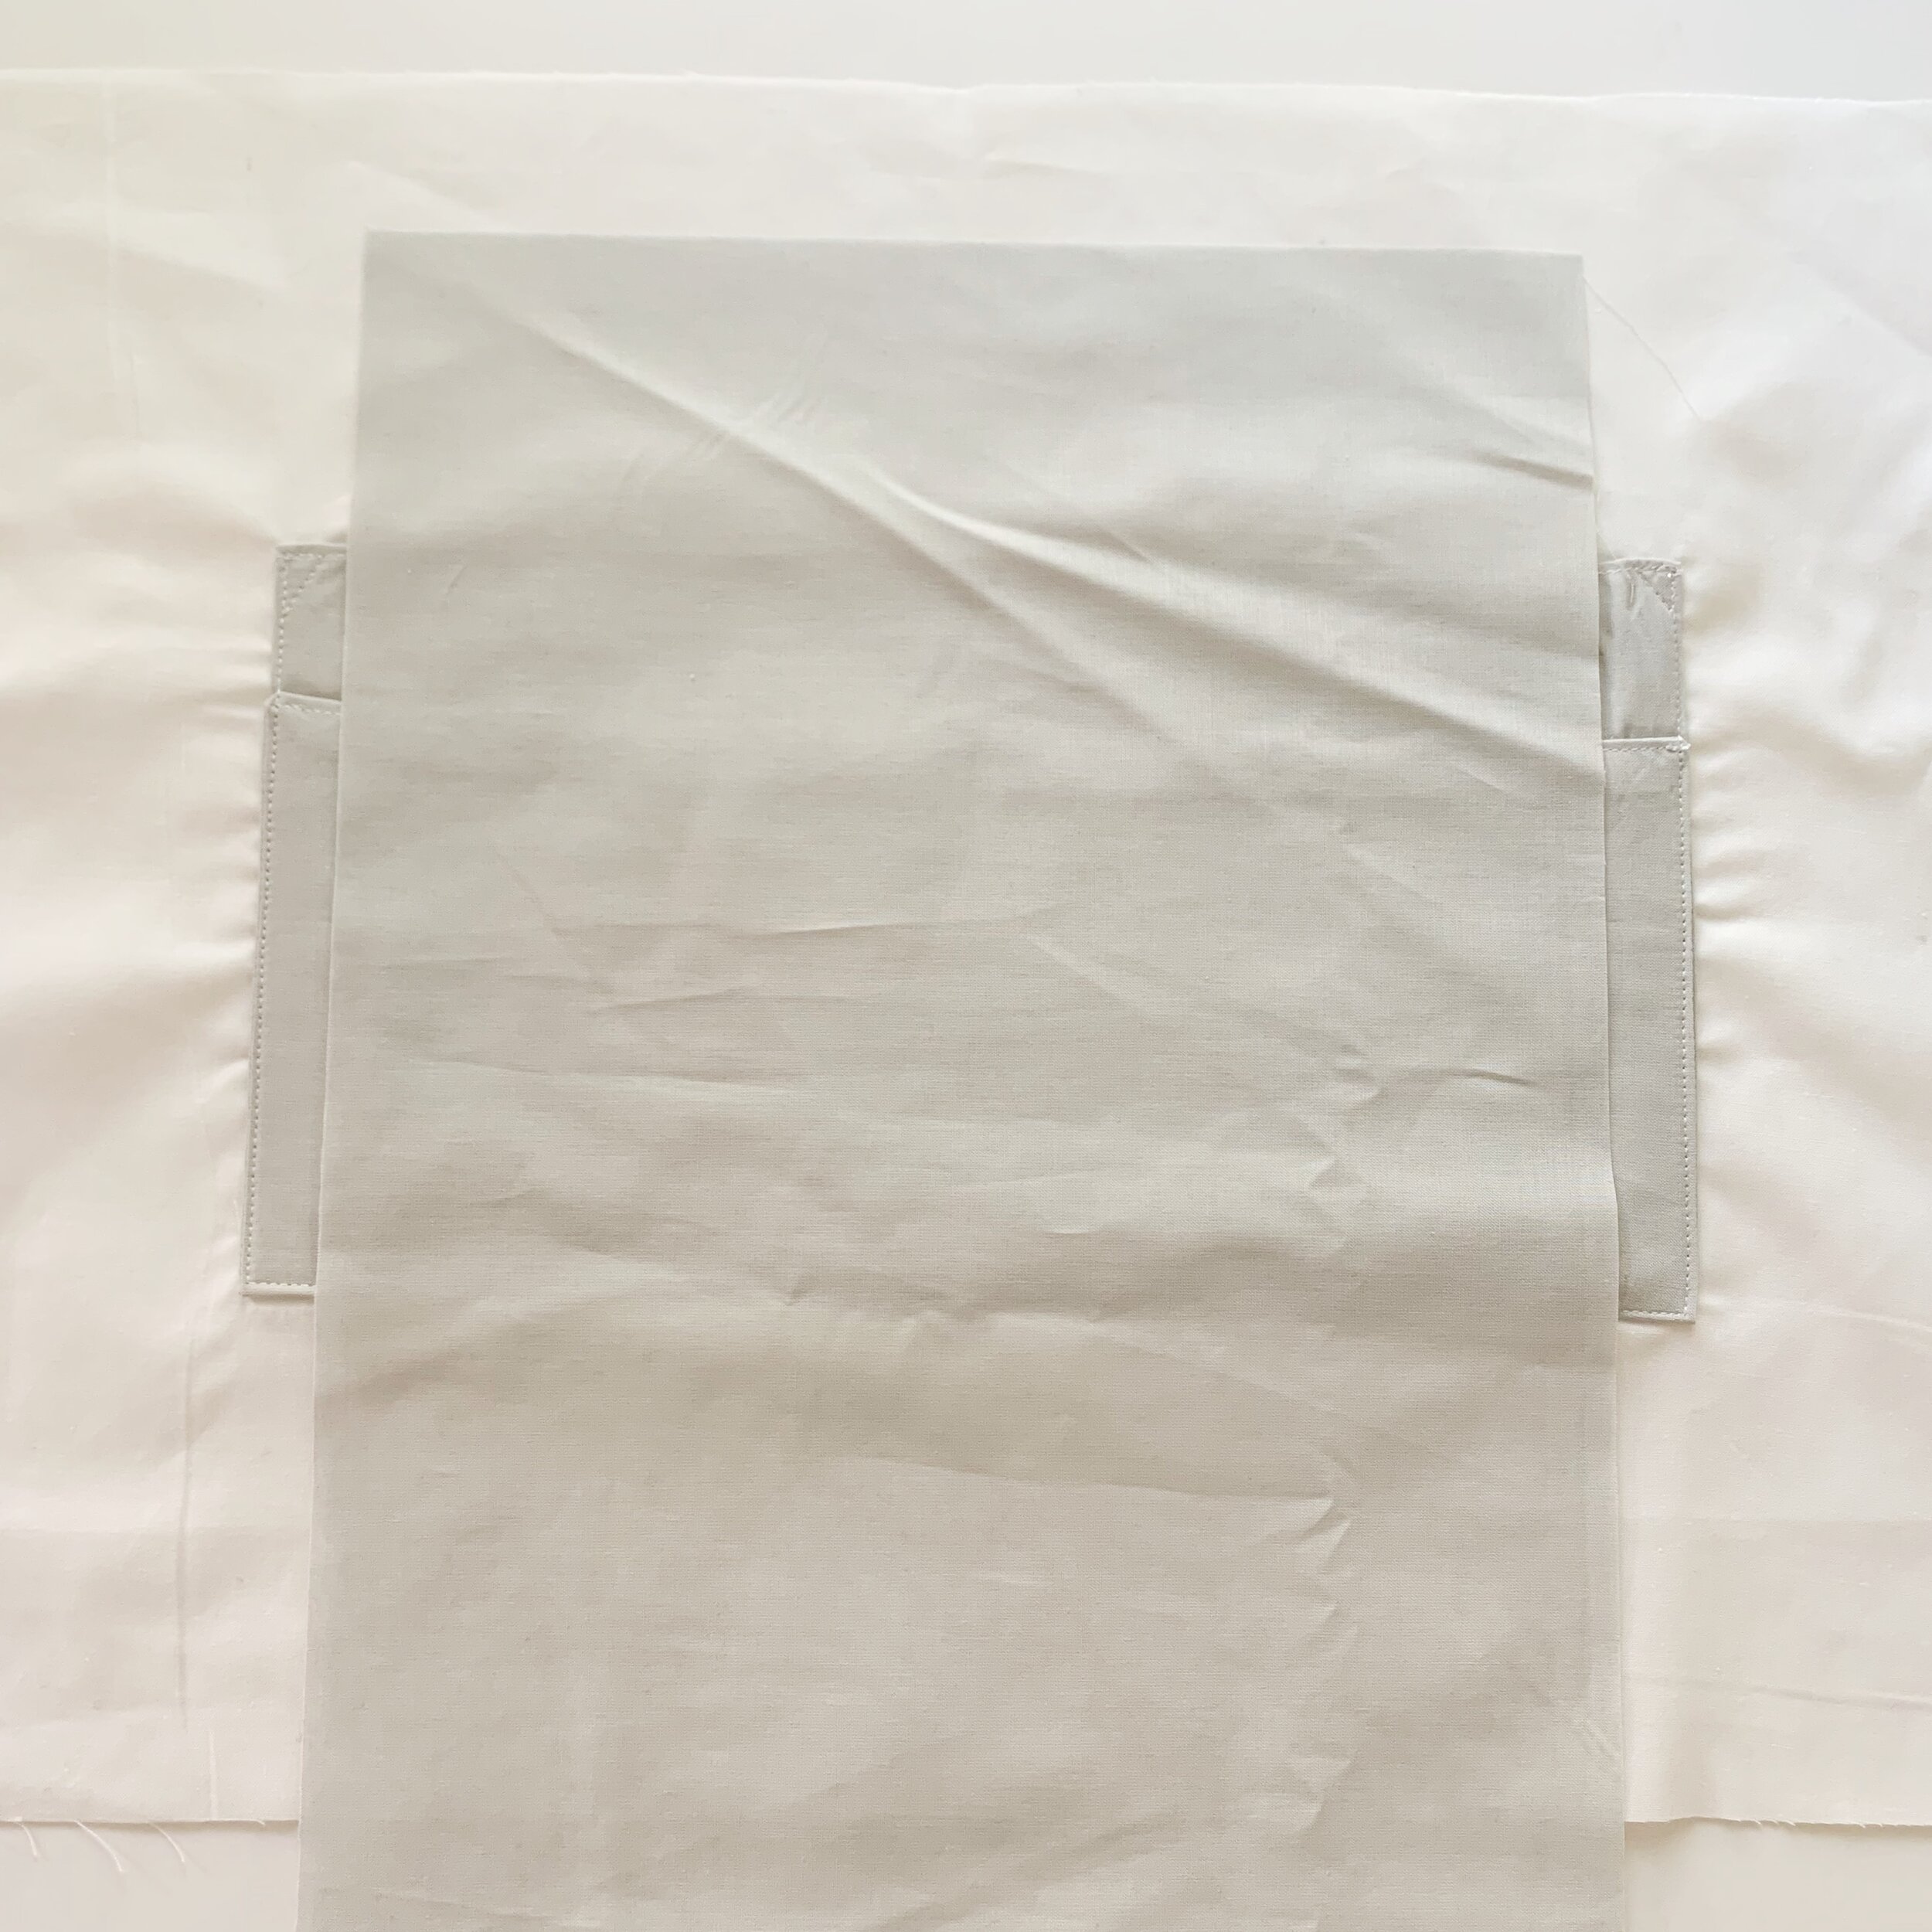
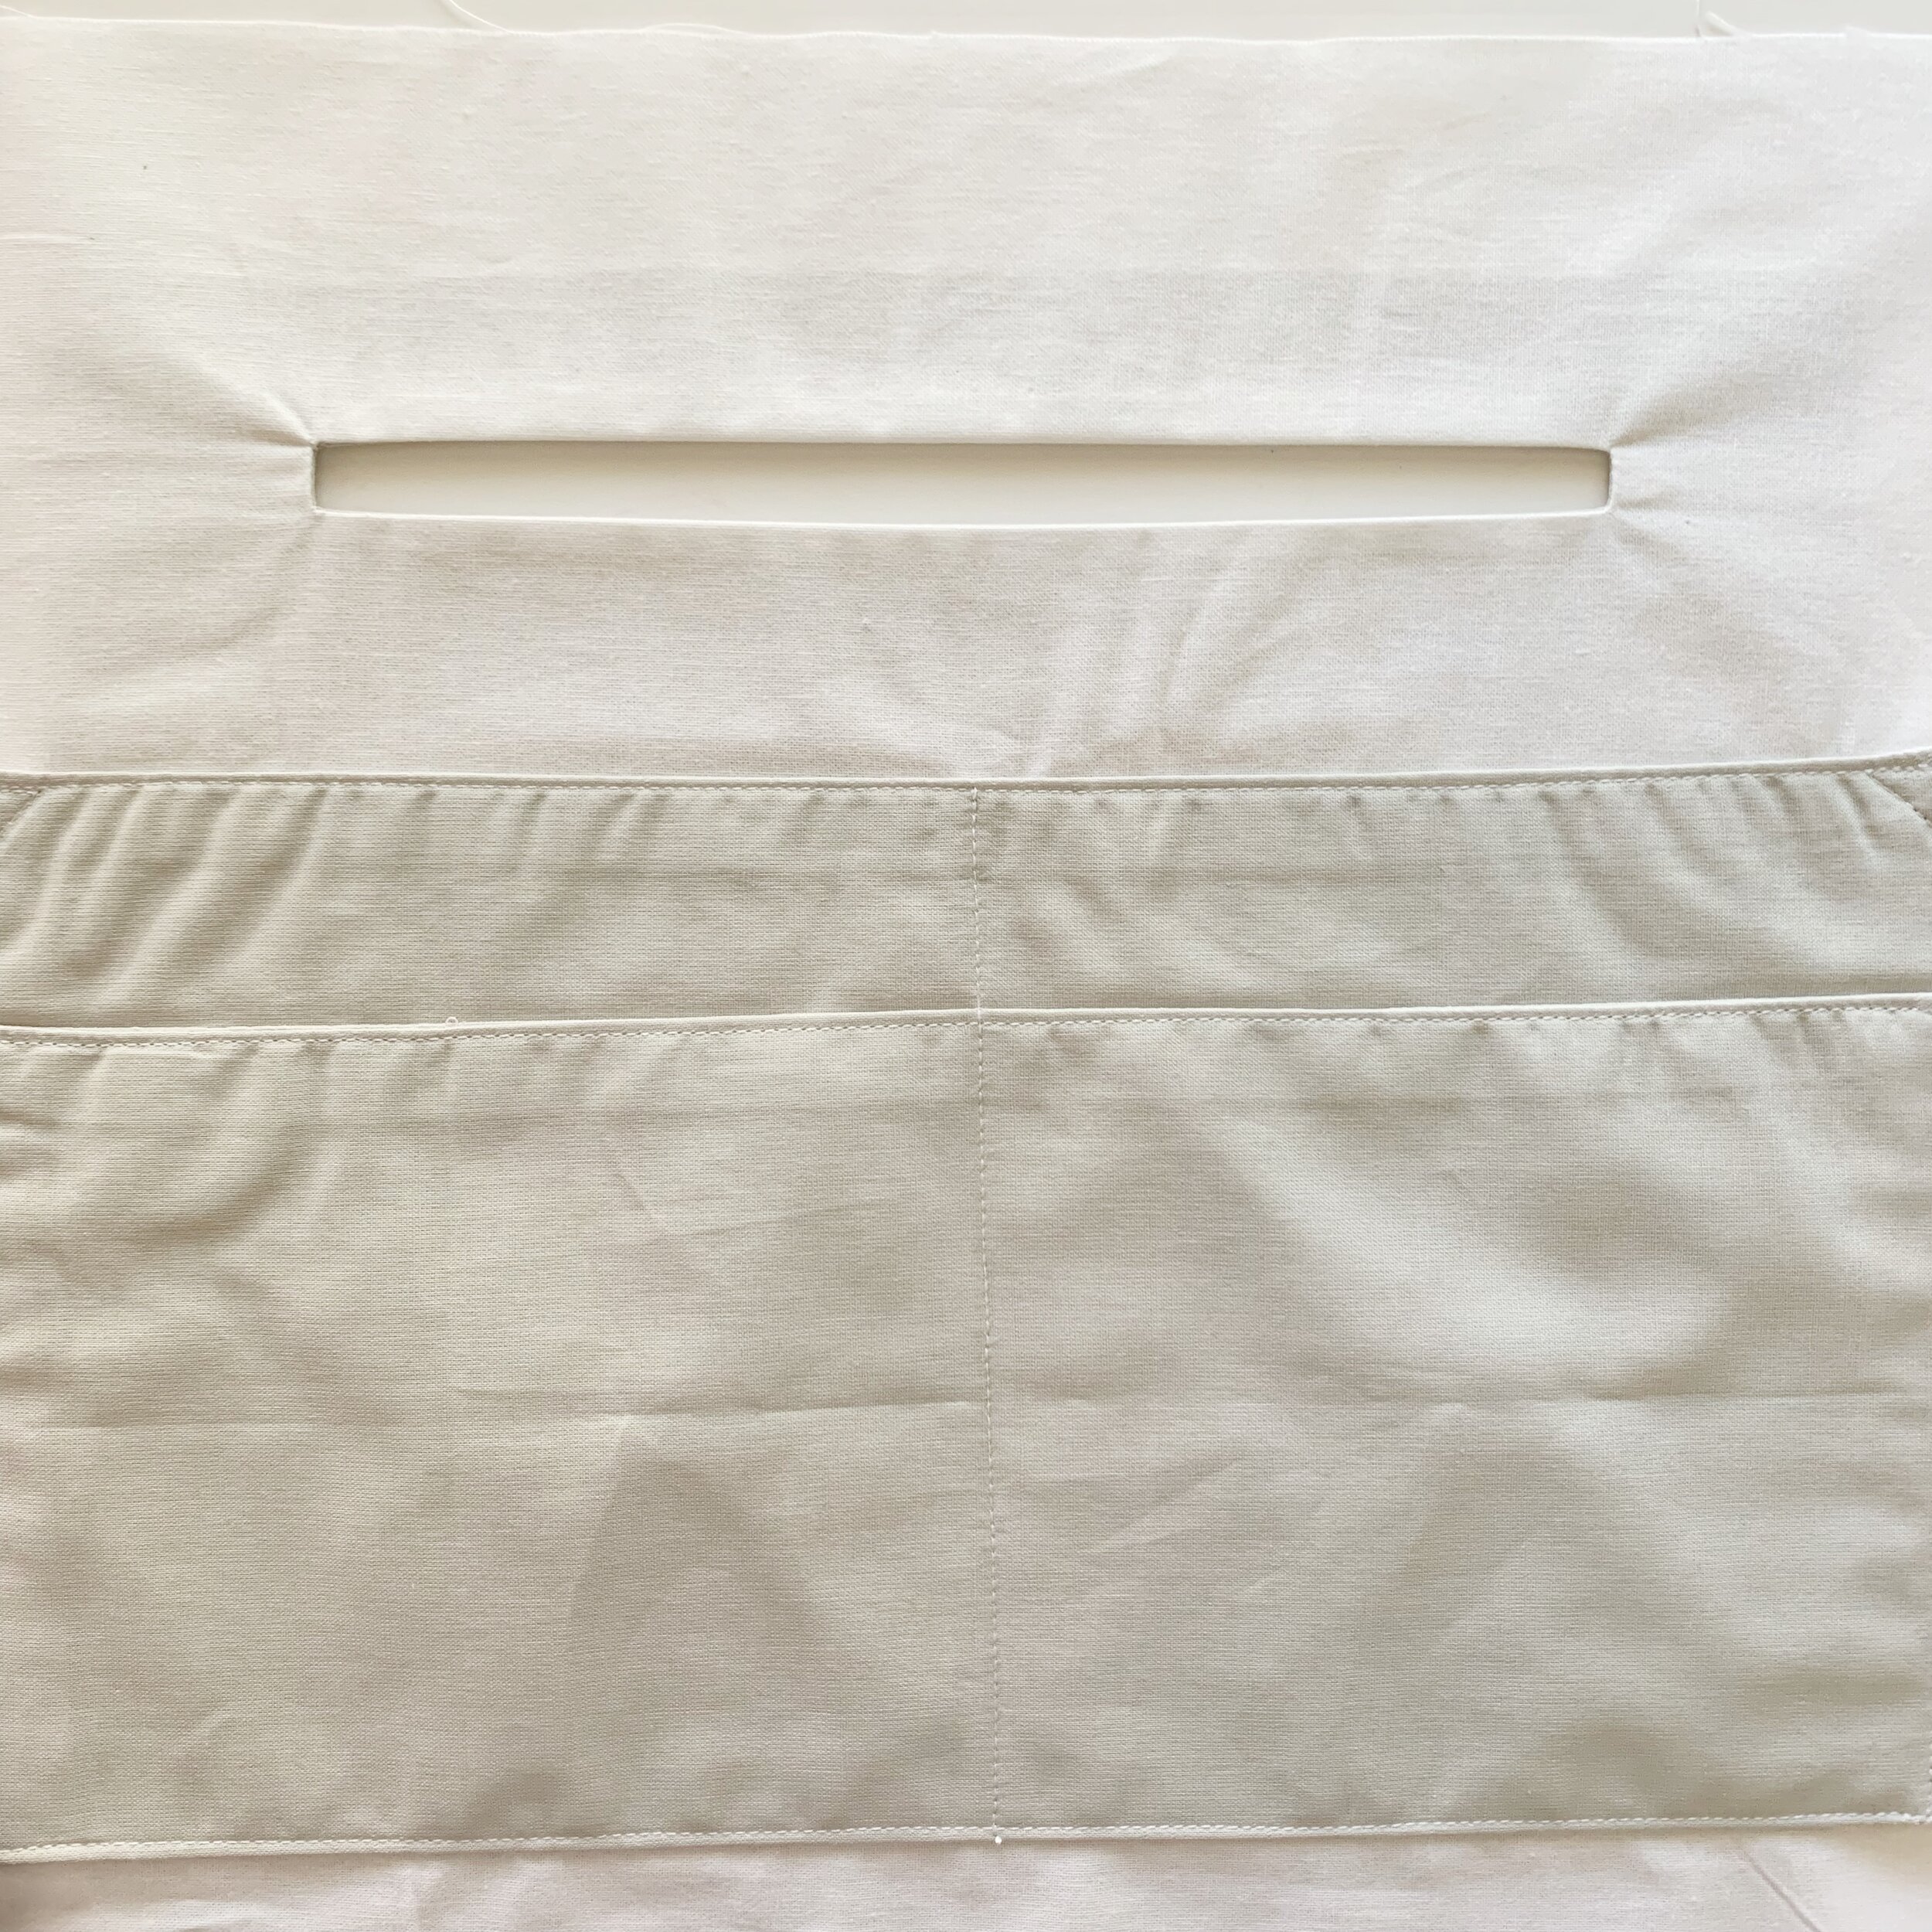
Lay the interior lining piece with the slide pocket right side up. Lay your 11” X 18” pocket piece right side down on top of your interior lining piece so that it’s short edge is 1.5” down from the top of the lining piece and about 3.5” from each side.
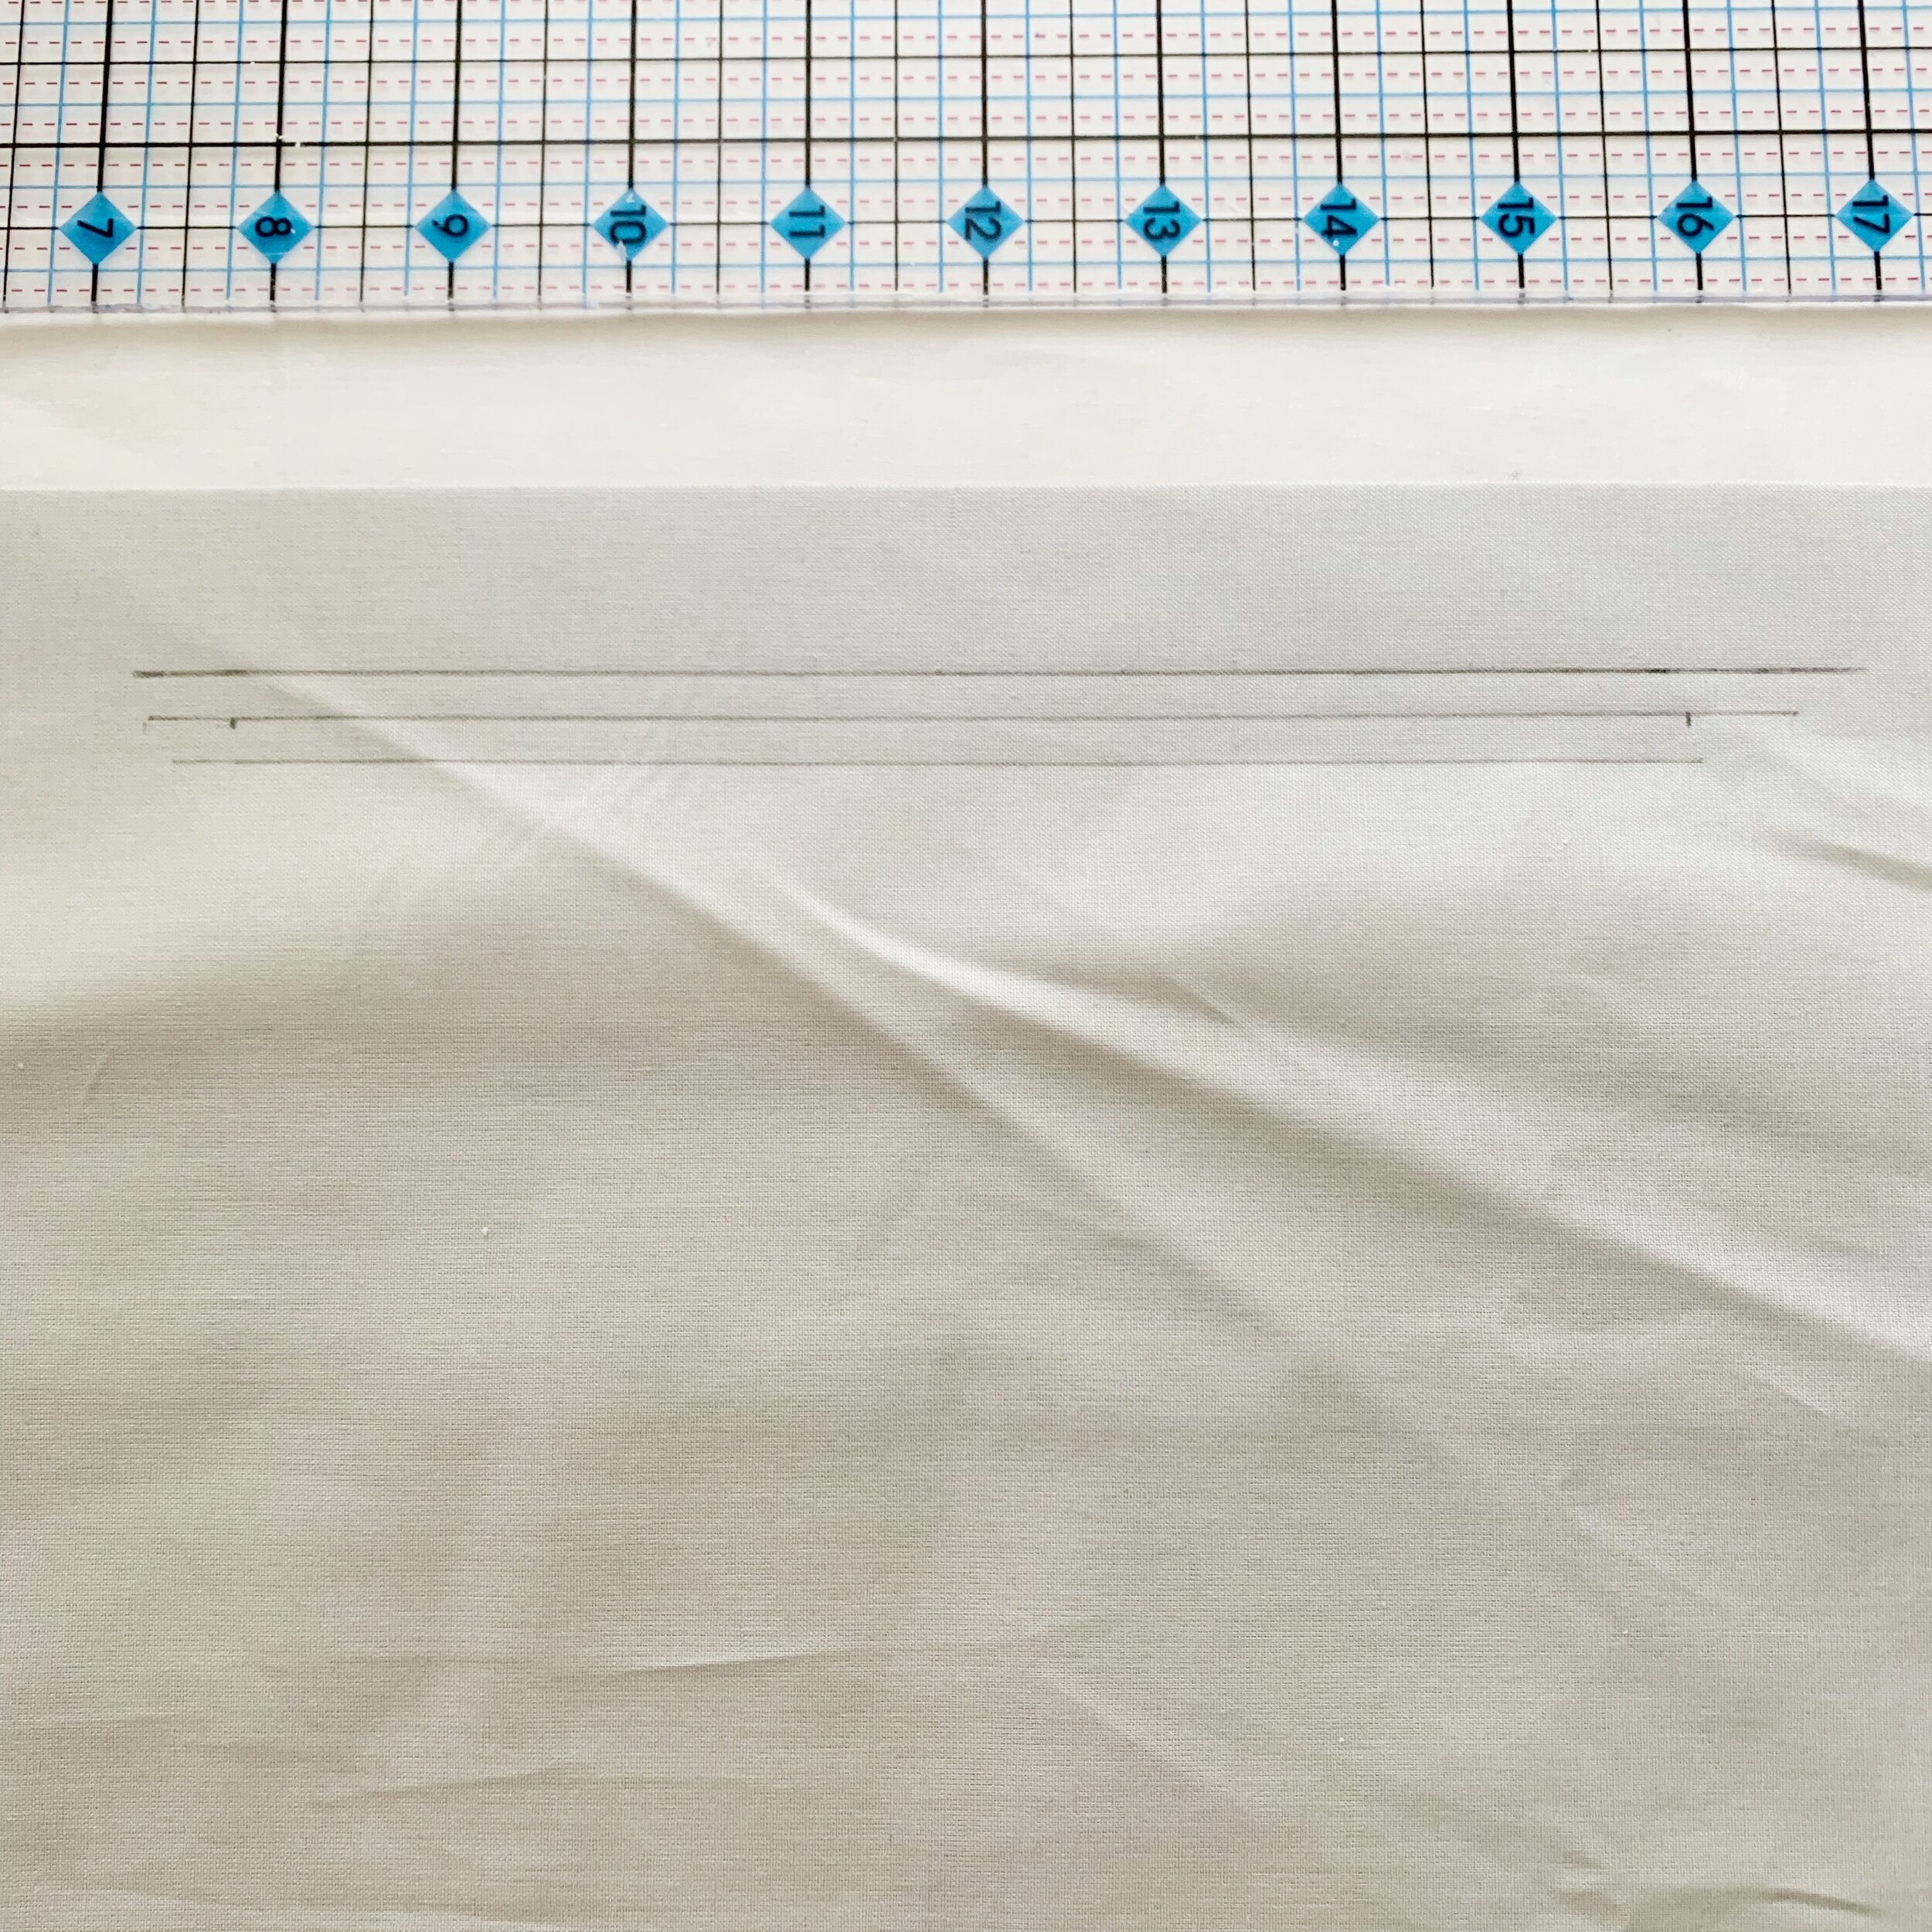

Then move your ruler so the edge is 1” below the pocket piece. Using a pencil, draw a line that is 8-9” long evenly spaced between the pocket piece. I started marking mine about 1.5” from the edge. Mark two more lines, one ¼” down from the first line, the other ¼” down from the second. Then connect all three lines on the sides to create a rectangle with a line in the center. Draw diagonal lines from the corners to the center line on each side.
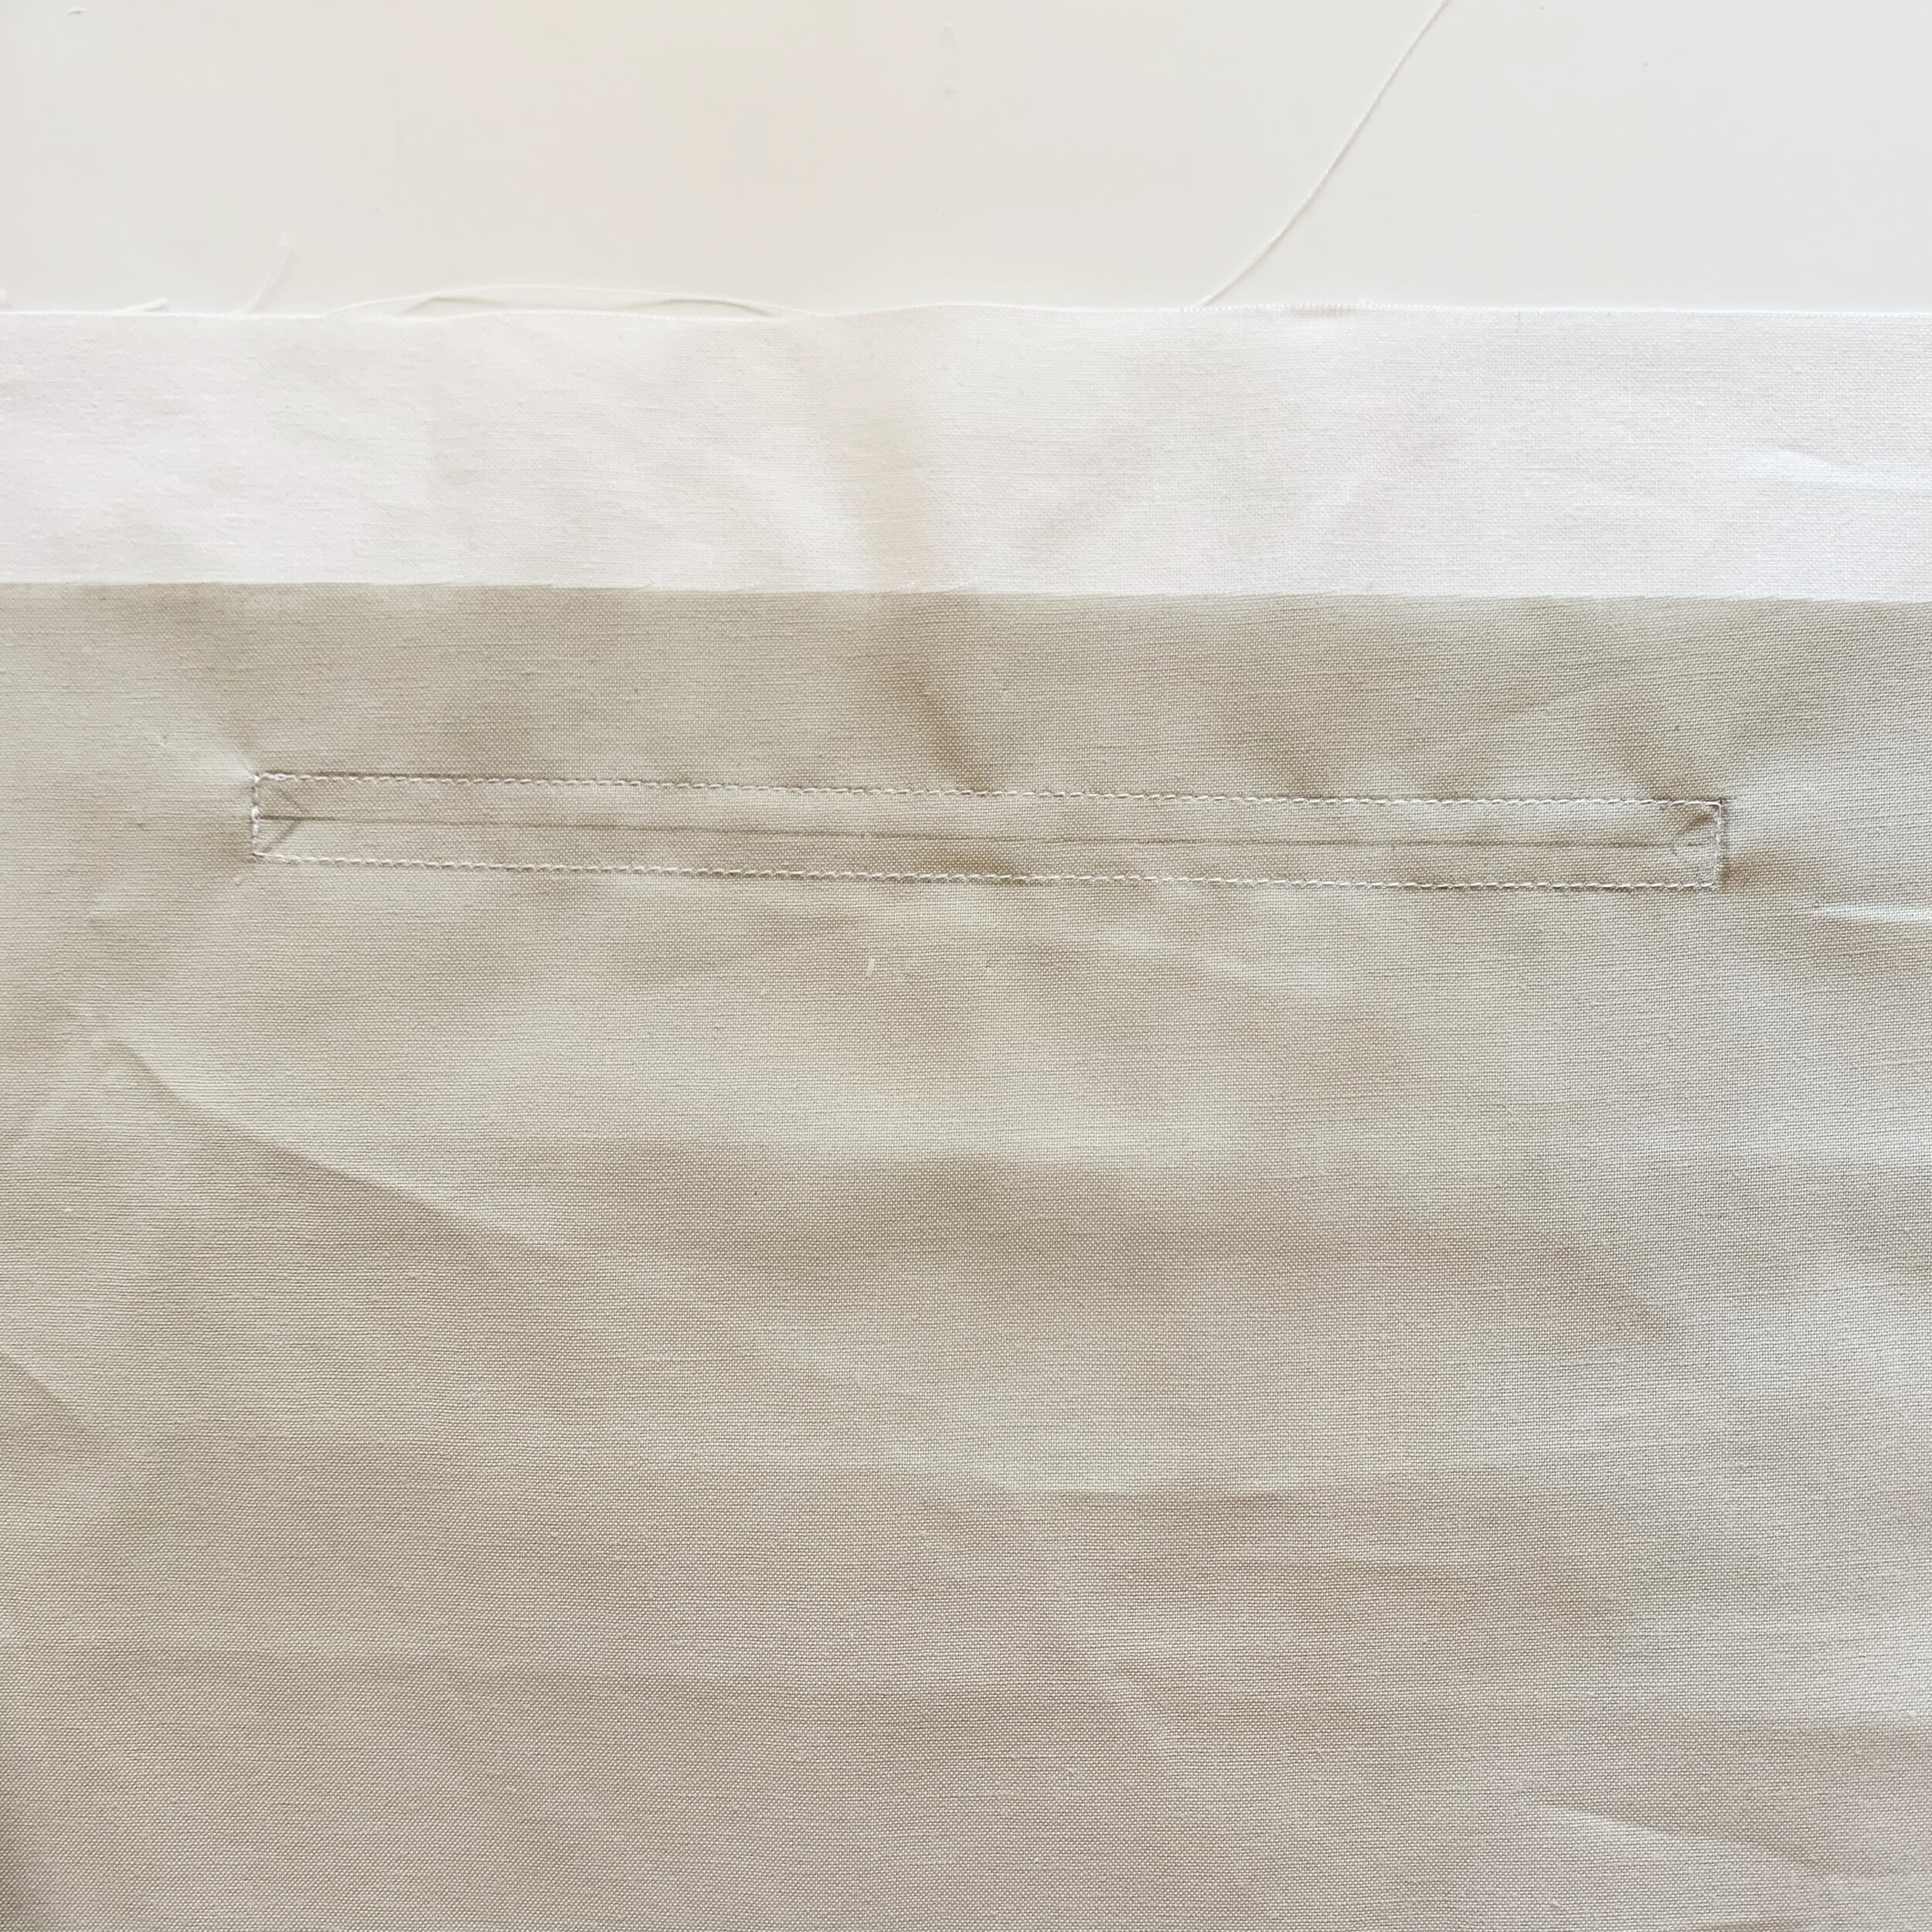
Pin the pocket piece to the lining piece to hold in place and then sew along the outside edge of the rectangle.
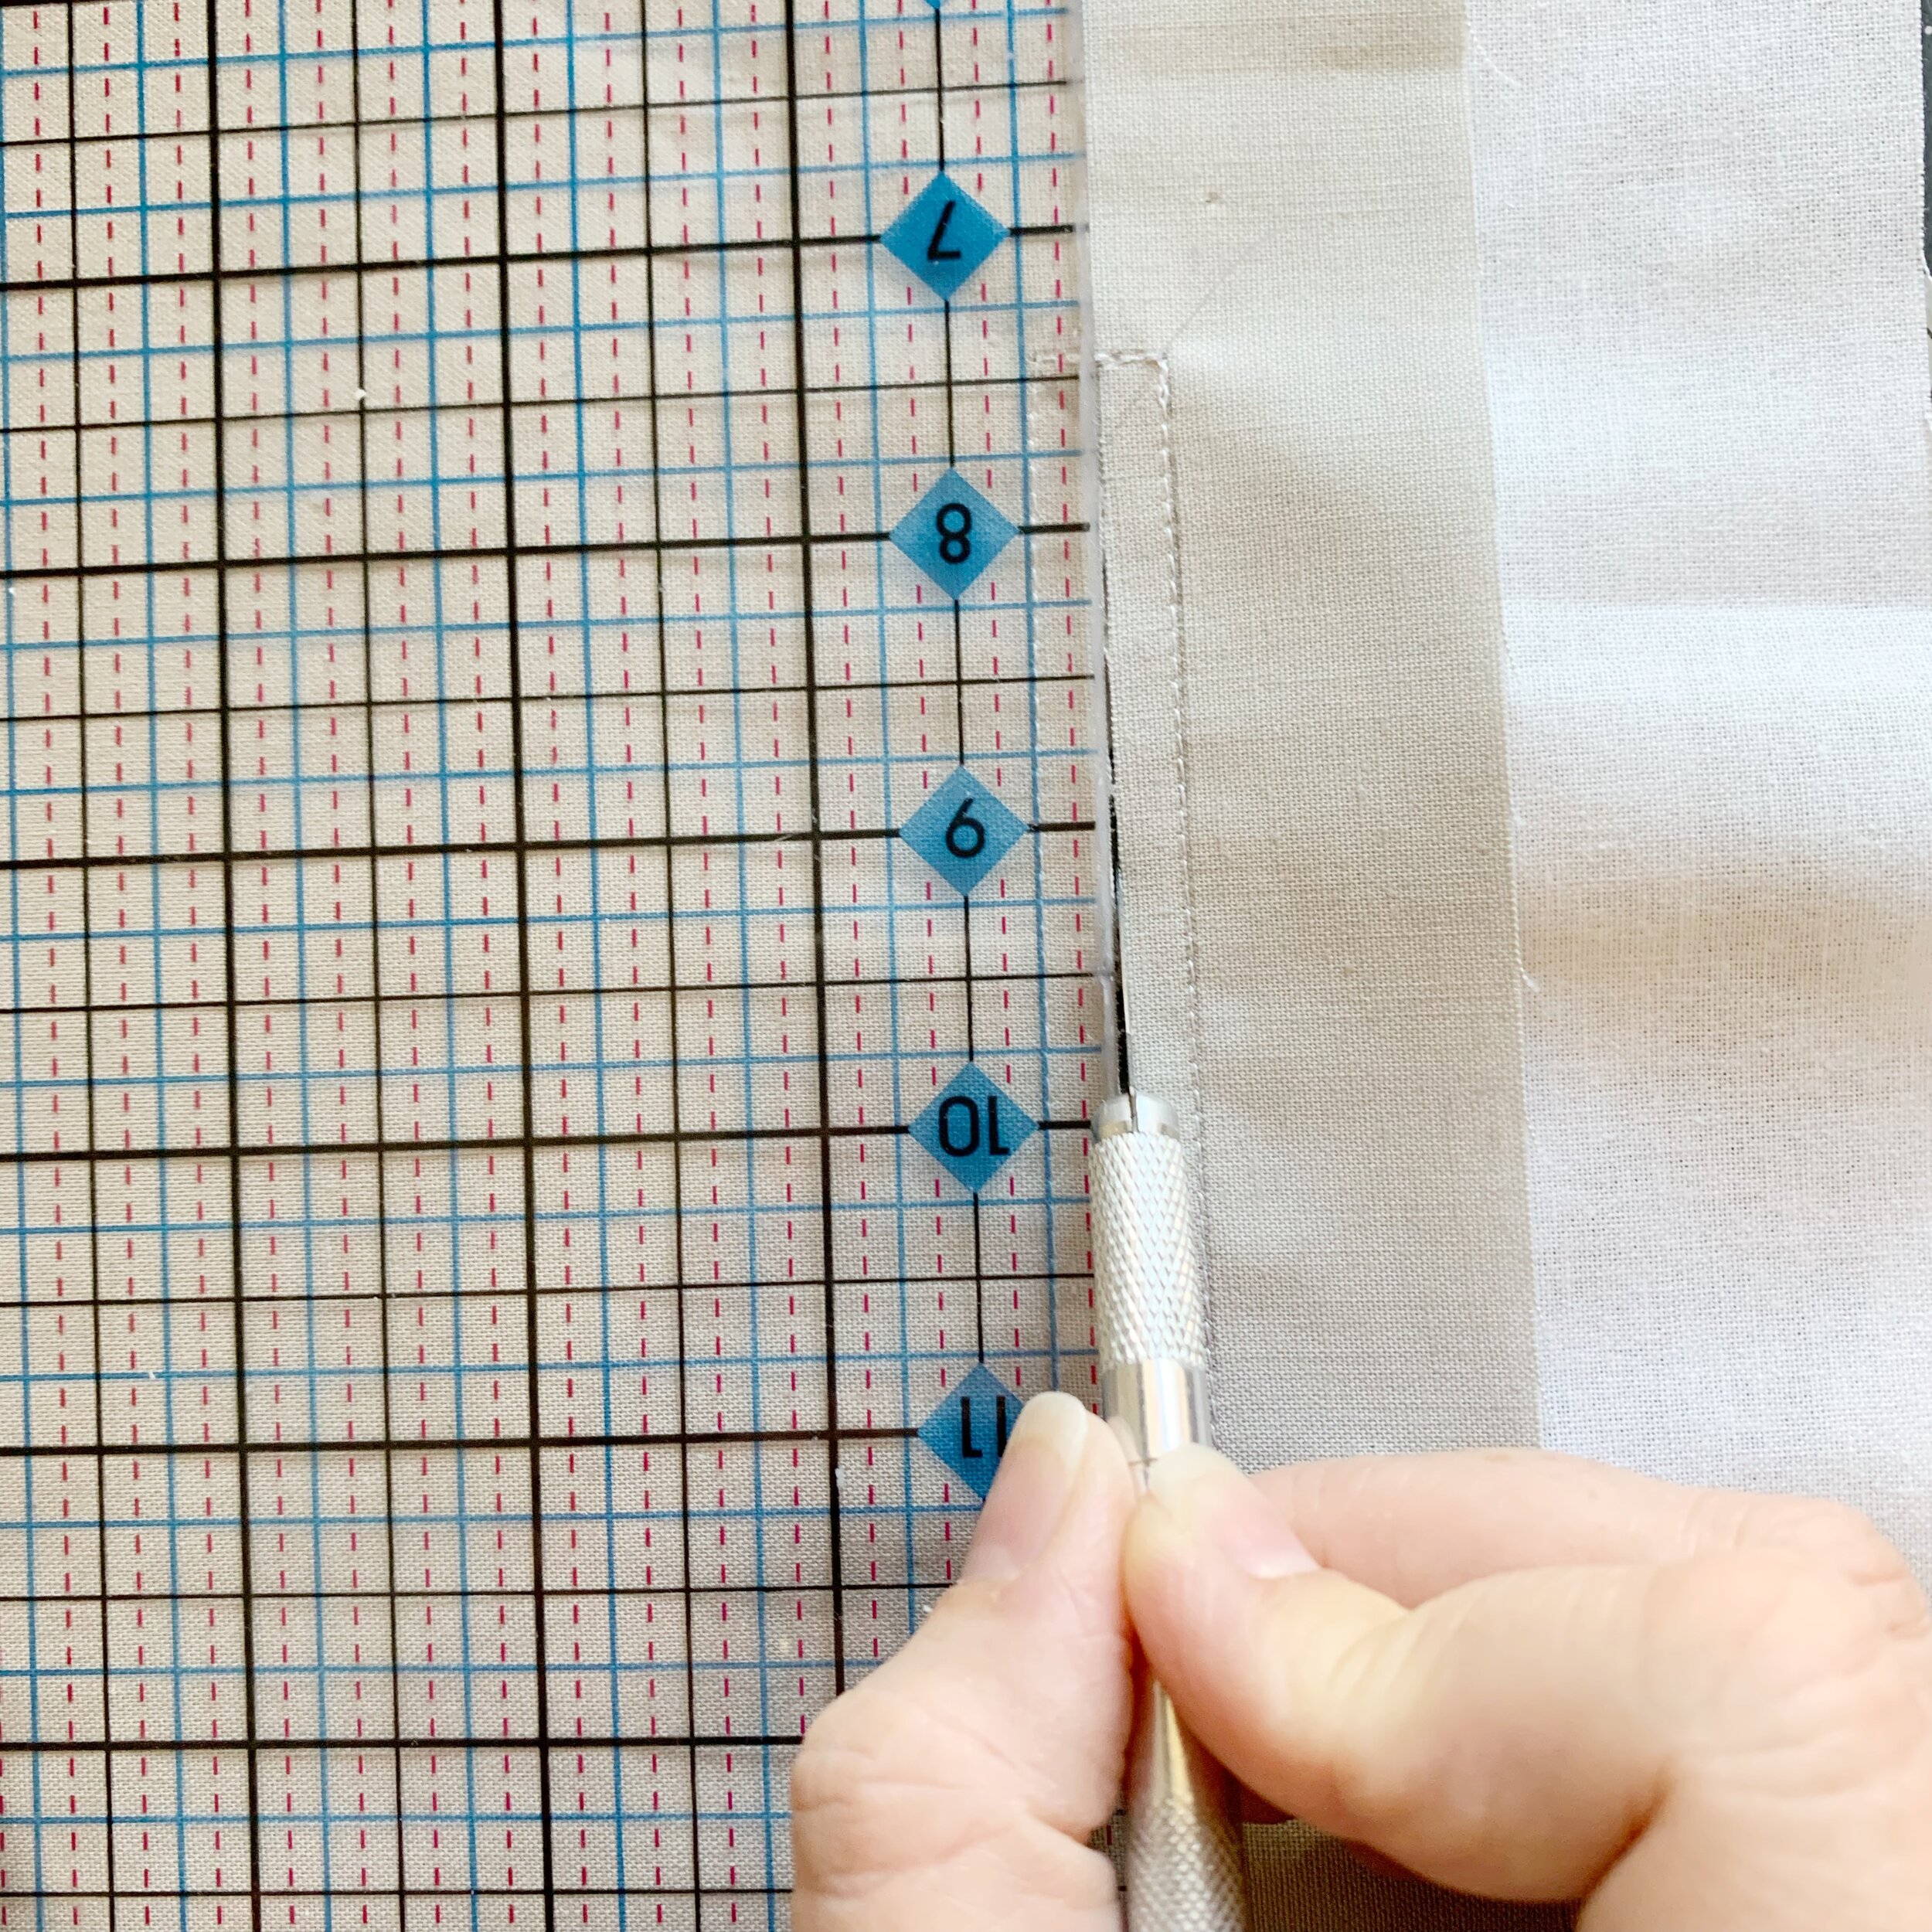
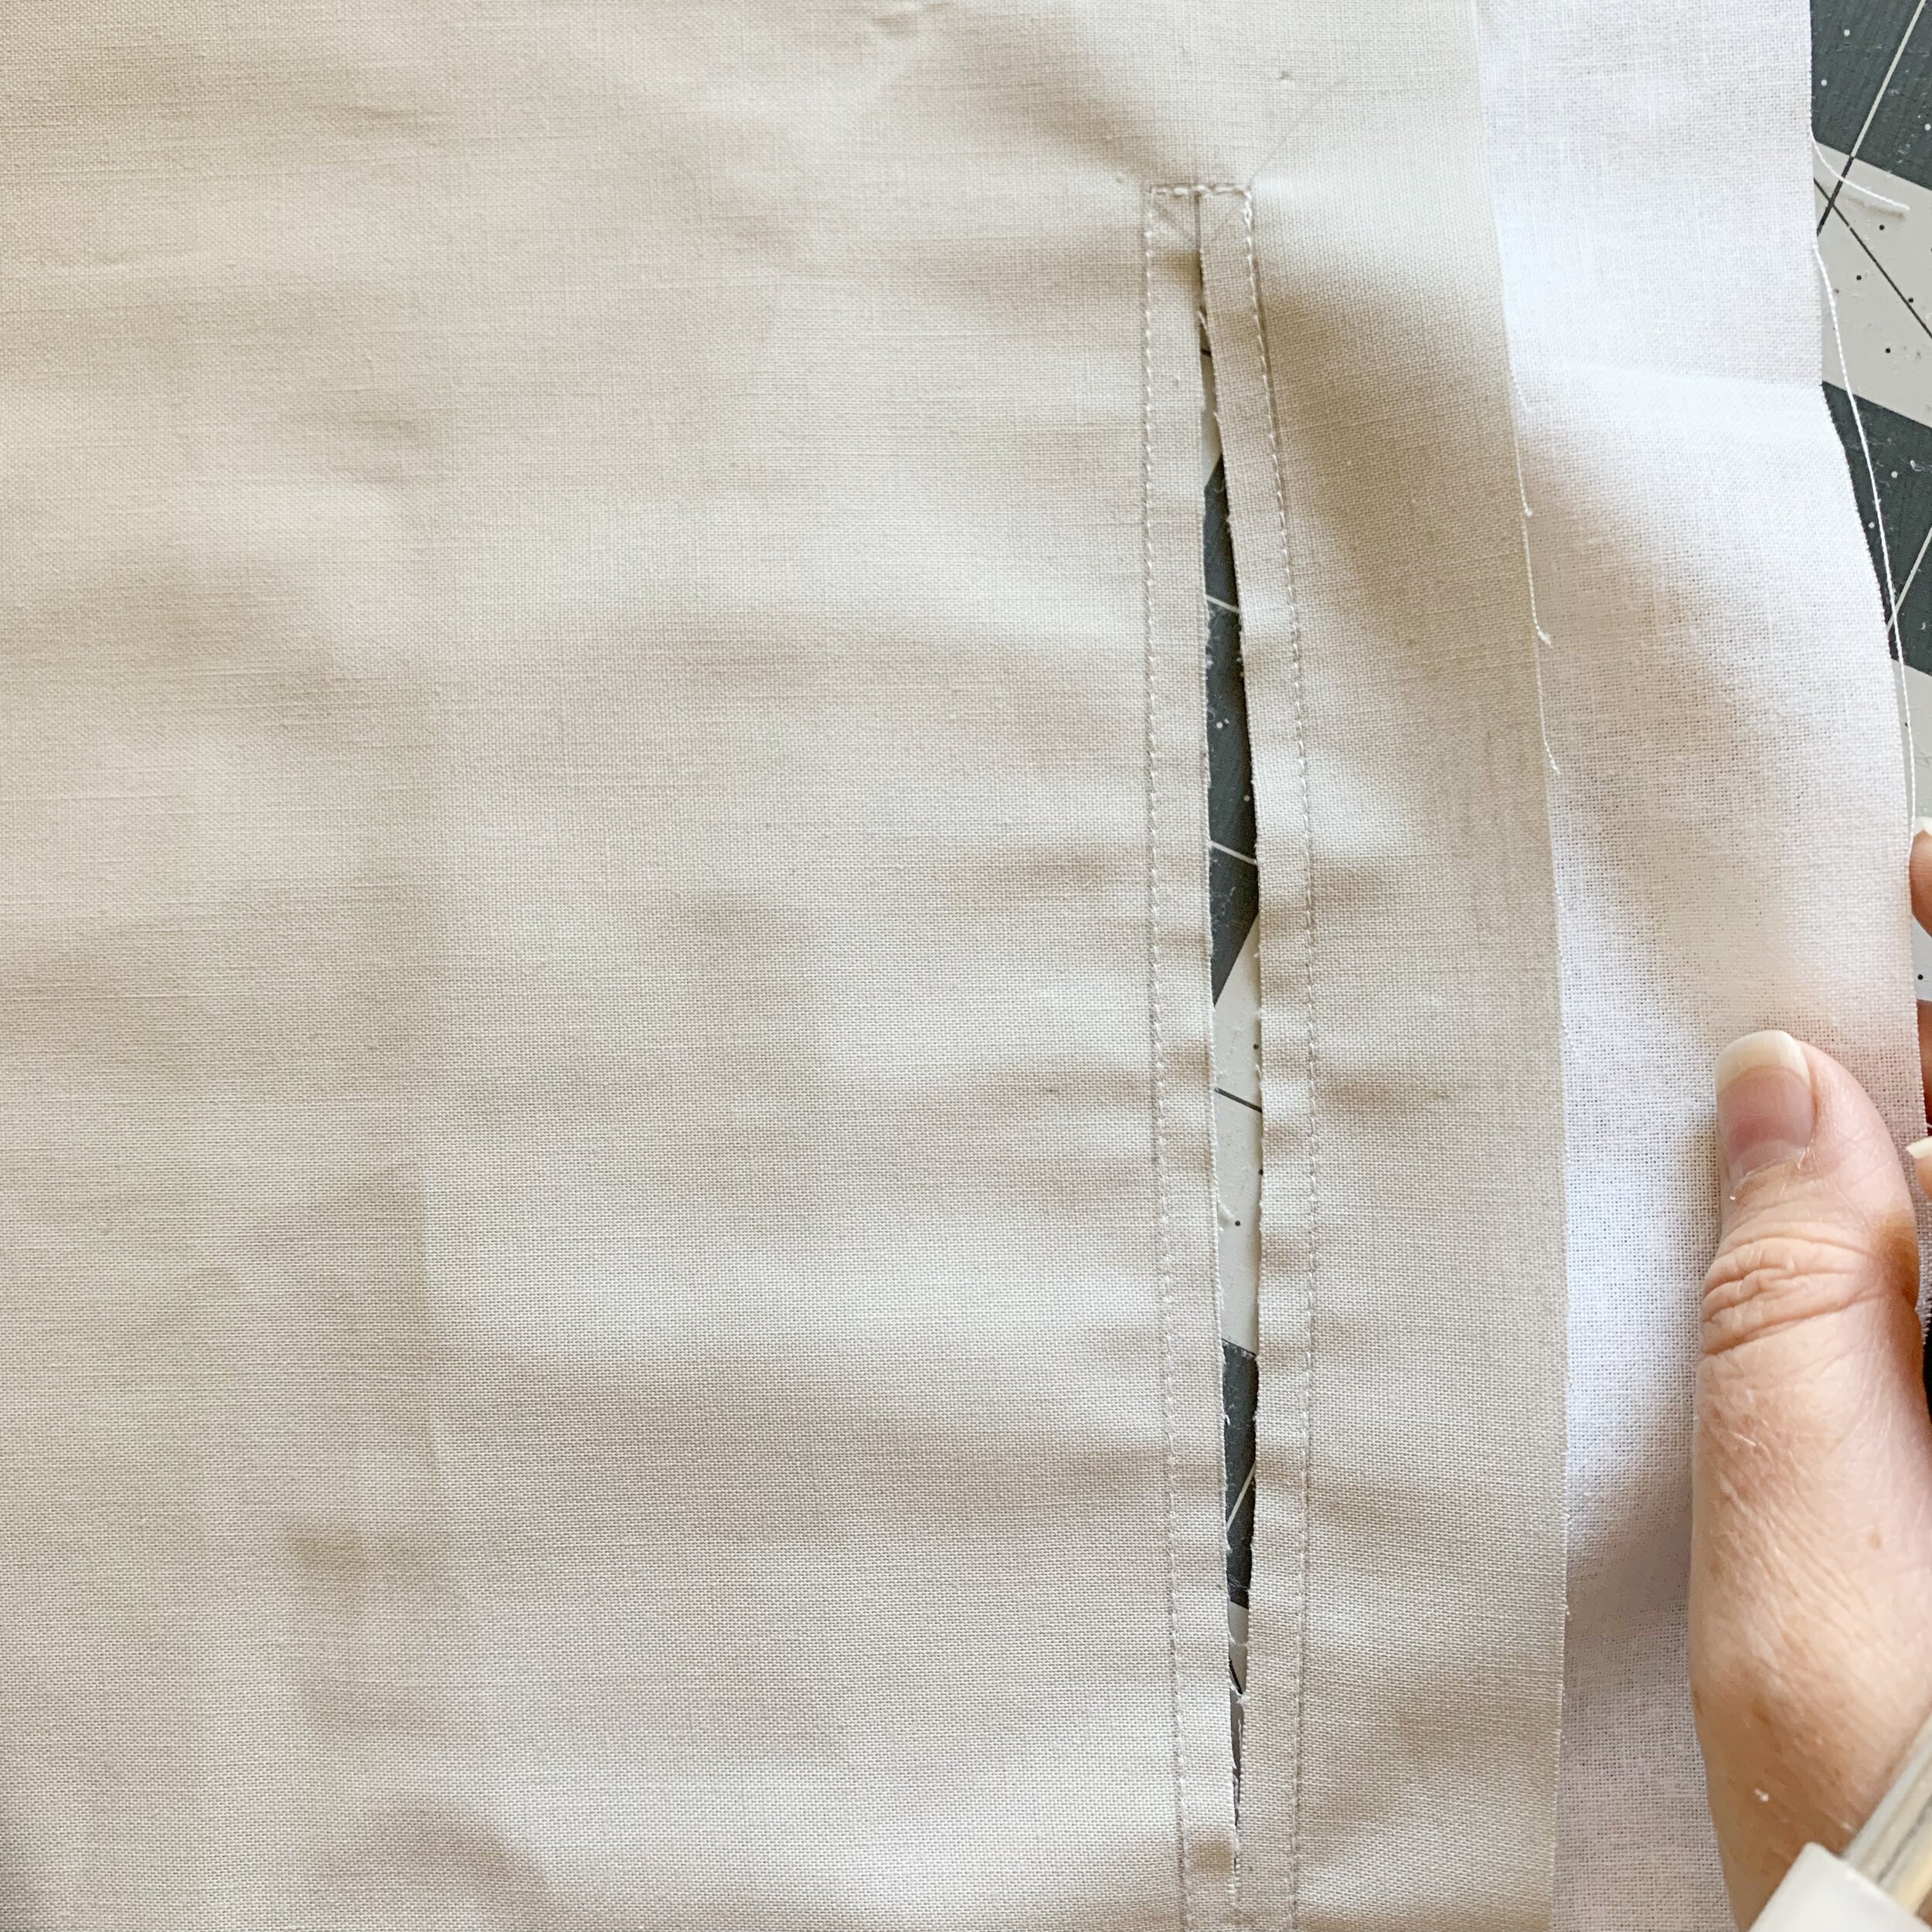
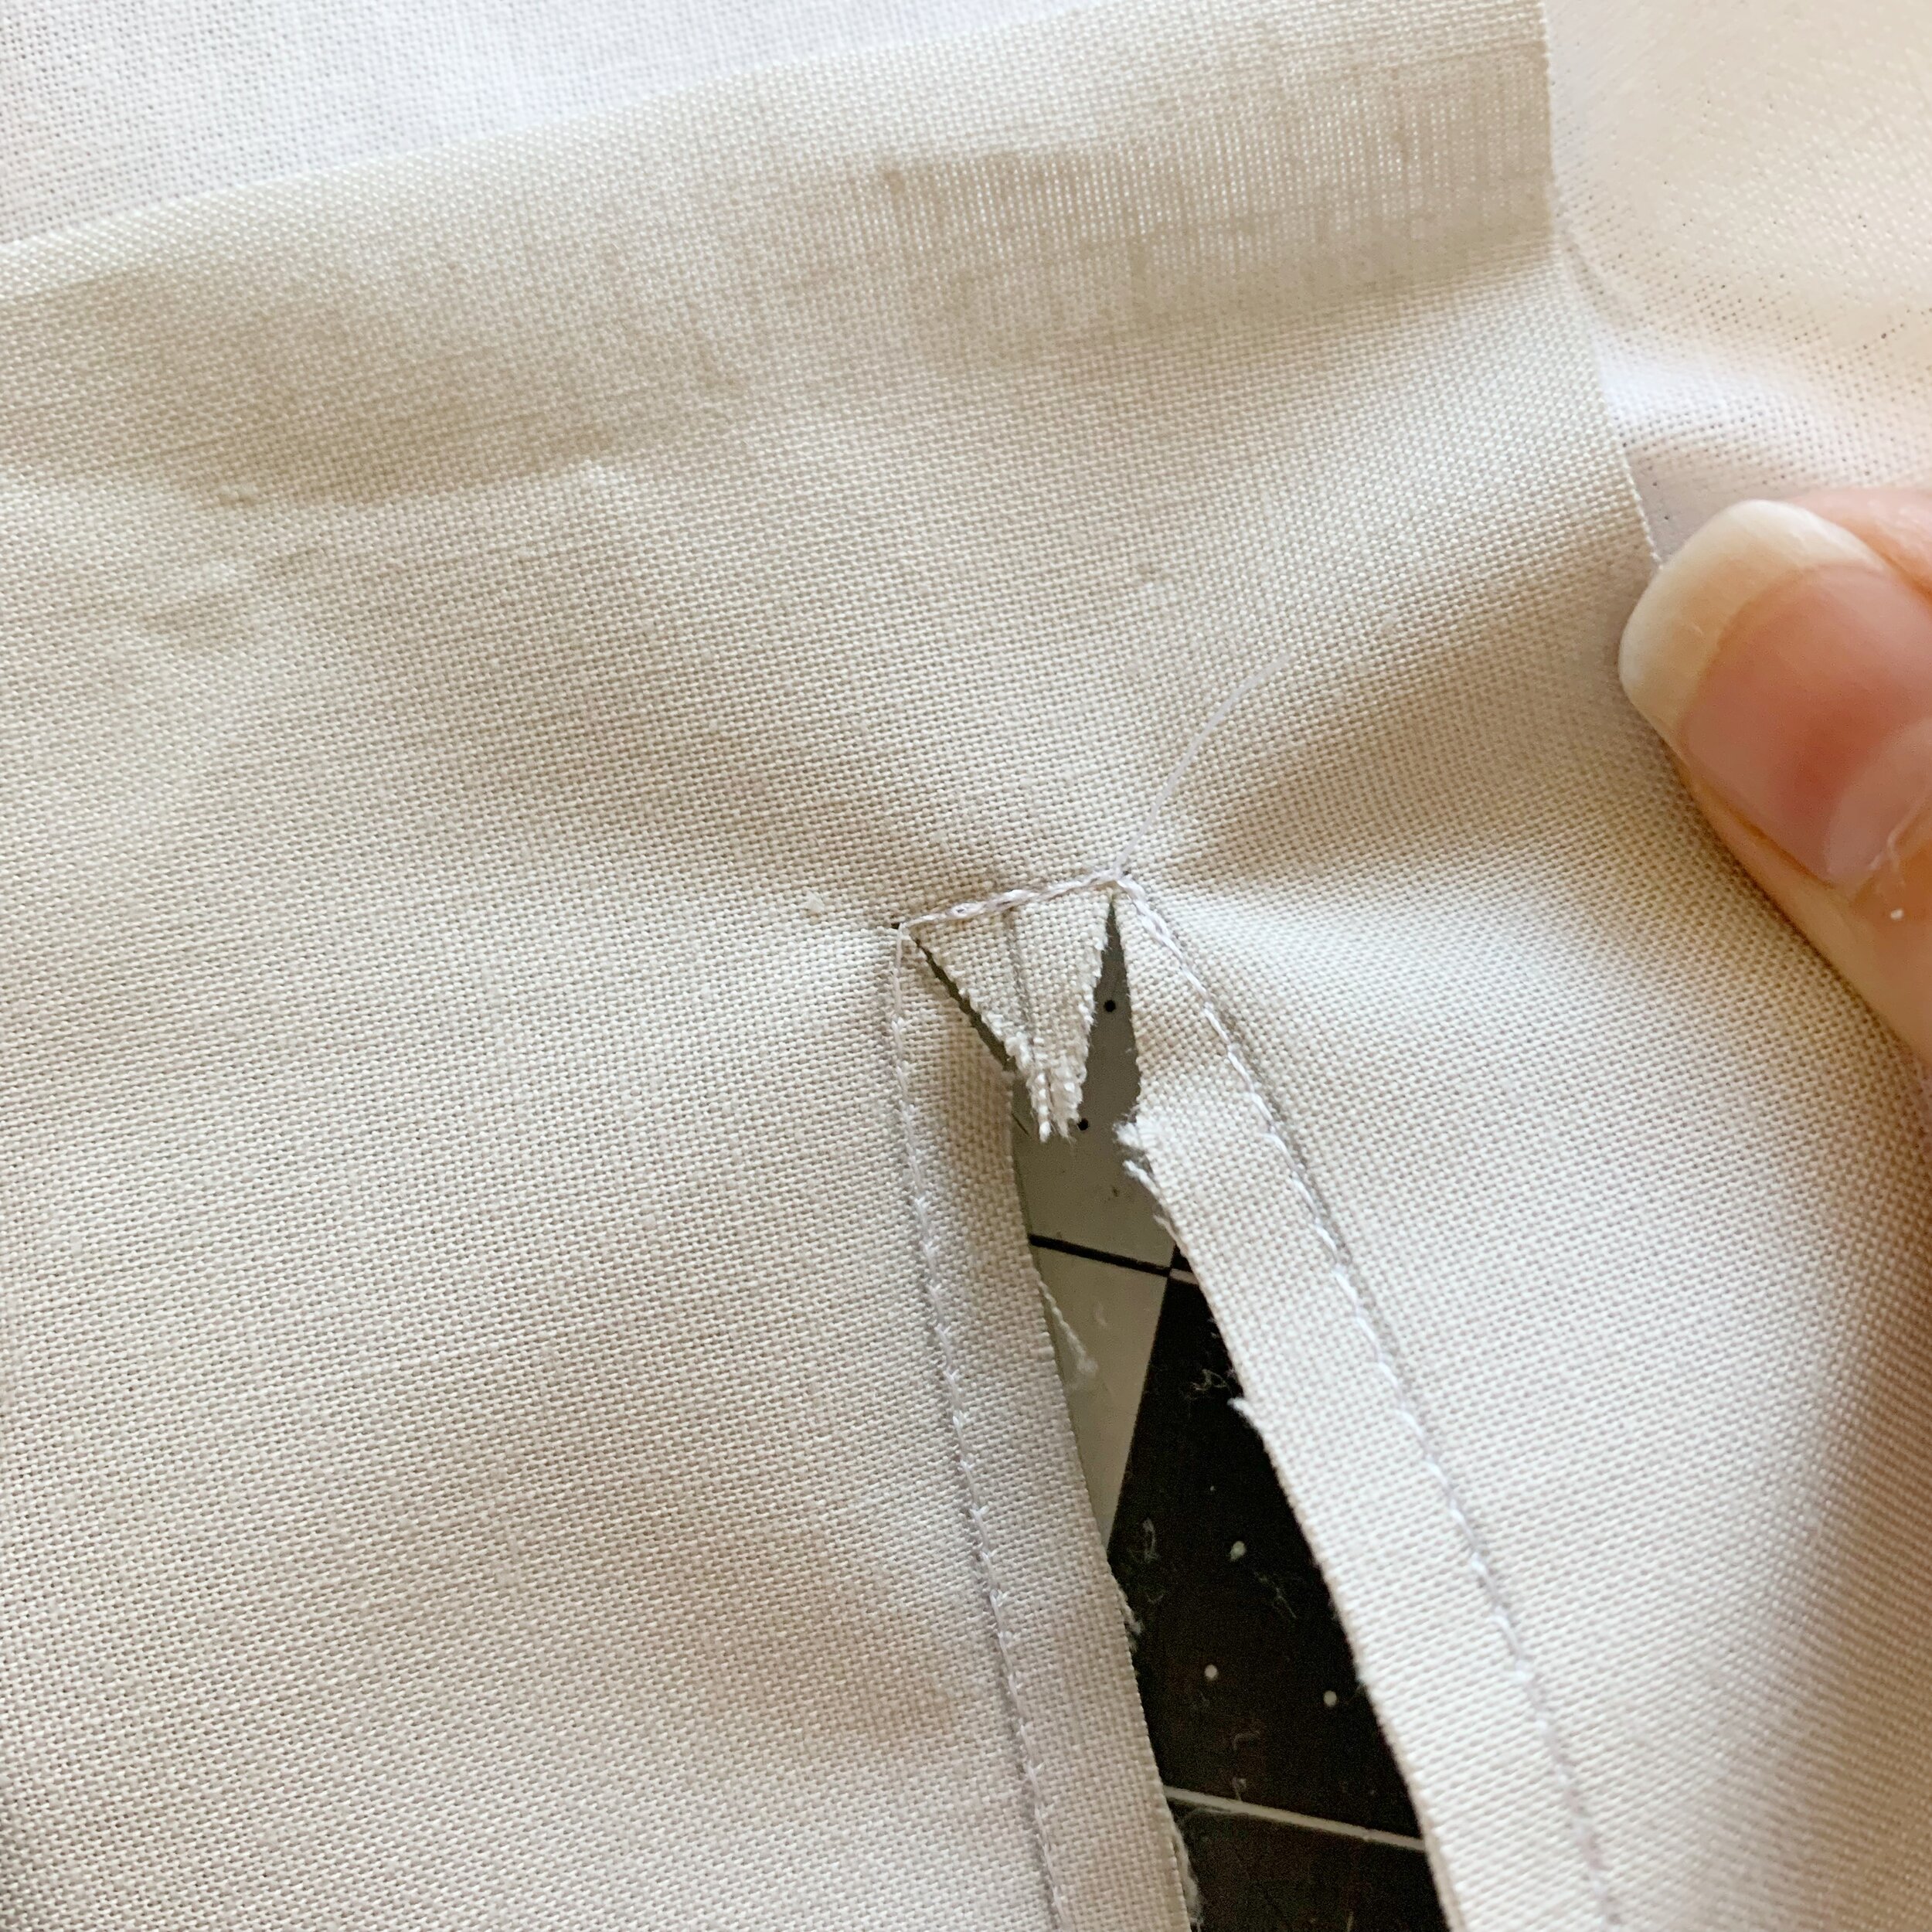
Using a ruler and Exacto knife, cut the center line (through both layers) from the point of each triangle. Then carefully cut along the diagonal lines to the center line you just cut.
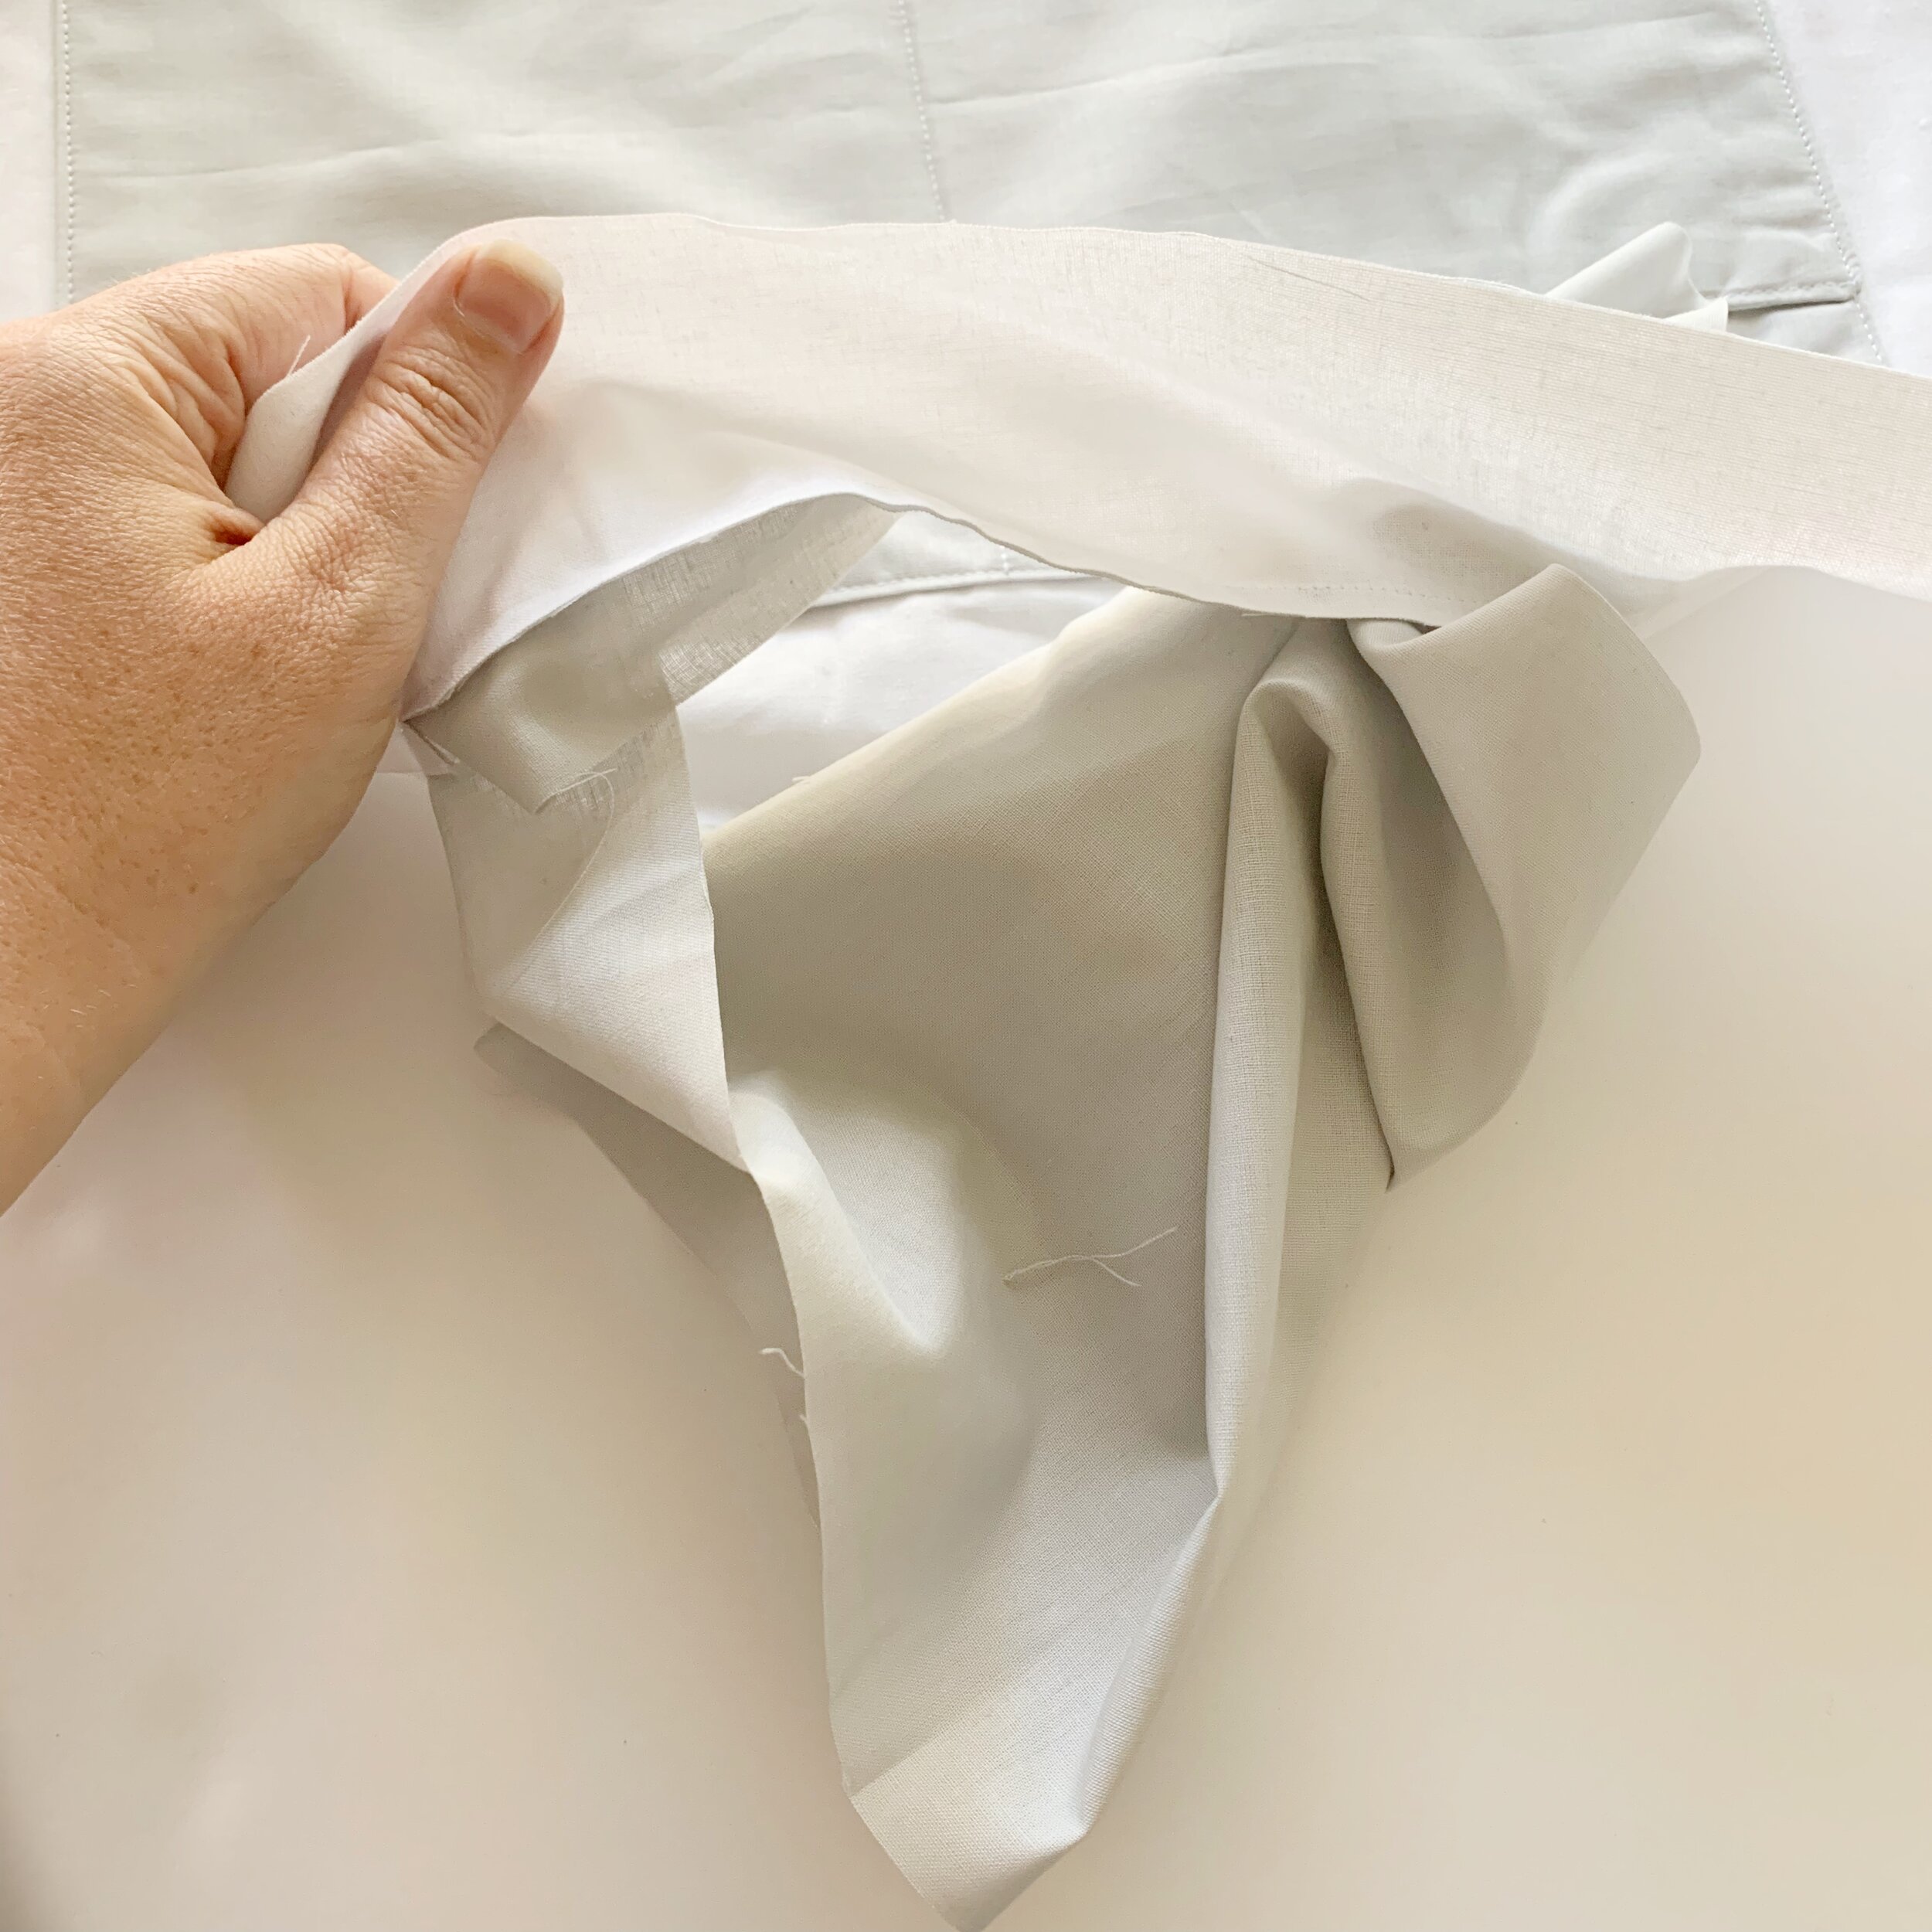
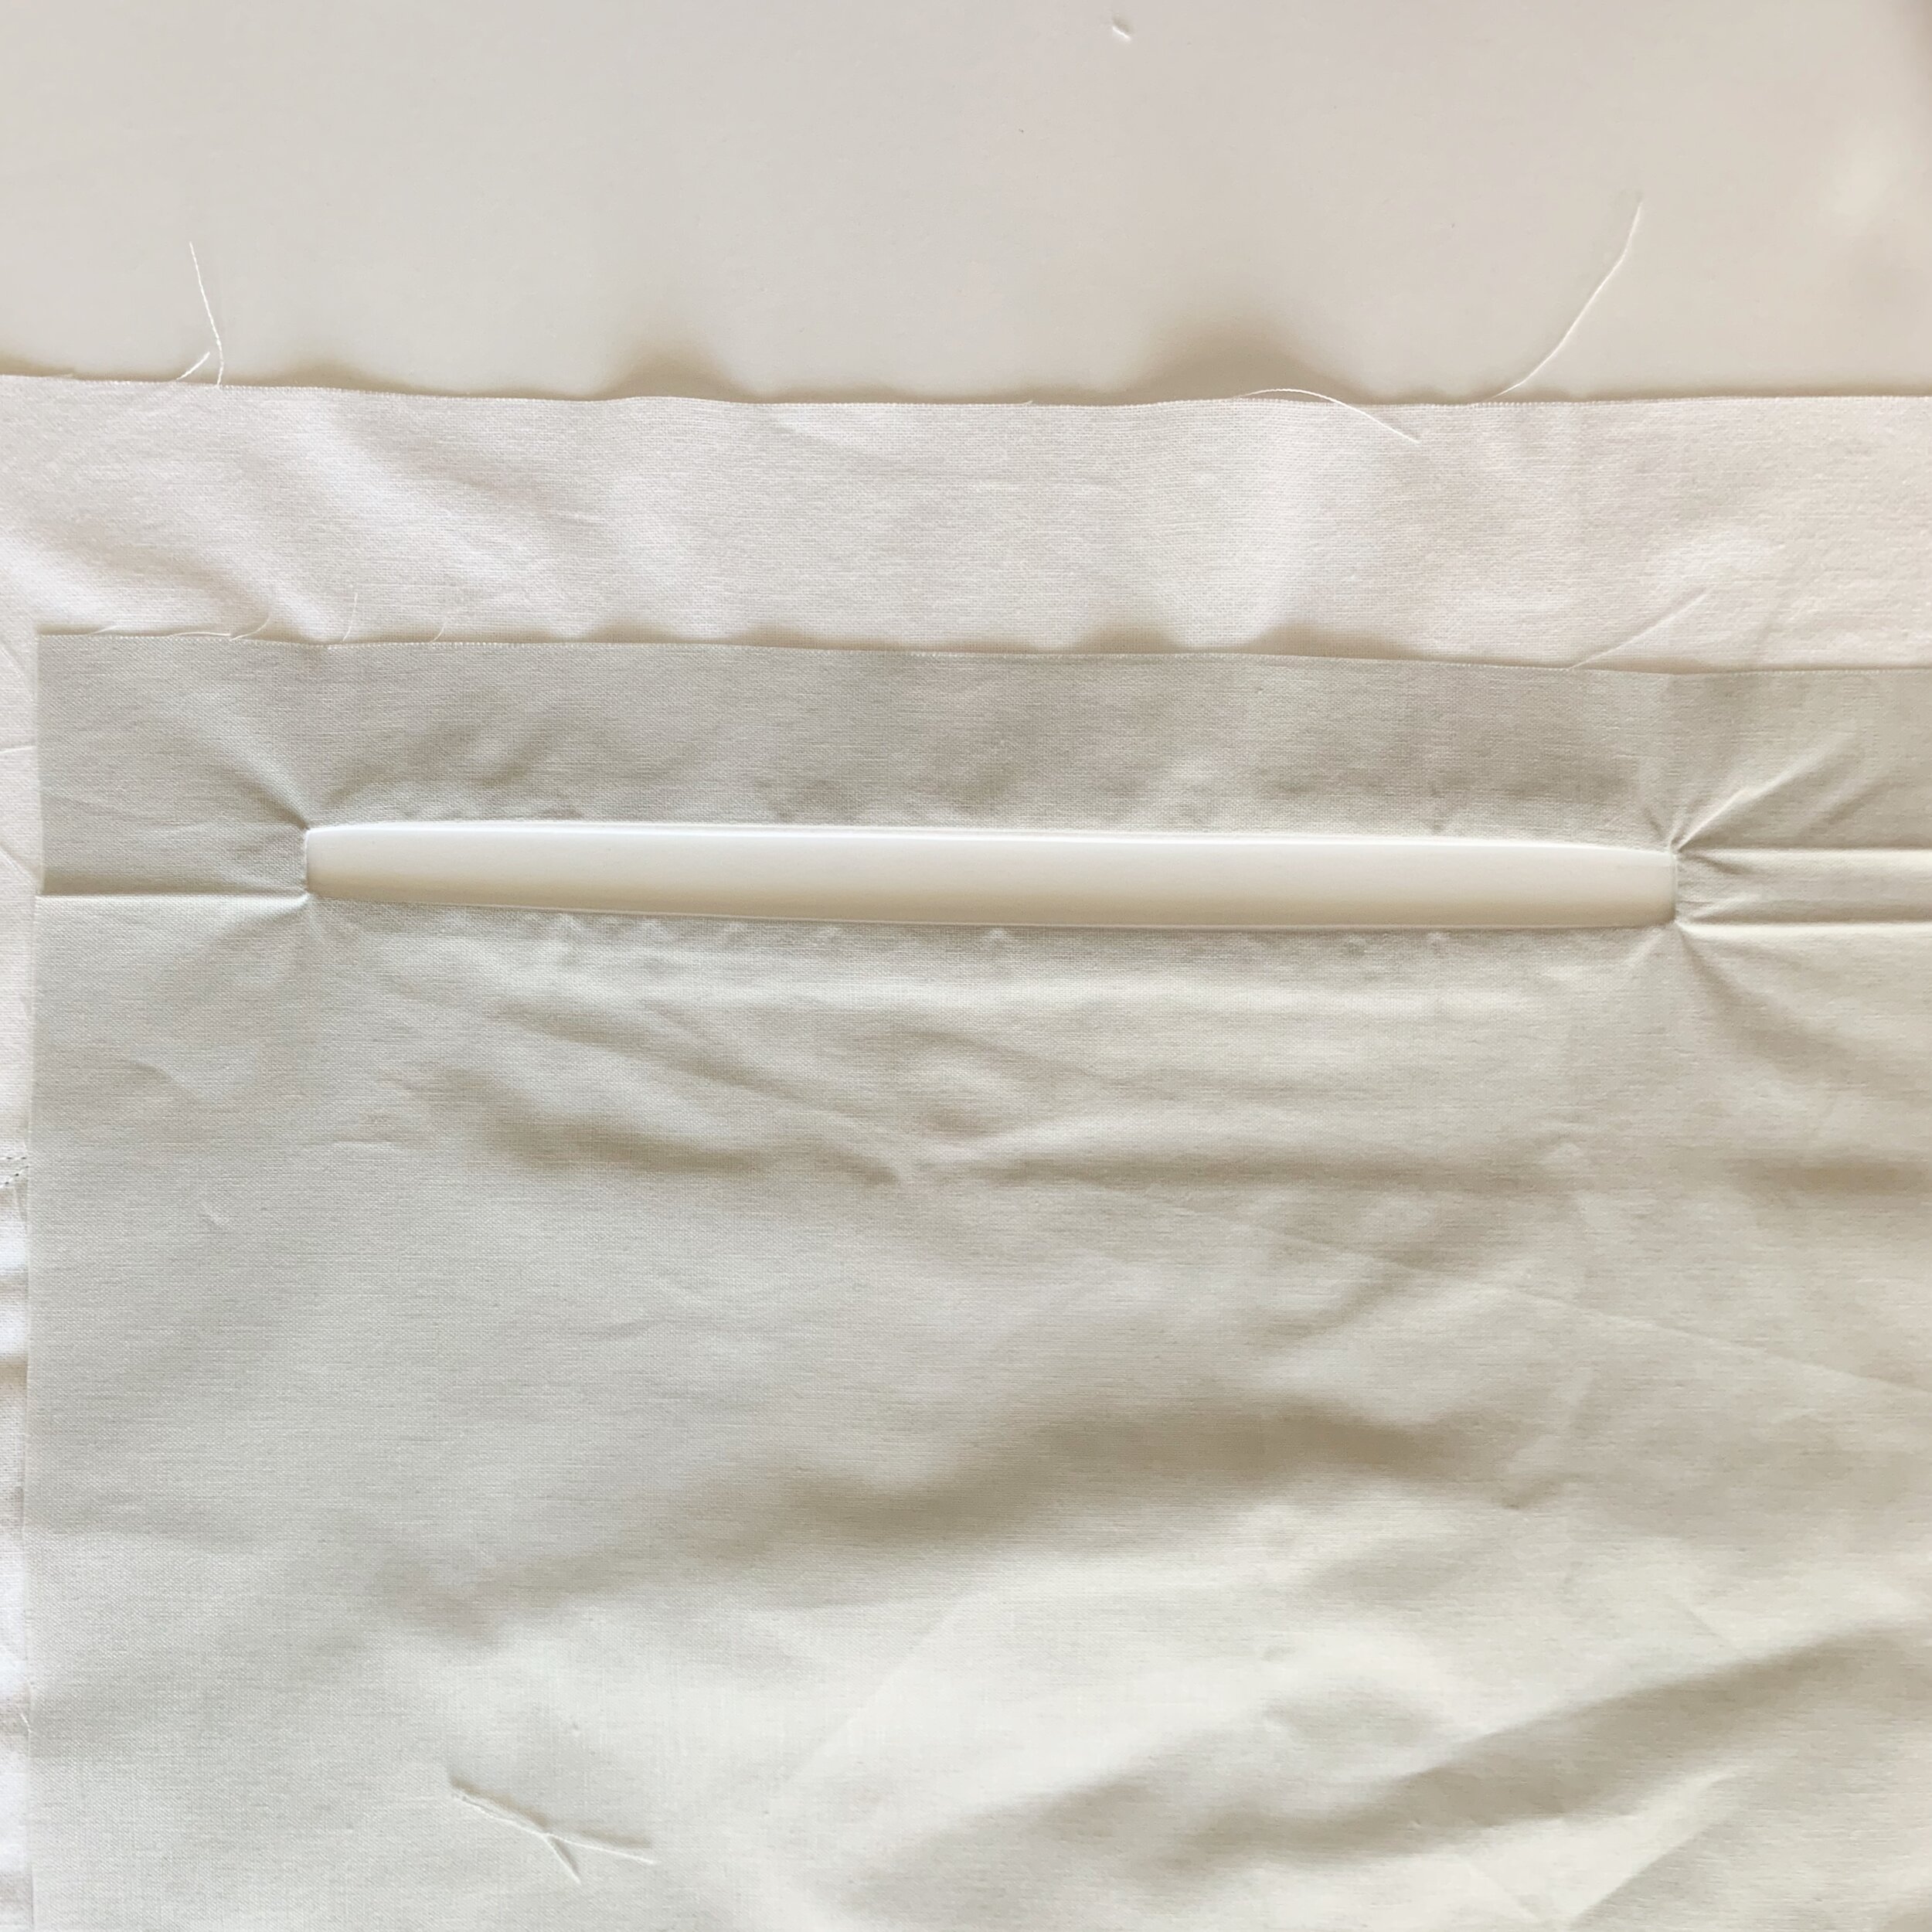
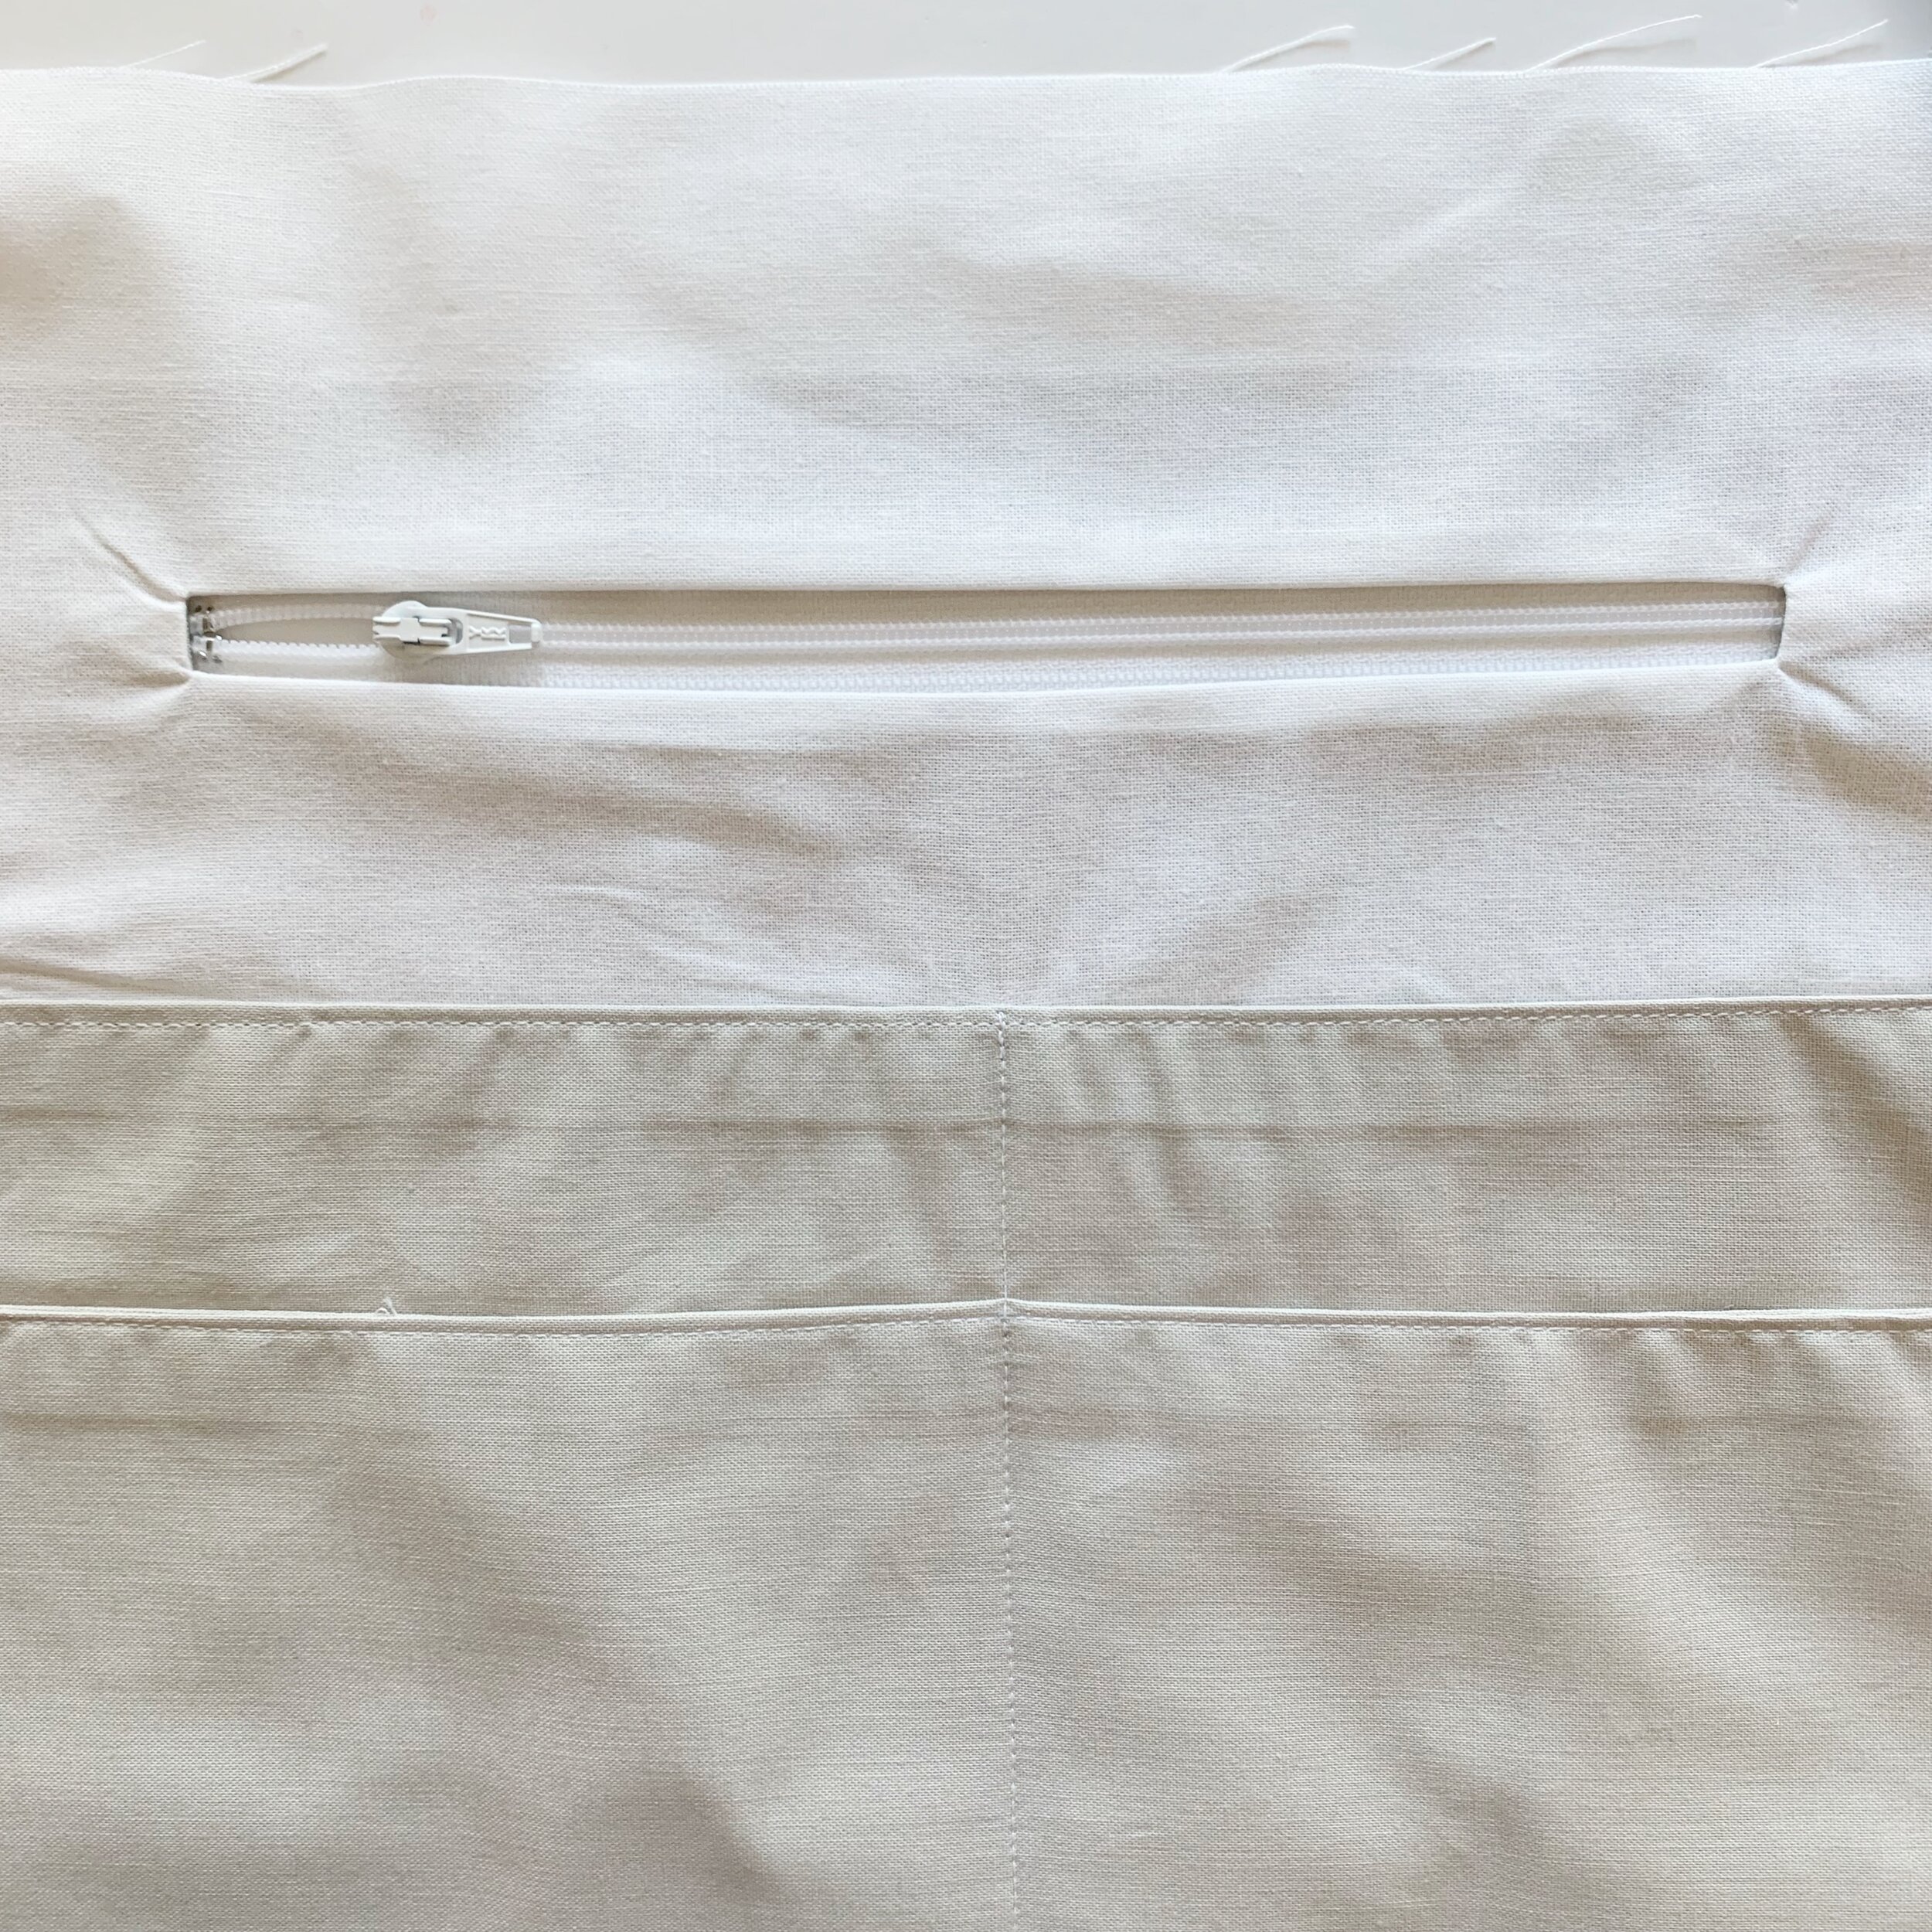
Push pocket piece through the cuts you just made so that the right side of the pocket is now showing on the wrong side of the interior lining piece. Iron edges of zipper opening so that it lays flat.
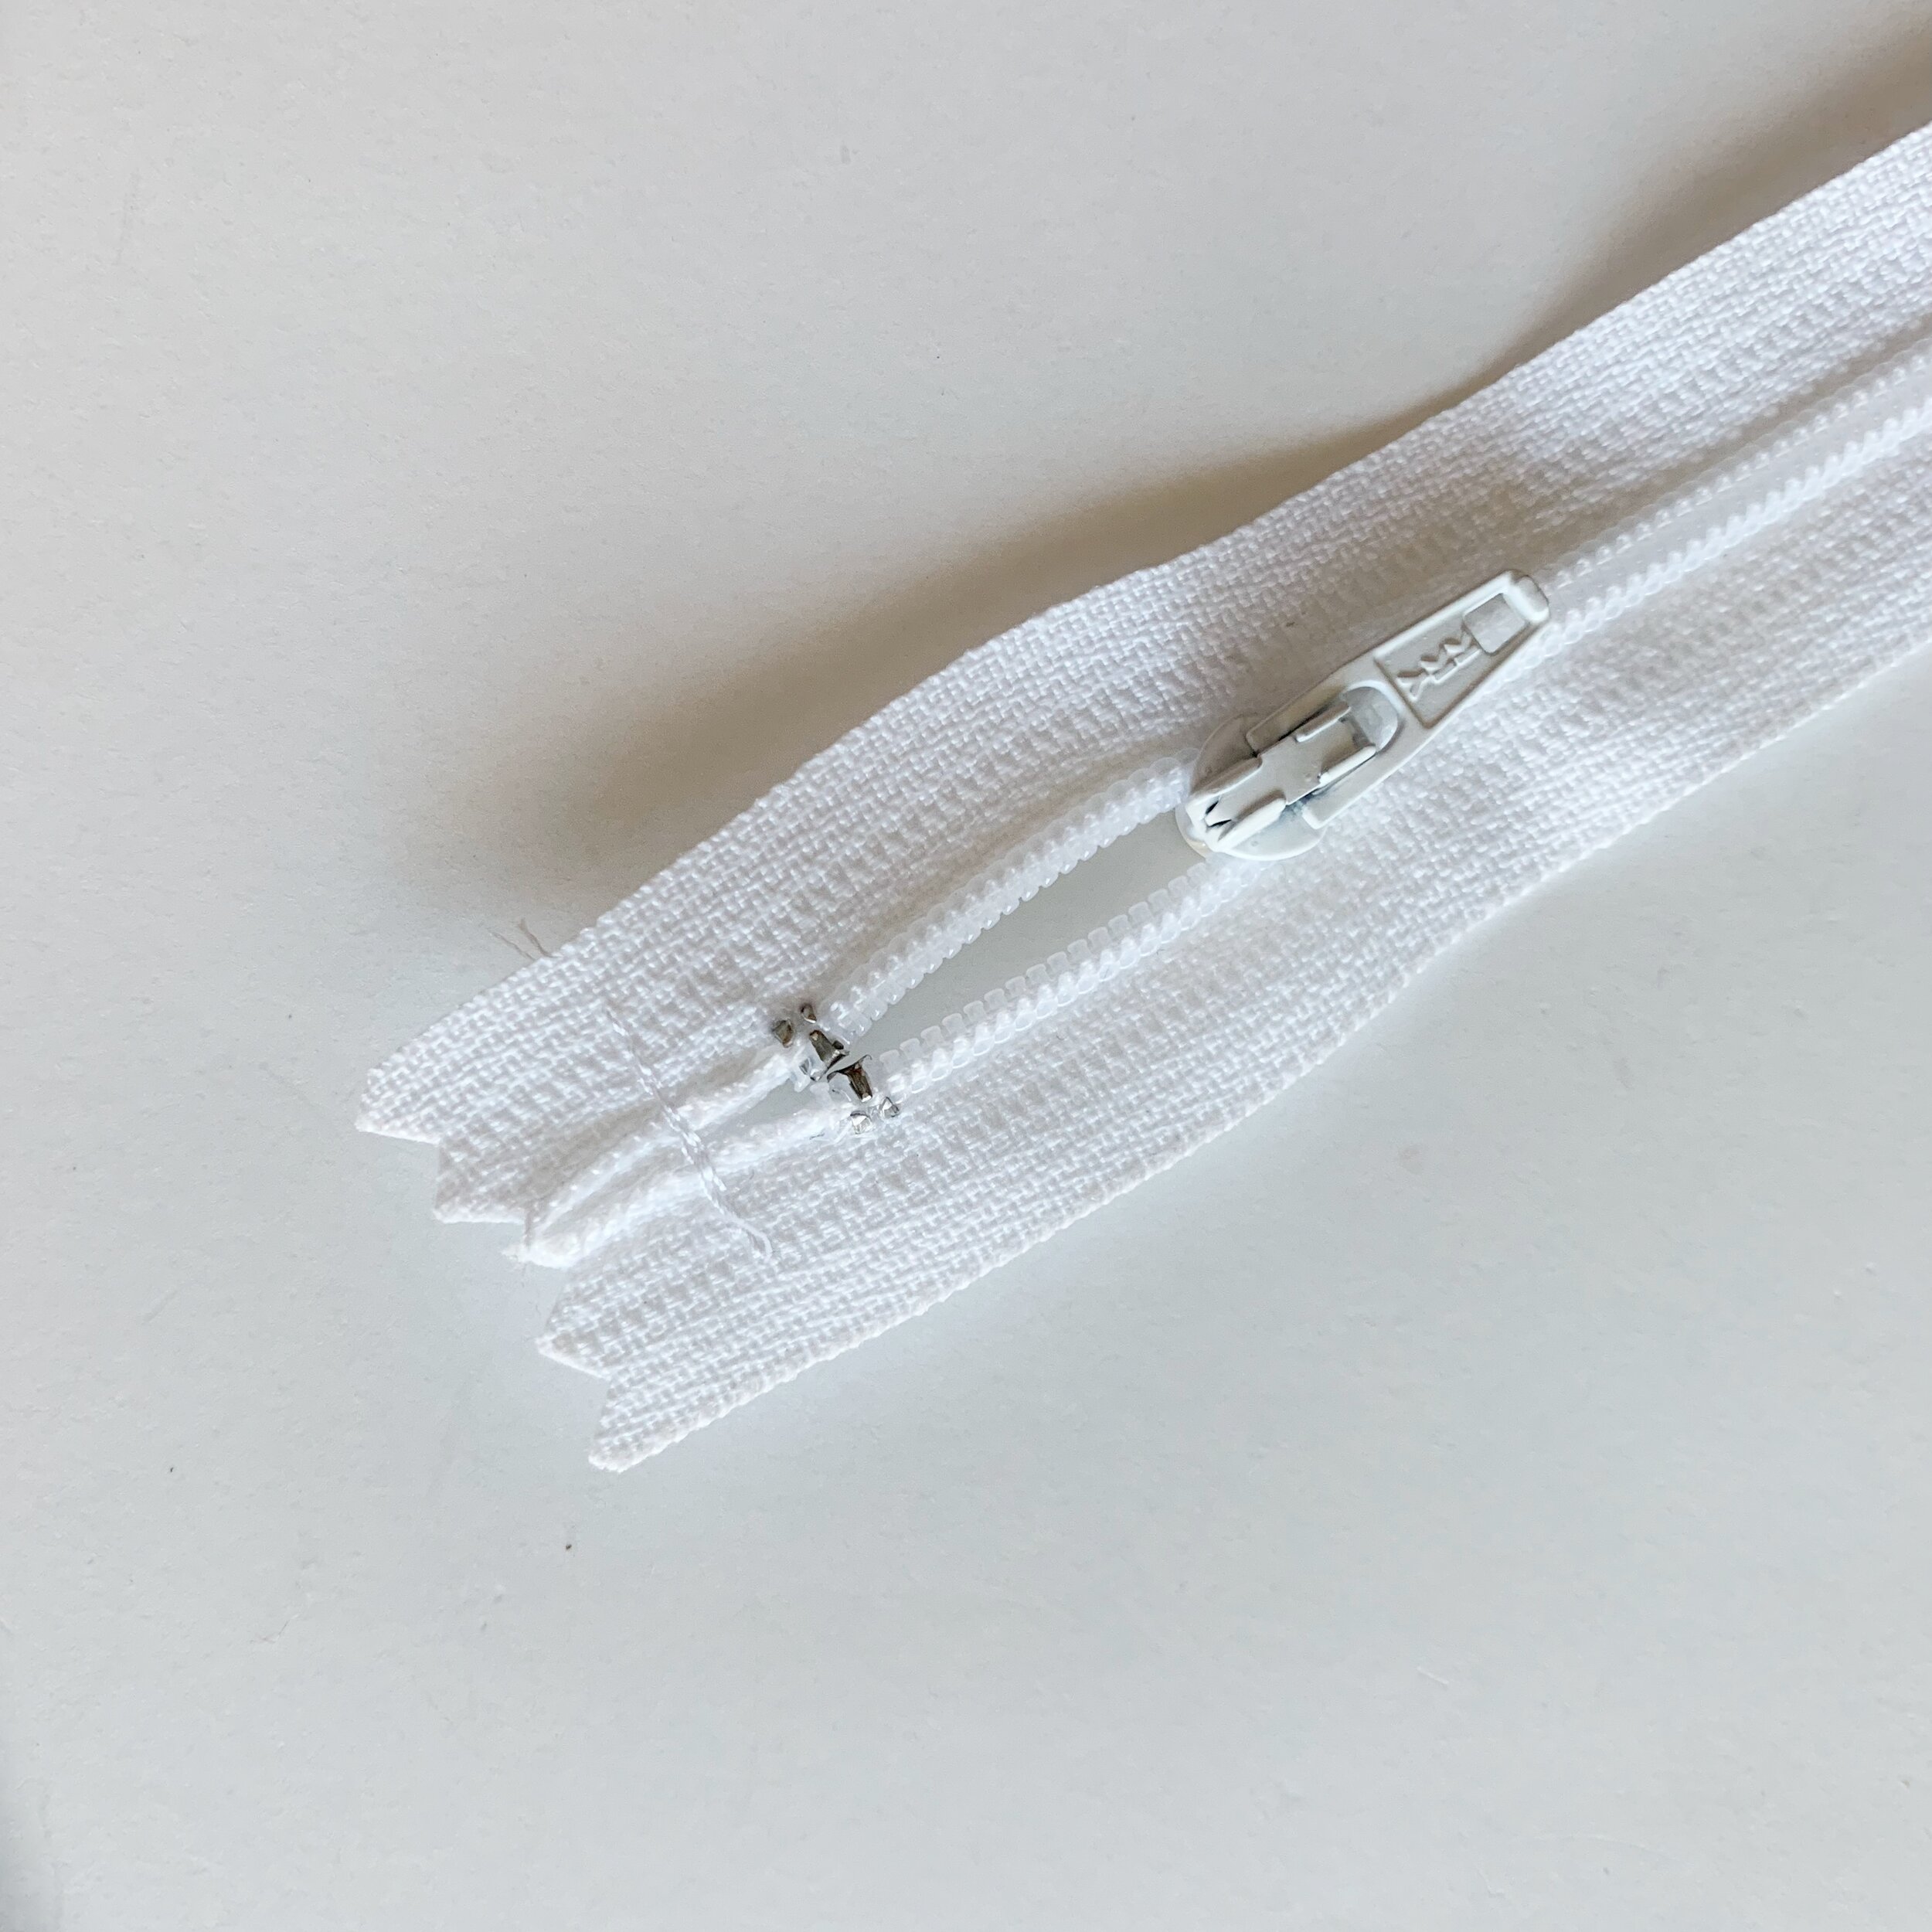
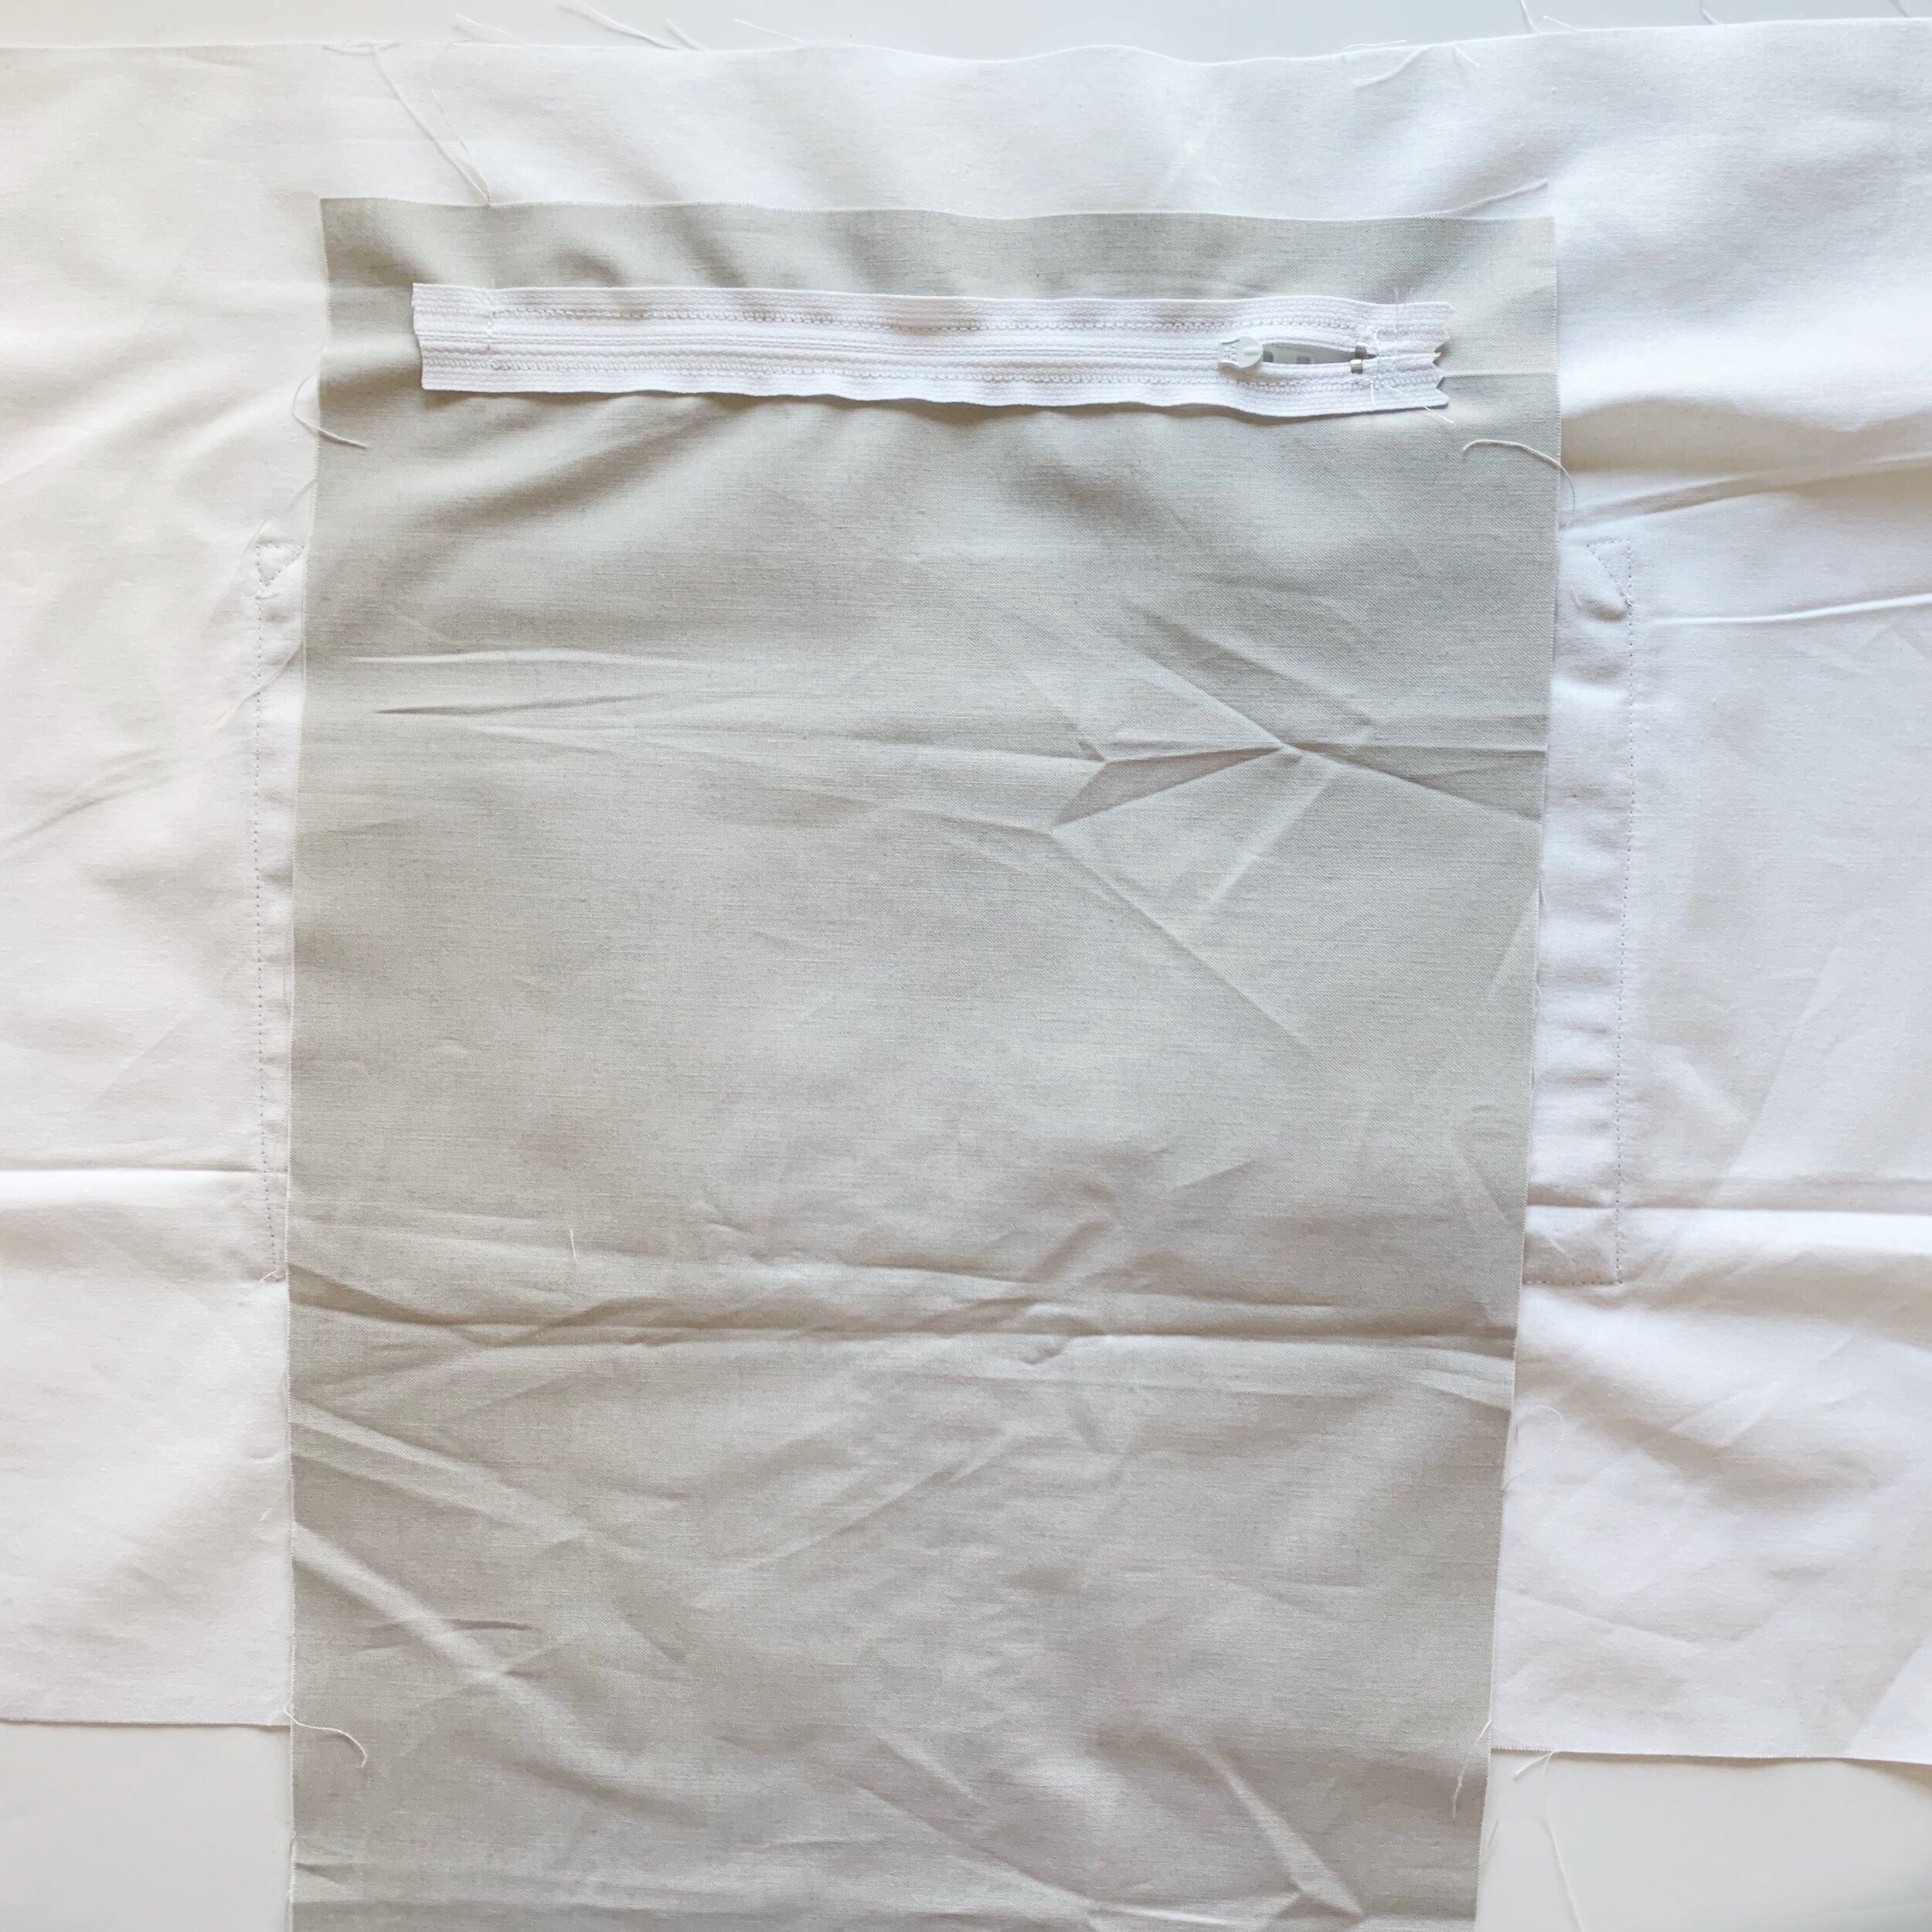
Sew open end of 10” zipper closed. Lay interior lining/pocket piece down so that the lining side is up. Place closed zipper underneath in line with the zipper opening you just created. Pin zipper in place making sure to go through both the lining piece and the pocket piece.
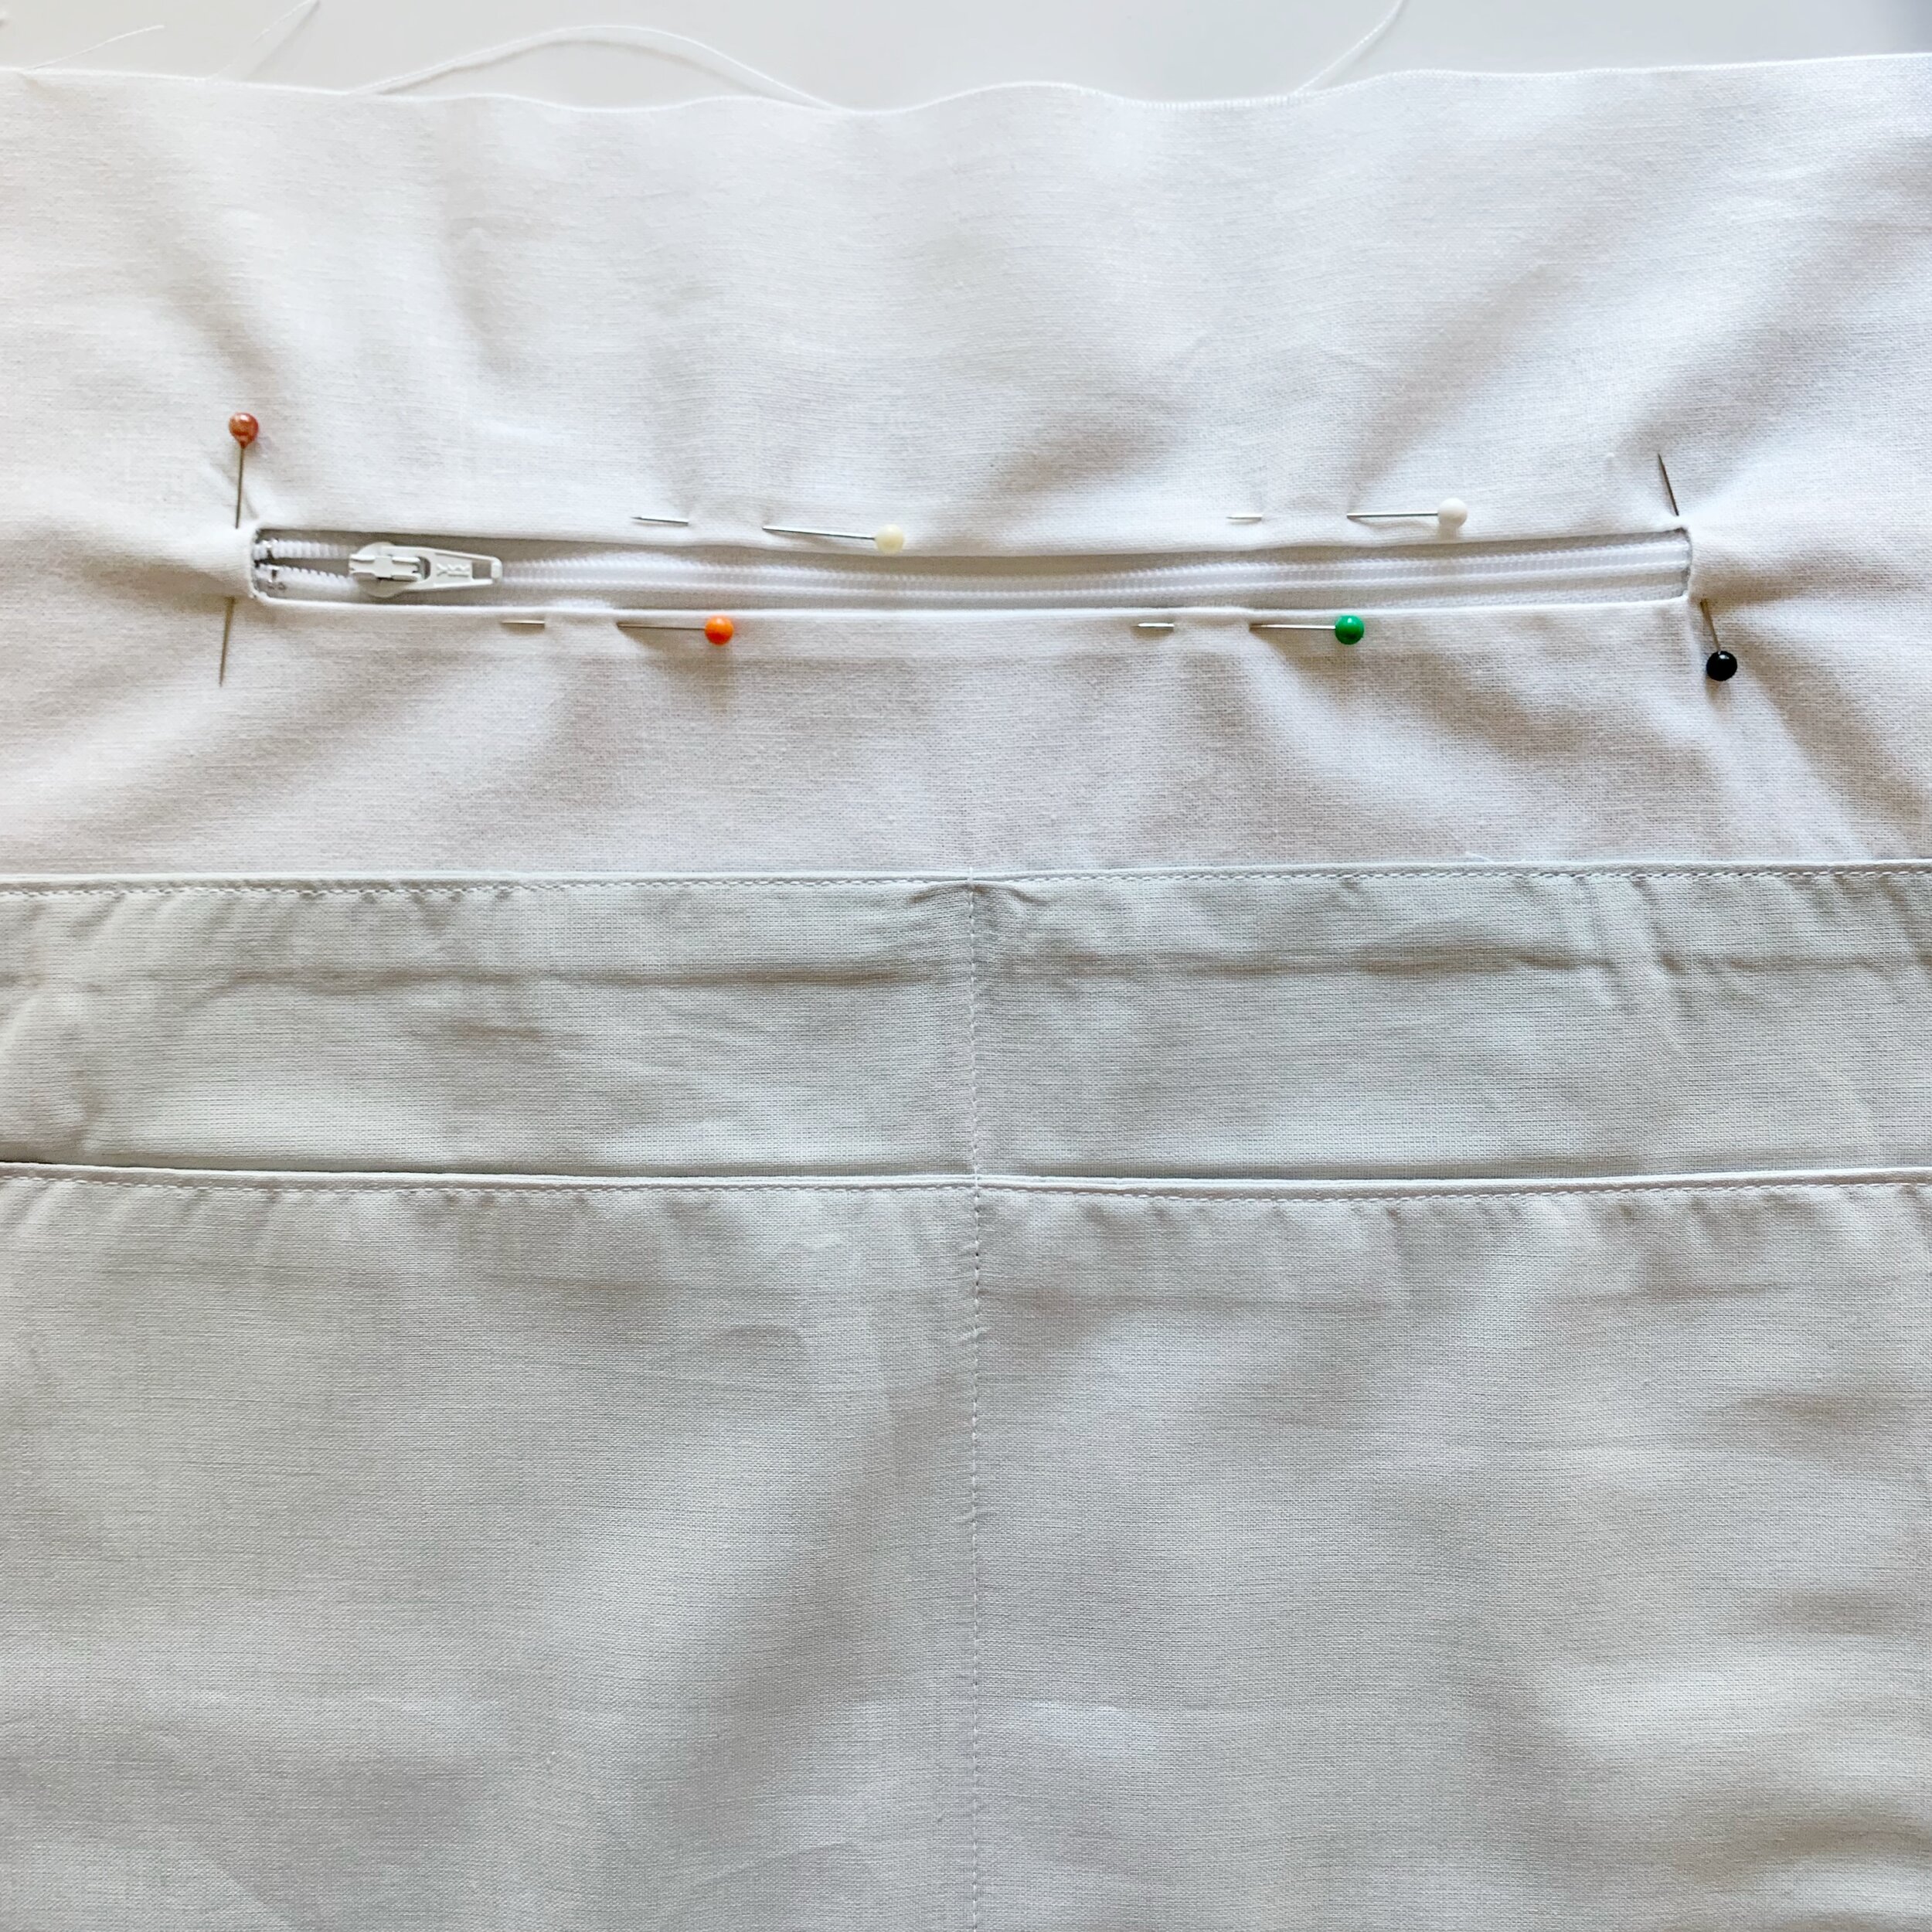

Using a zipper foot, carefully sew along the edge of the zipper opening, securing the zipper in place. It may help to first sew one short side and long side and then move your zipper foot over and sew the second long side and short side. This will prevent your zipper opening from puckering.
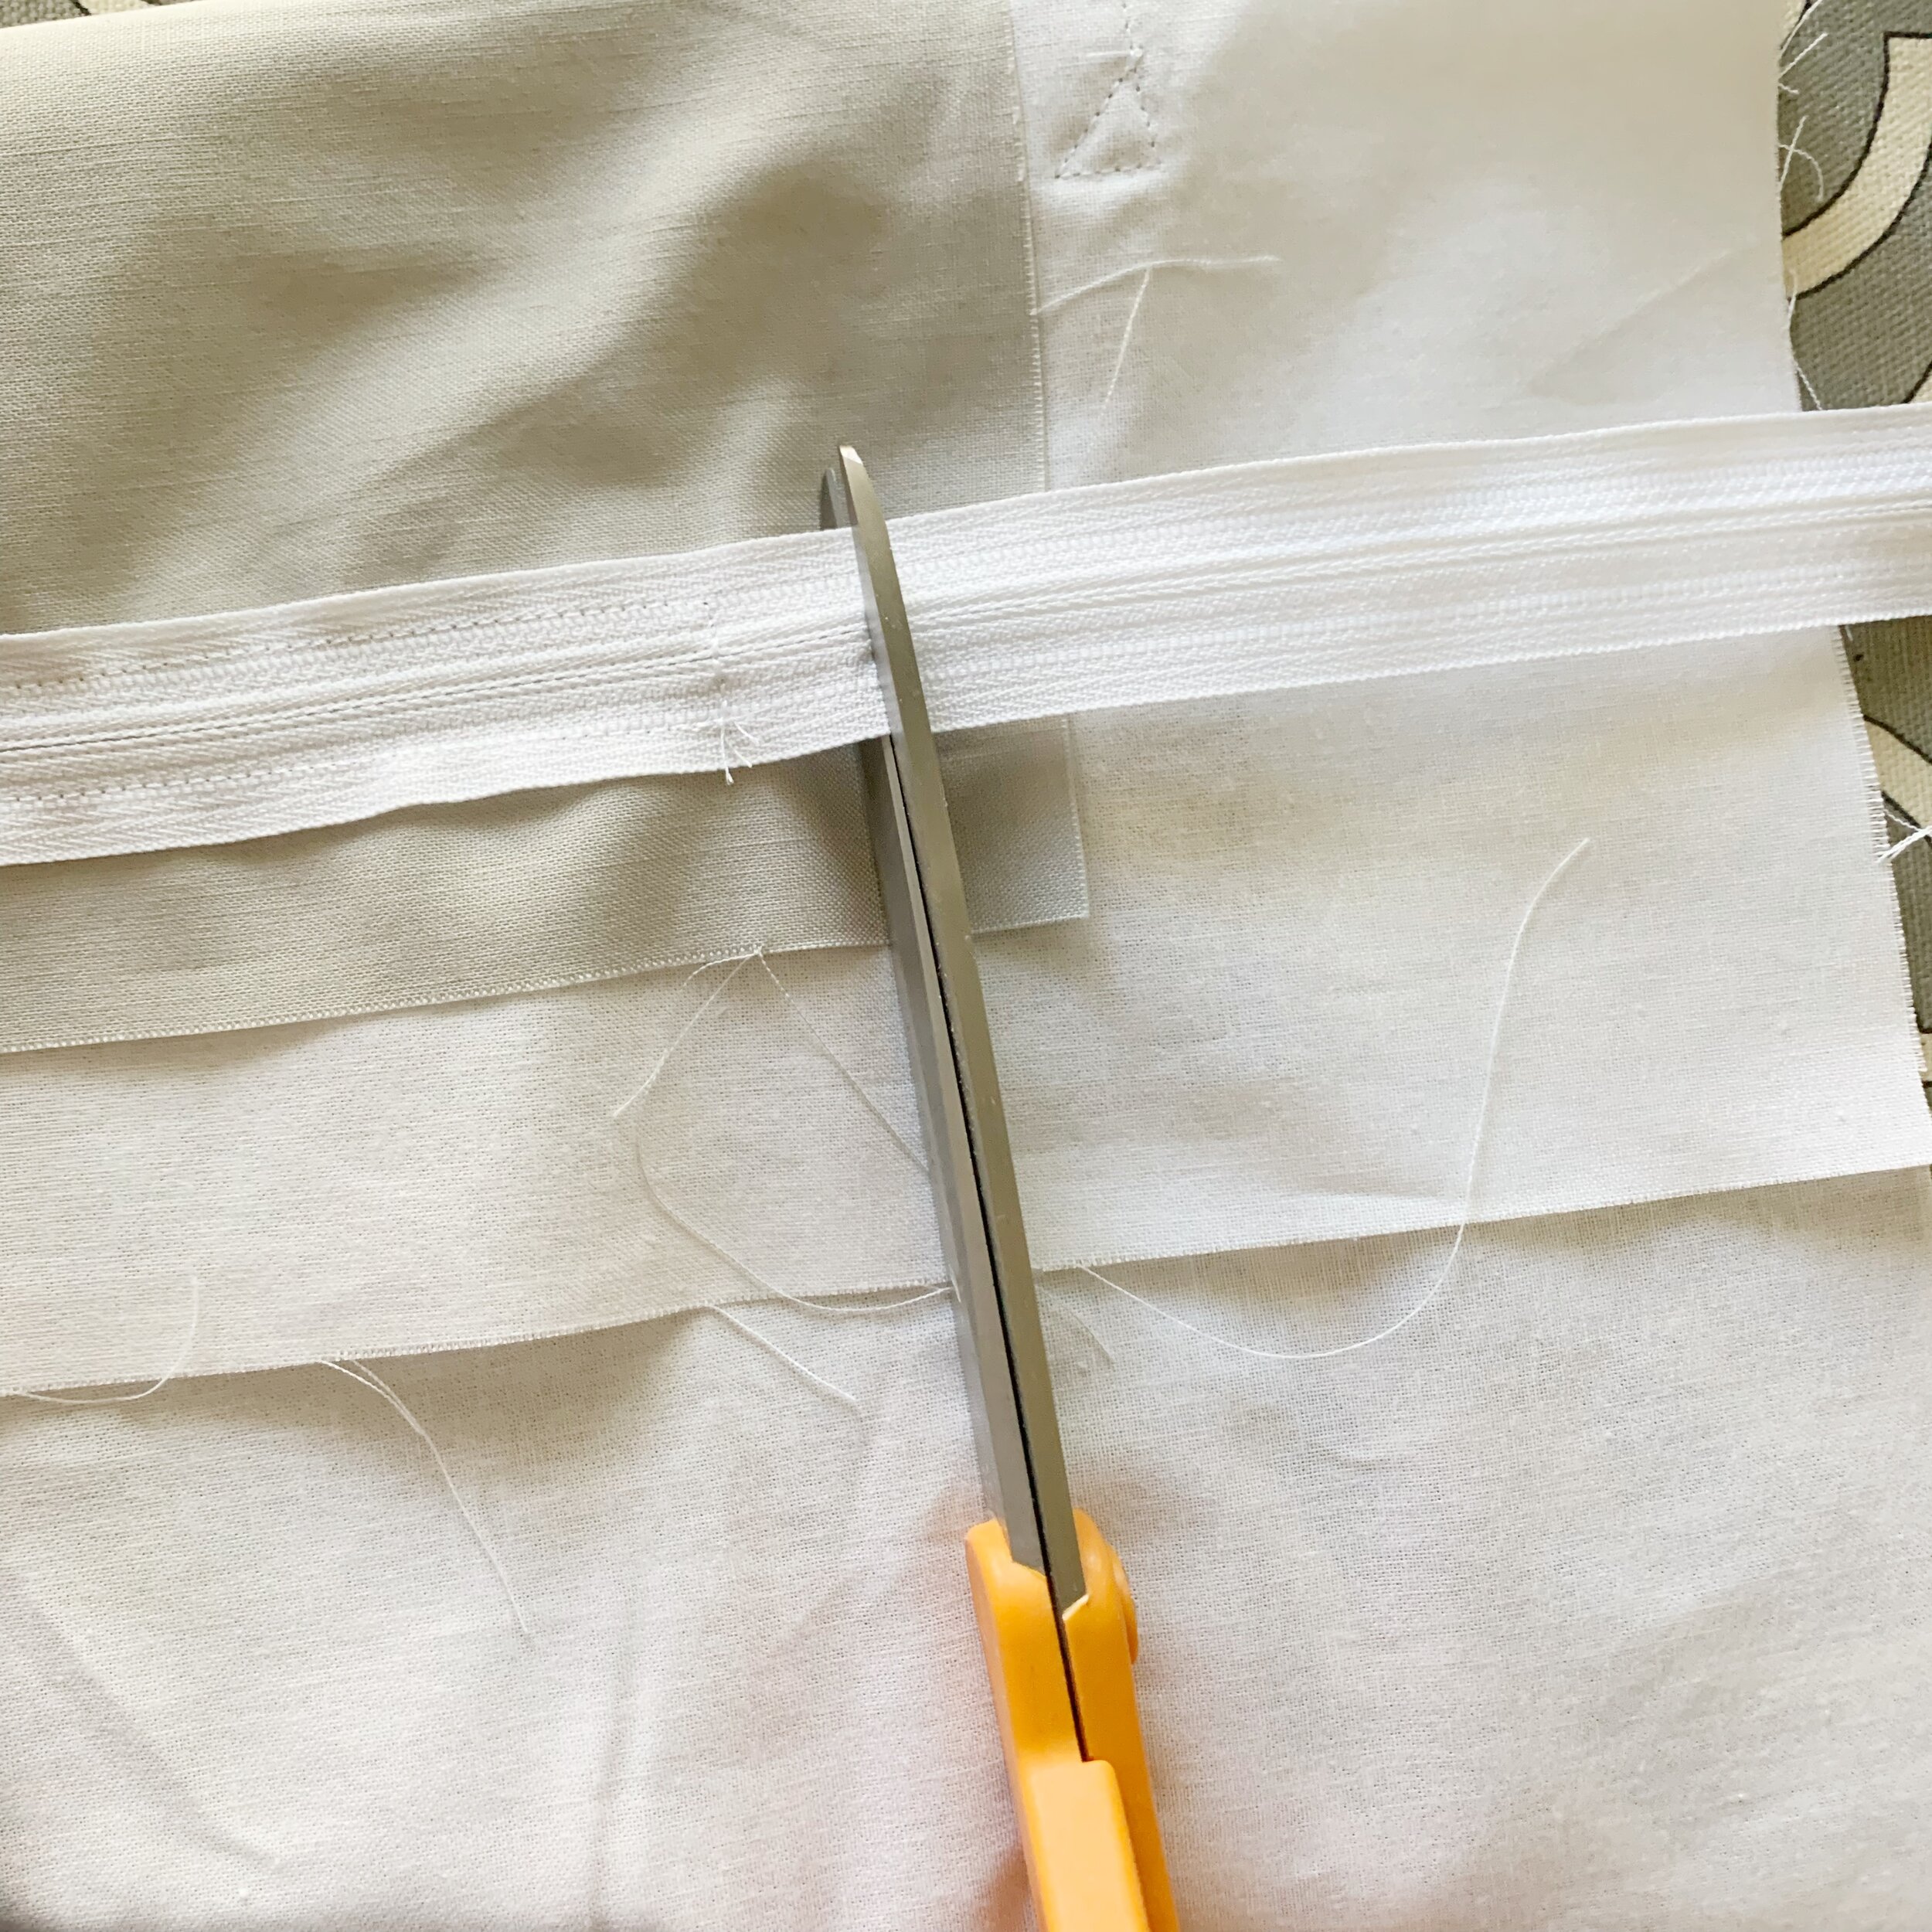
Trim excess zipper with scissors.
Your zipper will now be secure in the zipper opening. Flip your interior lining piece over. Bring the bottom of the pocket up to the top, covering the zipper. Then sew the three pocket sides together making not to catch the lining piece while sewing.
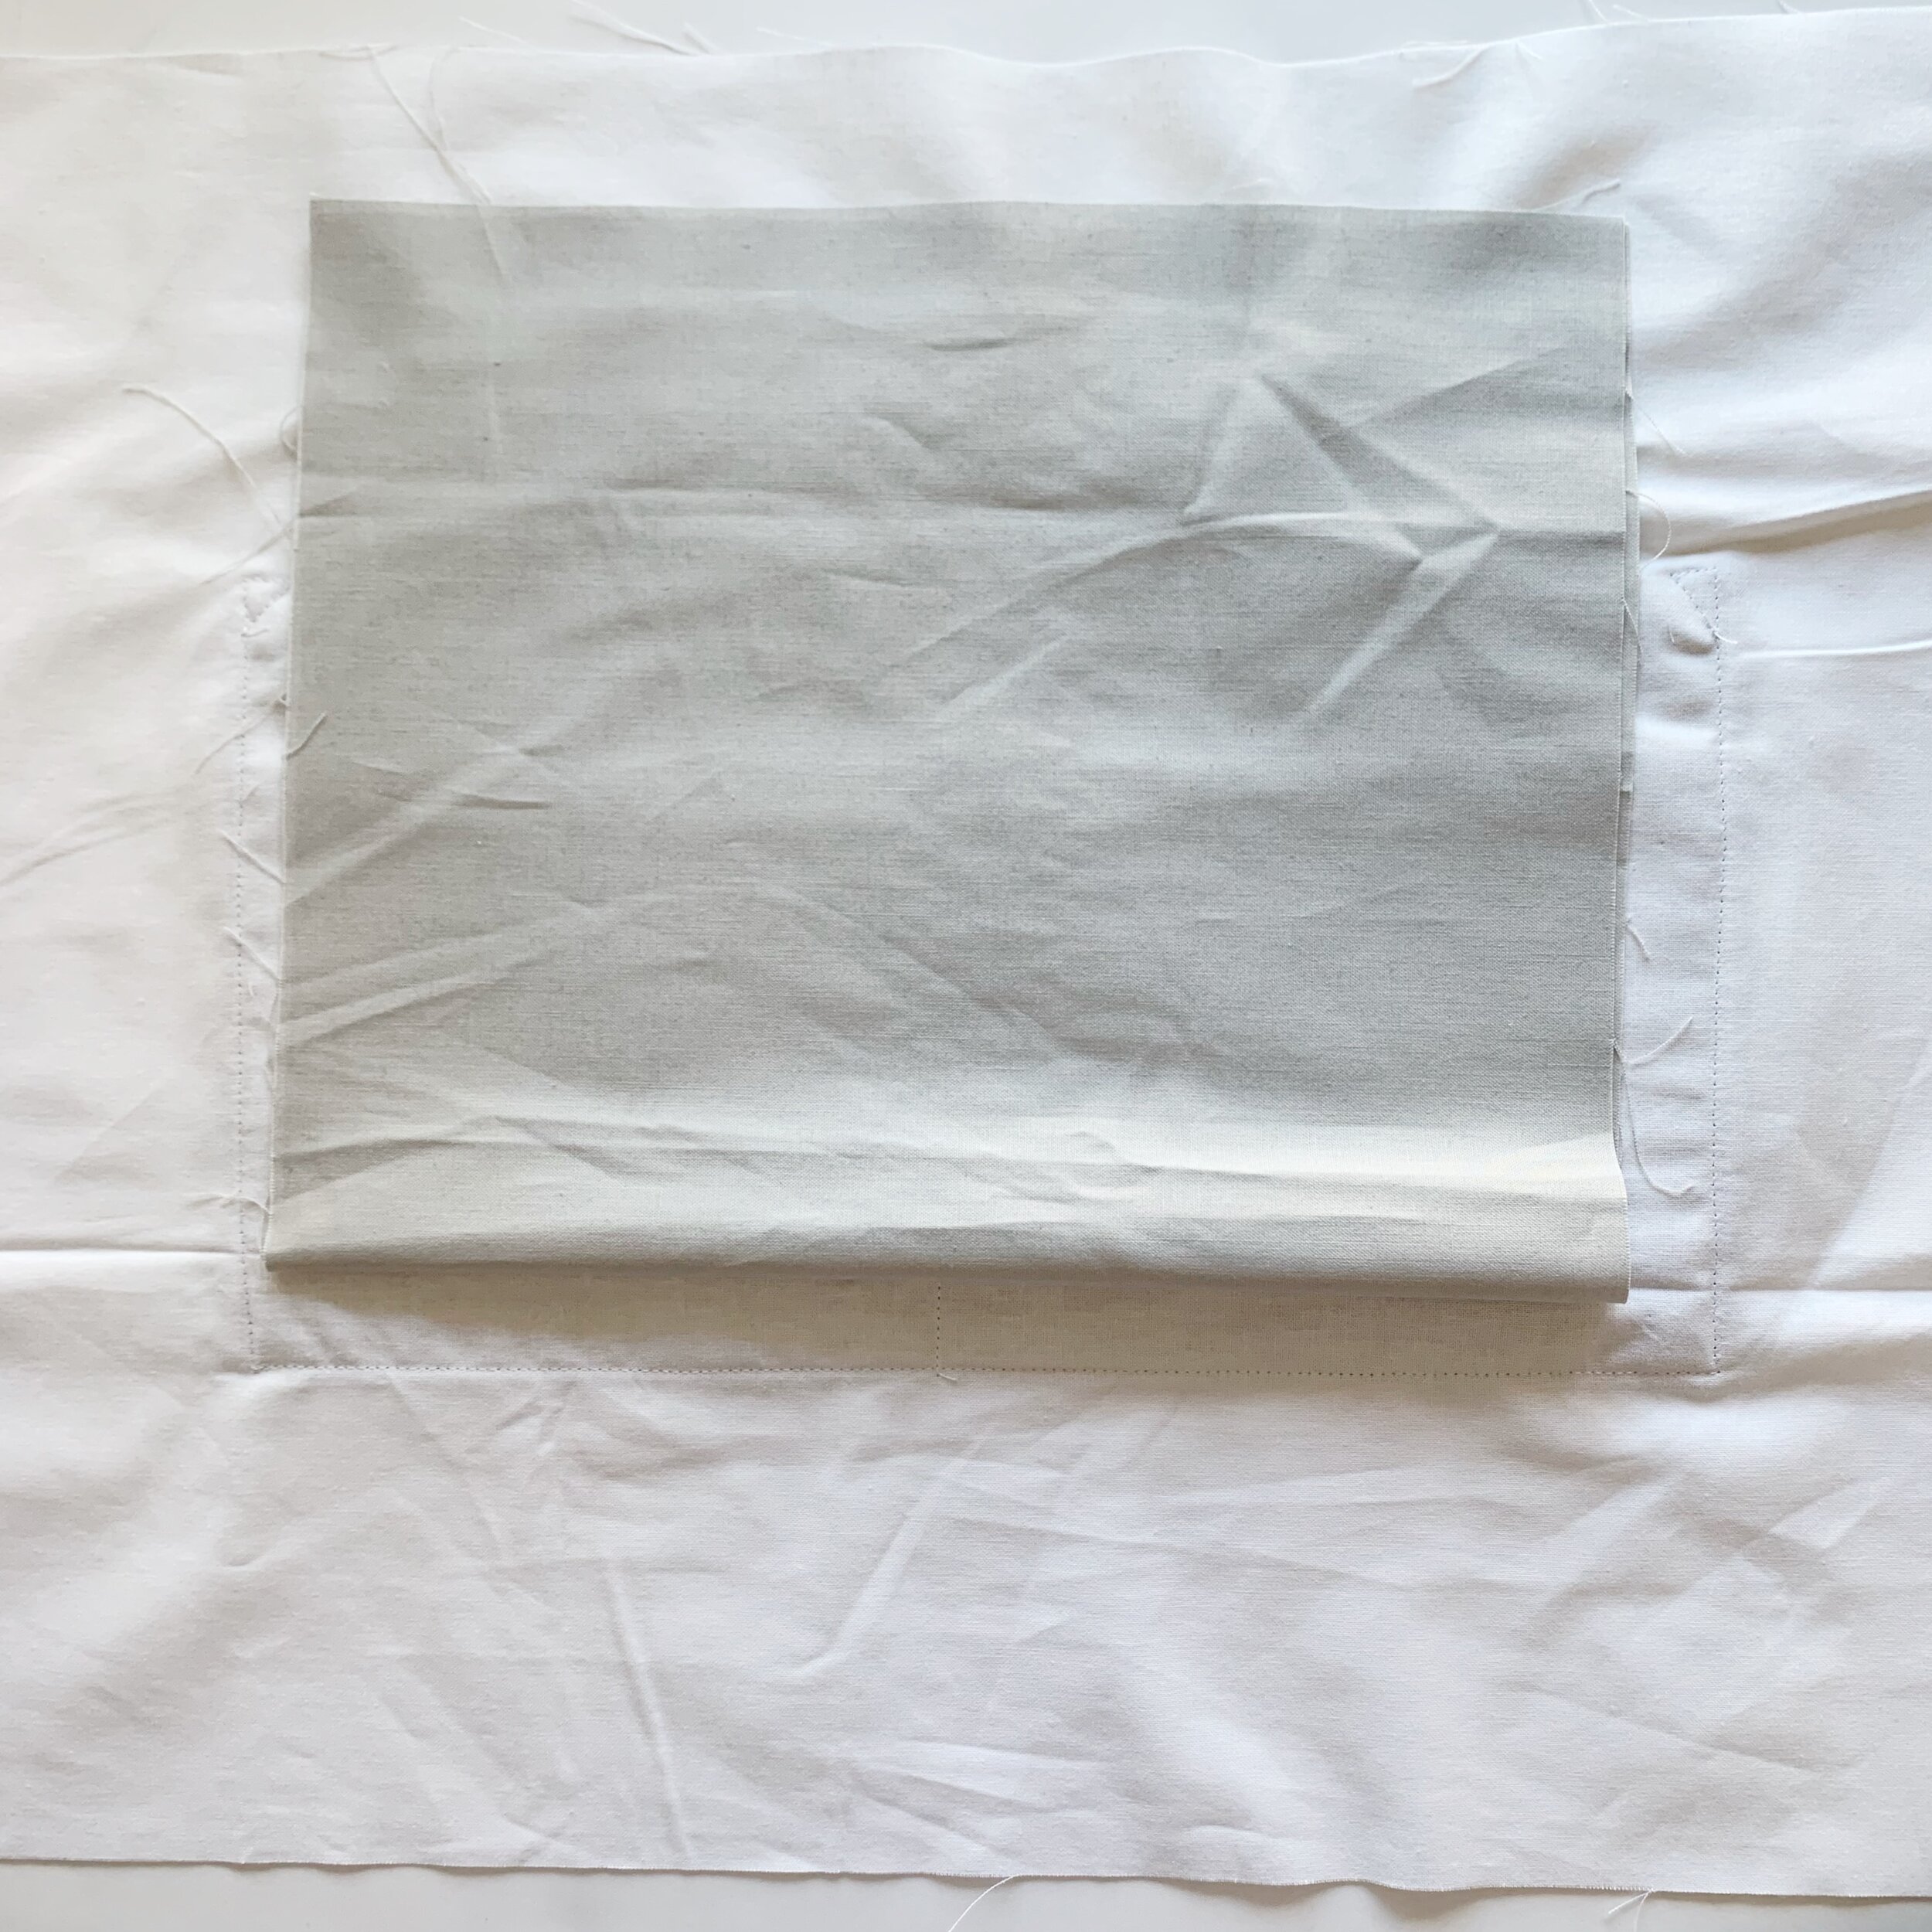
The second interior panel is complete. Set aside.
Straps:
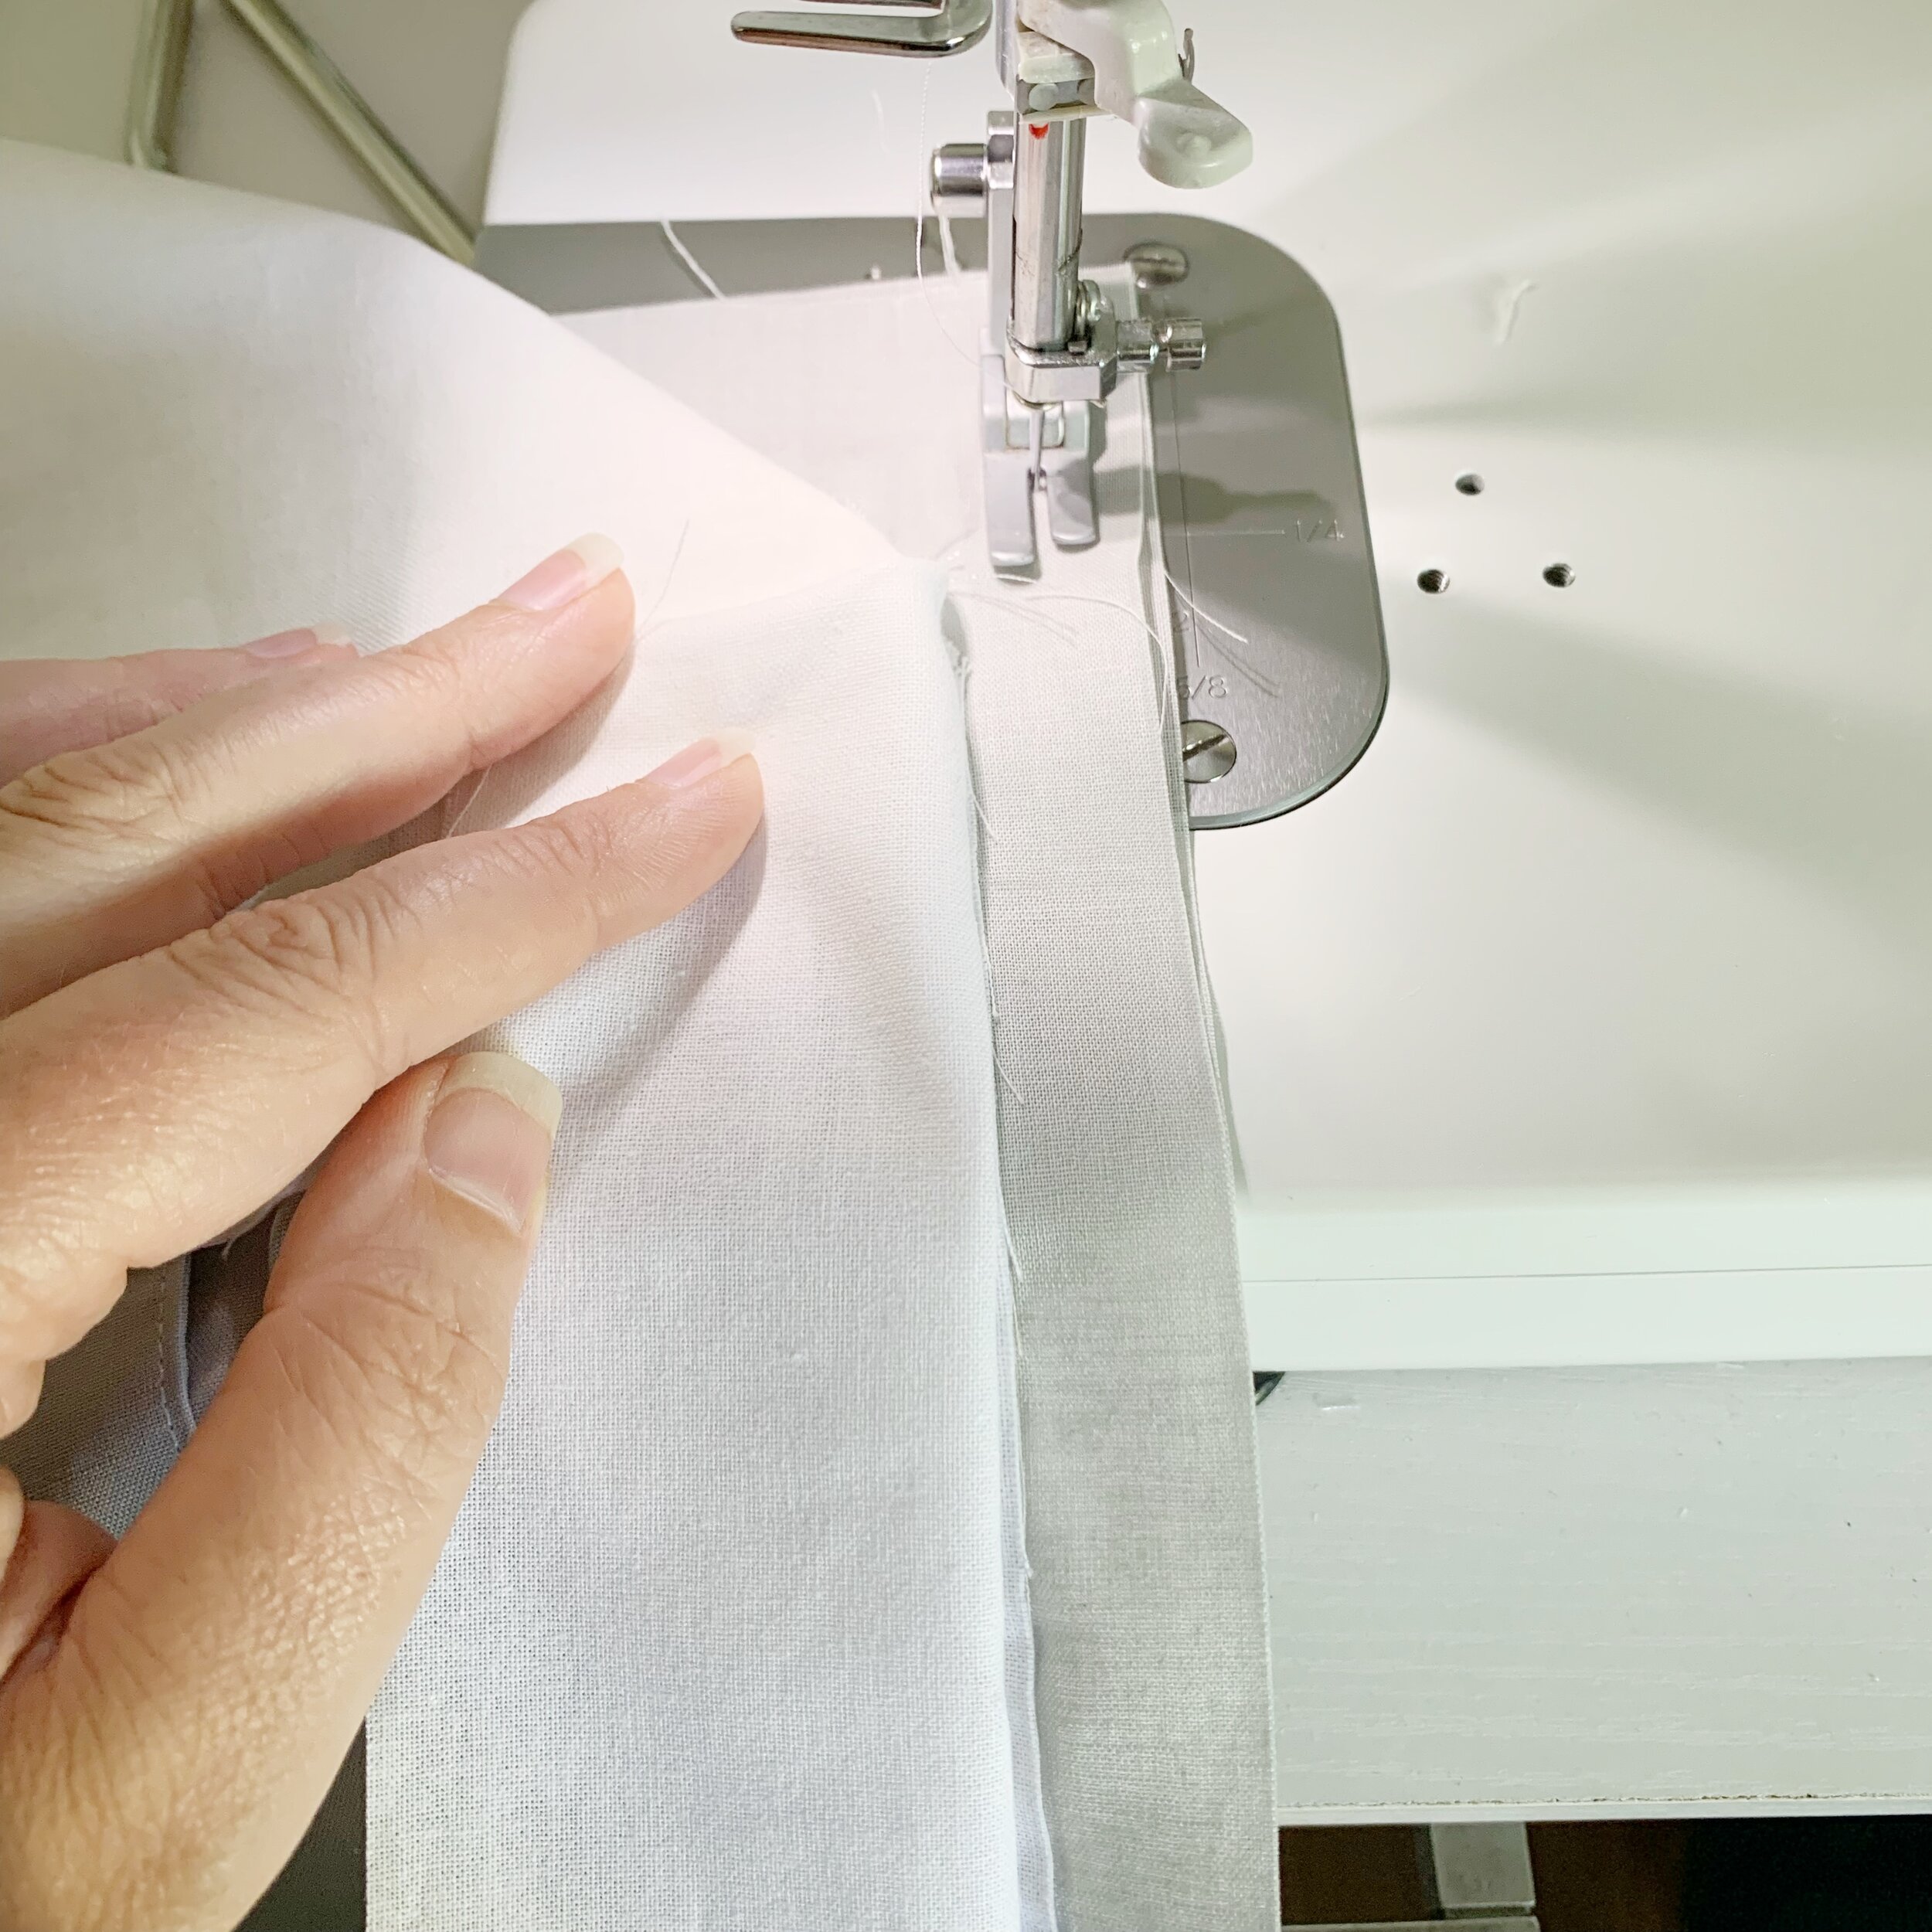
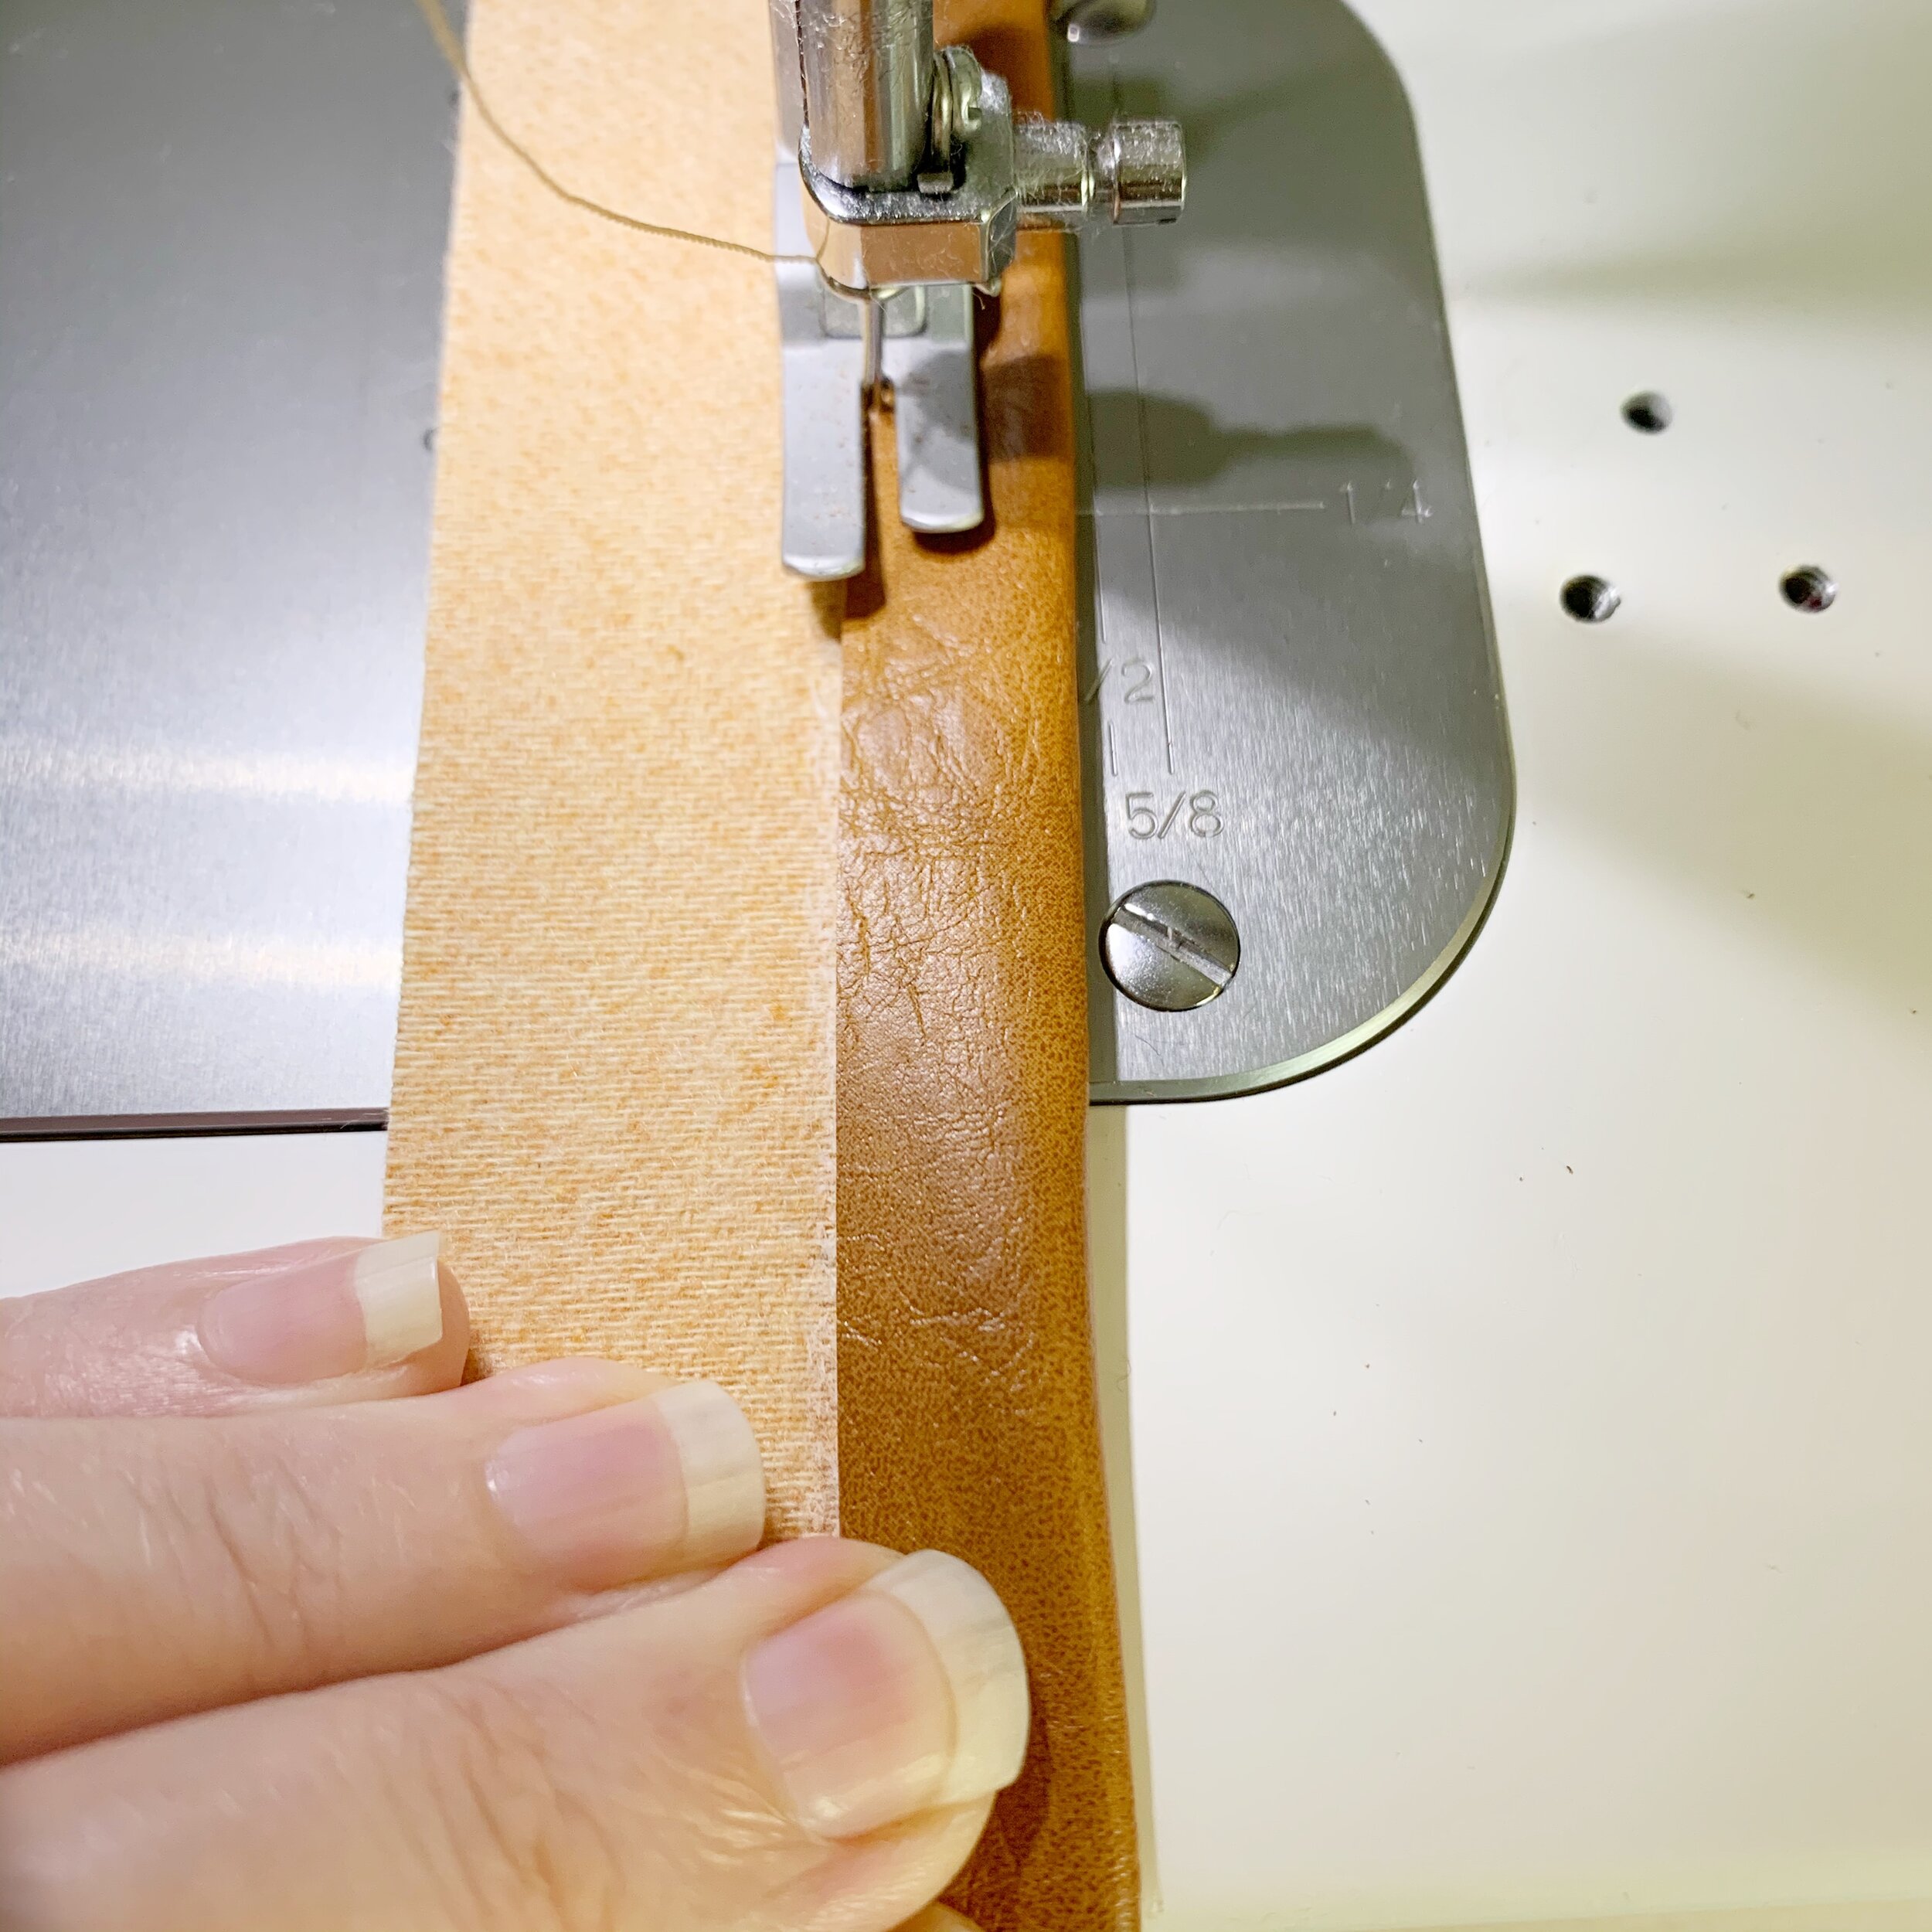
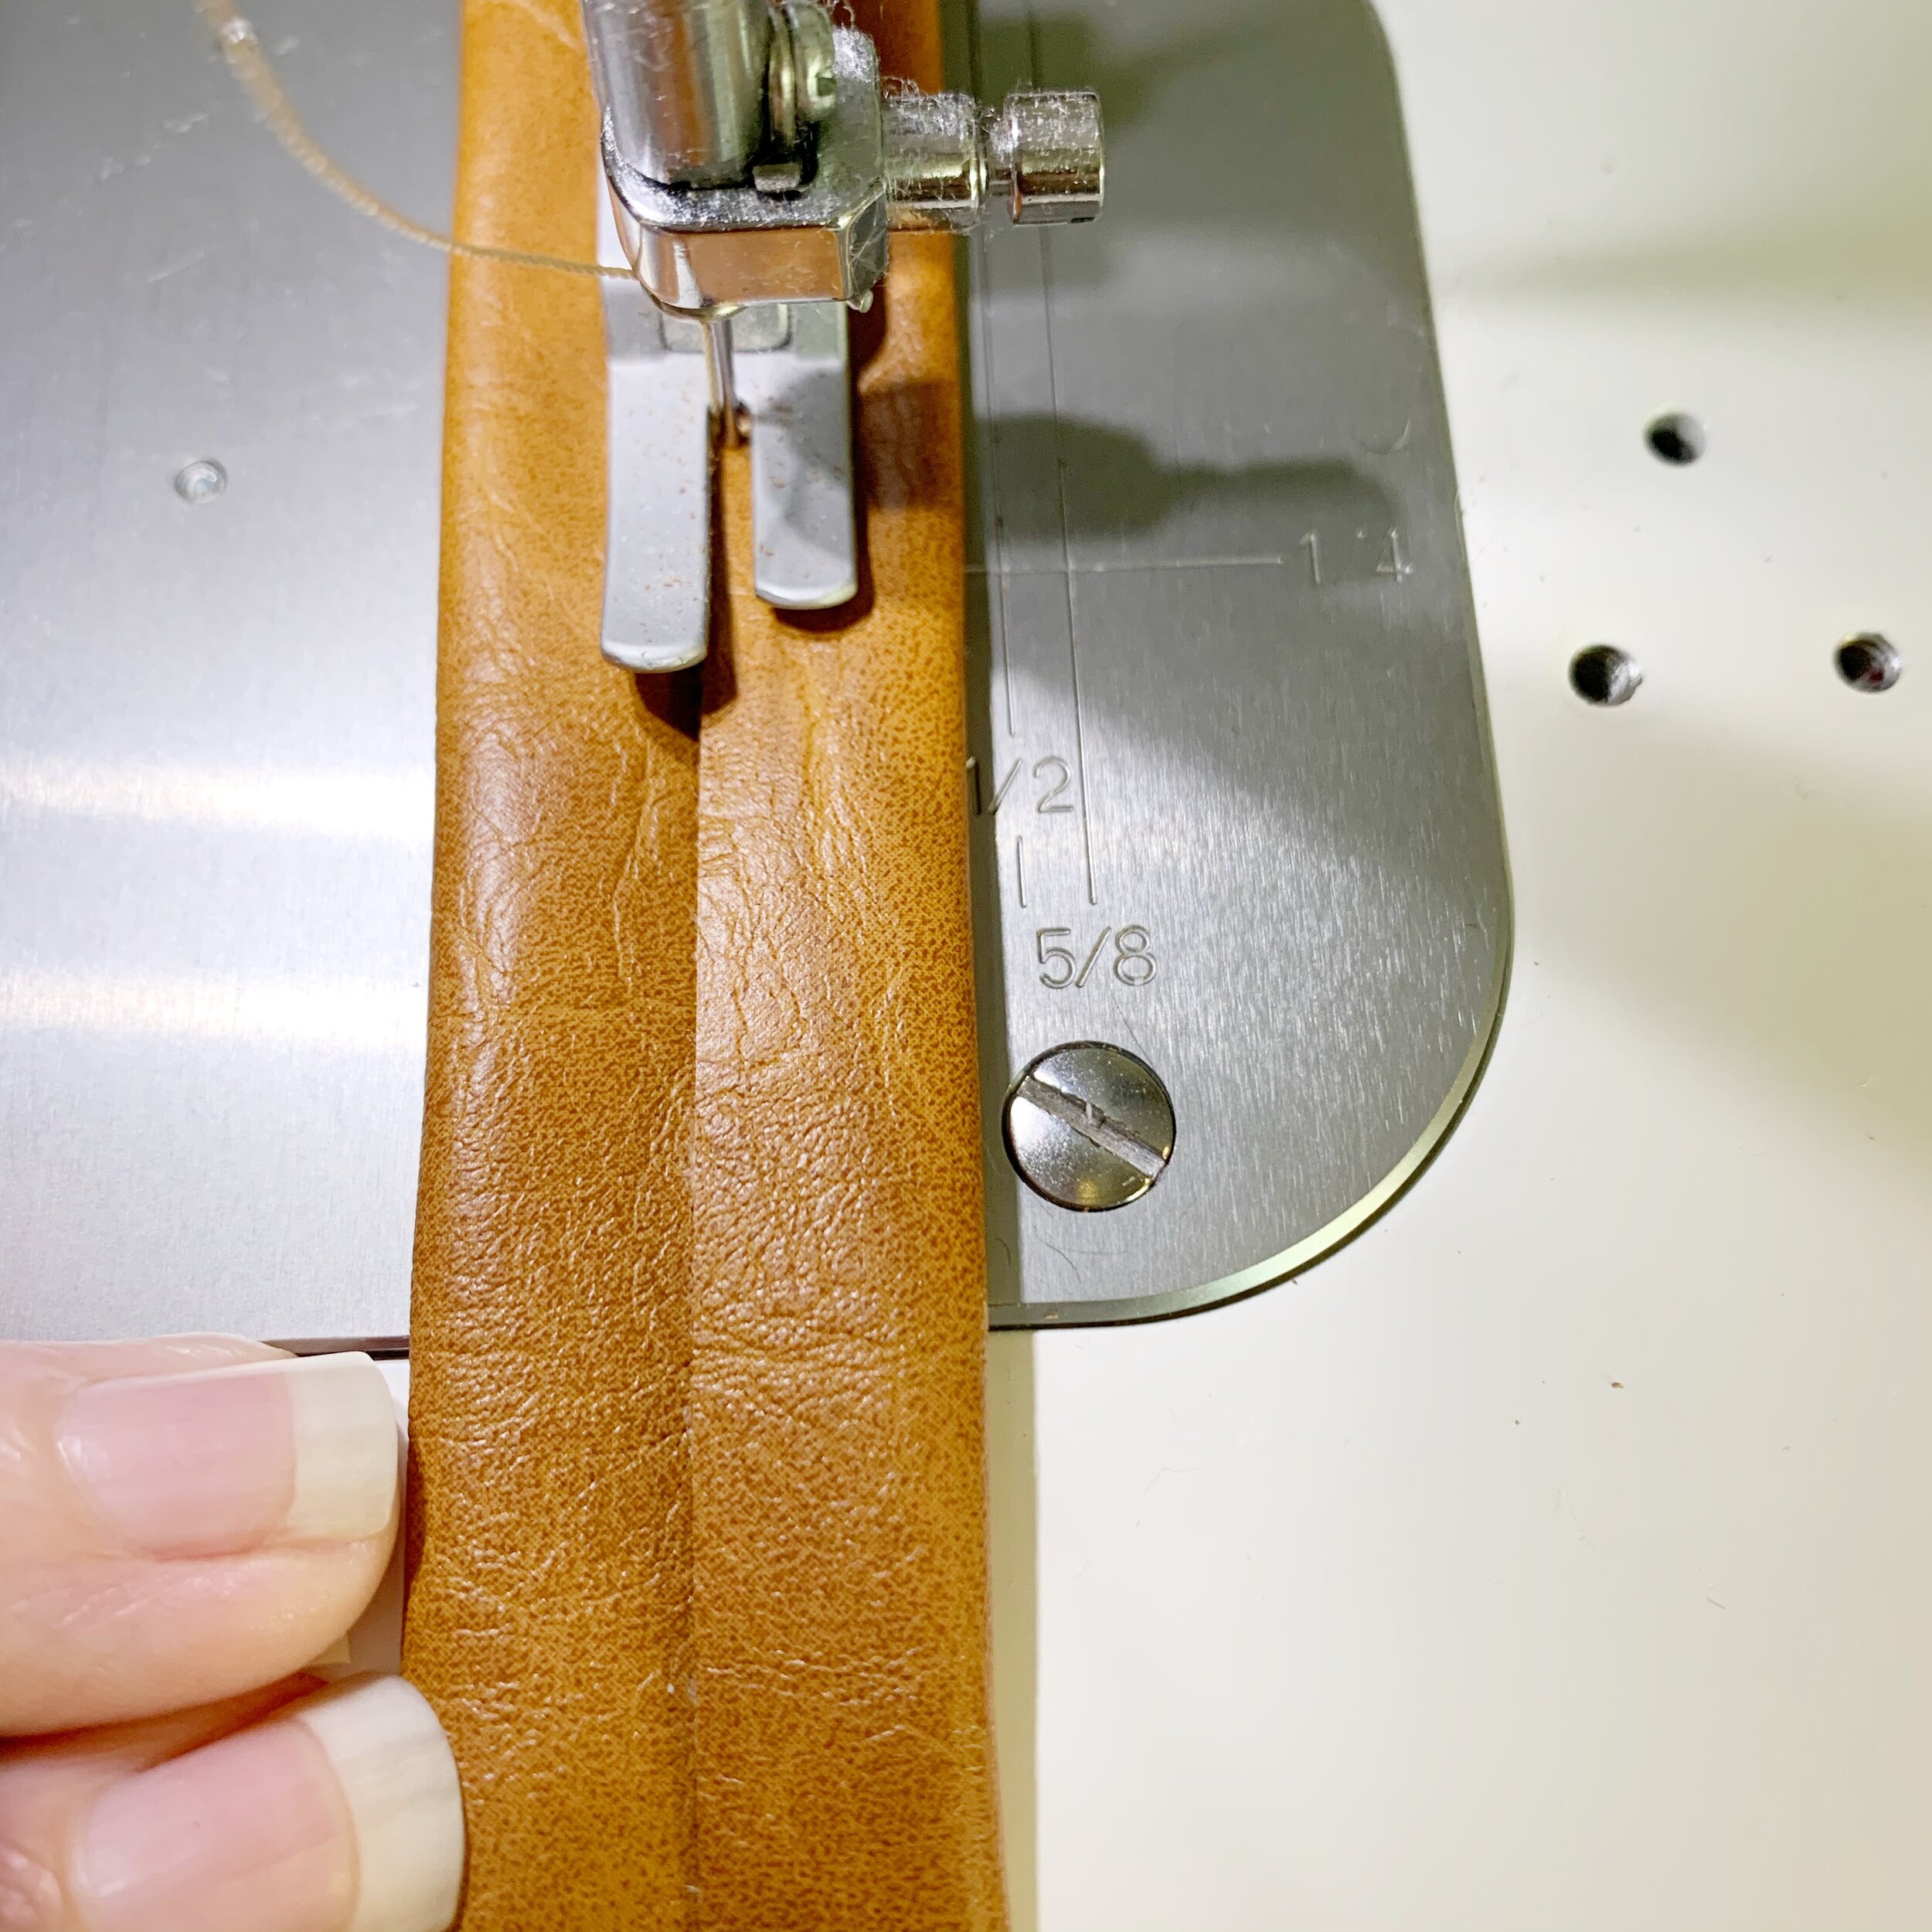
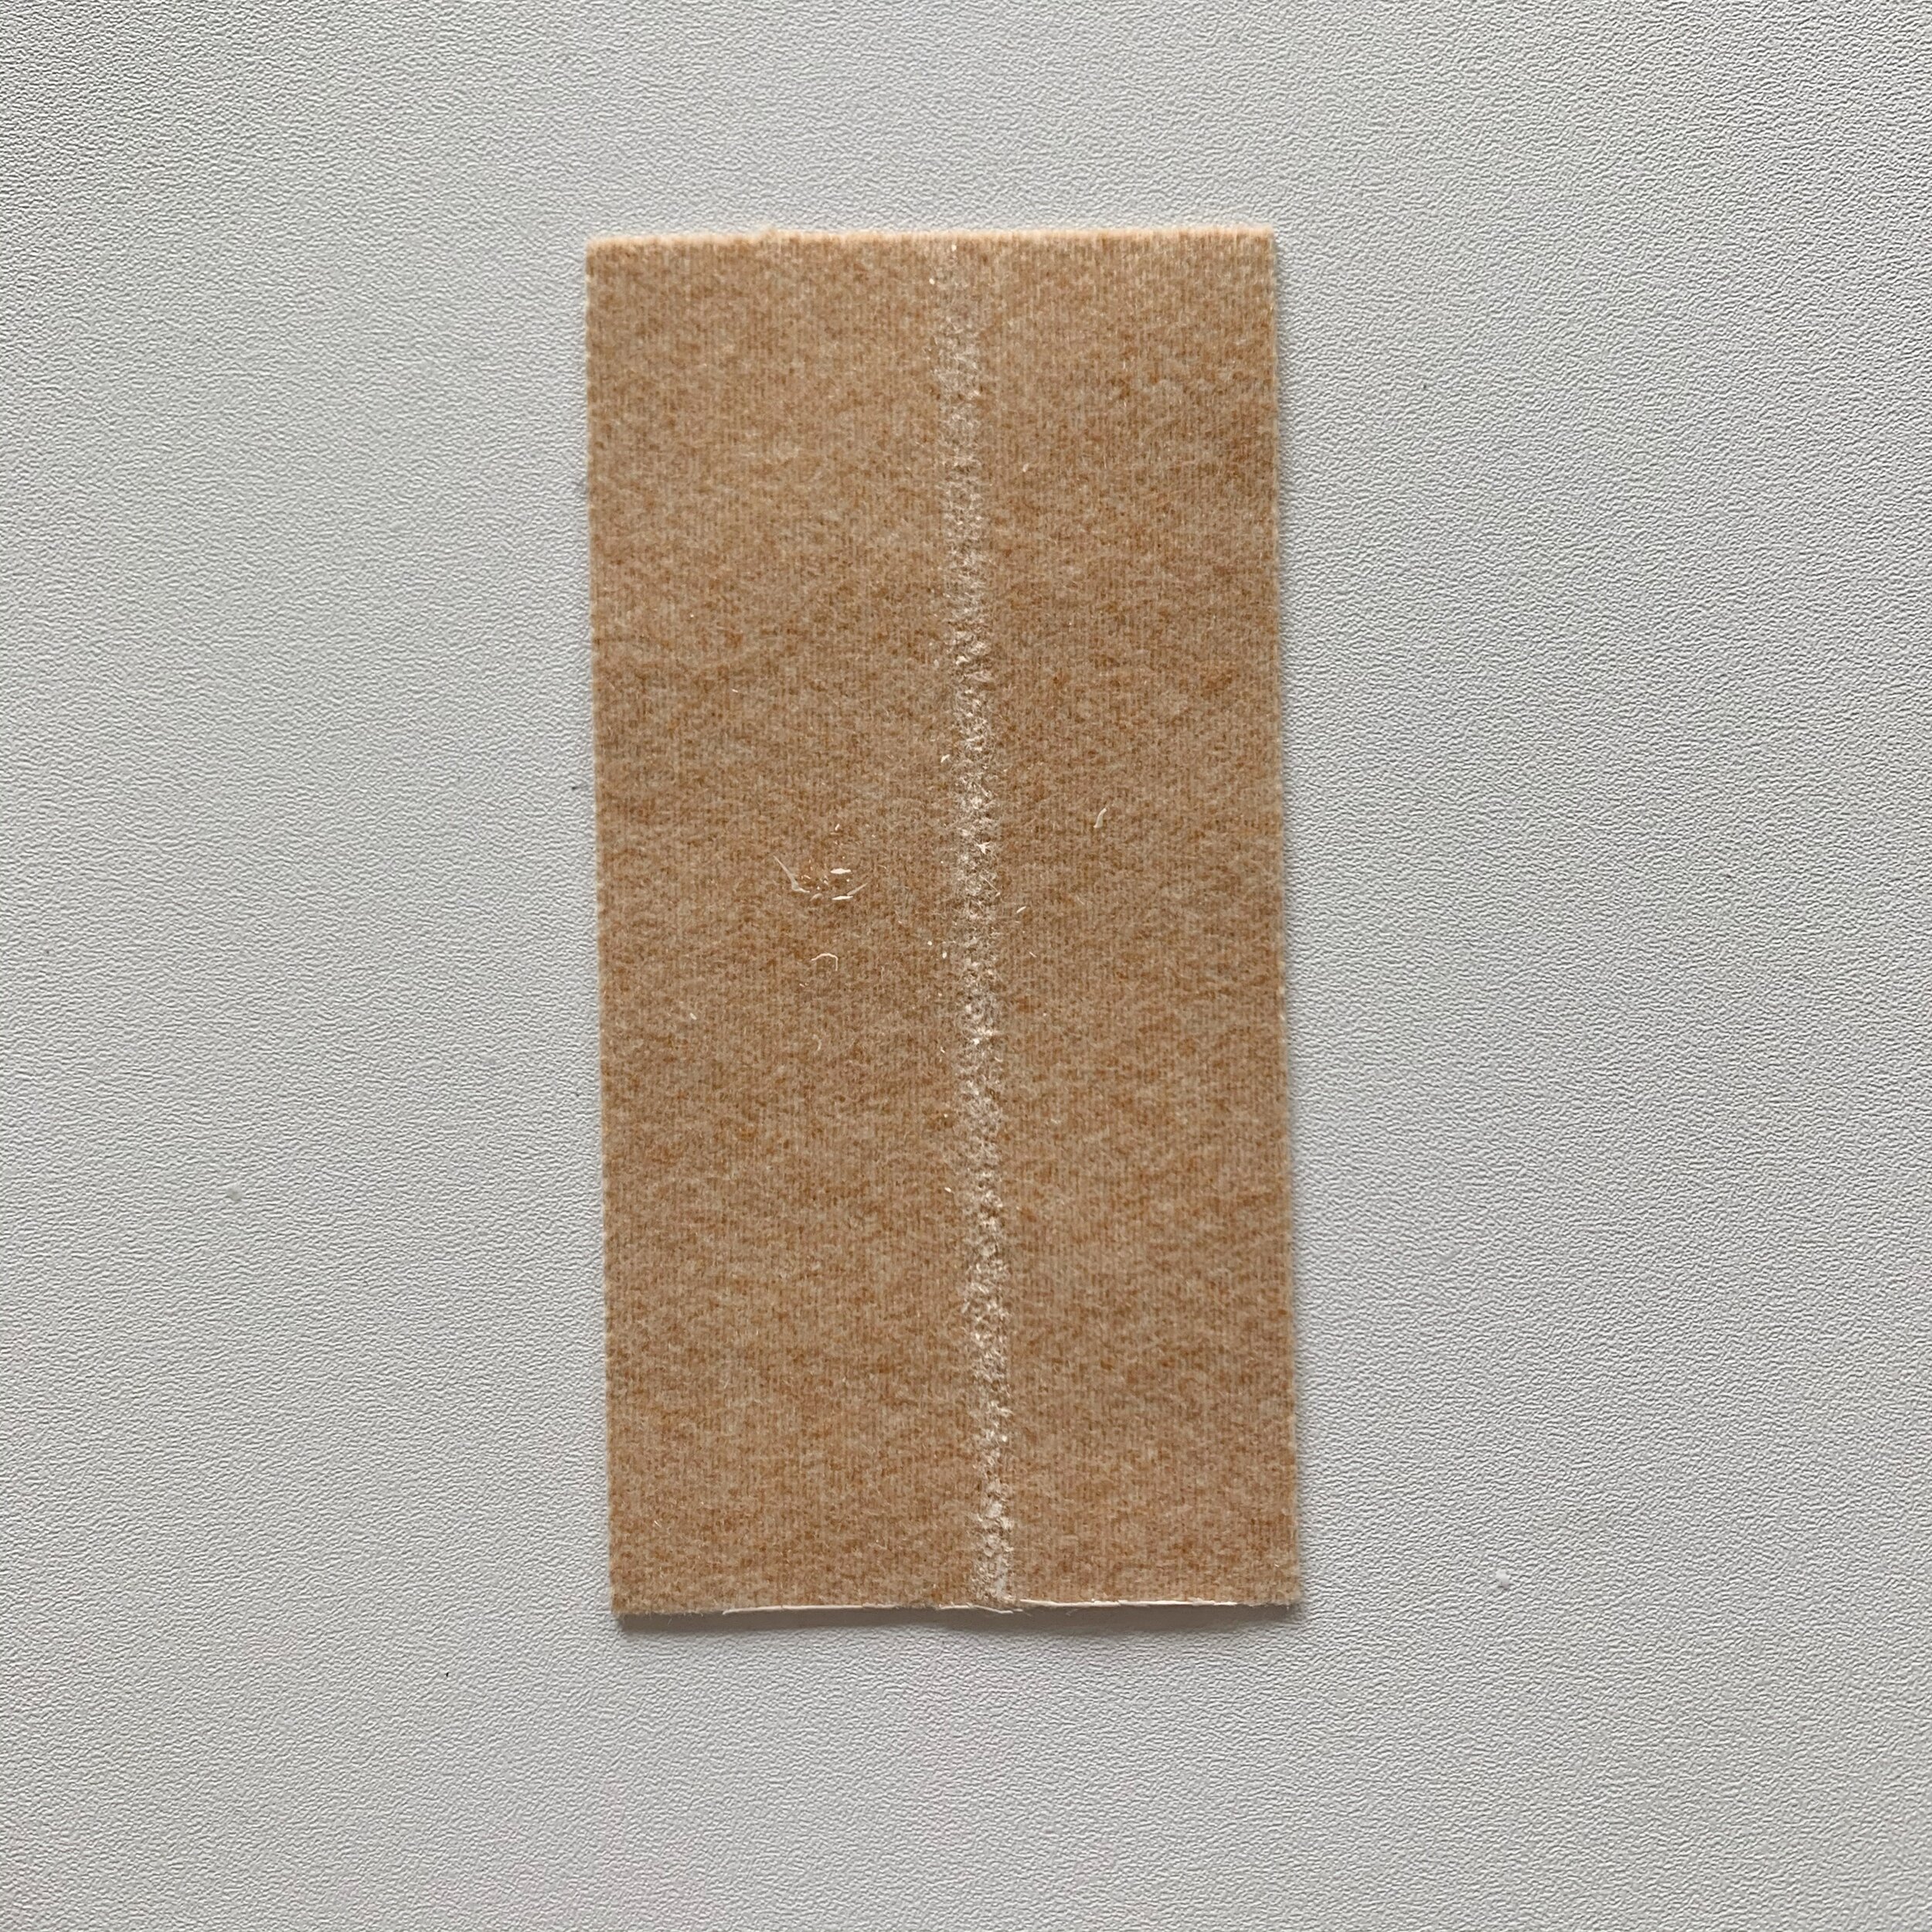
Using tailor’s chalk, mark a line down the center of the strap piece. Then using upholstery thread in both the machine and bobbin, fold one long edge in to the center line and sew along the edge all the way down. Repeat with the second edge. Then sew along both folded edges about 1/8th from the edge.

Cut the end off one of the short ends of the strap. Thread that end through the slide adjuster so that it goes around the center bar.
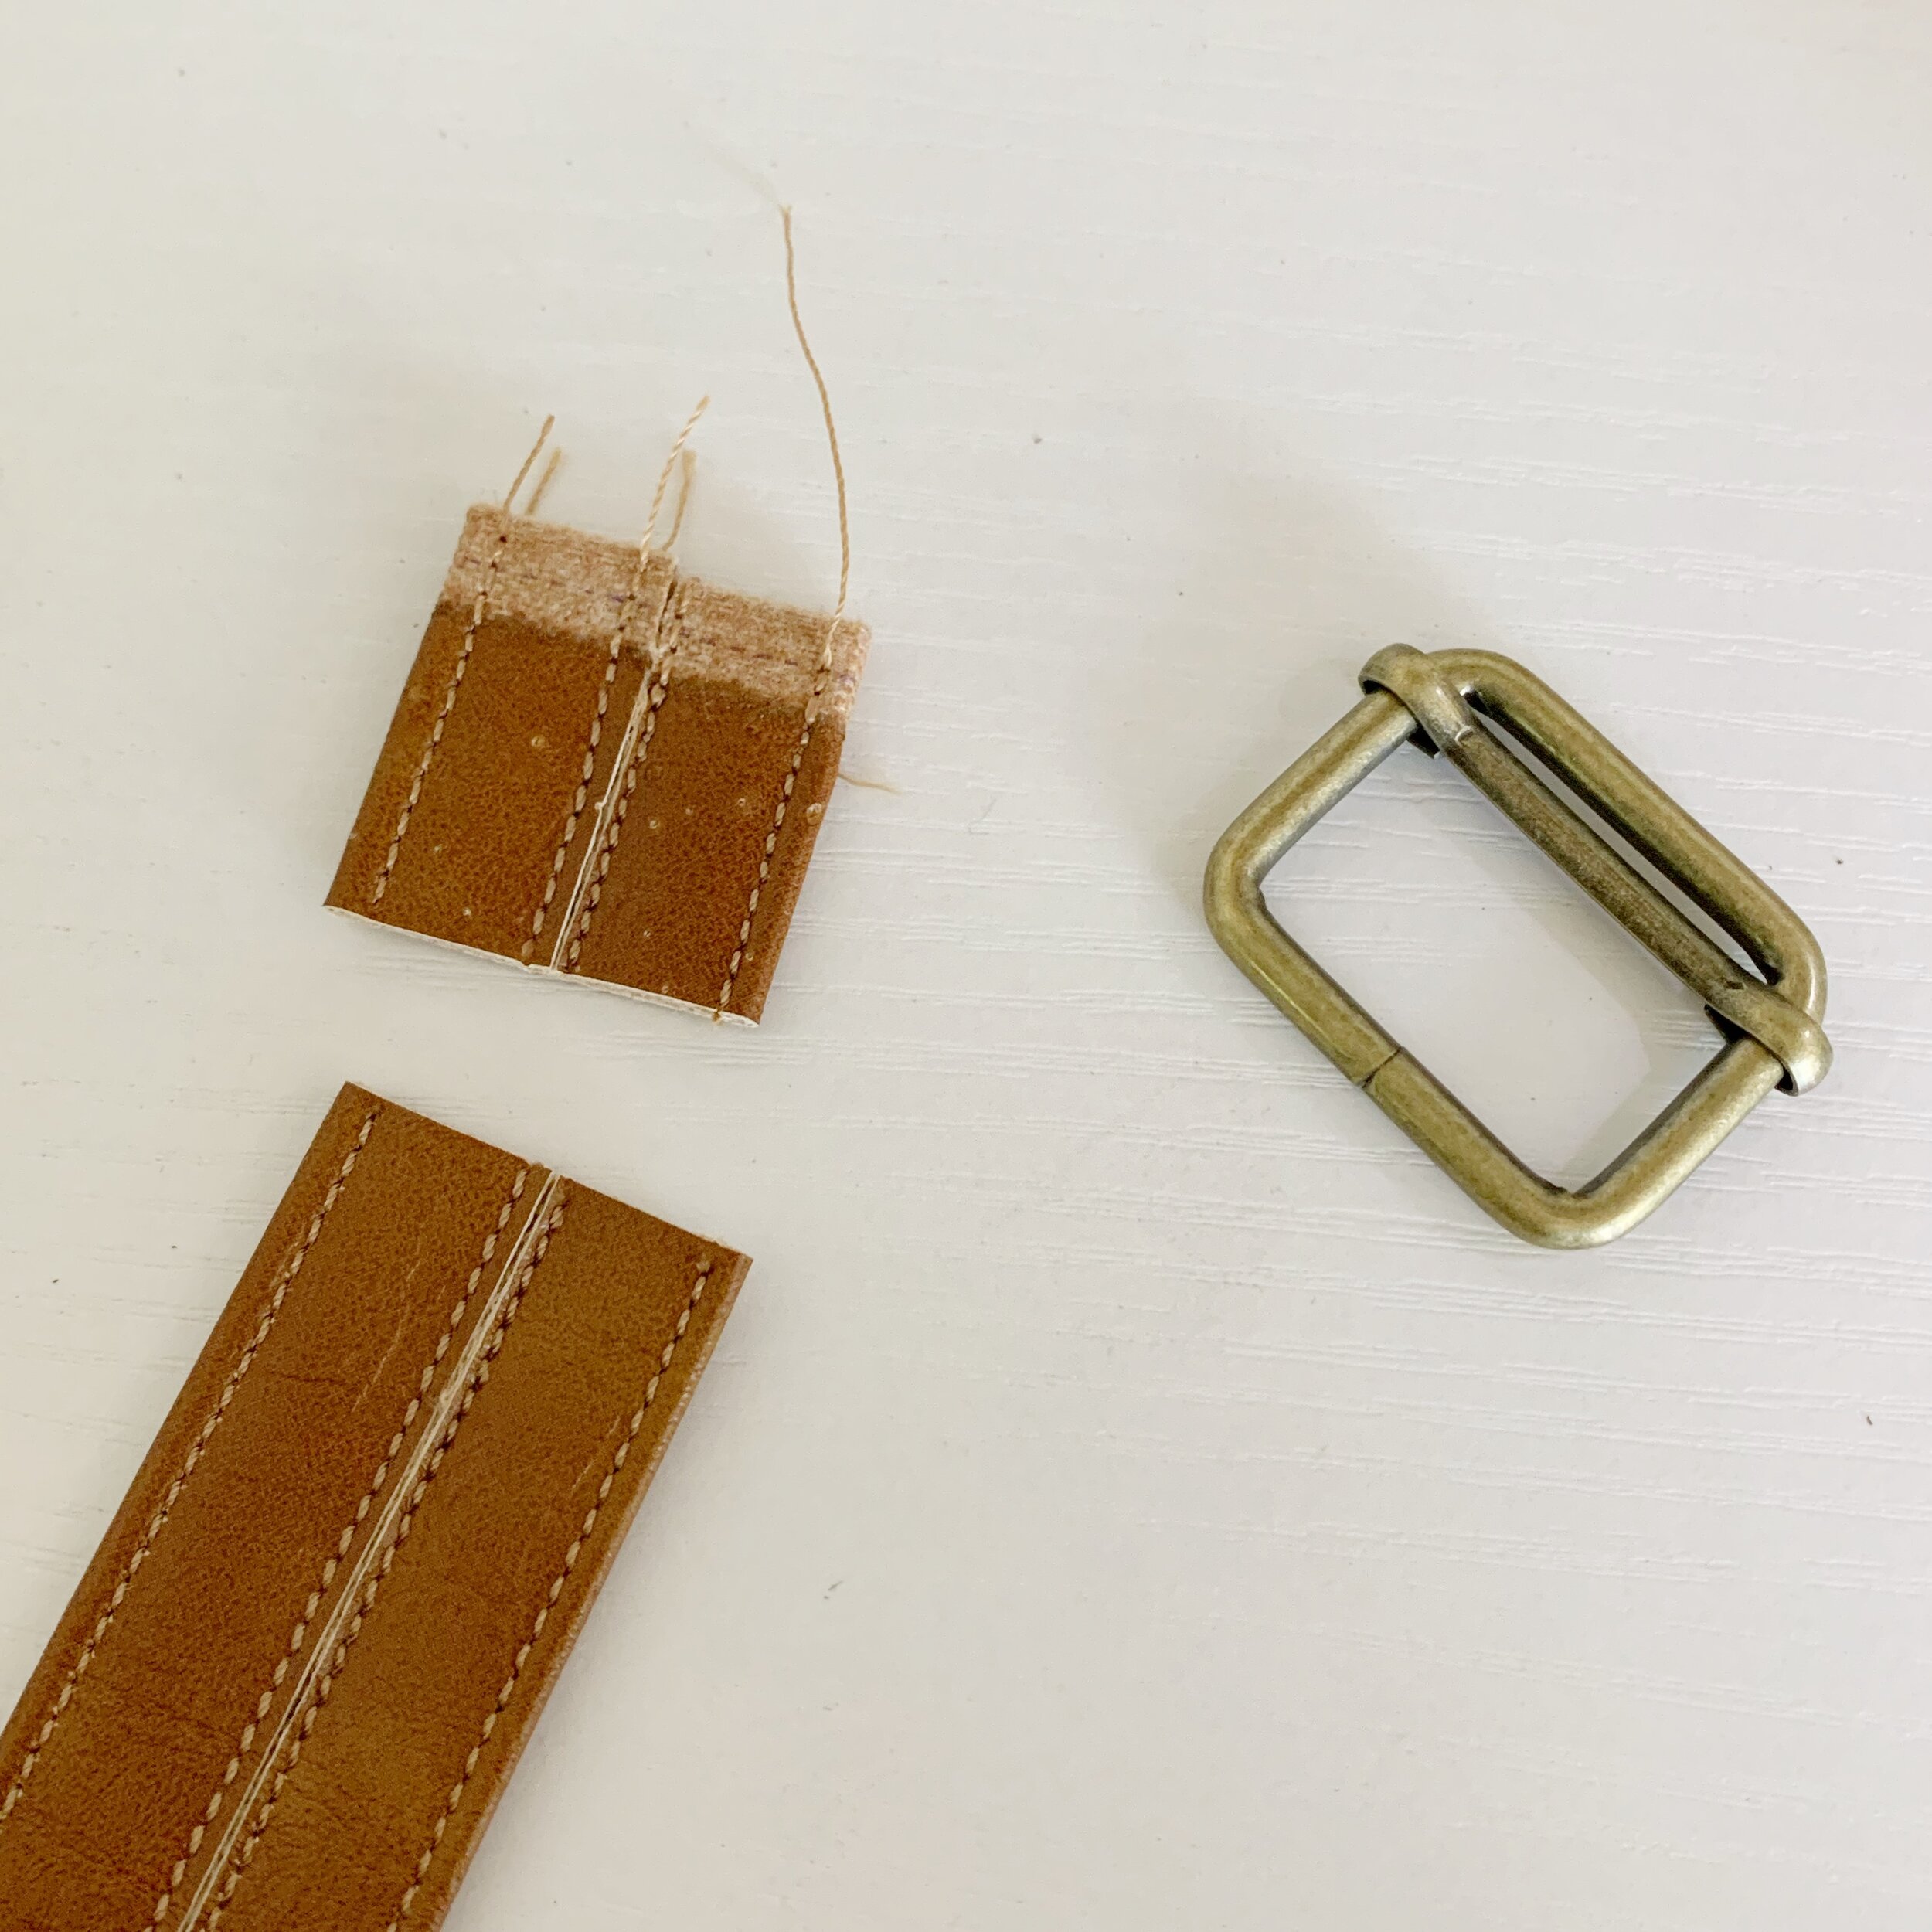

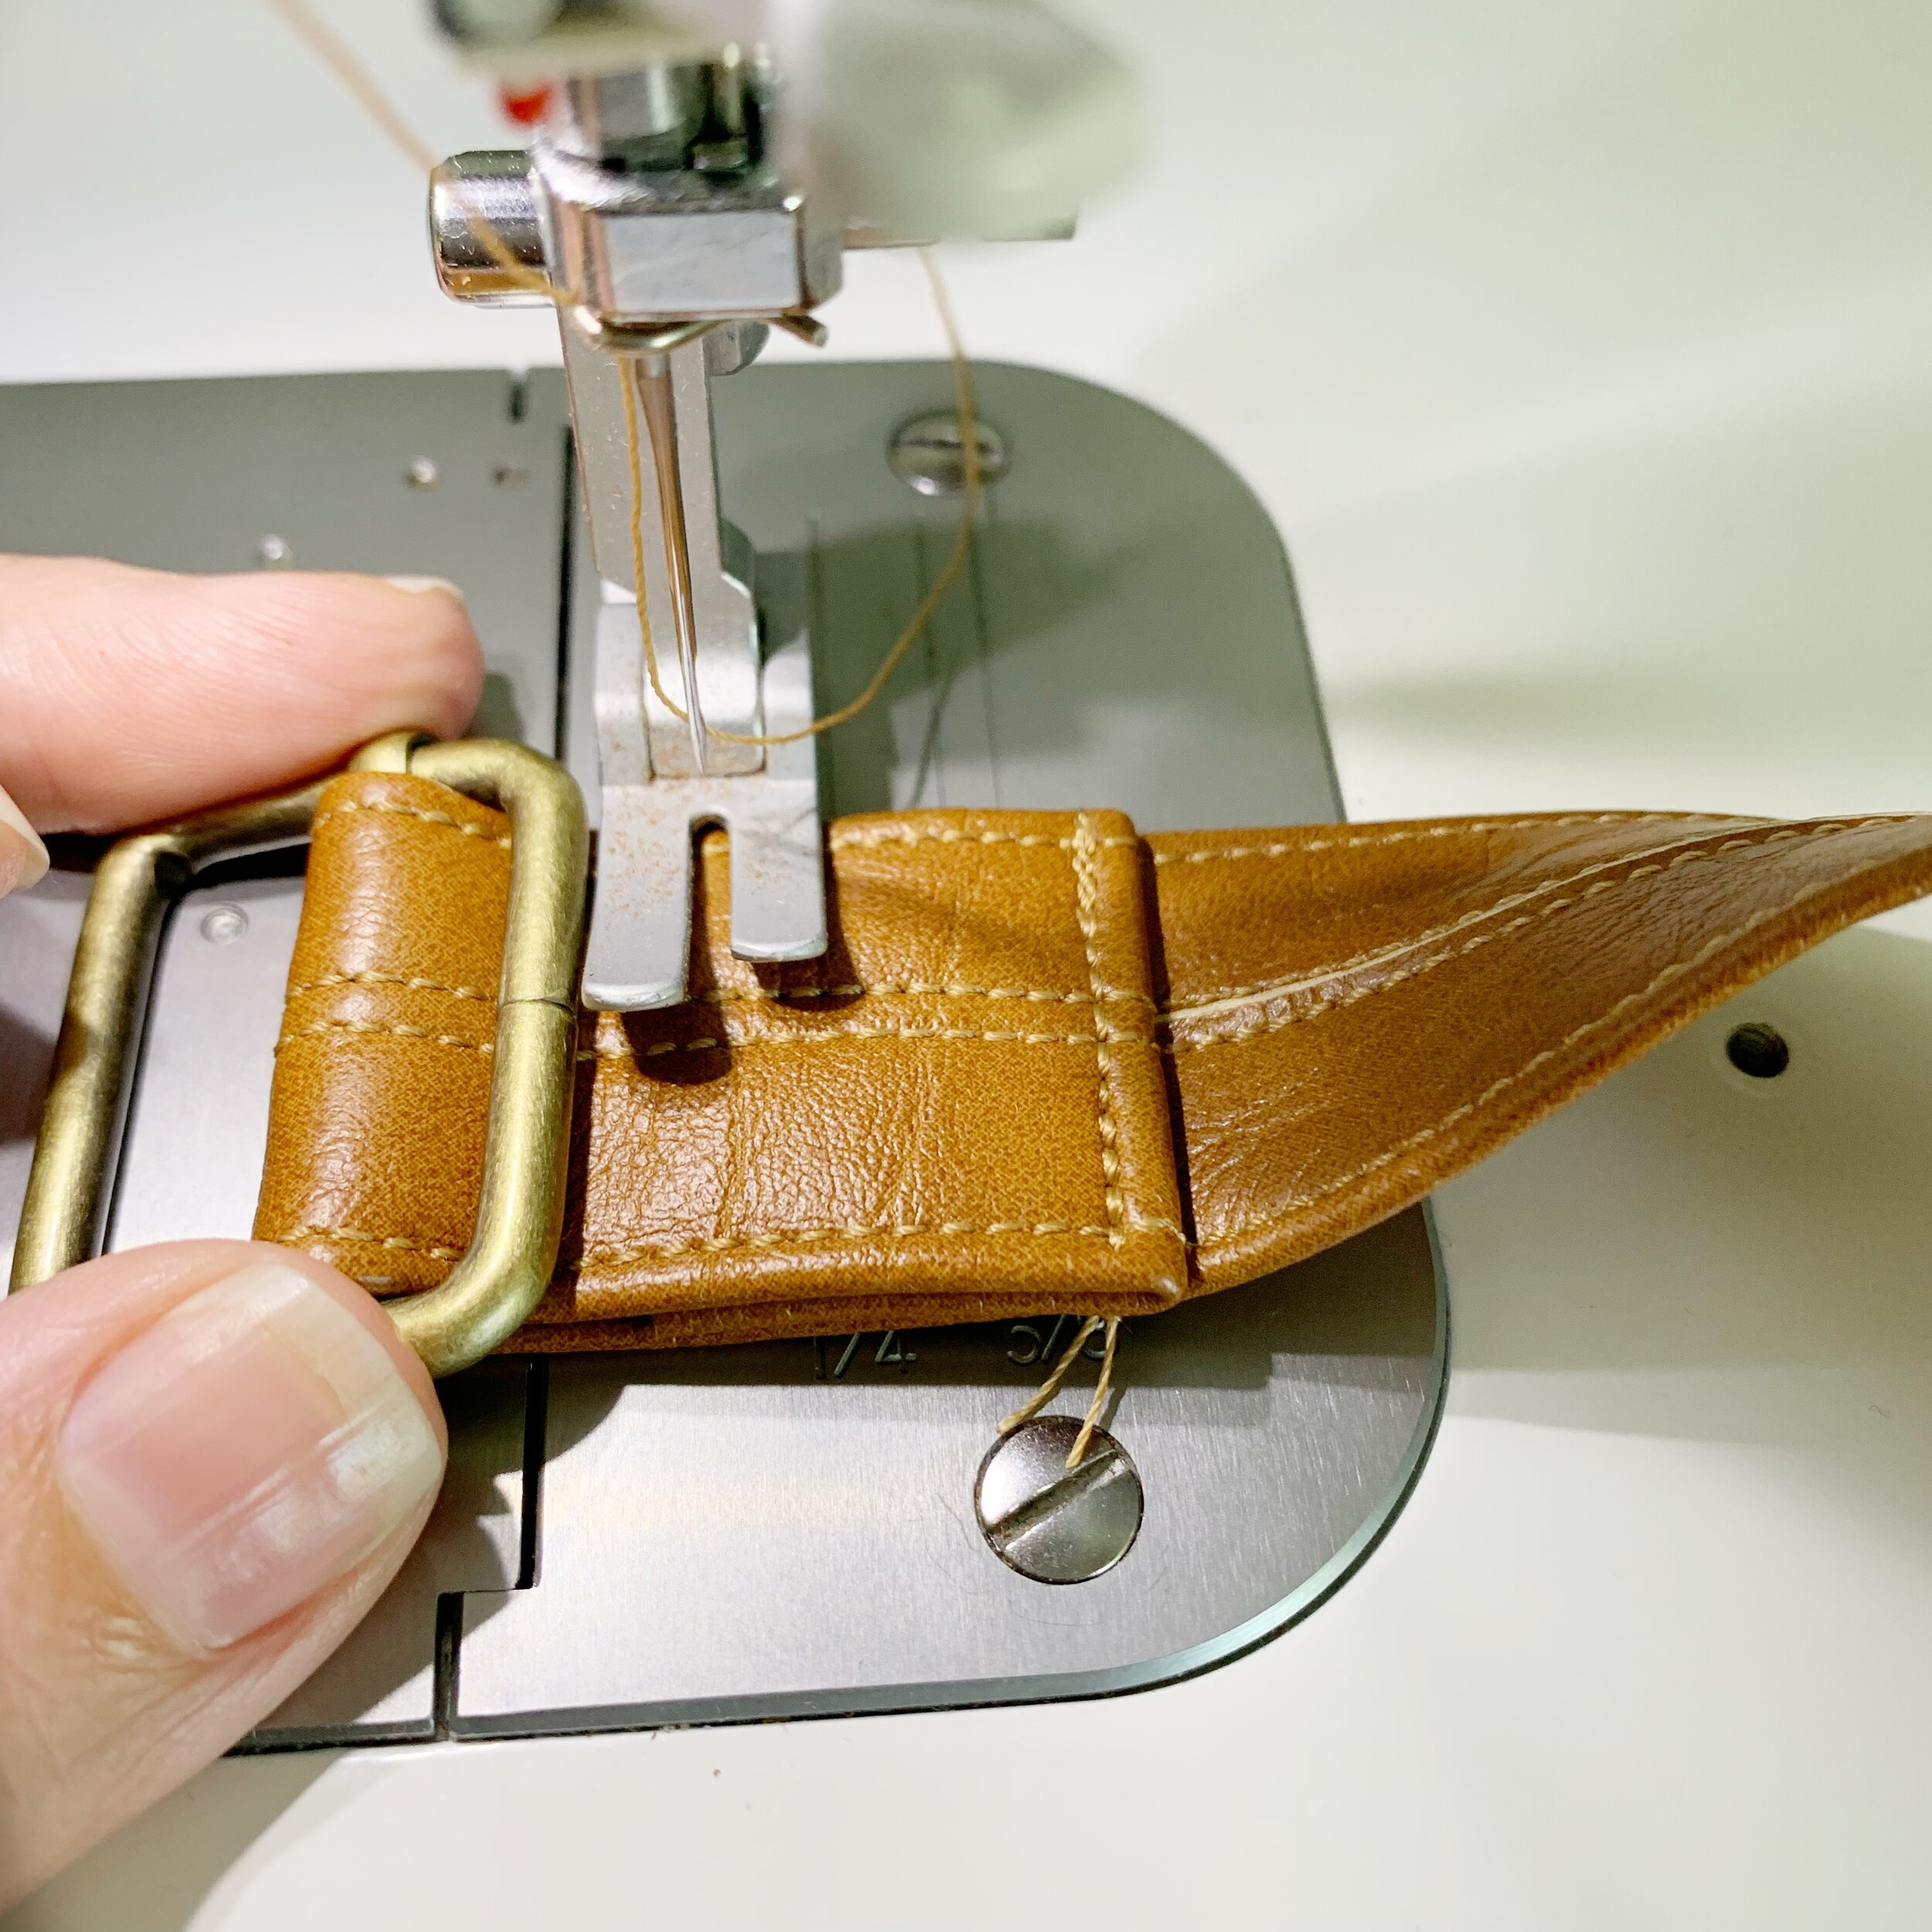
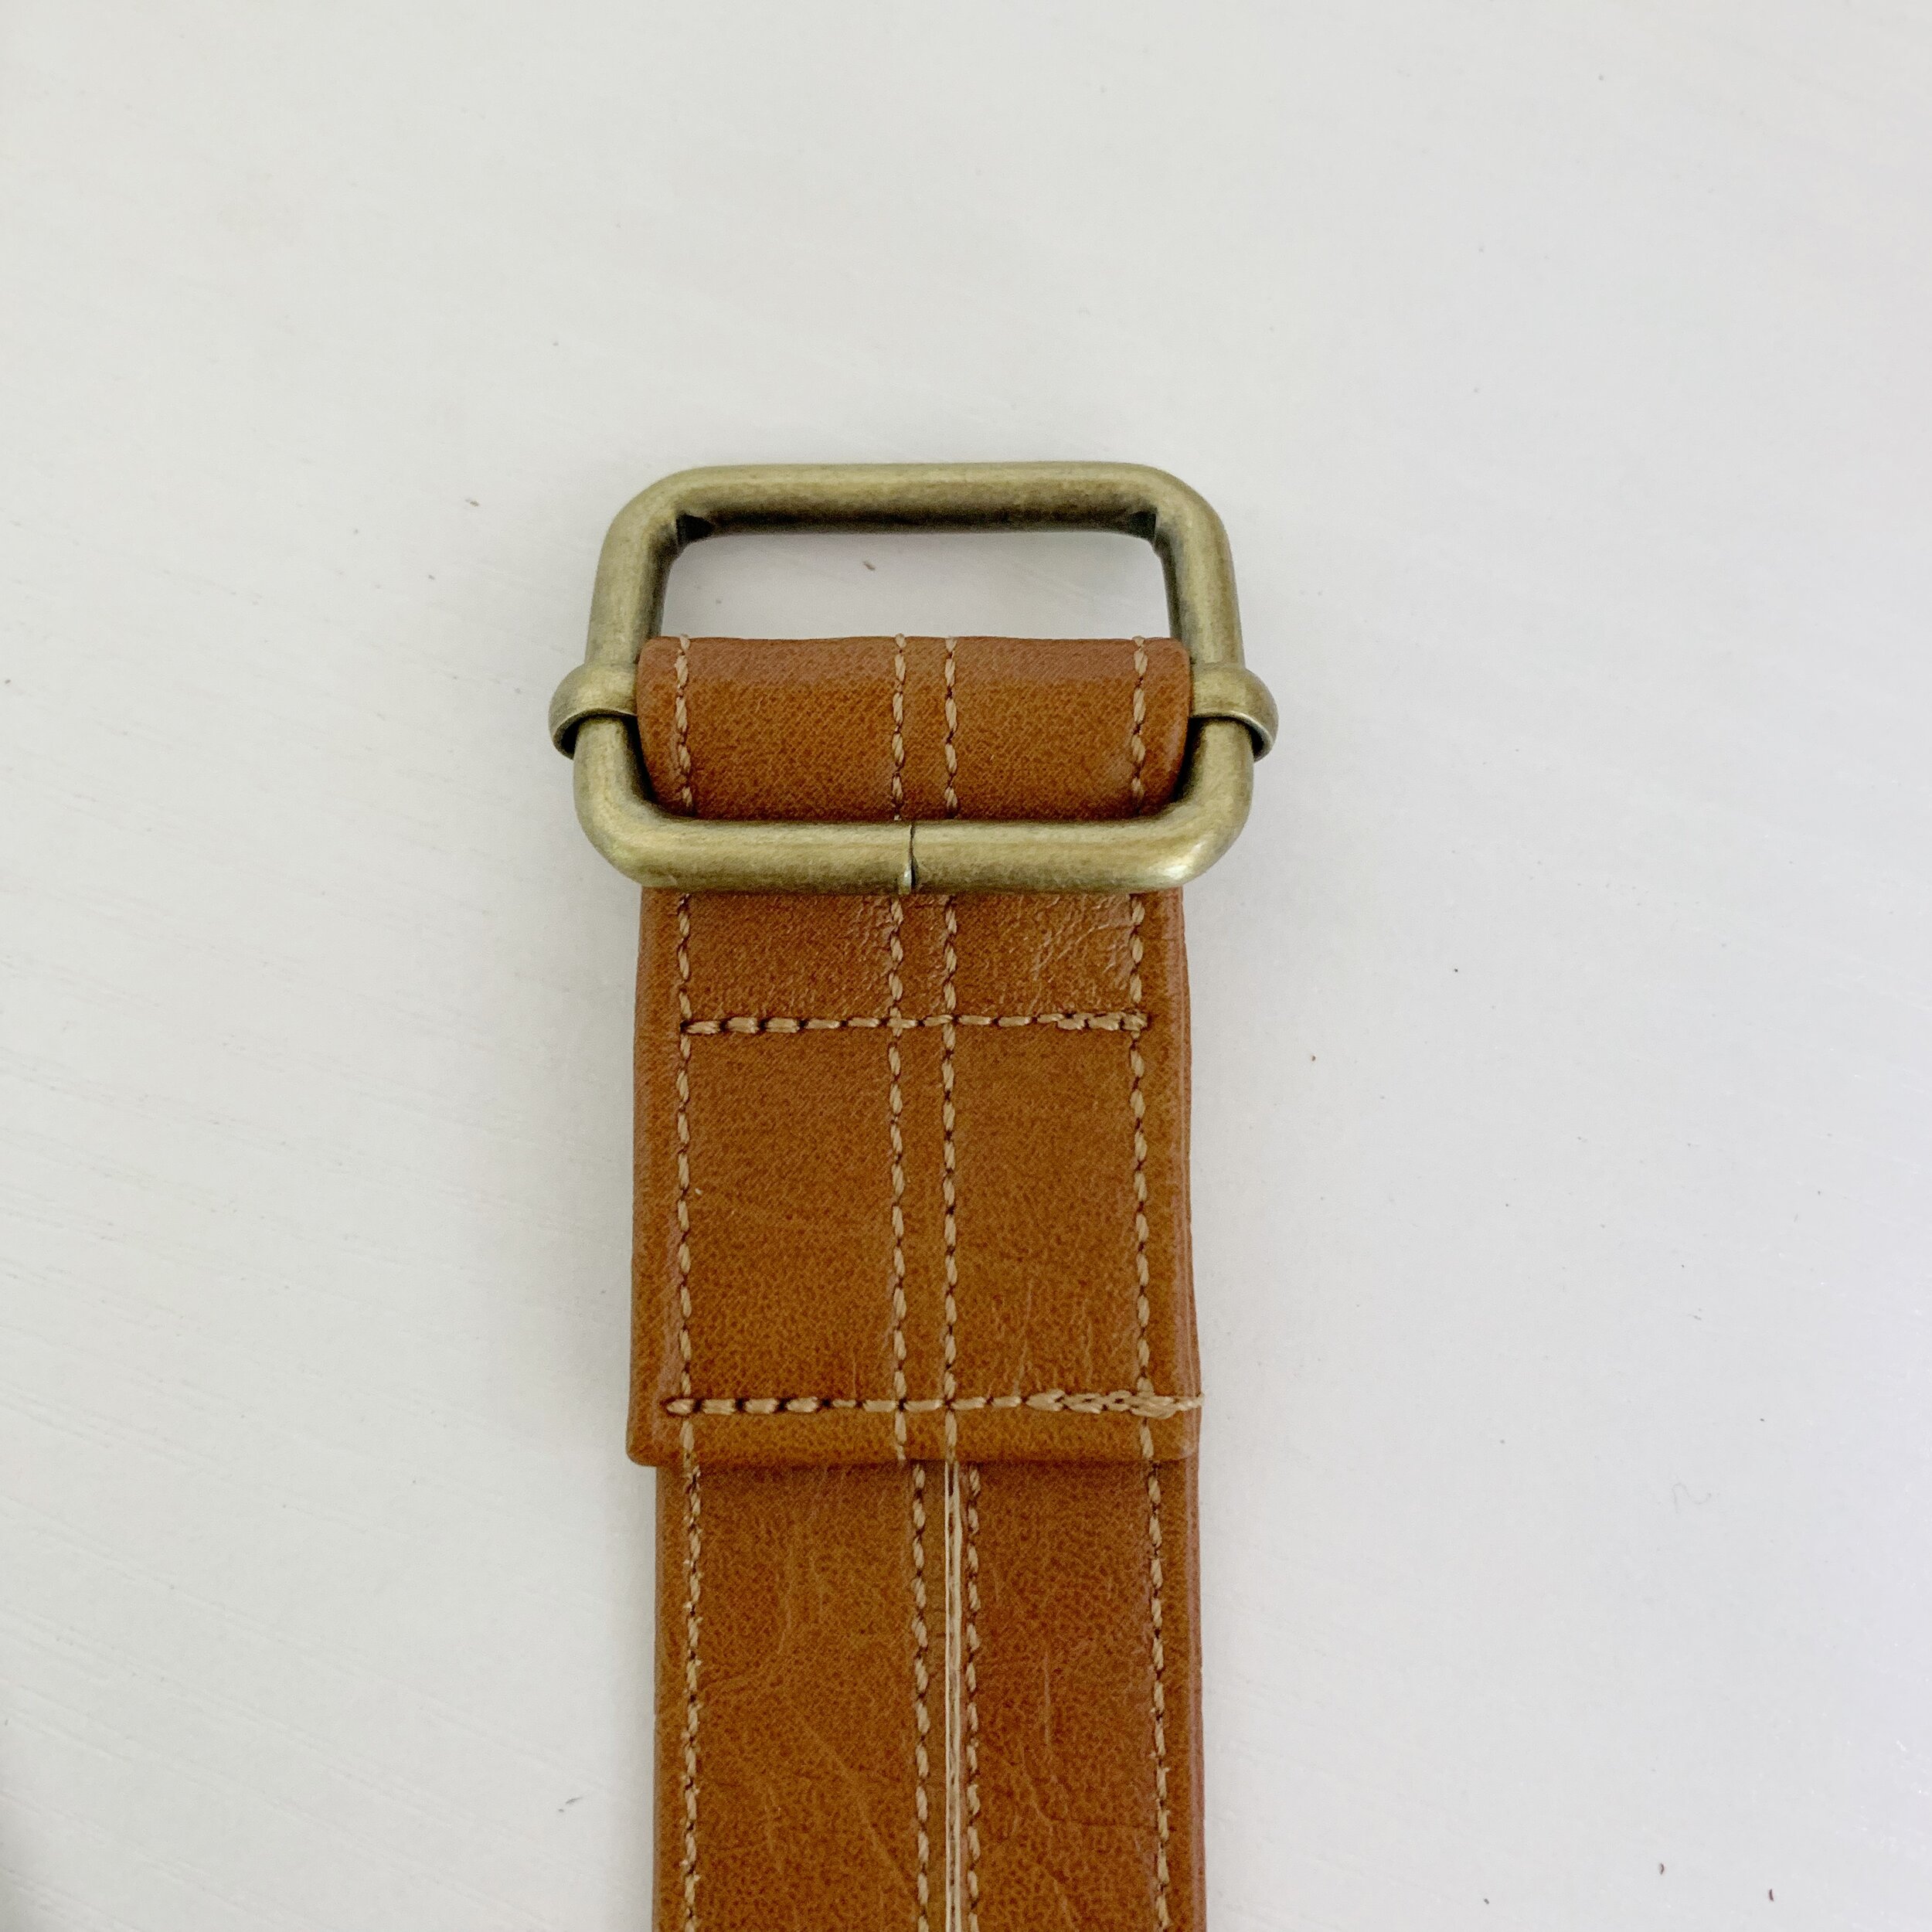
Fold the end over about an inch and lay it flat against the rest of the strap. Sew along the fold and along the edge of the slide adjuster to secure in place.
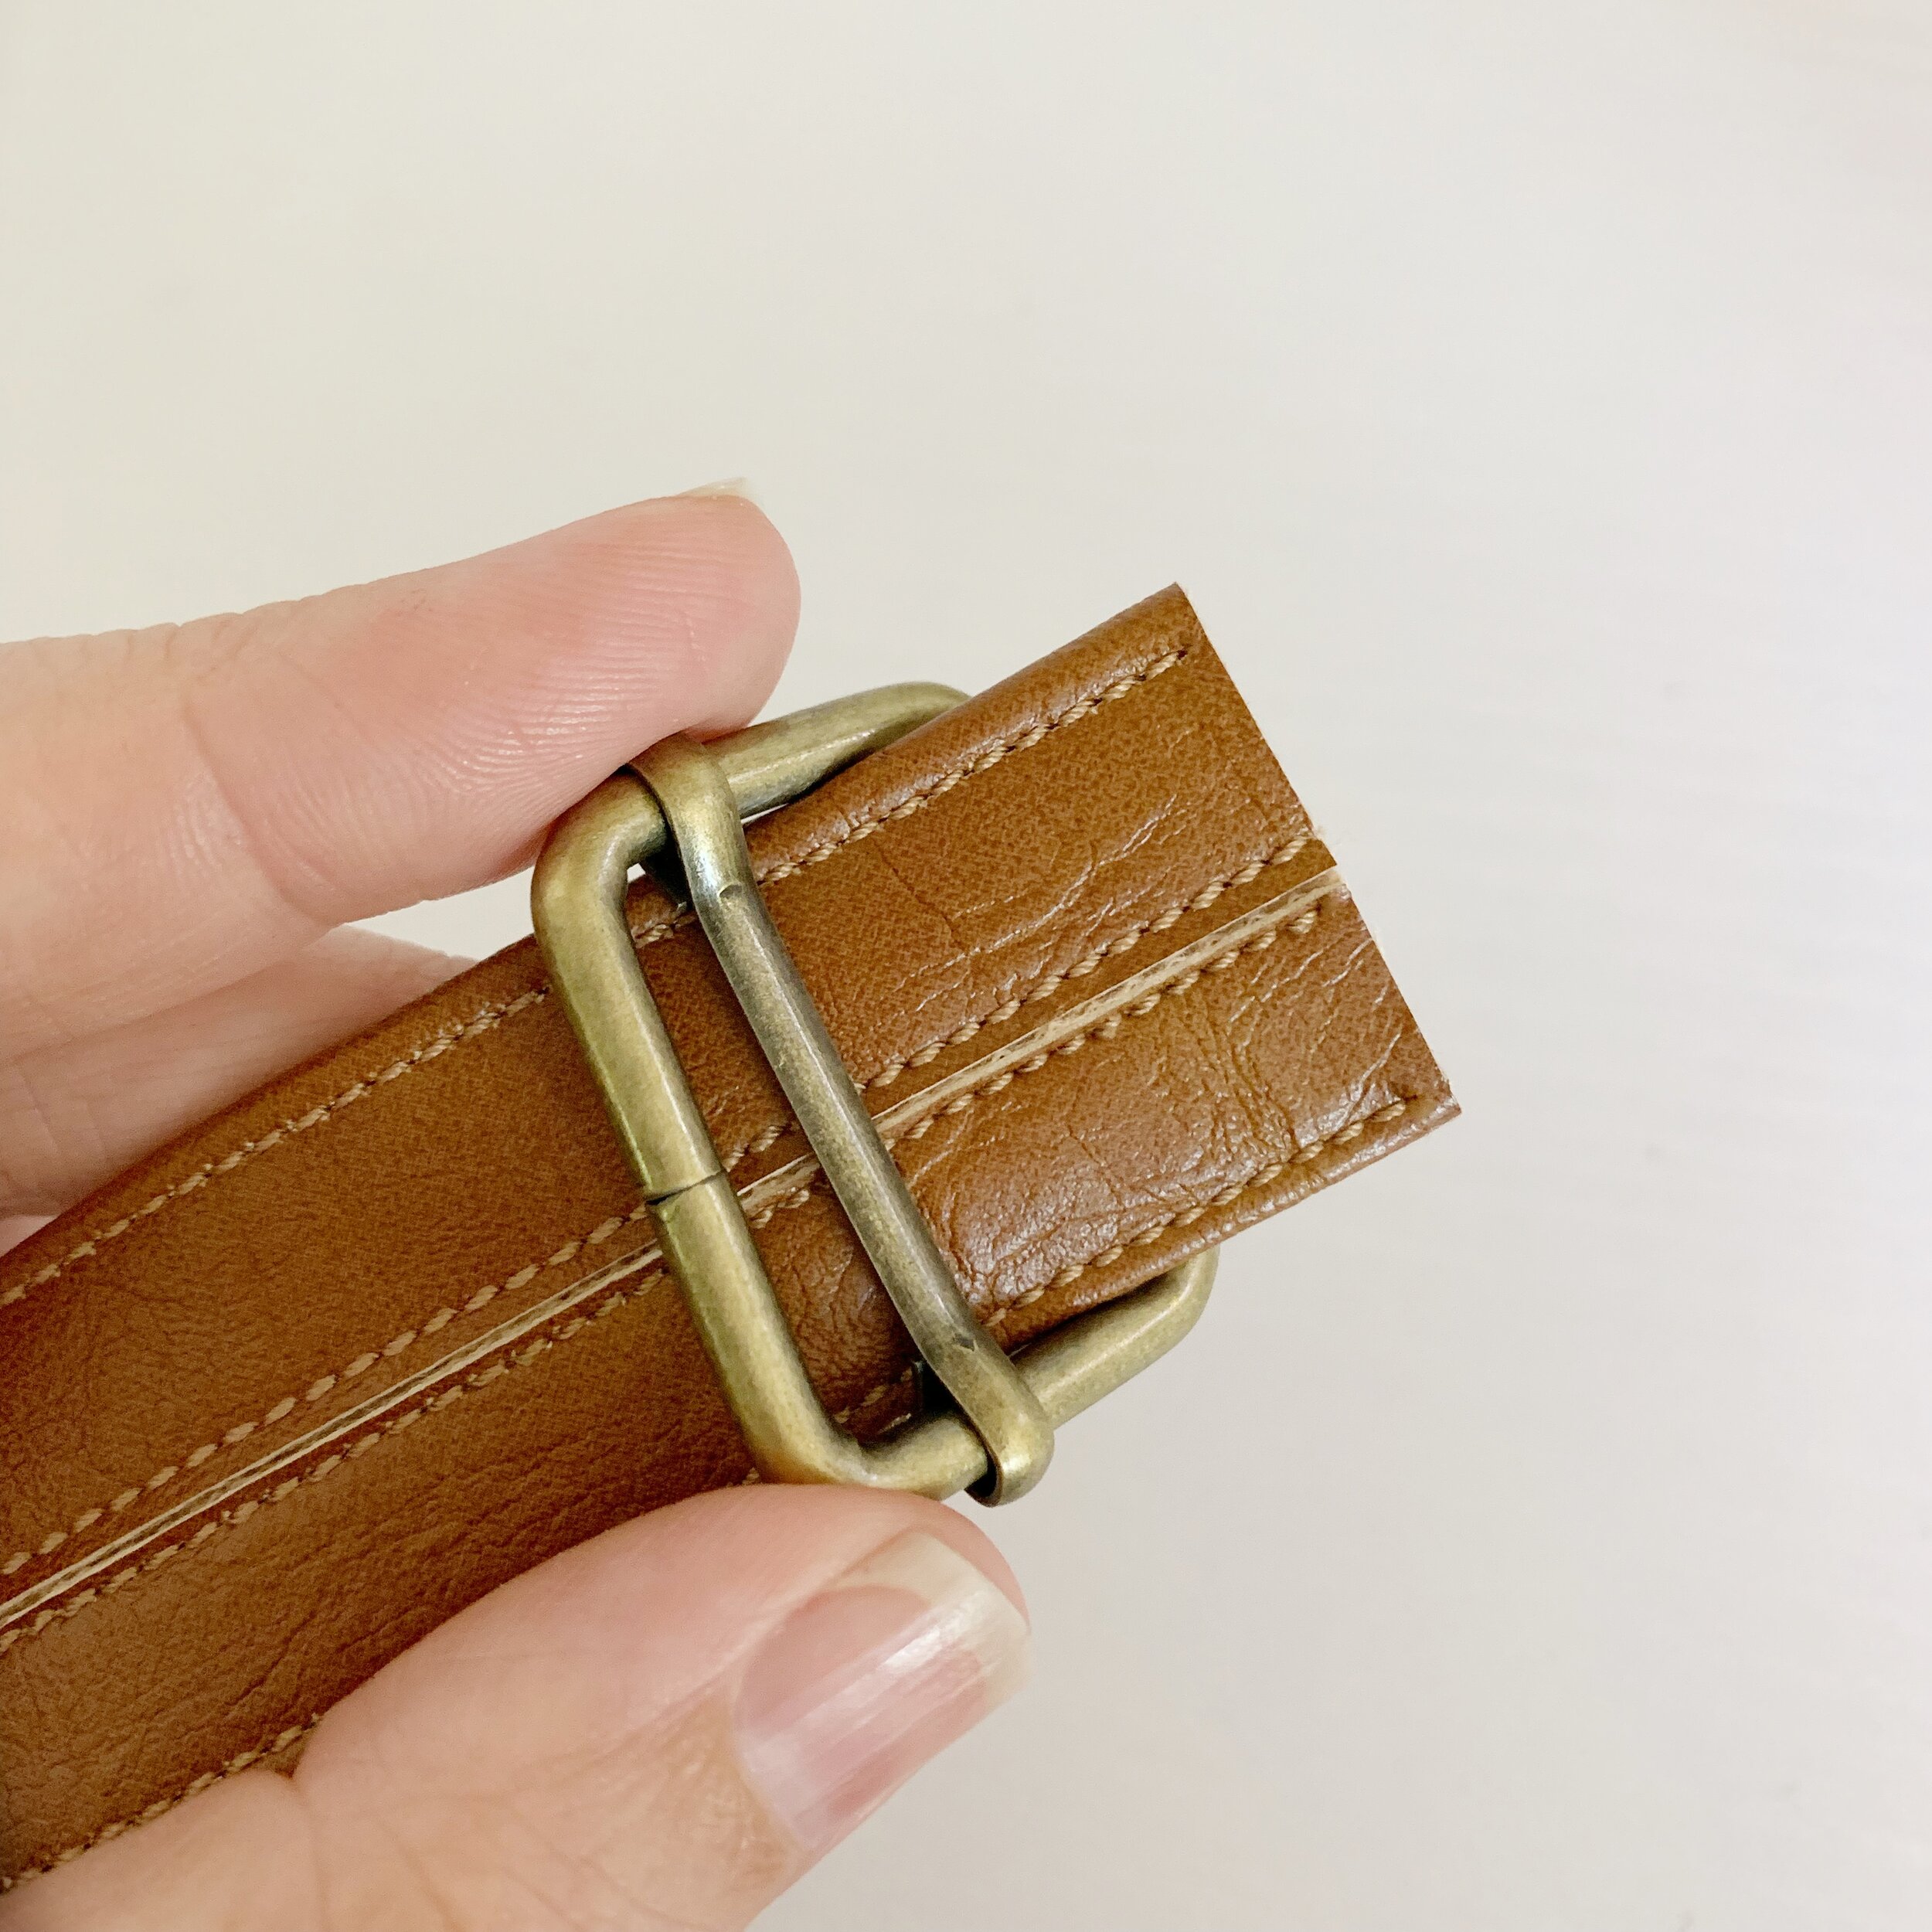
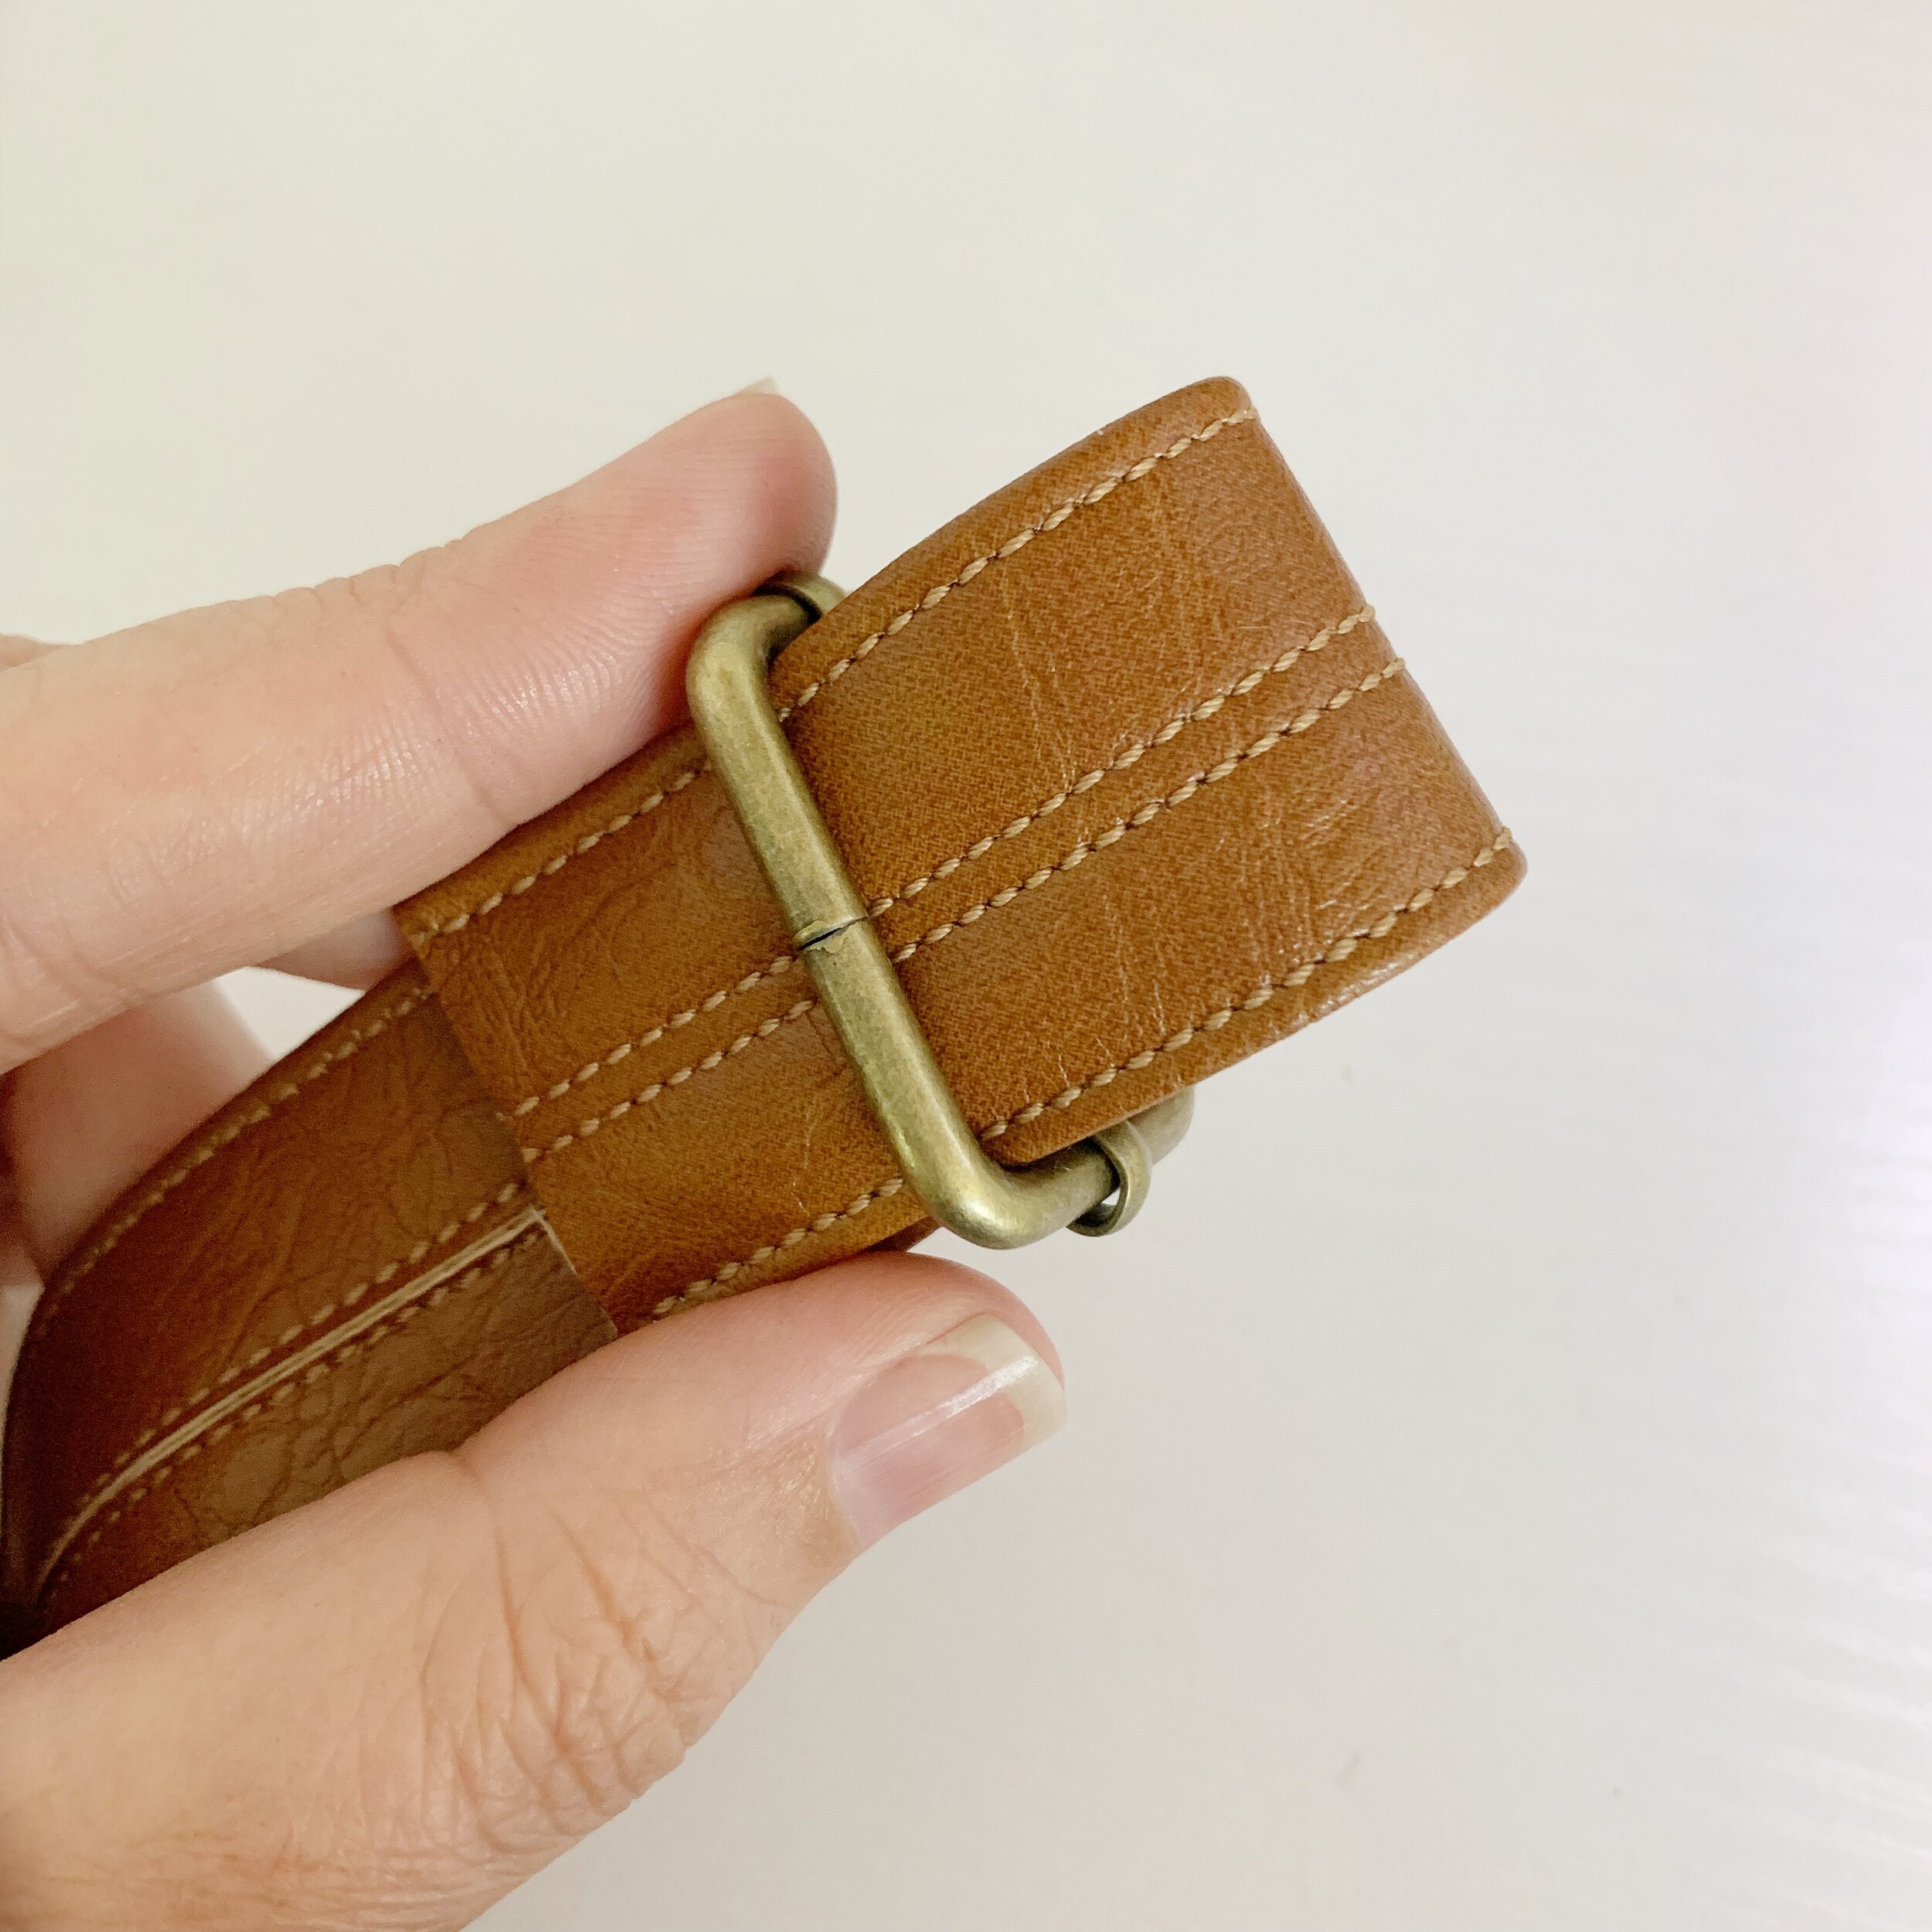
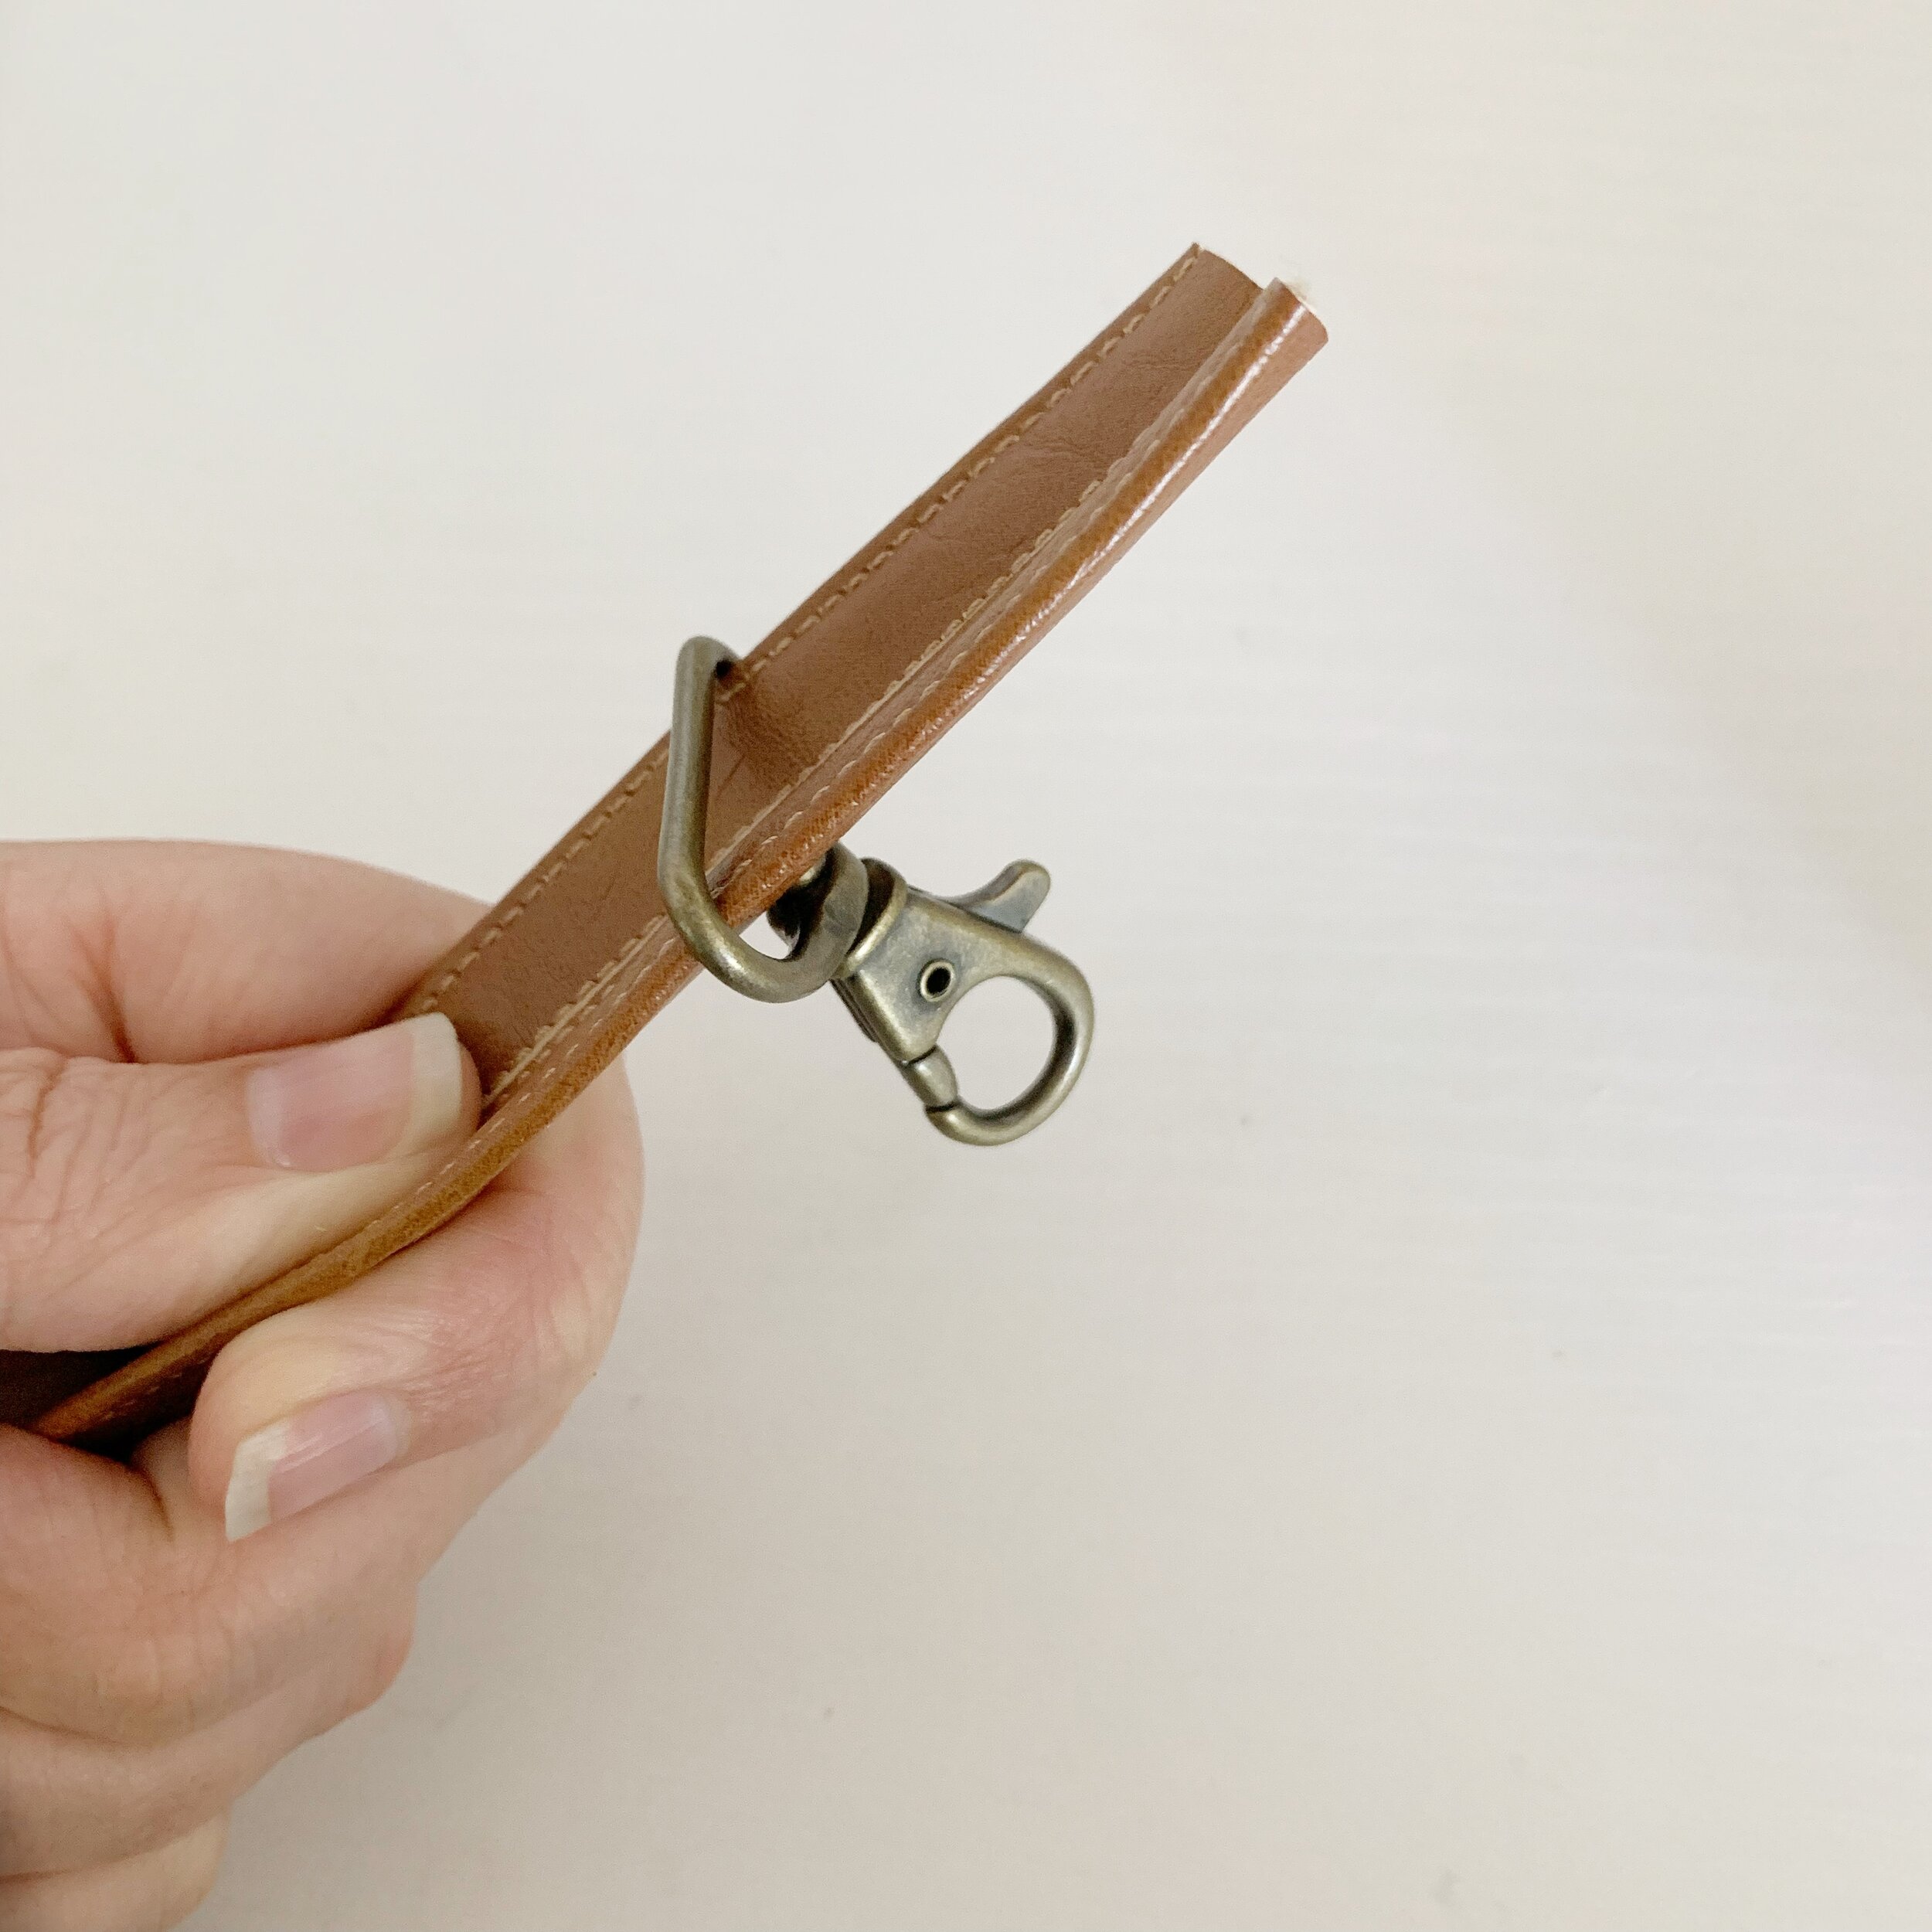
Cut the raw edge off the other end of the strap, Thread one of the swivel clasps onto the end and then thread it up and around the center bar of the slide adjuster, going over the piece of strap already in place.
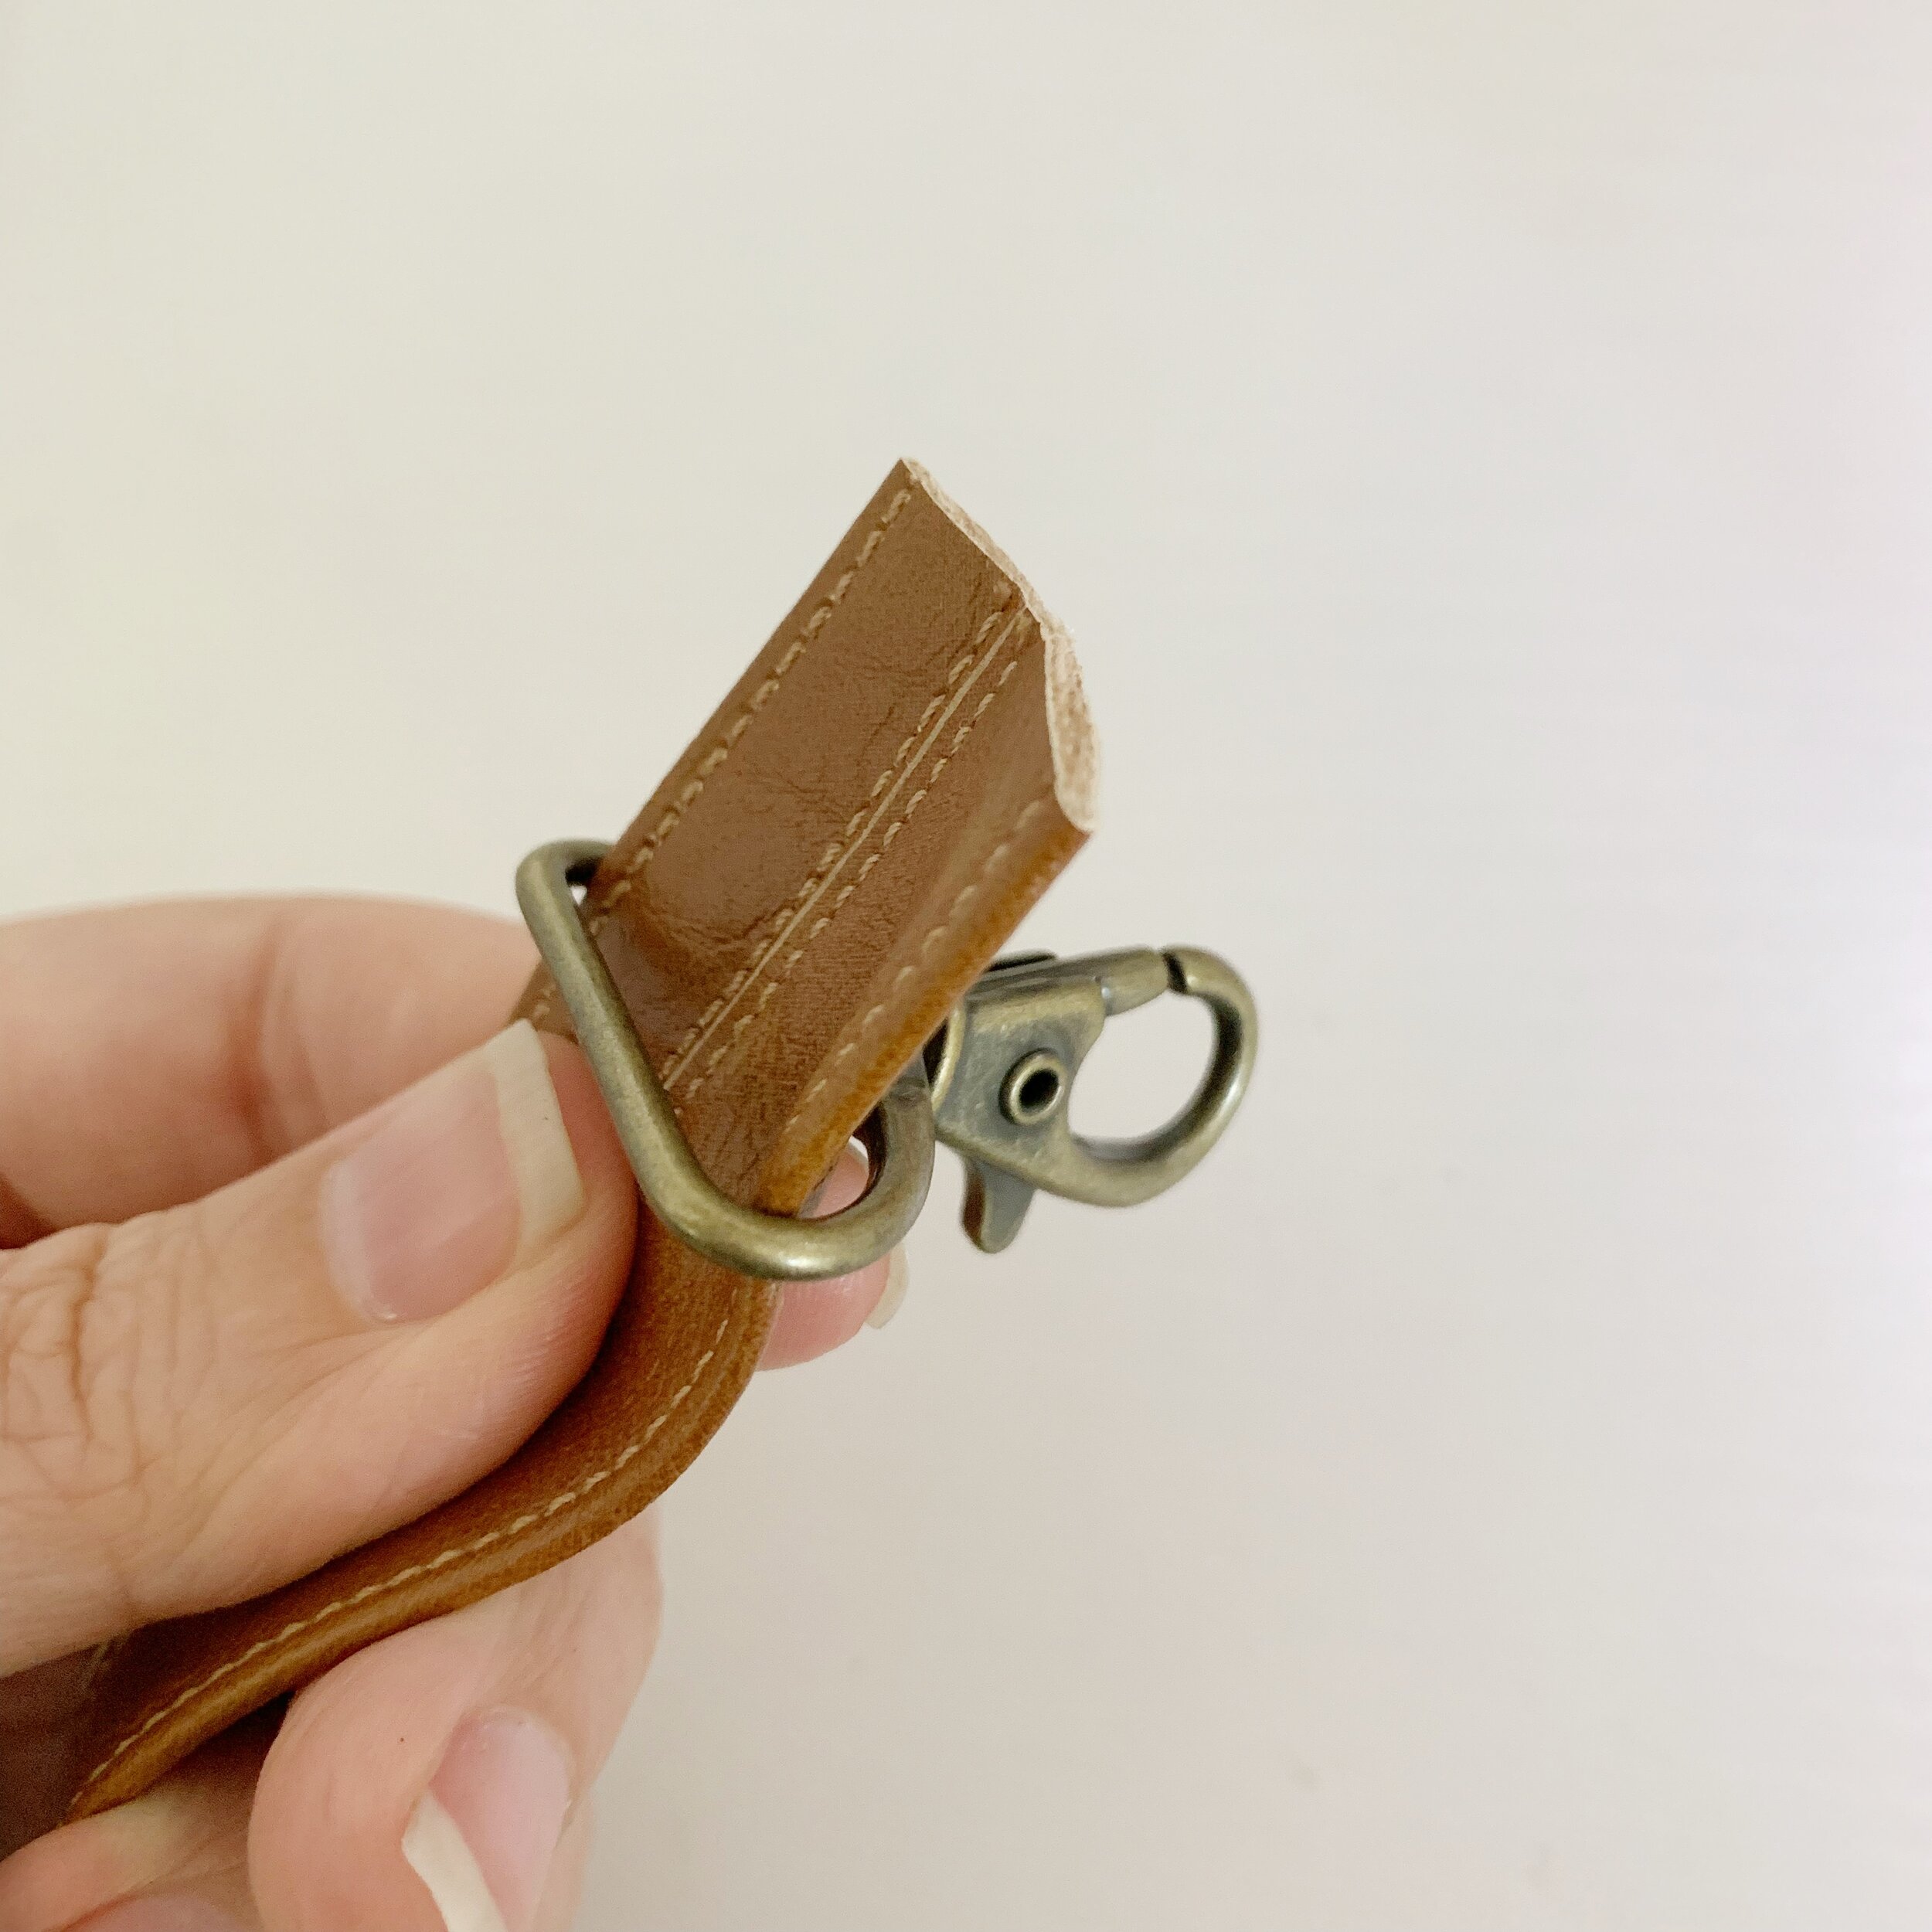
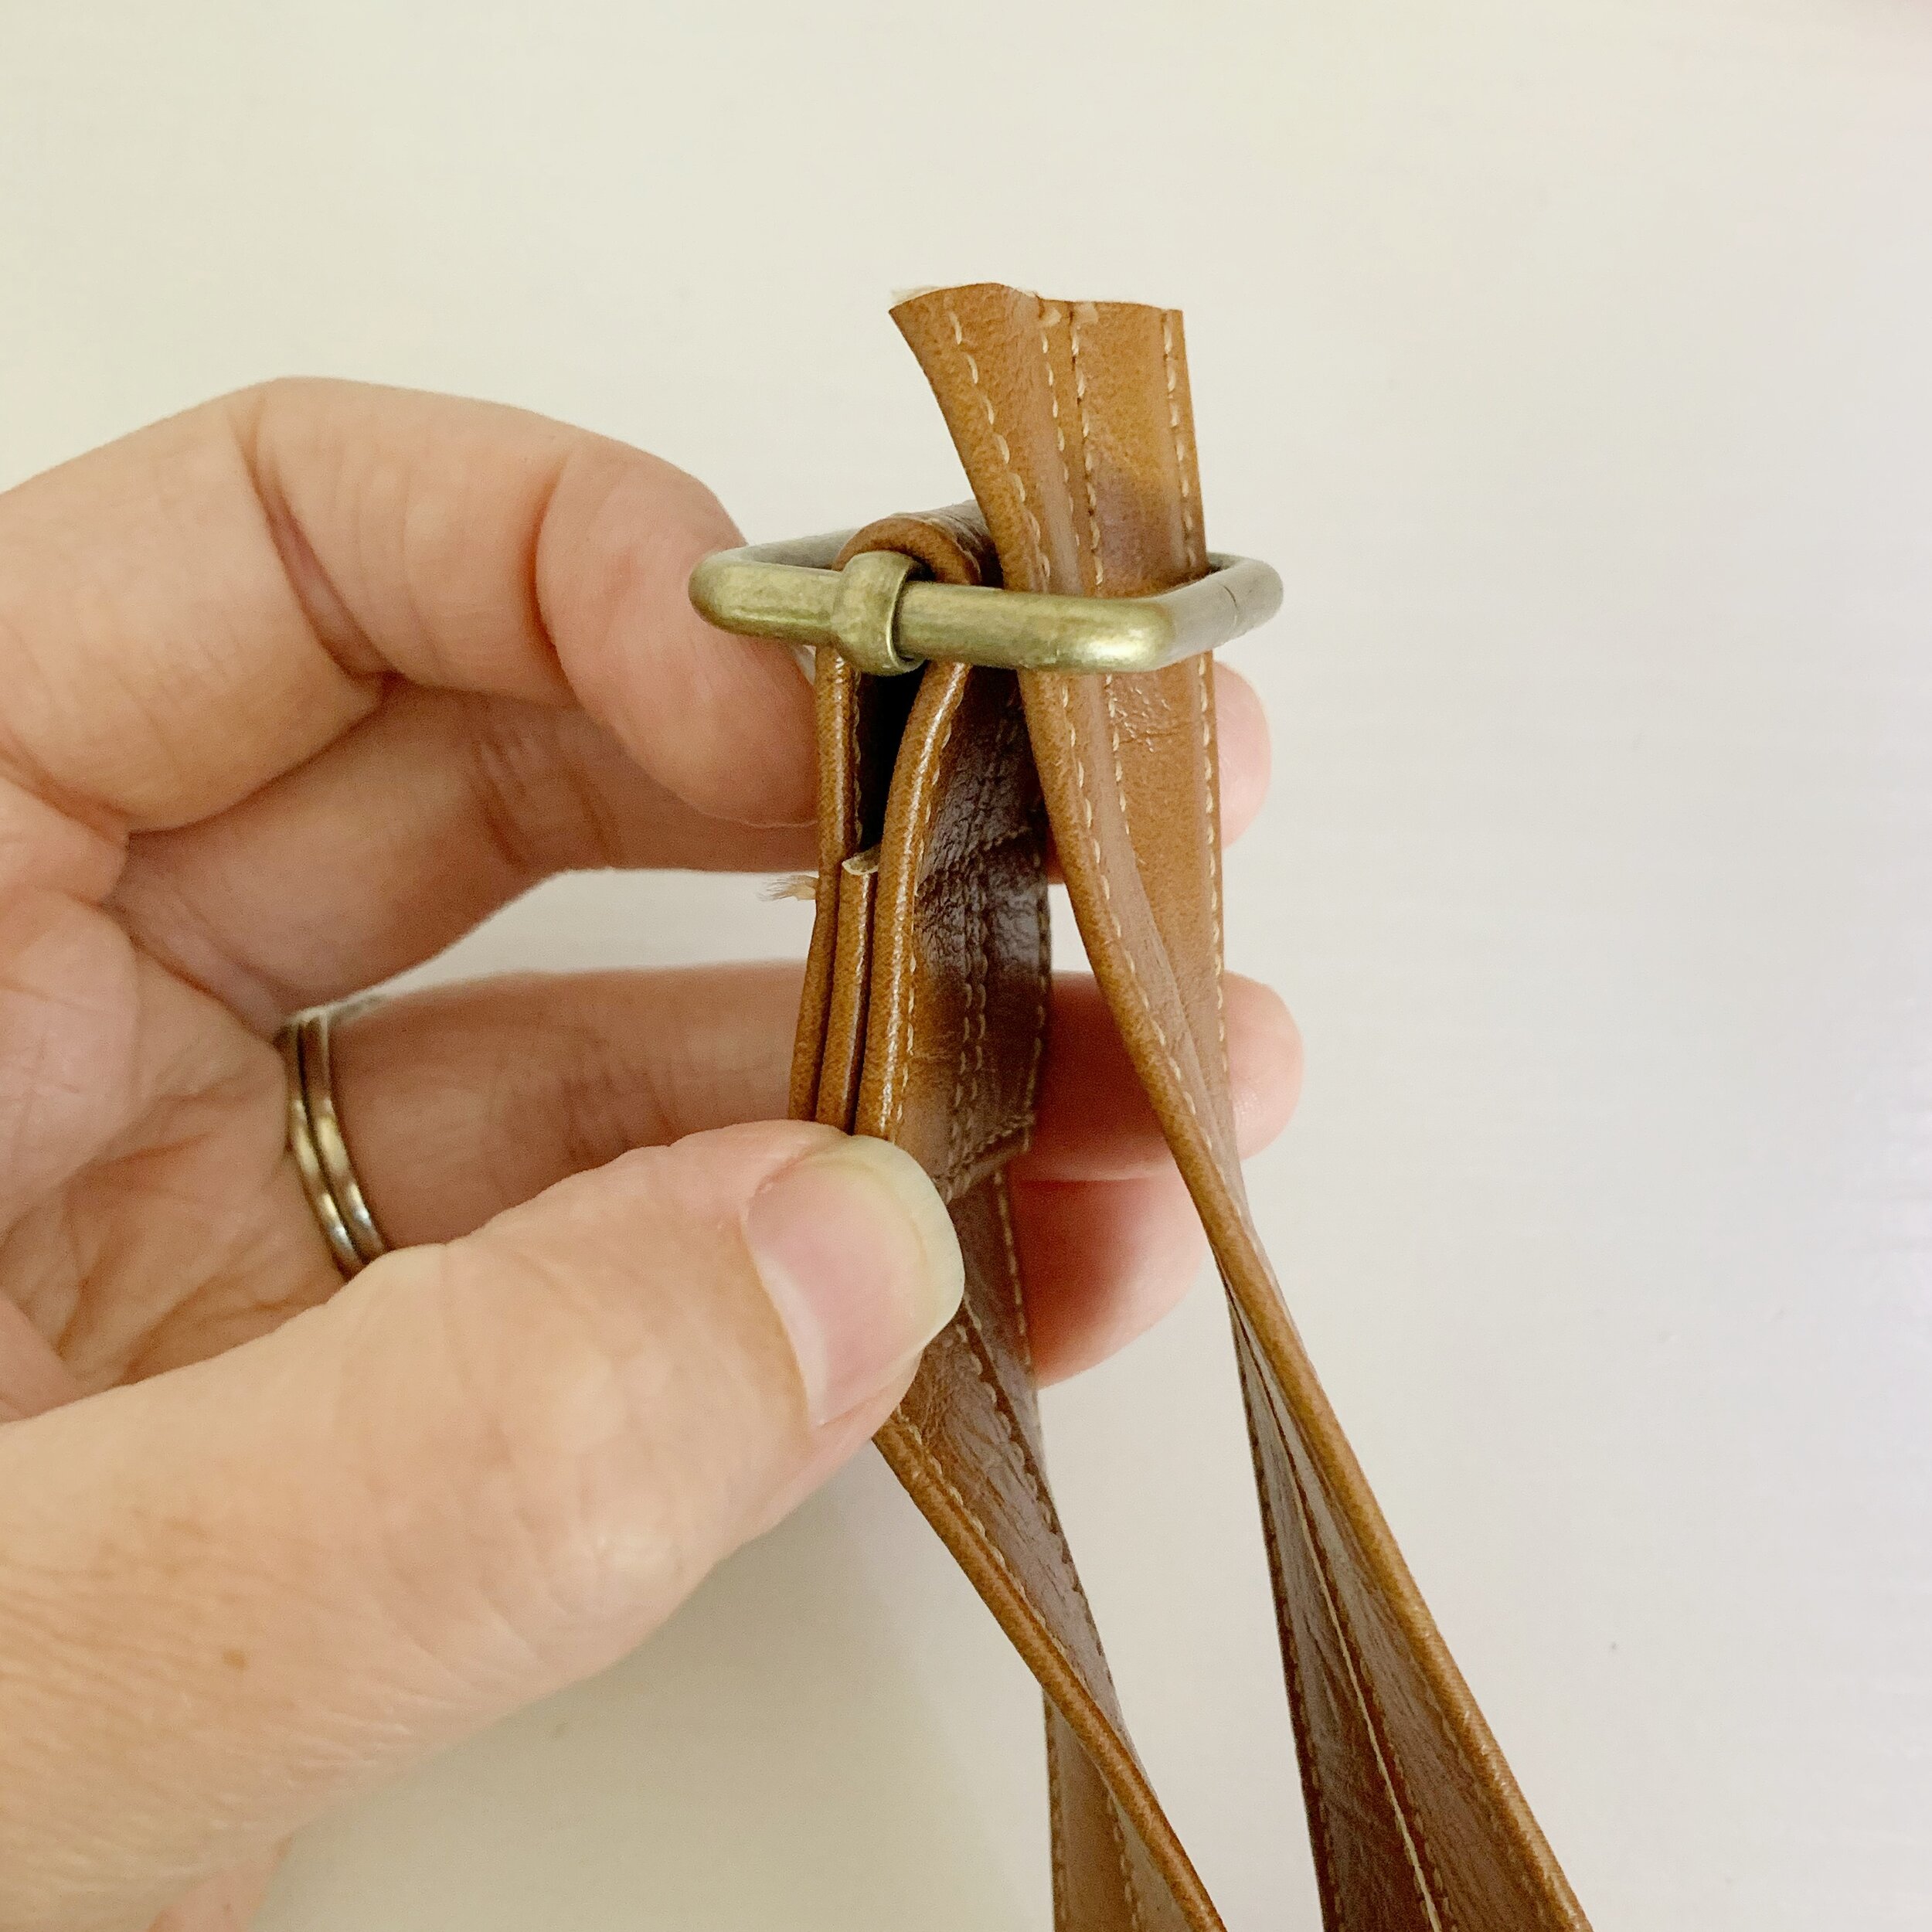
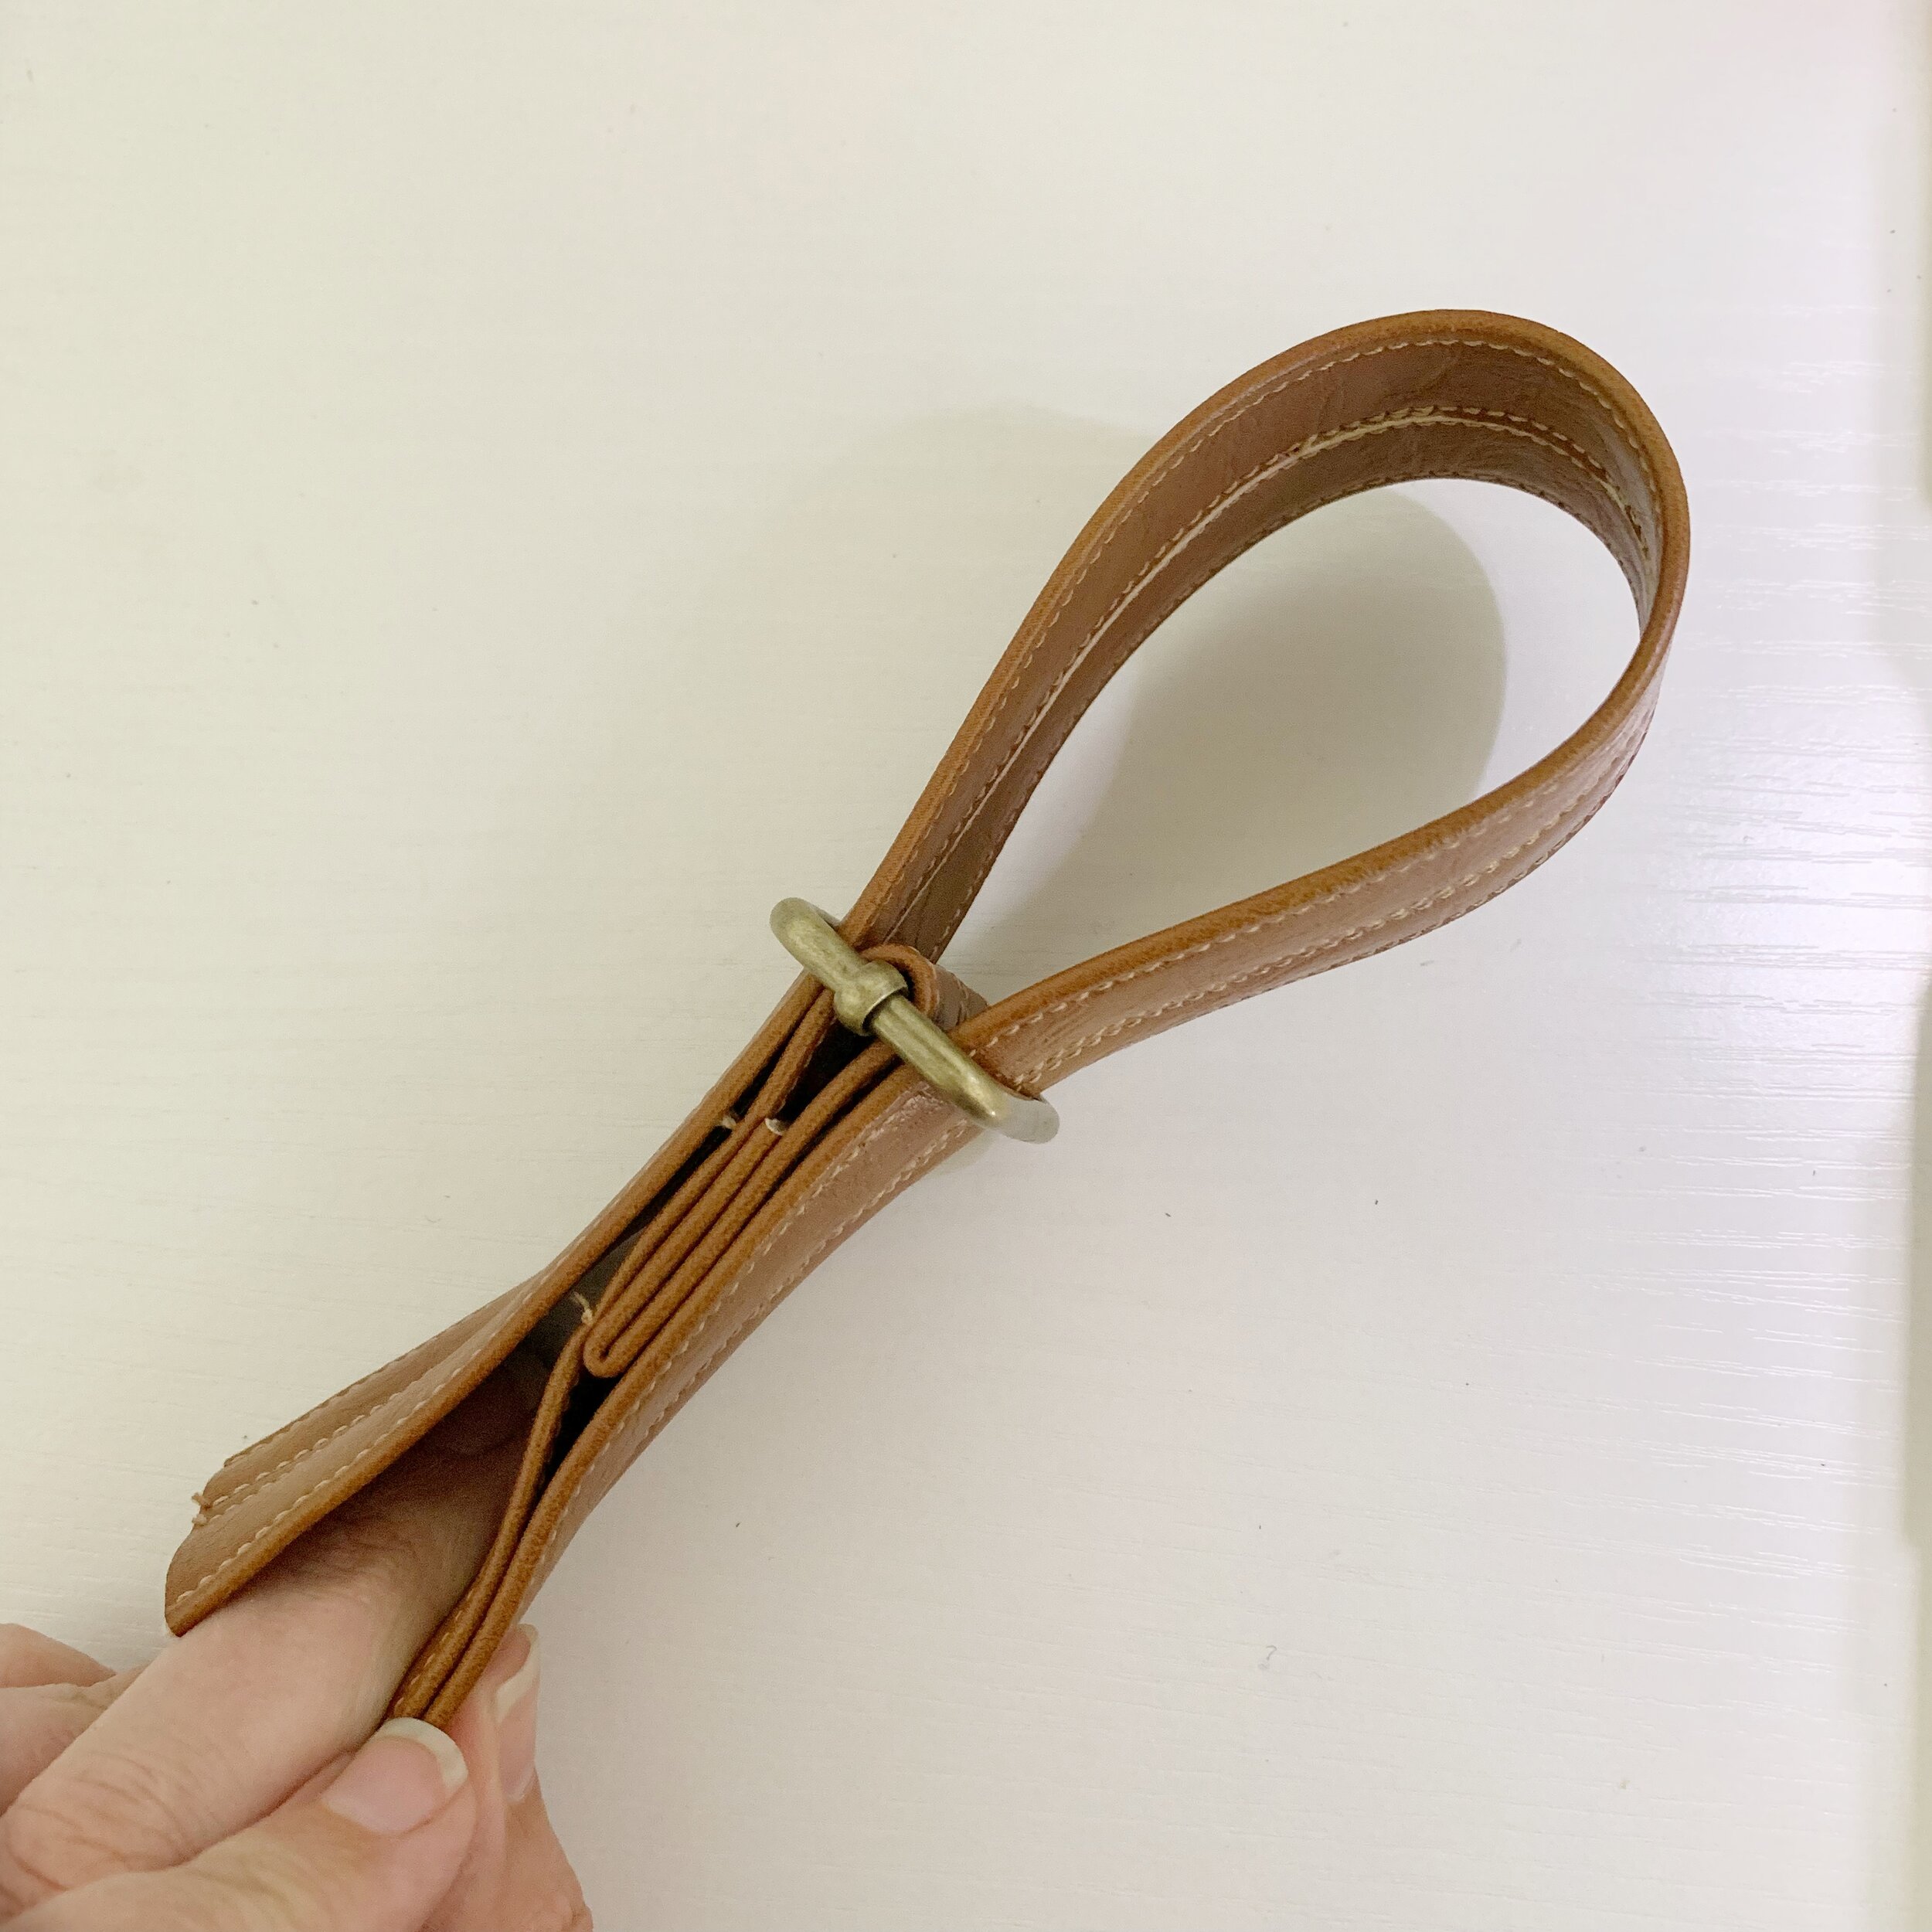
The swivel clasp will now be on a loop of strap as shown in the last photo.
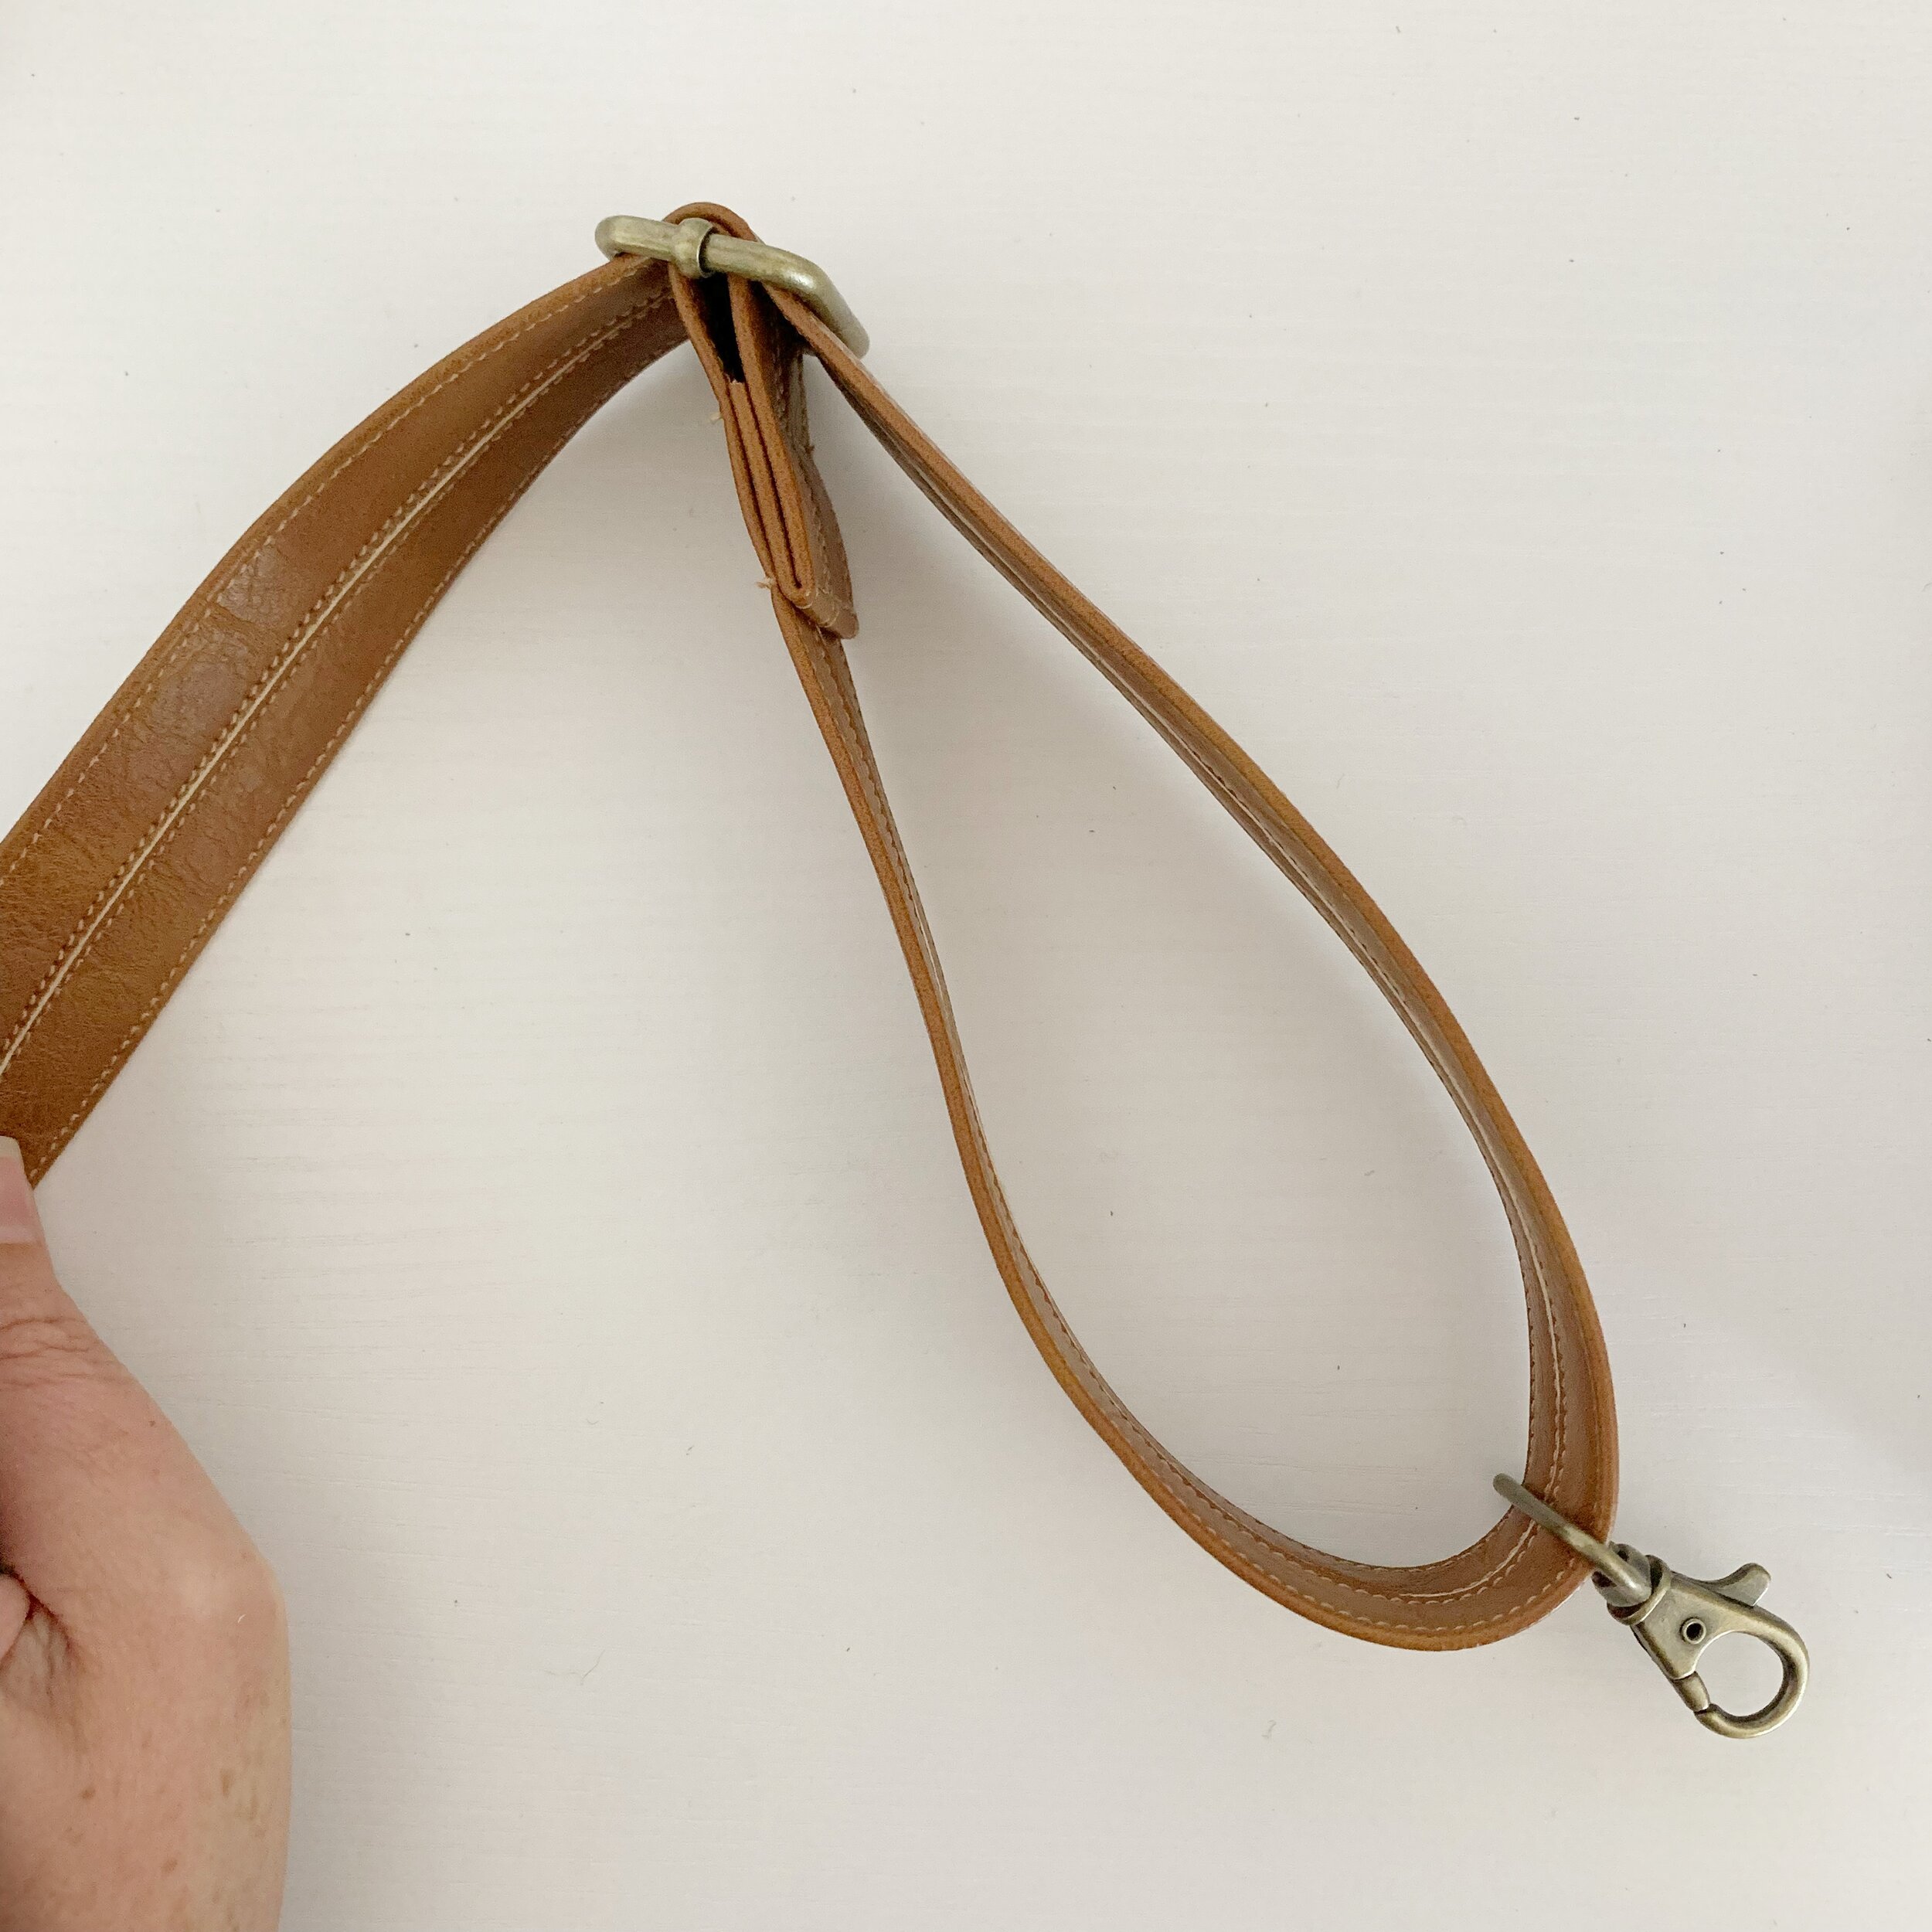
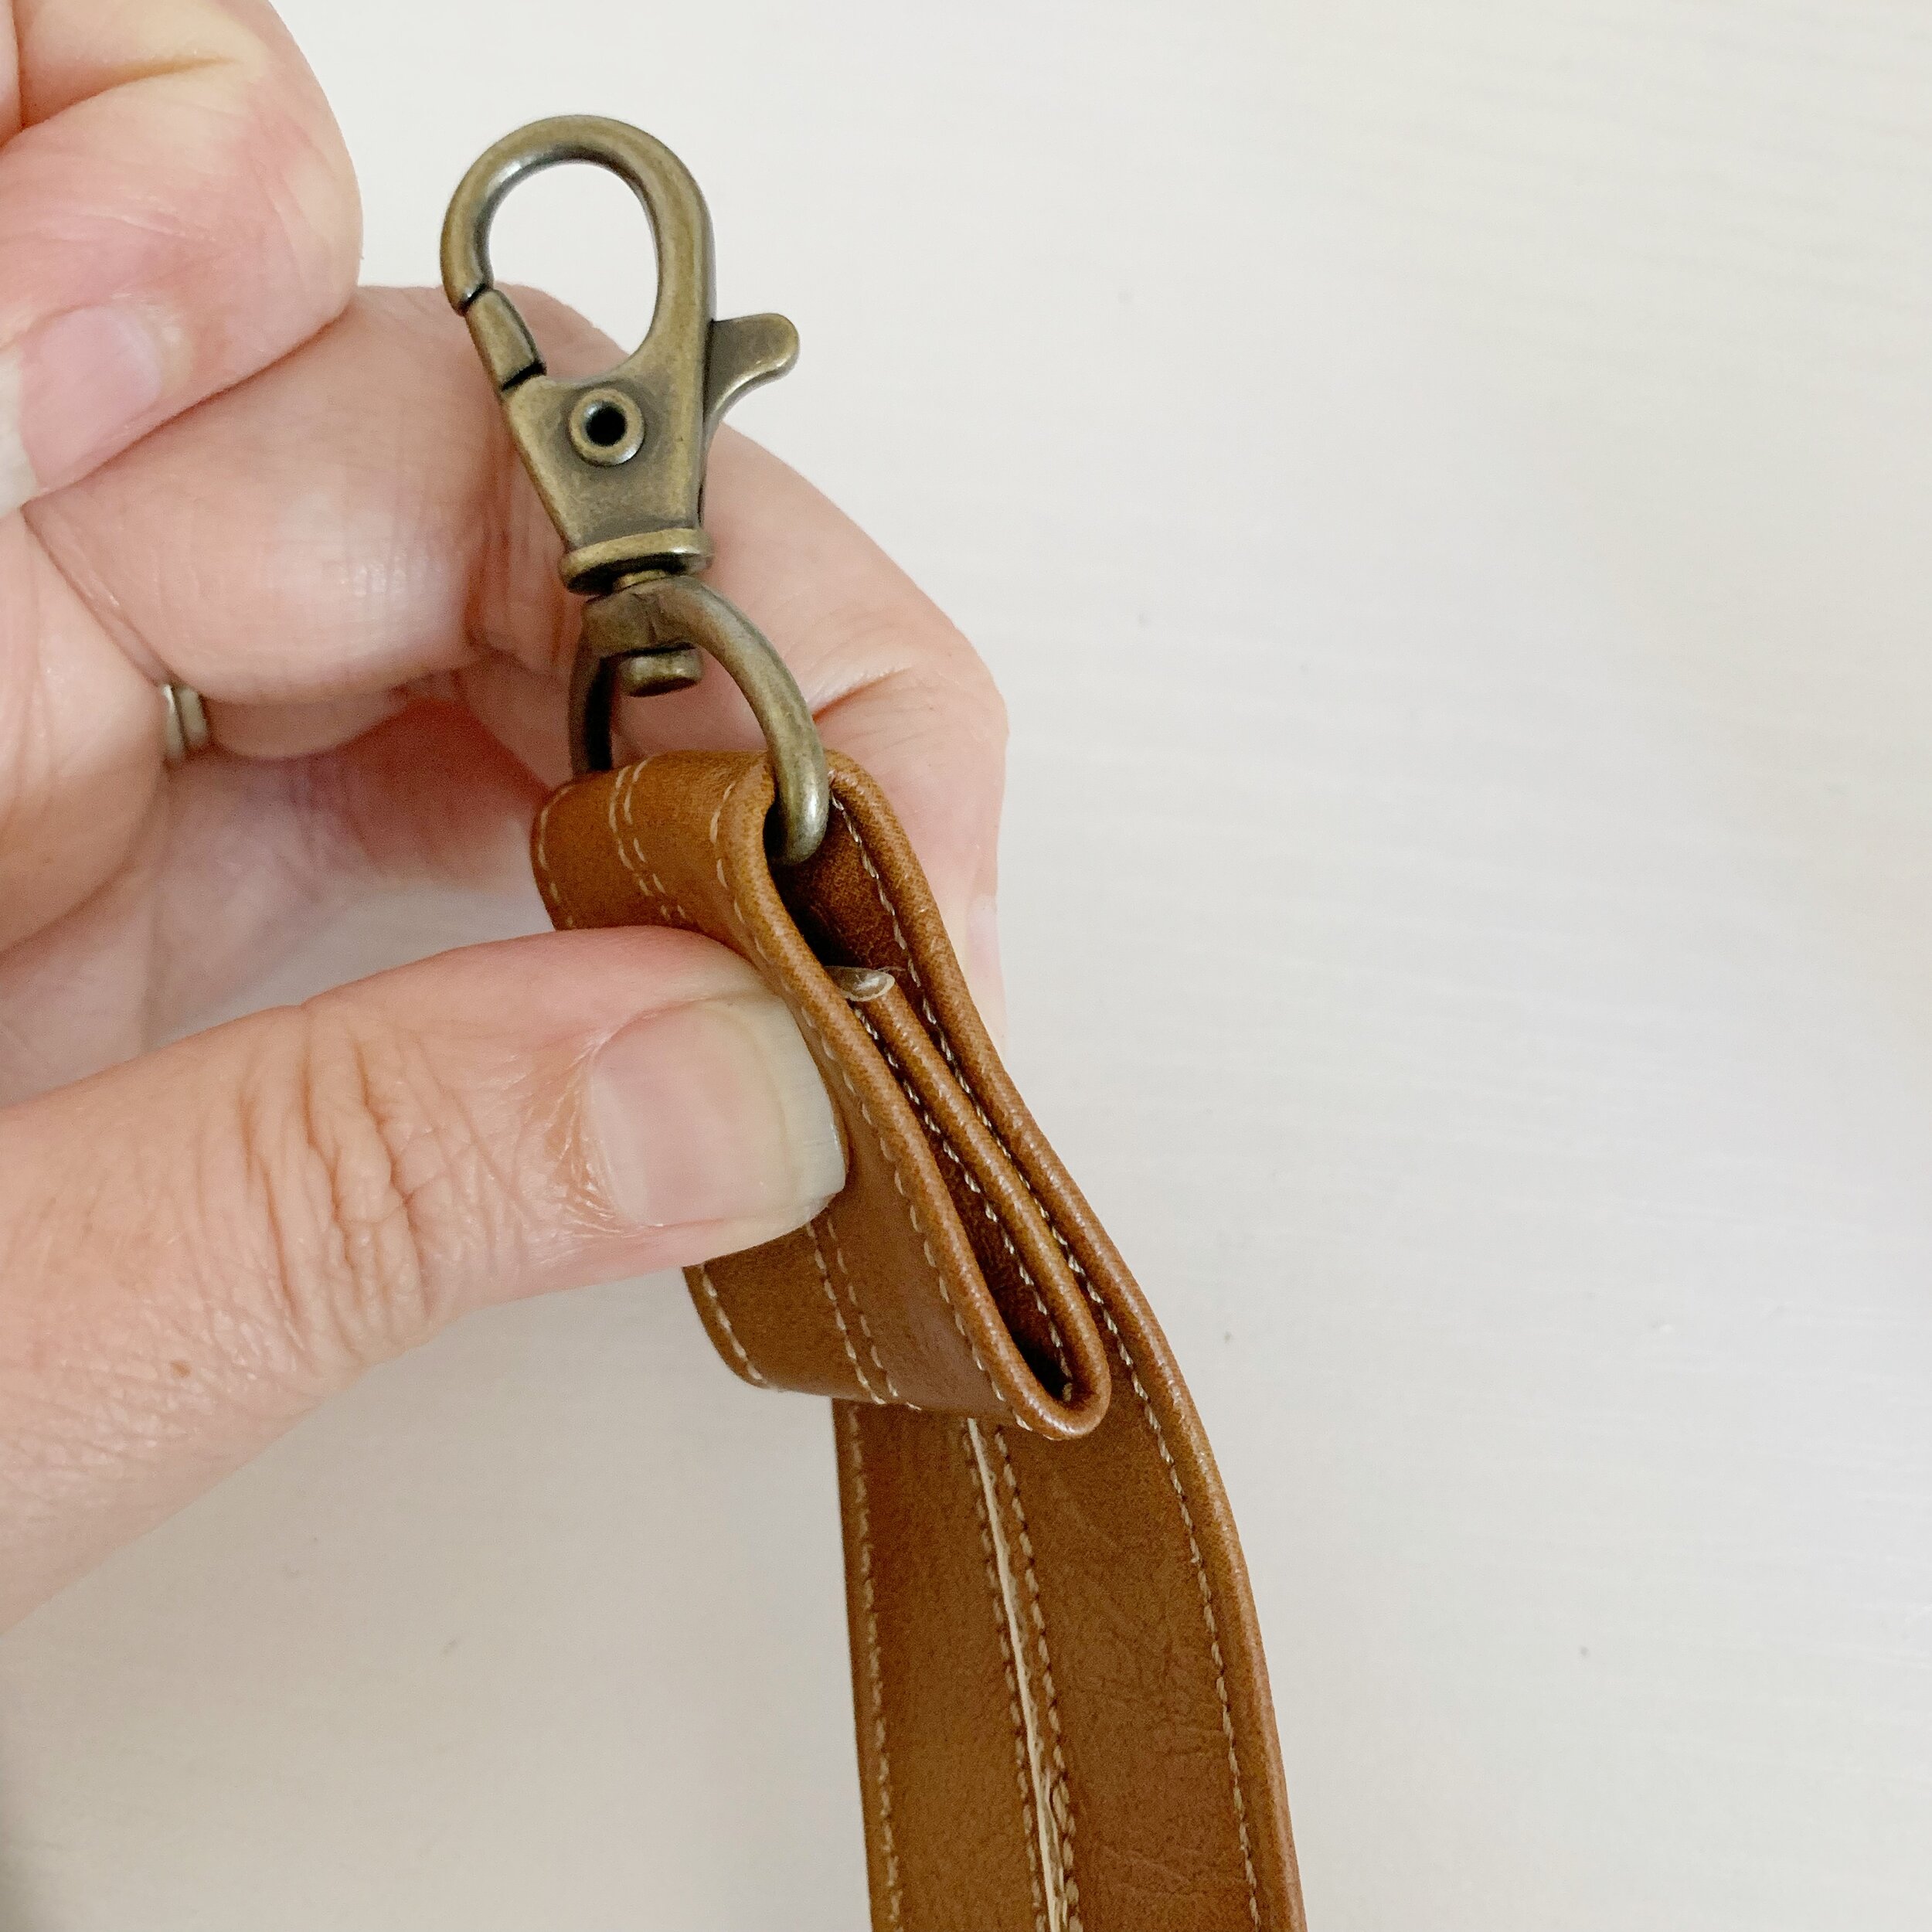
Thread the second swivel clasp onto the end of the strap. Fold end down about an inch, then fold again so it is flat against the strap. Sew along folded end and along swivel clasp to secure. Set strap aside.
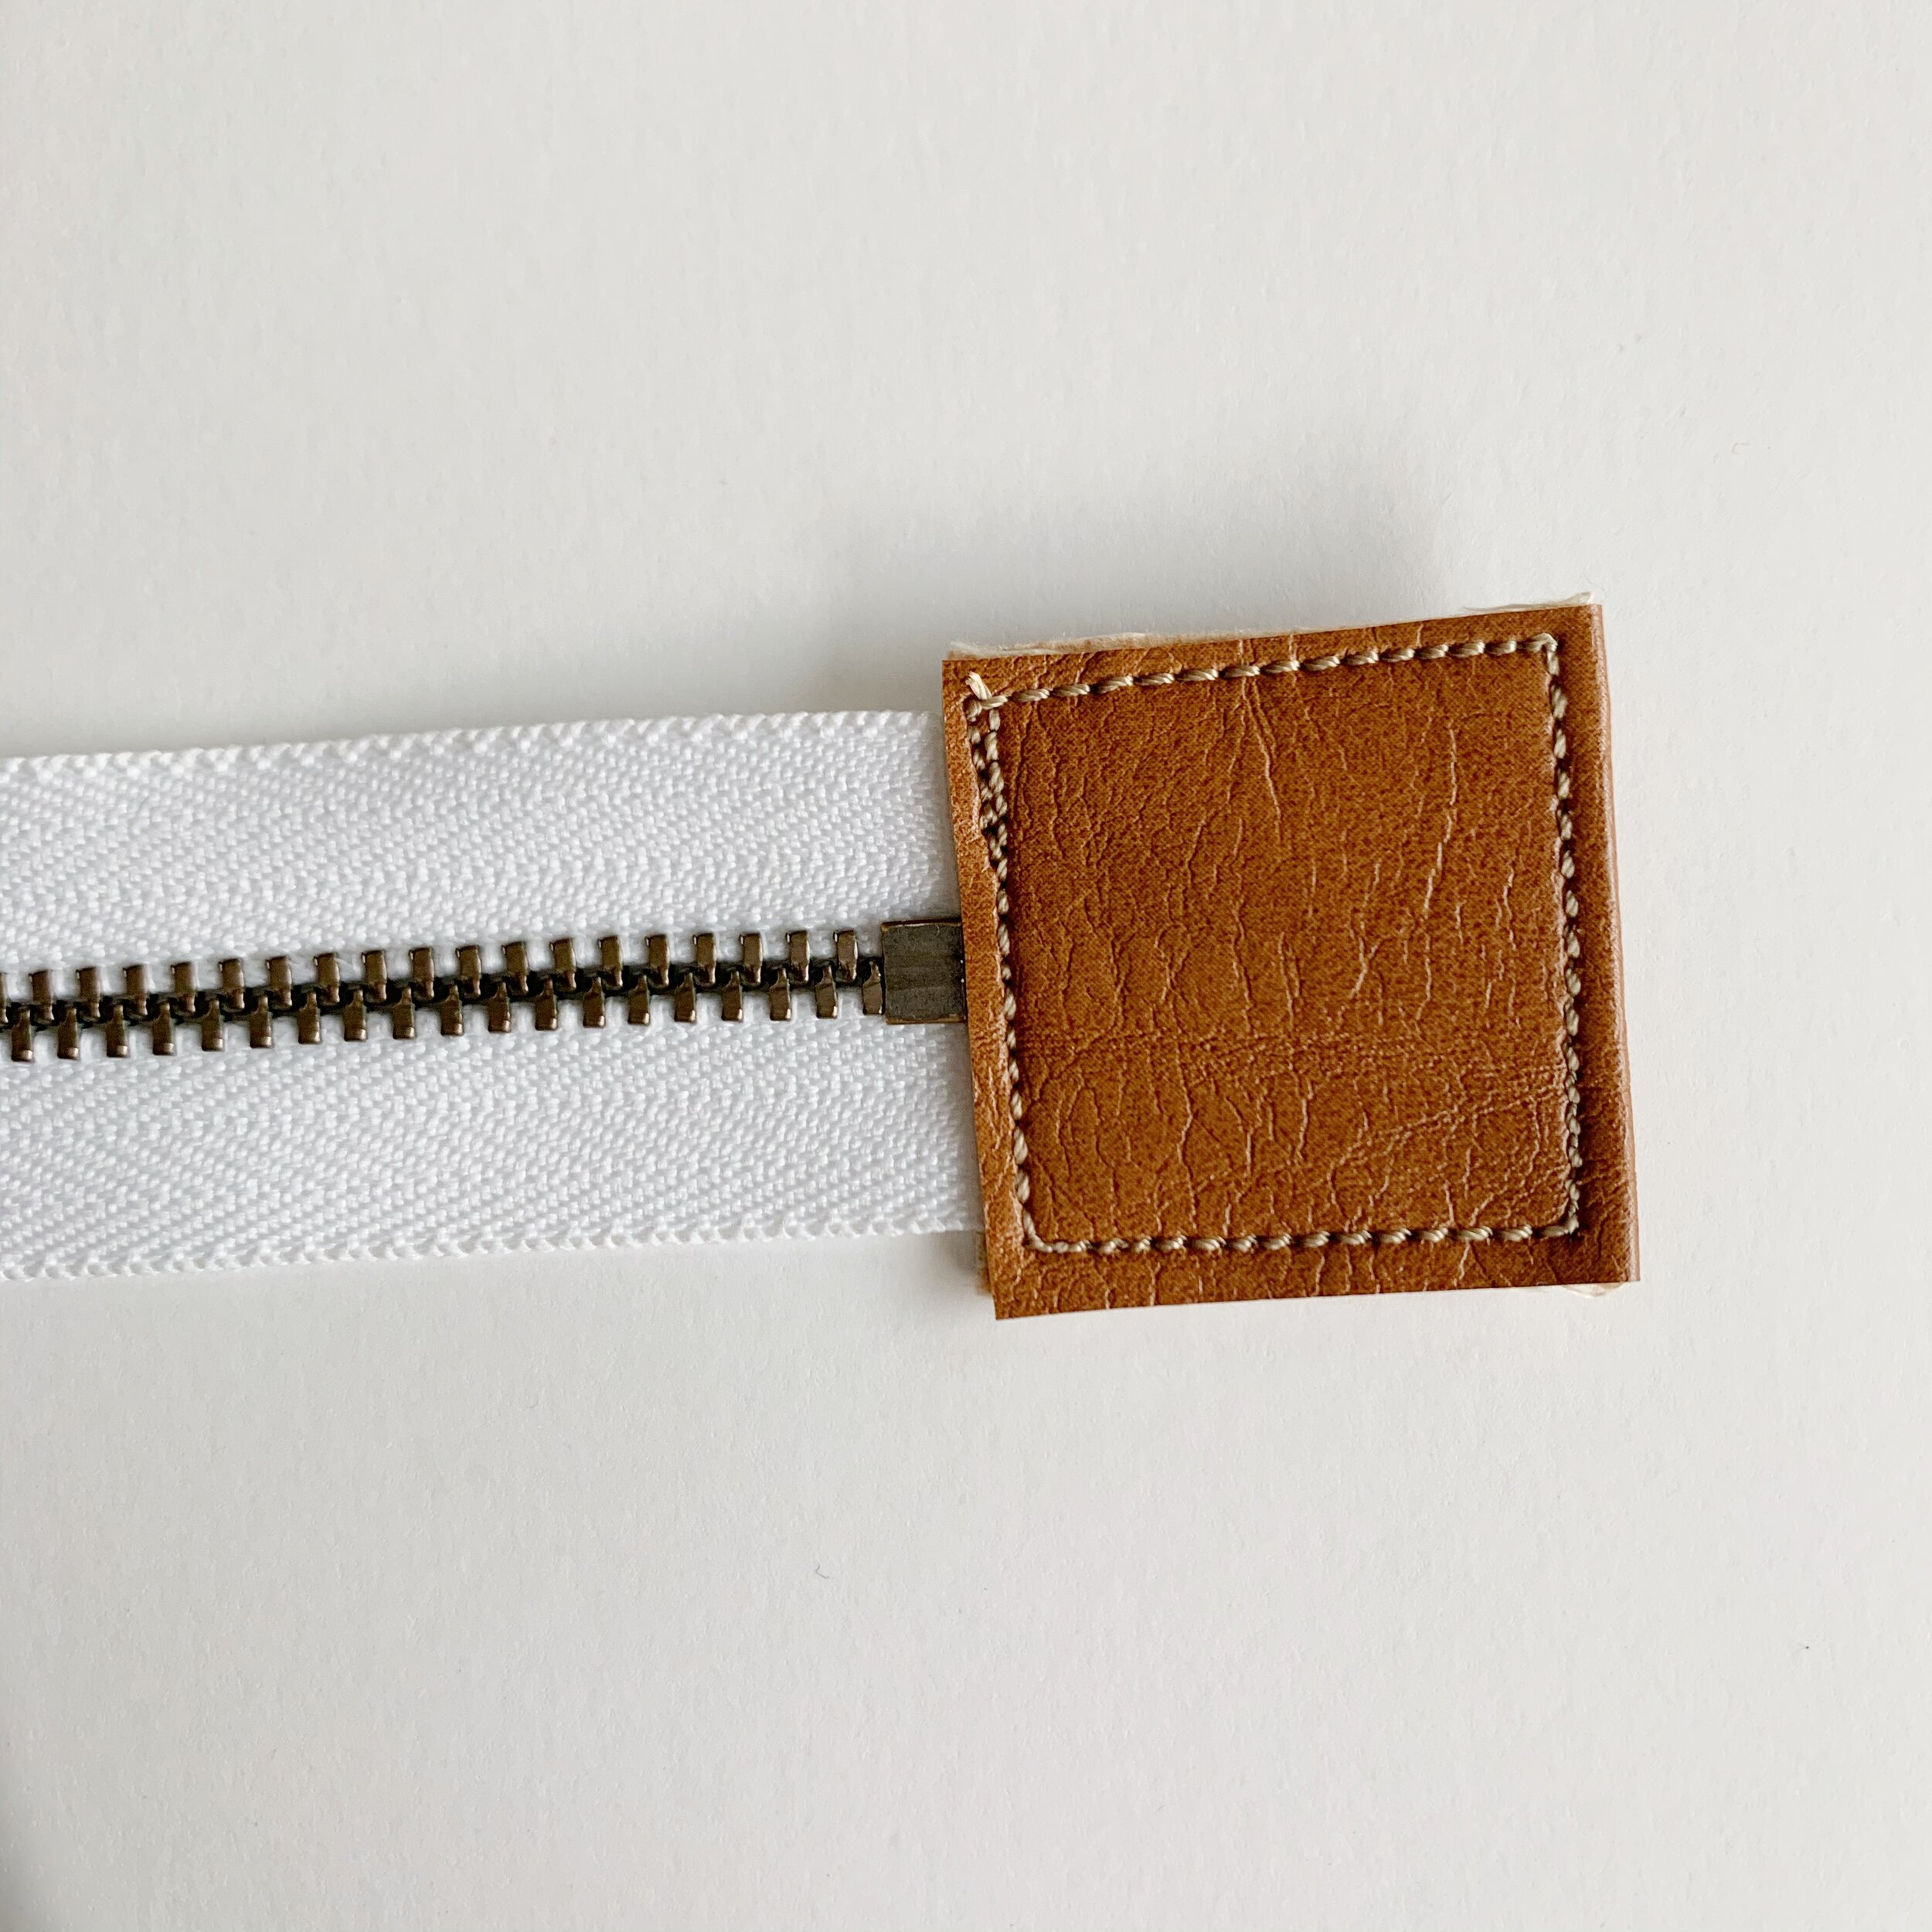
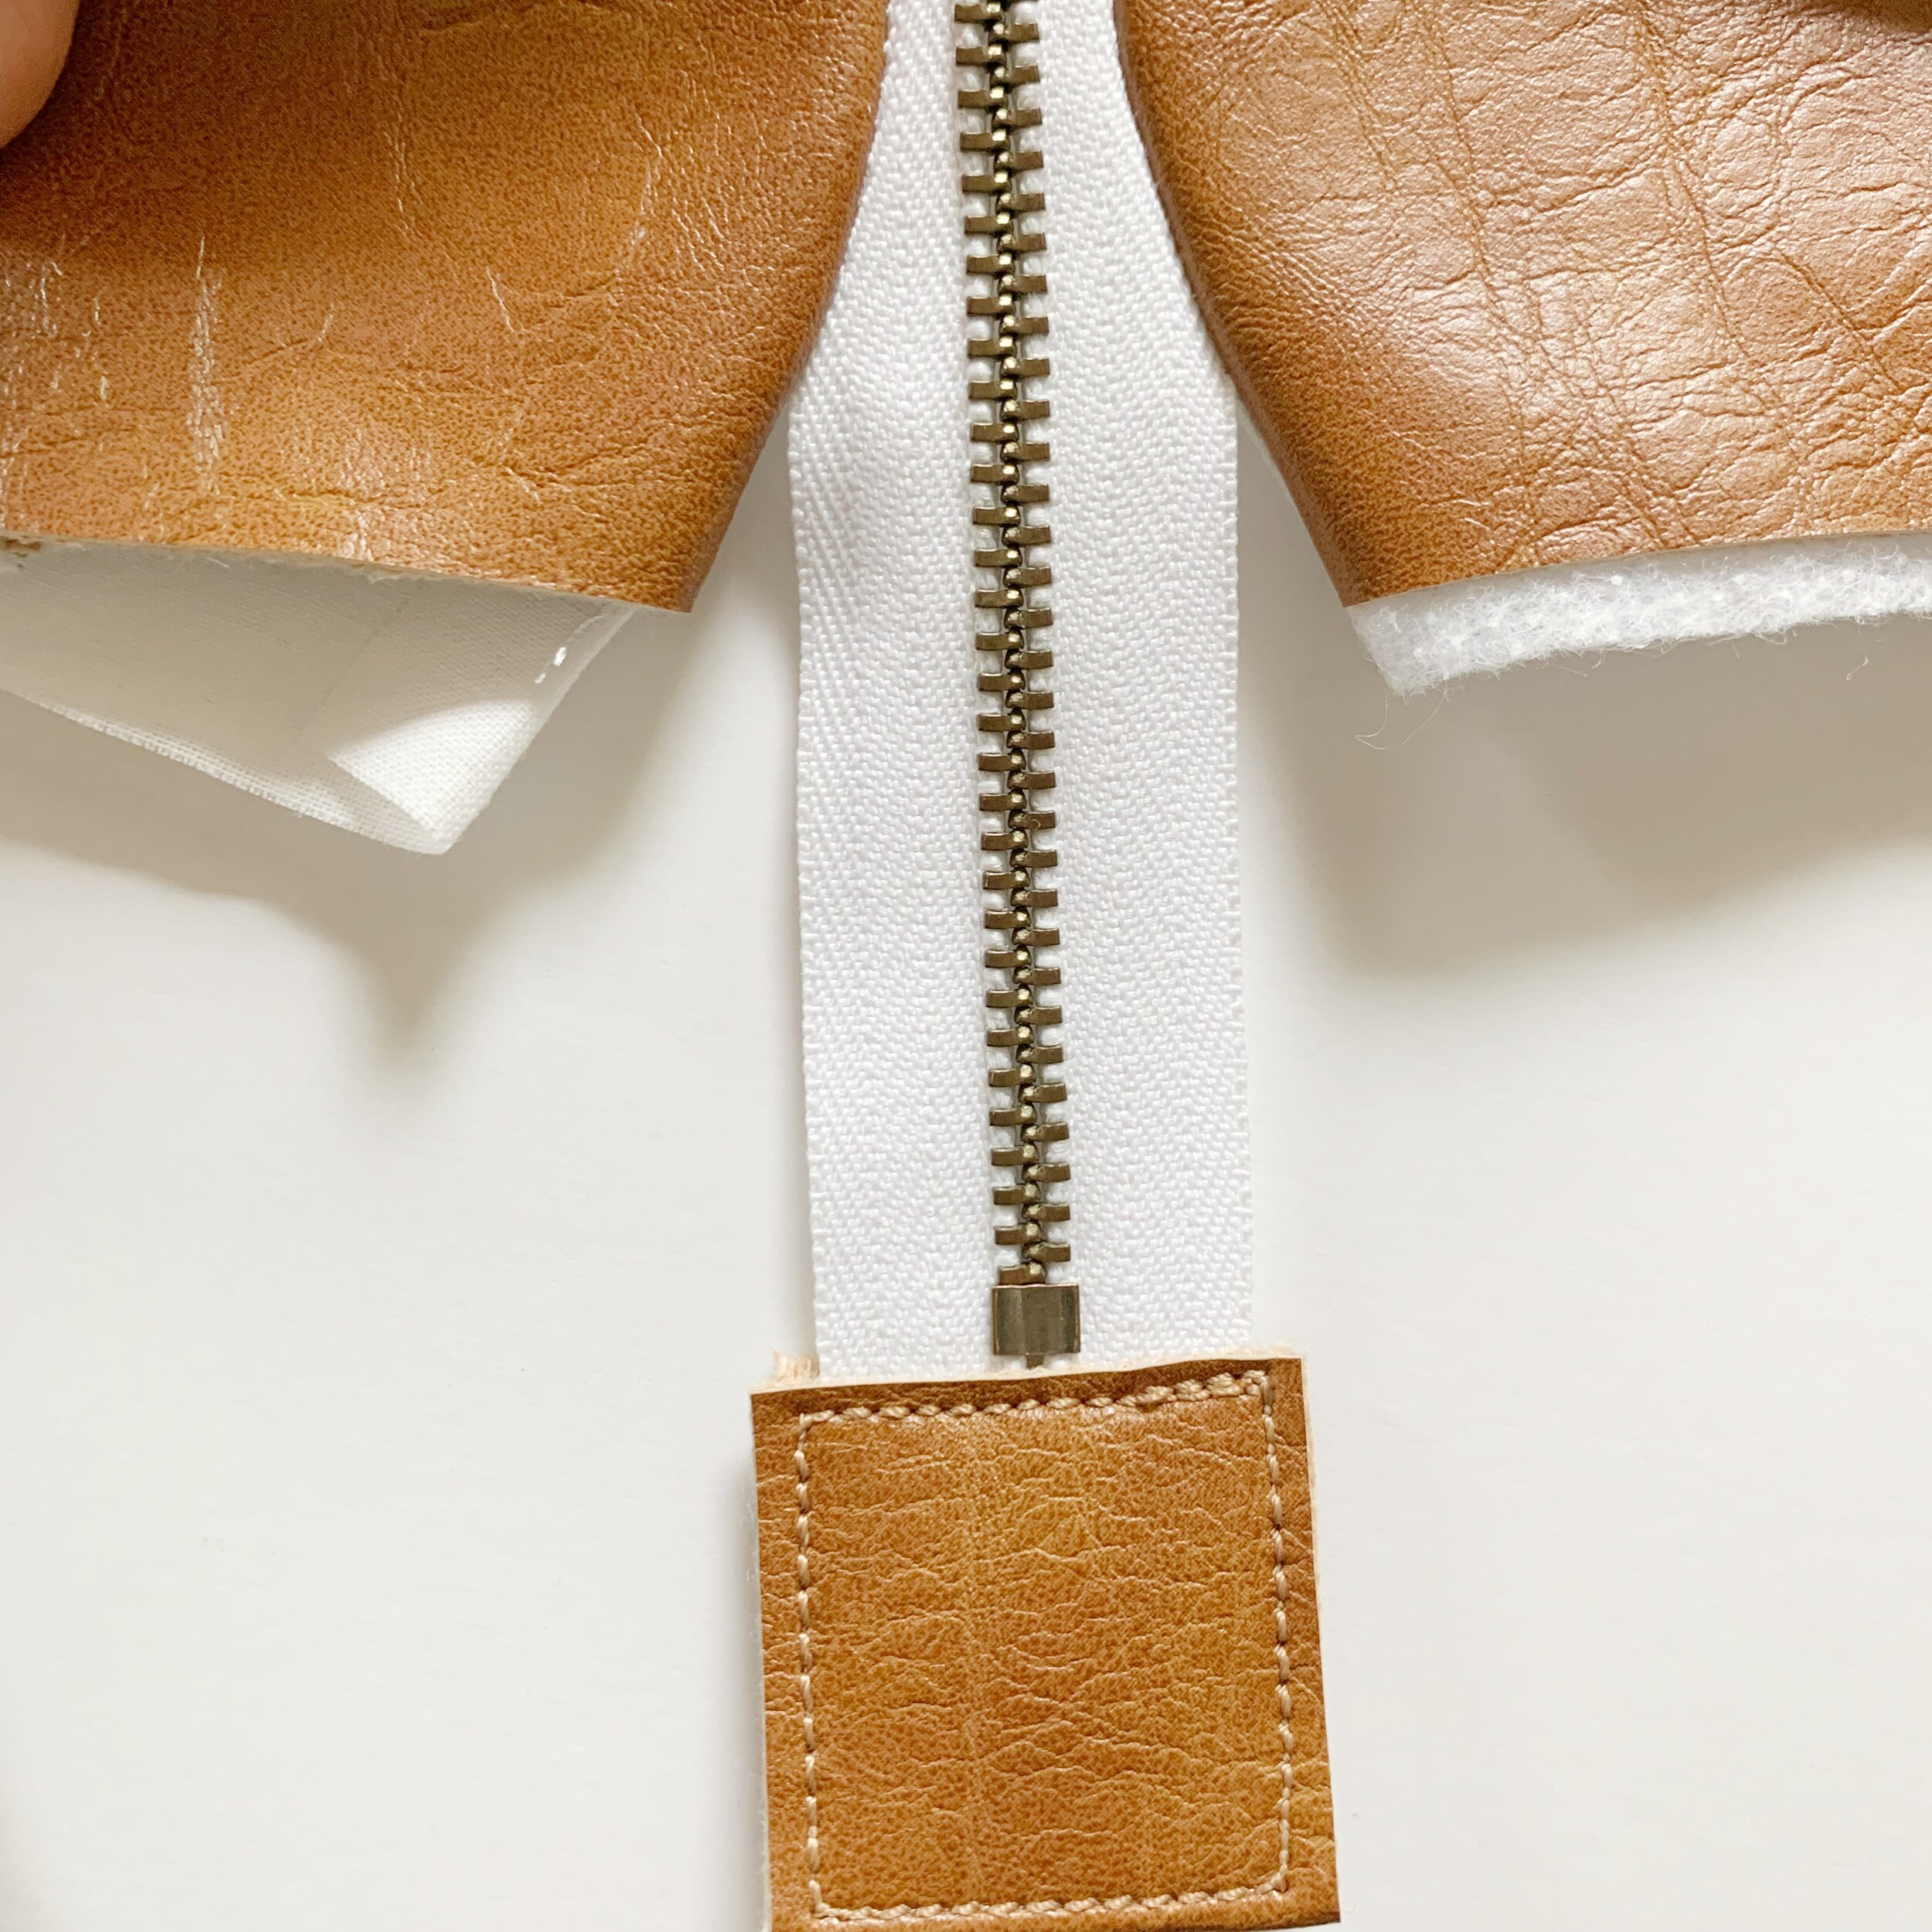
Zipper Tab:
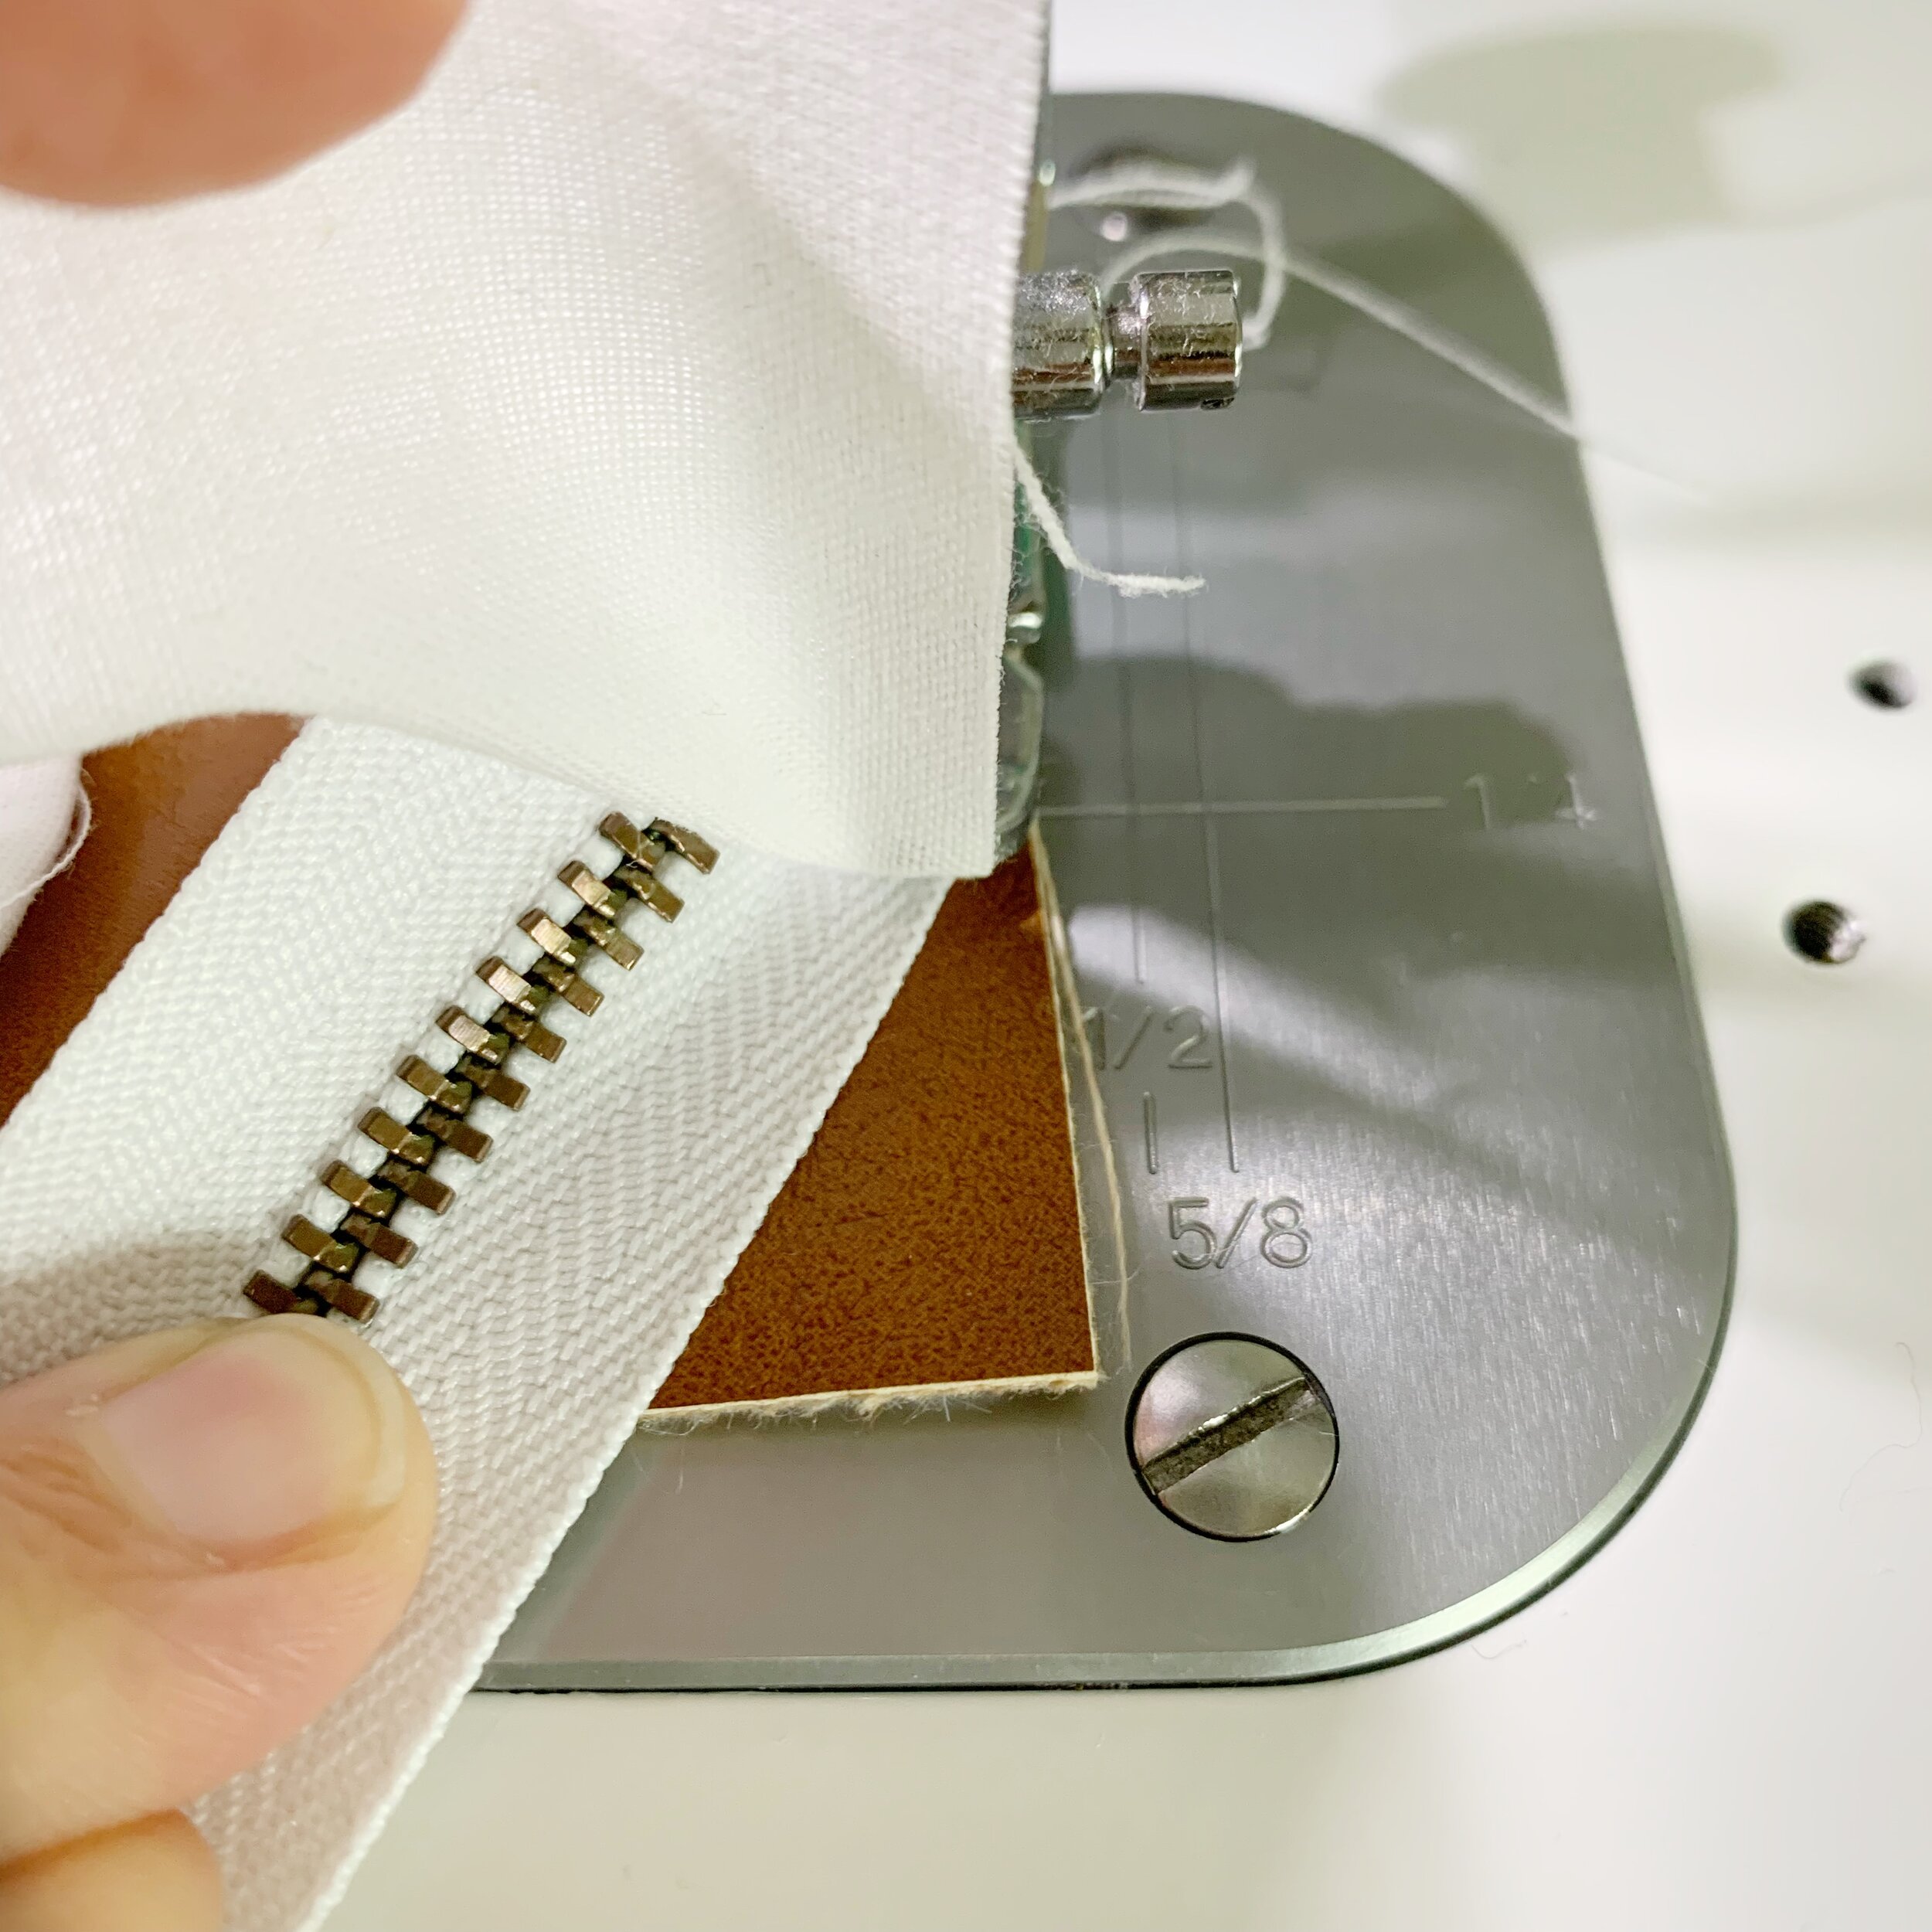
Take your 18” metal zipper and your 2.5” X 1.25” faux leather piece. Lay the closed end of the zipper down on top of the faux leather piece. Fold the faux leather over top of the zipper end. Then using upholstery thread in machine and bobbin, sew along all four sides of the faux leather to secure. Set aside.


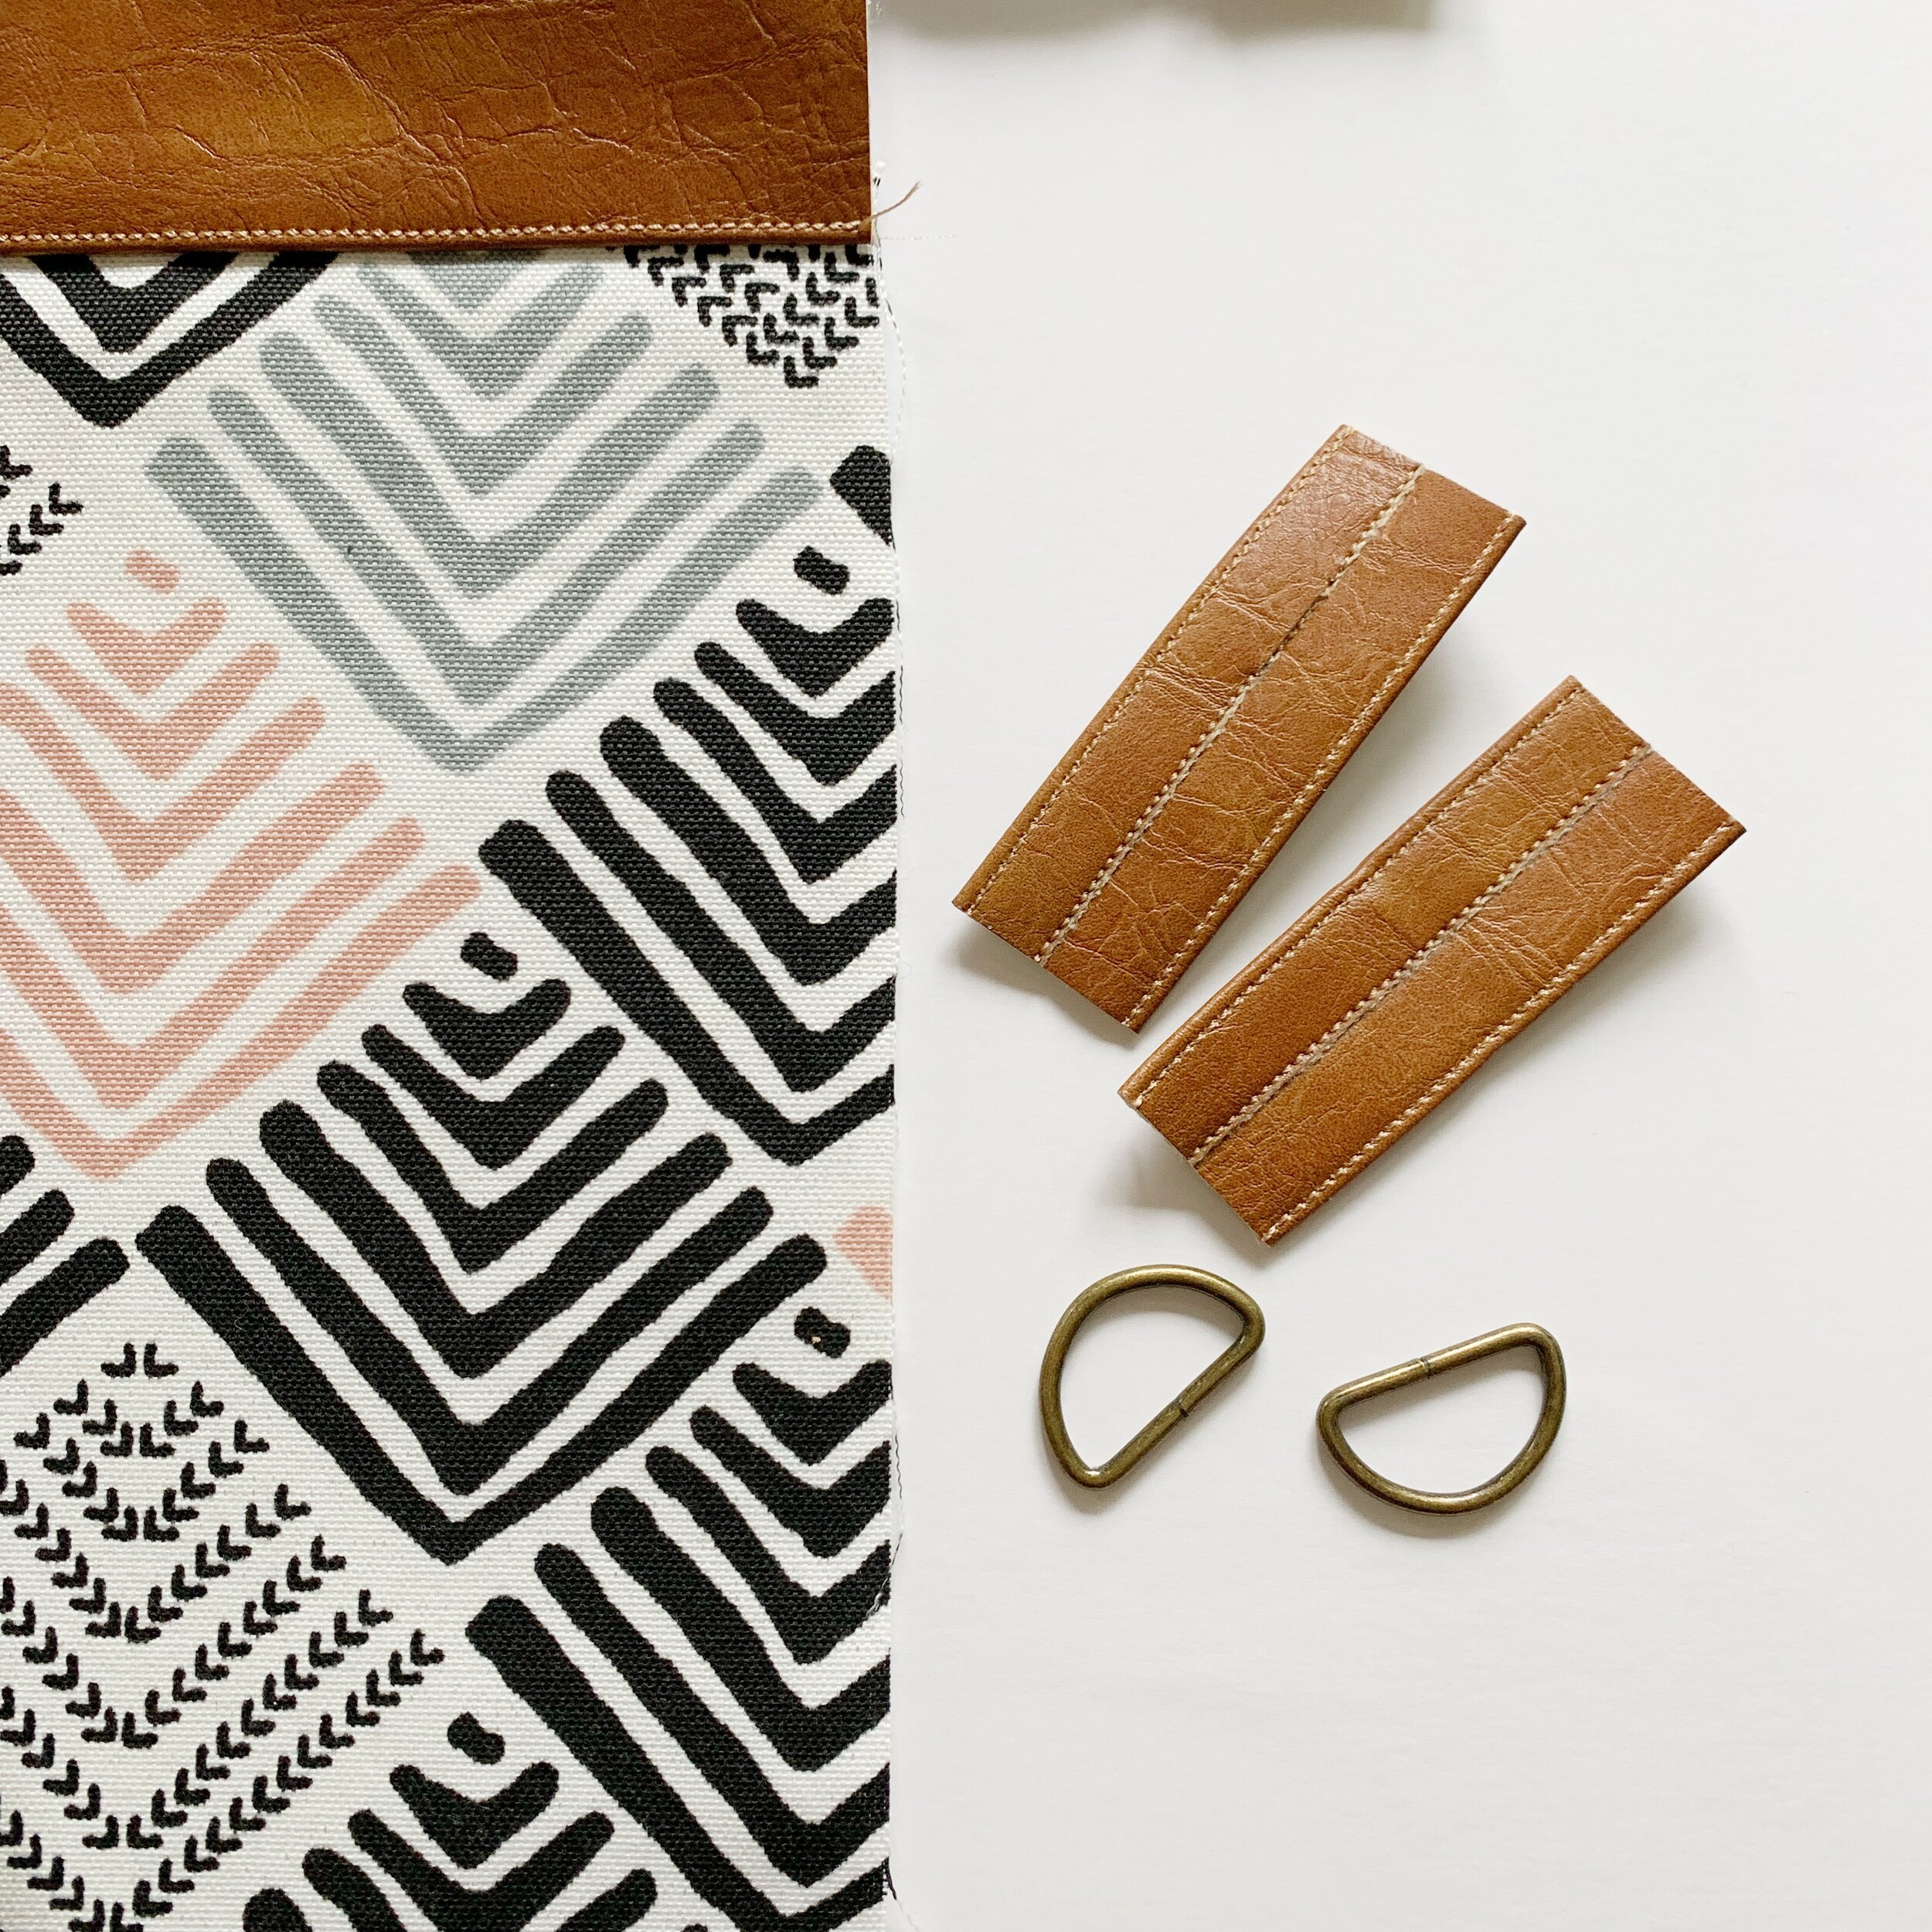
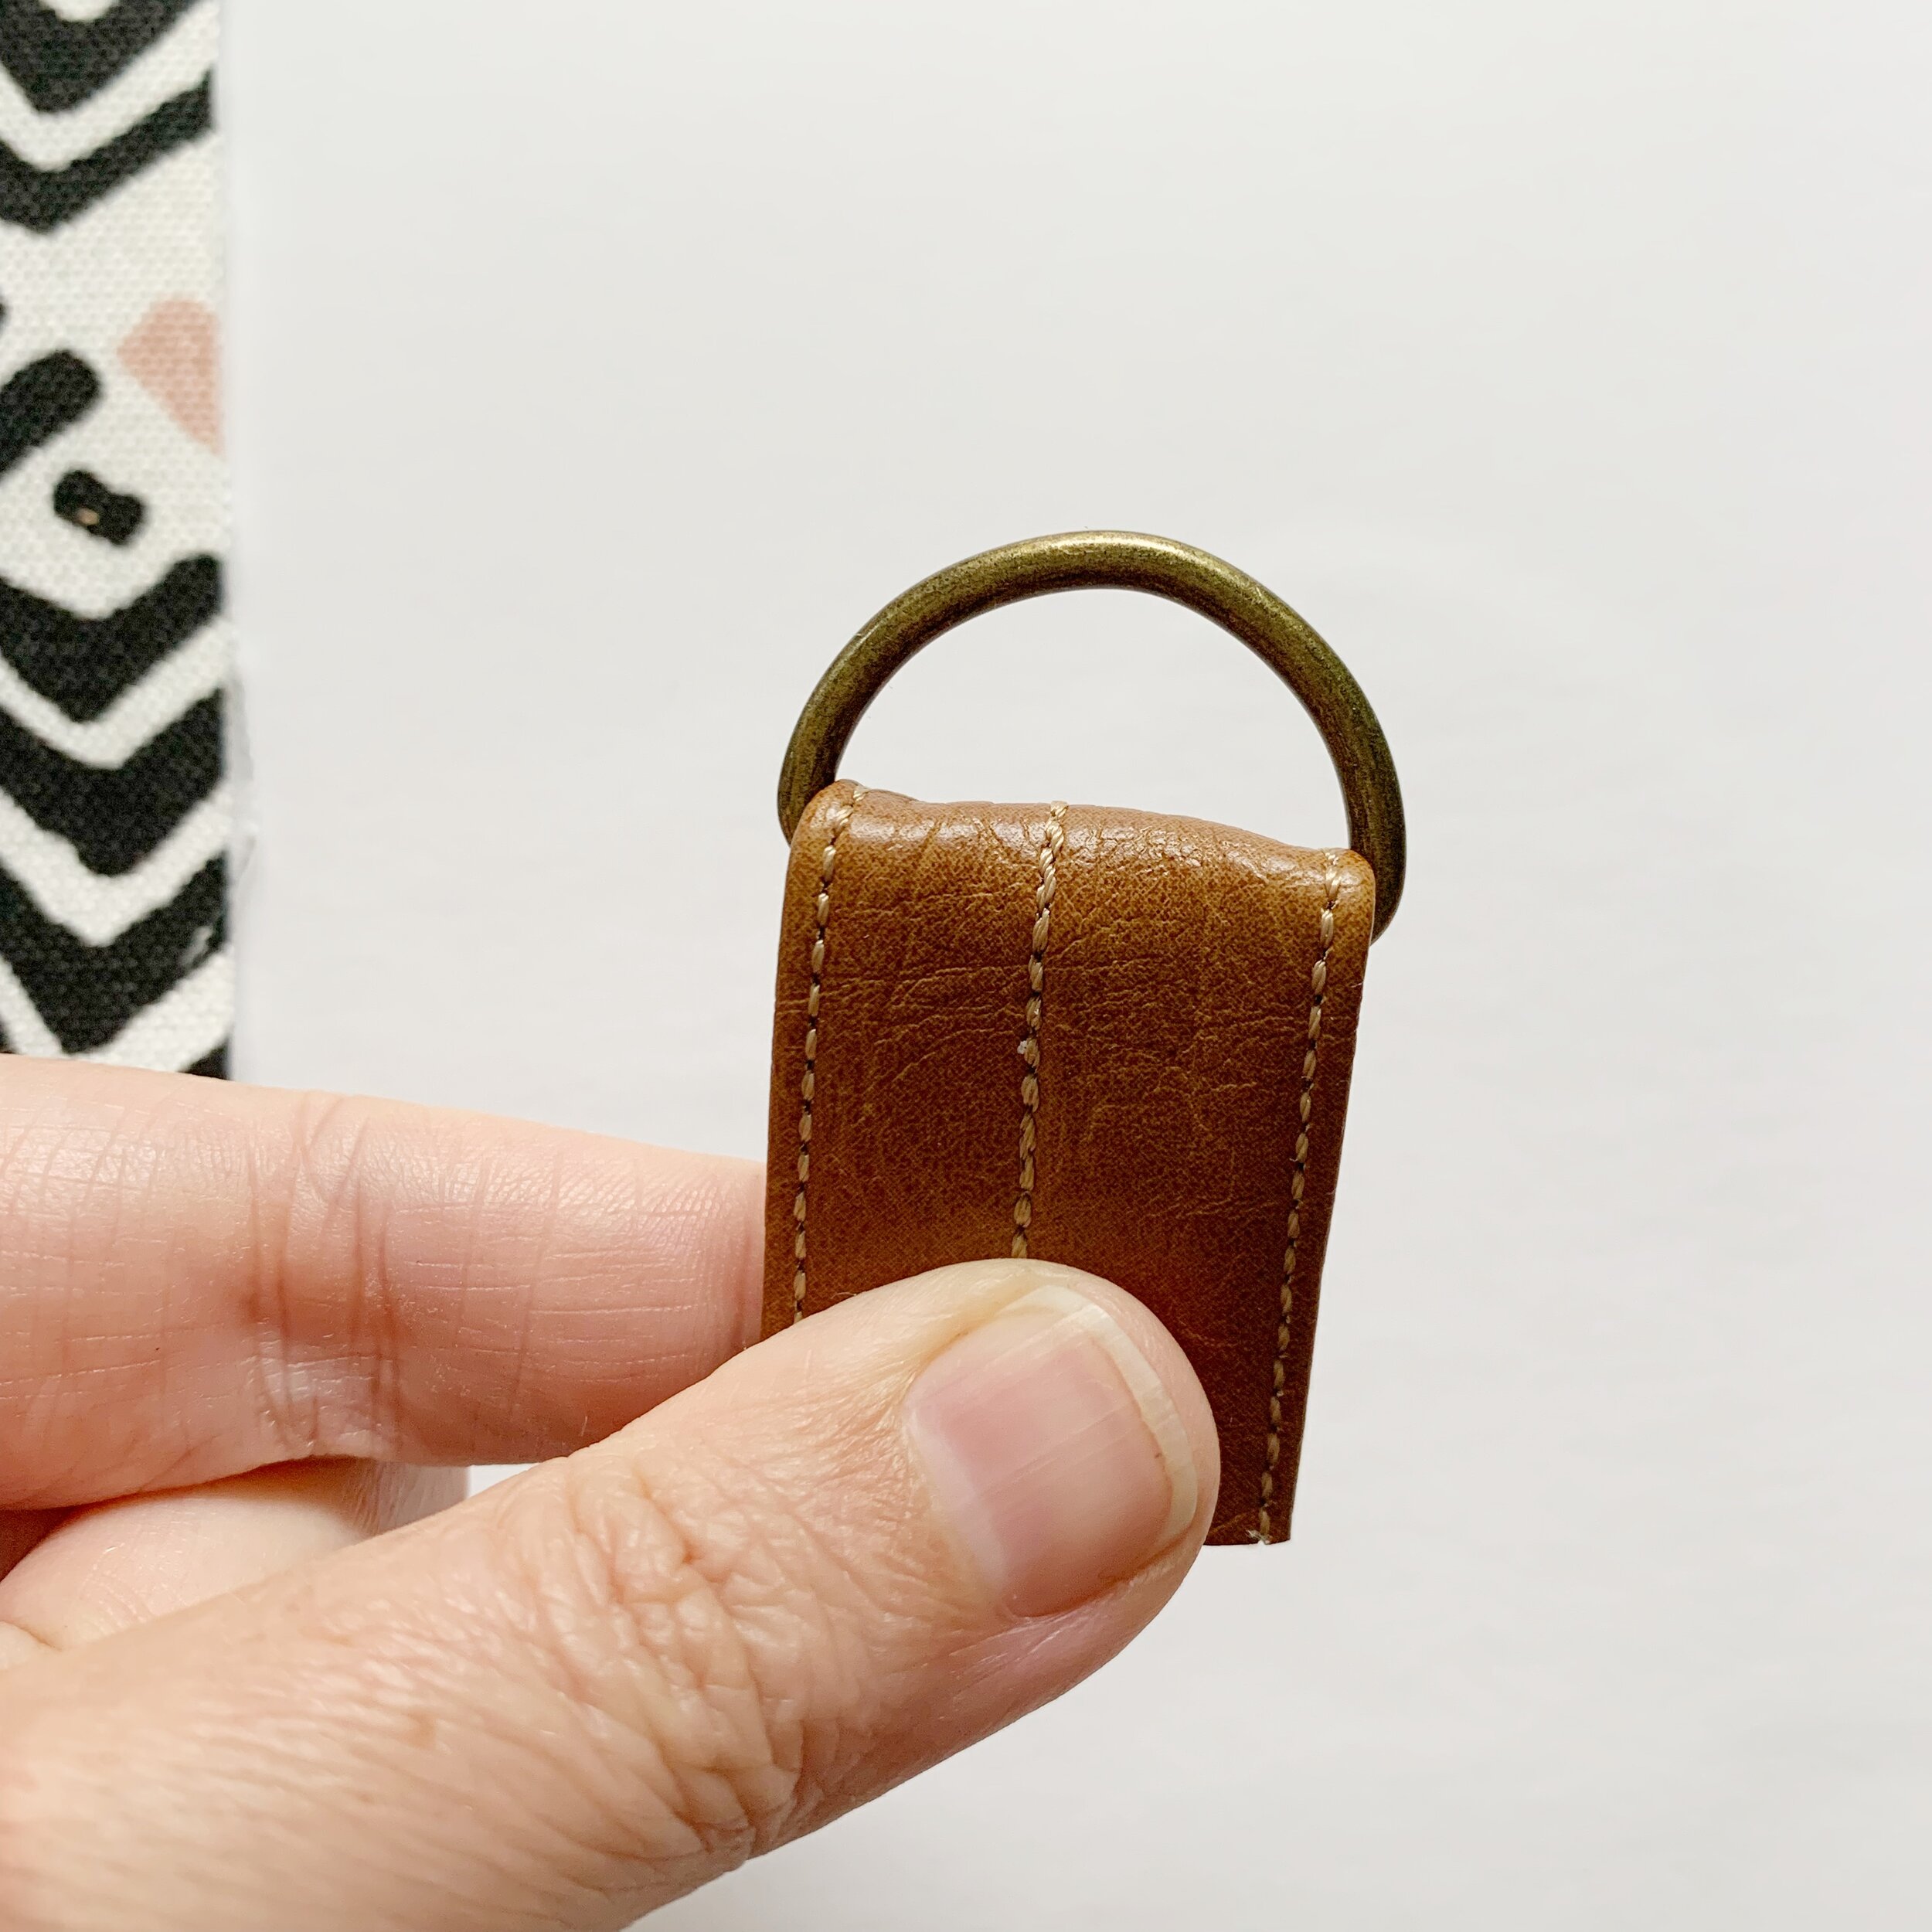
D-Ring Holders:
Take the two 4” X 2” pieces of faux leather and mark a line down the center of each piece (from short end to short end). Use upholstery thread in the machine and bobbin. Fold edges into center line and sew along each edge. Then sew along each folded edge 1/8th in from the edge, just as you did for the strap.
Assembly:
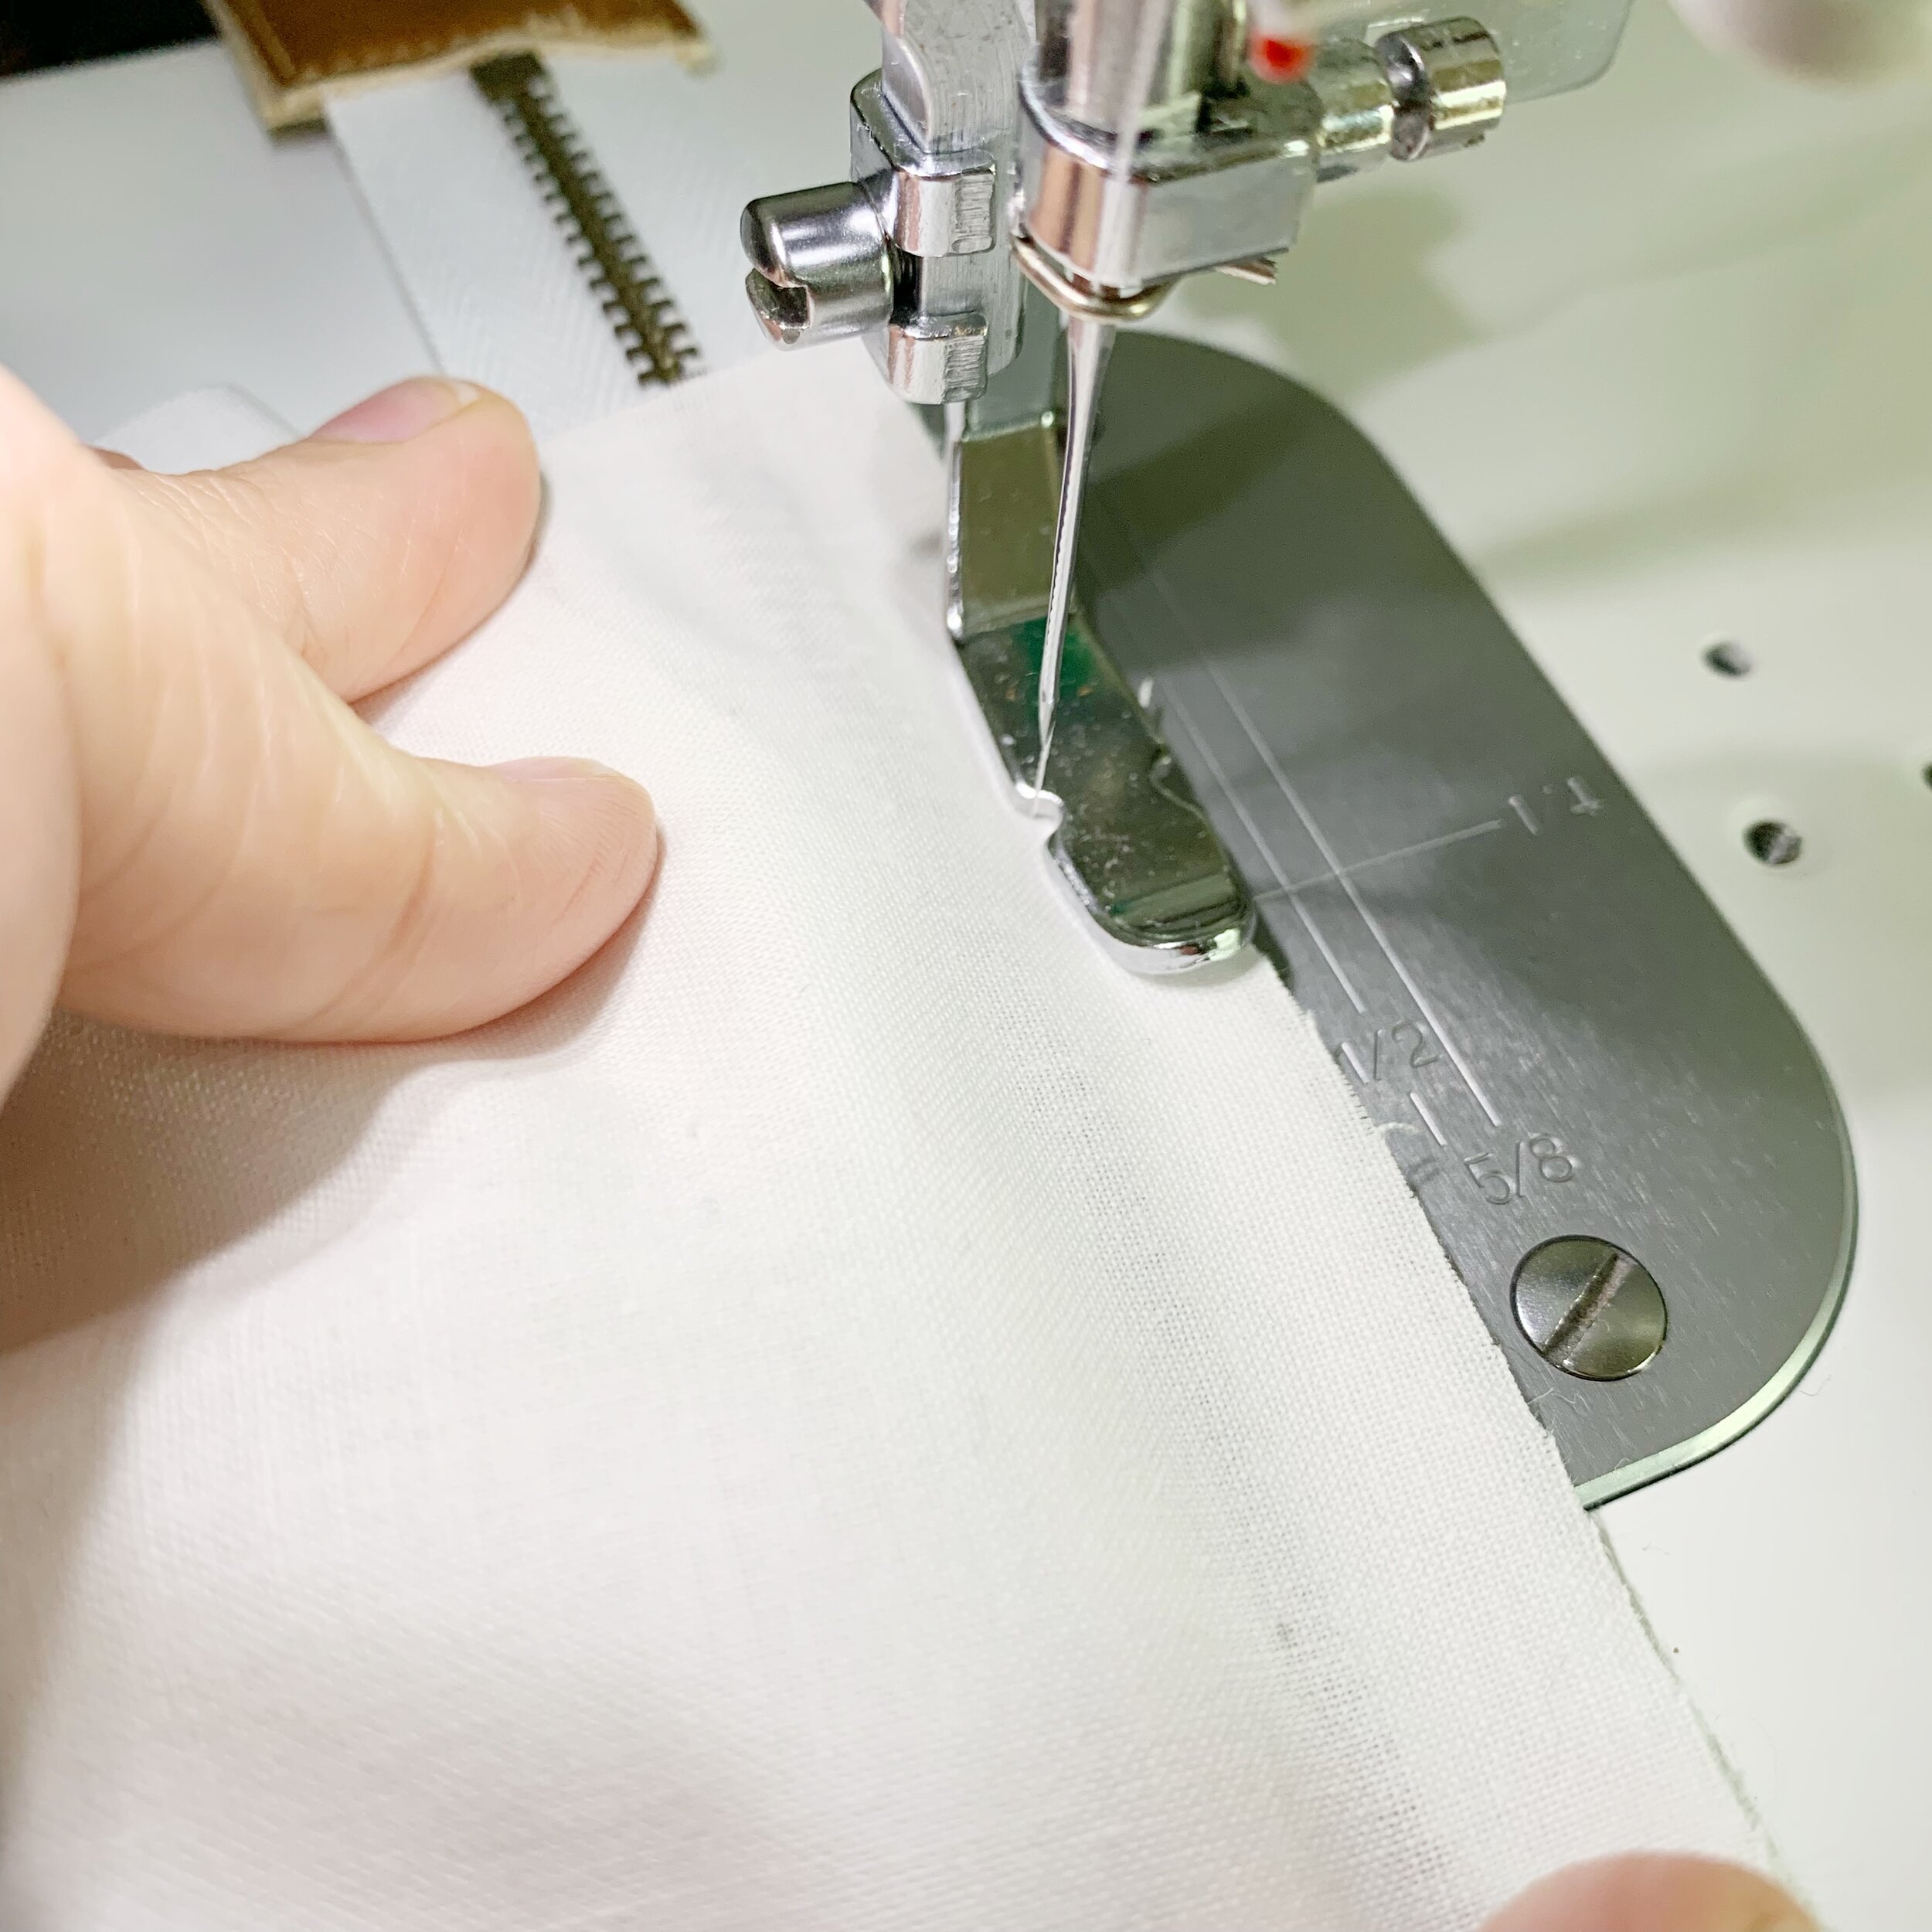
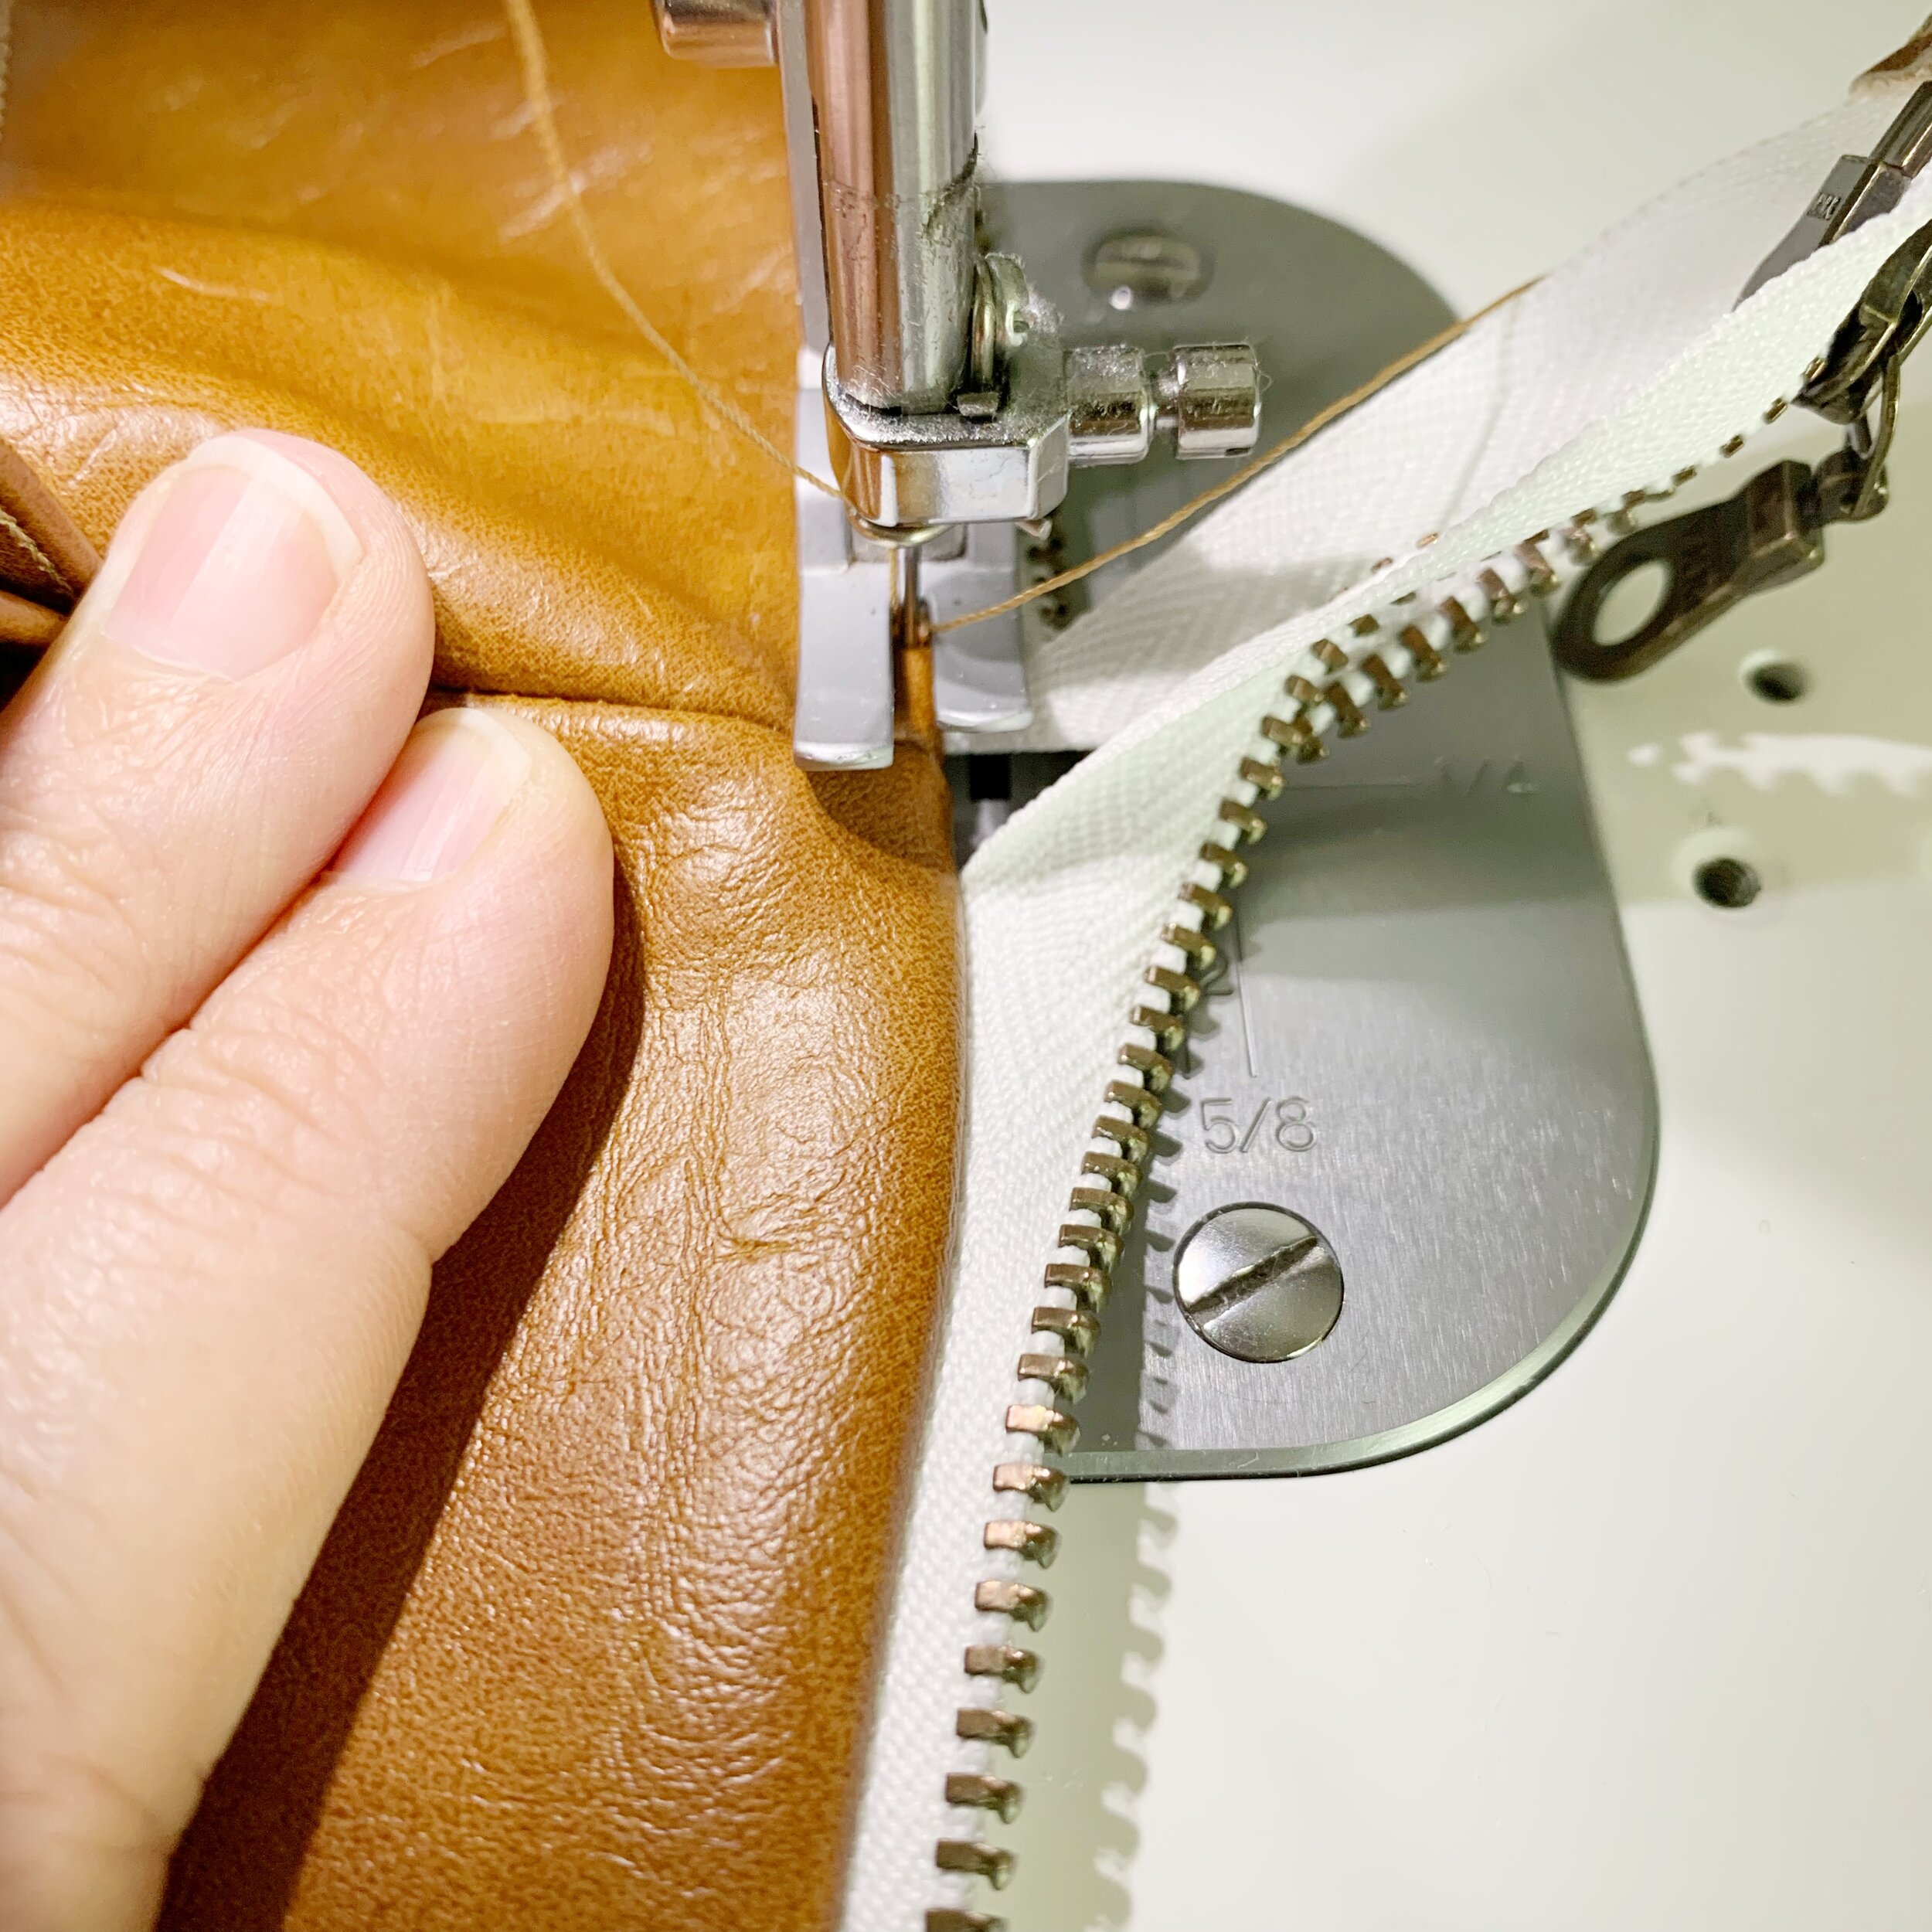
Take one exterior panel and lay it right side up. Lay the metal zipper down along the top edge right side down. Then lay one of the interior lining pieces on top with the right side down. Fold the top edge of the zipper up at a 45 degree angle. Pin all layers together if needed. Then using the a zipper foot and regular thread, so along the top edge through all layers, stopping about 1” from the end of your piece.
Tip: It may help to sew the ends of your zipper up at a 45 degree angle.
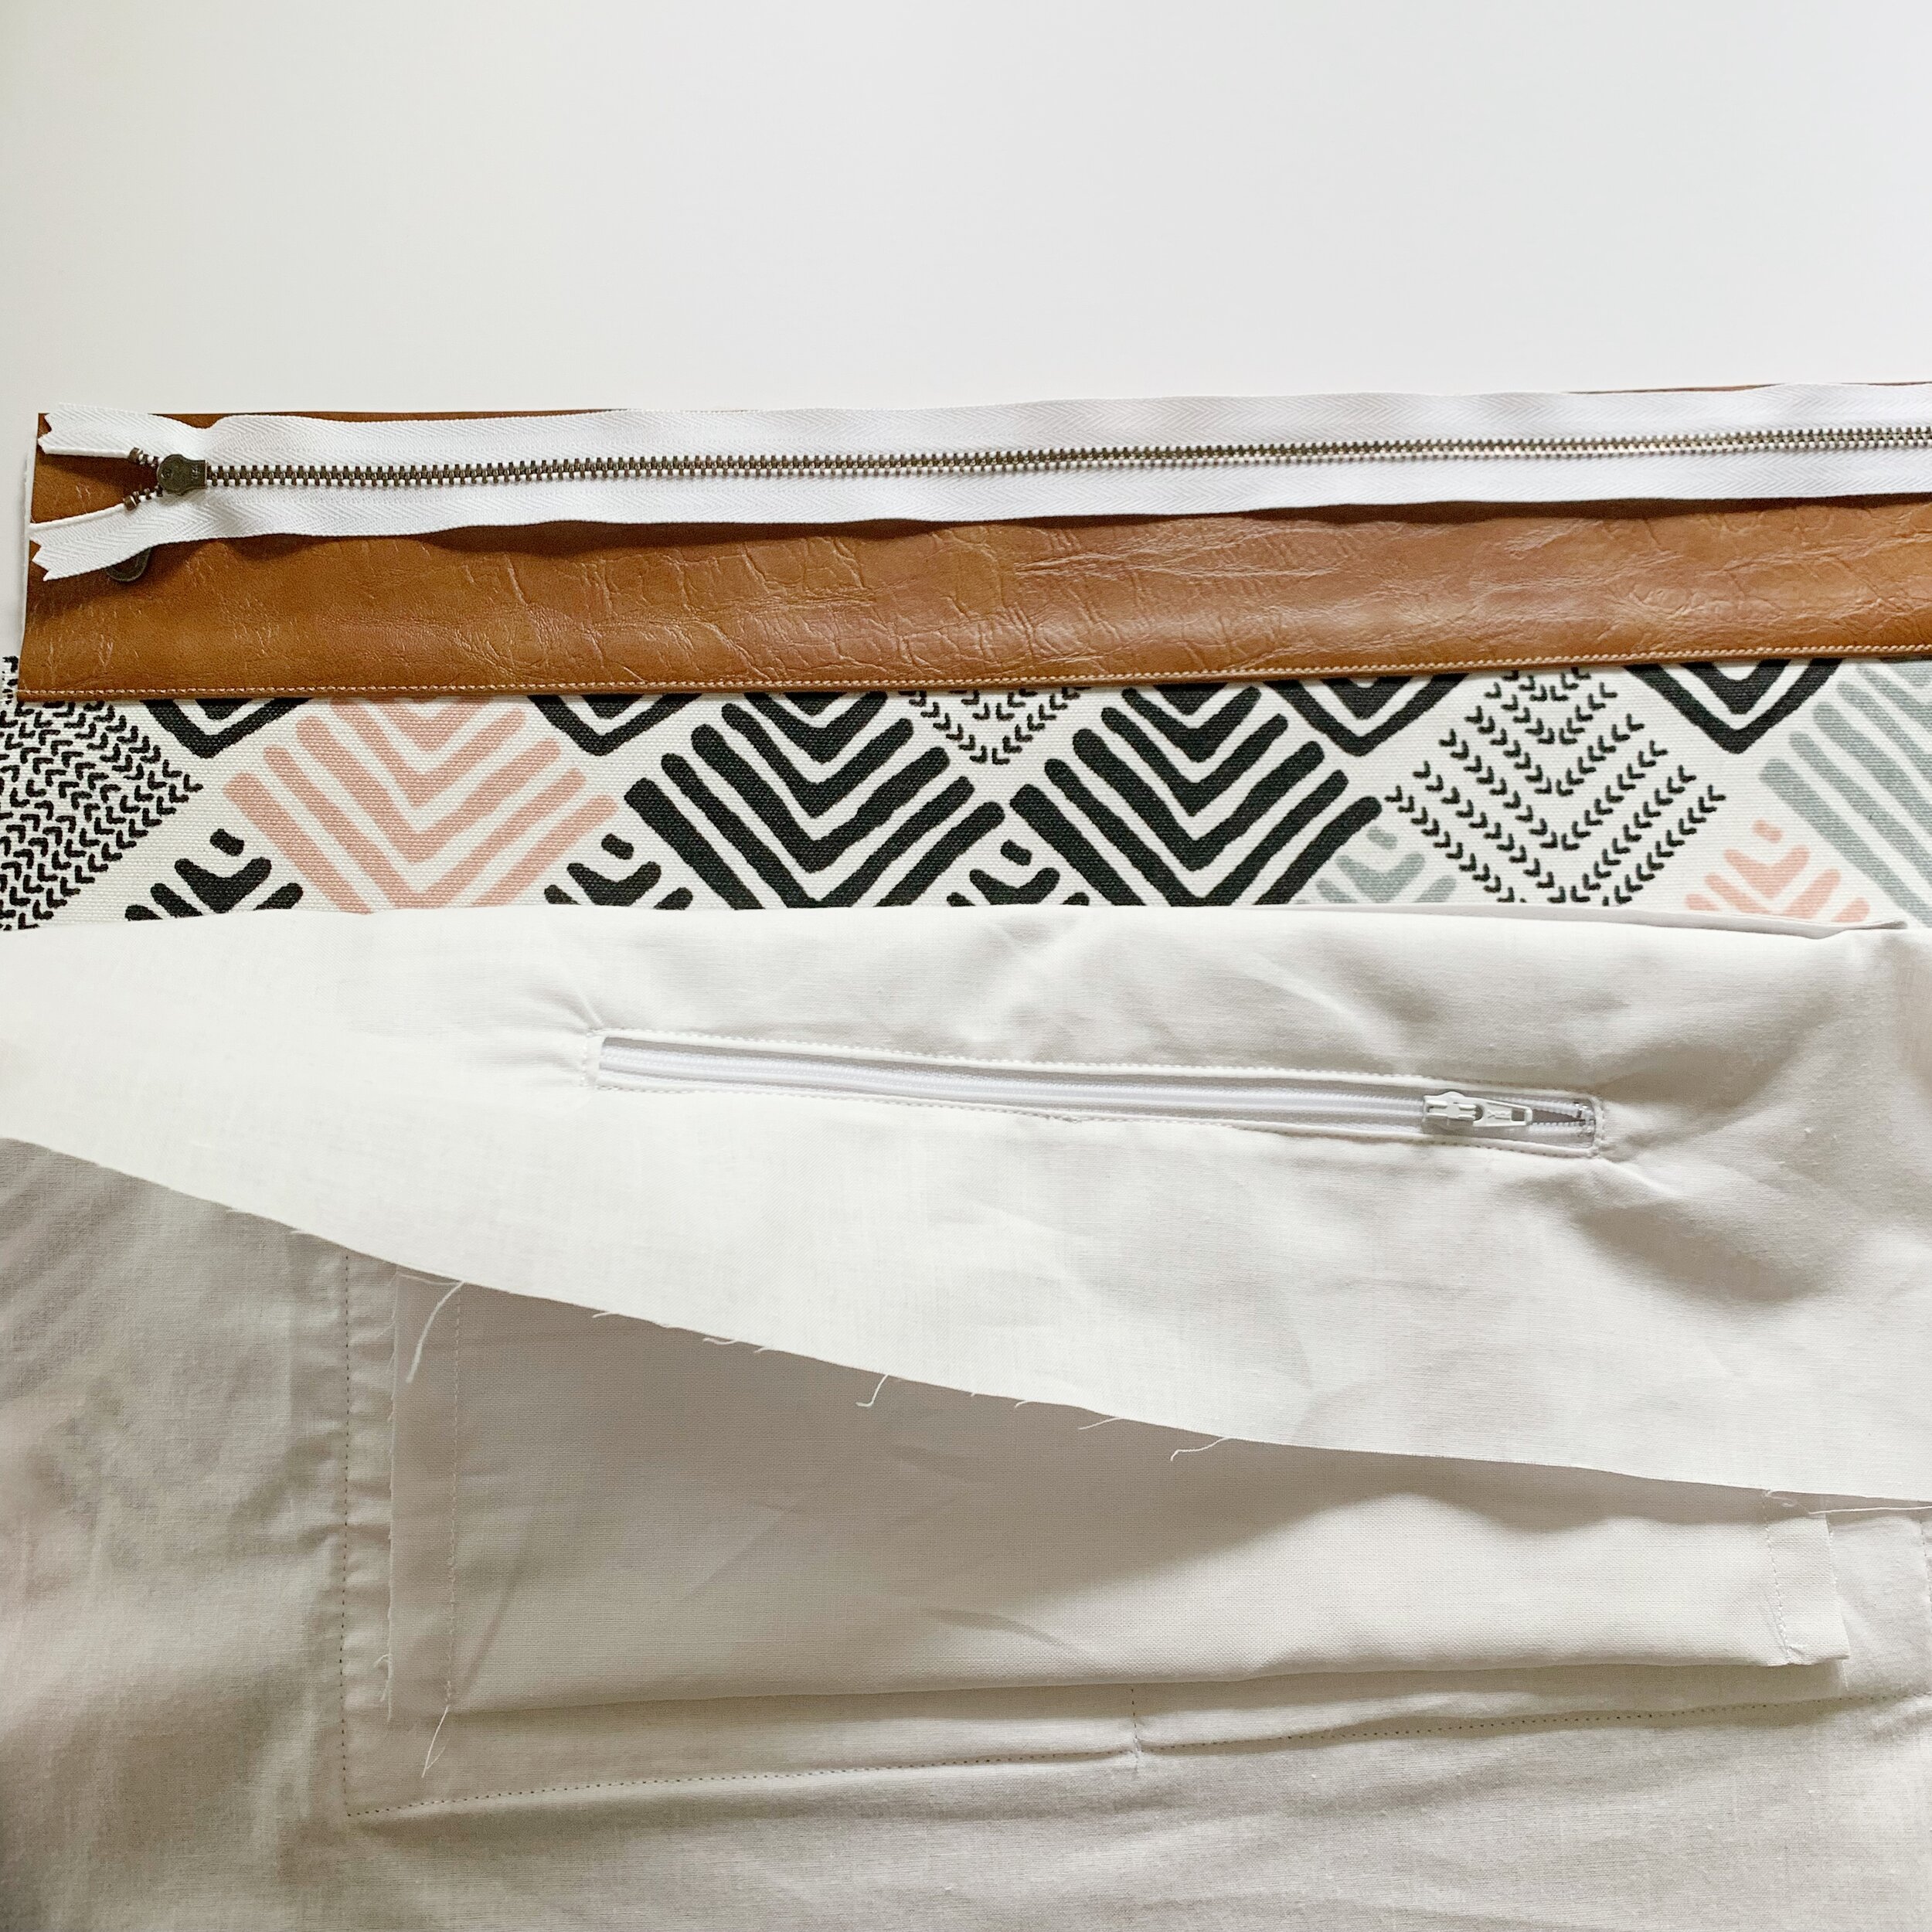
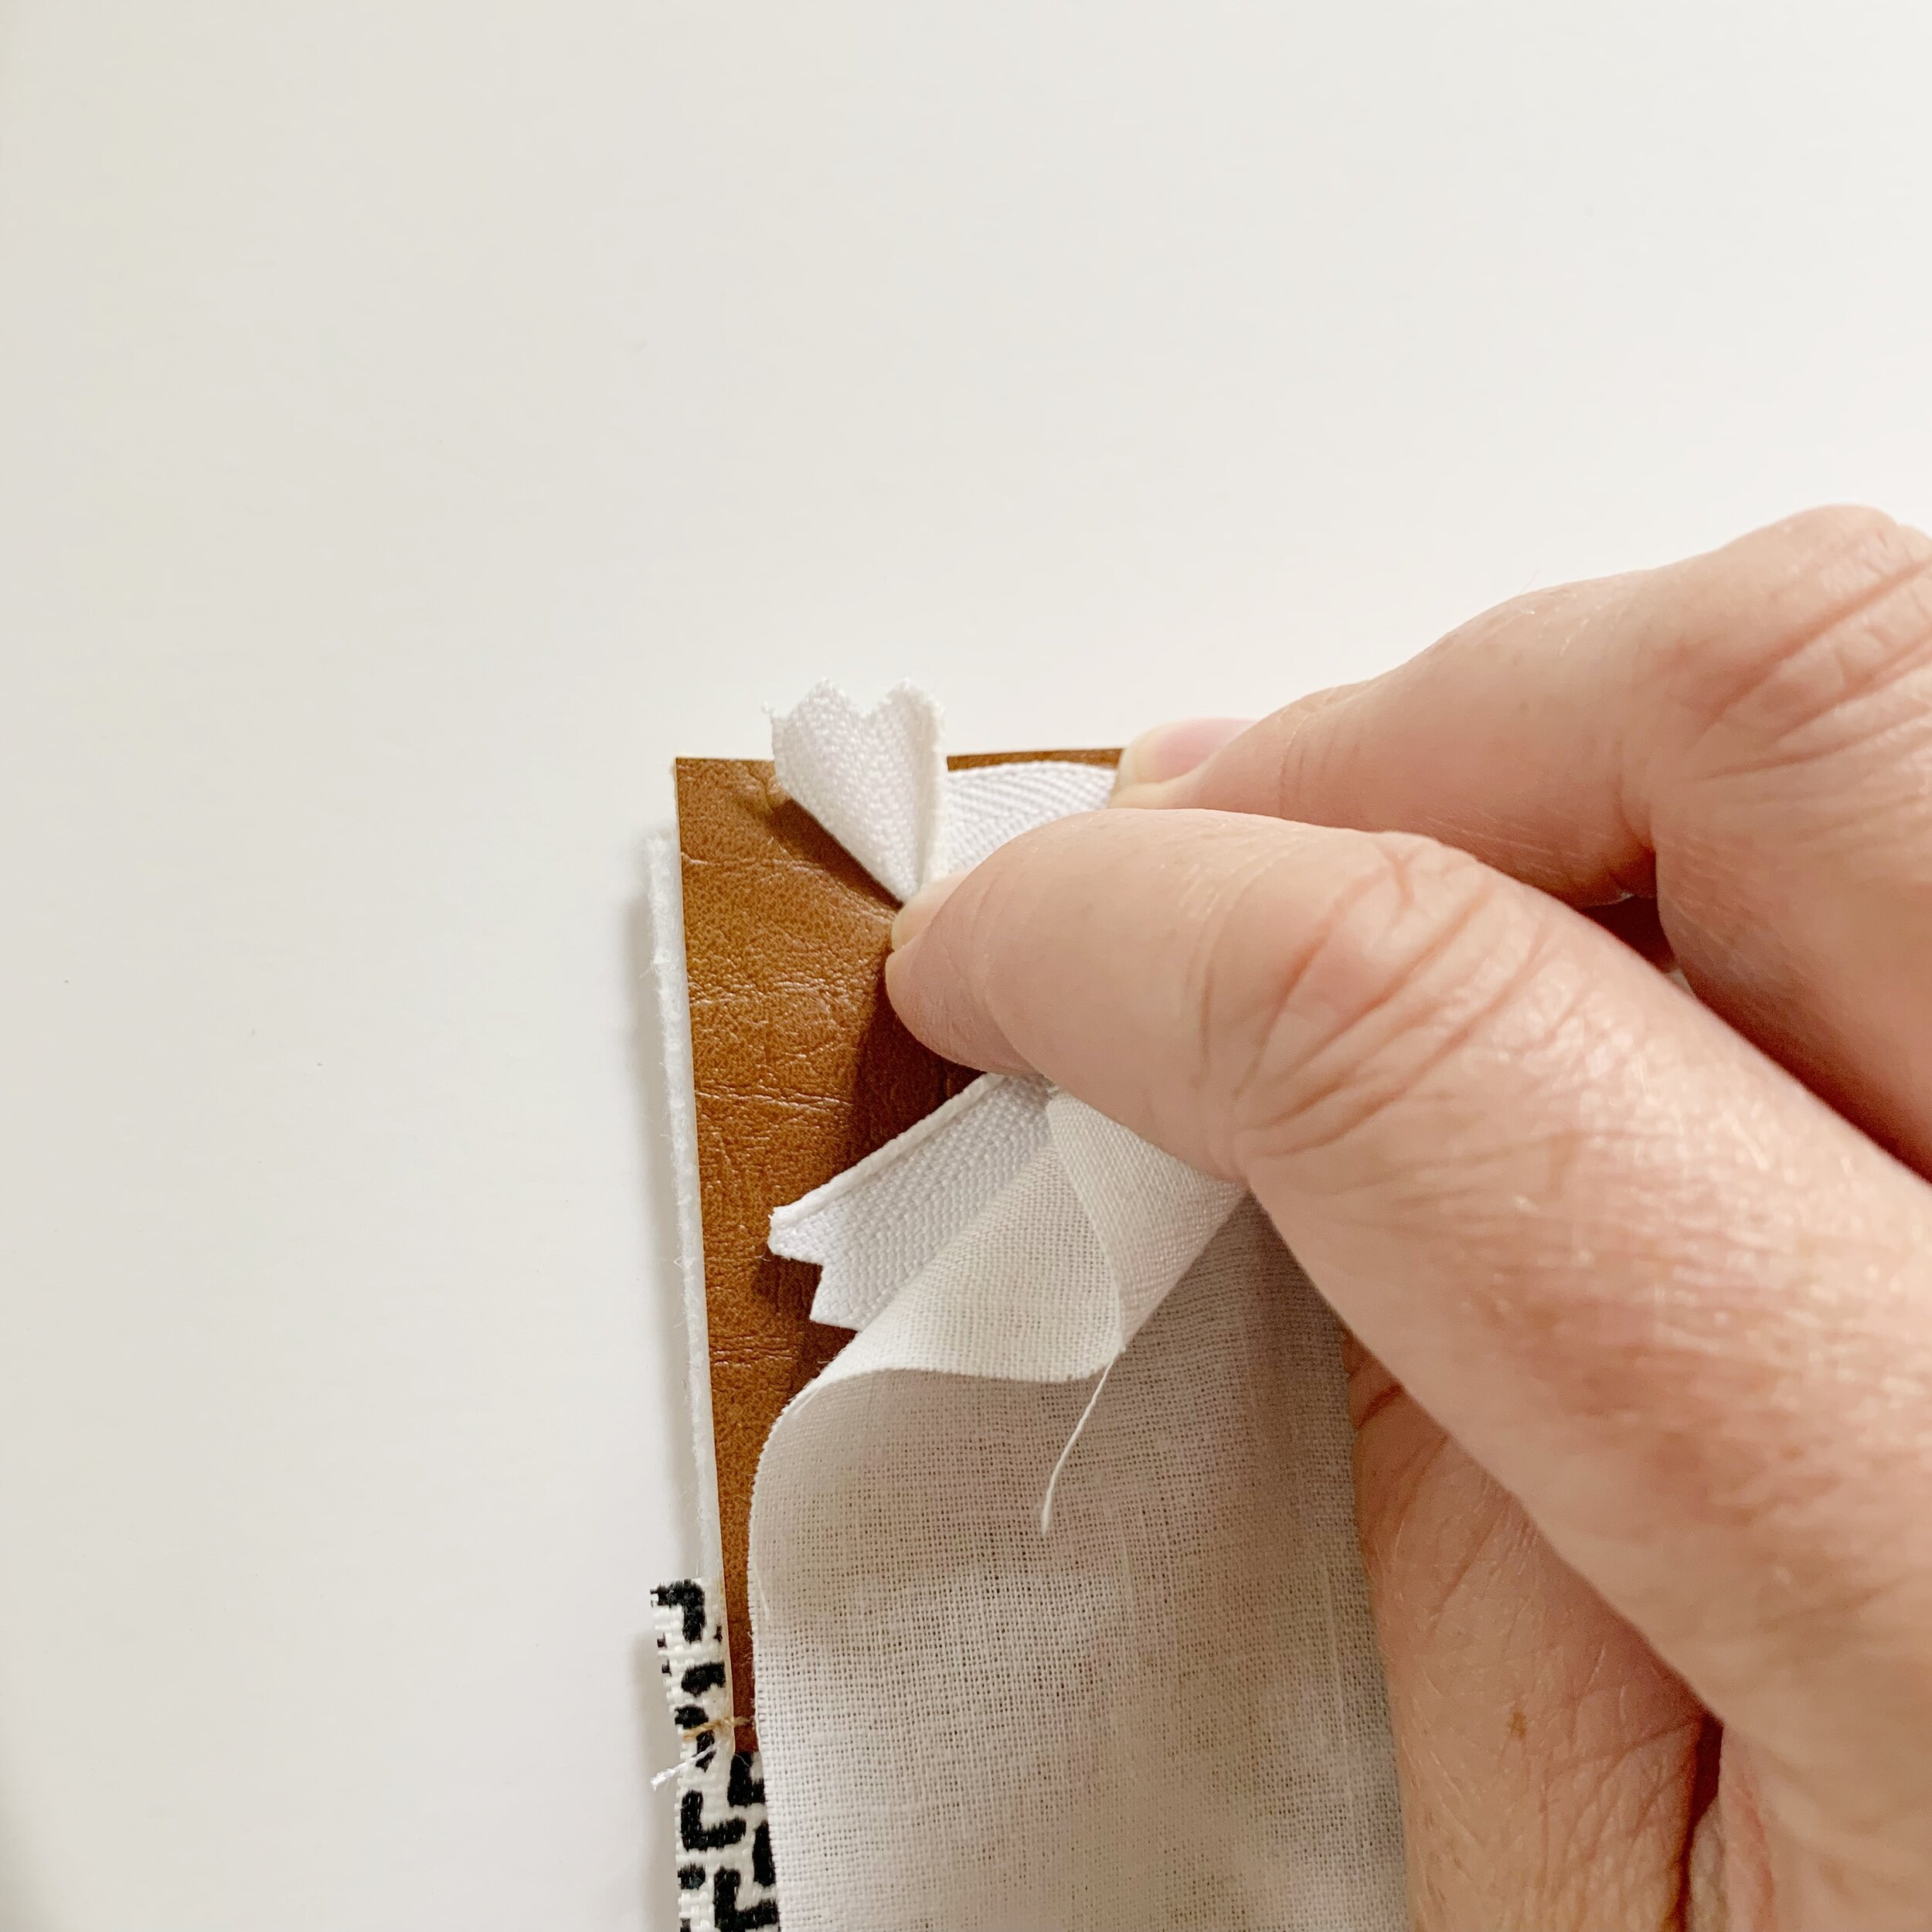
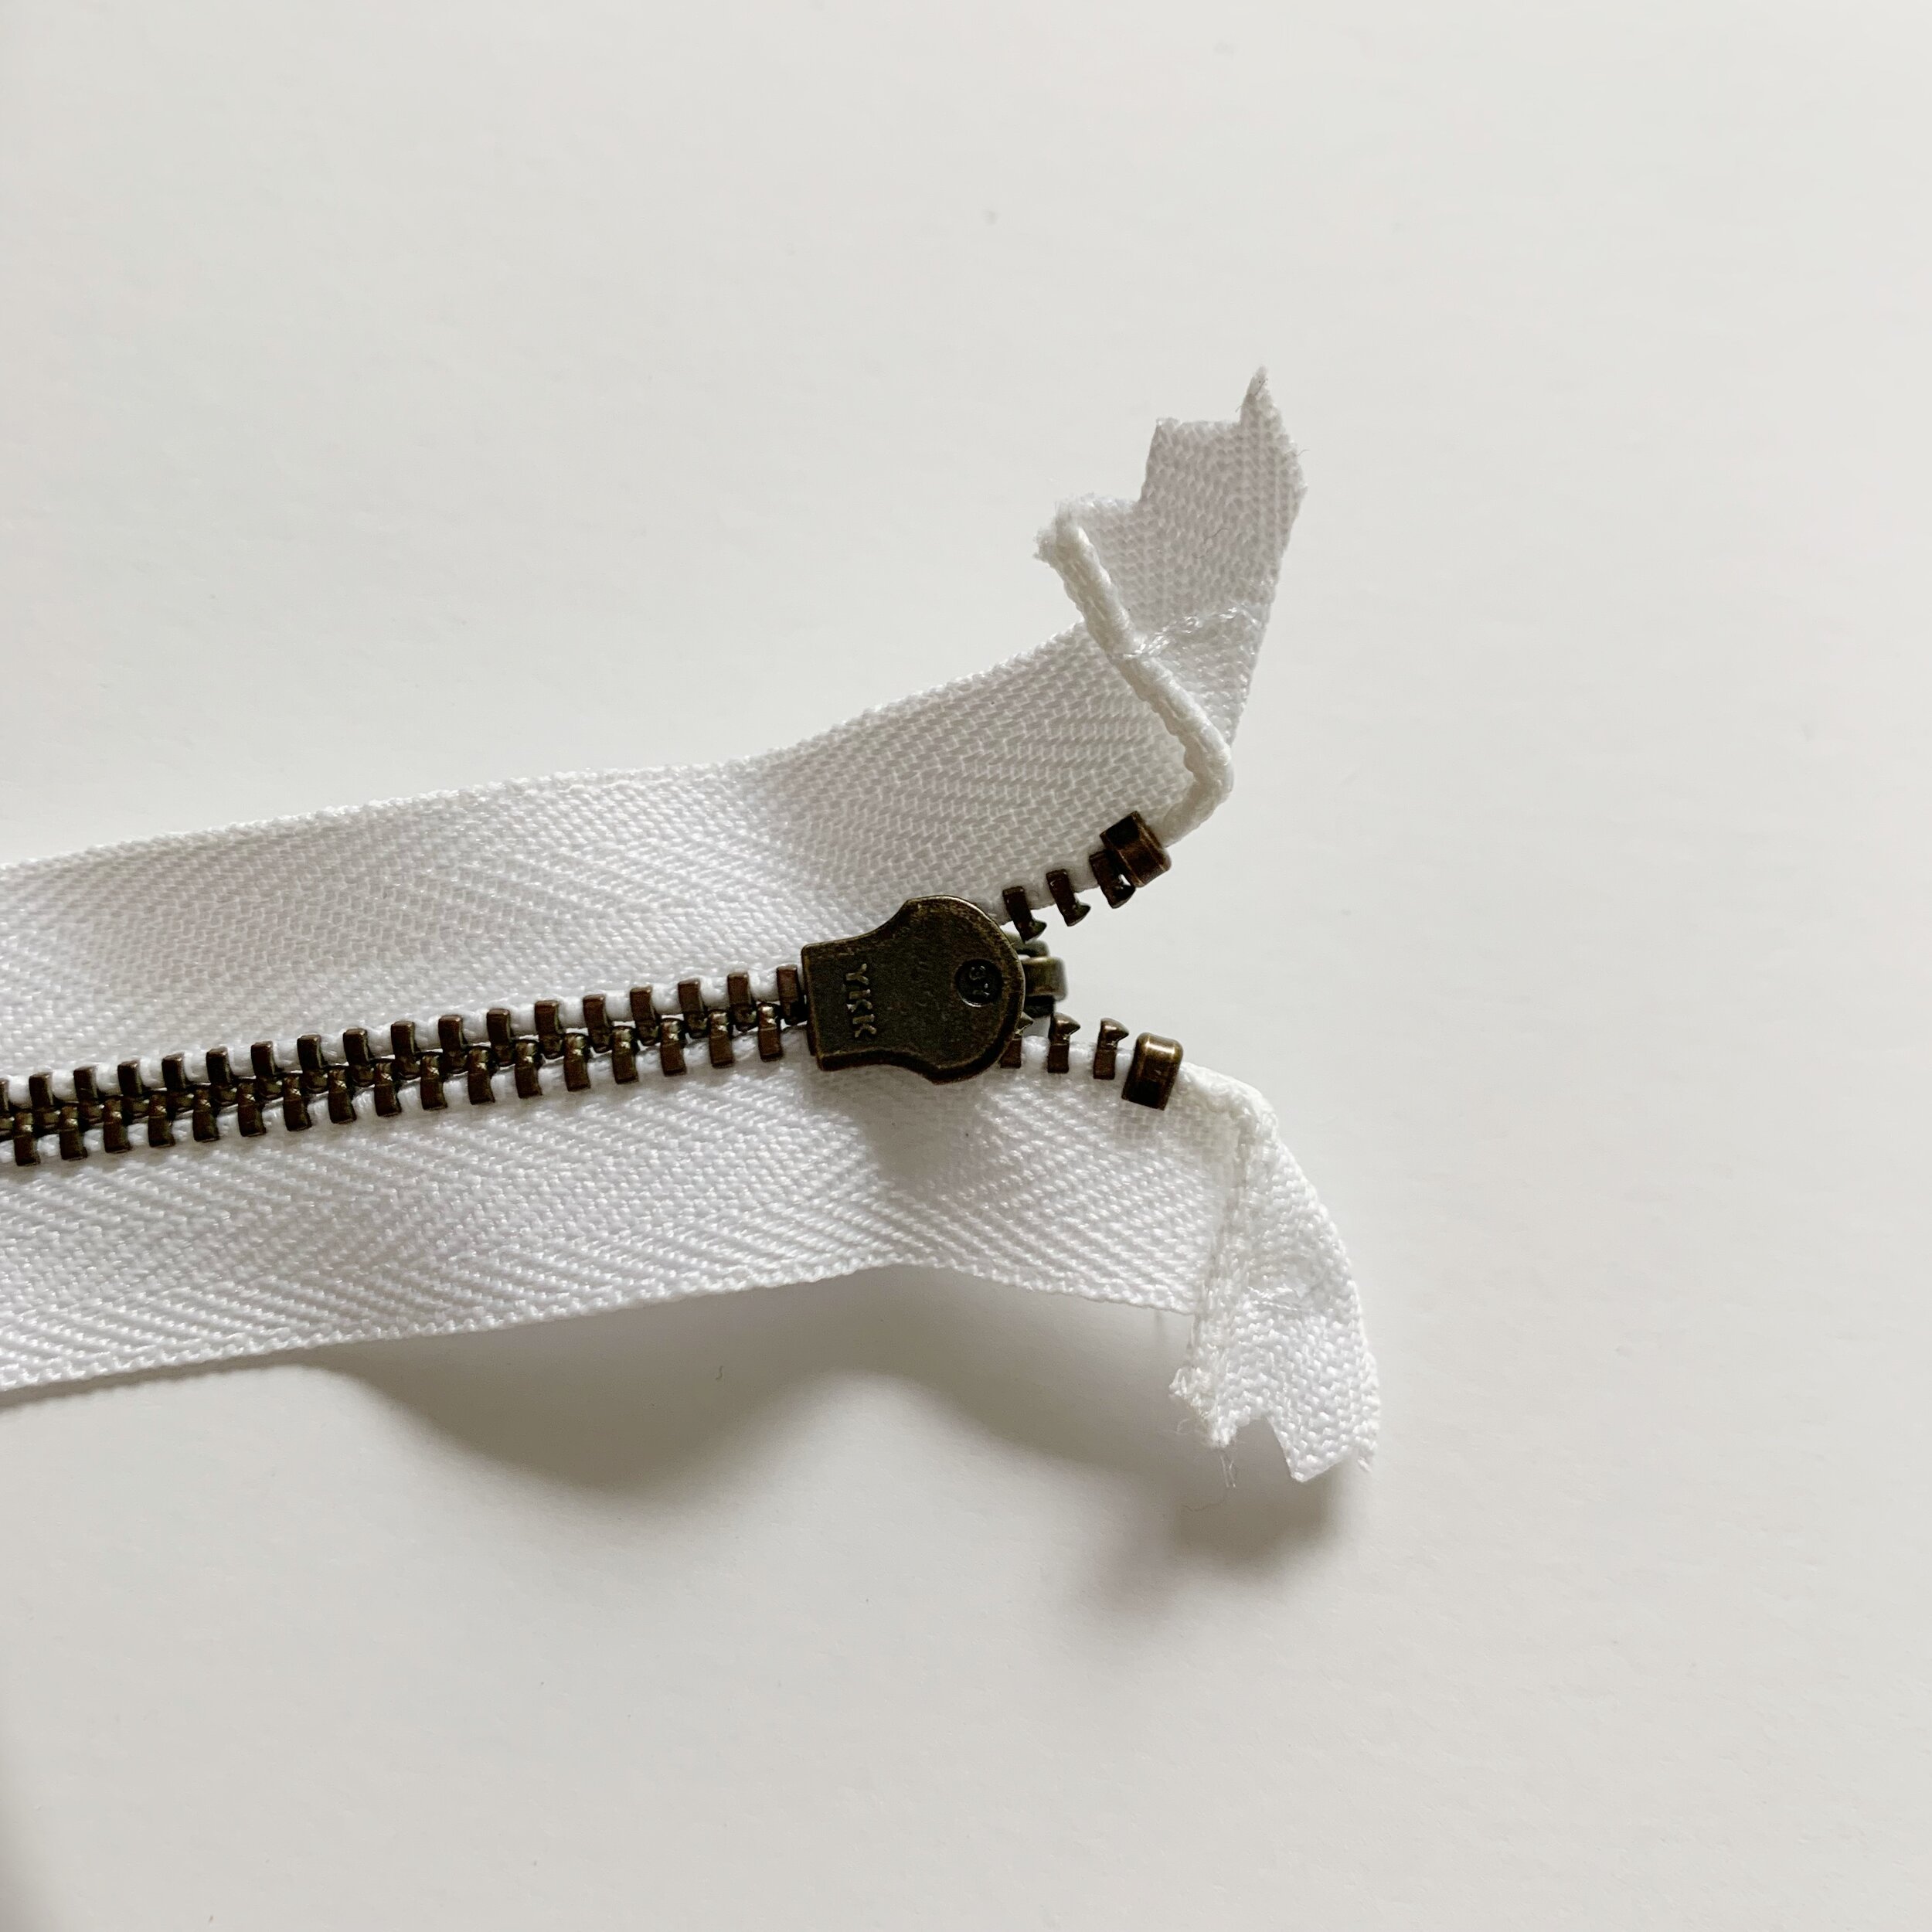
Make sure needle is down, lift zipper foot up and slide the end of the zipper over so it is out of the way. Then lay the lining and zipper foot back down on top of the exterior panel and continue sewing to the end.
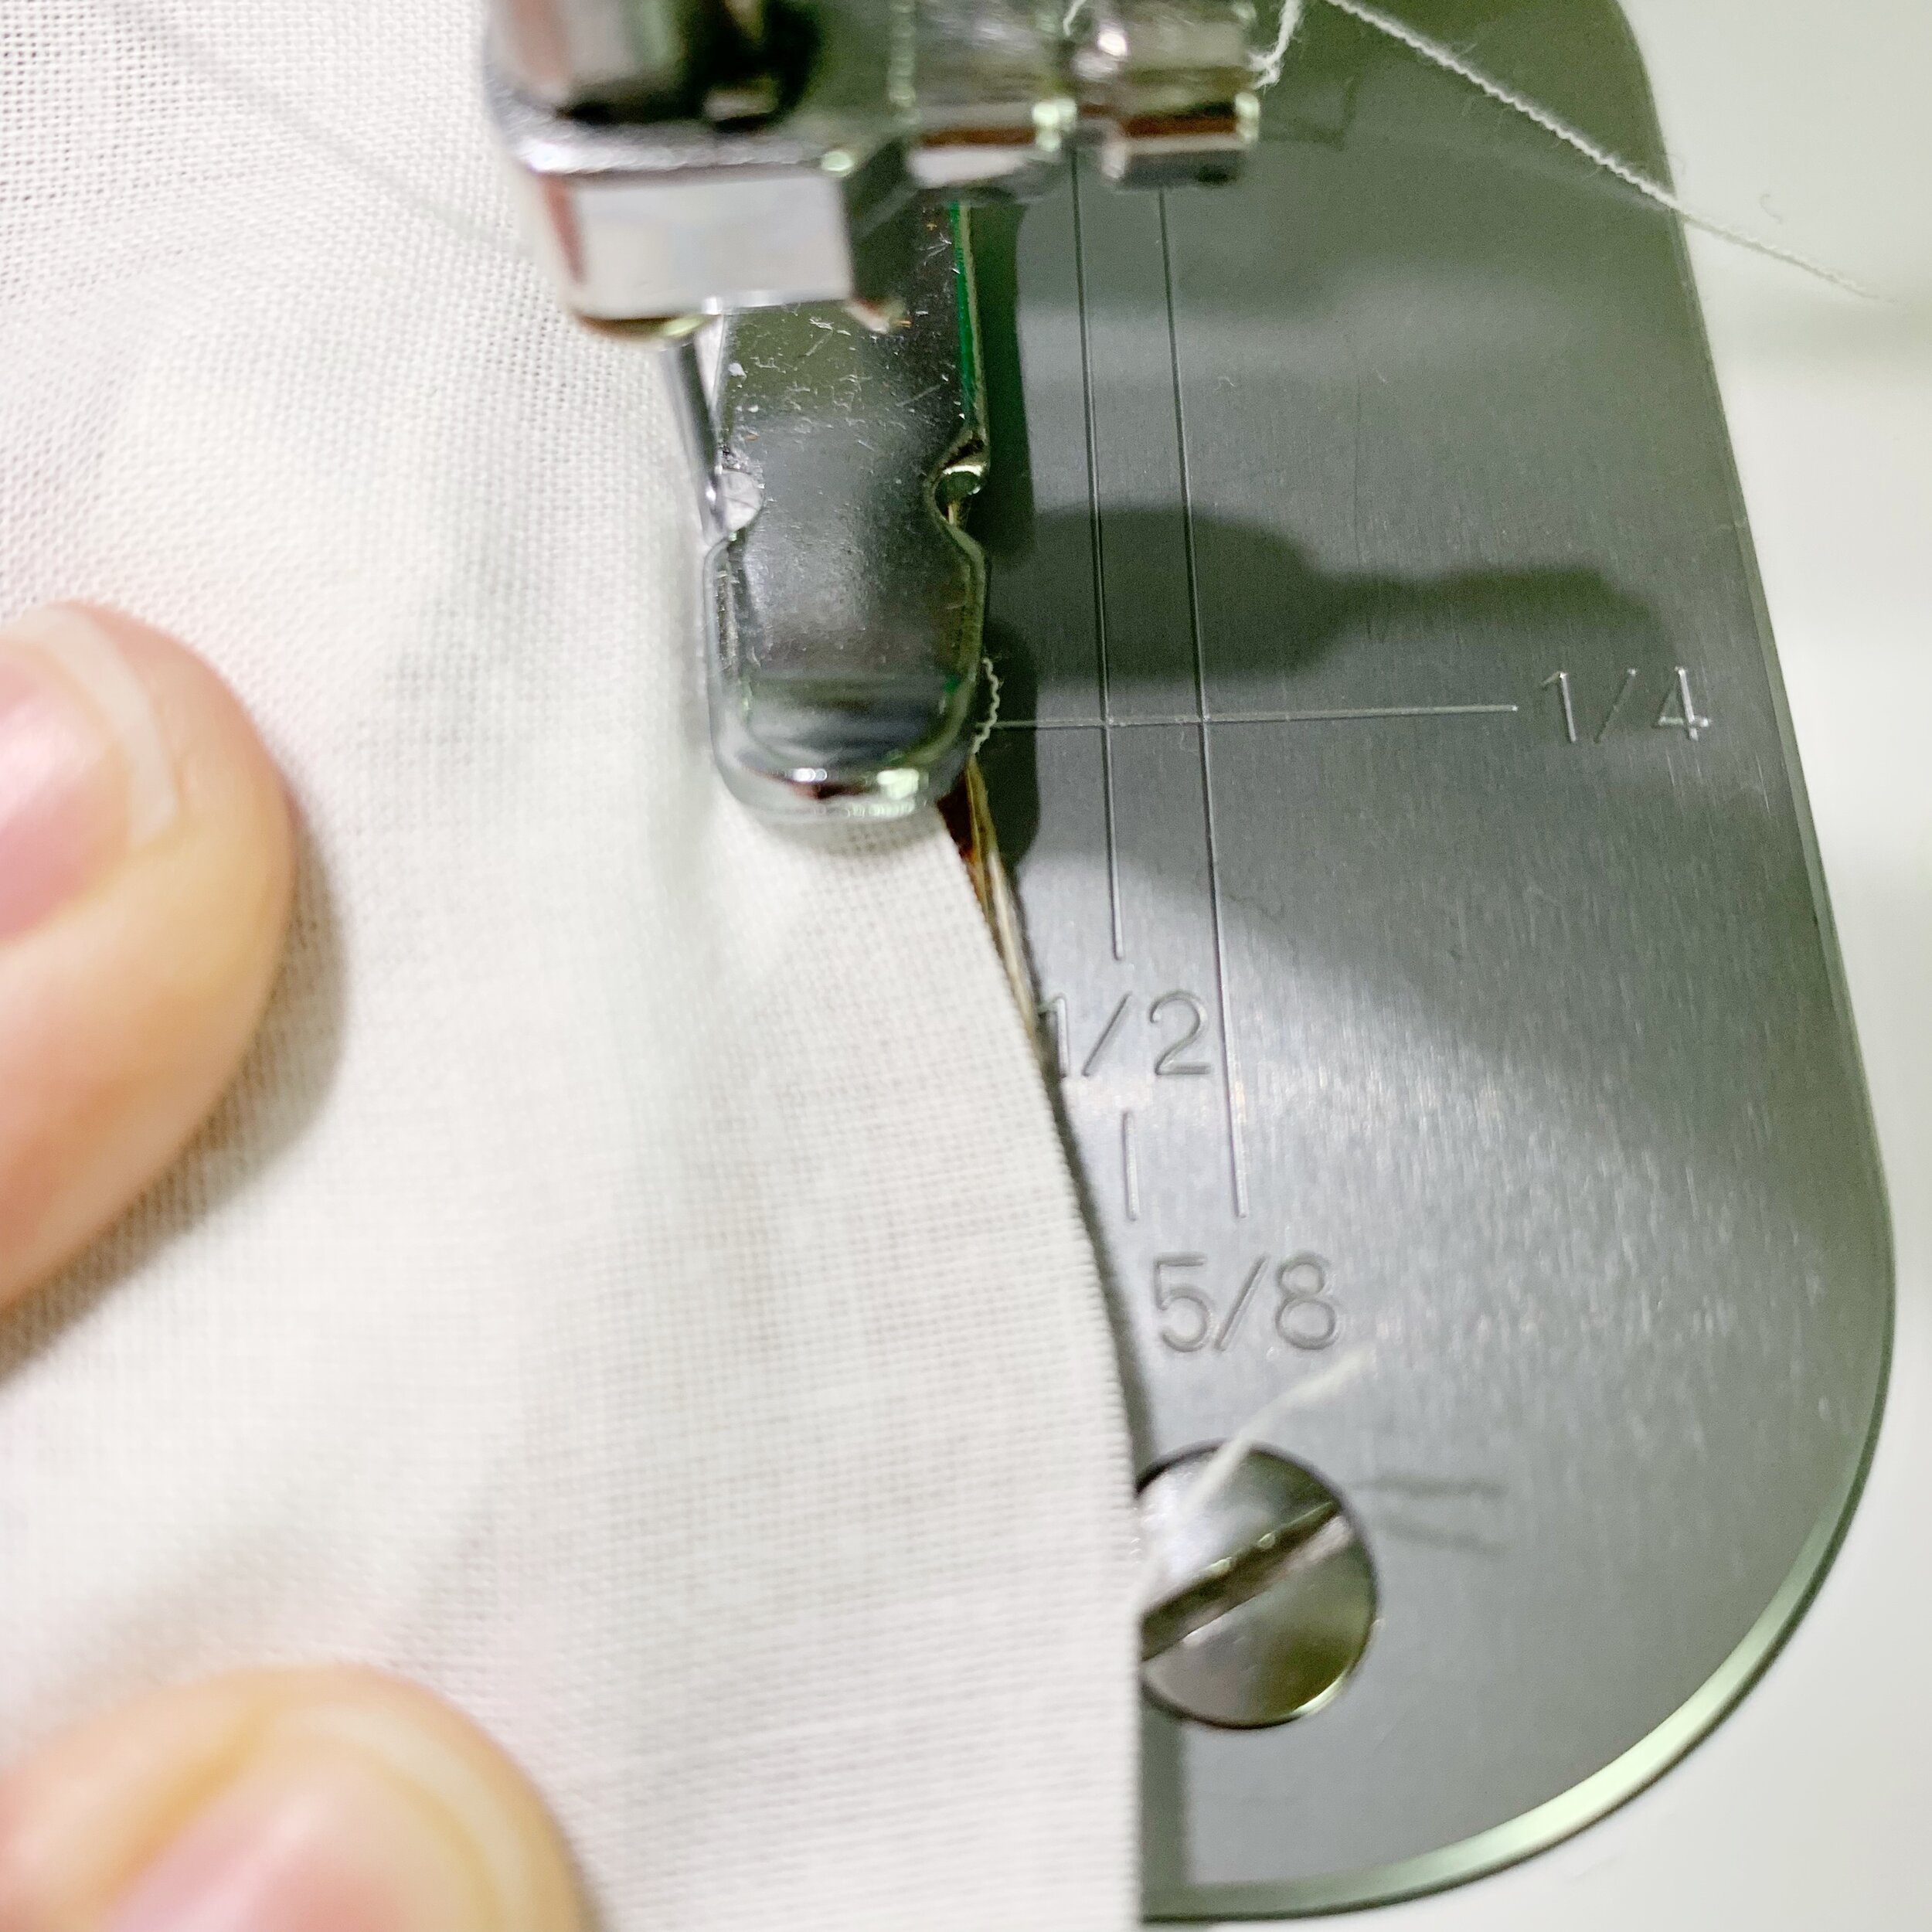
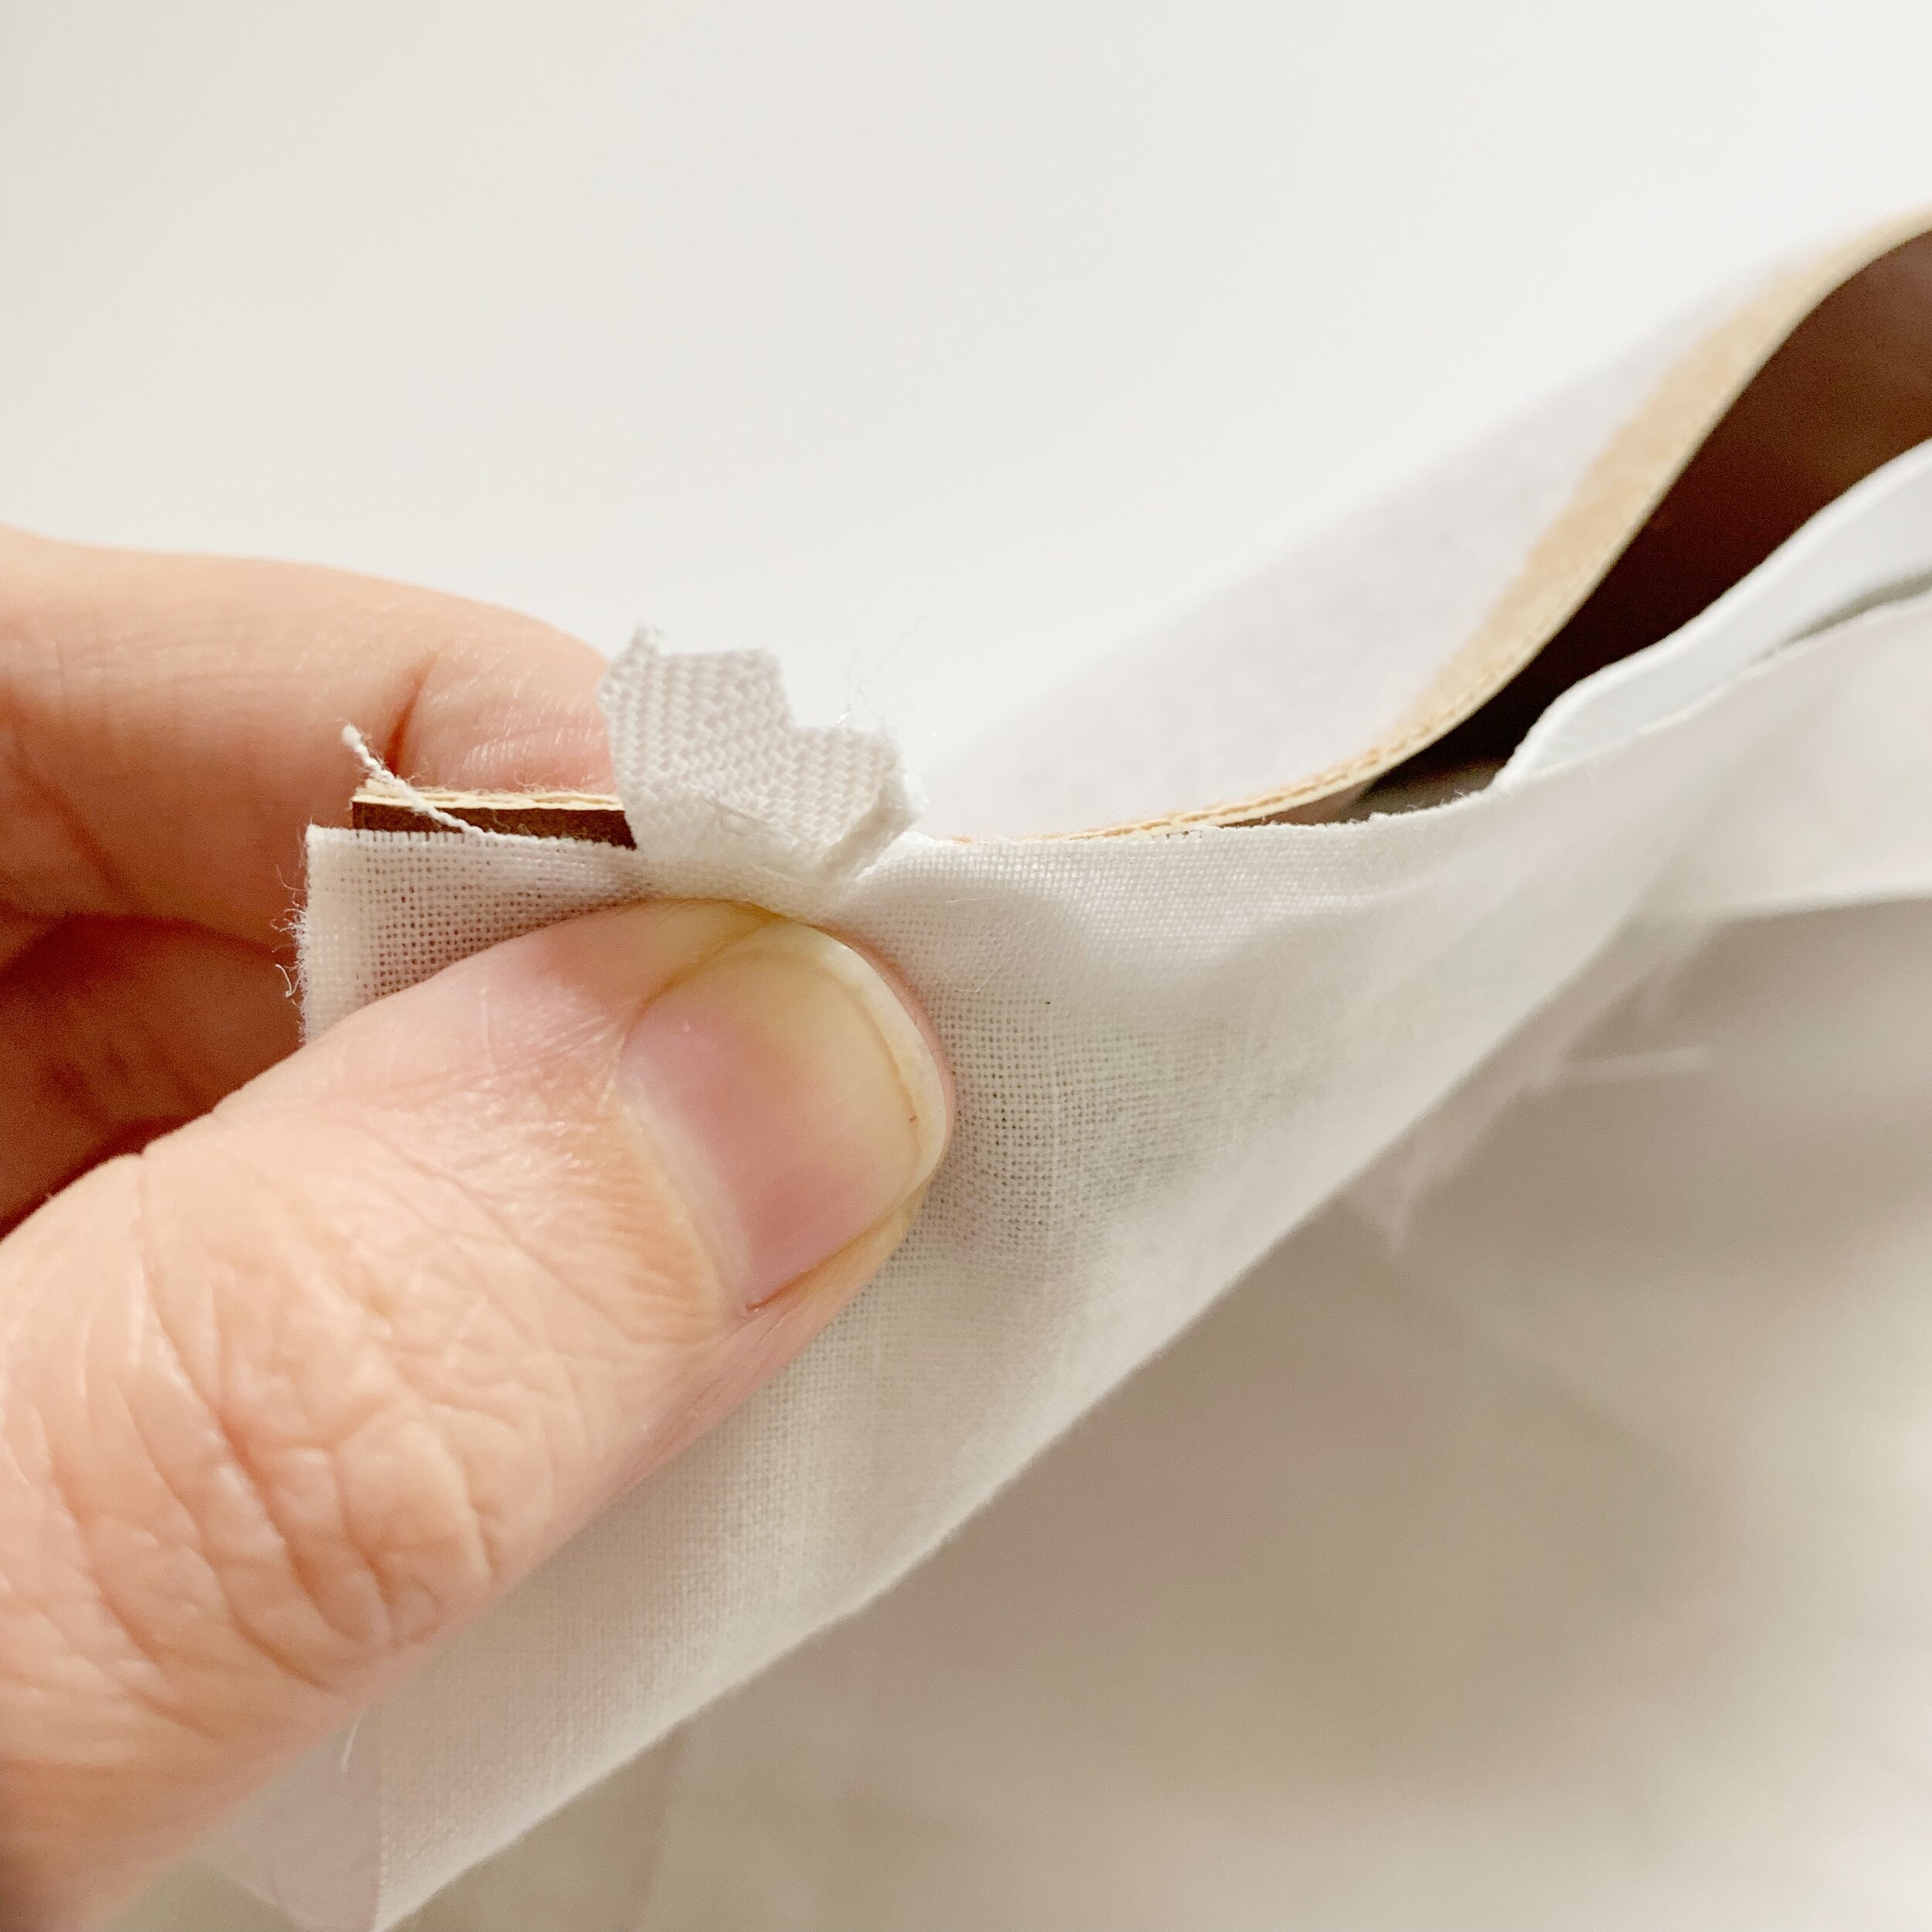
Press panels down away from zipper teeth with iron.
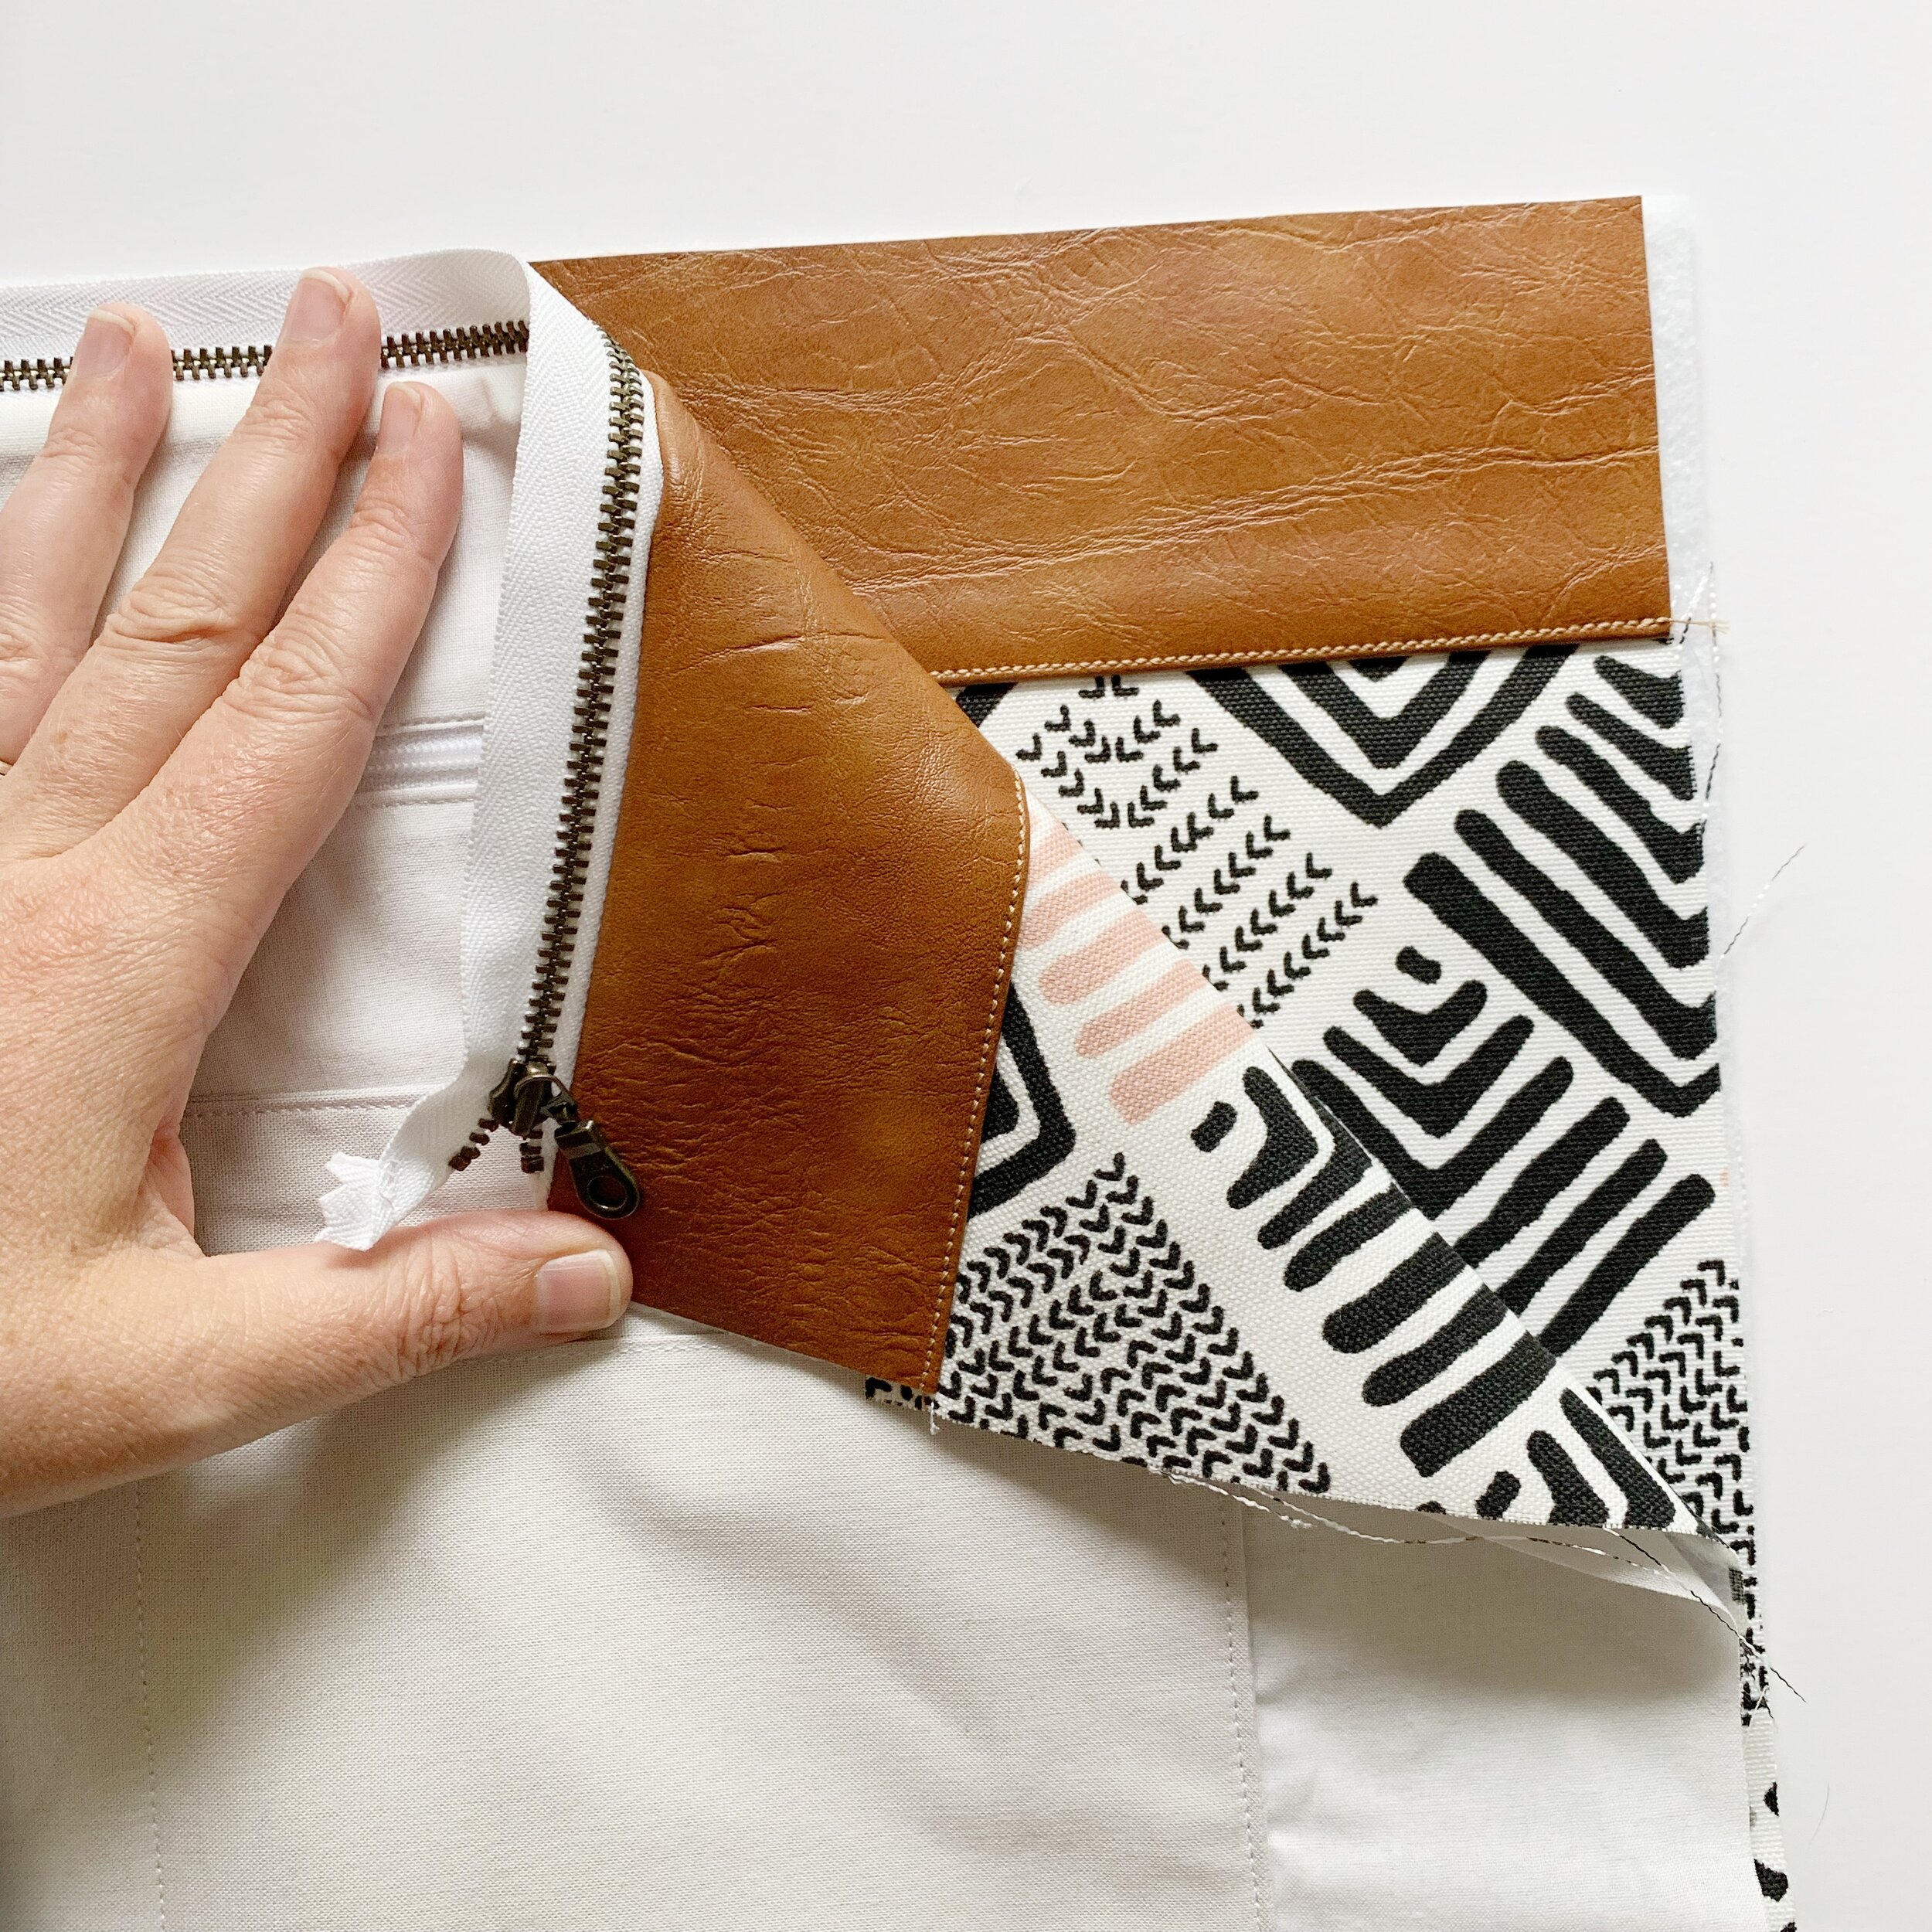
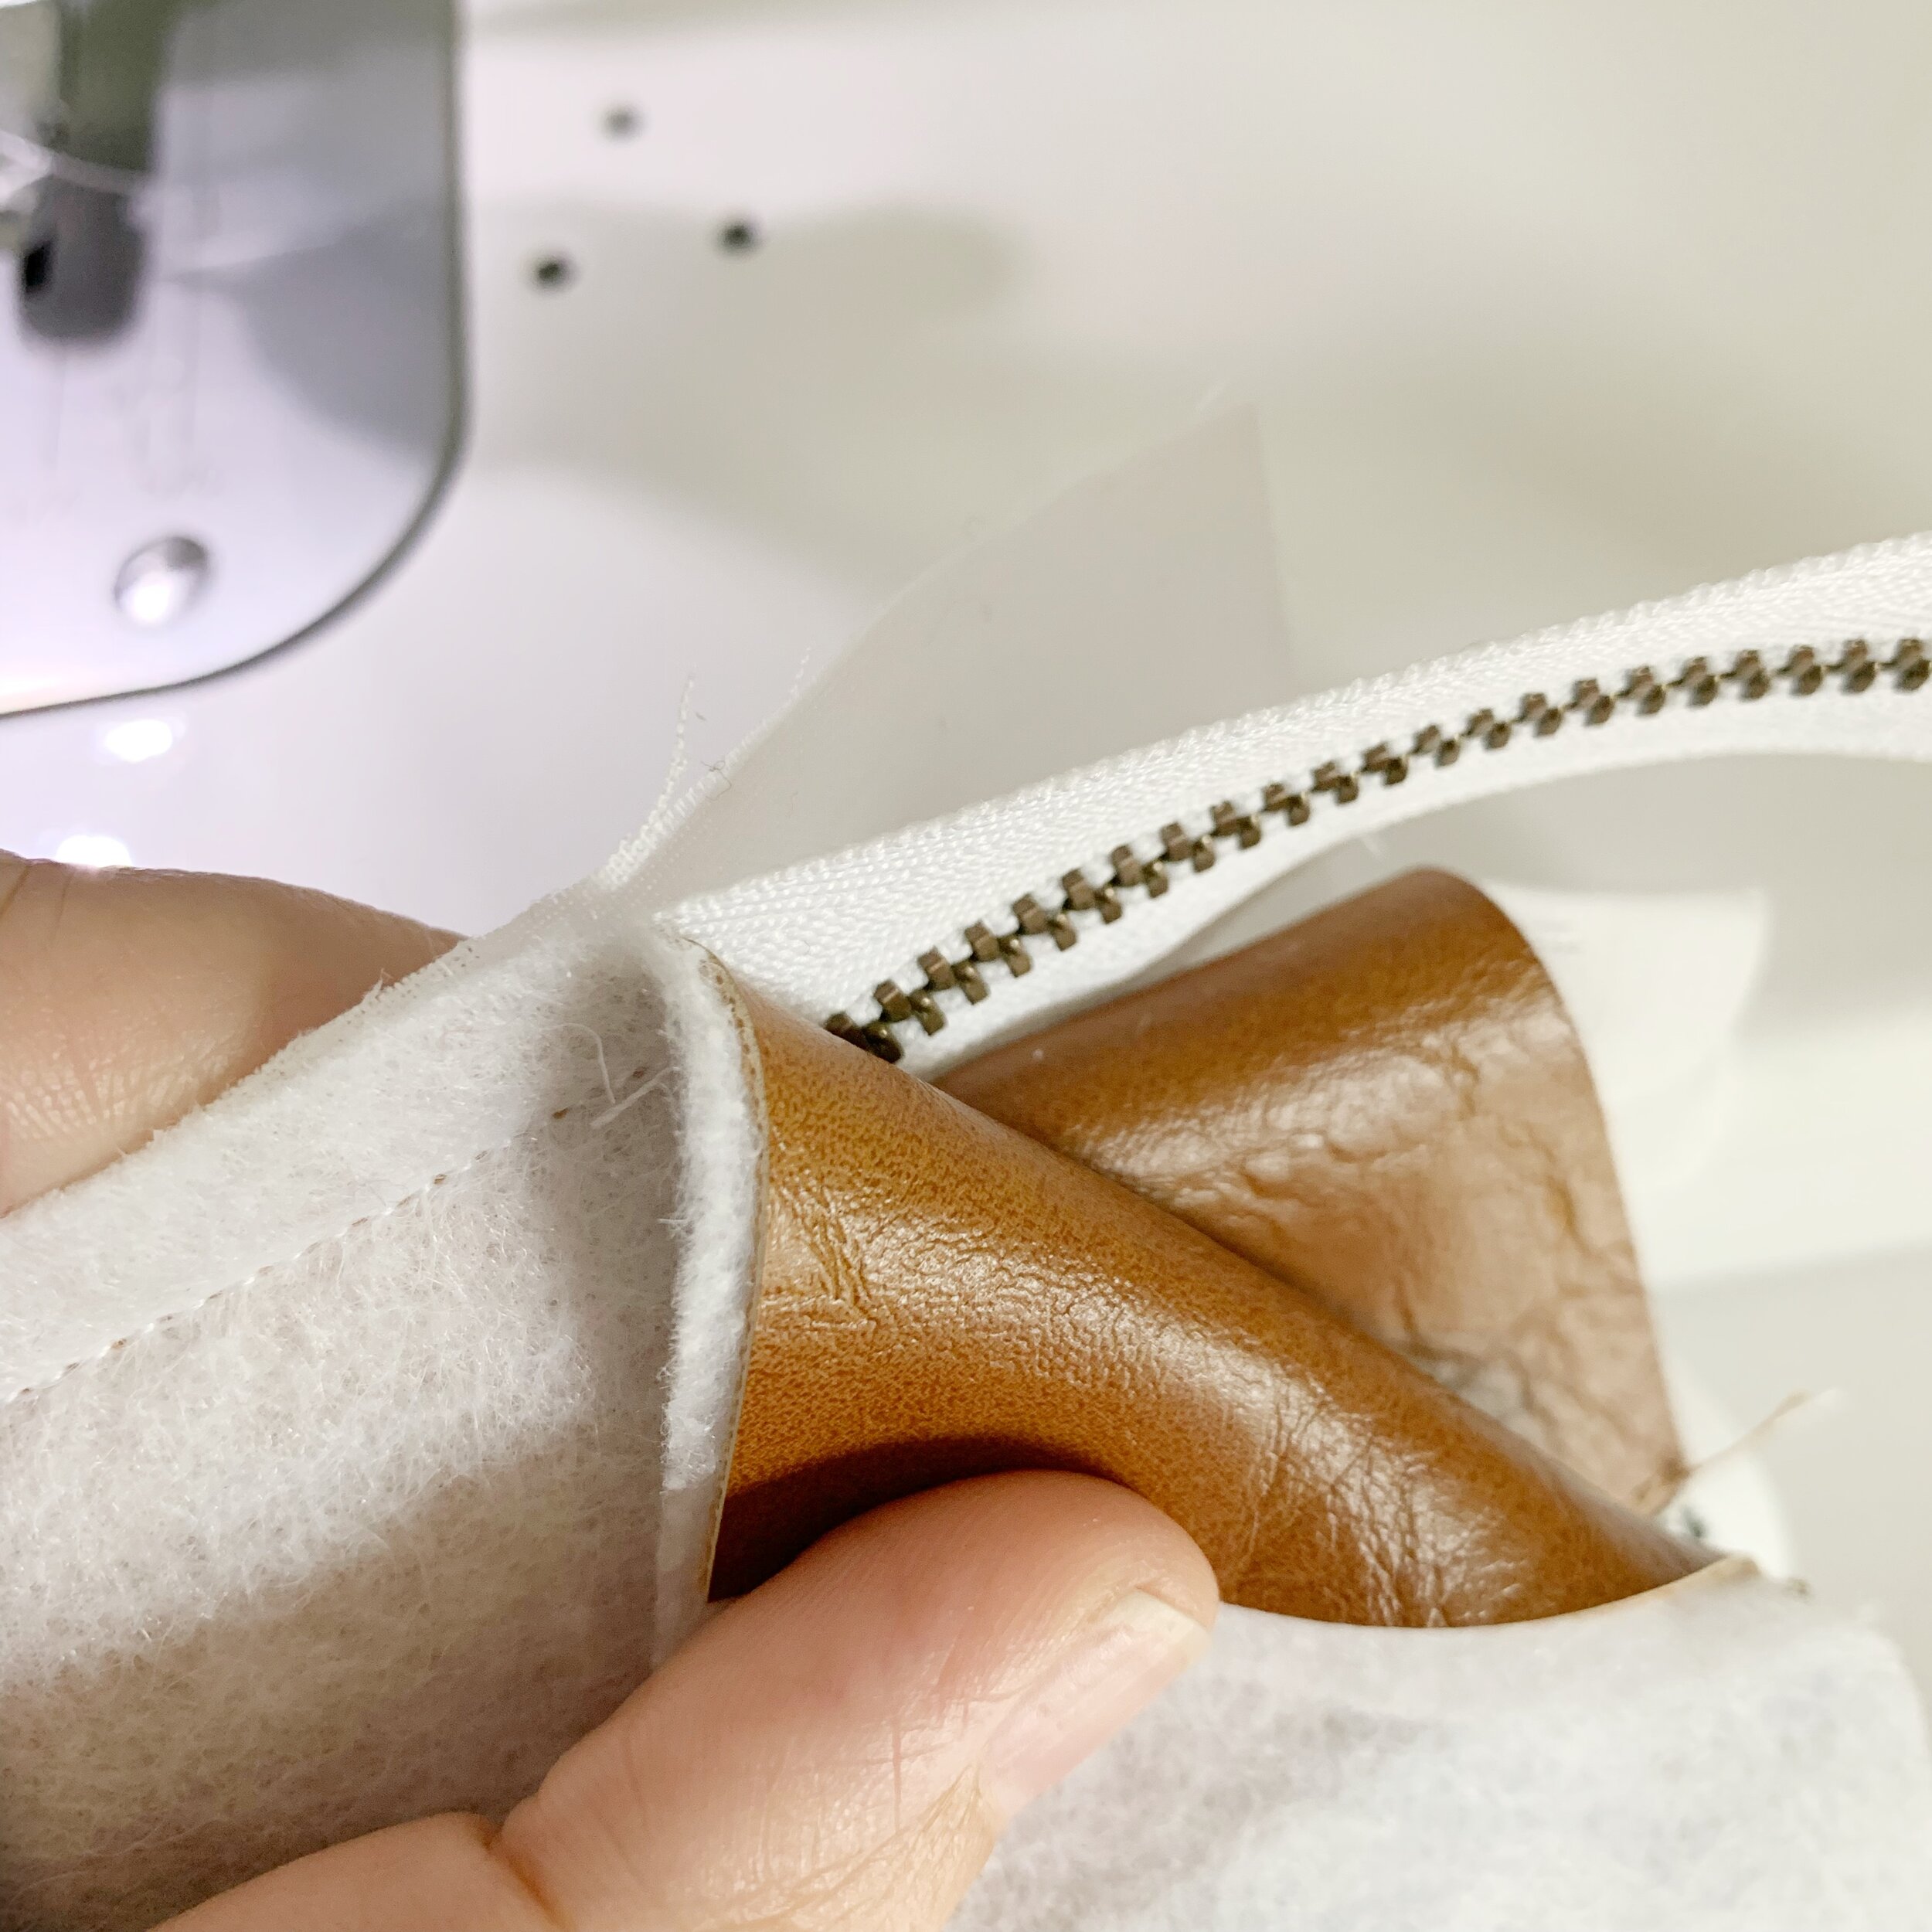
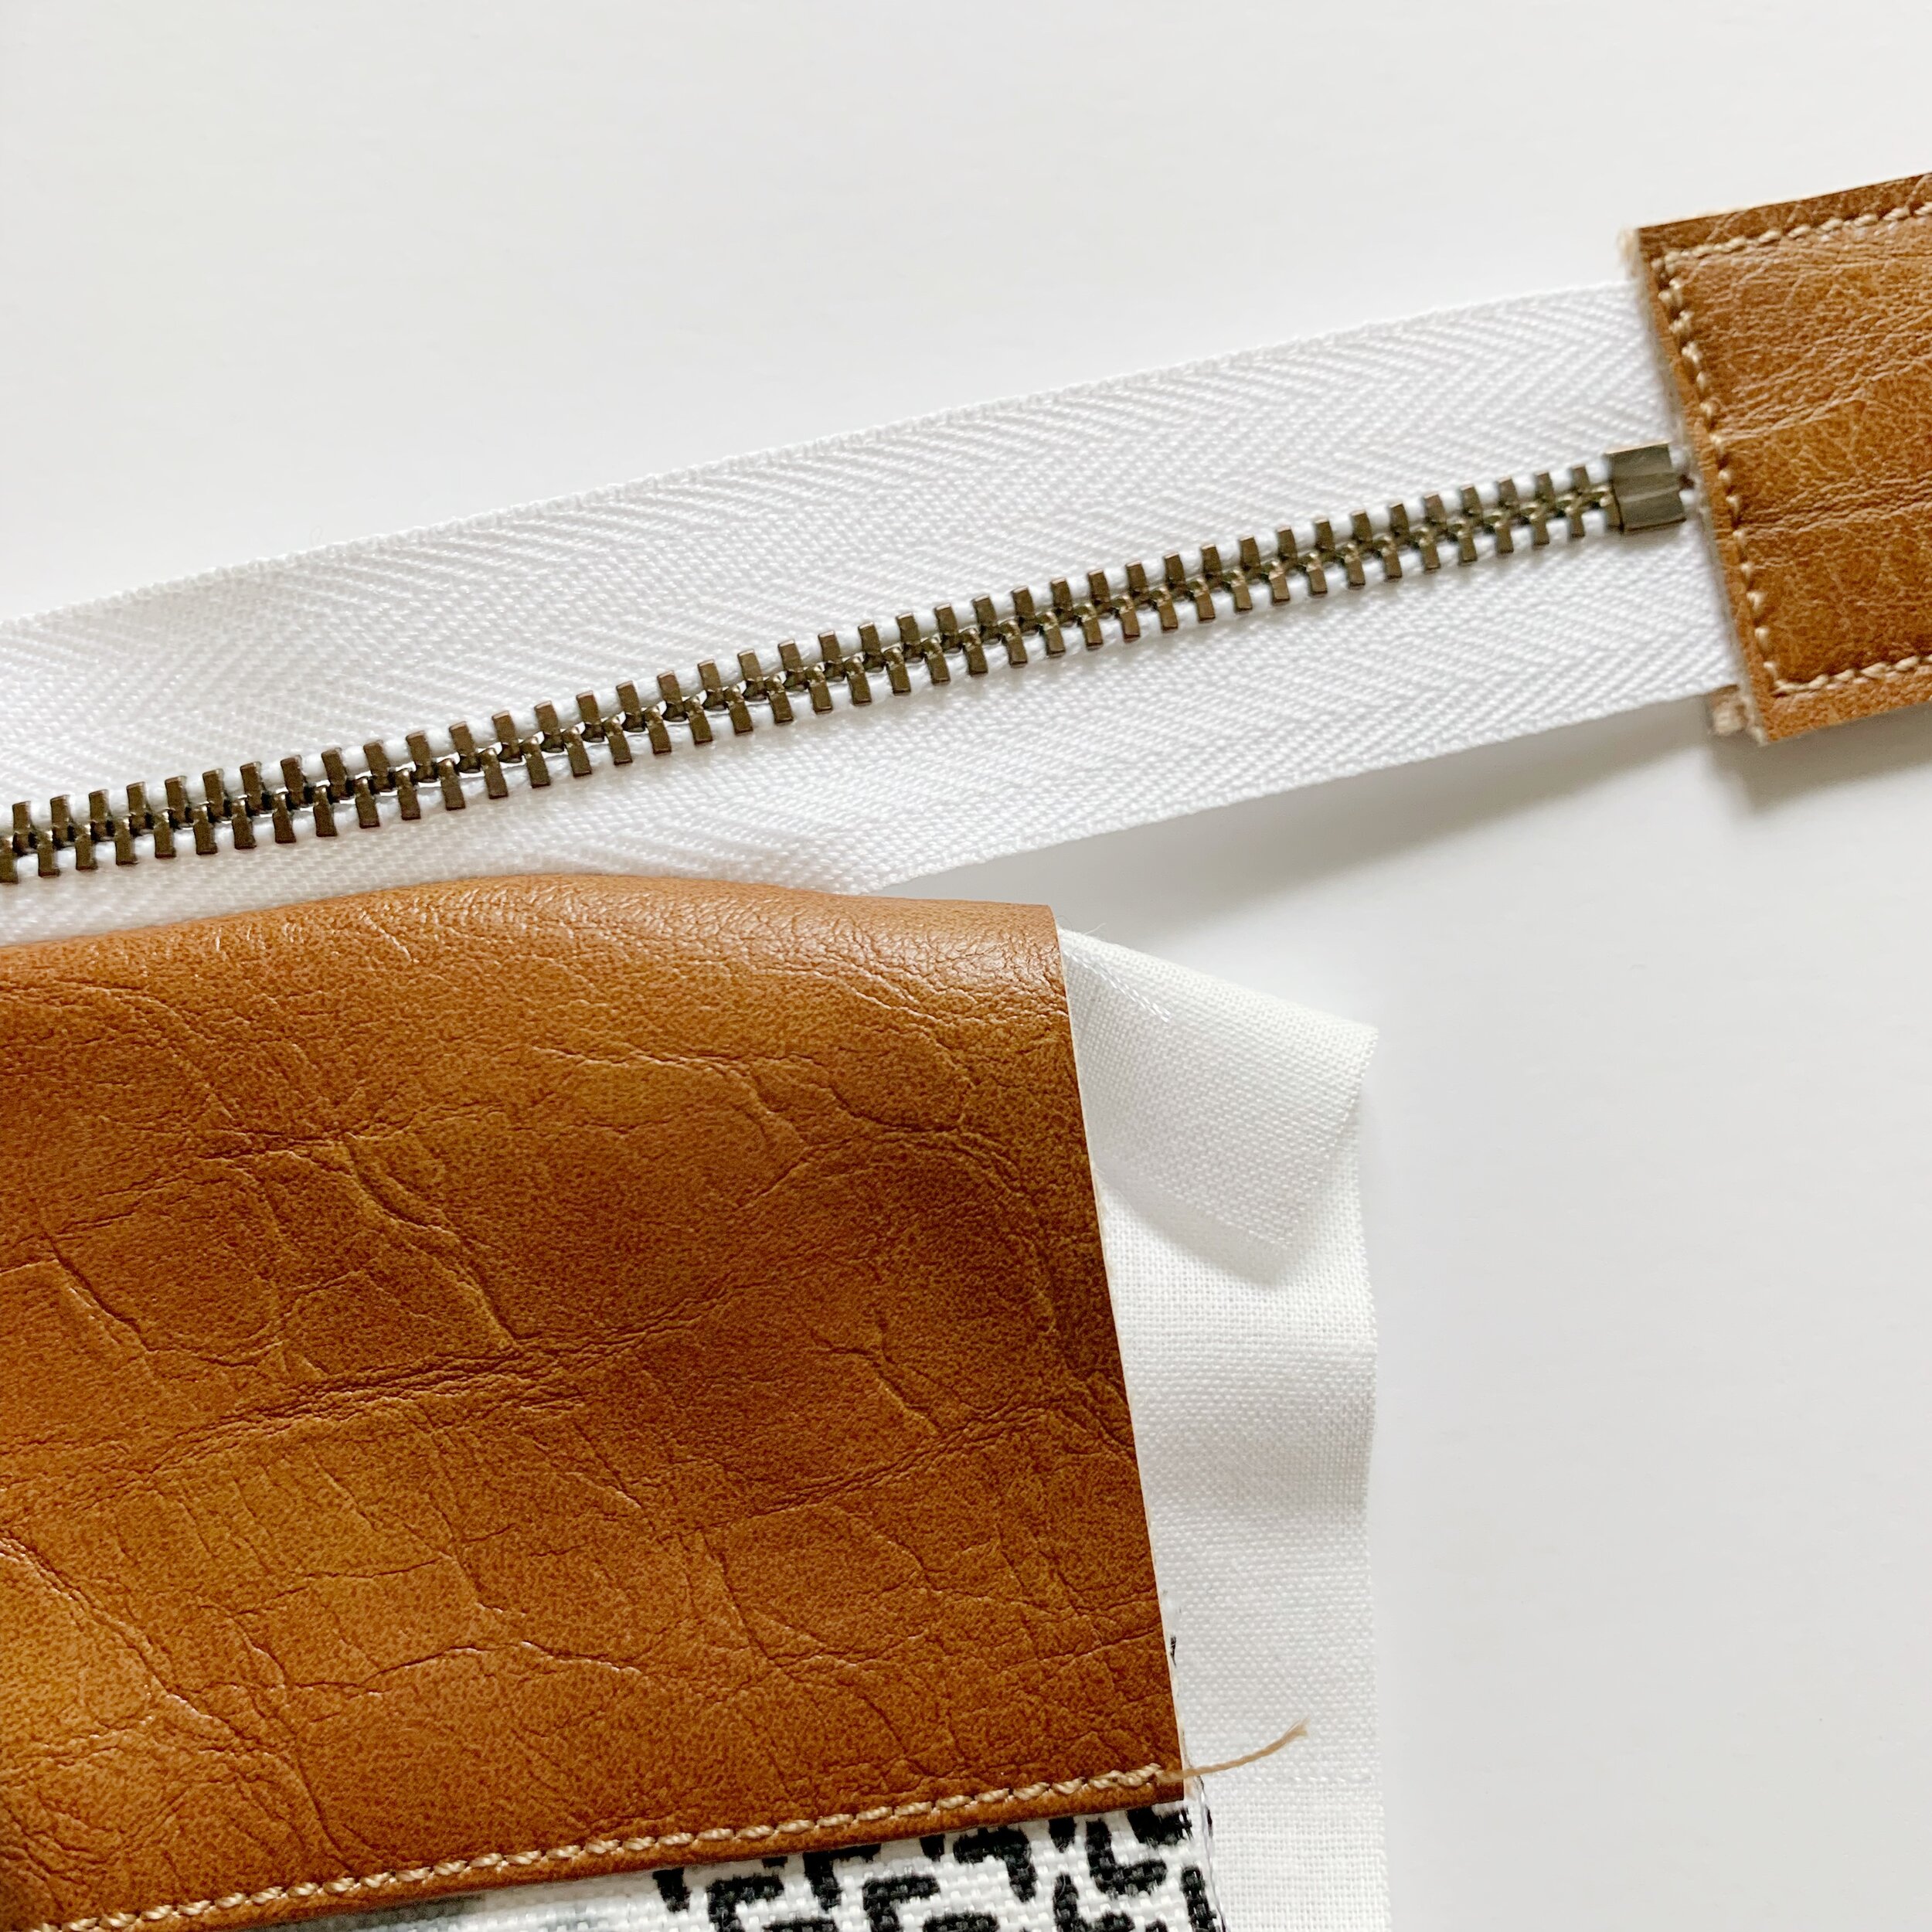
Lay second exterior panel down with right side facing up. Lay 1st panel, right side down, on top so the zipper edge lays along the top edge of the 2nd exterior panel. Then lay the second interior lining panel down so it covers the edge of the zipper. Starting at the end, leave about an 1” of space and sew along the edge, again folding the edge of the zipper up 45 degrees.
Then go back and sew the unfinished end, again sliding the end of the zipper out of the way so the last inch is just the exterior and lining sewn together. Press with iron so panels are away from the zipper.

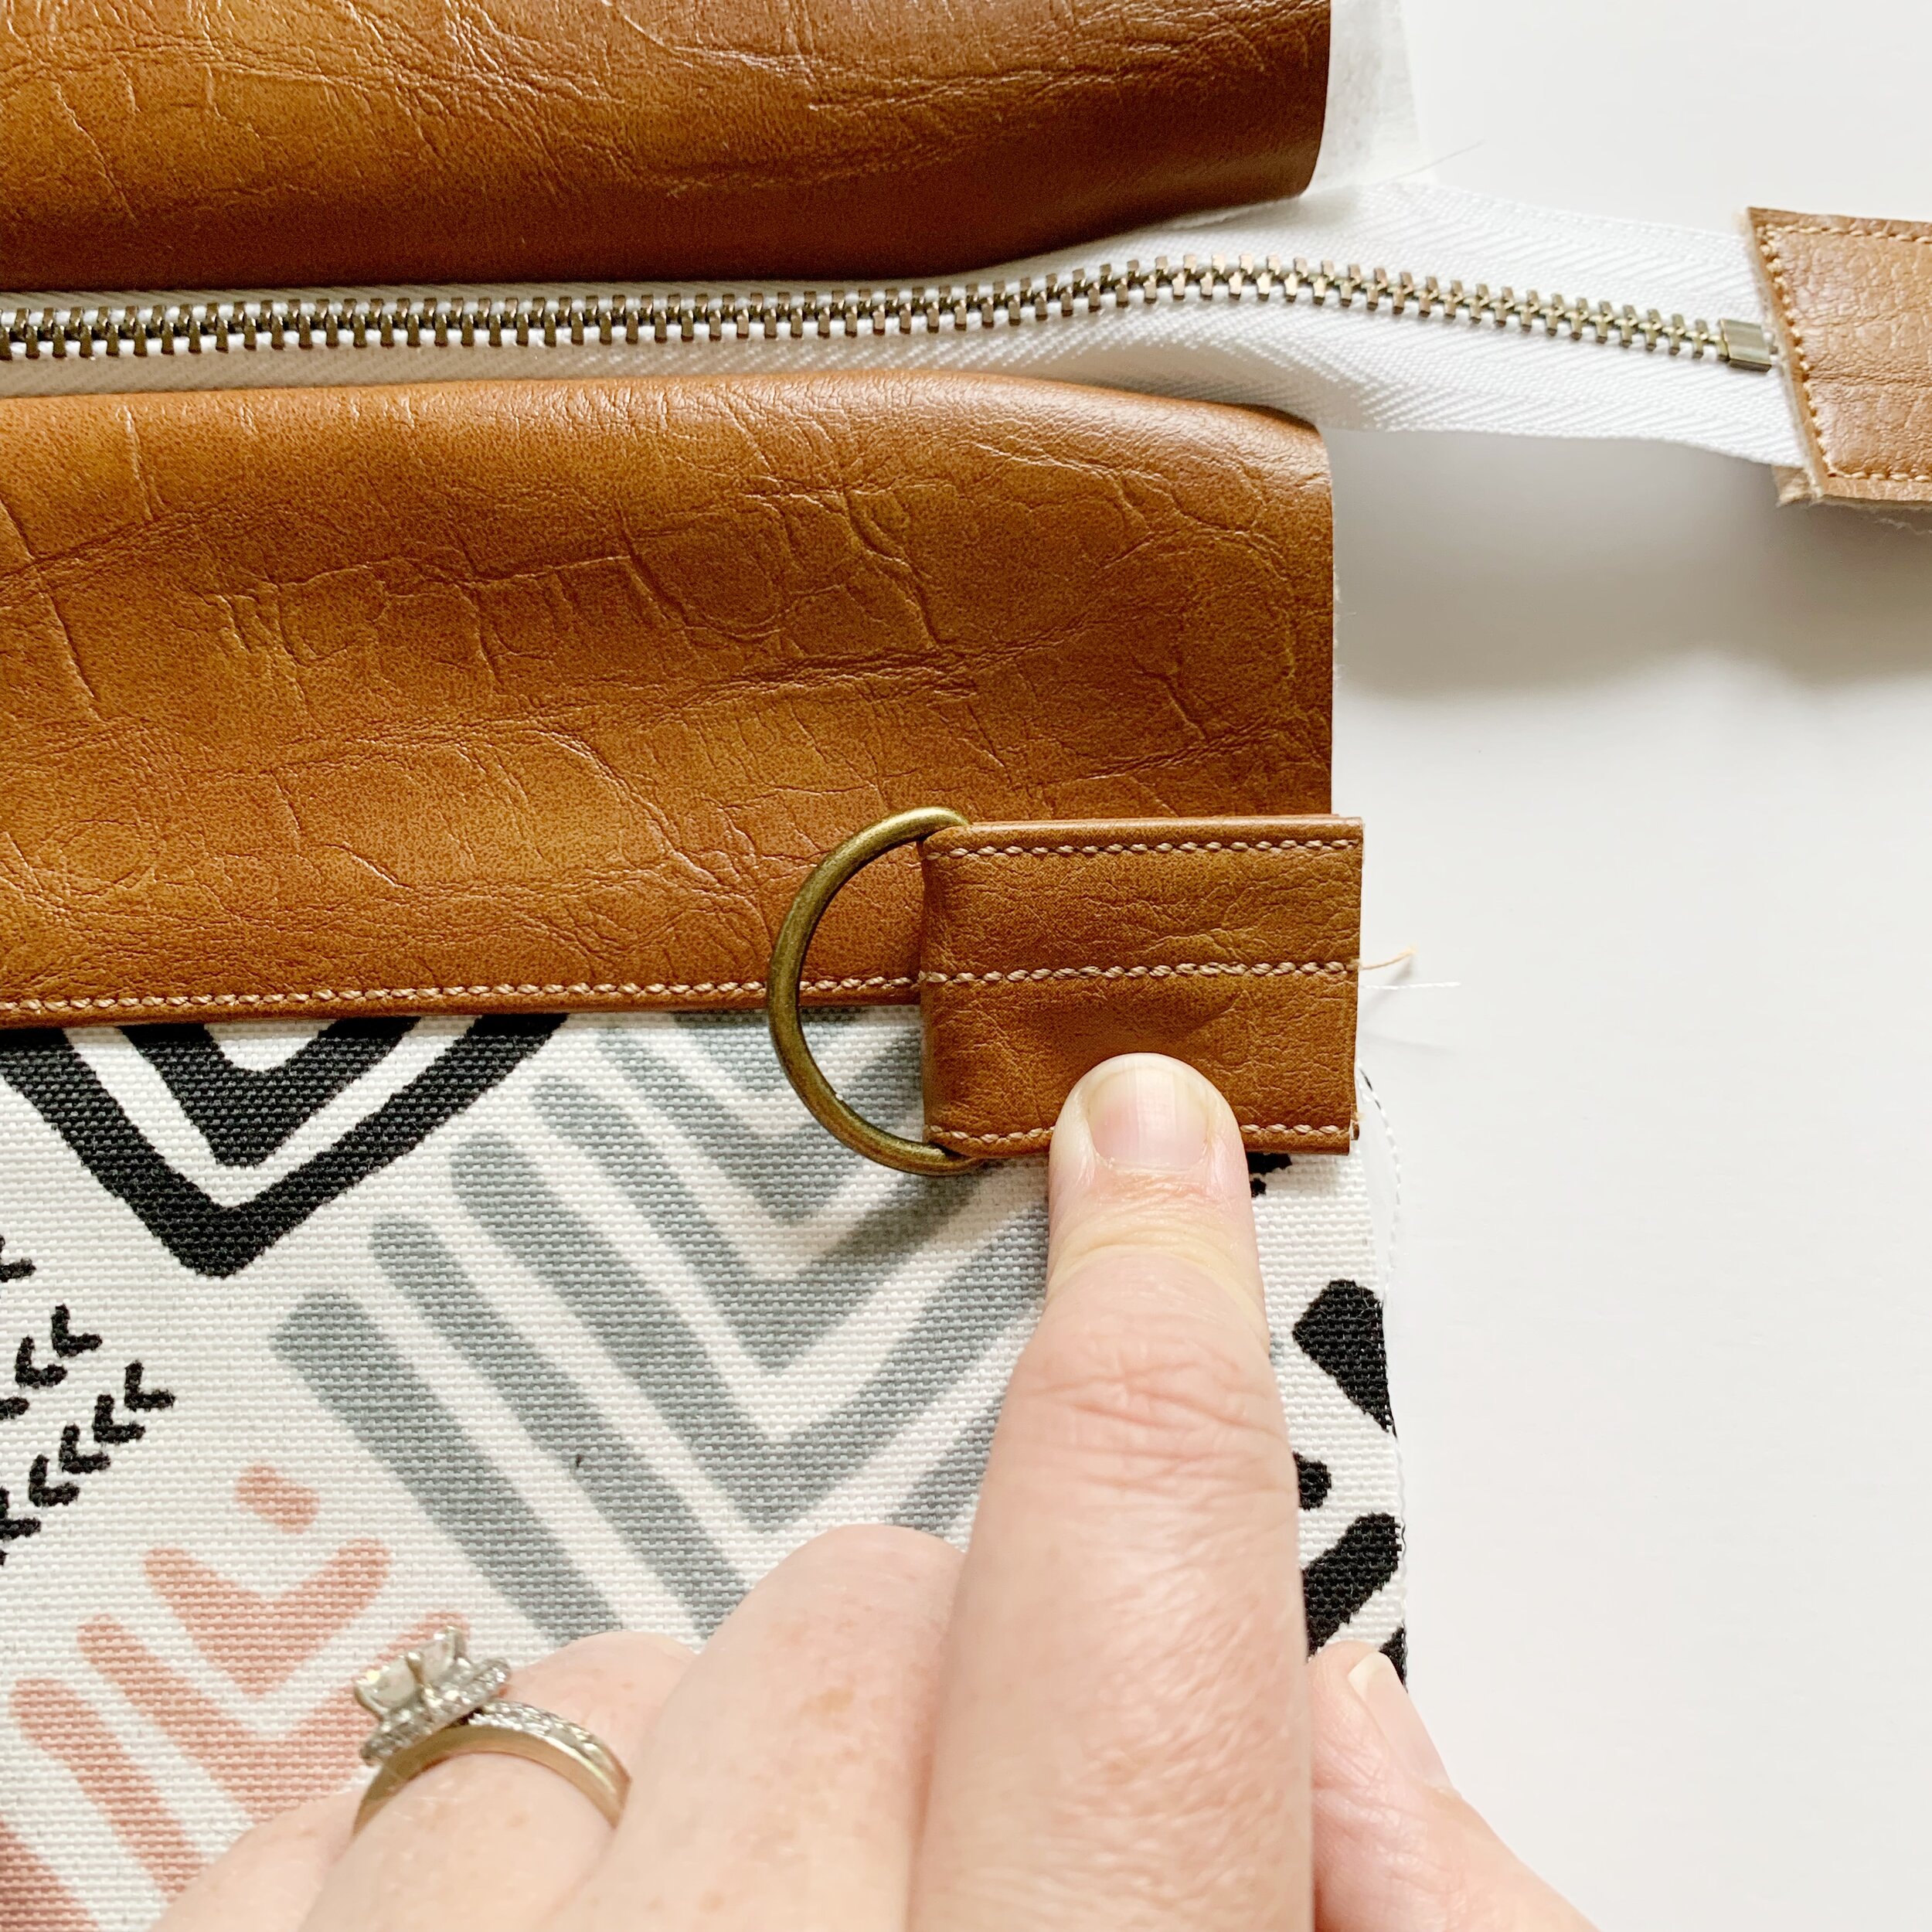
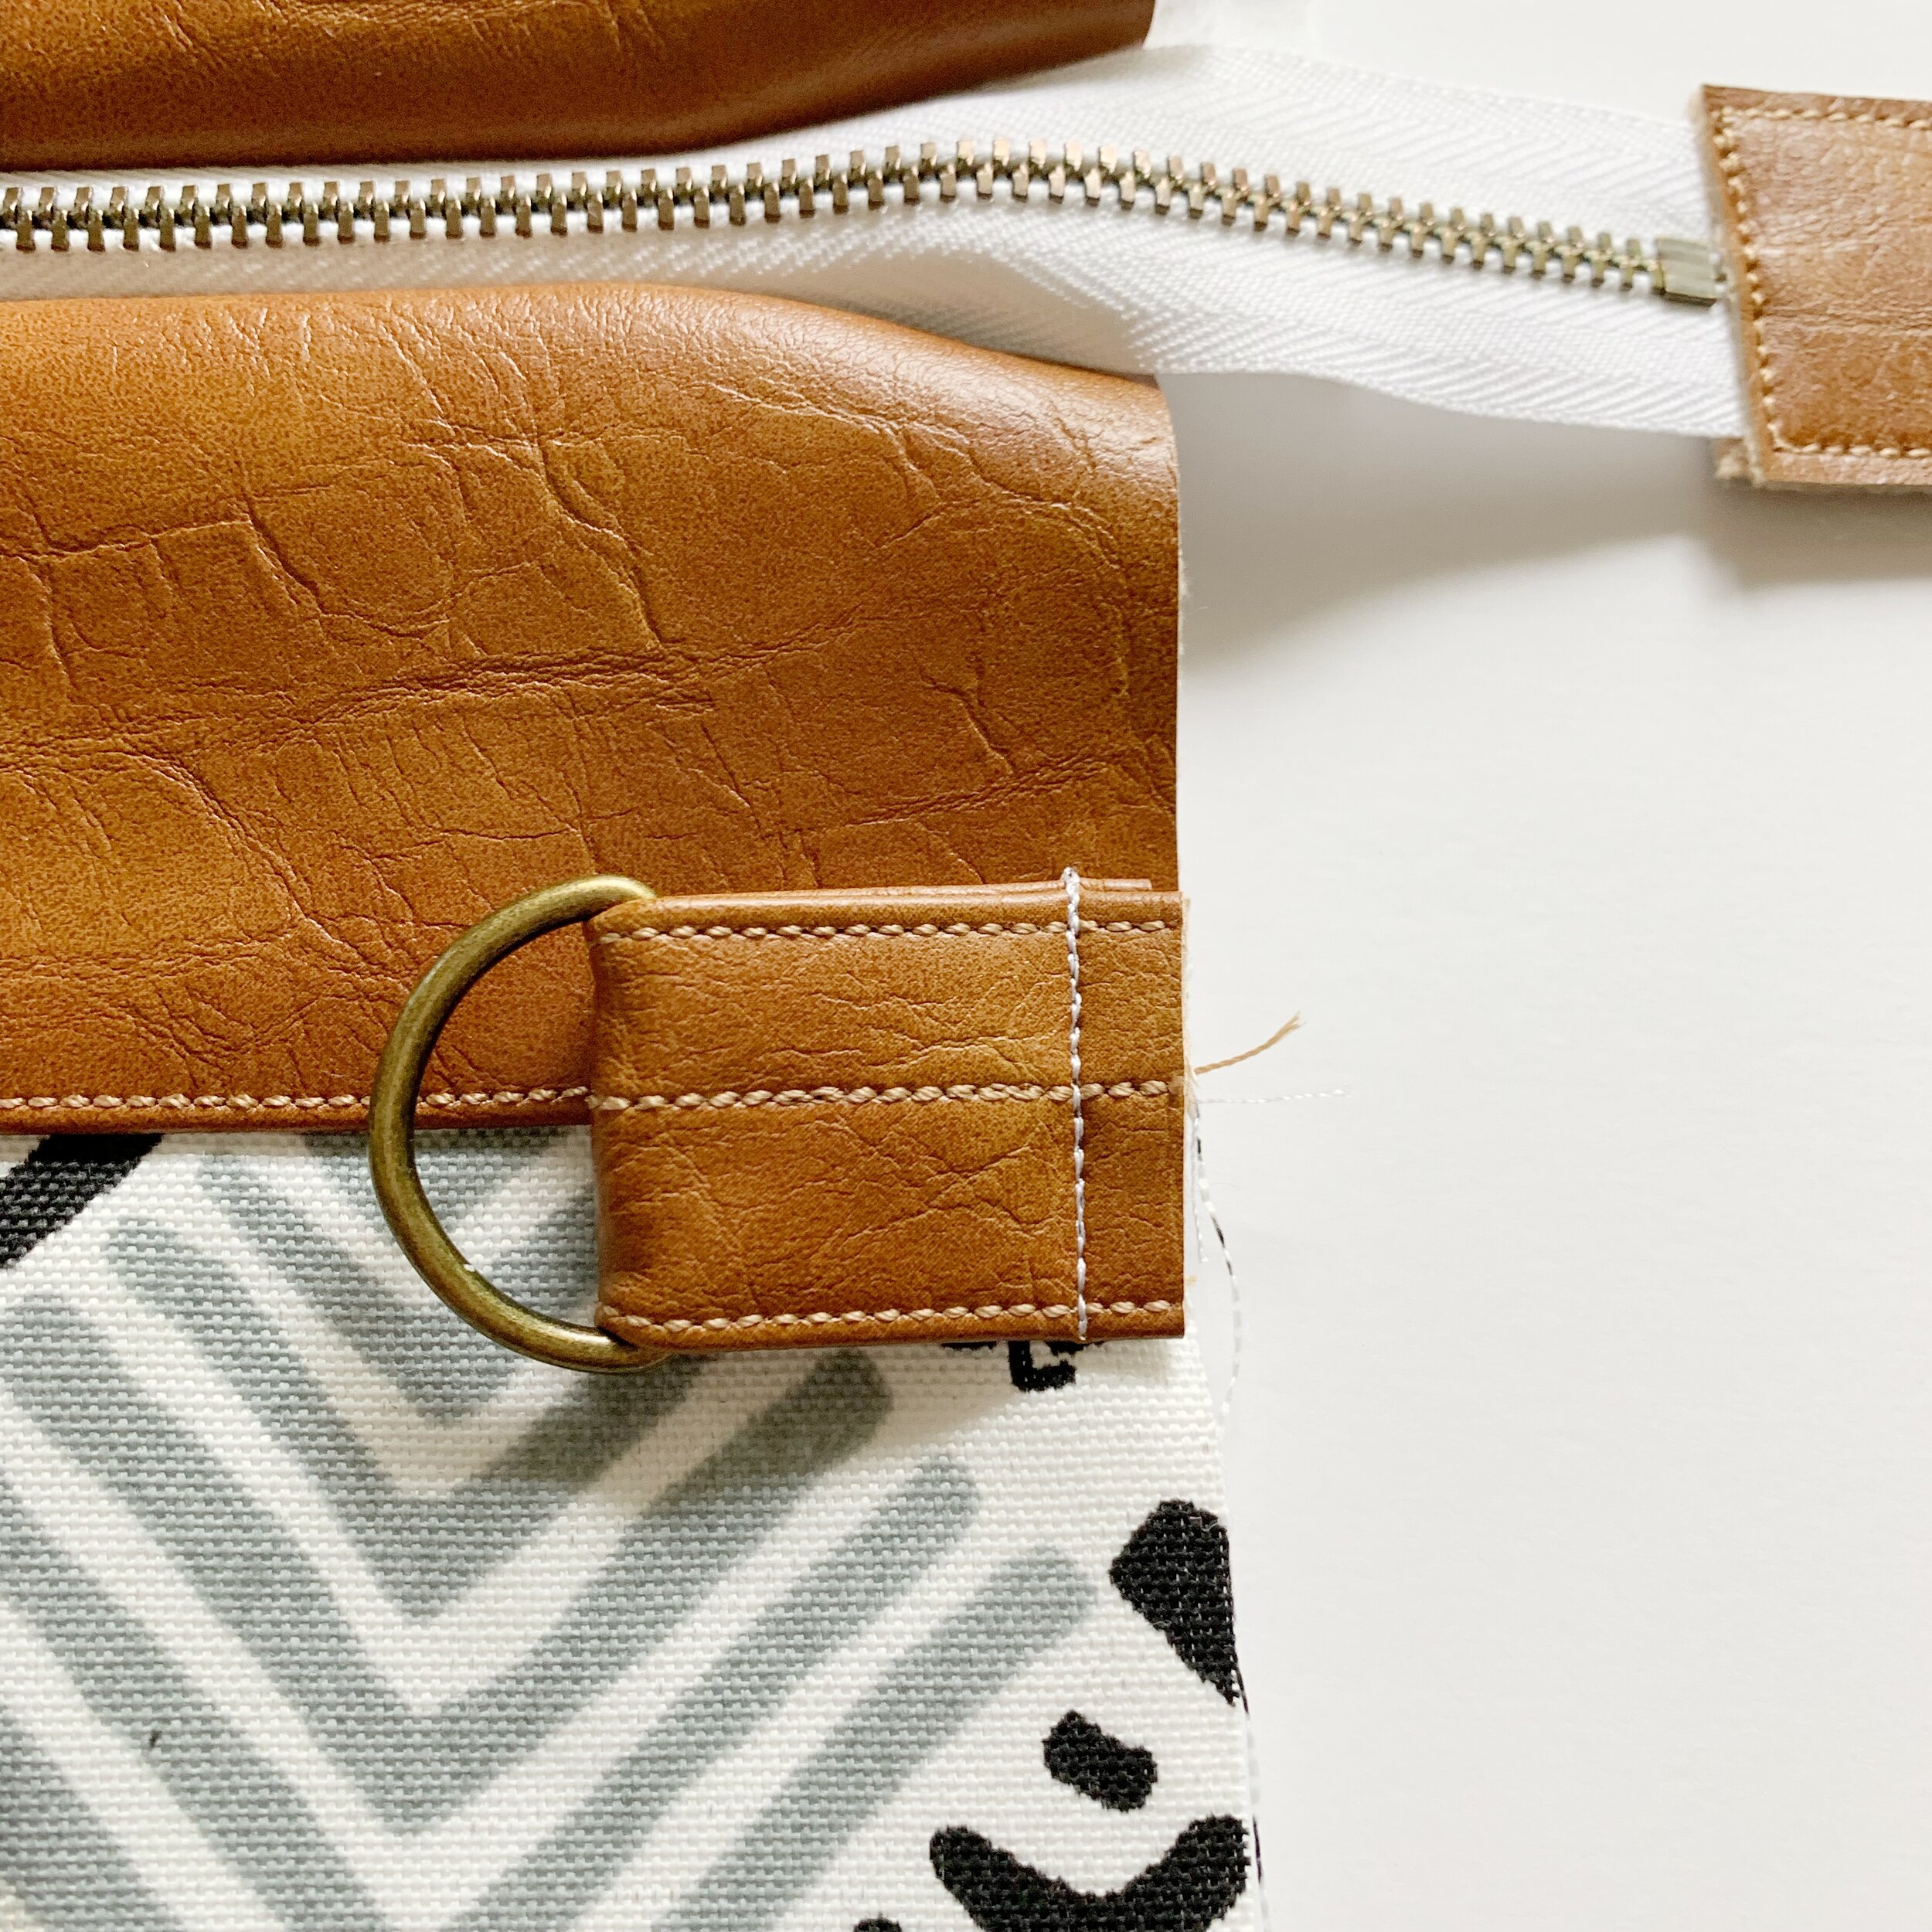
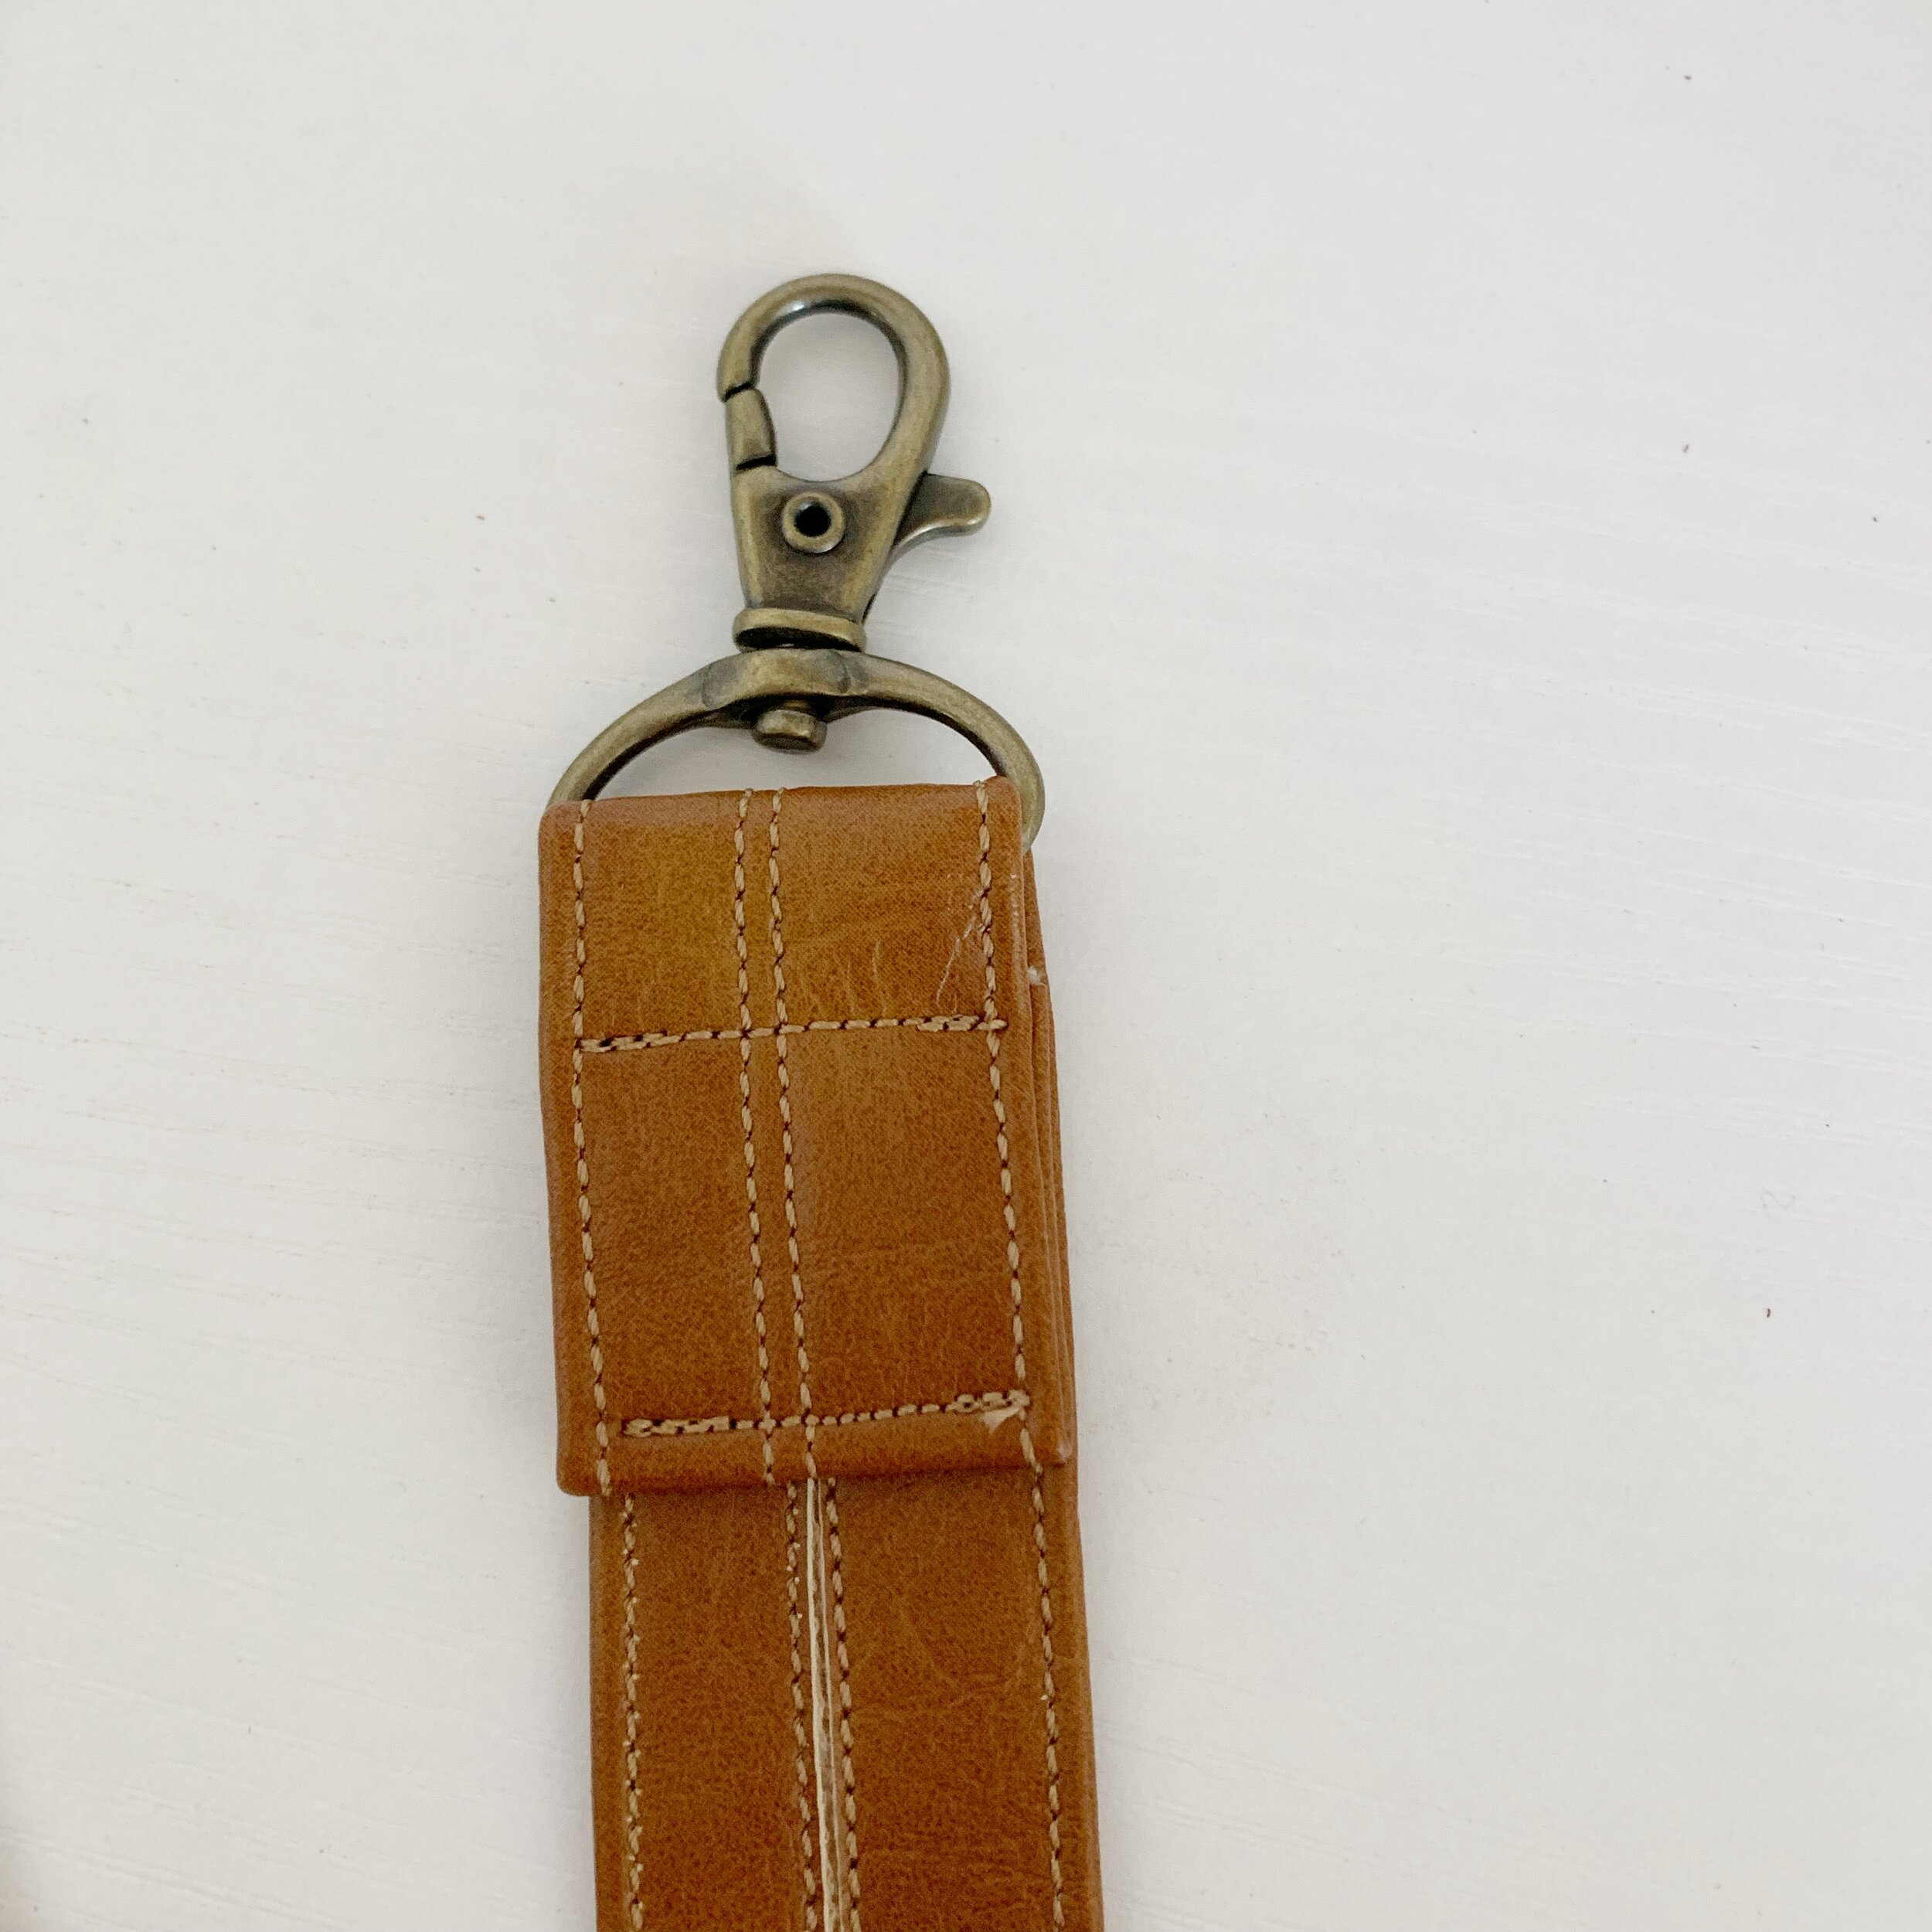
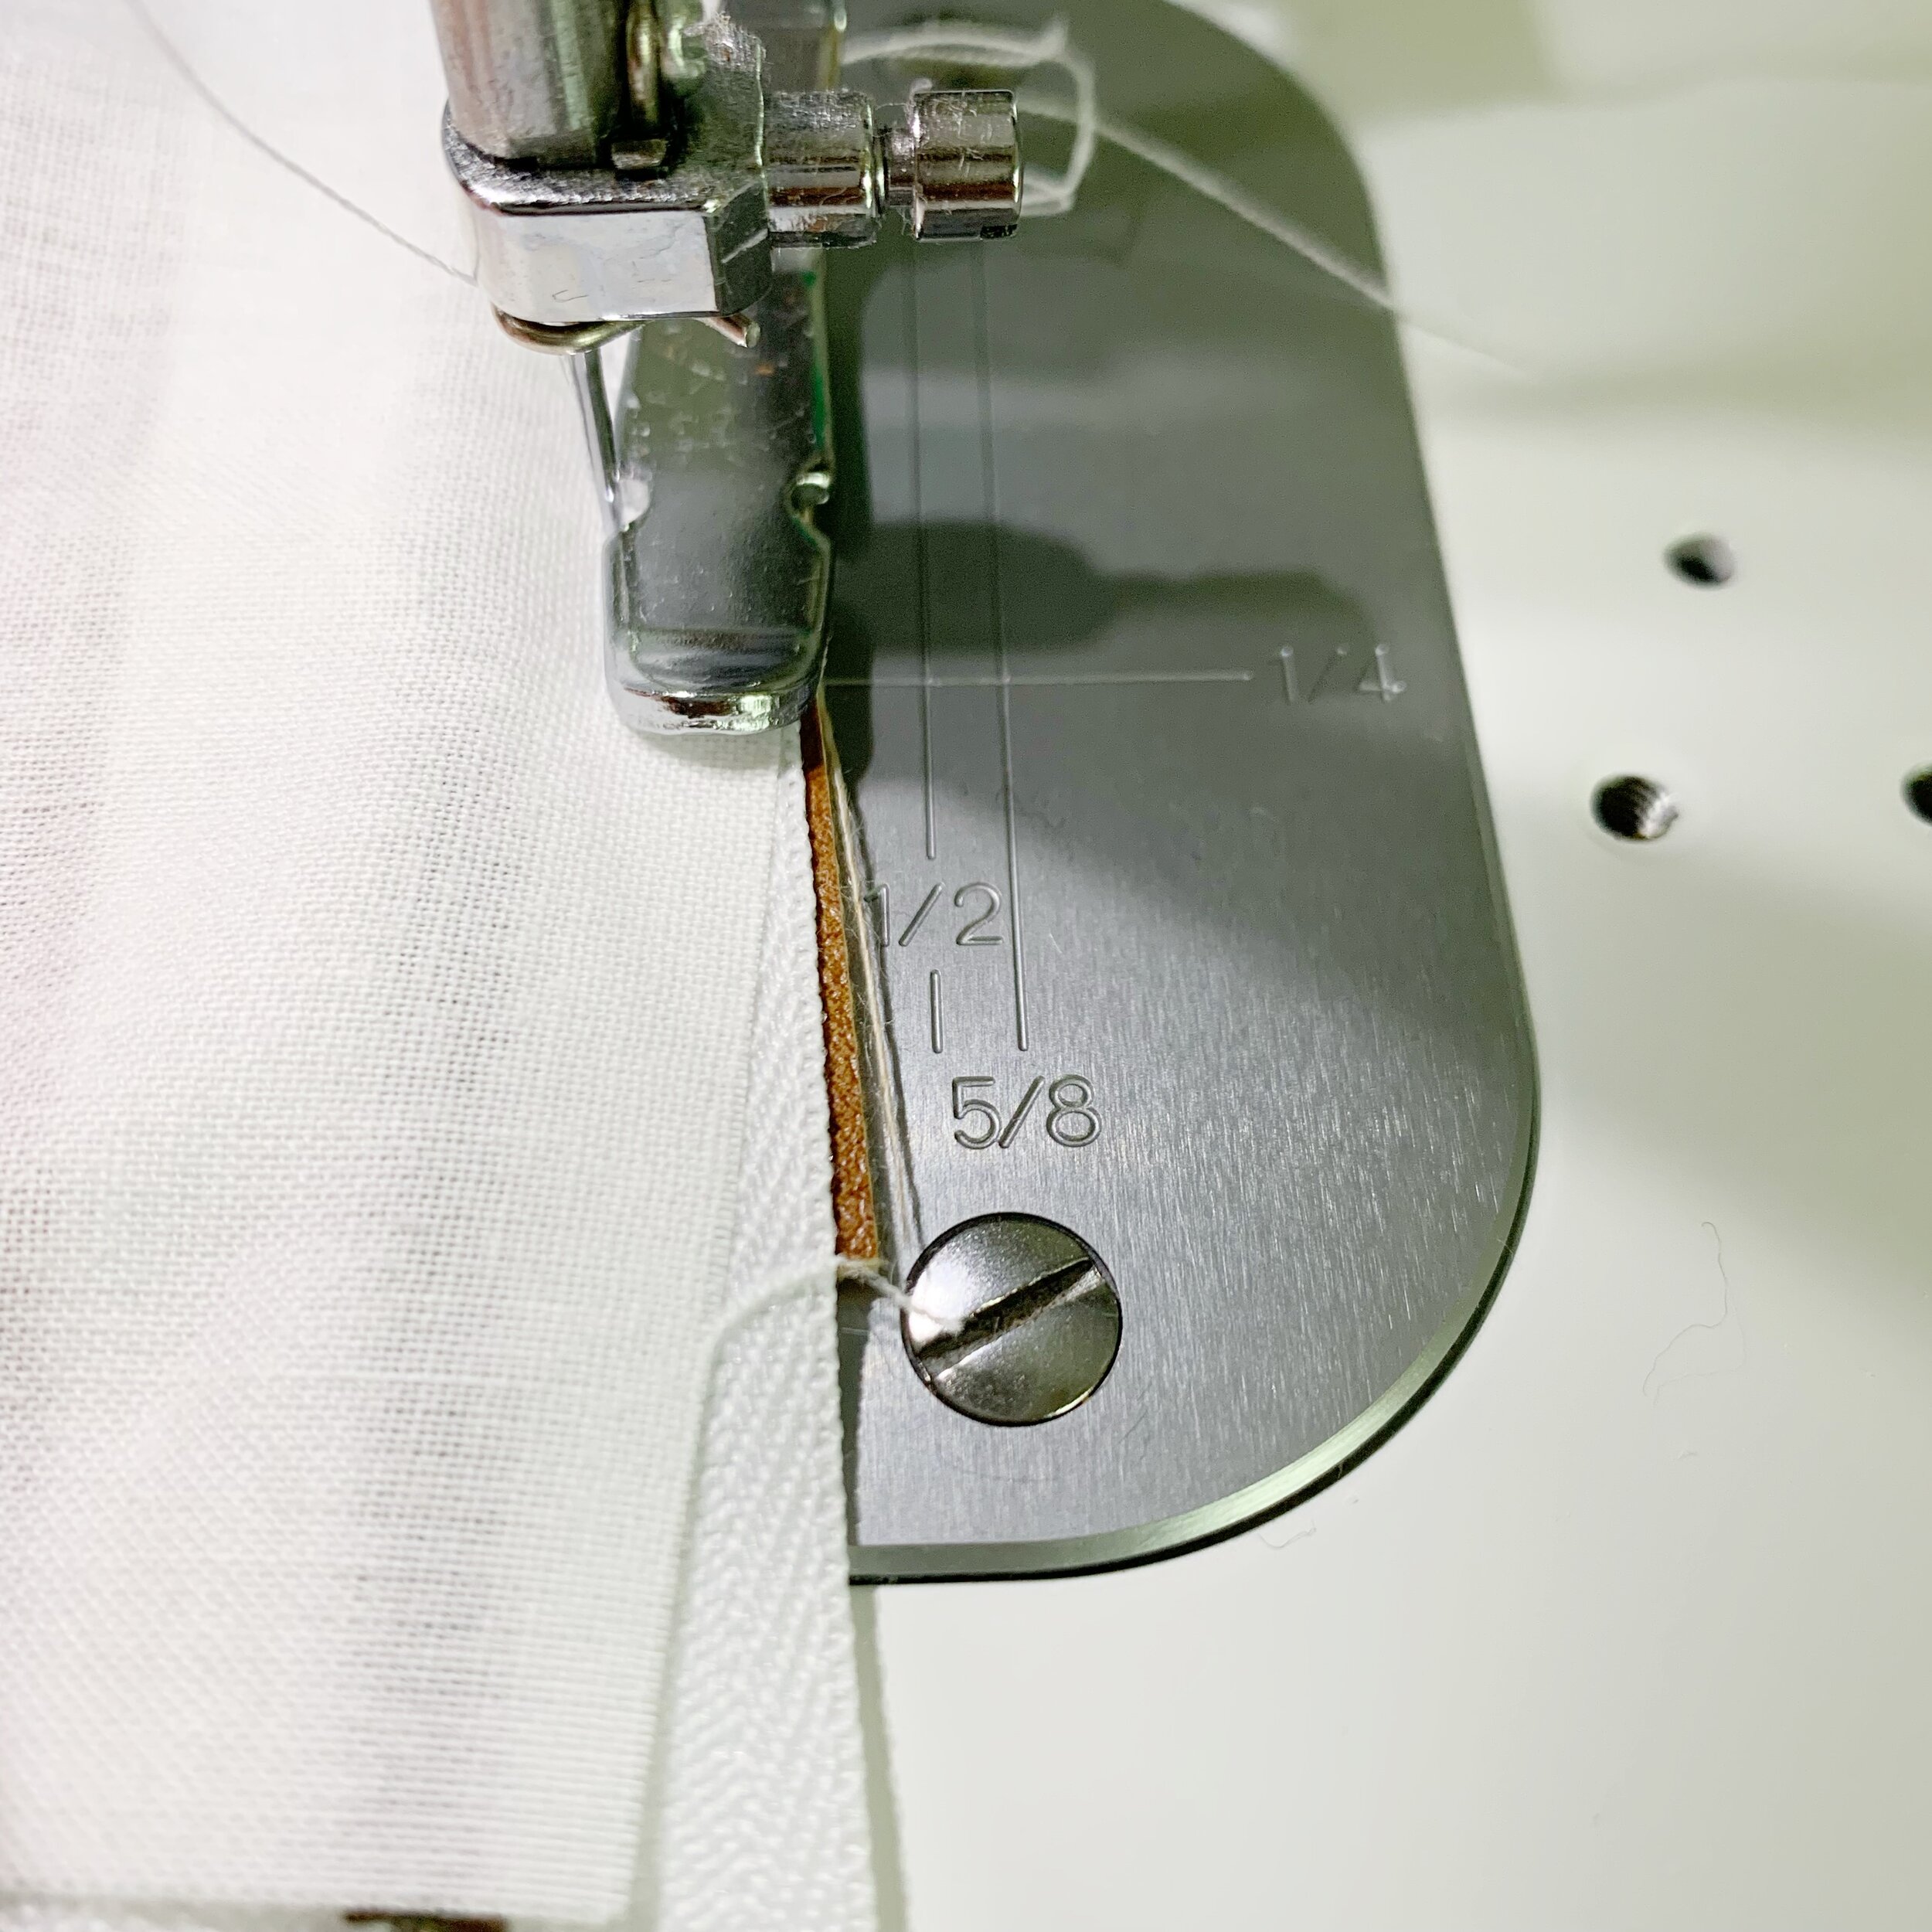
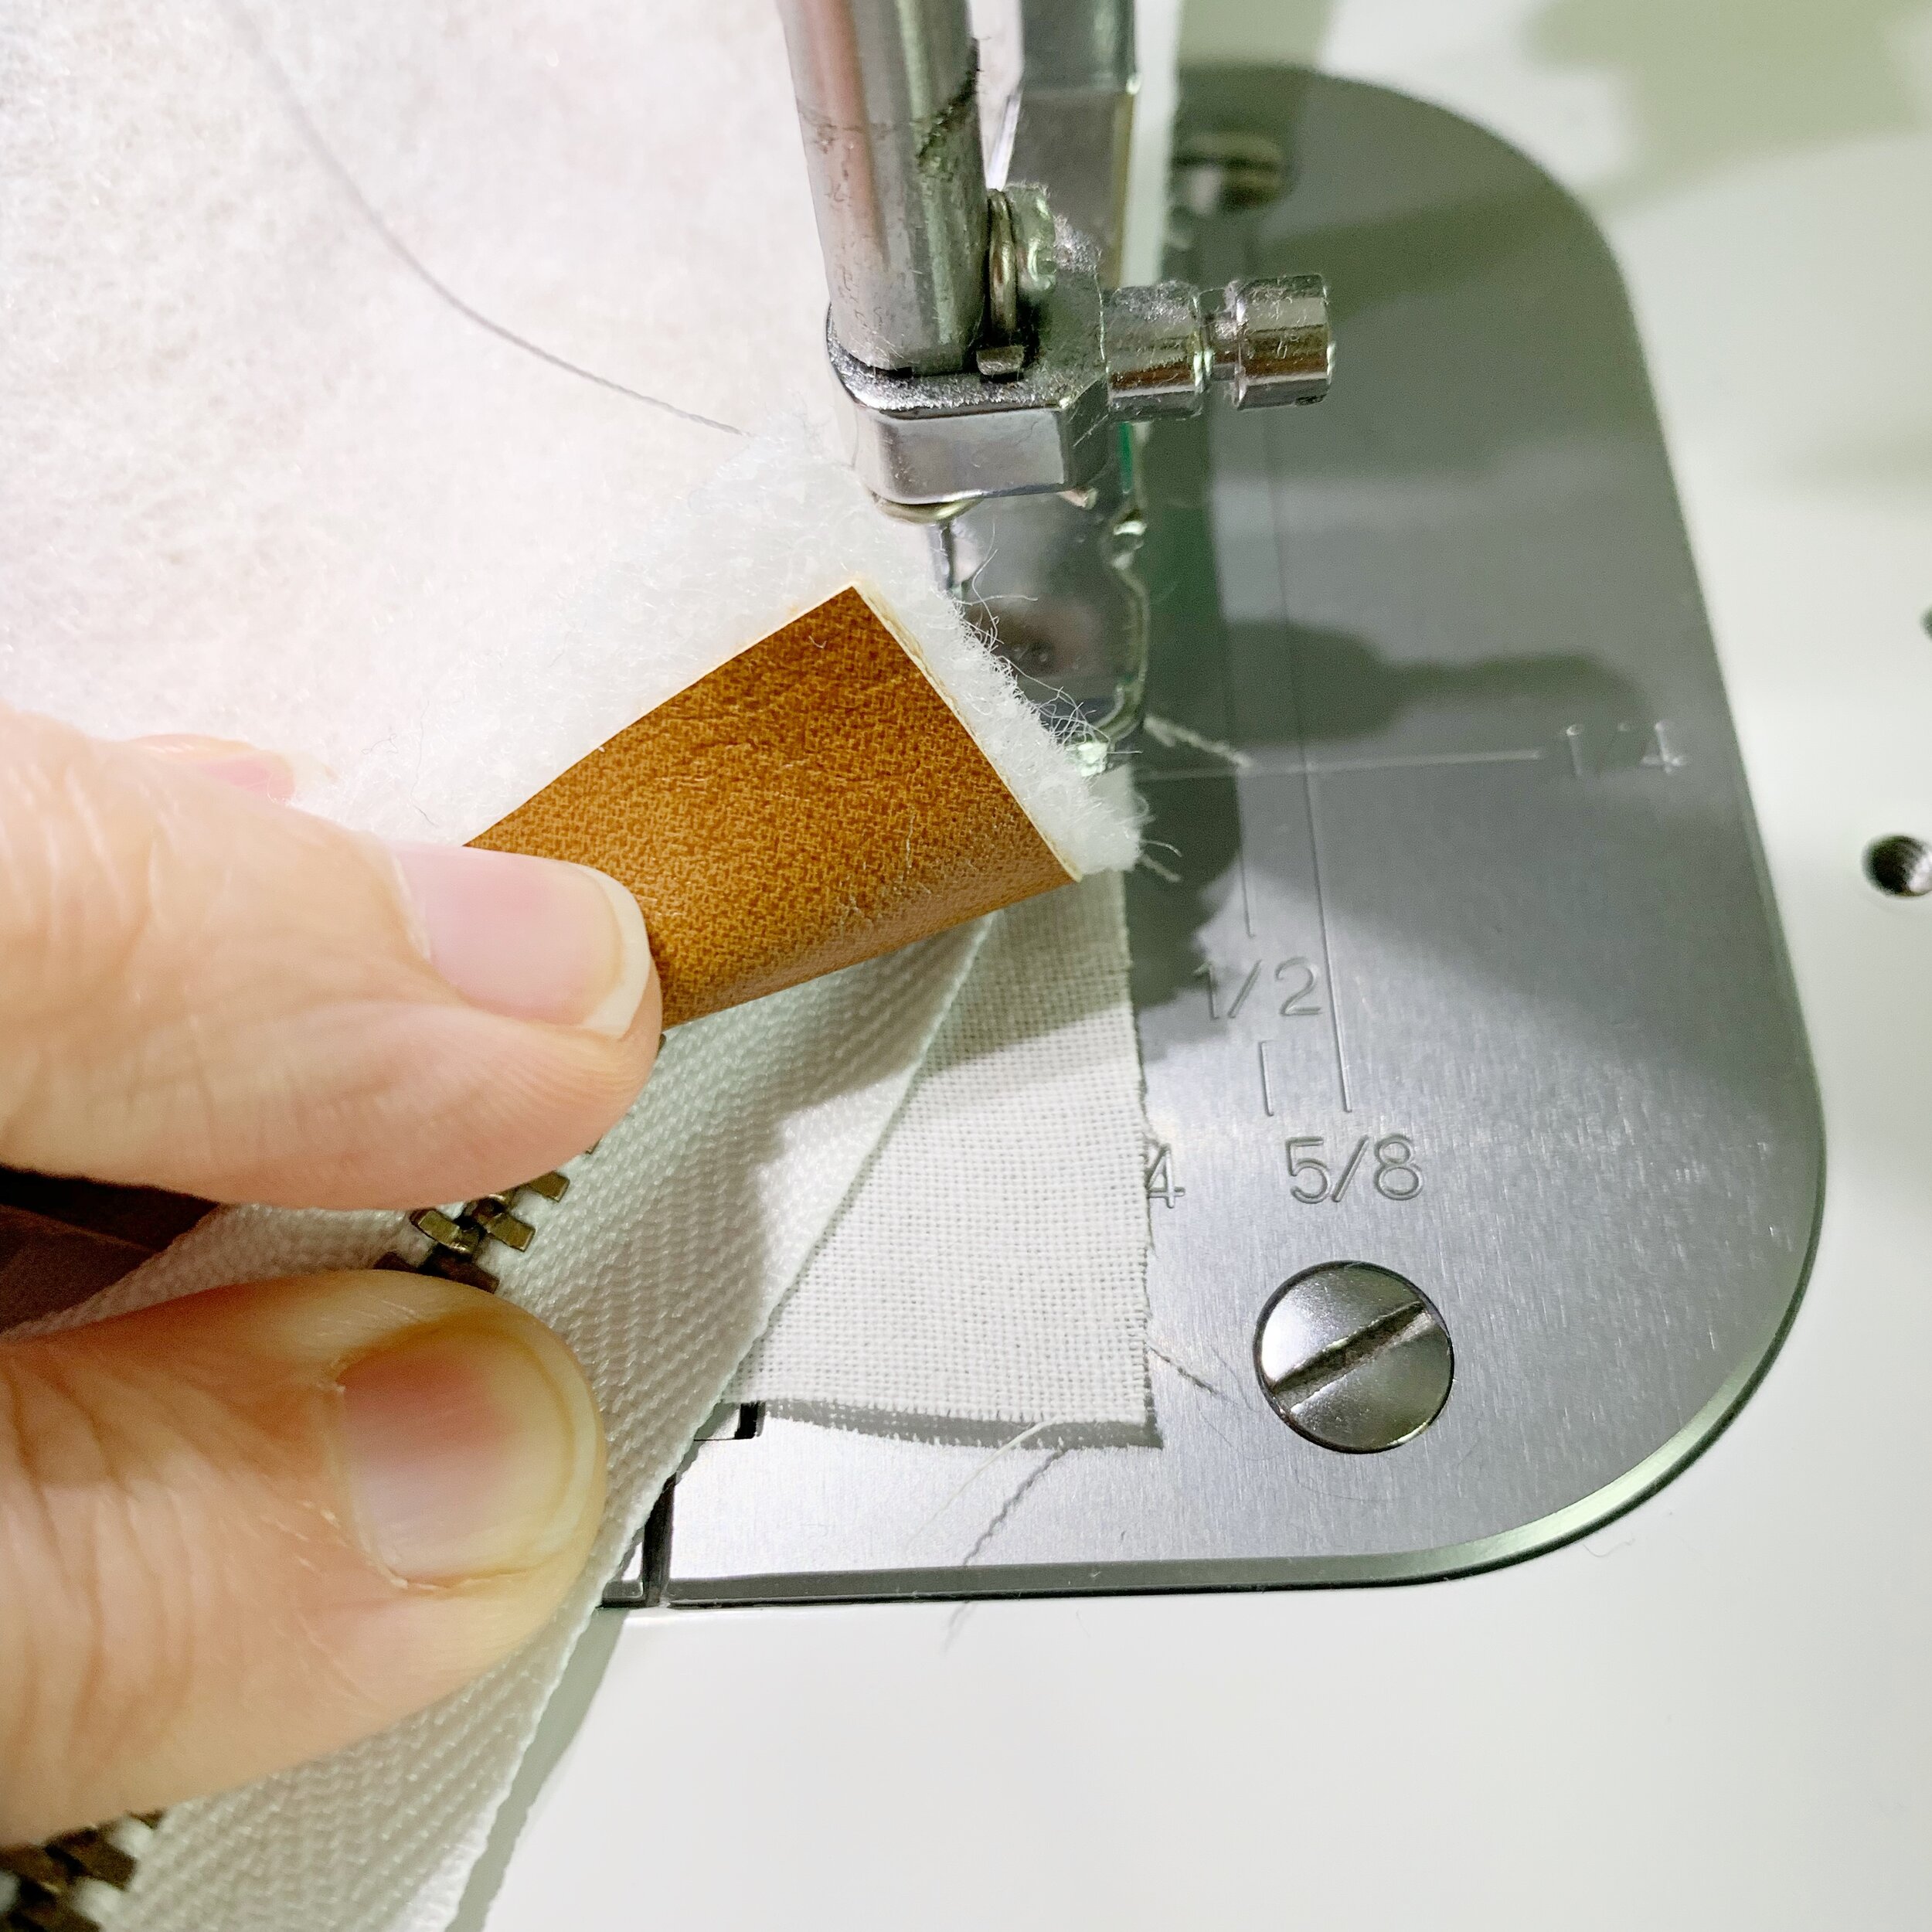
Grab the d-rings and the d-ring tabs. Insert the d-ring tabs through the d-rings and fold down. Lay the raw edge along the edge of one of the exterior panels so the center of the tab is in line with the seam of the top faux leather piece and the center panel. Stitch along the edge about ¼” in from the edge. Repeat on the other side. Make sure to only sew through the exterior panel and not the lining. Then open the zipper until the pull is about 1-2” from the edge of the panels.
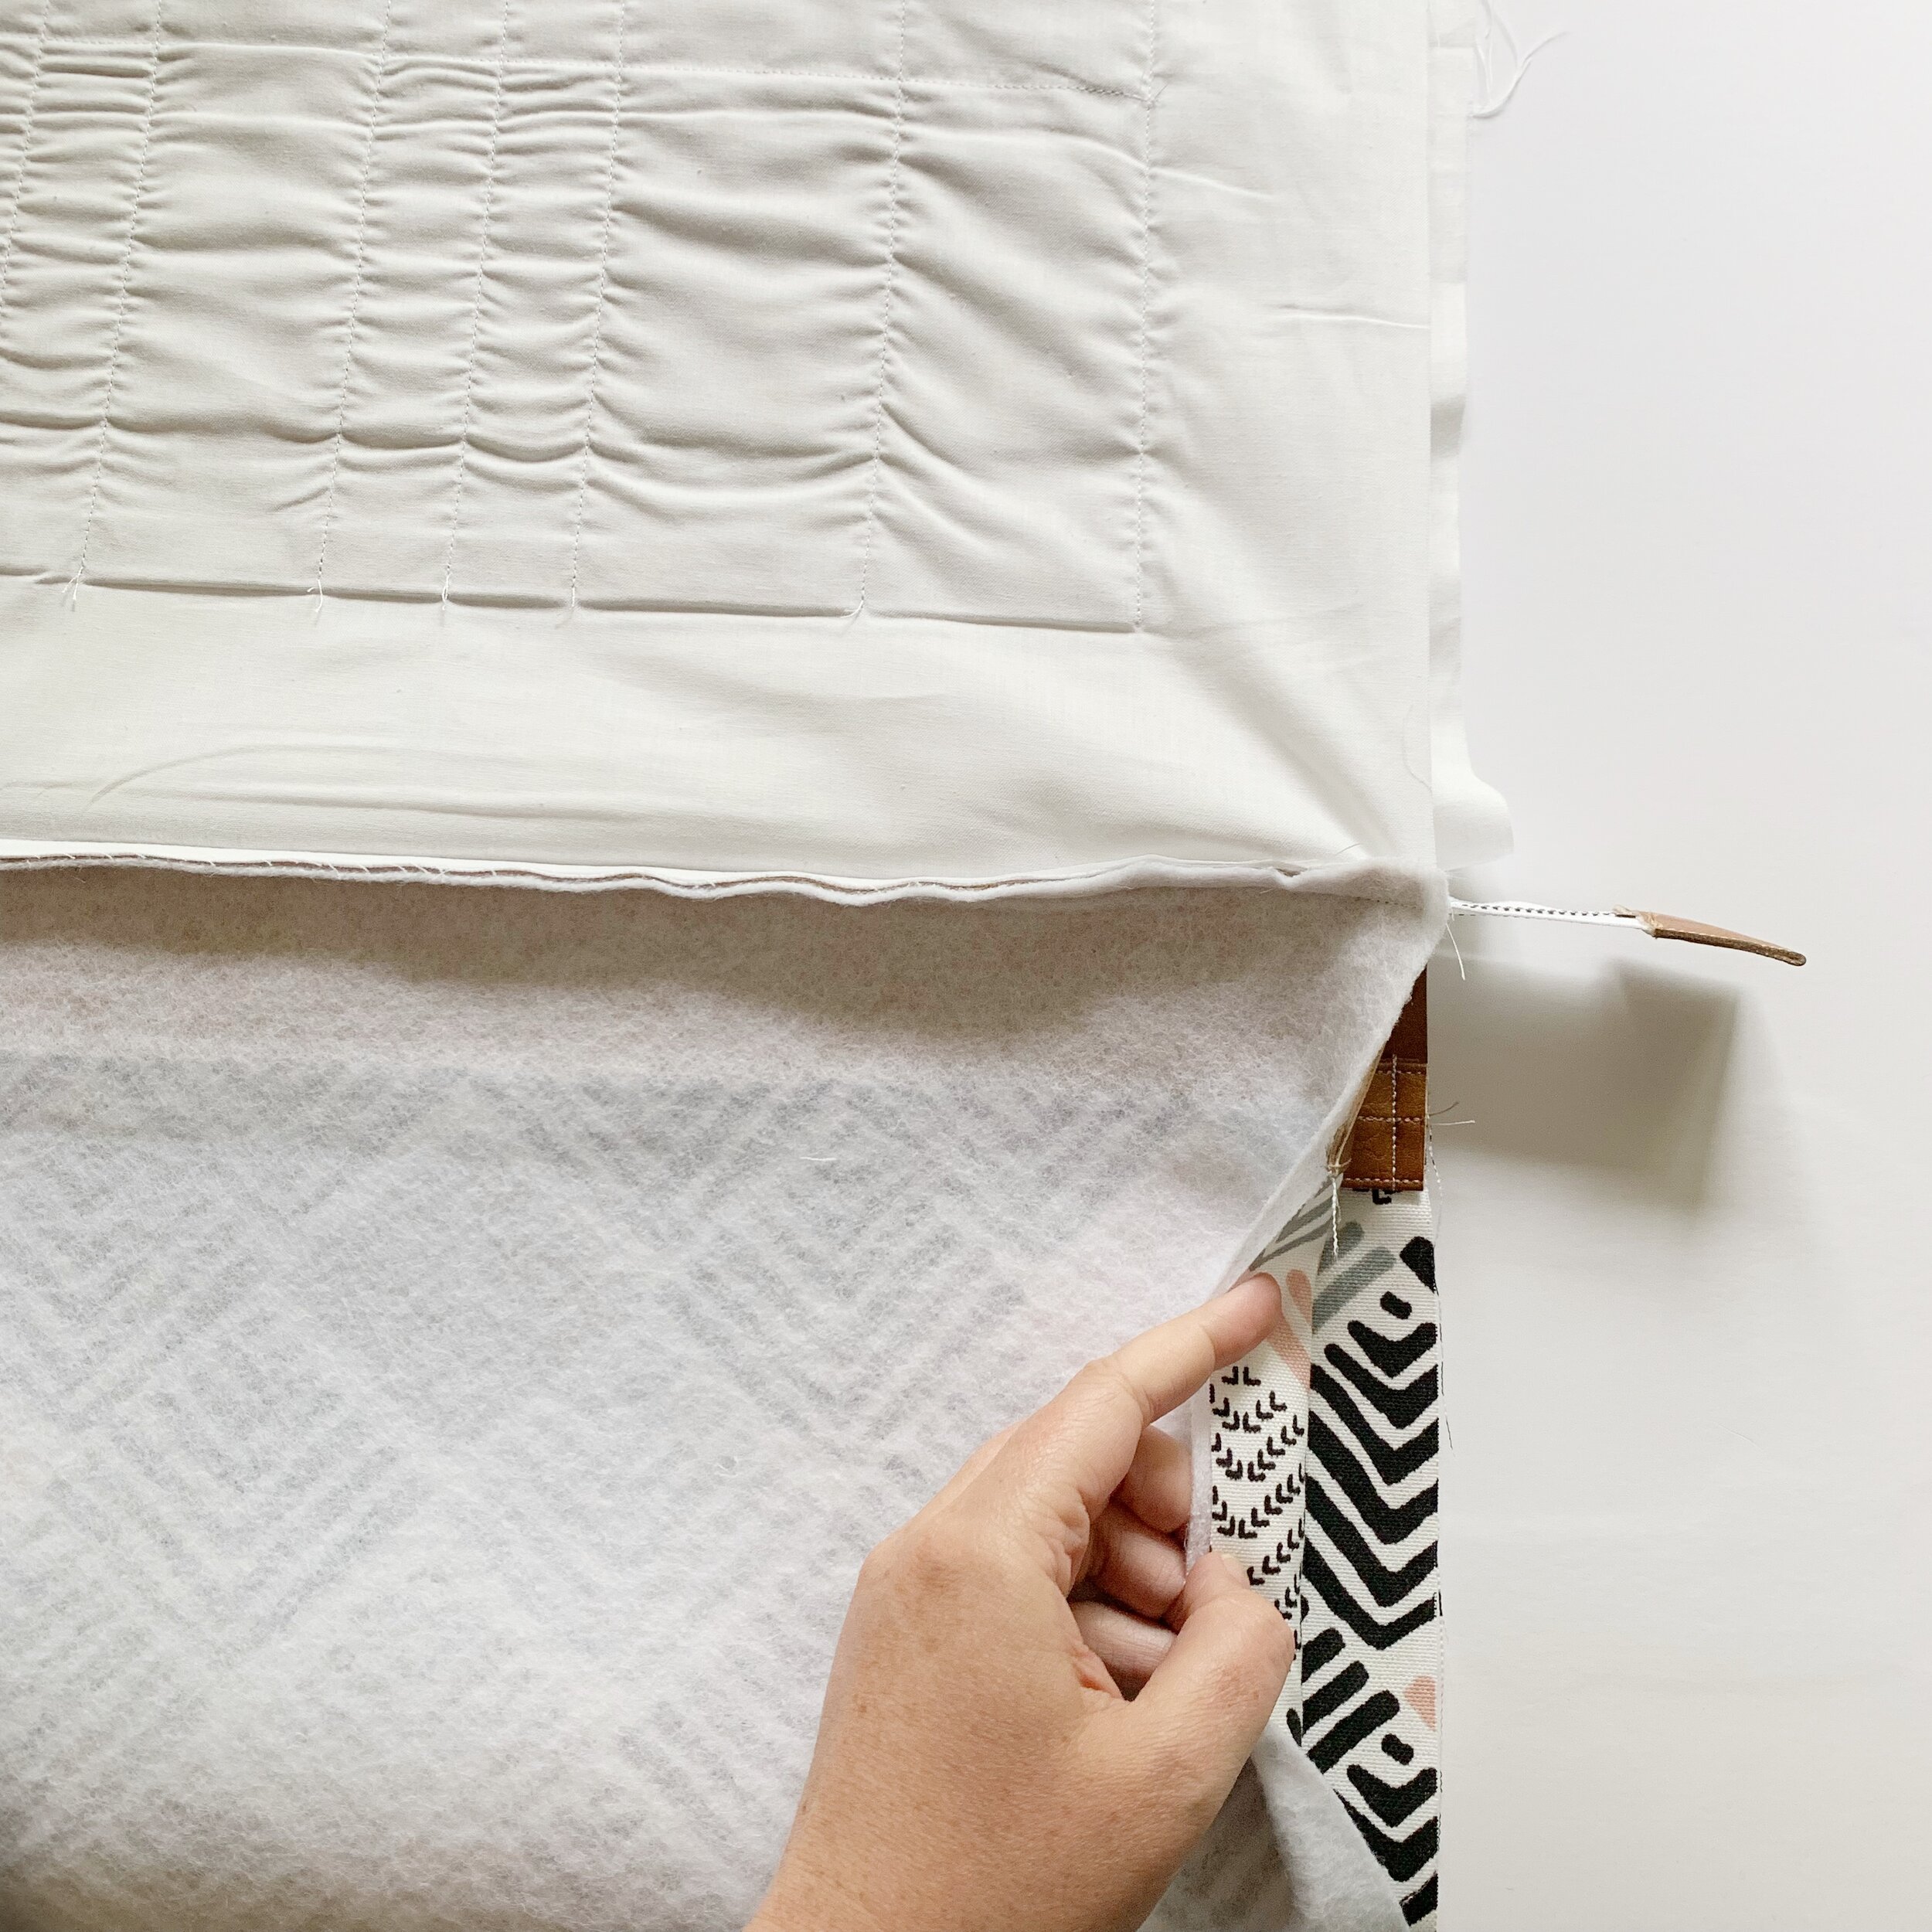
Open up the bag so the right sides of the exterior panels and right sides of the interior panels are facing each other. Starting on the edge with where the end of the zipper is. Line up the seams where the lining and exterior panels meet. If needed, place a few pins along the edges to secure. Then sew along the edges and bottom of the exterior pieces, making sure to push the end of the zipper to the inside of the bag.

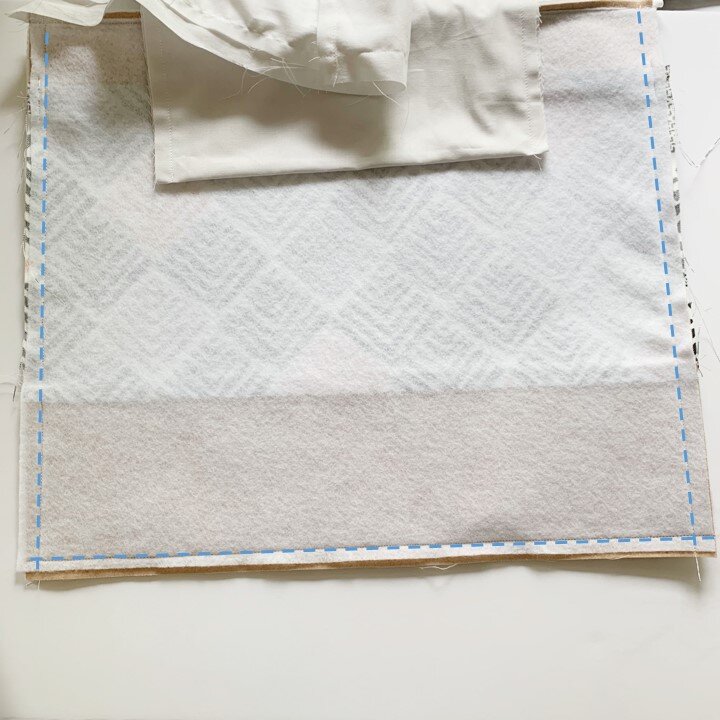
Then sew along the edges and bottom of the lining panels, leaving a large opening at the bottom for turning.
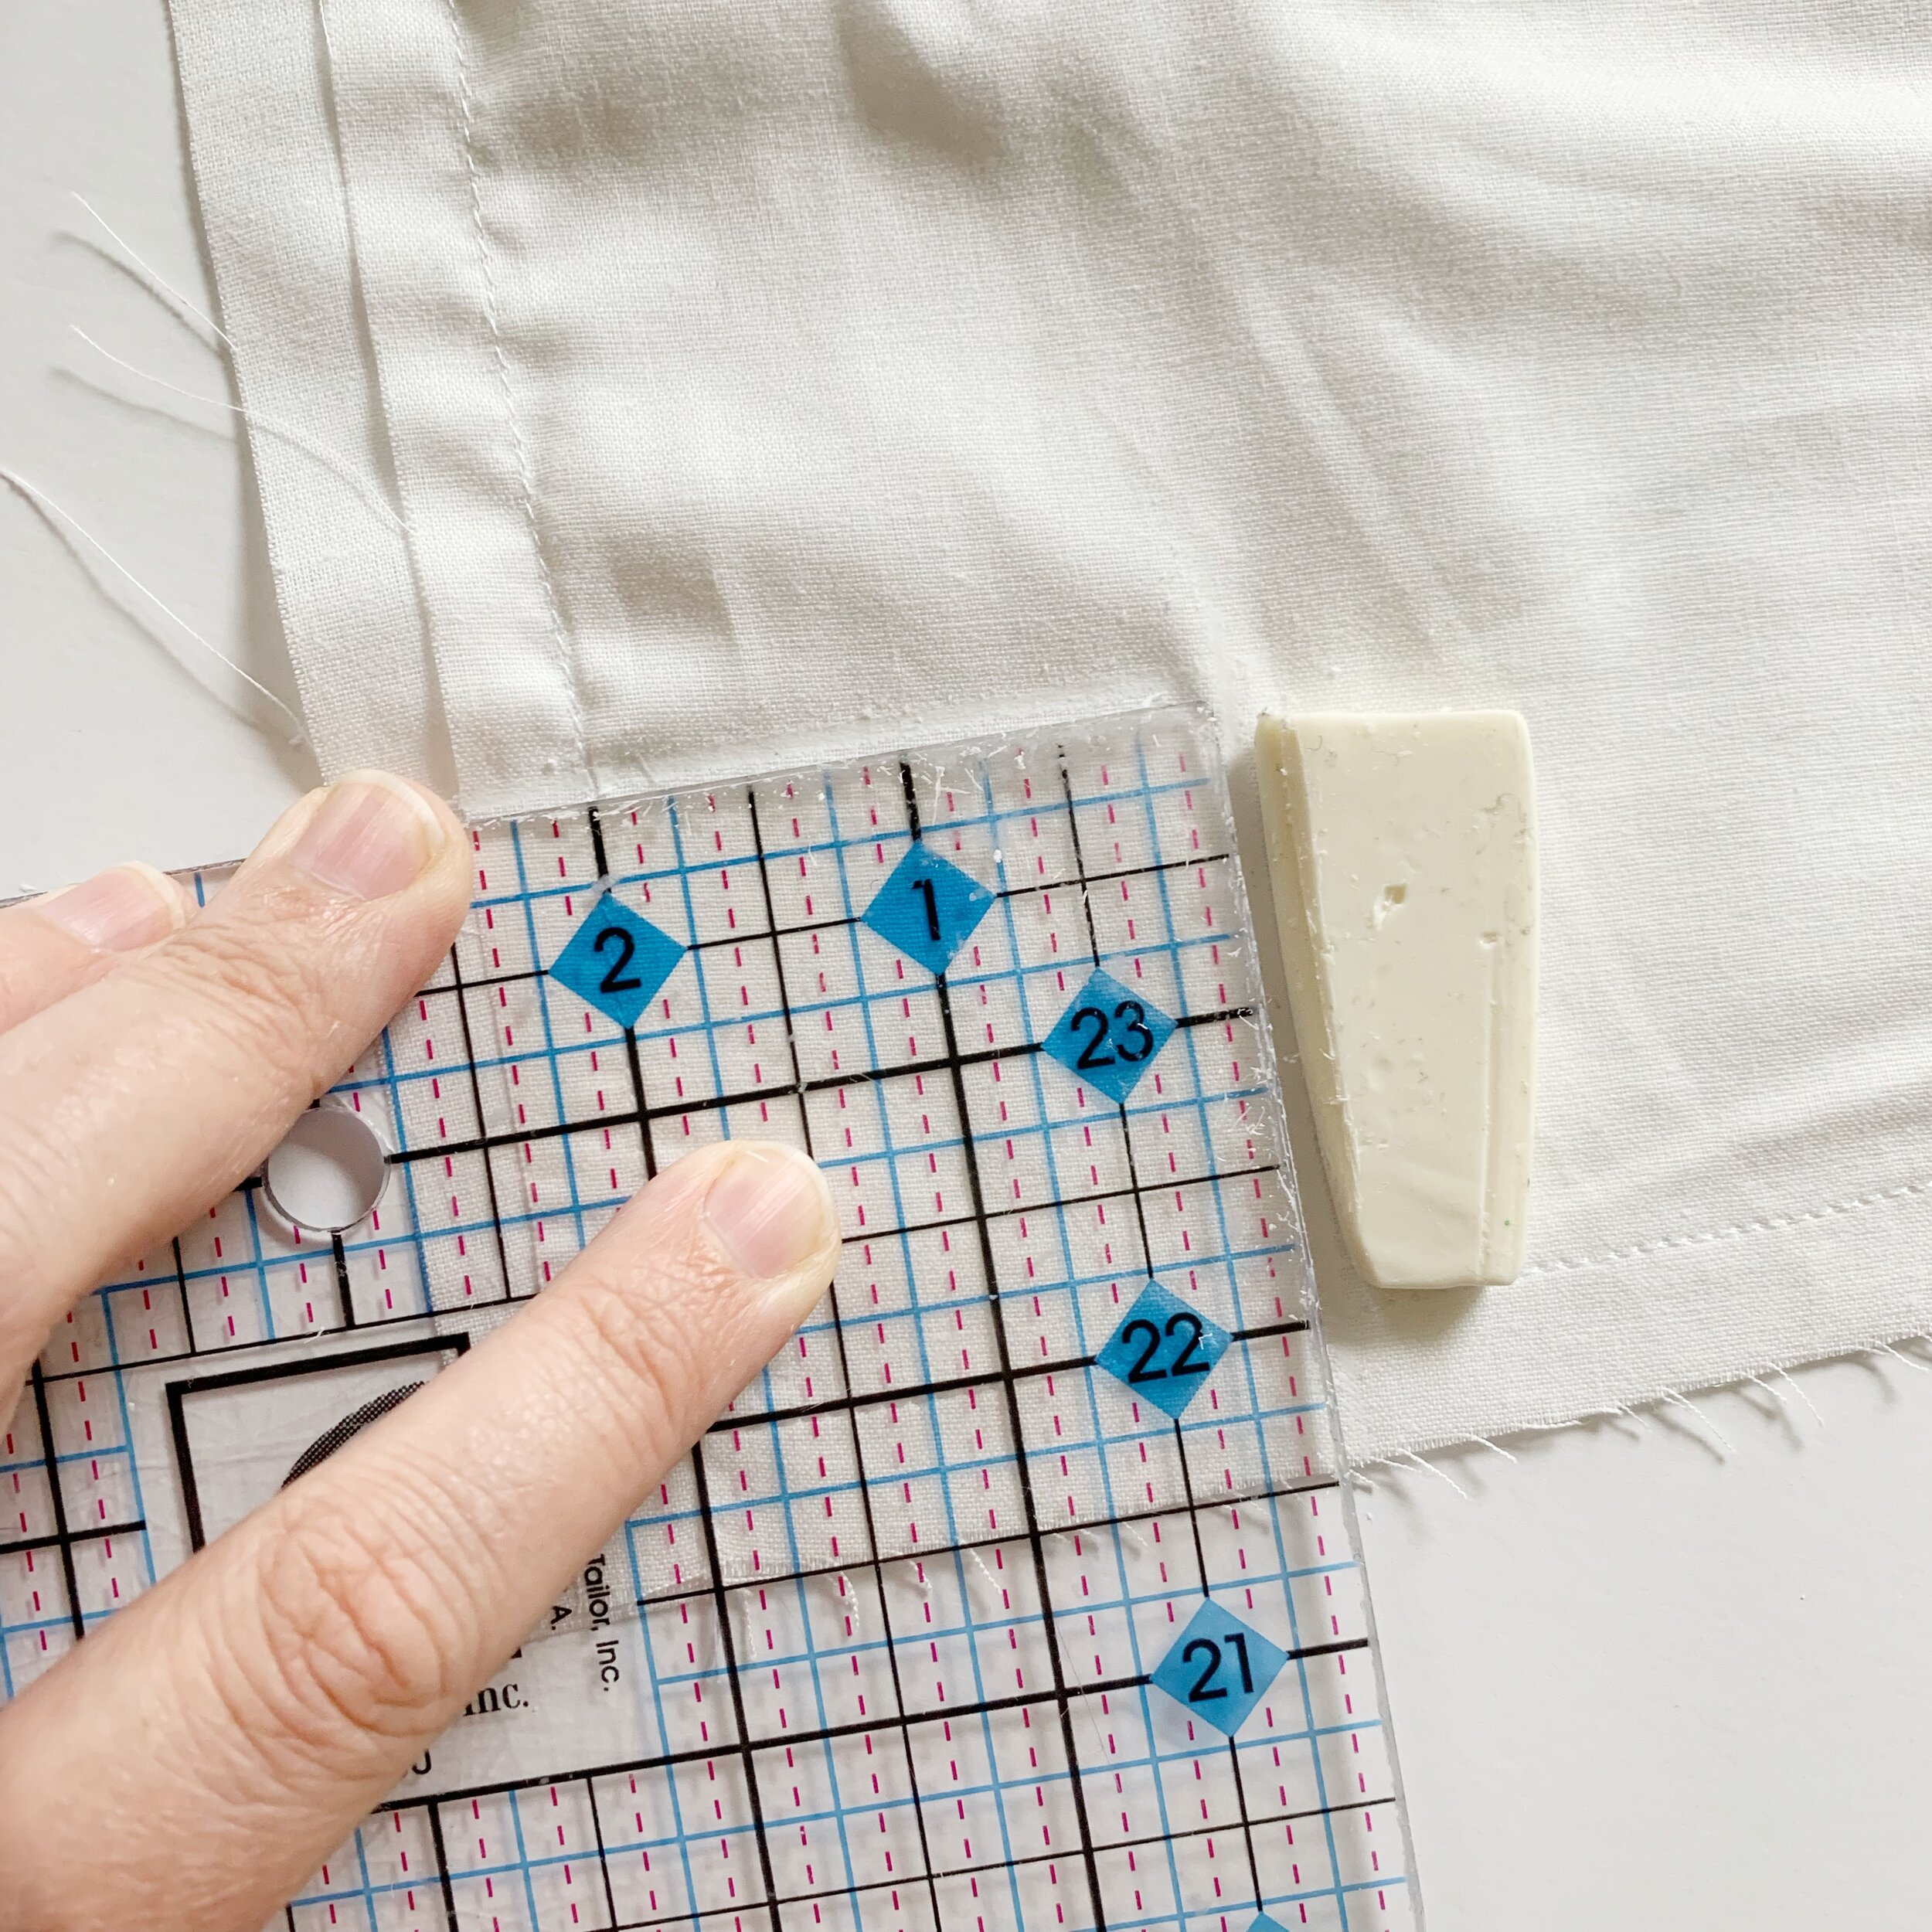
We will now be cutting the corners out and sewing them together. Lay the bag down and using tailor’s chalk, mark lines 2” in from the seams, creating a square, in all four corners. Cut along the lines you just made.
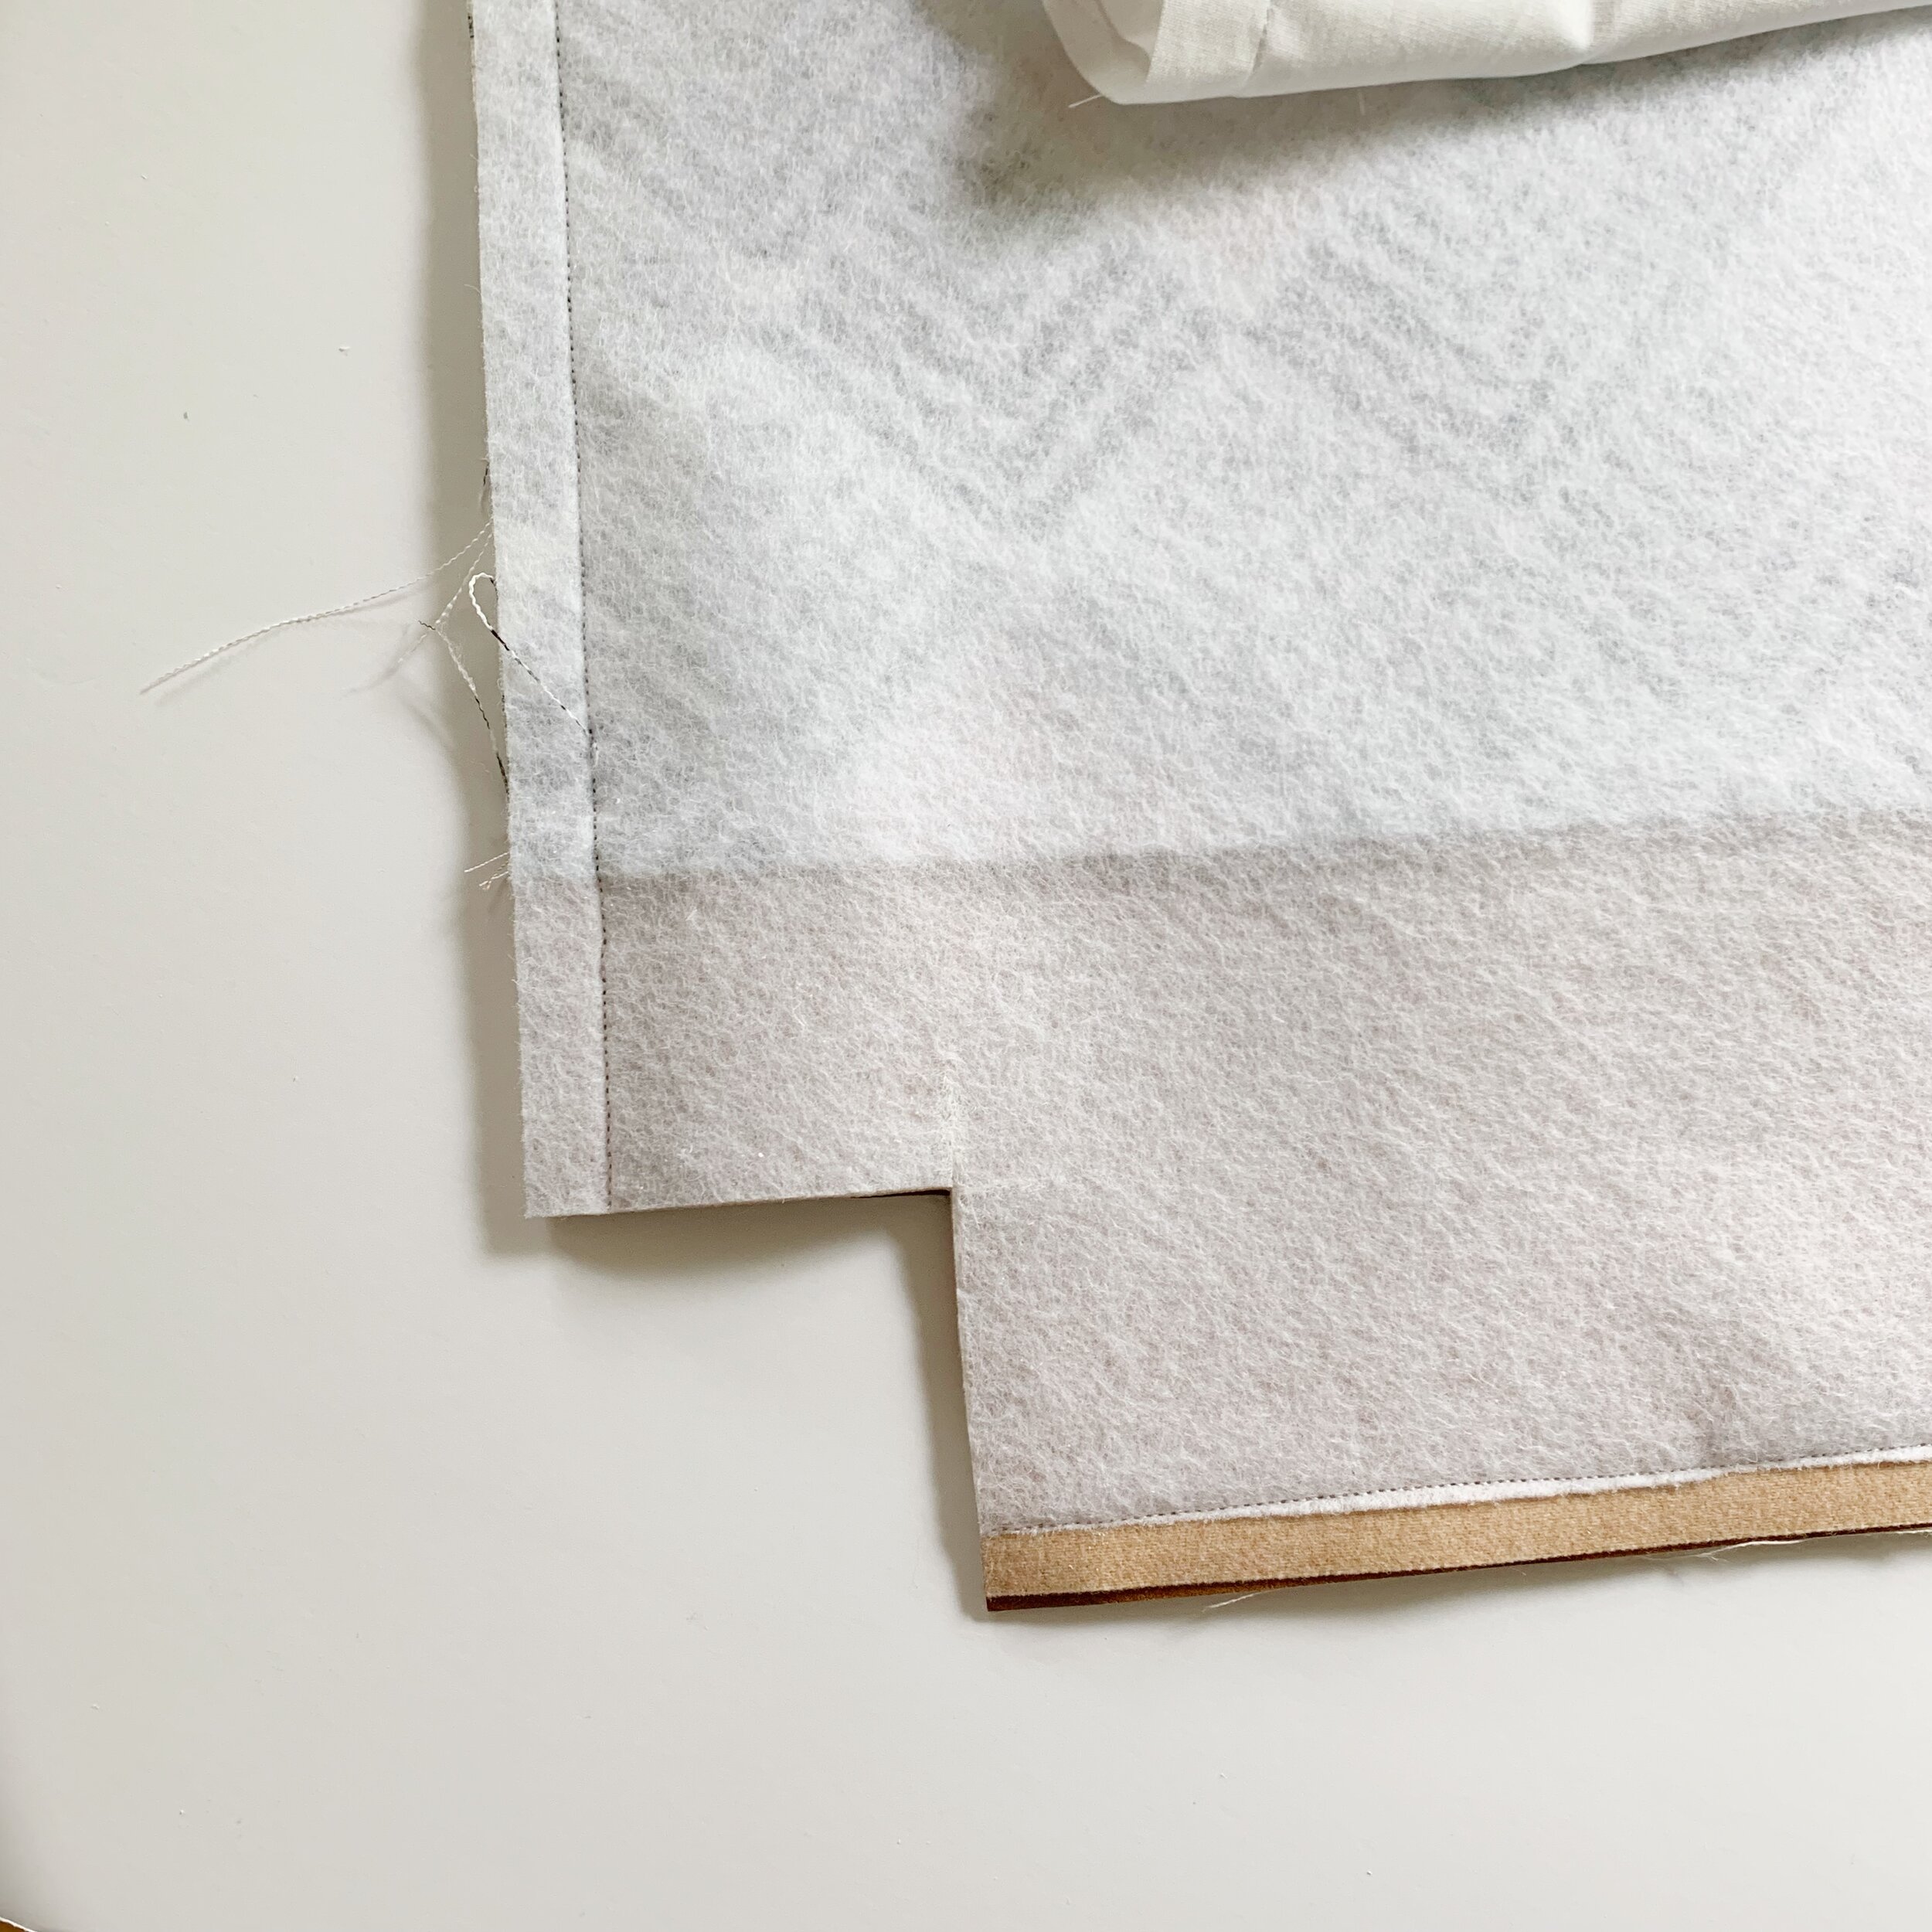
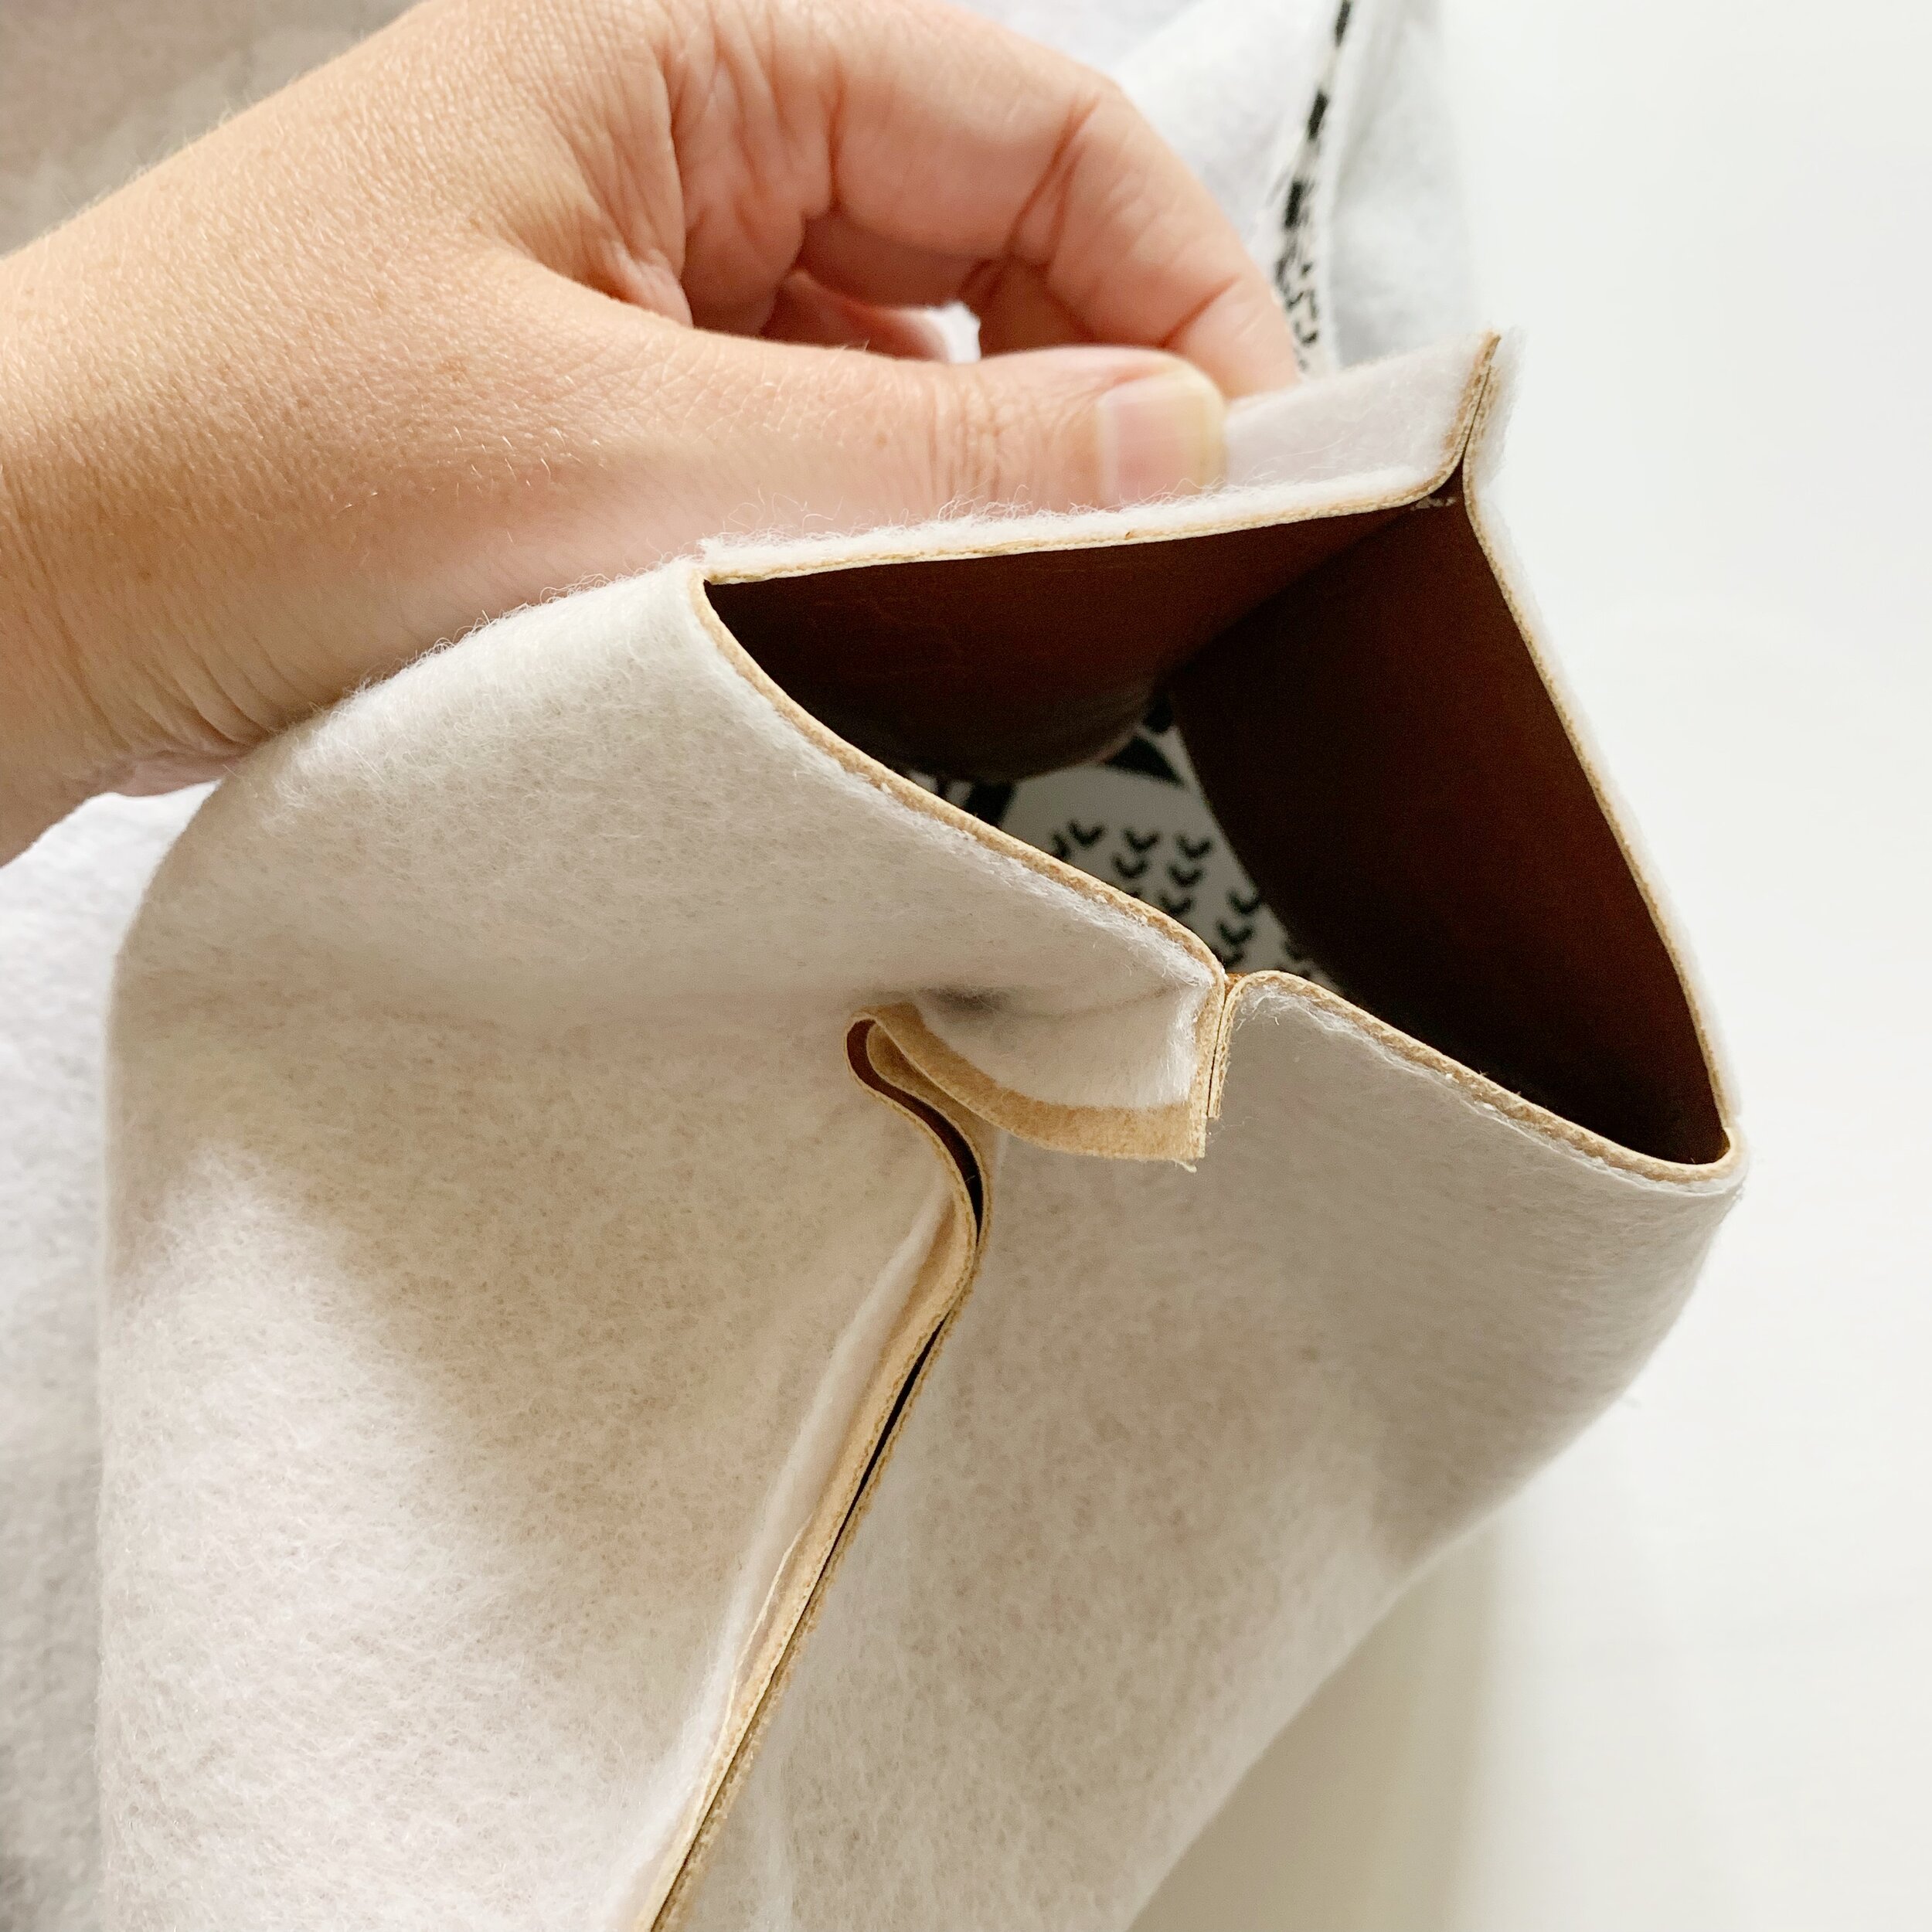
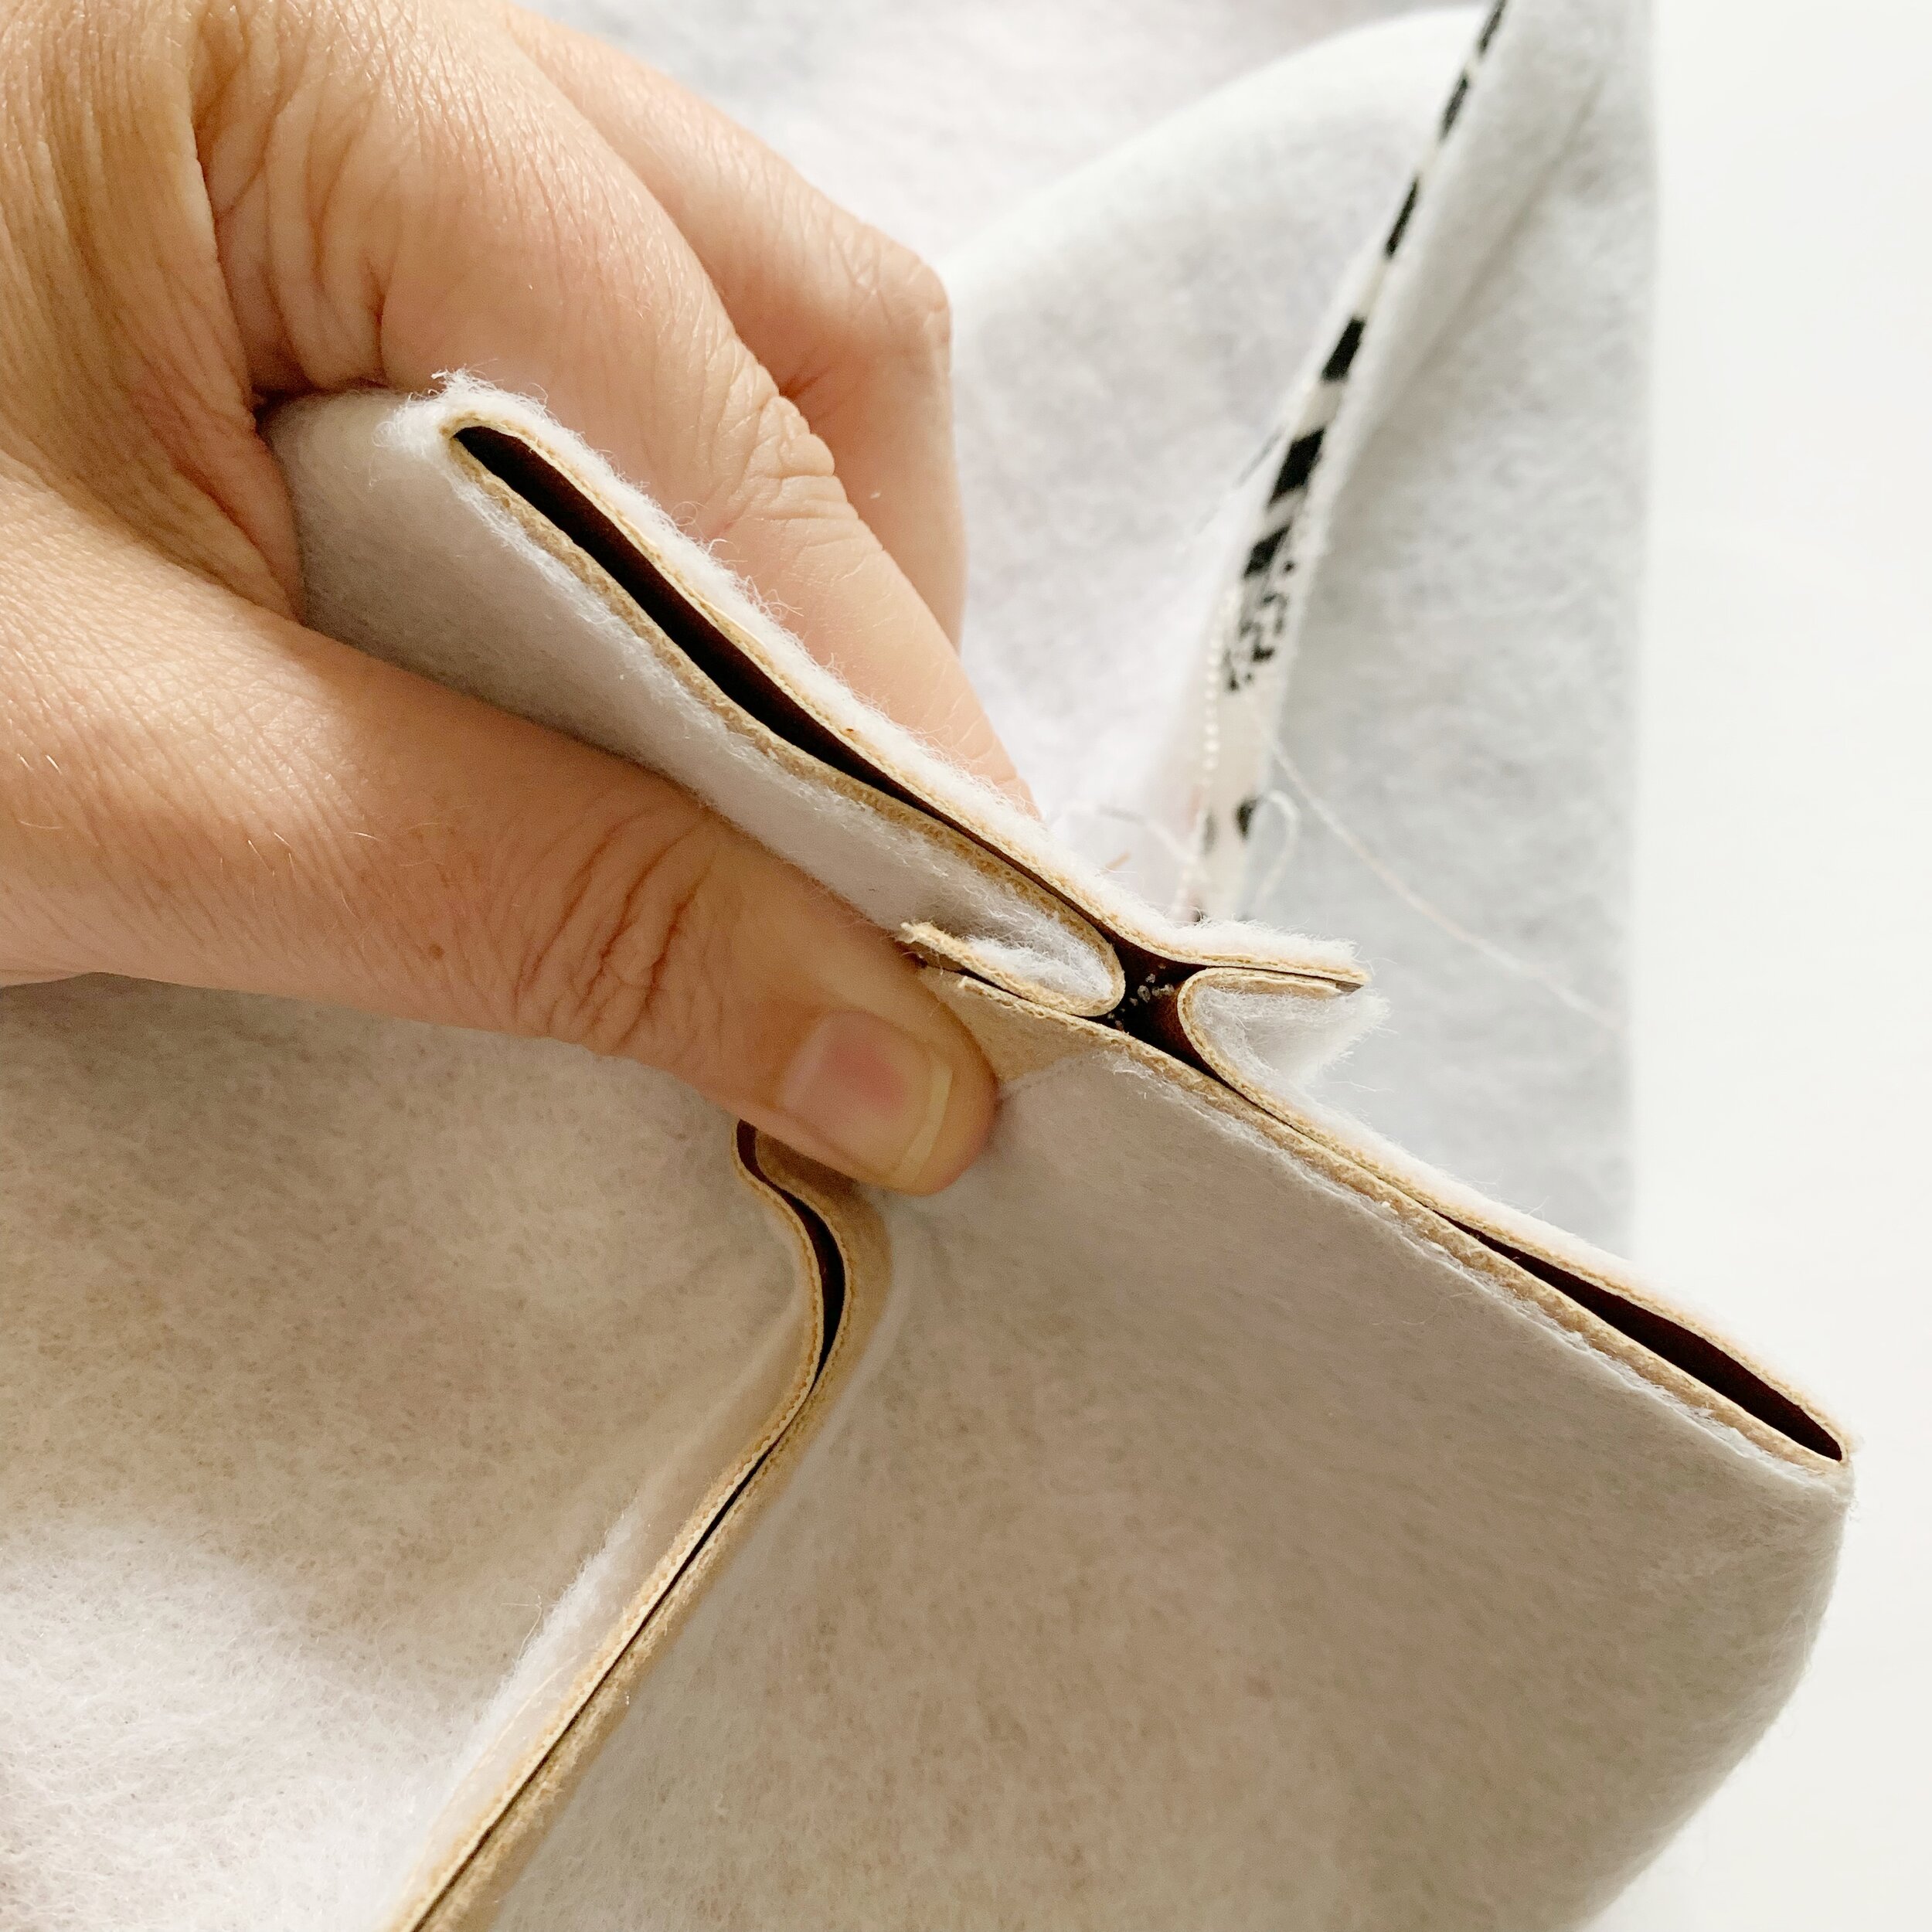
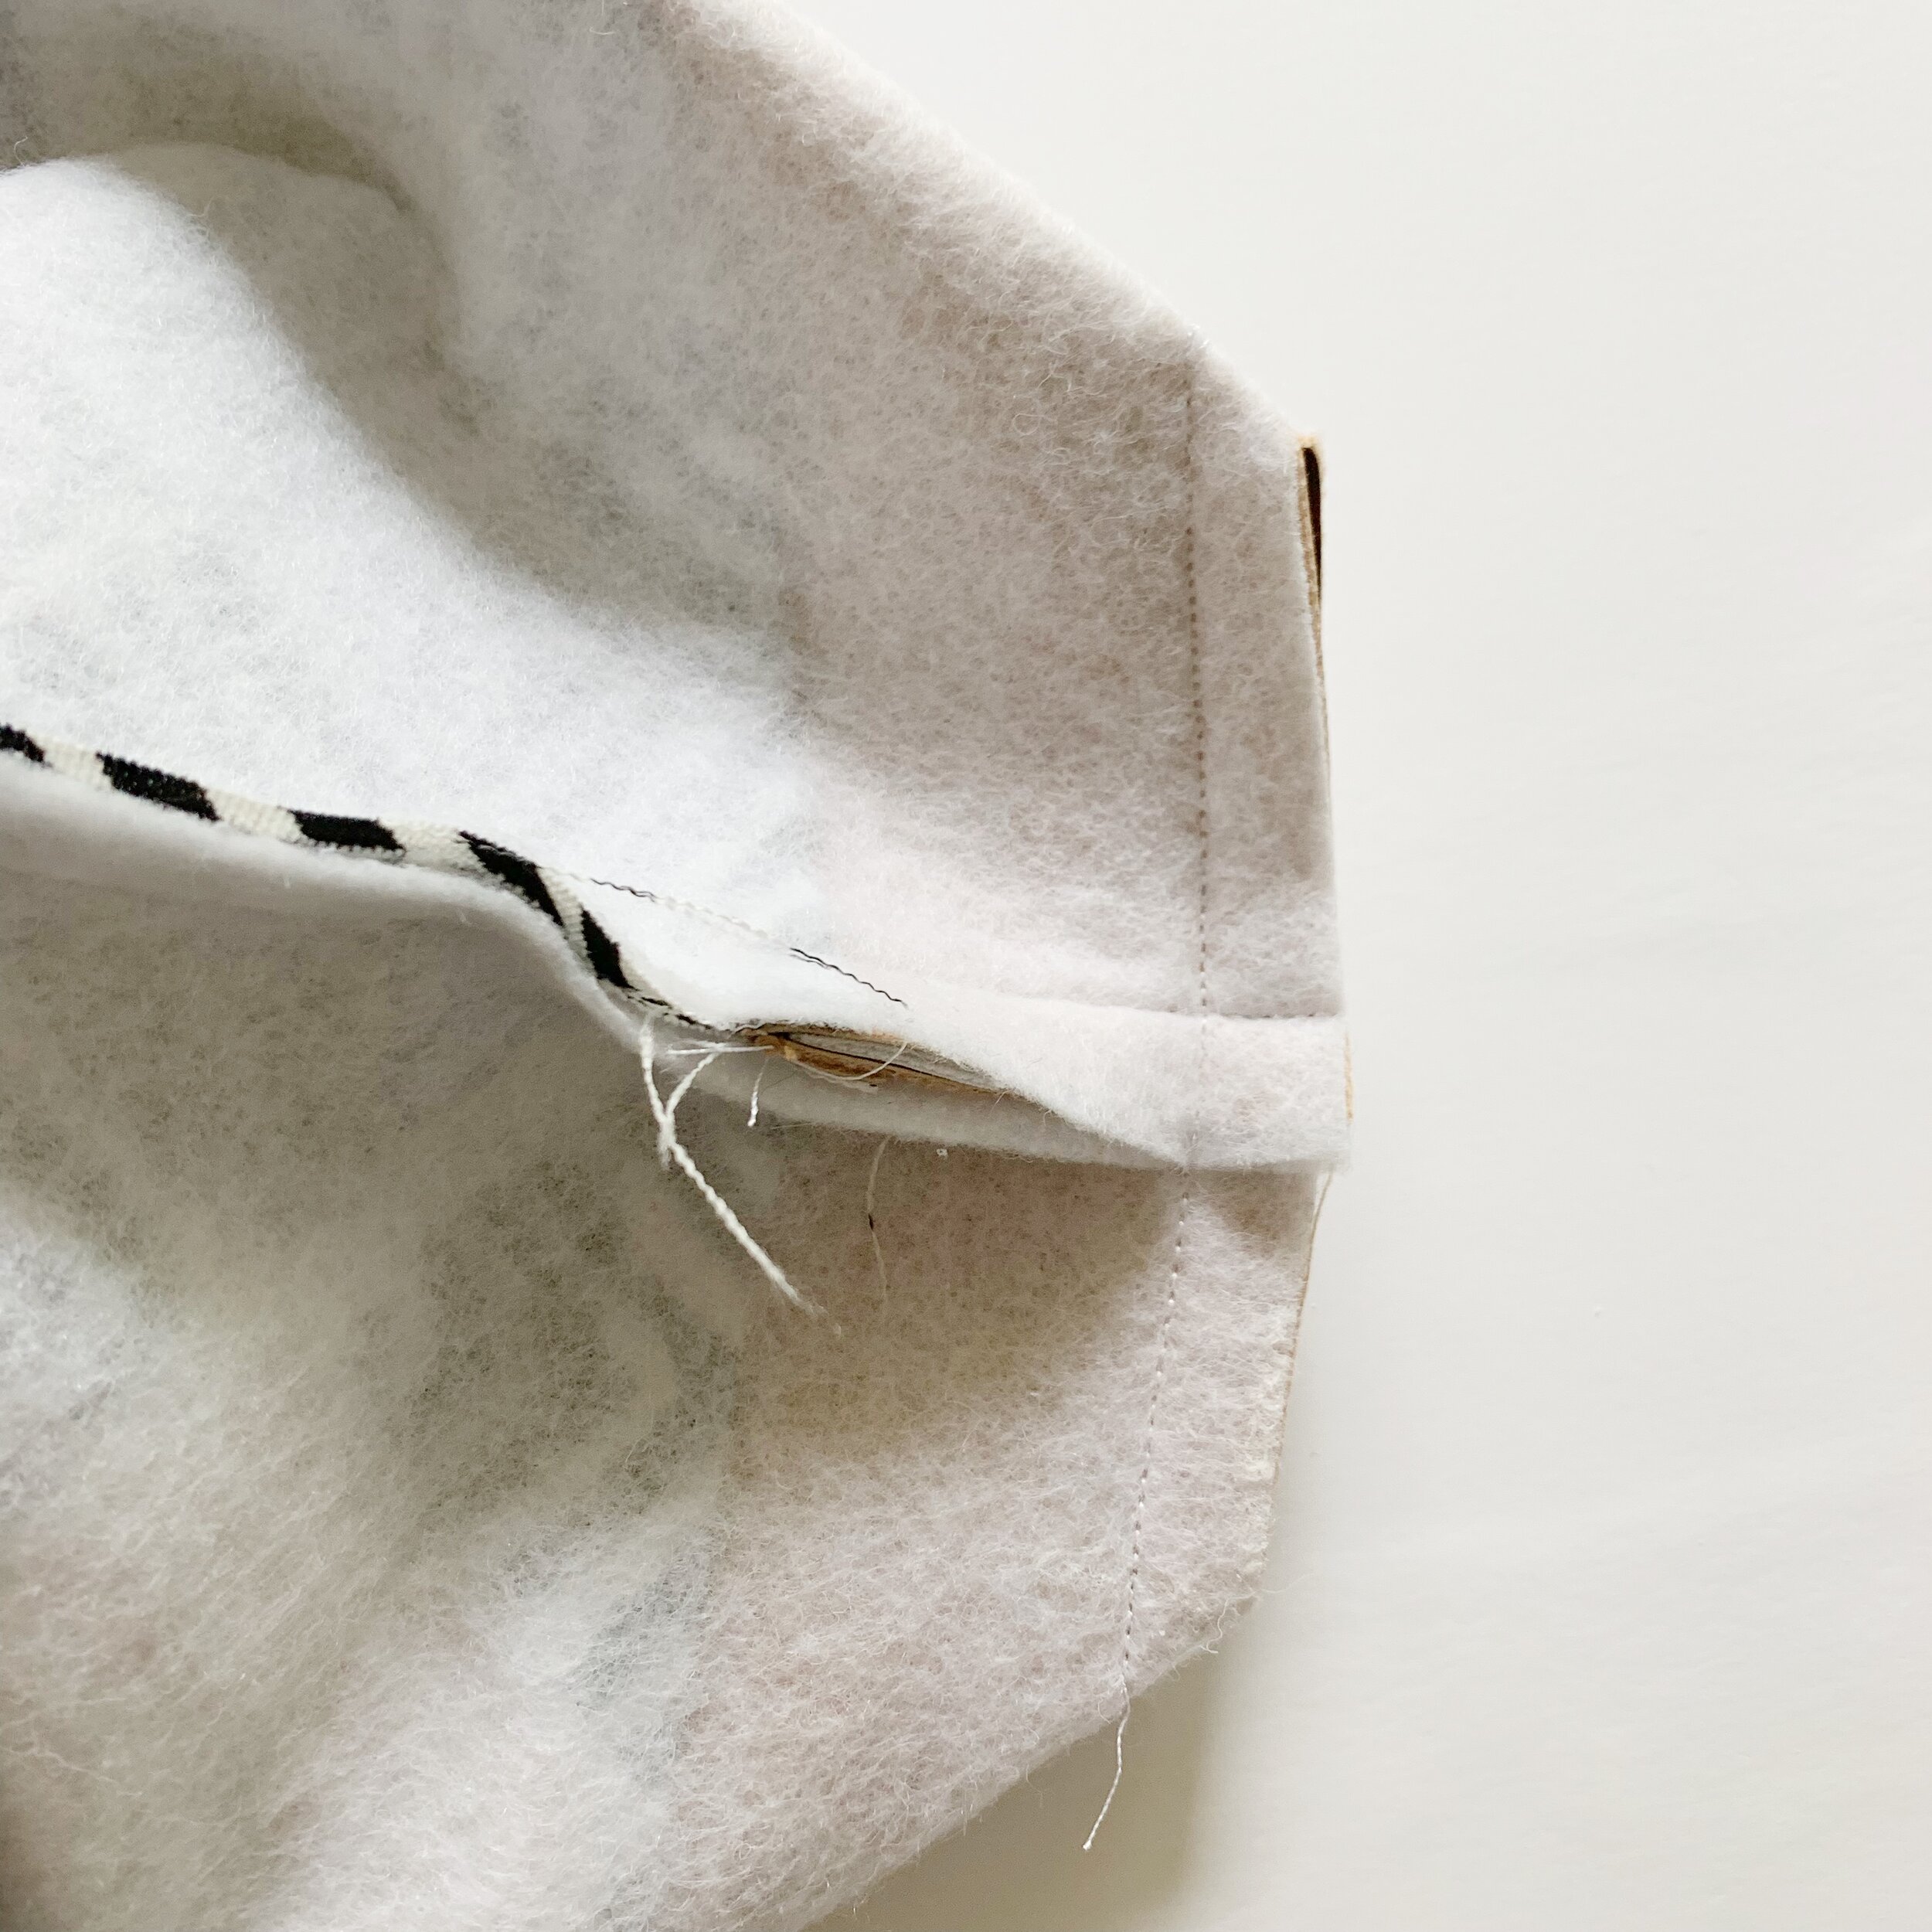
Open up the corners and line the seams up in the center. Sew along the edges using a ½” seam allowance.
Turn right side out and push out exterior corners. Then pull out lining and sew closed the opening.
Push lining back inside bag.


Using upholstery thread in the top and regular thread in the bobbin, top stitch along top edge of the bag making sure to push down both the faux leather and lining away from the zipper.
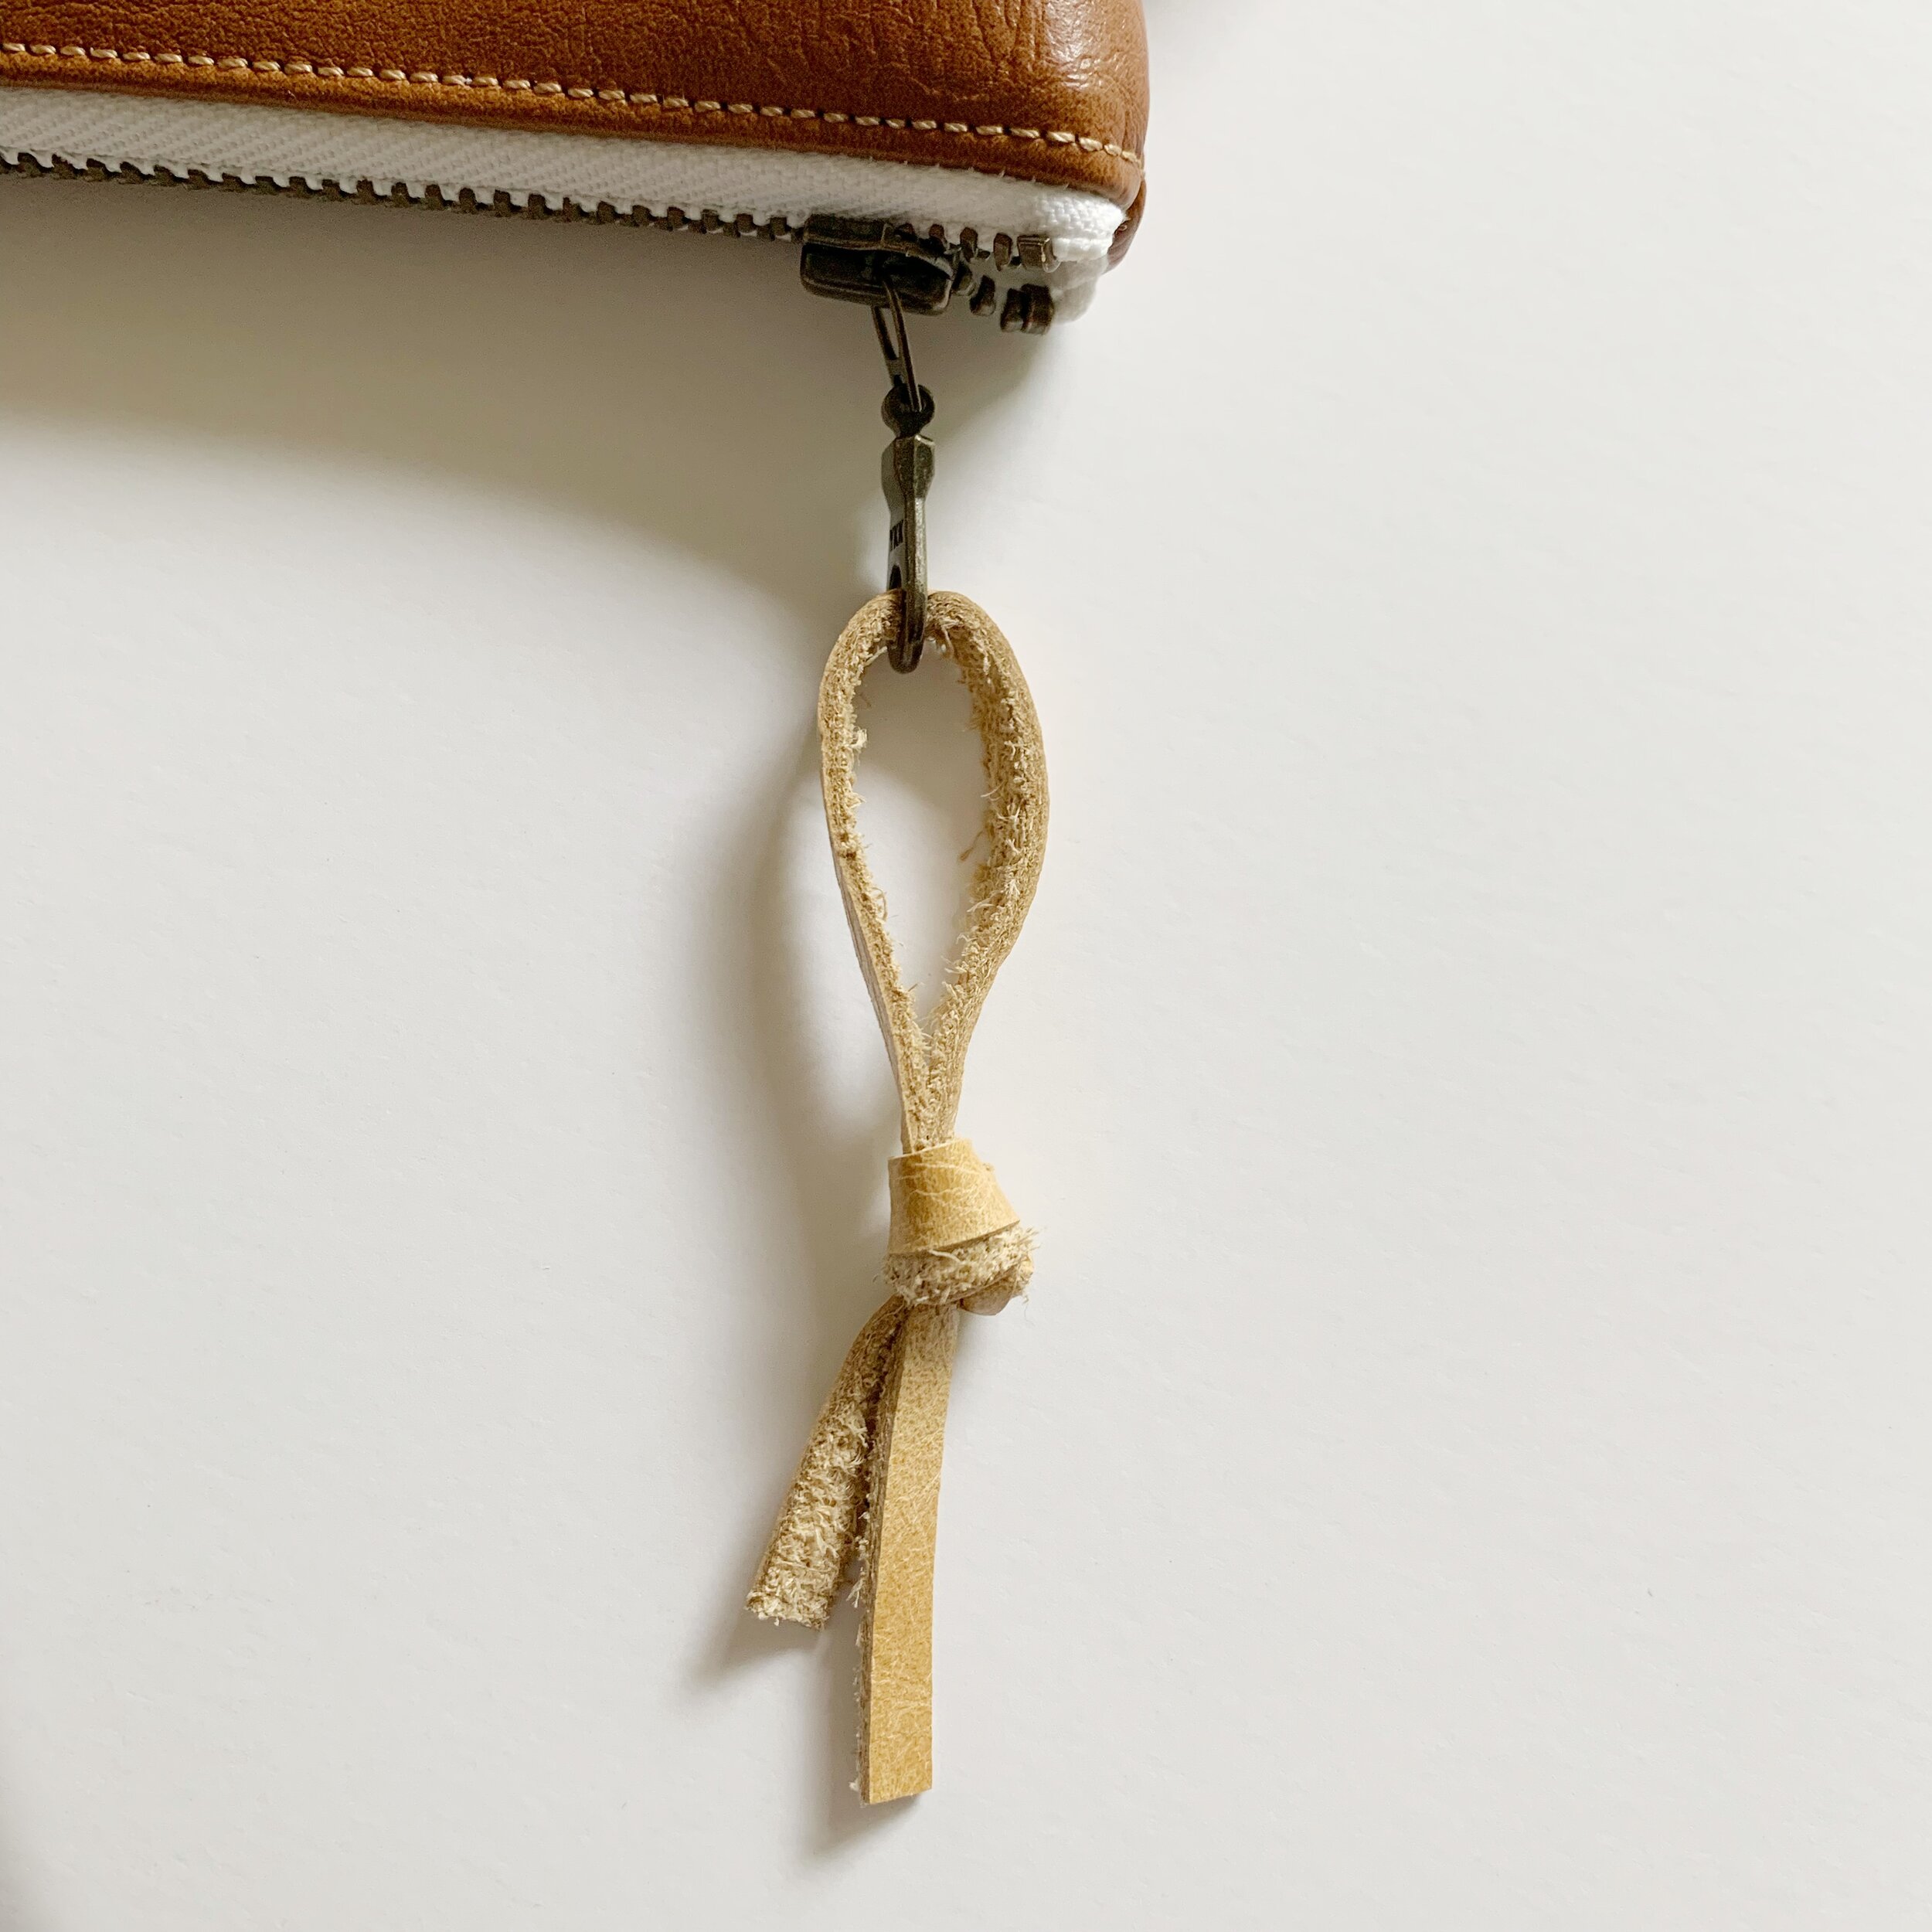
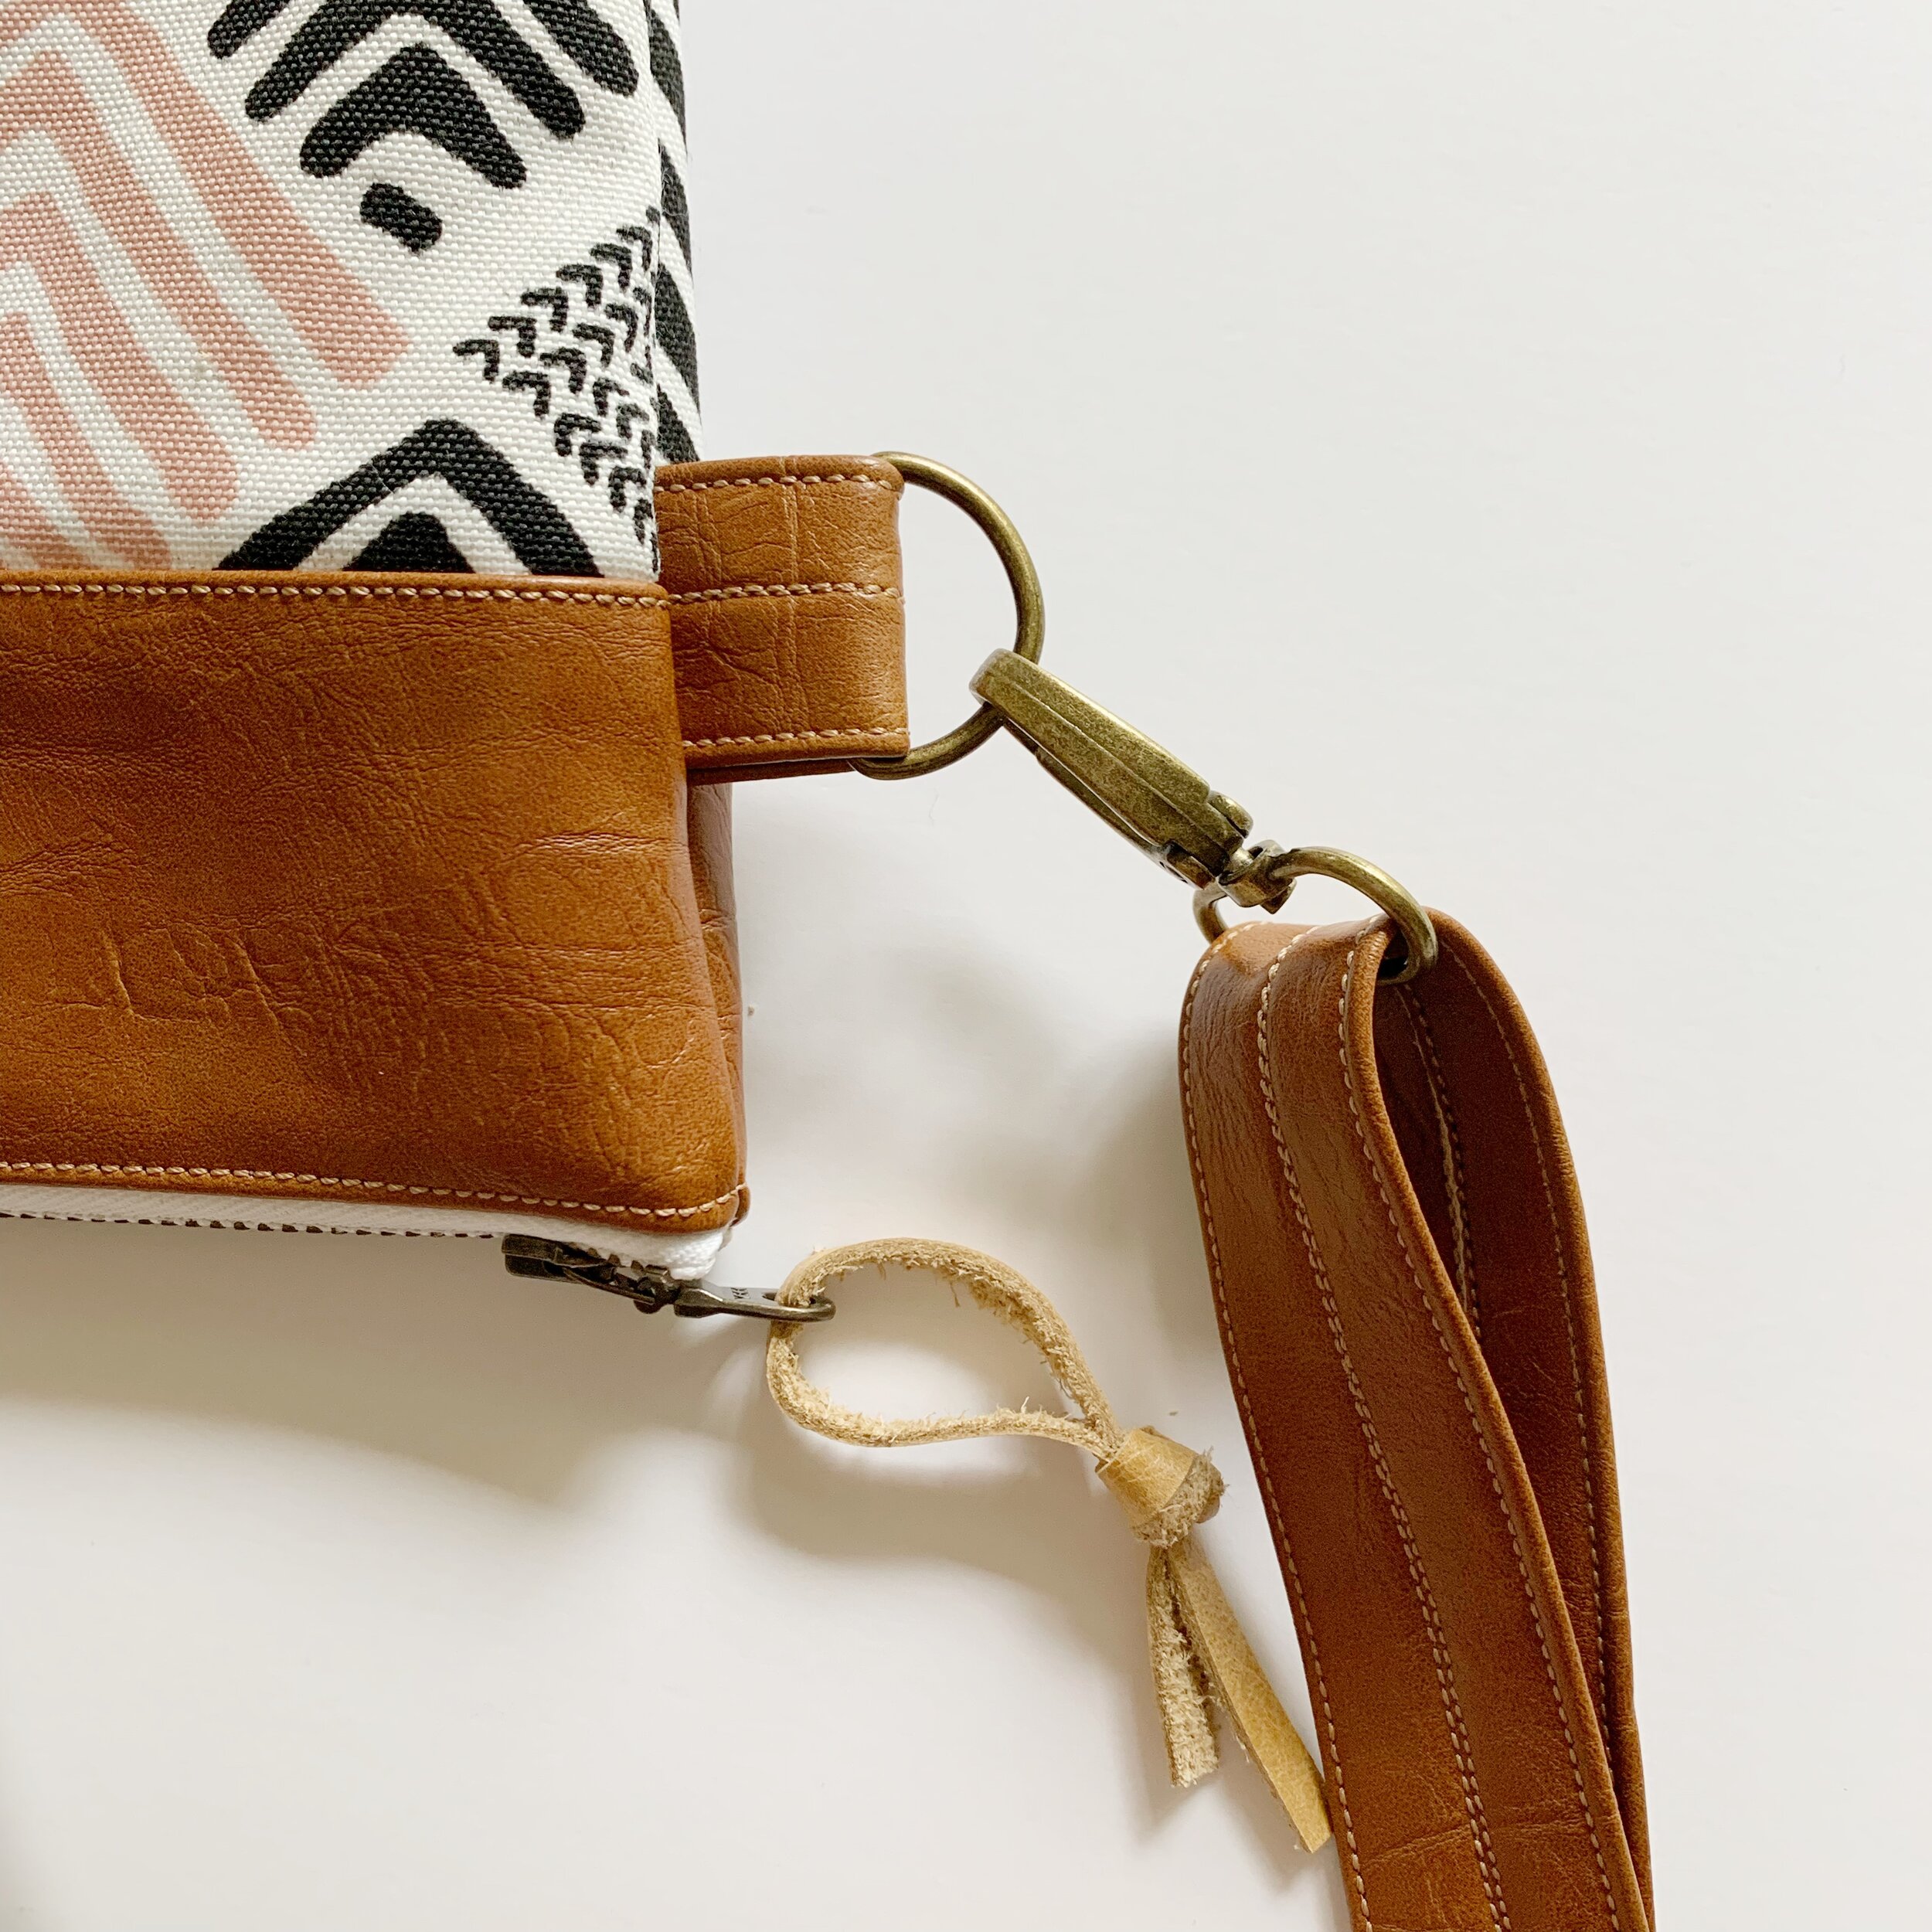
Attach a small piece of leather or other accessories for a zipper pull. Clip swivel clasps to each d-ring to add strap.
Enjoy your brand new Beauregard Bag!