The Beryl Pumpkin-Free Crochet Pattern
This post may contain affiliate links. If you make a purchase through one of those links I may receive a small commission.
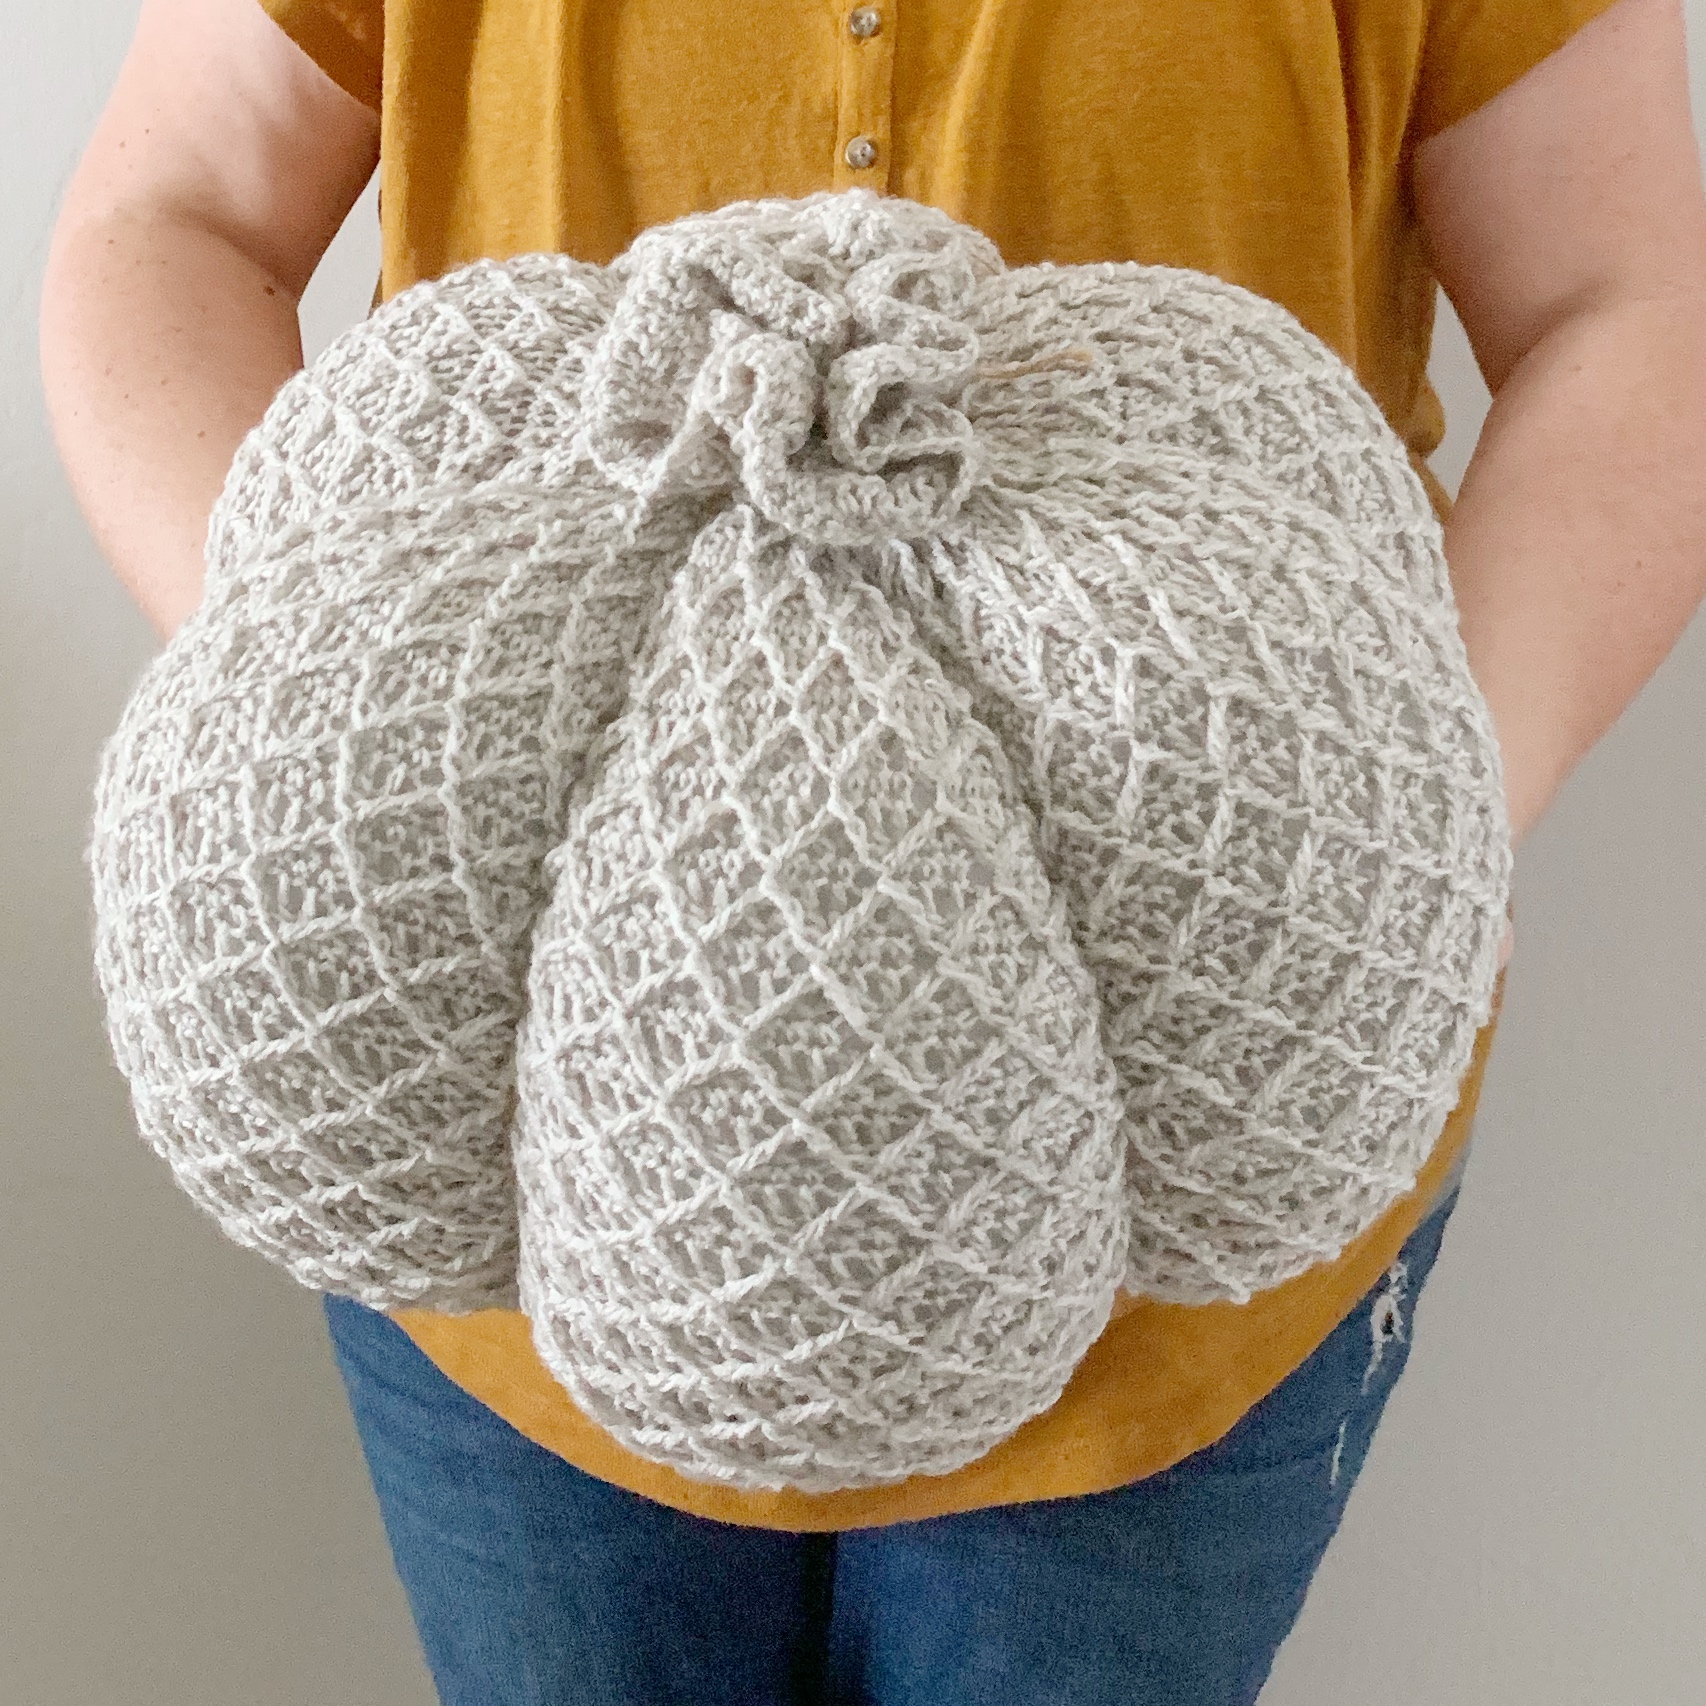
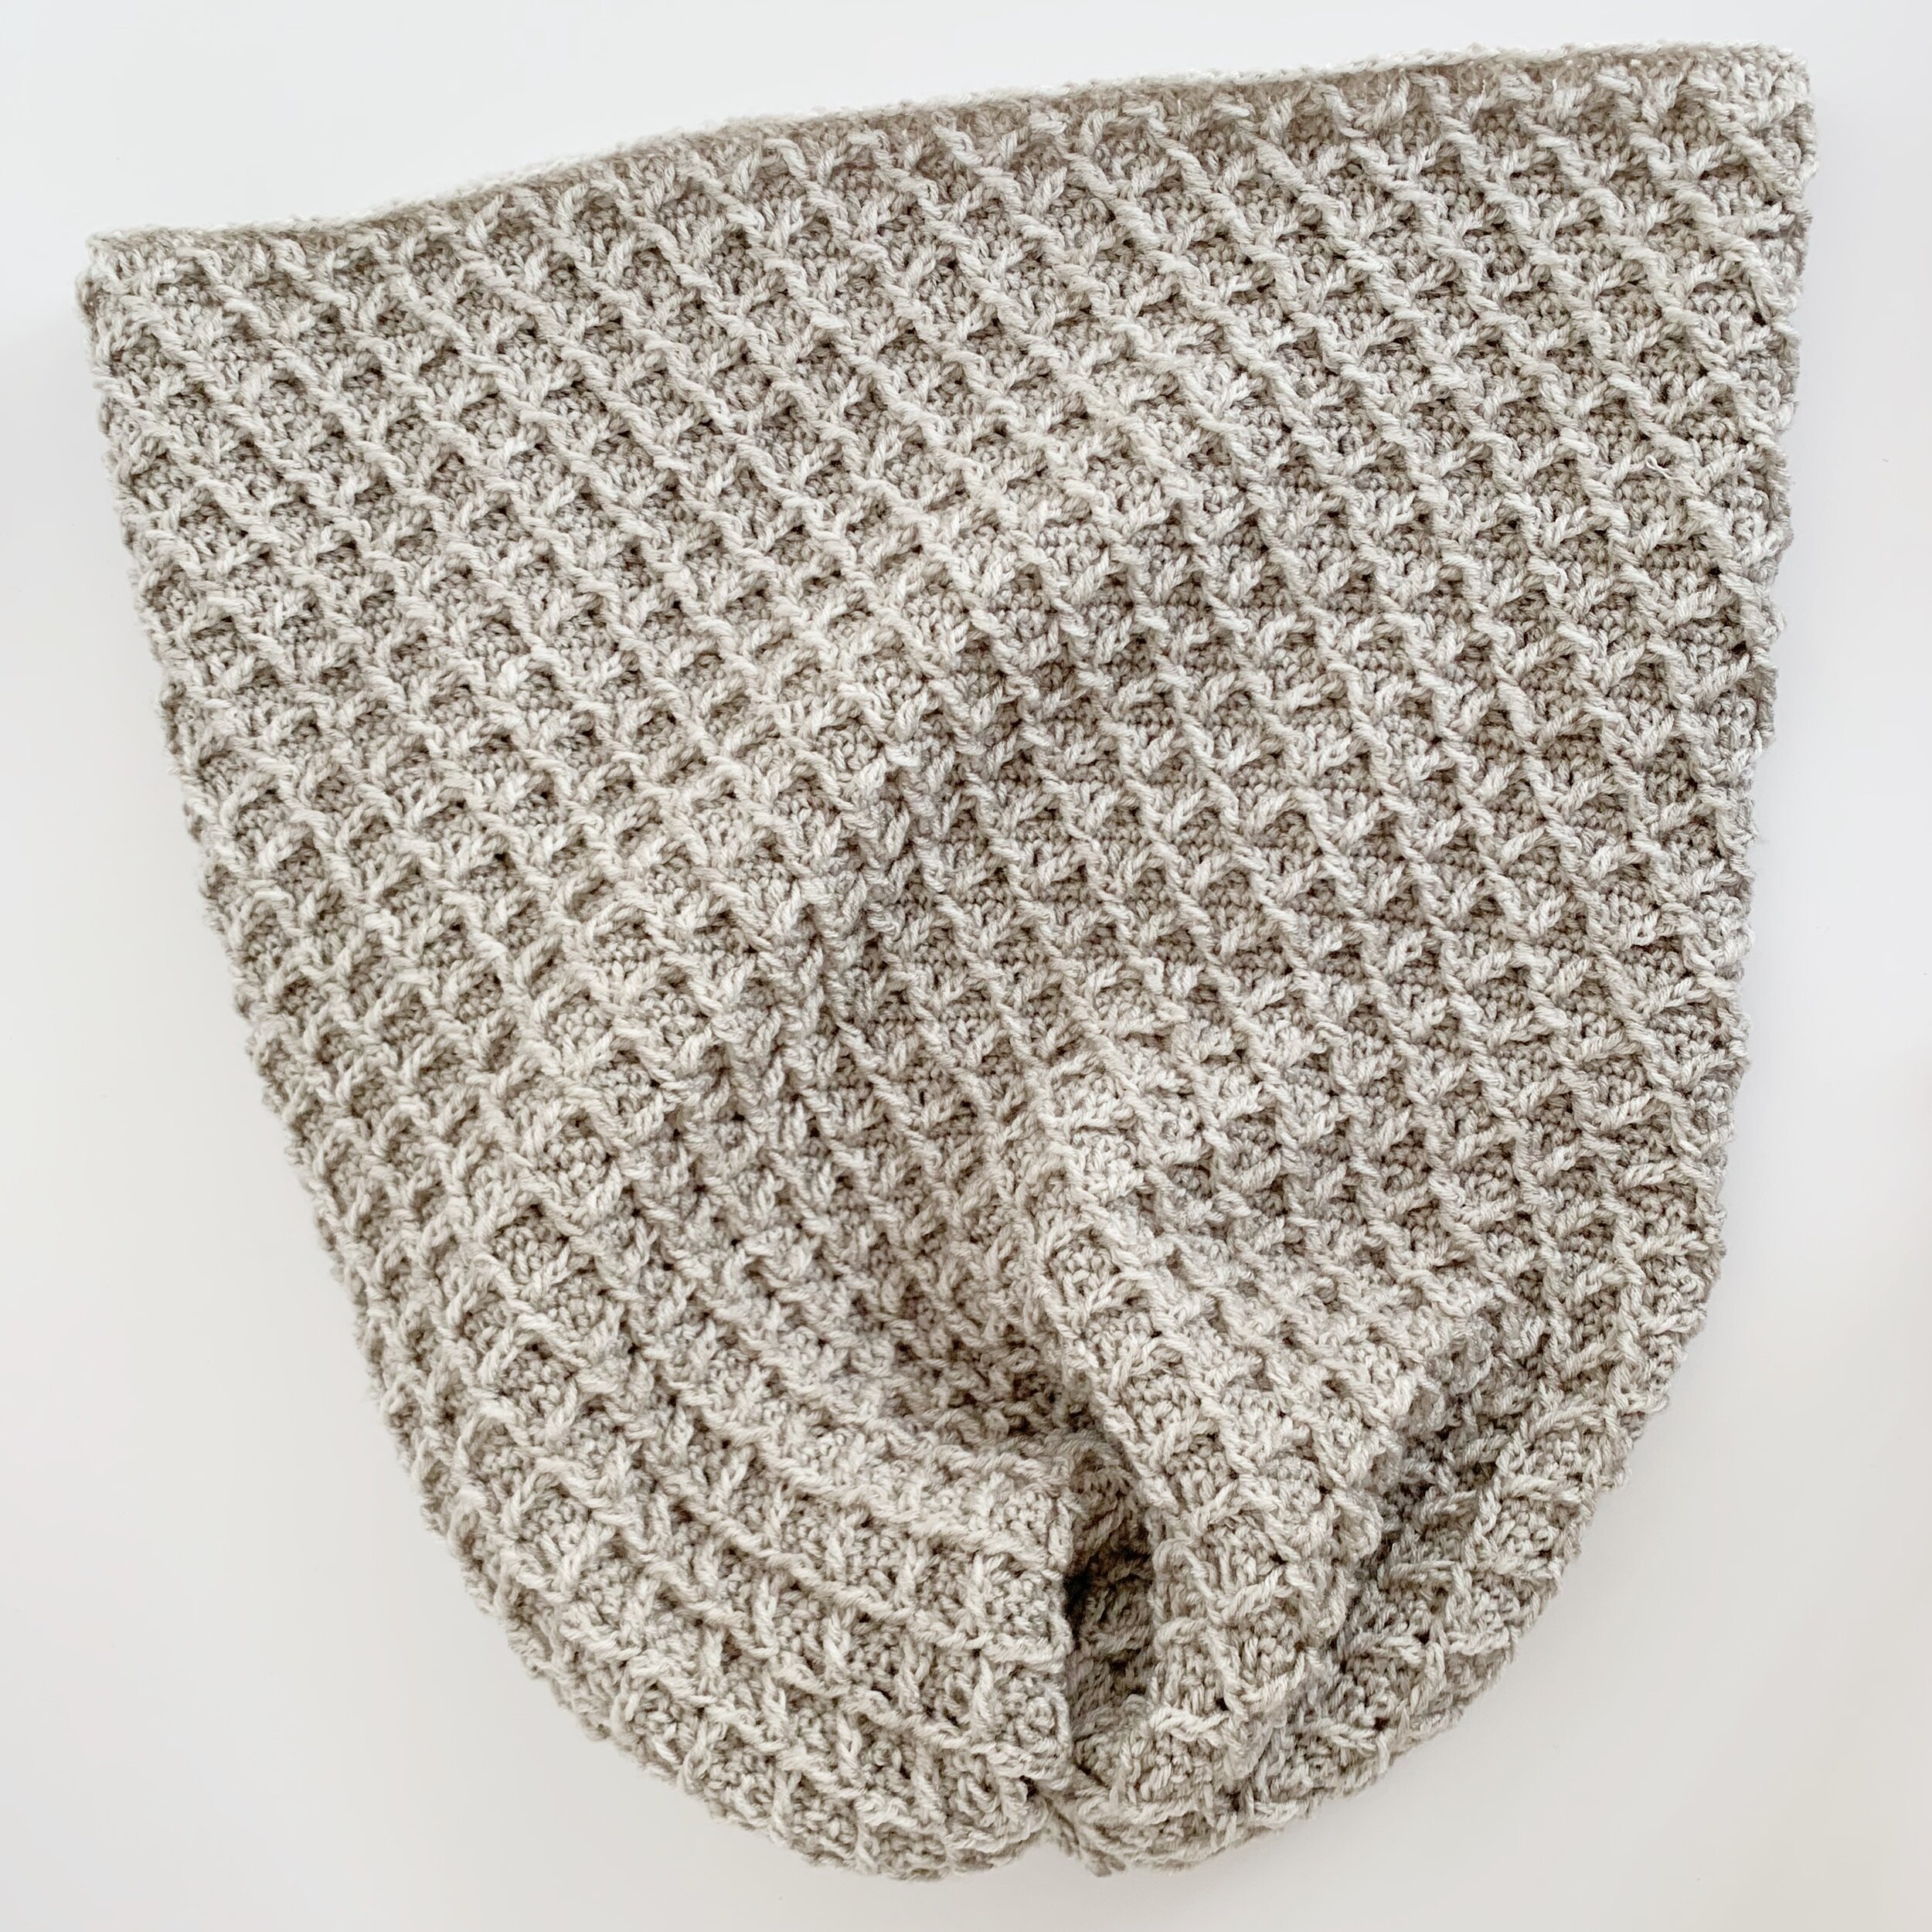
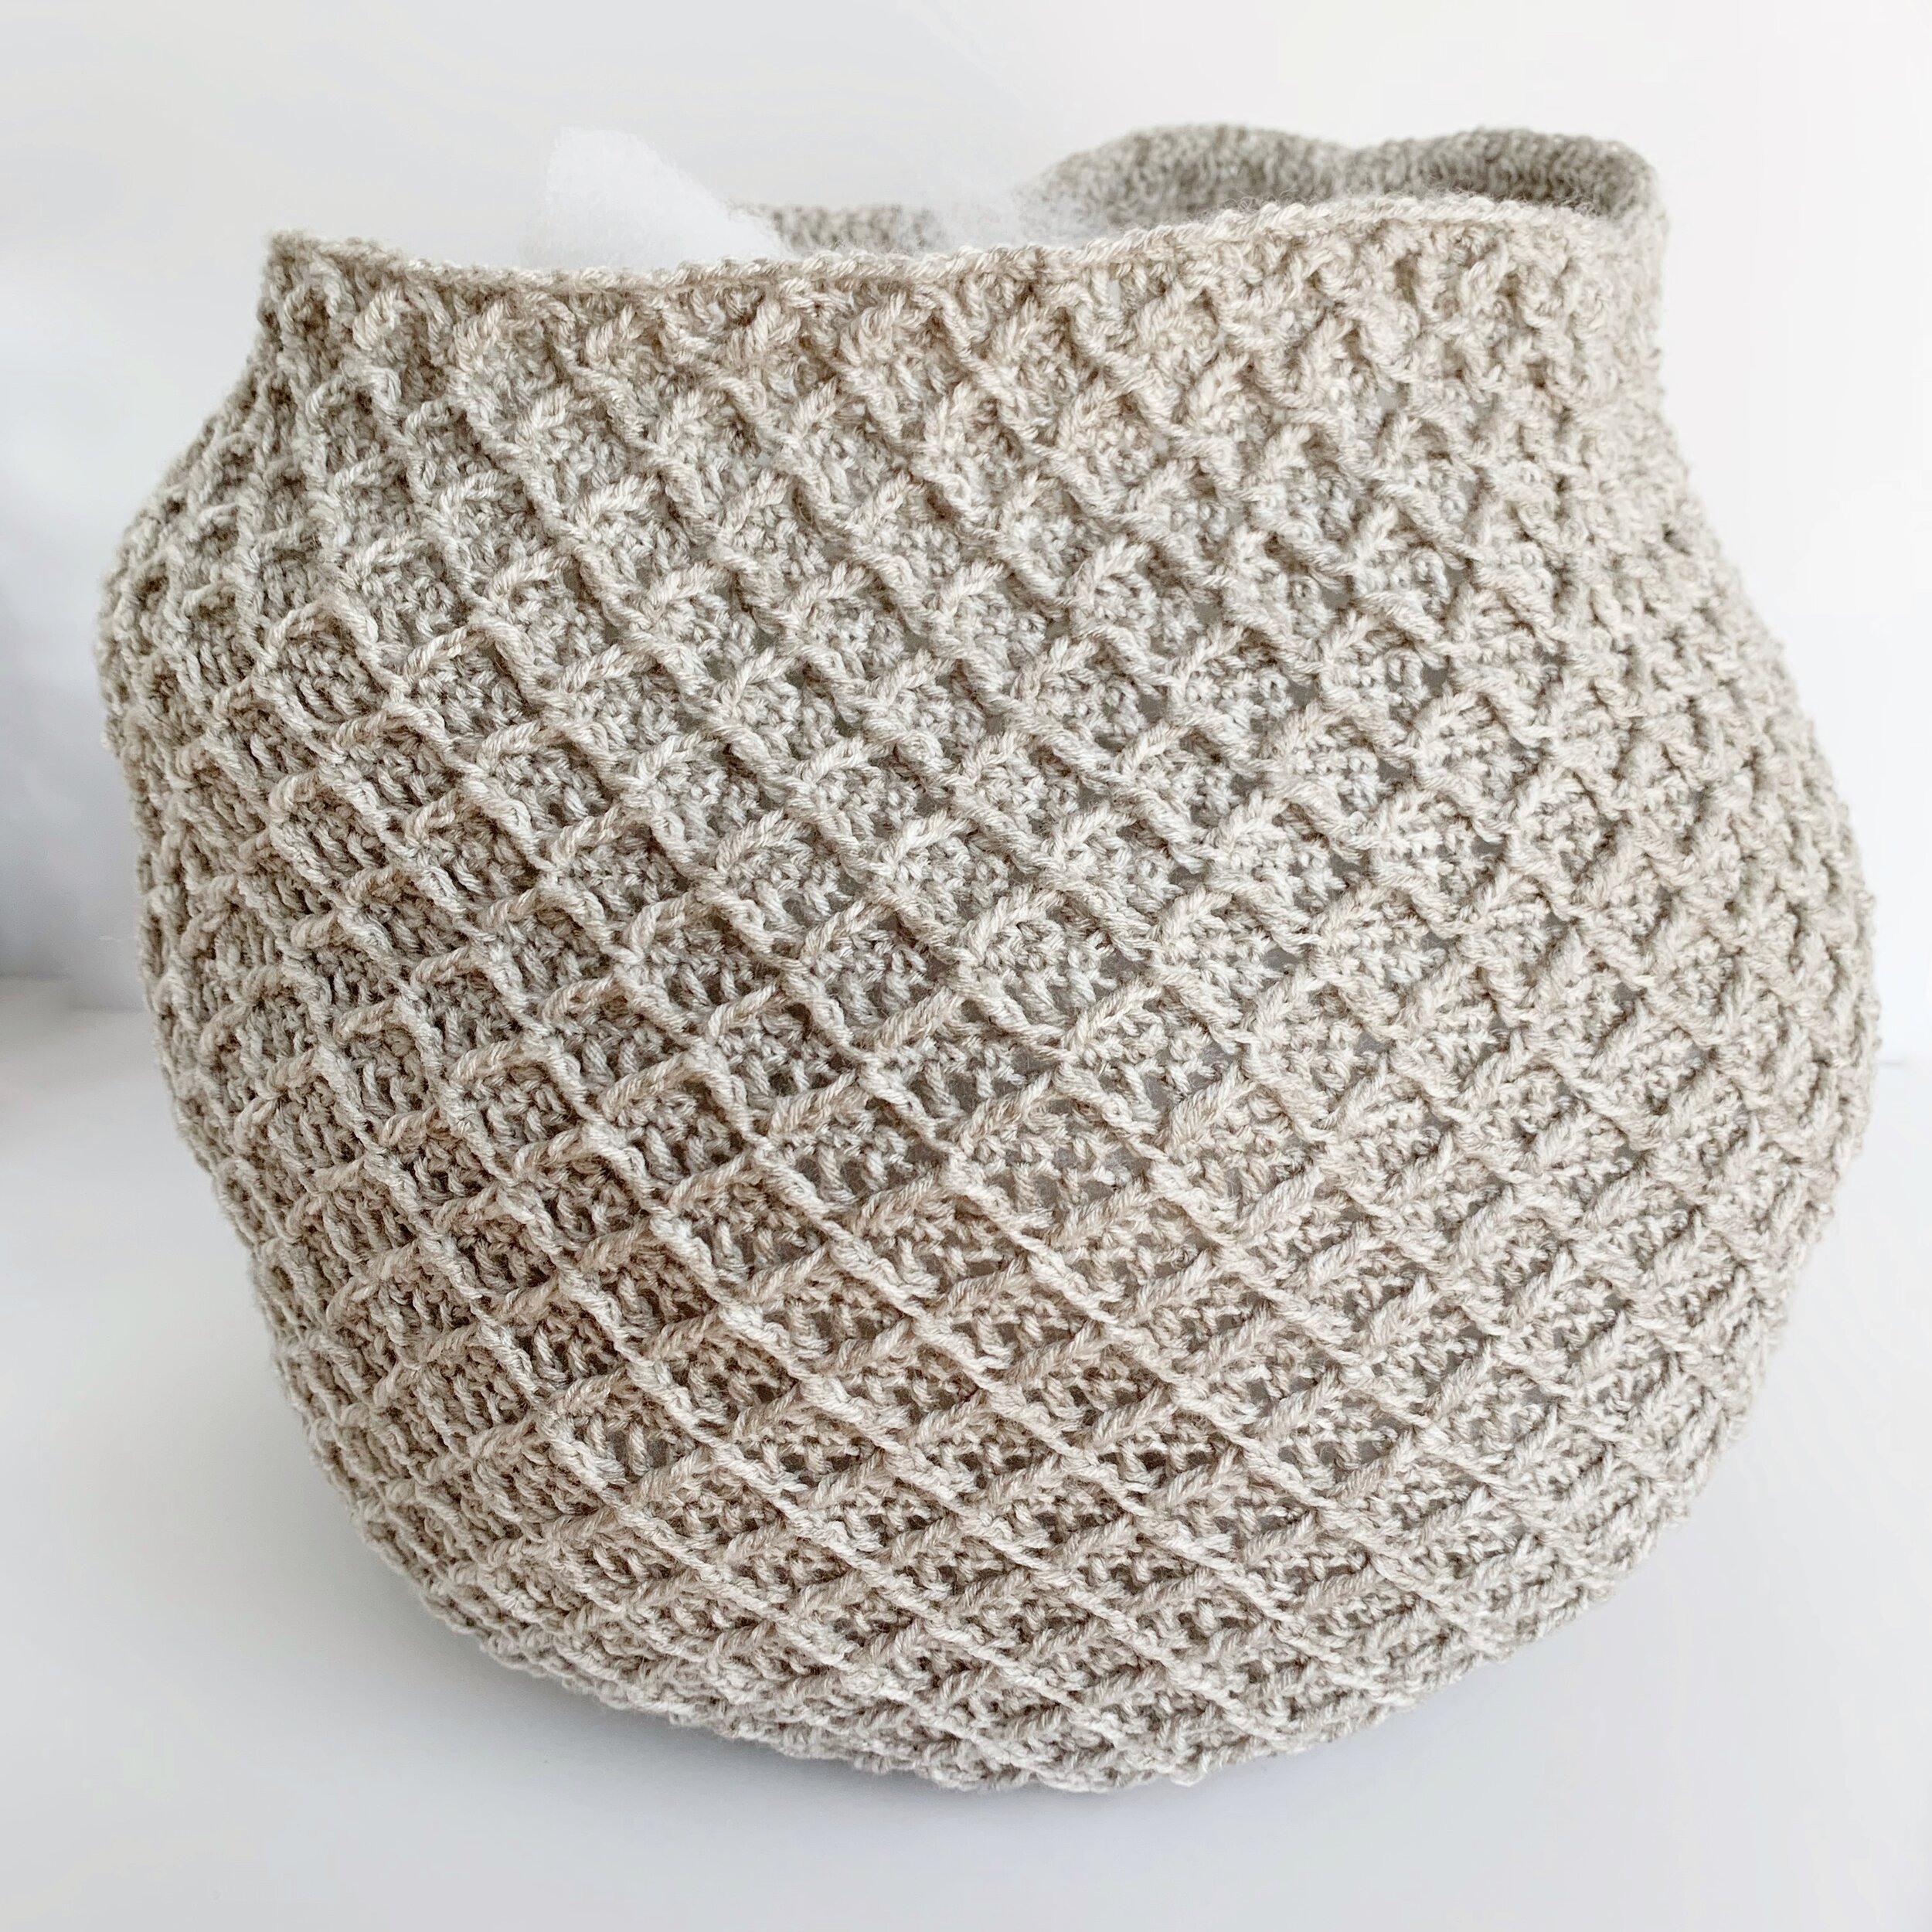
Take your home decor to the next level with this gorgeous rustic pumpkin crochet pattern. Made with the eye catching diamond lattice stitch you’ll be adding it to your home in no time. Find the free pattern below or grab an ad-free PDF in my shop.

Last week I introduced you to The Wavel Pumpkin and this week I’d like to introduce you to her sister, Beryl. When first designing the Wavel Pumpkin I thought I was set on the waffle stitch, but during a late night pinterest search I came across this gorgeous Diamond Lattice crochet stitch and then couldn’t decide which one to use. I knew it would be a lot of work, but figured why not make both! I’m so glad I did. The Beryl Pumpkin has won over my heart and I can’t get enough of this stitch.
It is a surprisingly easy stitch once you master it. Worked up in the Soft and Sleek DK with a small hook creates the most amazing texture. I can honestly say that I loved every minute of working on this design. I’m thrilled to be able to share the free pattern with you today.
If you are new to working the Diamond Lattice stitch make sure you check out my video tutorial for more details. I’ve included detailed instructions with photos as well to show you all the tips and tricks I discovered while creating the Beryl Pumpkin.

The Beryl Pumpkin Crochet Pattern
Materials Needed:
885 yards of Yarn Bee Soft and Sleek DK in Linen
Crochet hook size E (3.5mm)
Tapestry needle
Scissors
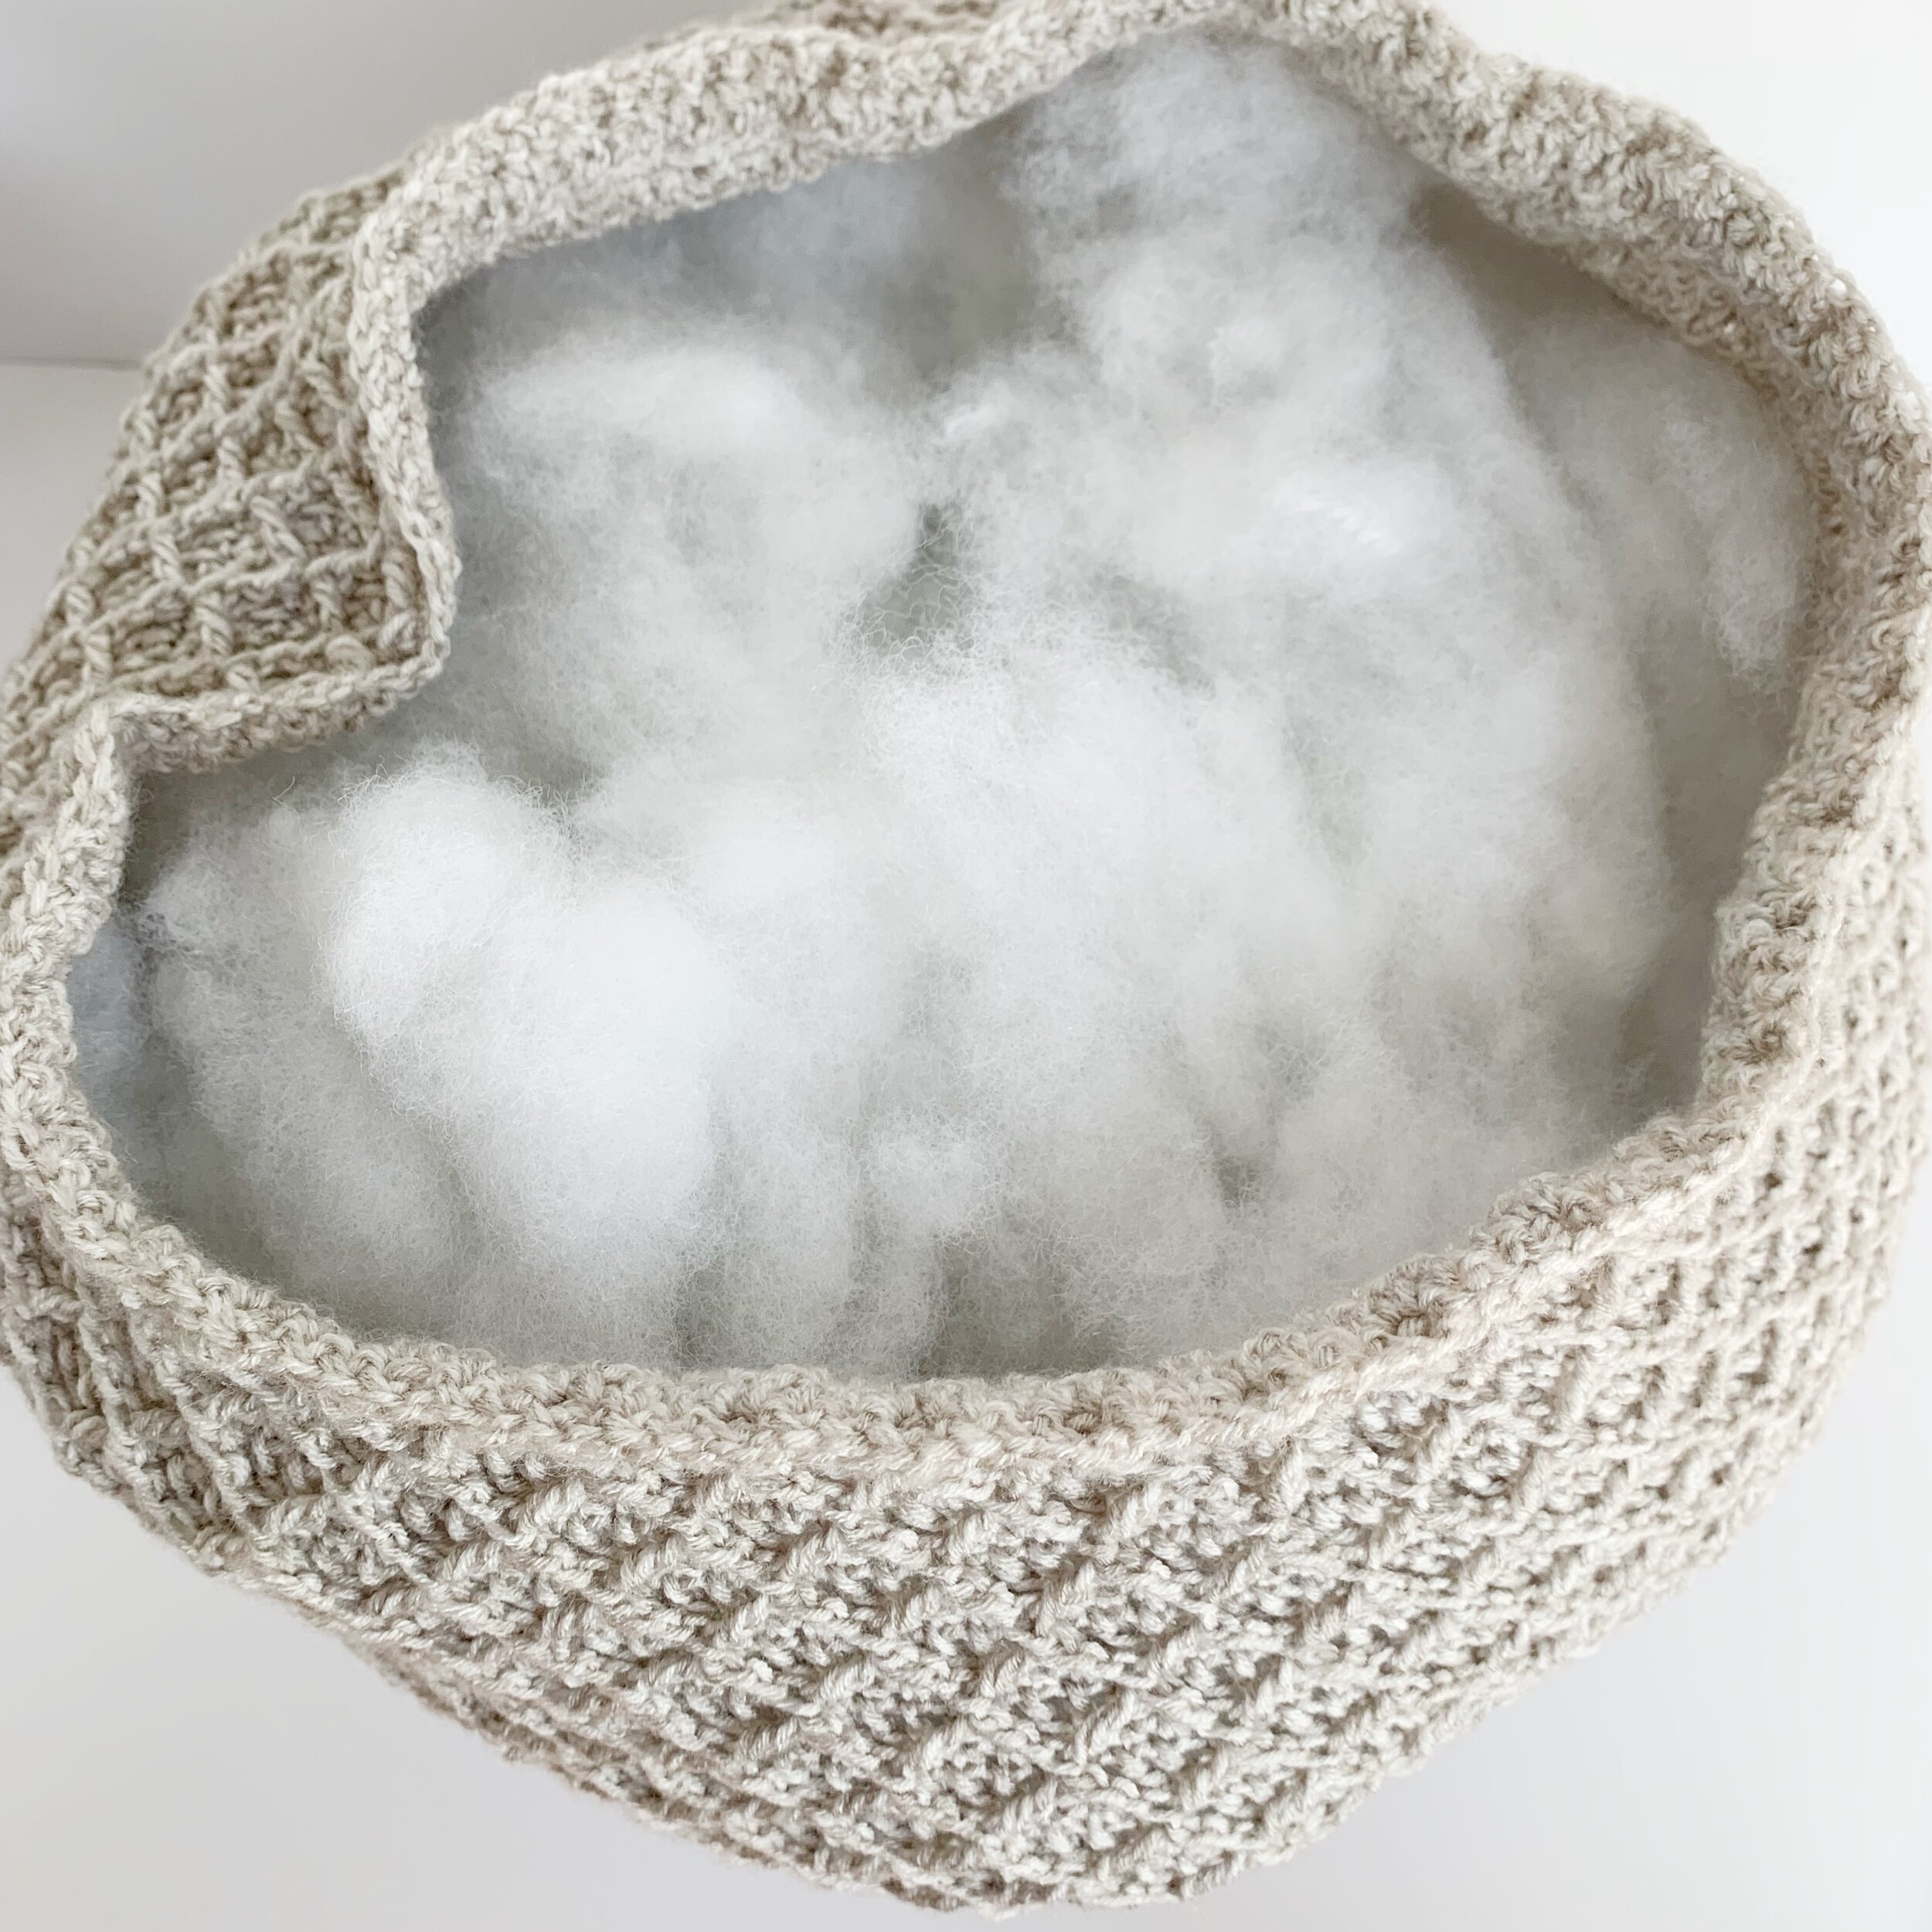
Fiber Fill
20 yards of twine
Abbreviations:
Ch- chain
St(s)- stitch(es)
Sl st- slip stitch
Sc- single crochet
Dc- double crochet
fptrc2tog- front post treble crochet two together
Gauge:
19 stitches X 10 rows = 4” square in double crochet
Size:
Finished size is approx. 15” wide by 11.5” high. Size may vary depending on how heavily stuffed.
Notes:
1.Pattern is worked in the round from the top down.
2.Ch 3 at the beginning of dc rounds counts as a stitch.
3.All fptrc2tog stitches are worked around the sc or fptrc2tog stitches two rounds below.
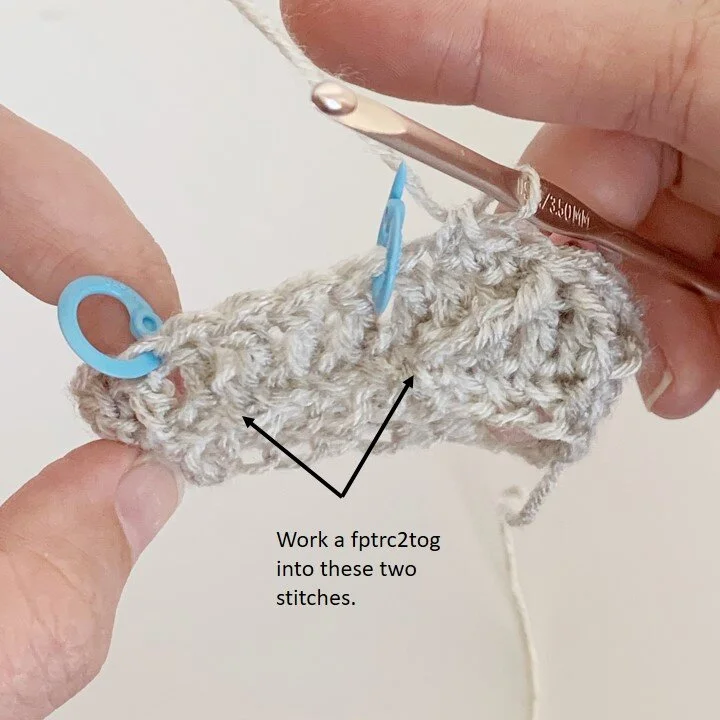
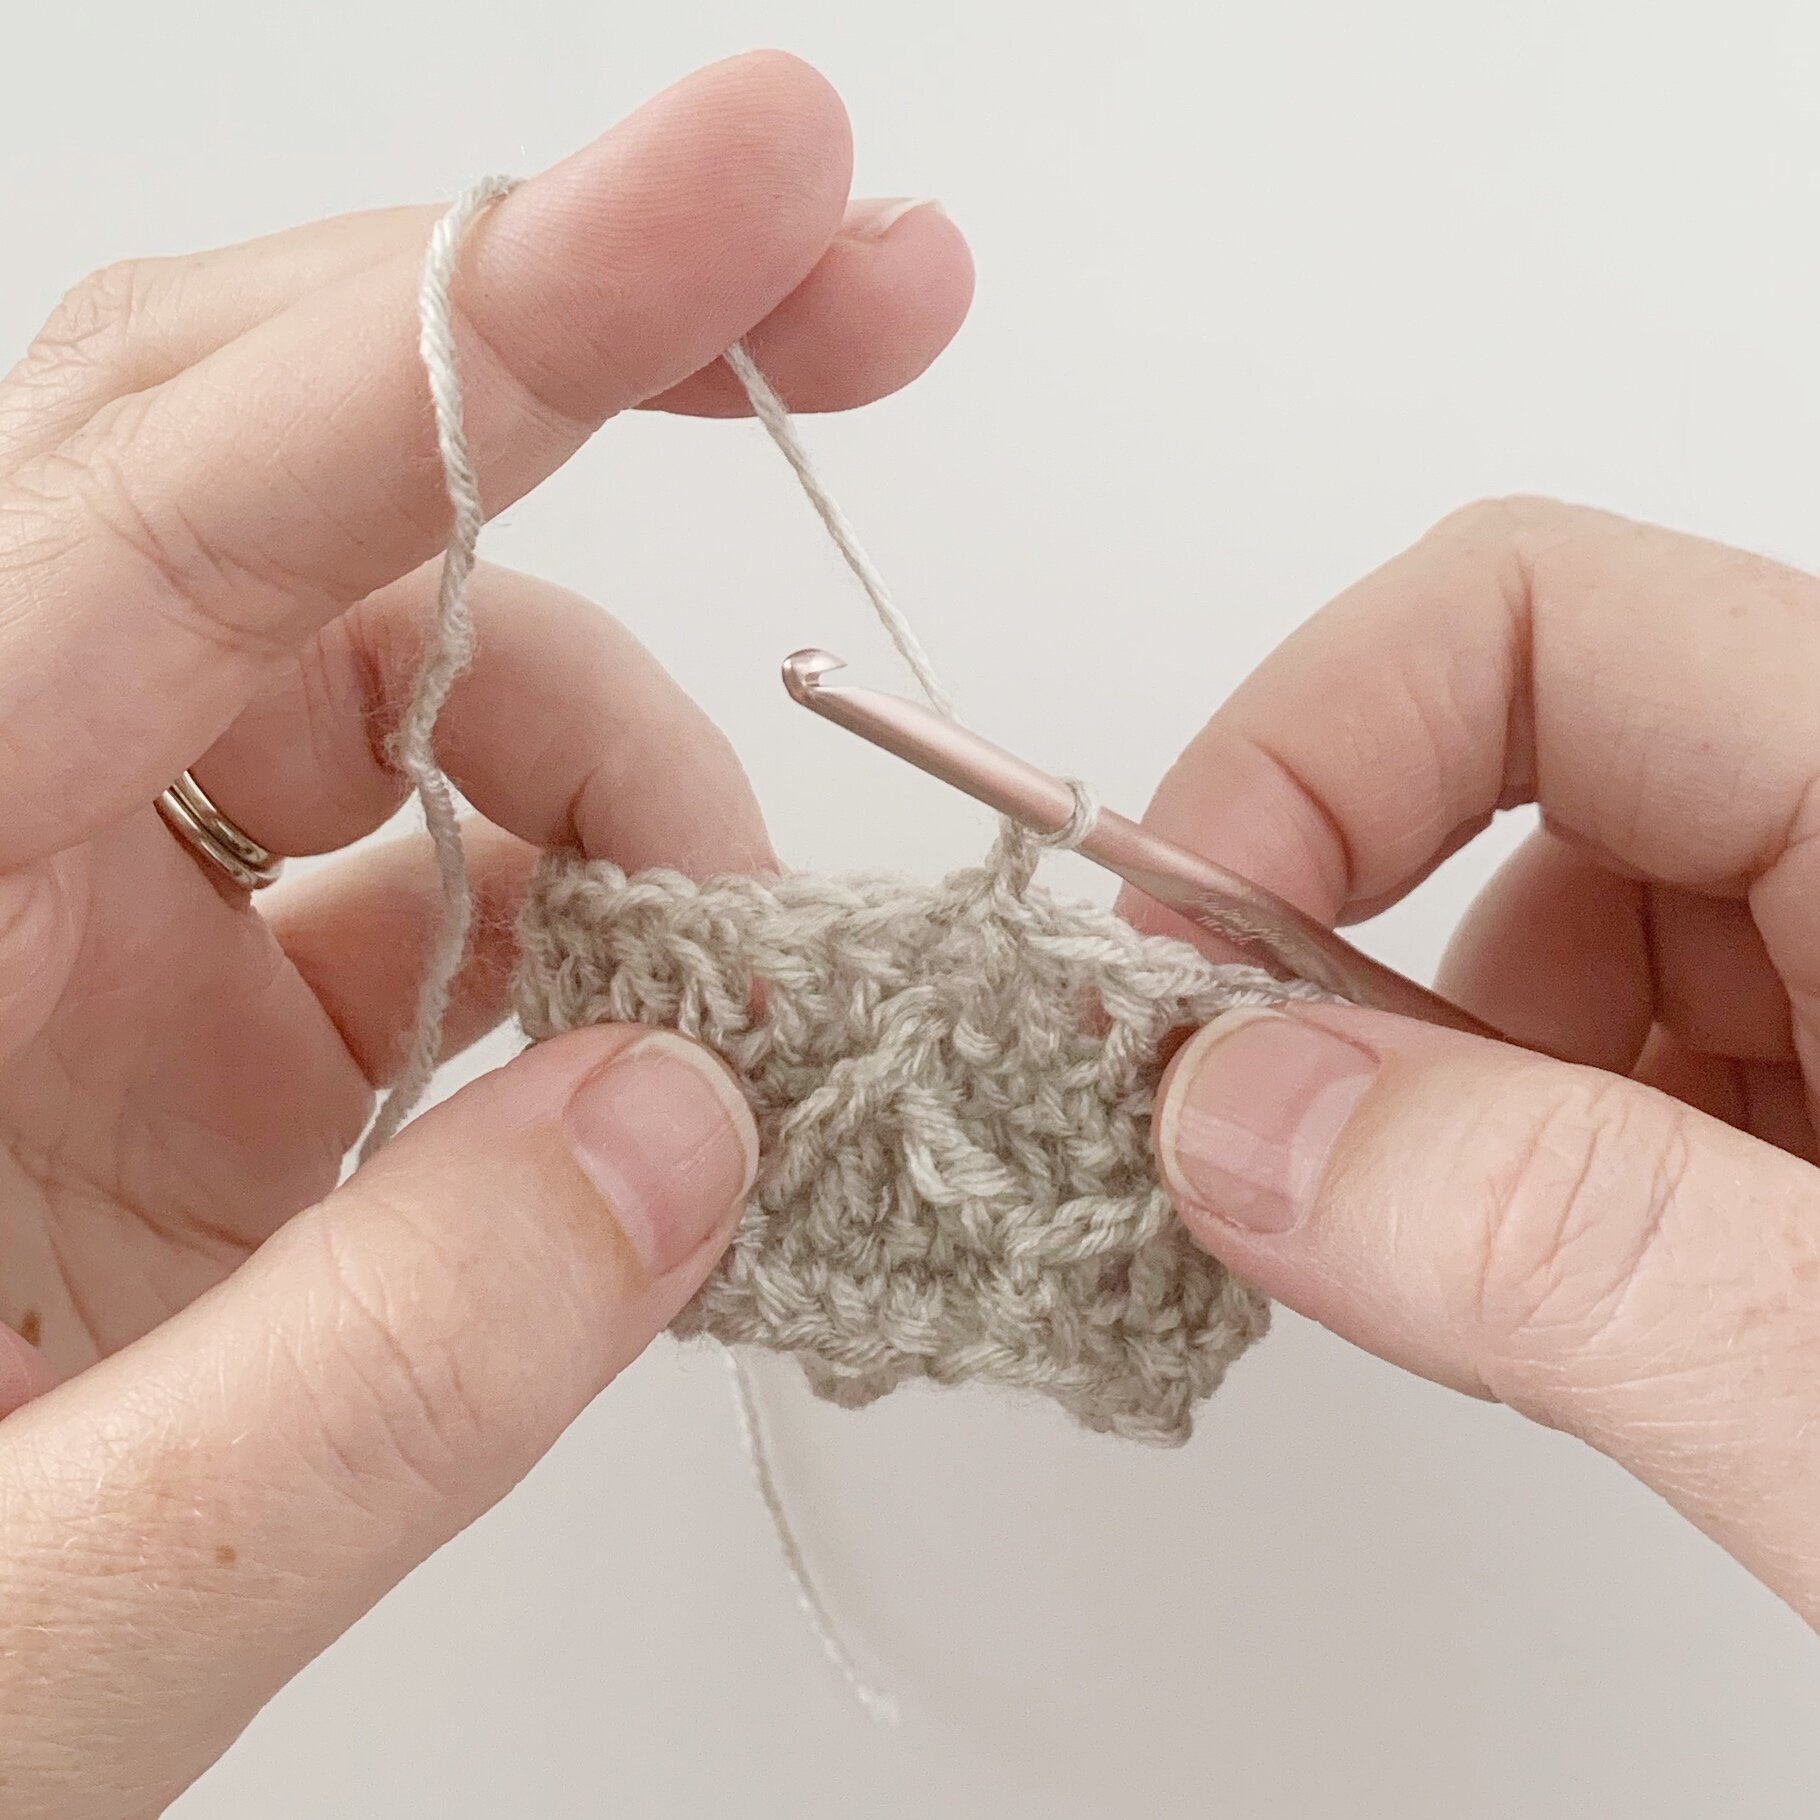
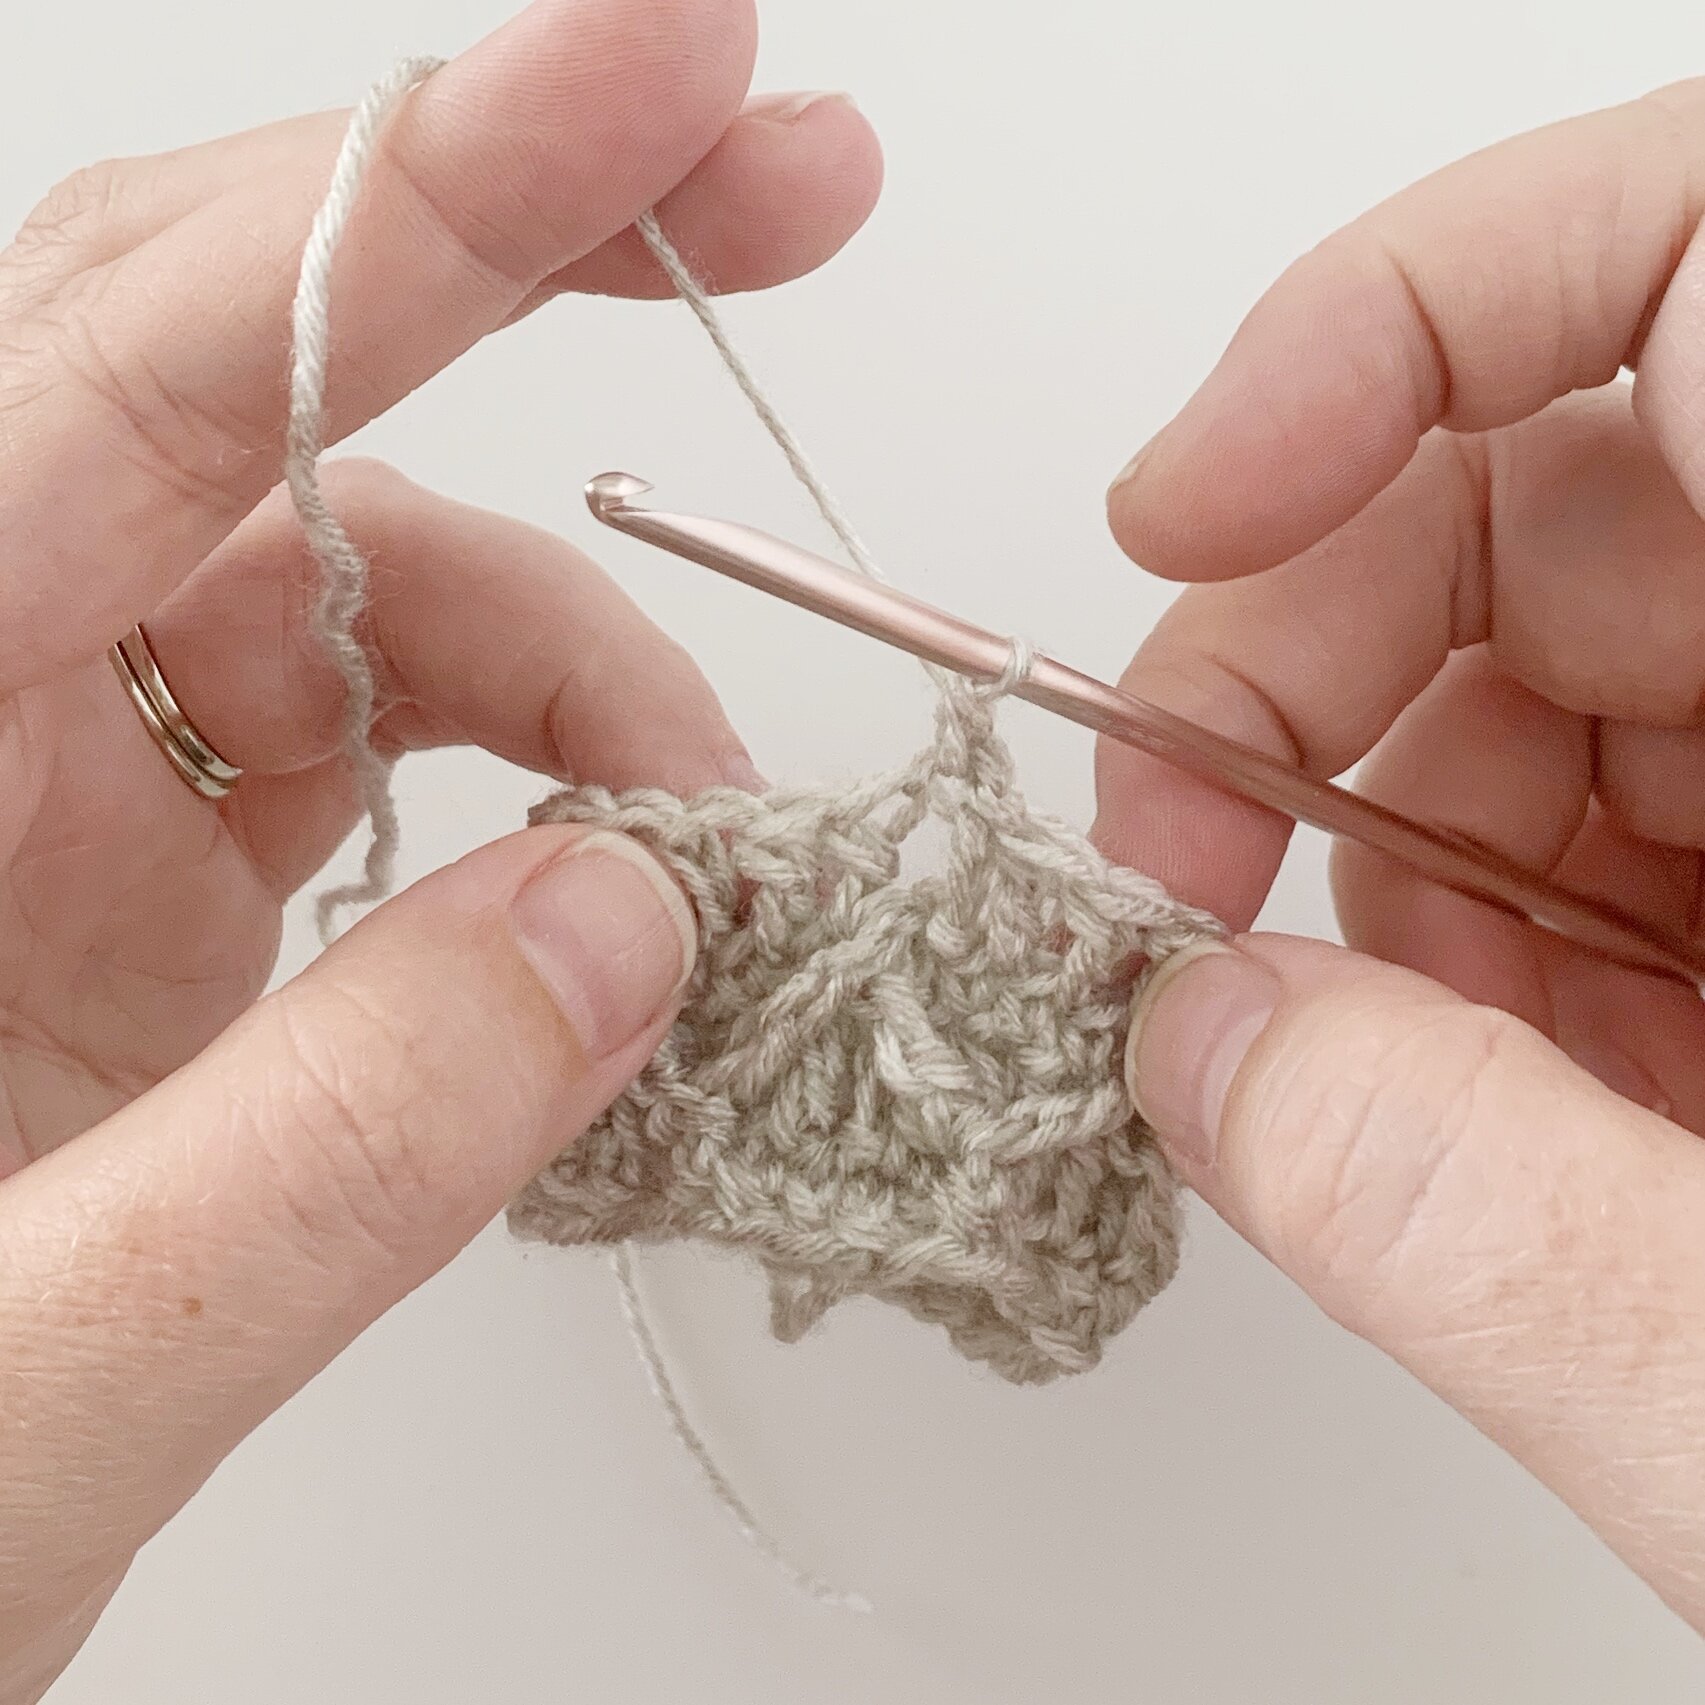
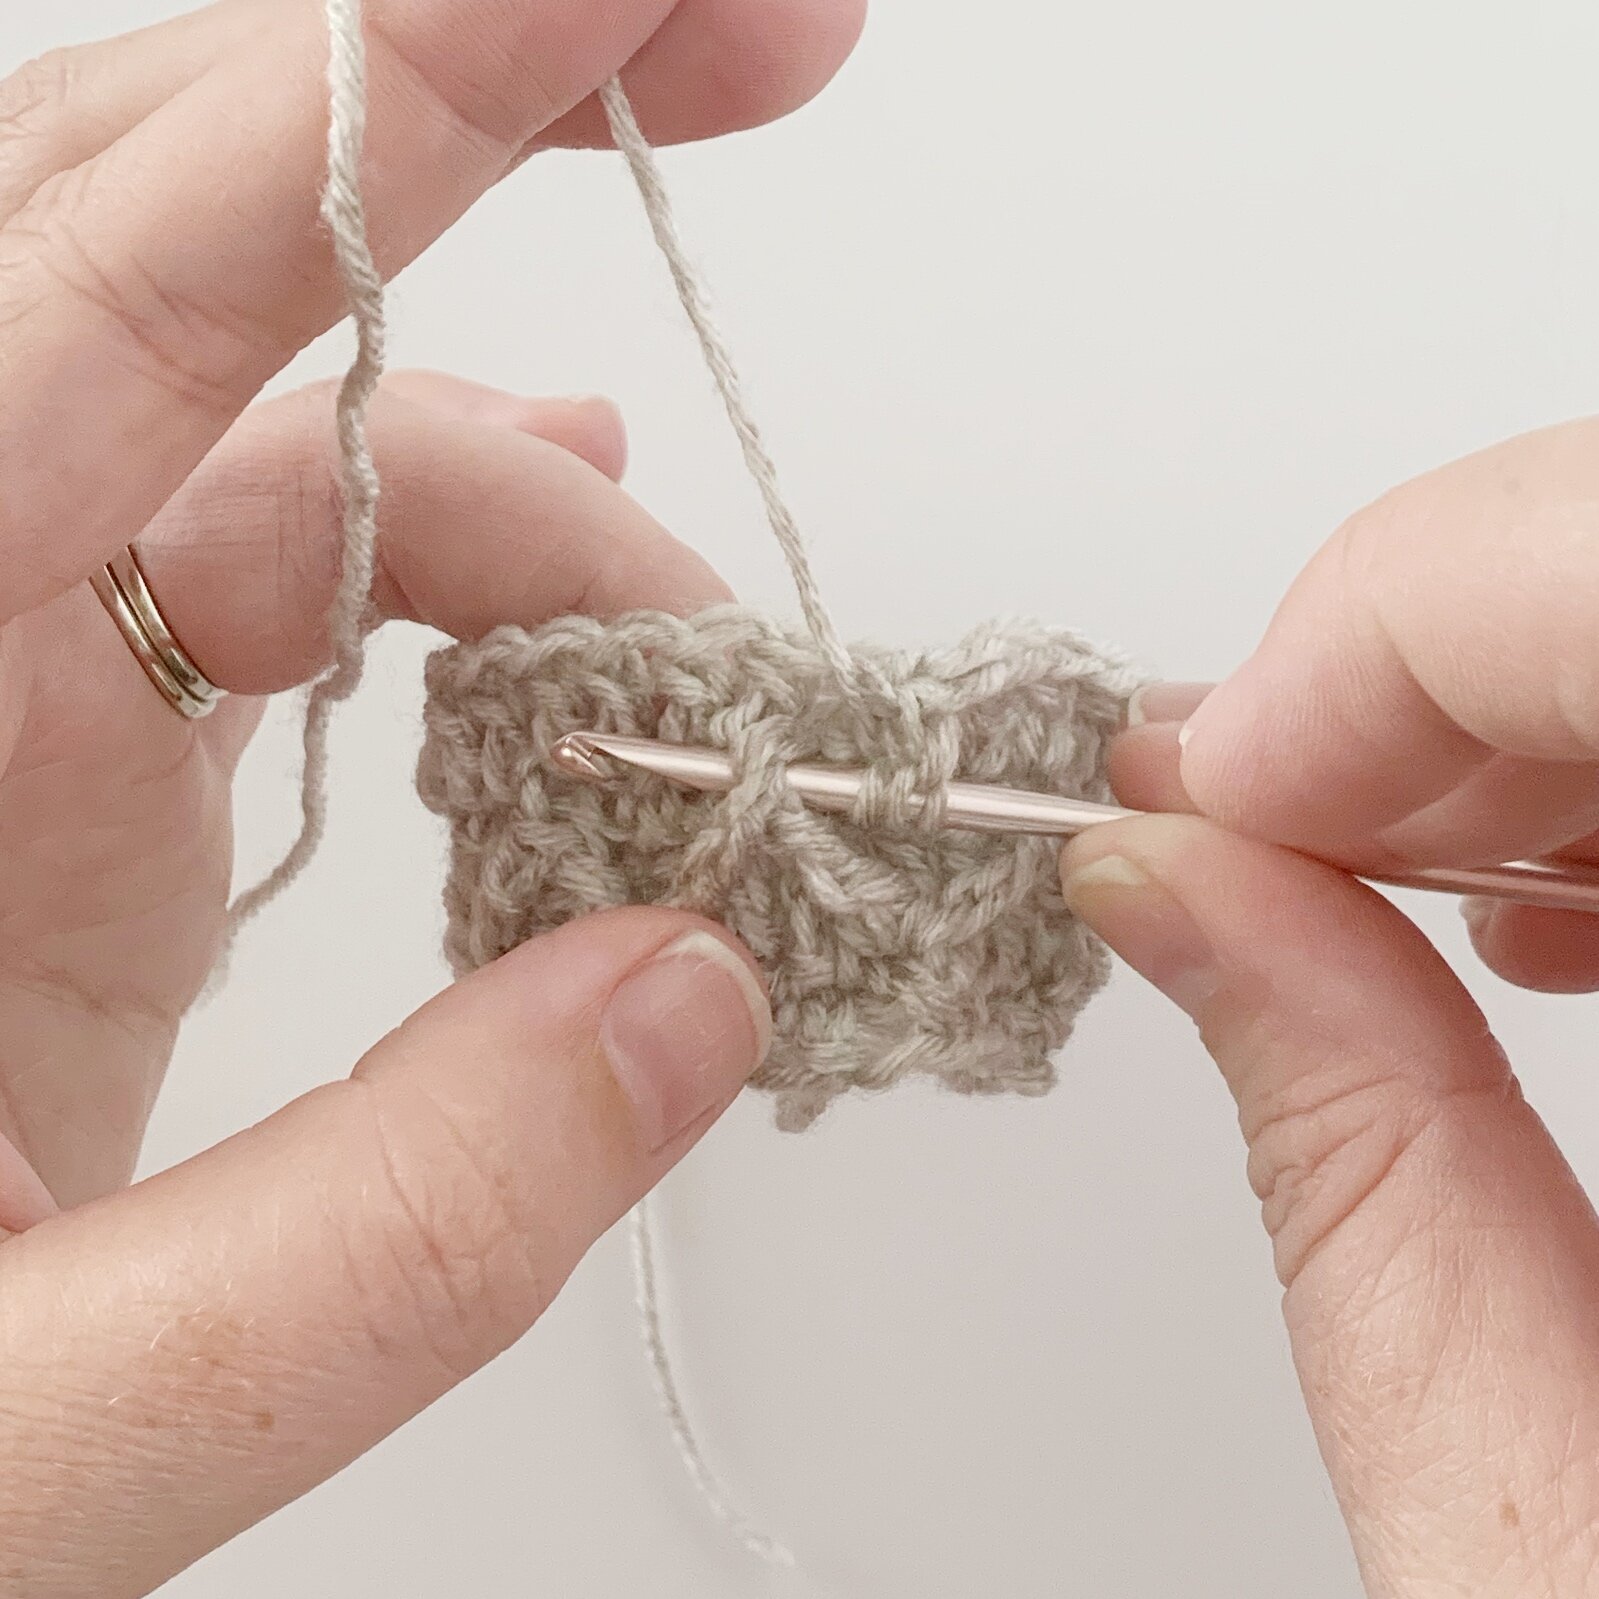
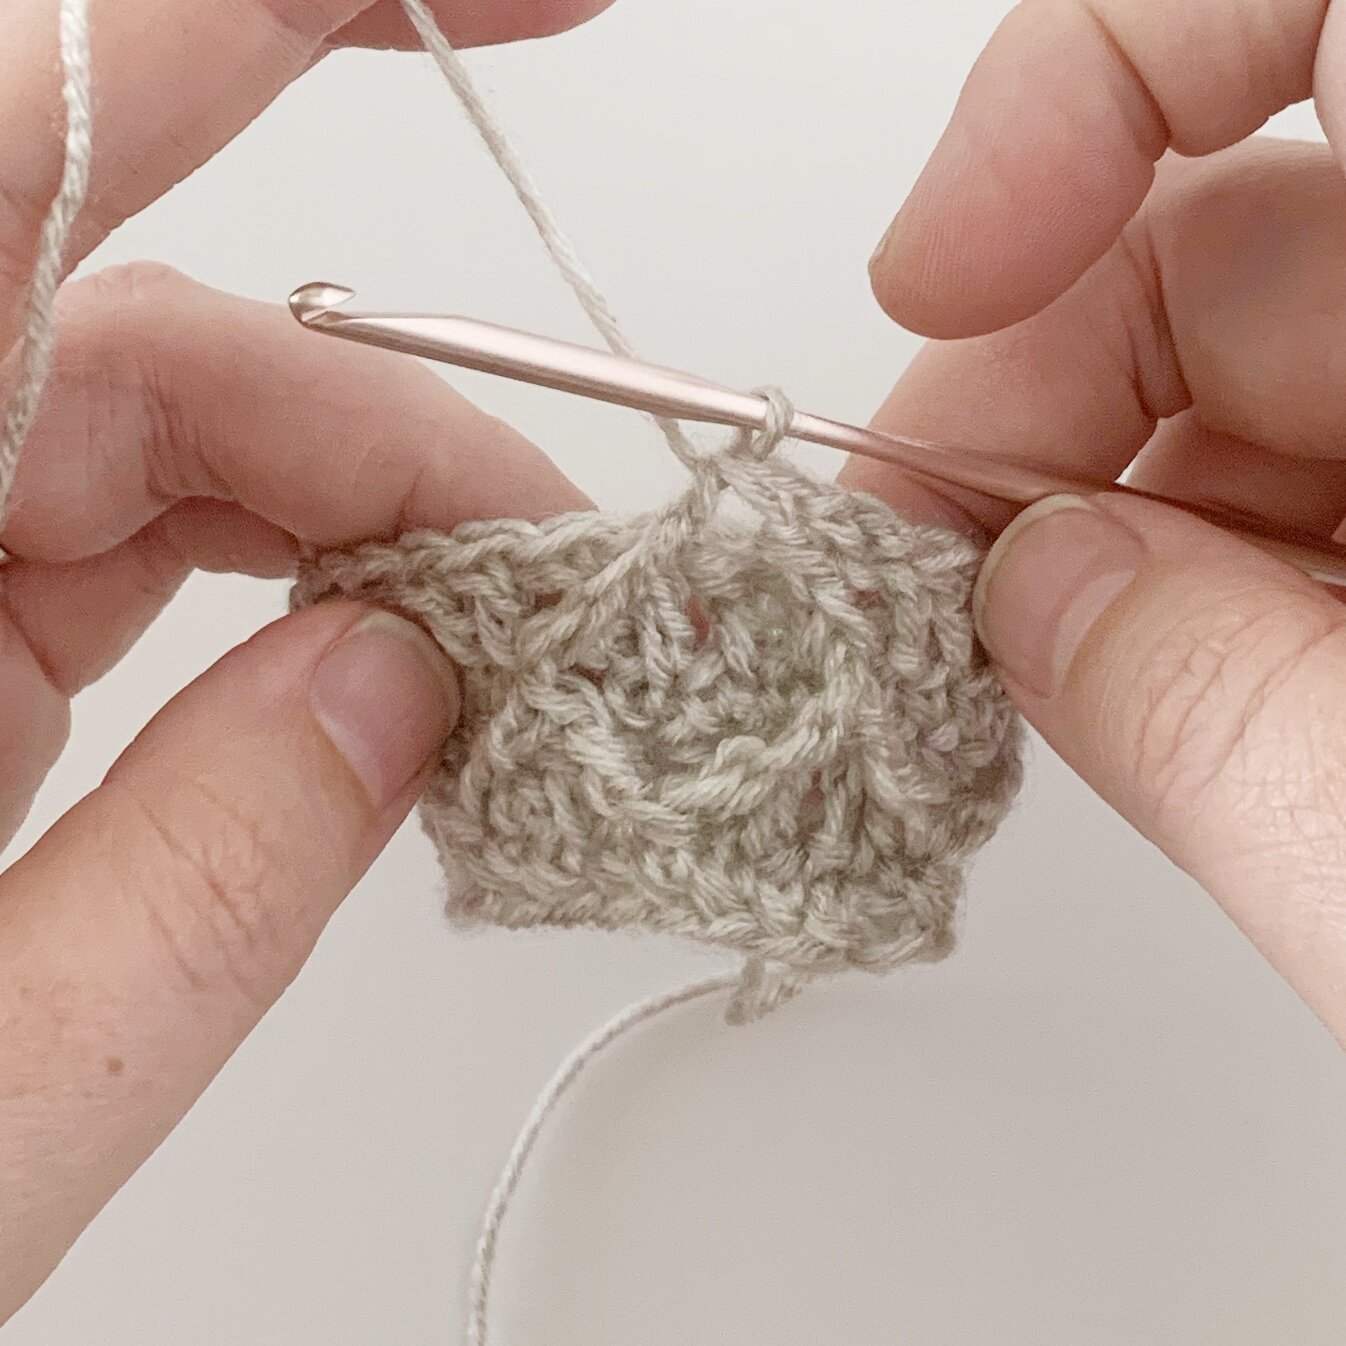
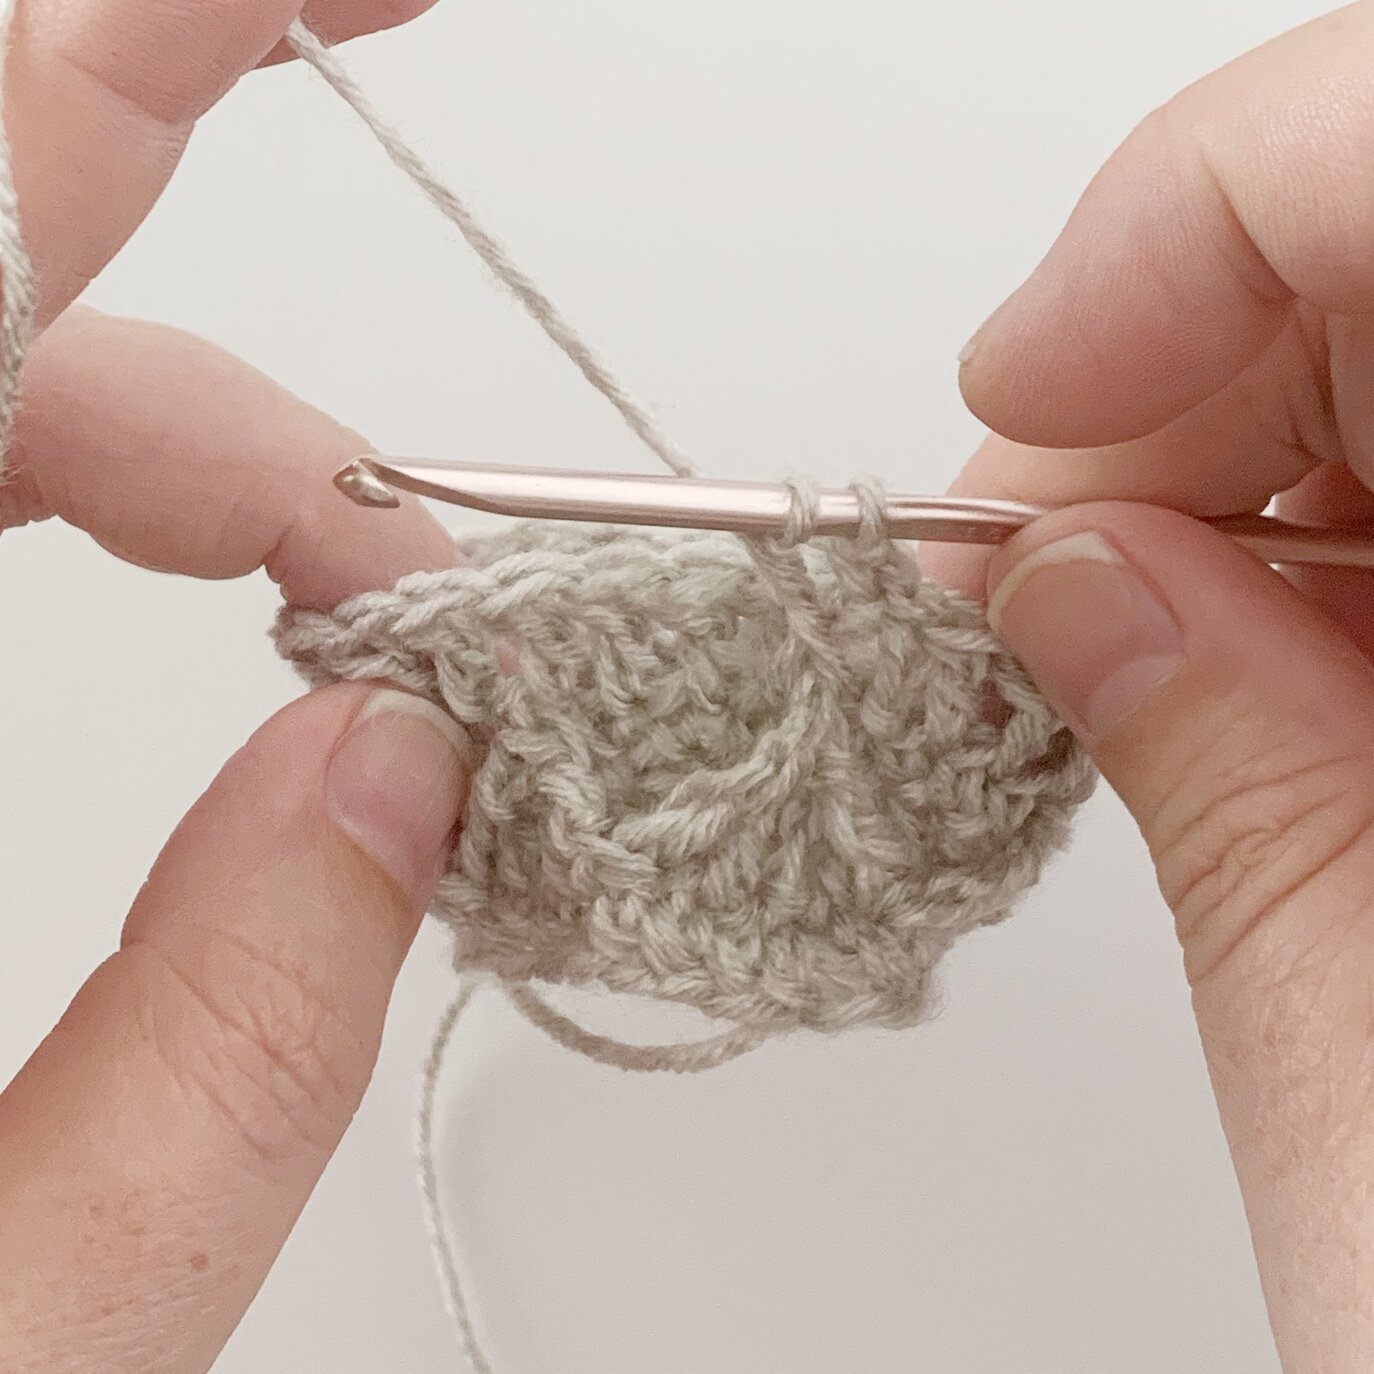
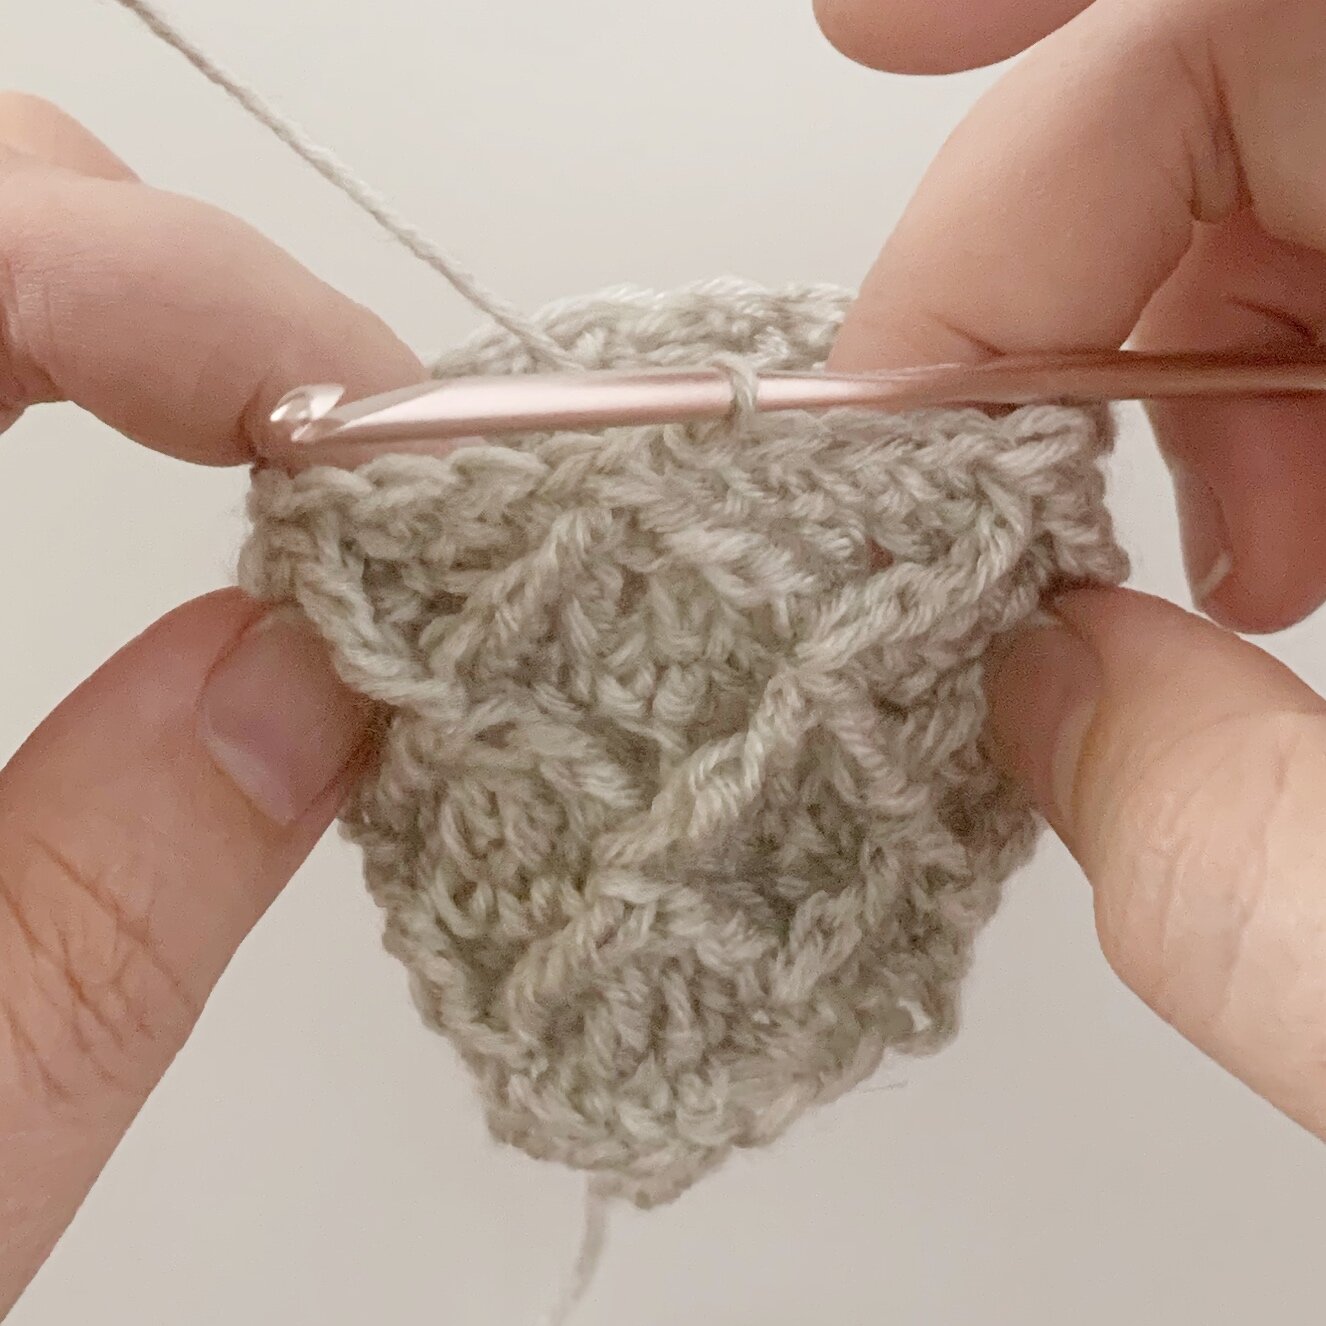
How To Work A fptrc2tog:
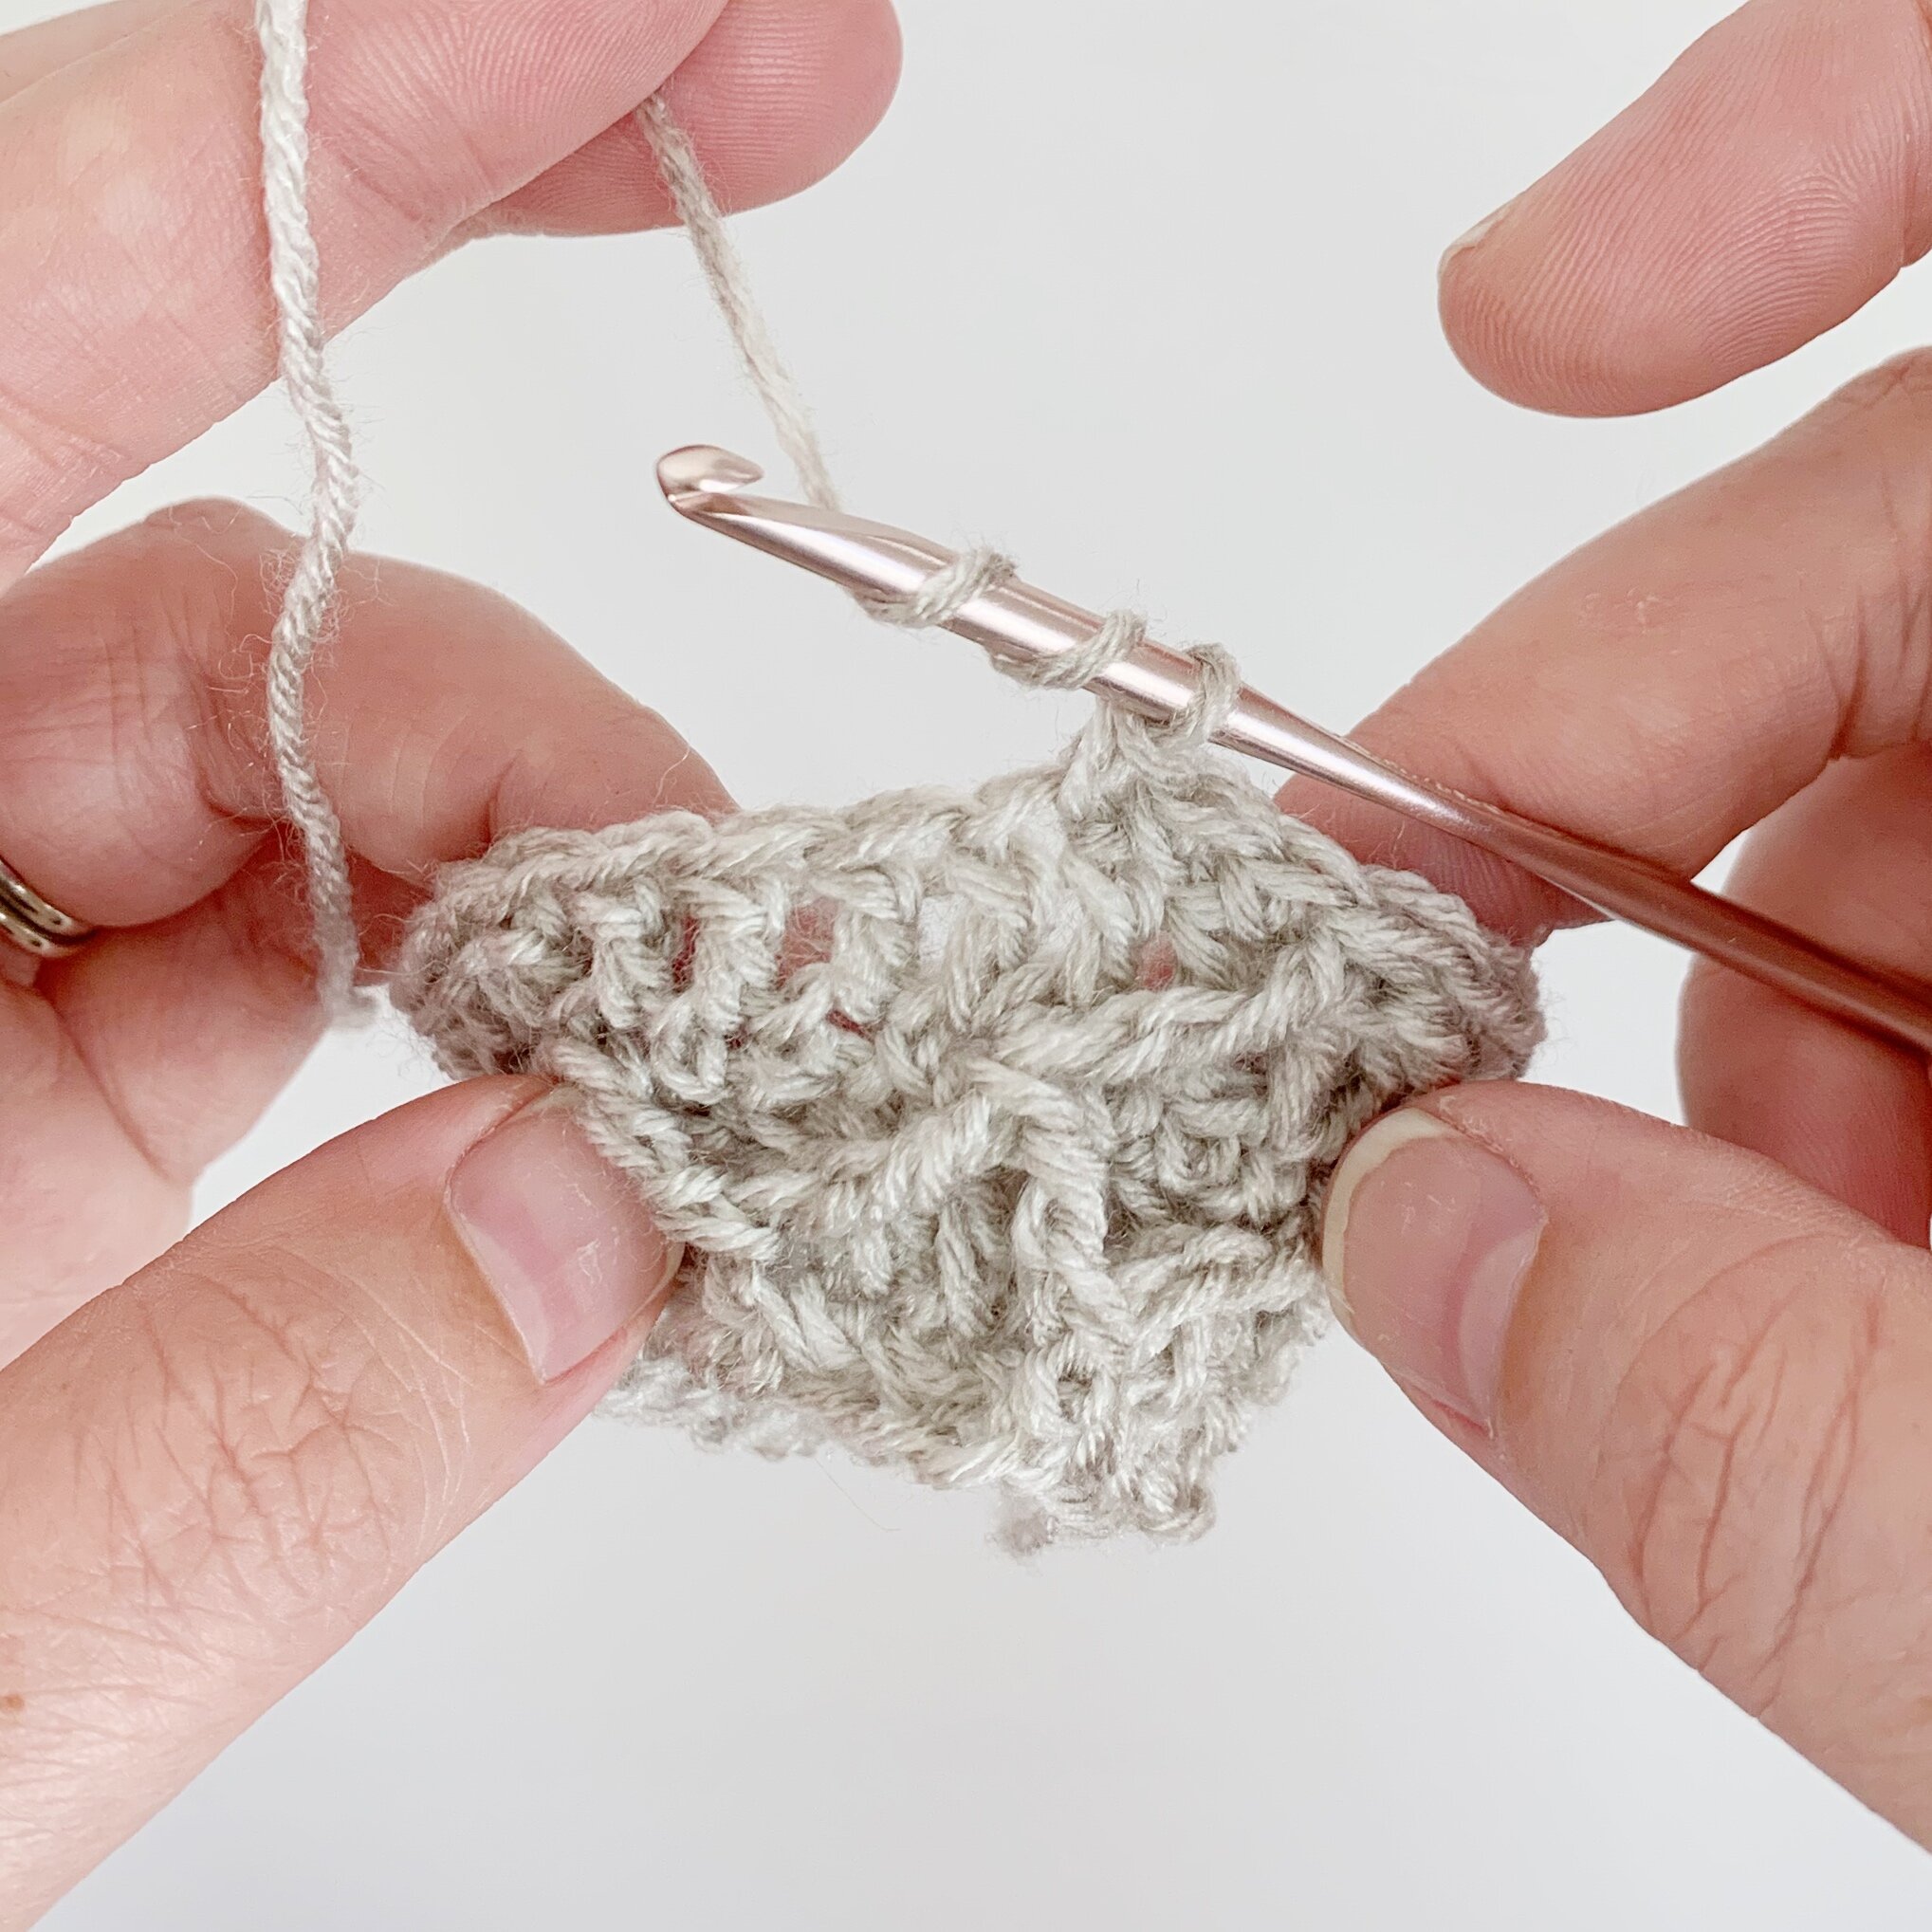
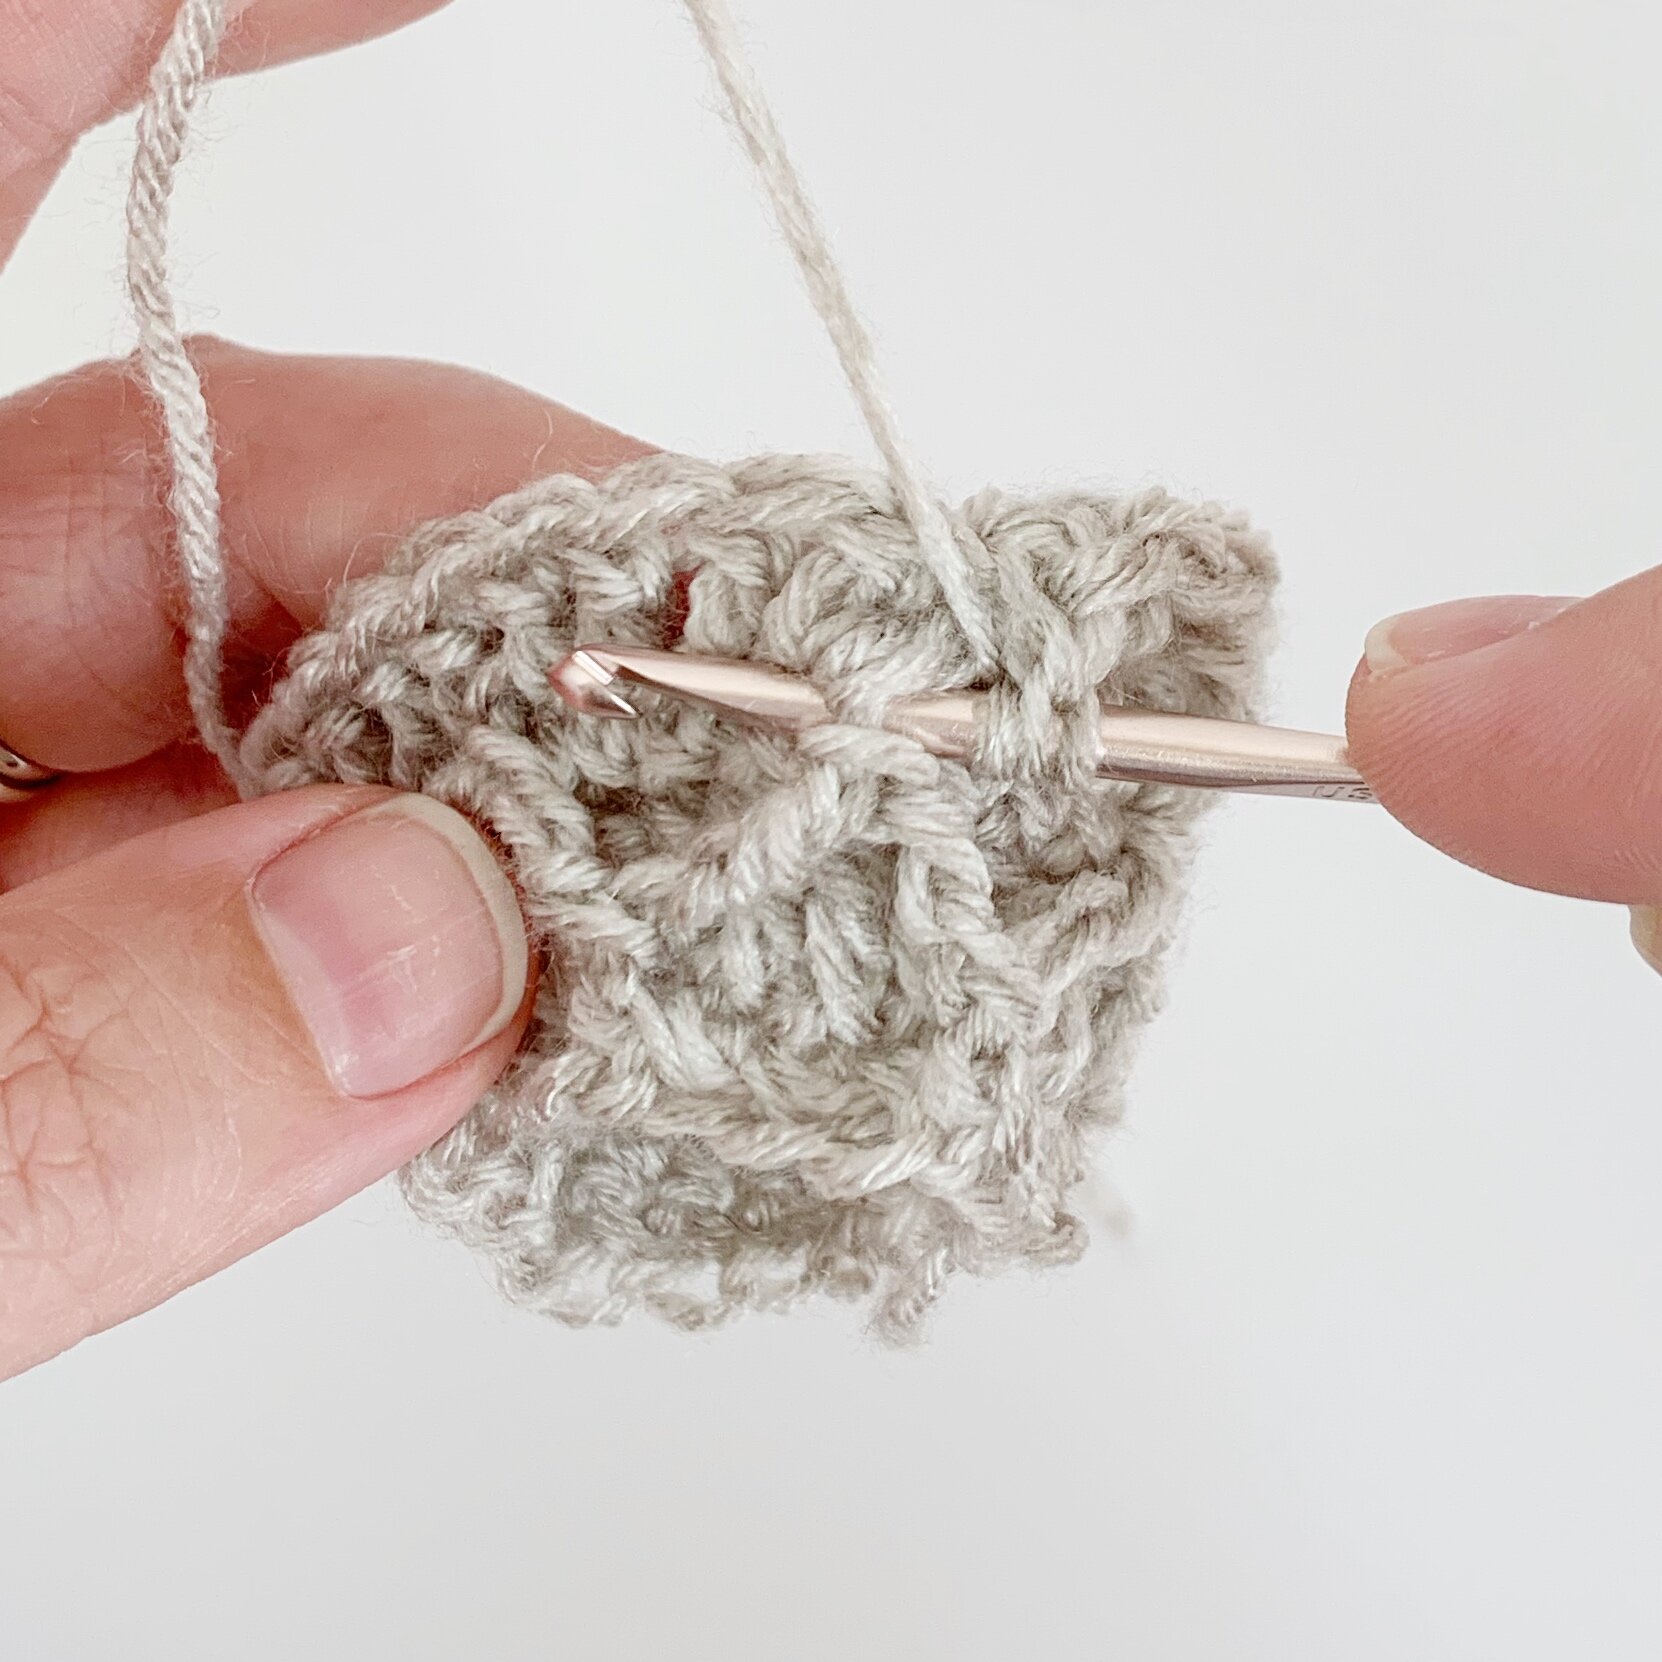
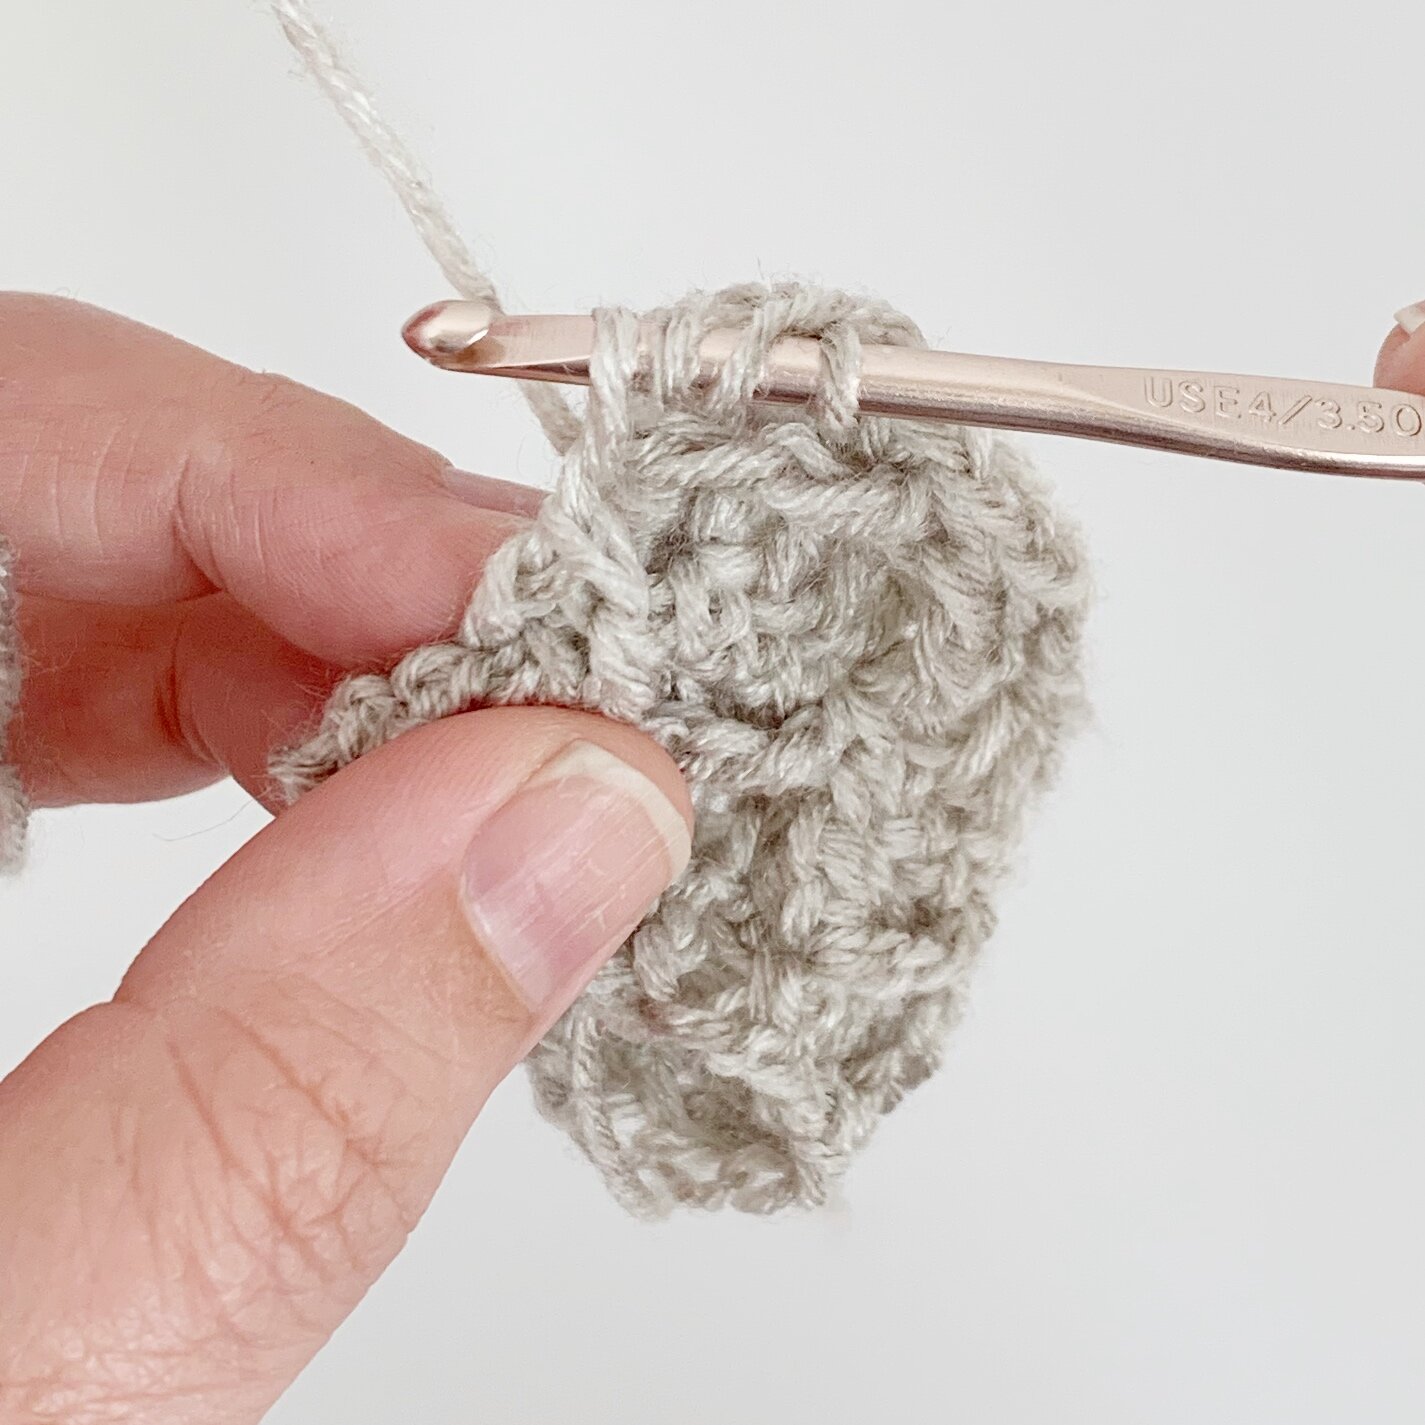
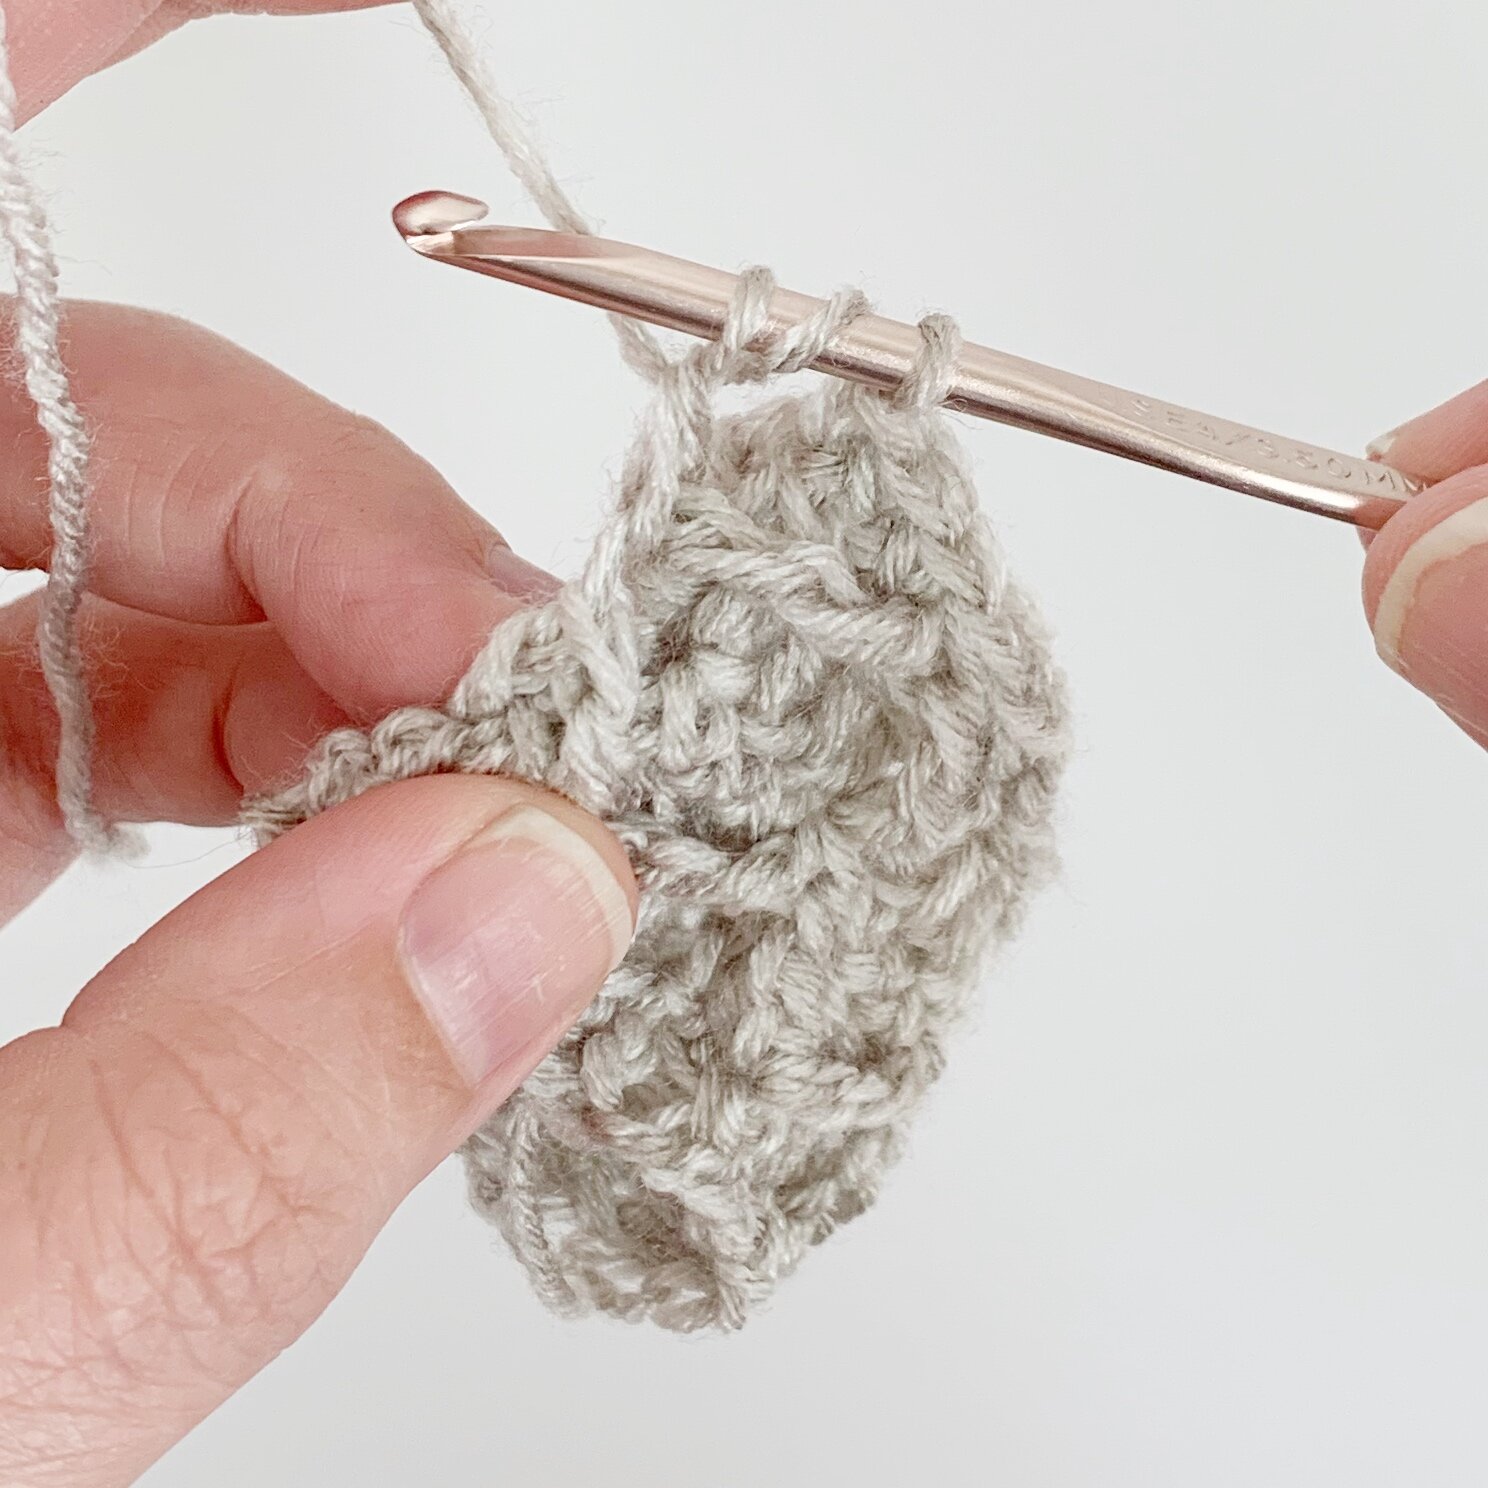
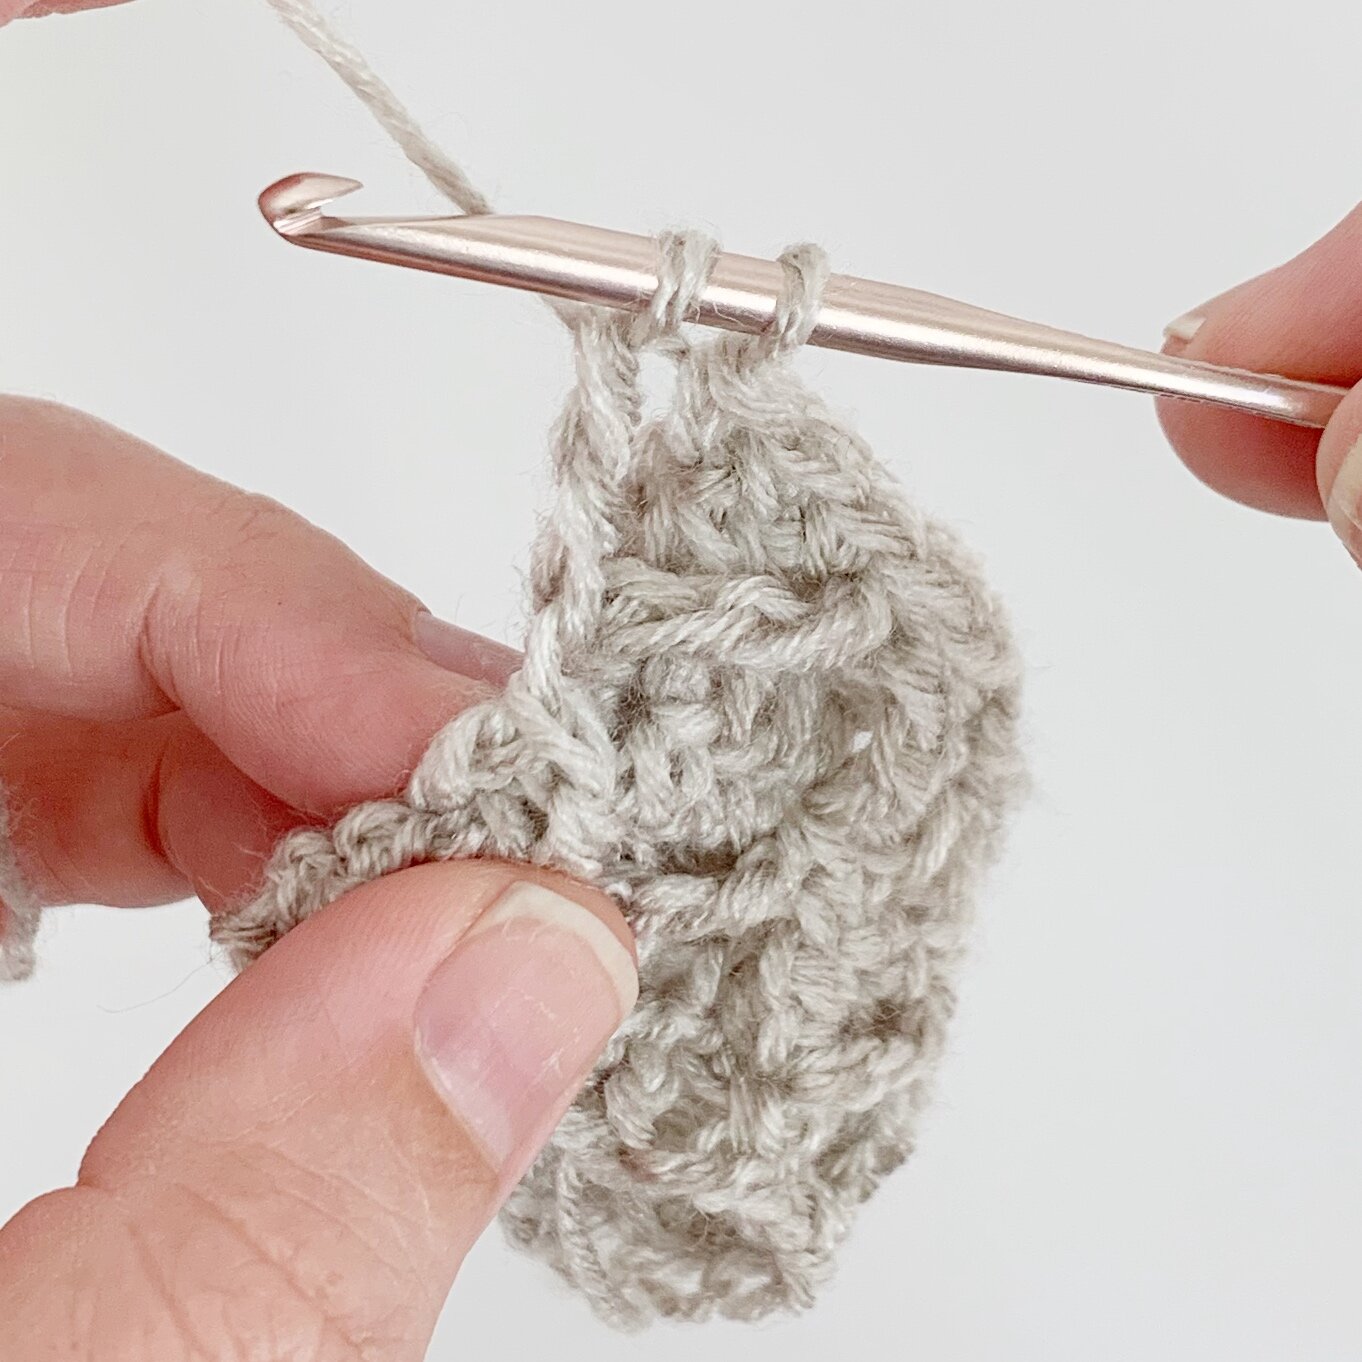
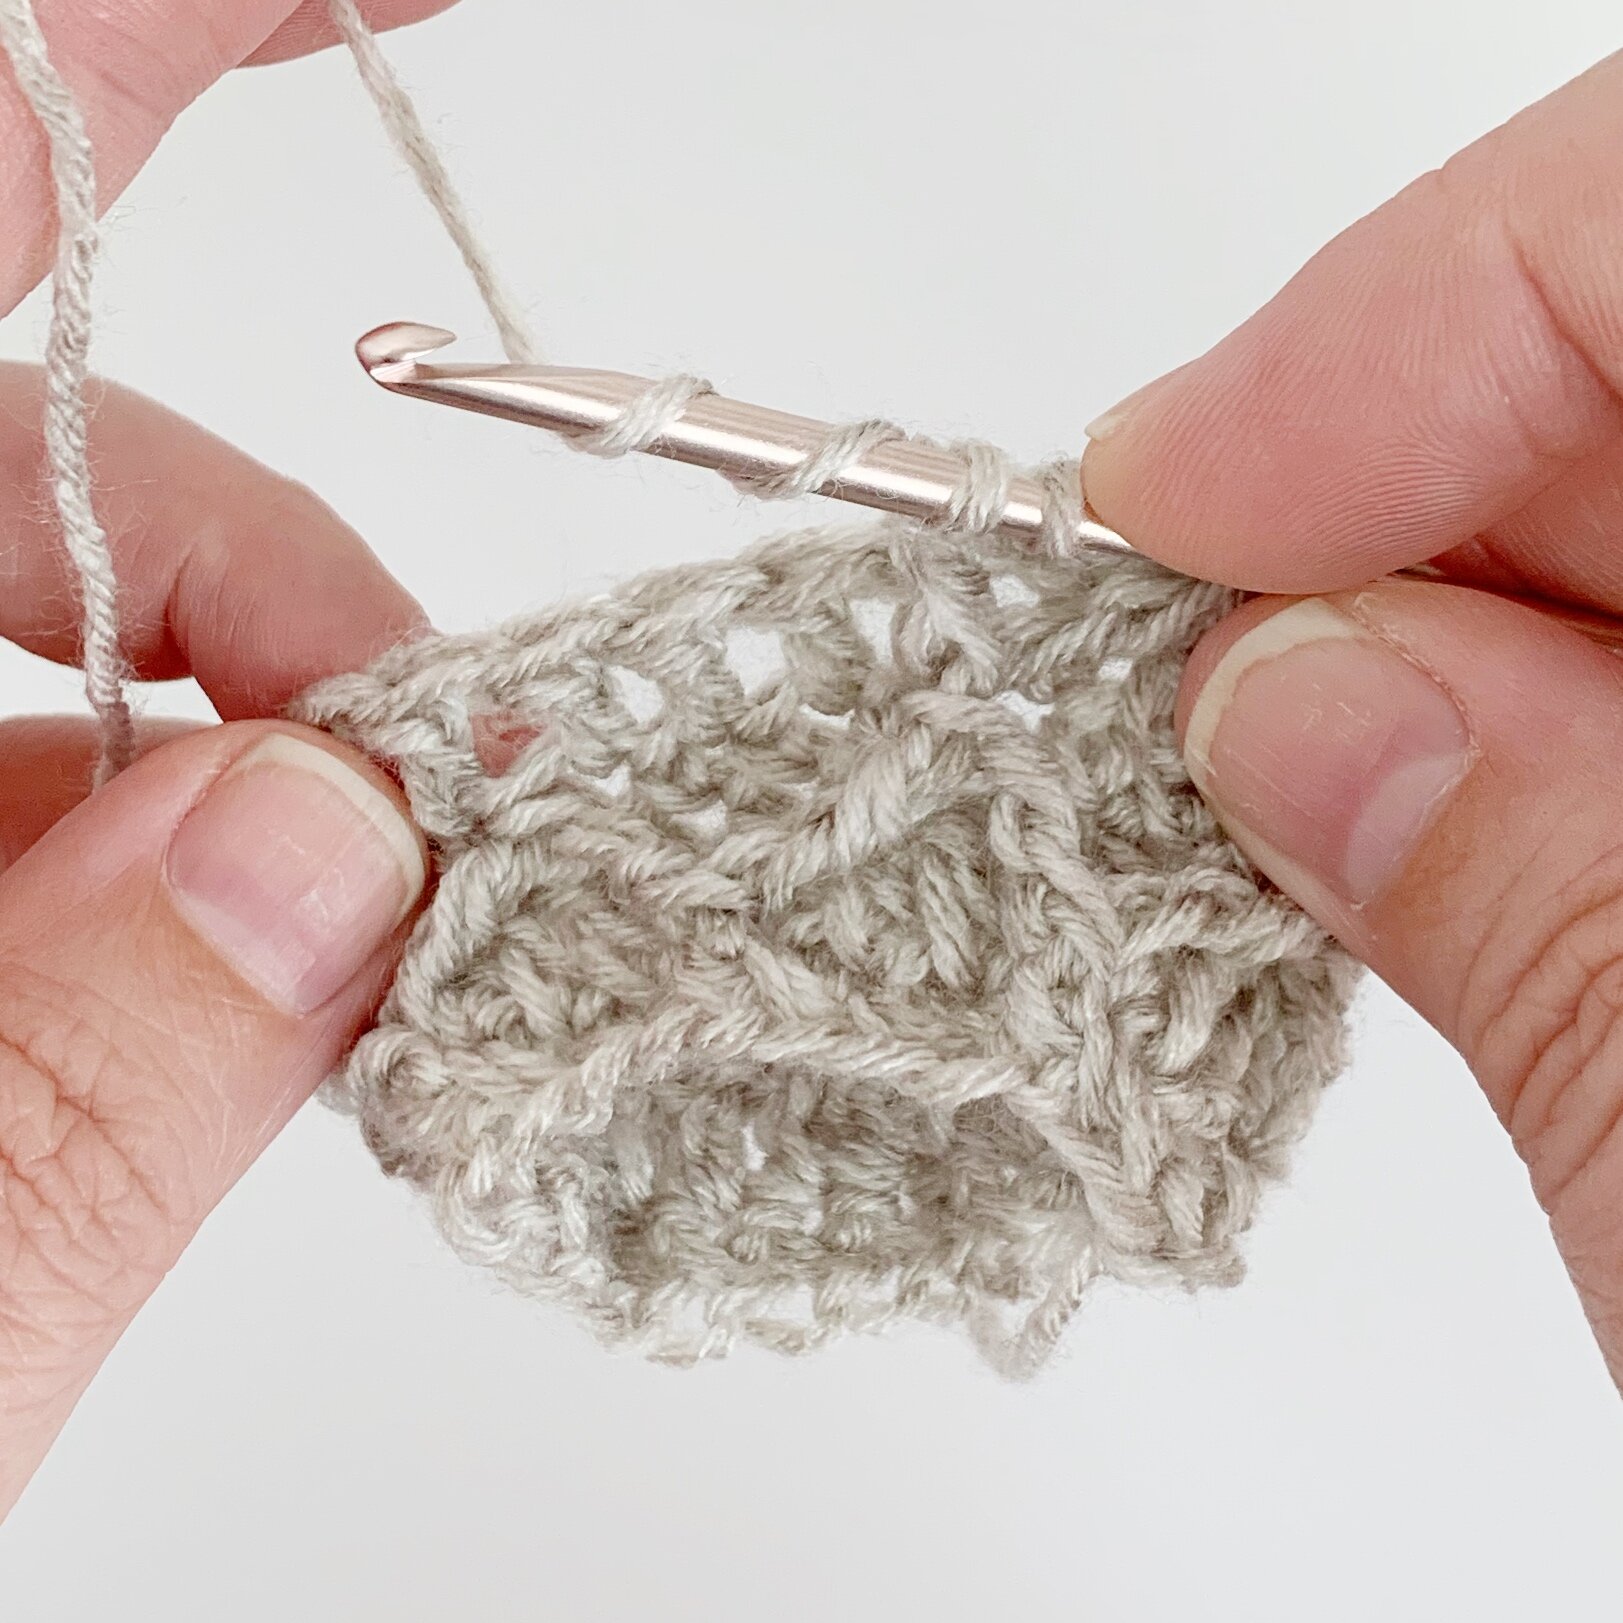
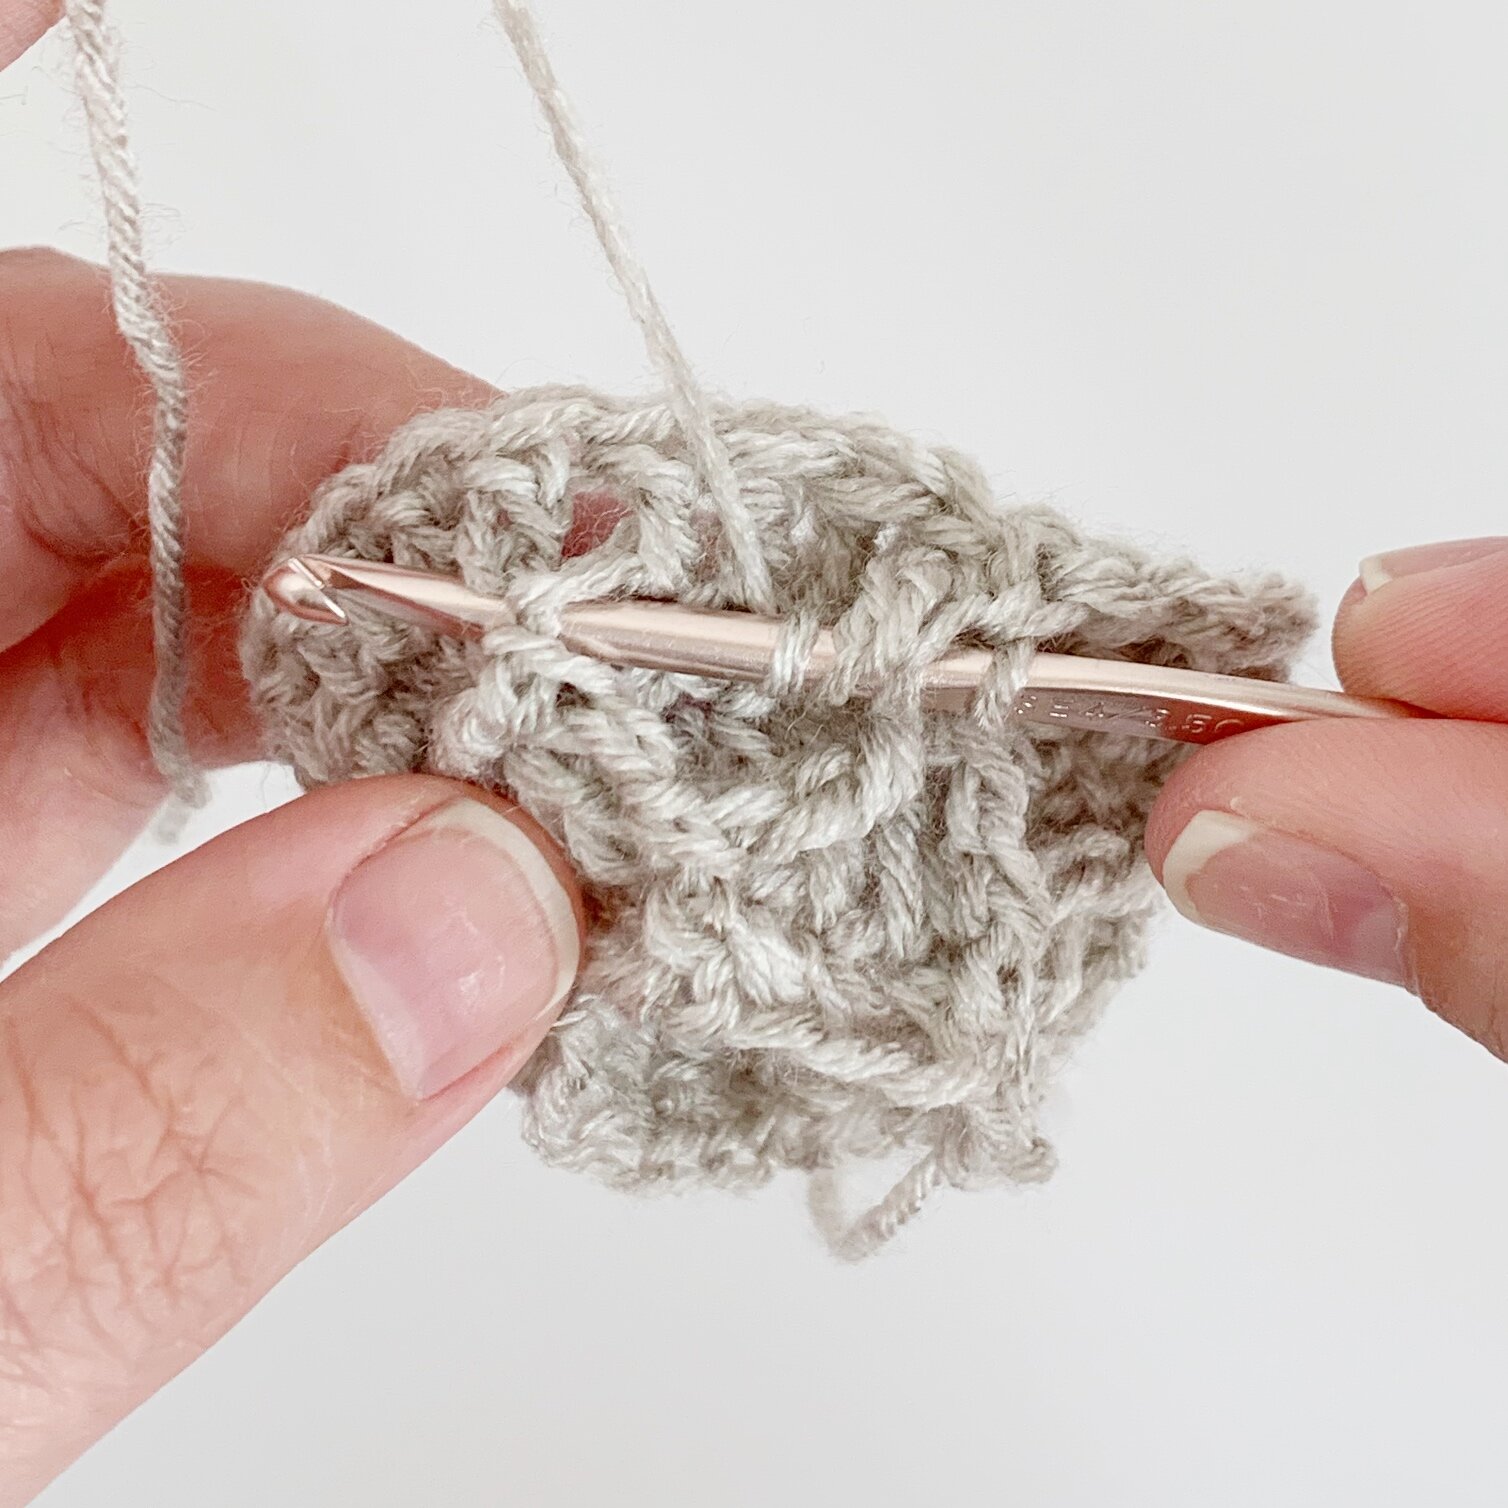
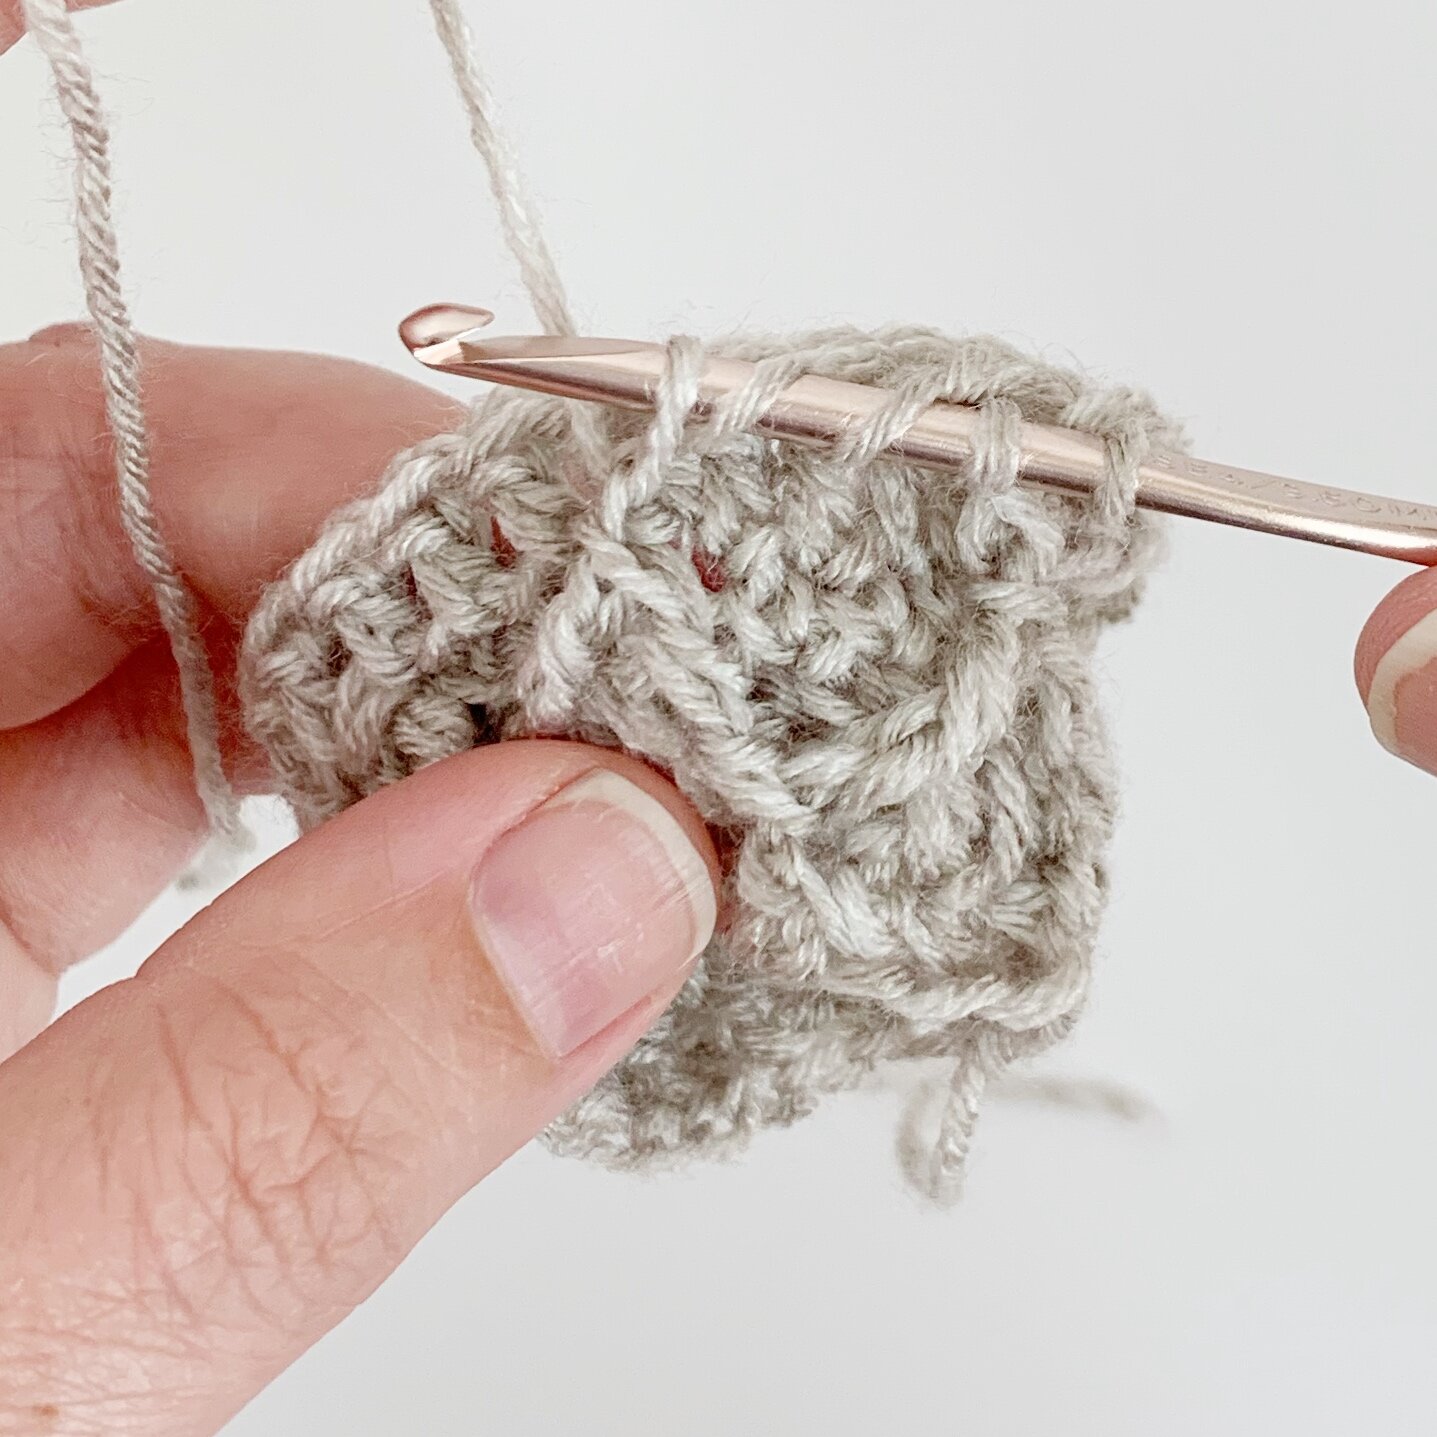
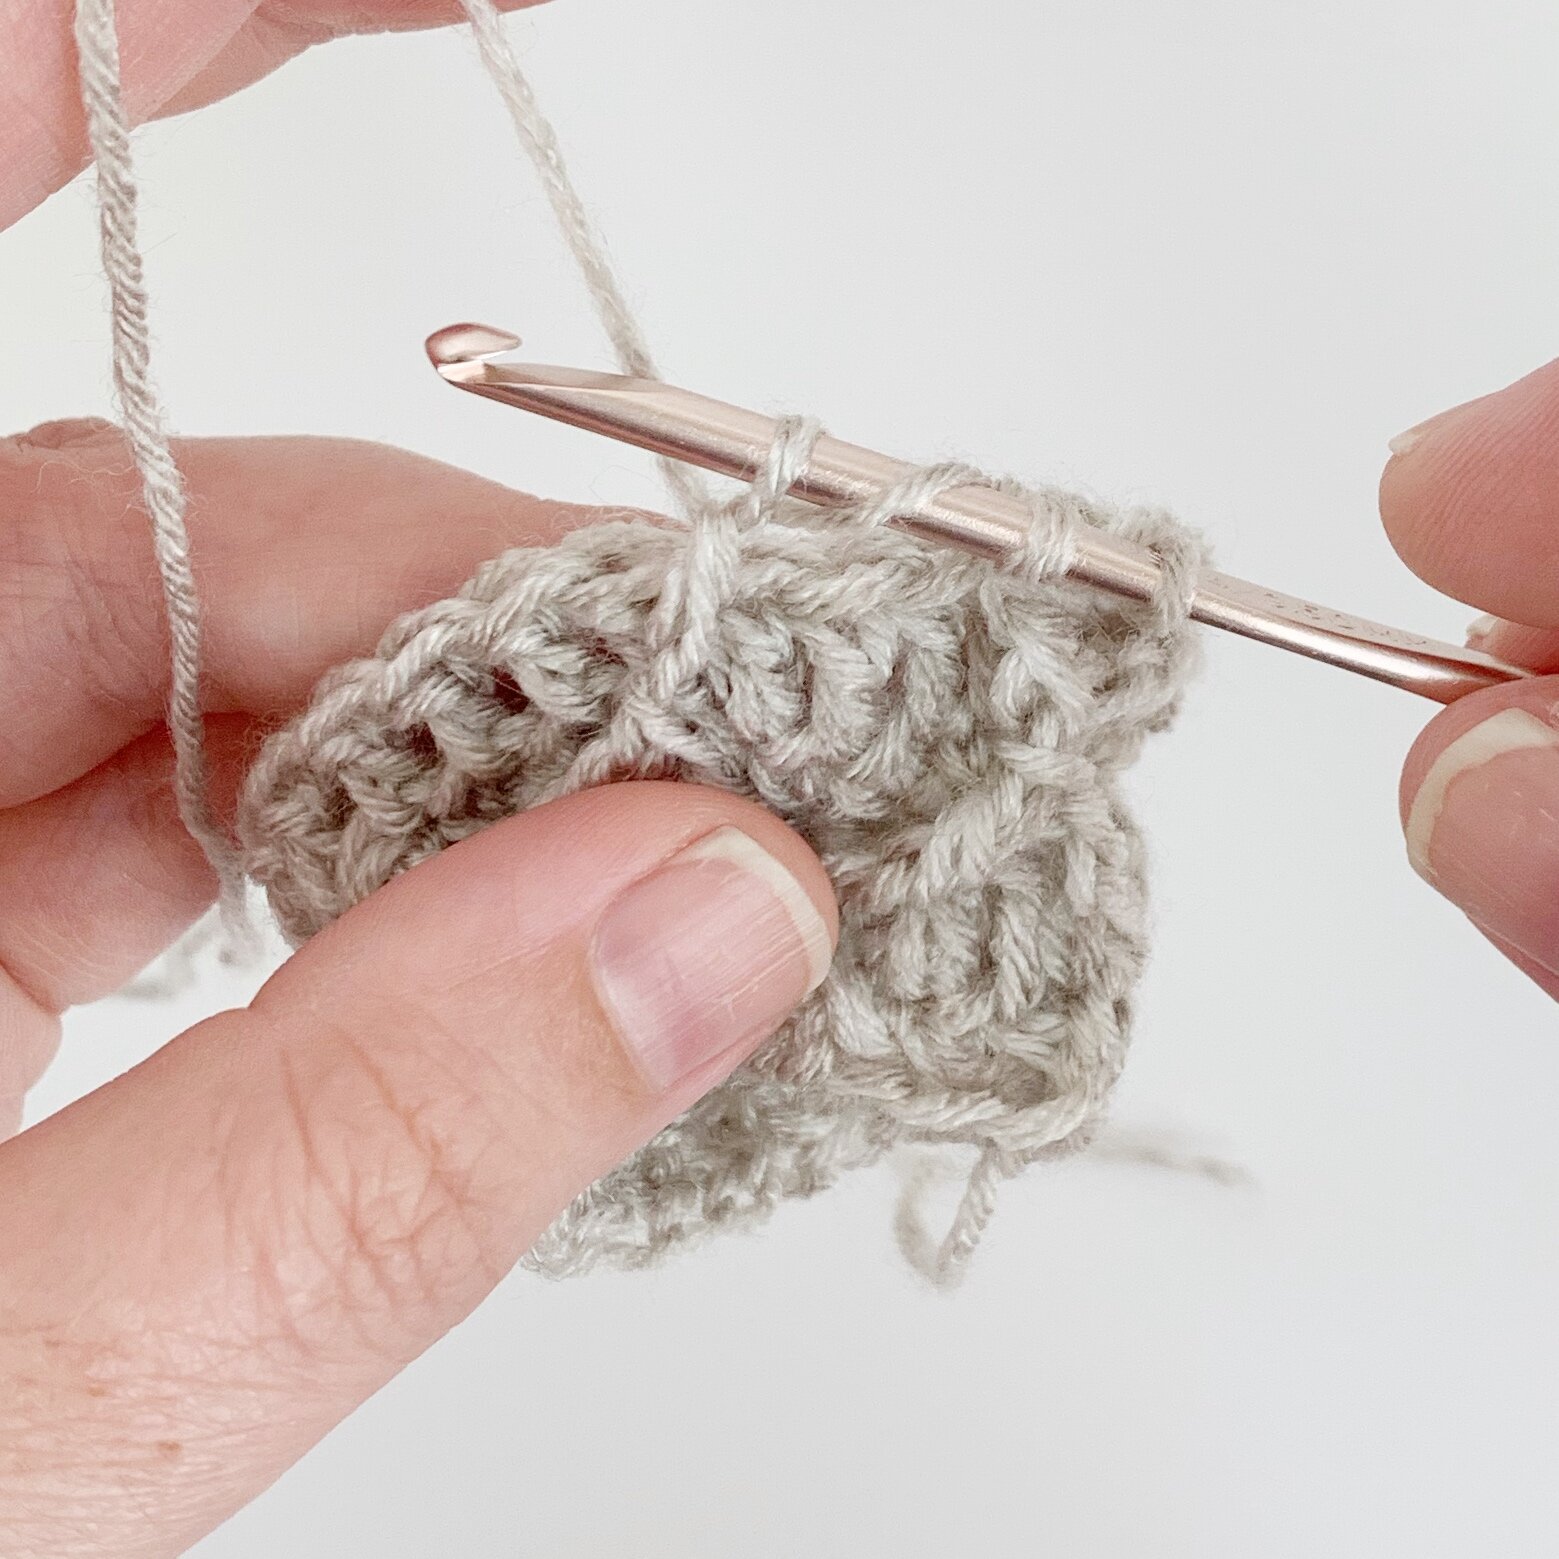
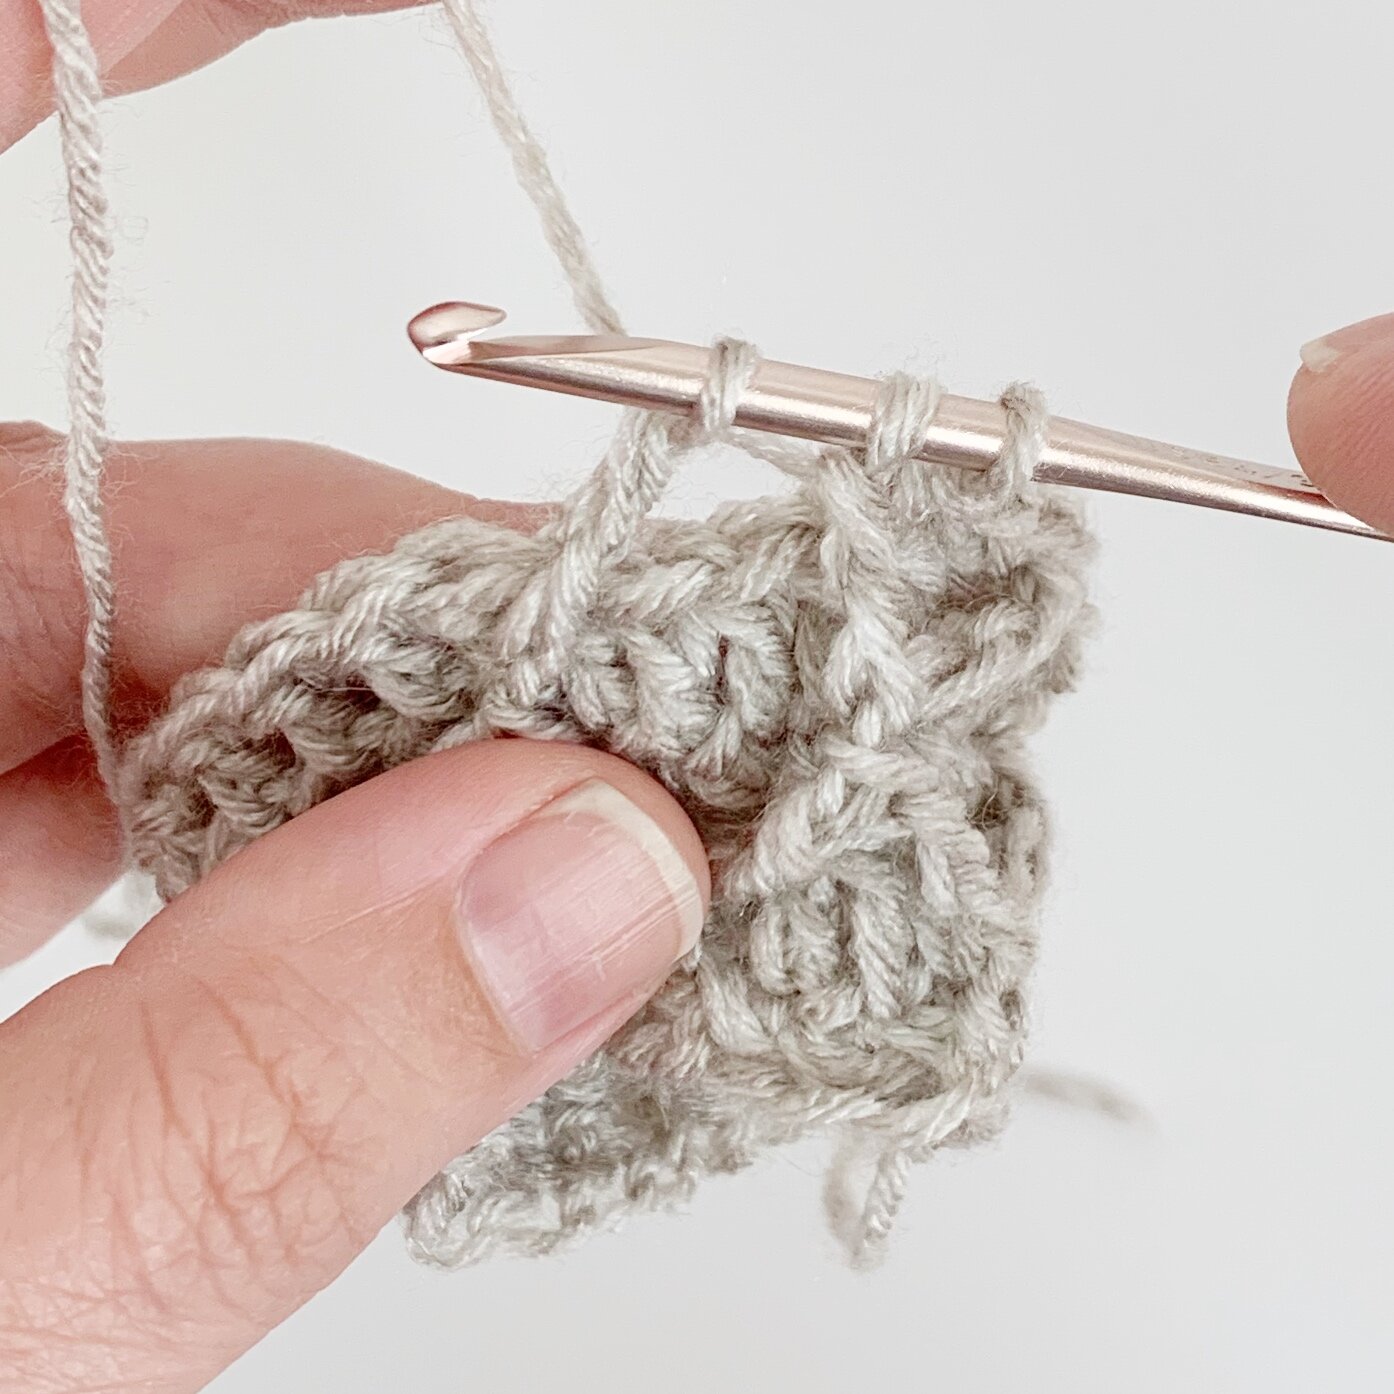
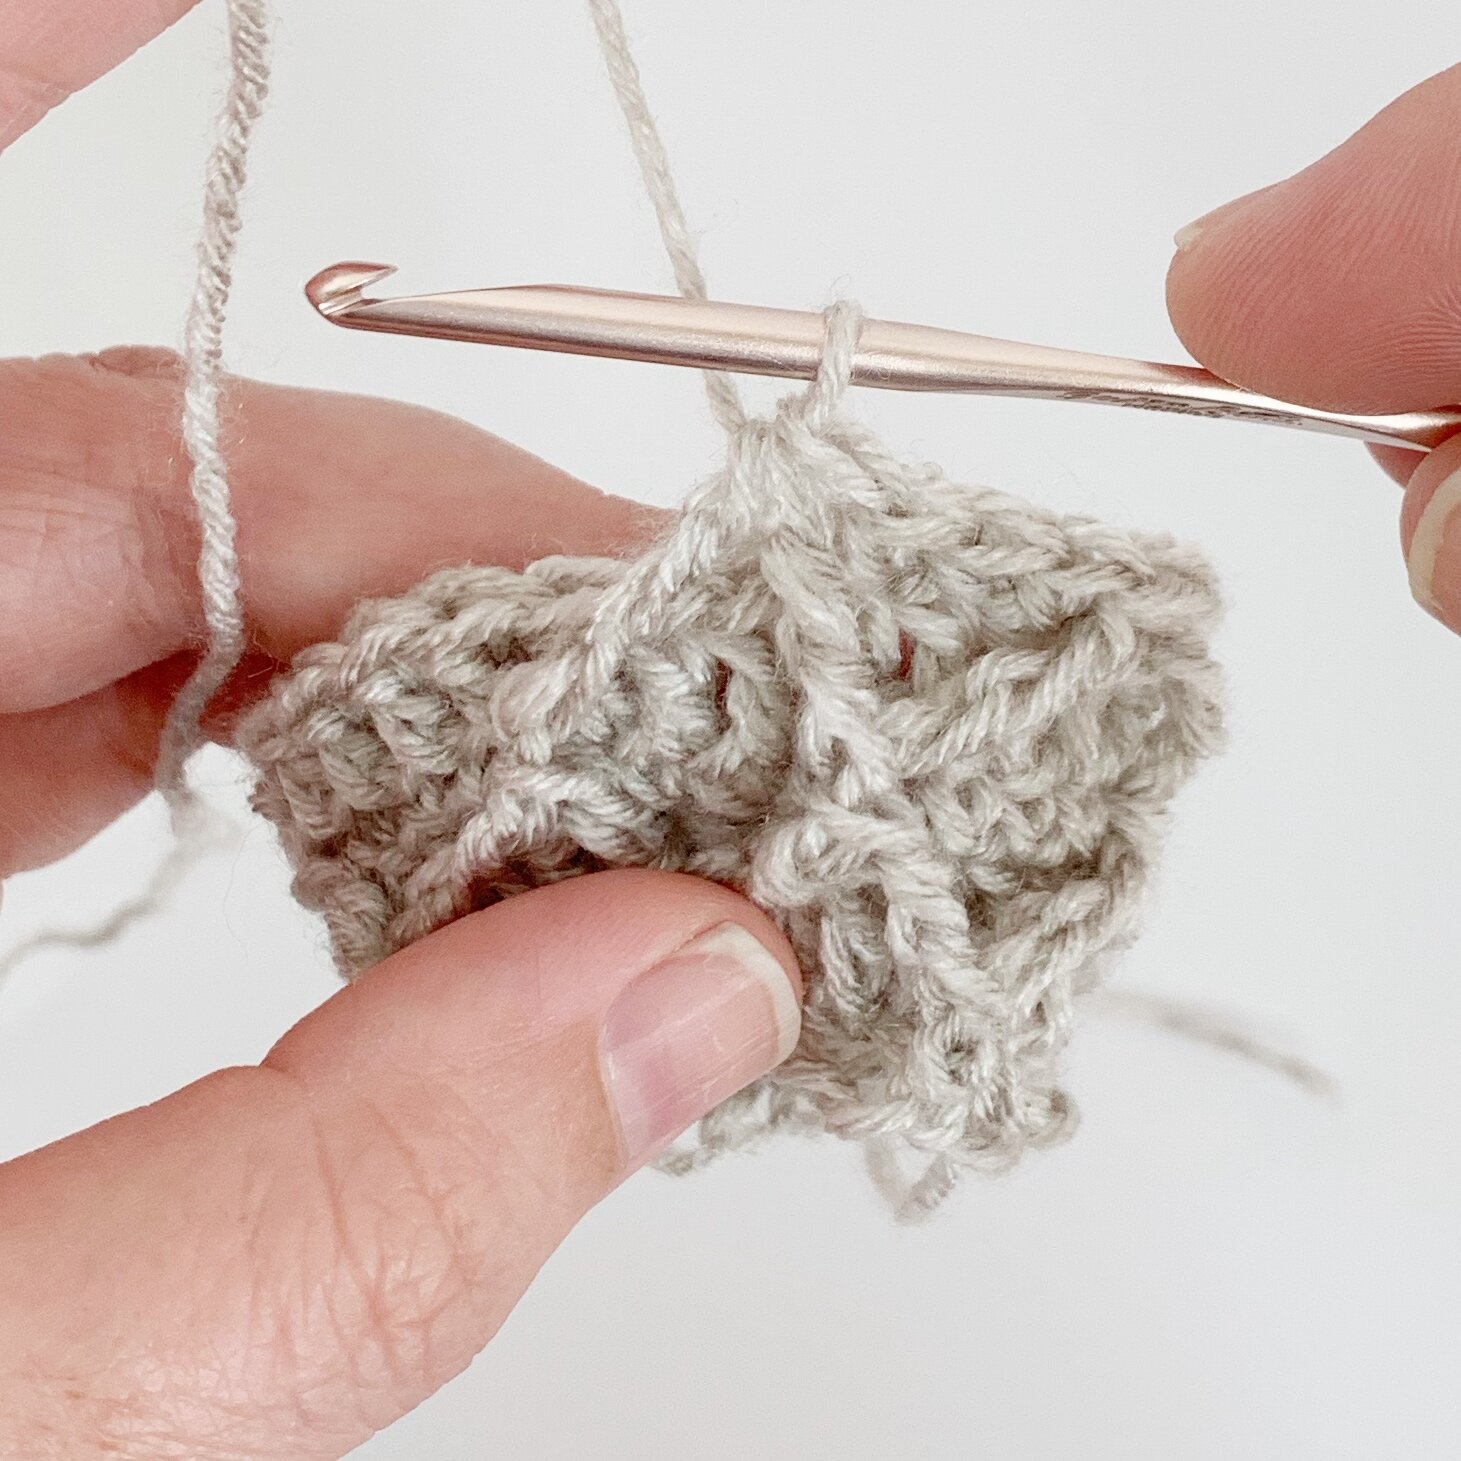
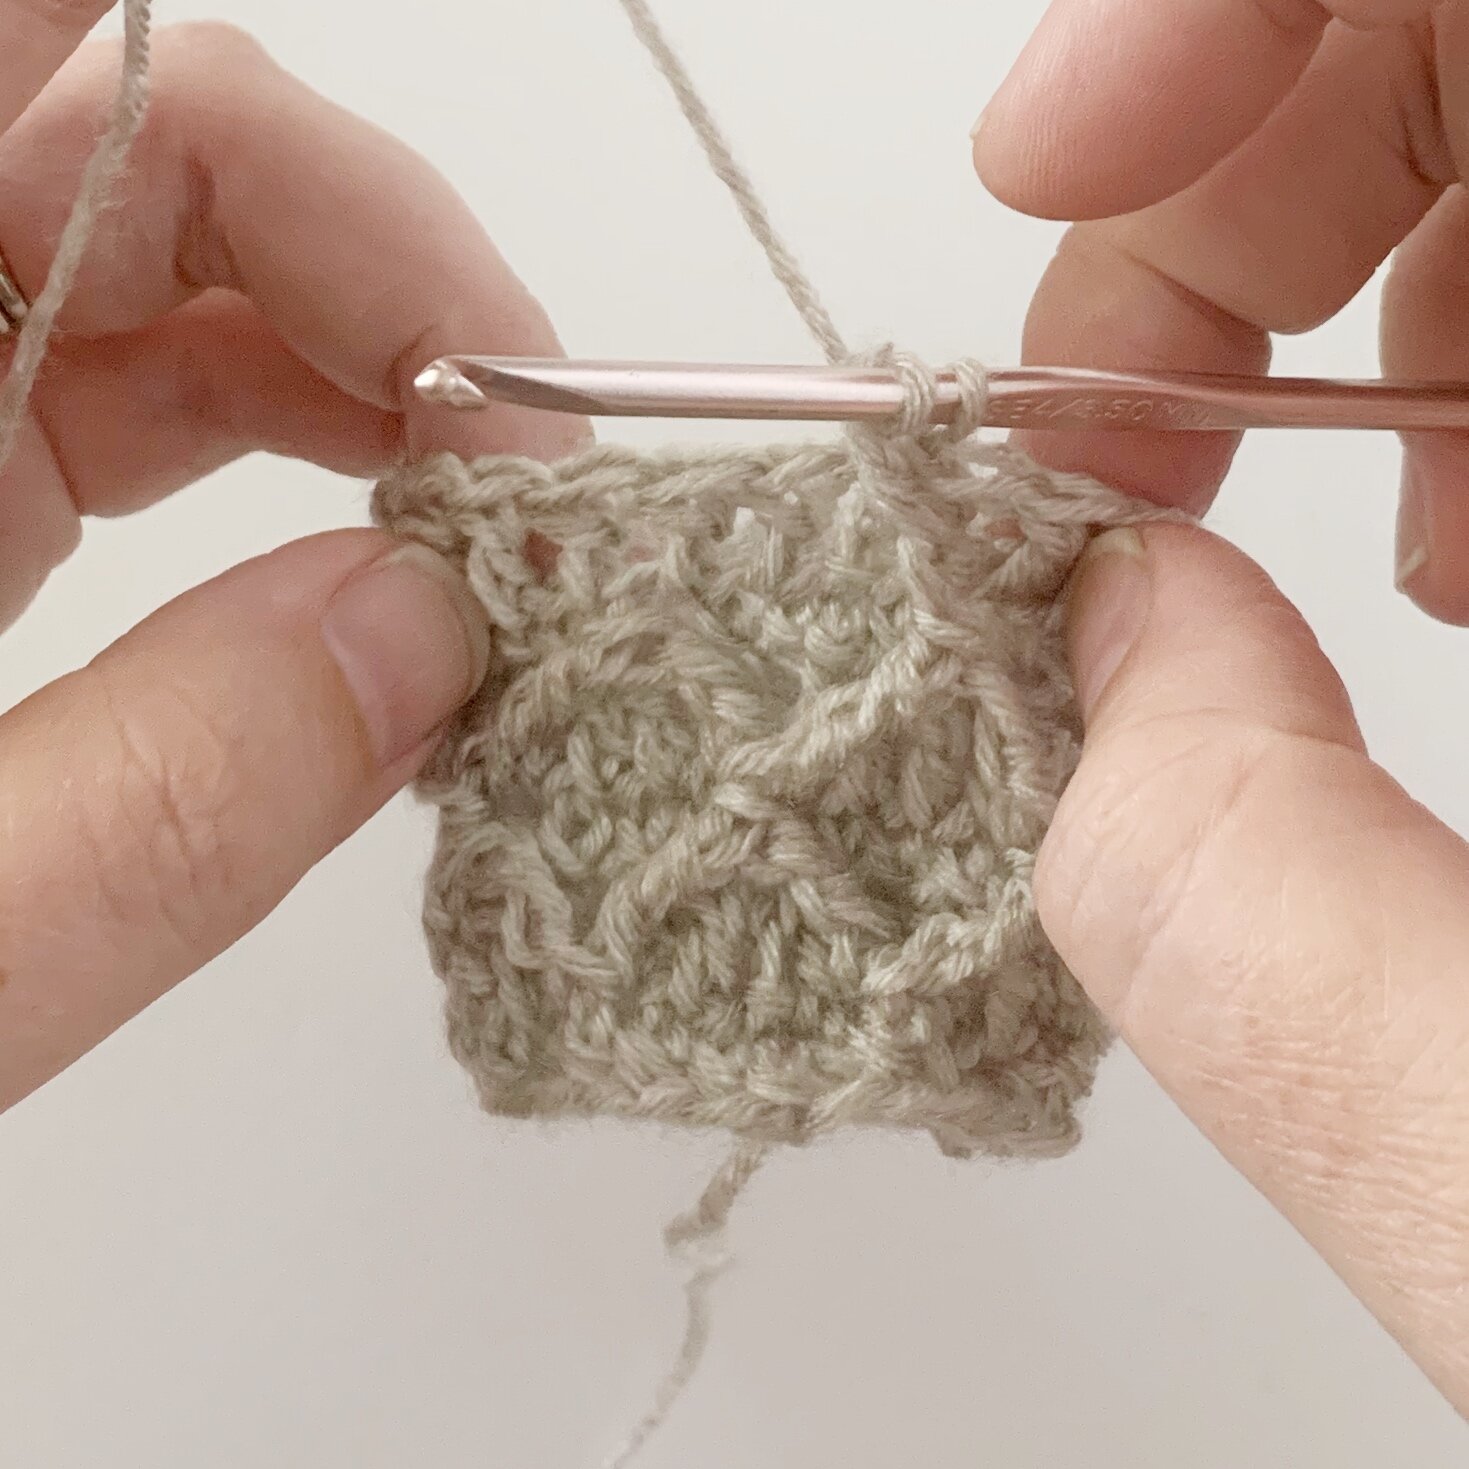
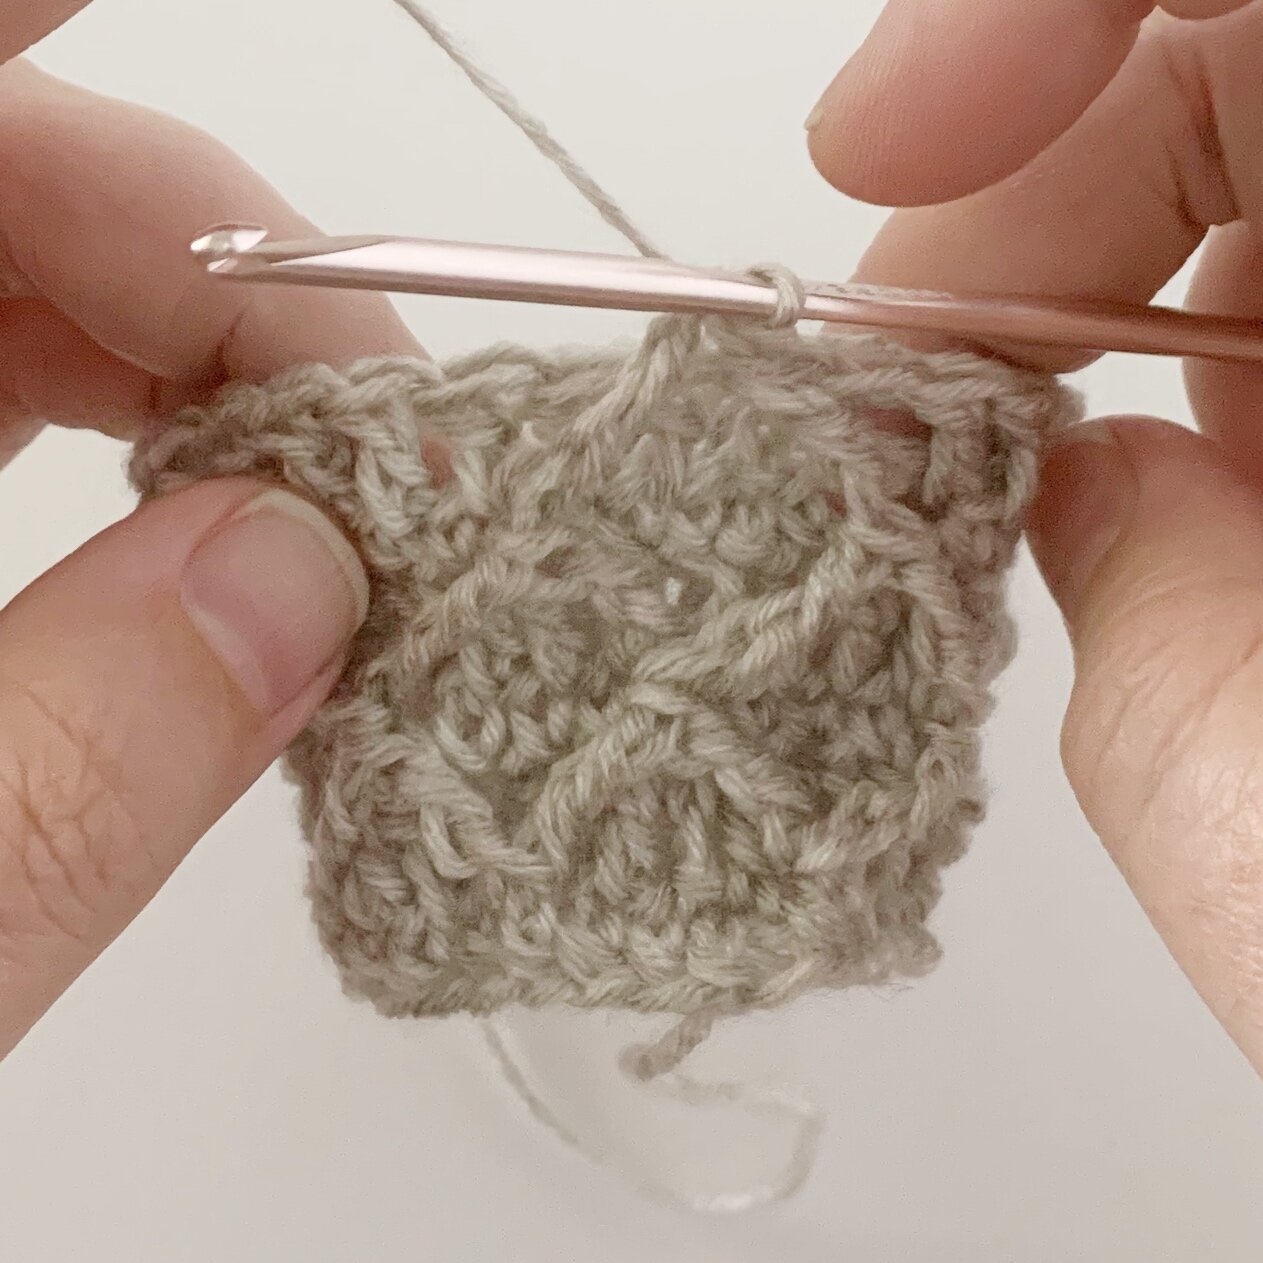
To work a fptrc2tog you will yo twice, insert hook from front to back and then to the front going behind the stitch indicated. Yo and pull up a loop (4 loops on hook), yo and draw through 2 loops (3 loops on hook), yo and draw through 2 loops, leave the last two loop on hook. Yo twice and insert hook from front to back and then to the front going behind the next stitch indicated. Yo and pull up a loop (5 loops on hook), yo and draw through 2 loops (4 loops on hook), yo and draw through 2 loops (3 loops on hook), yo and draw through all 3 loops.
Pattern:
Ch 160, sl st to 1st chain to join making sure not to twist the chains.
Round 1: ch 1, sc in same st as join and in each ch around, sl st to top of 1st st to join. (160)
Round 2: ch 3 (counts as 1st st), dc in each st around, sl st to top of ch 3 to join. (160)
At this point it may be helpful to place stitch markers in every fourth stitch, starting in the join, to help set up your initial diamond stitch row.
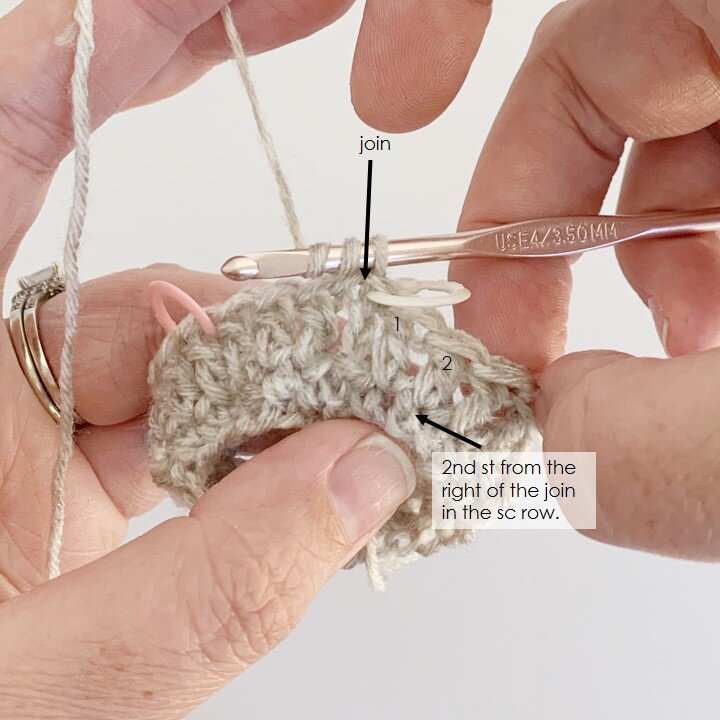
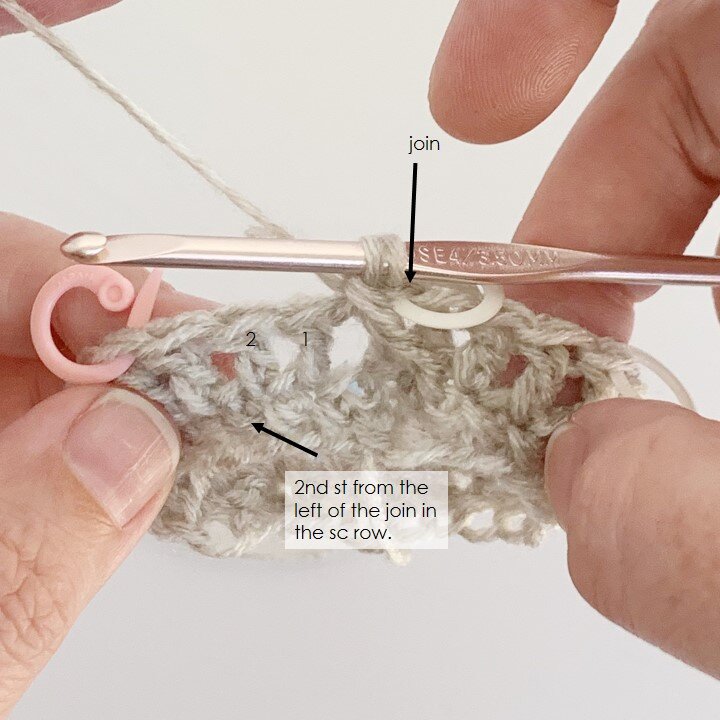
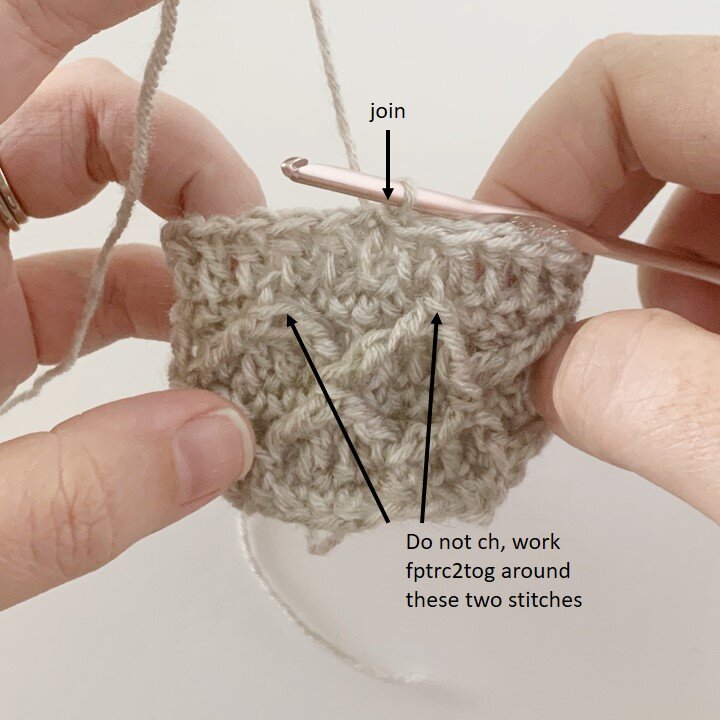
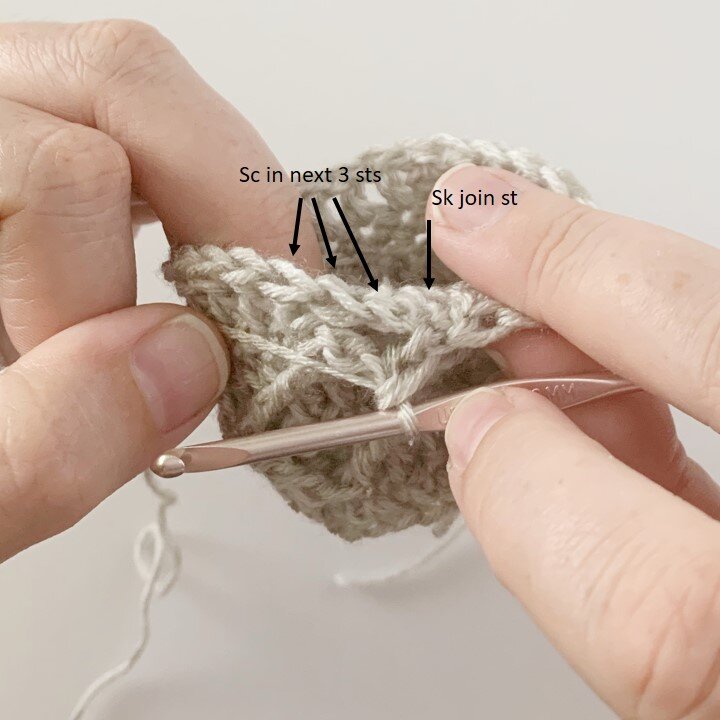
Round 3: do not ch, fptrc2tog working back into the sc row two stitches to the right of the join and into the sc row two stitches to the left of the join,
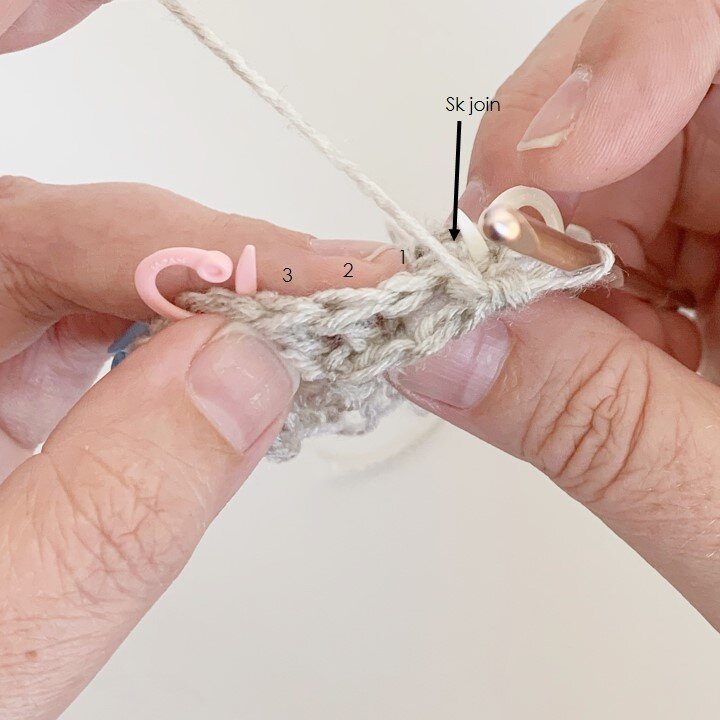
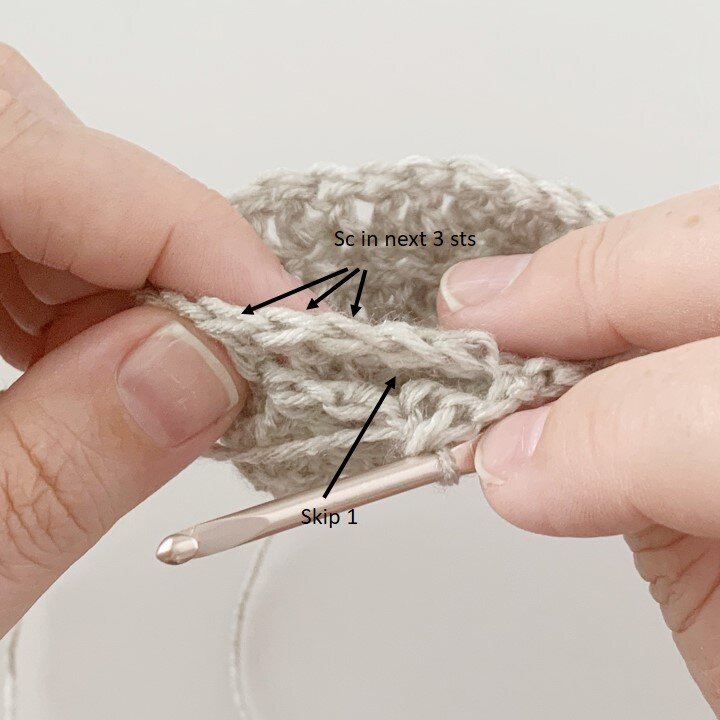
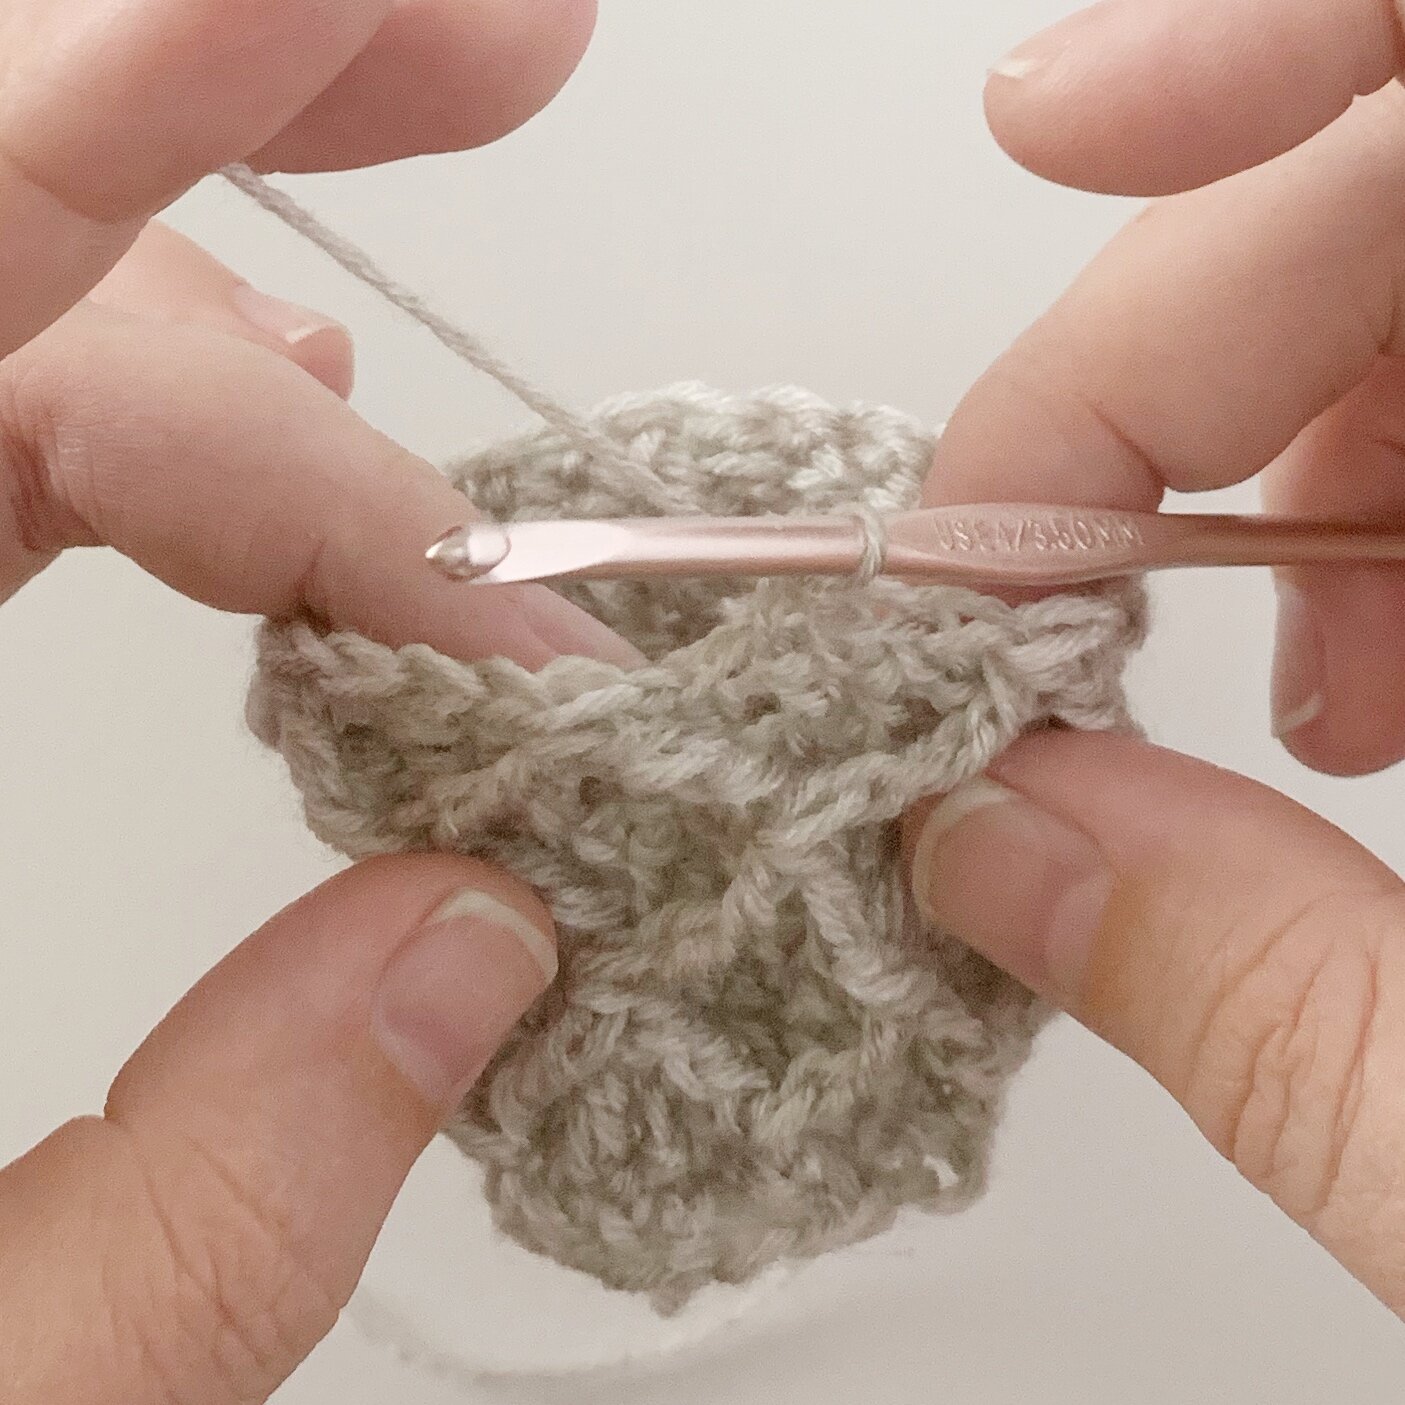
Now working back into the top of the dc stitches of round 2, sk 1, sc 3,
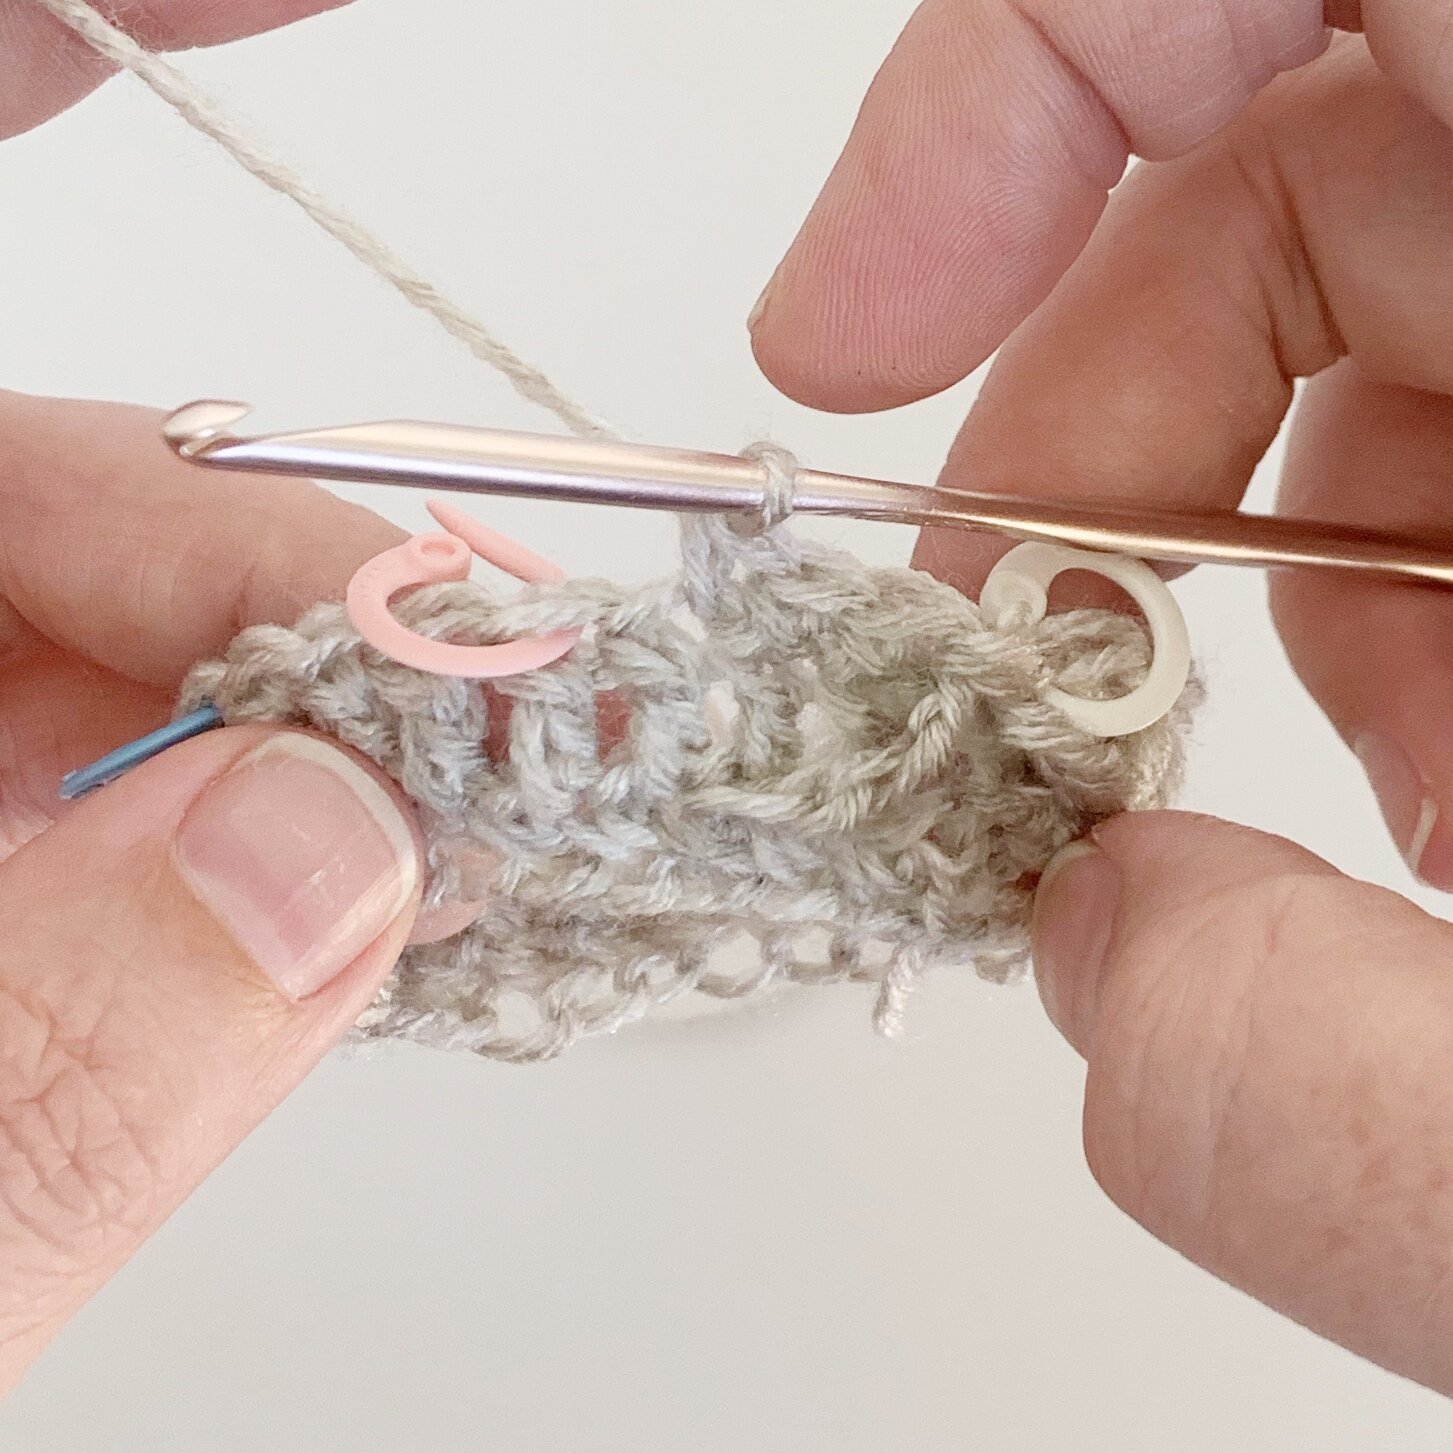
*fptrc2tog working into the same st as the previous fptrc2tog and the fourth stitch from that fptrc2tog in the sc row,
Working back into the dc sts, sk 1, sc 3, repeat from * around, sl st to top of 1st fptrc2tog st to join. (160)
Round 4: ch 3 (counts as 1st st), dc into each st around, sl st to top of ch 3 to join. (160)
Round 5: ch 1, sc into same st as join and in next st, *fptrc2tog around the top of the first two fptrc2tog two rounds below, working back into the dc from the previous round, sk 1, sc 3, repeat from * until last set of fptrc2tog, working back into the dc from the previous round, sk 1, sc, sl st to top of 1st st to join. (160)
Round 6: ch 3 (counts as first st), dc in each st around, sl st to top of ch 3 to join. (160)
Round 7: do not ch, working around the fptrc2tog to the right of the join and in the next fptrc2tog two rows below, *fptrc2tog, working back into dc, sk 1, sc 3, repeat from * around, sl st to the top of the first fptrc2tog to join. (160)
Repeat rounds 4-7 until pumpkin measures 17.5” high.

Fasten off leaving a long tail for sewing. Weave in all other ends.
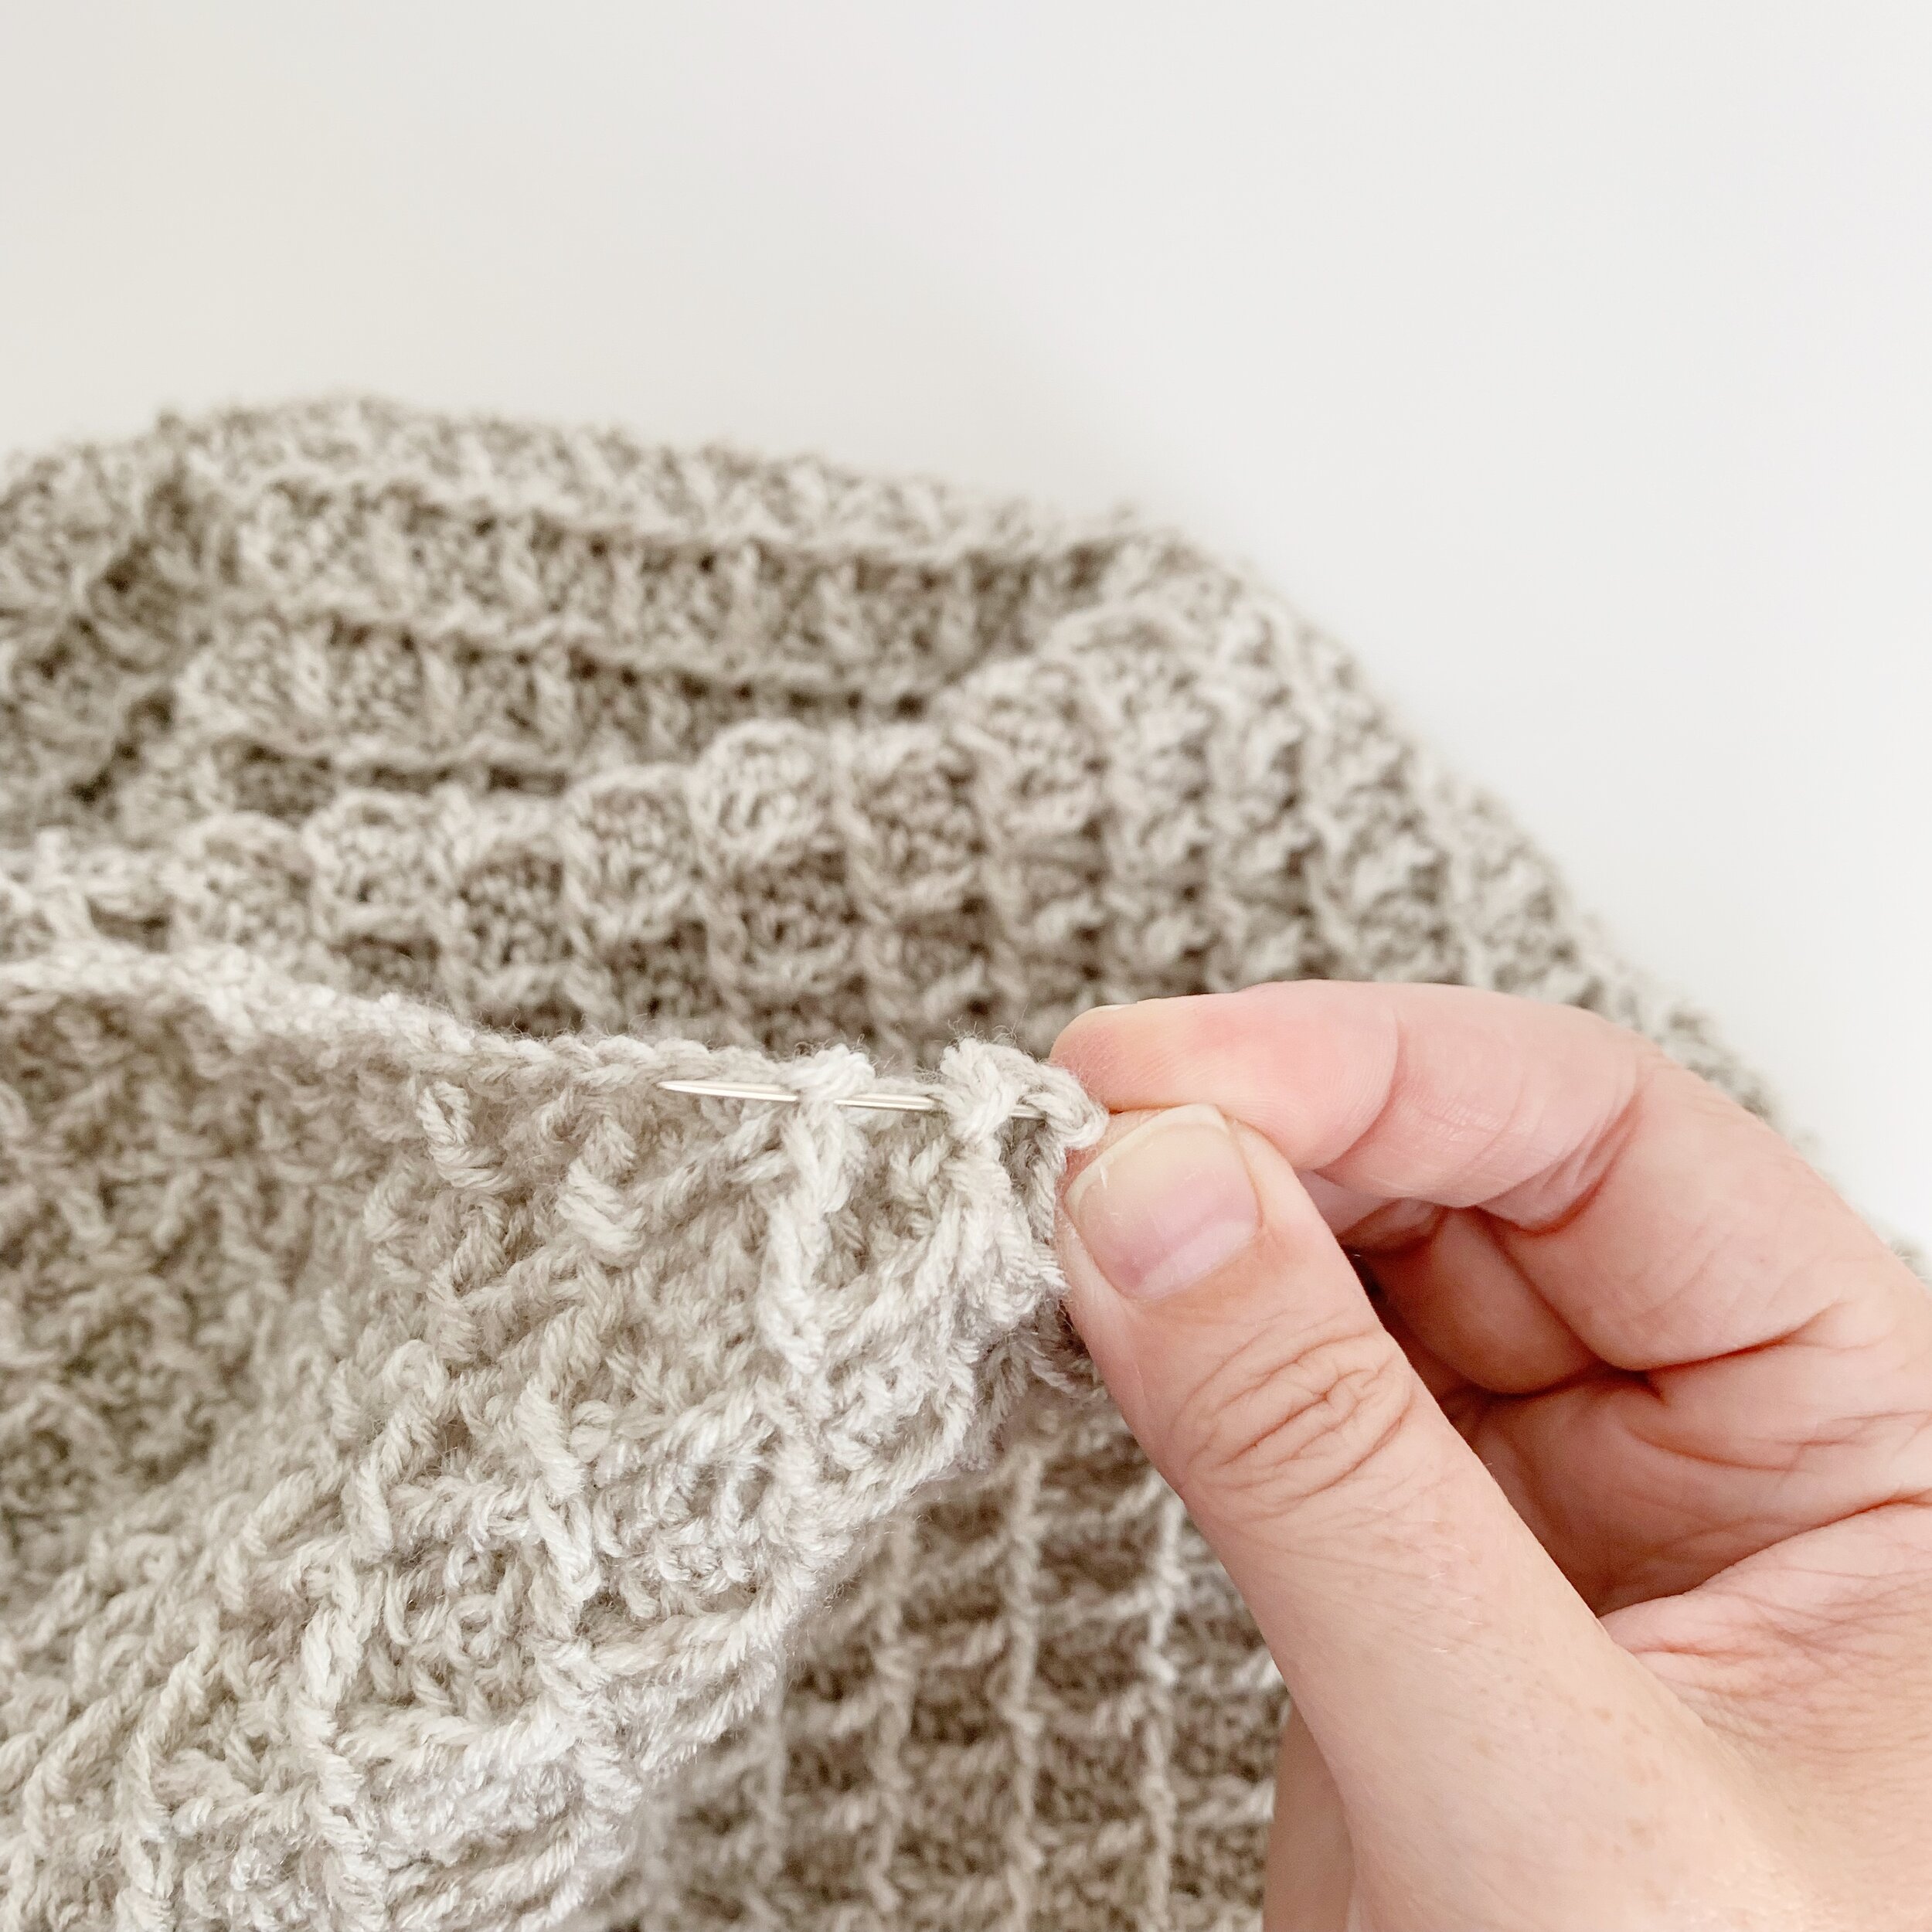
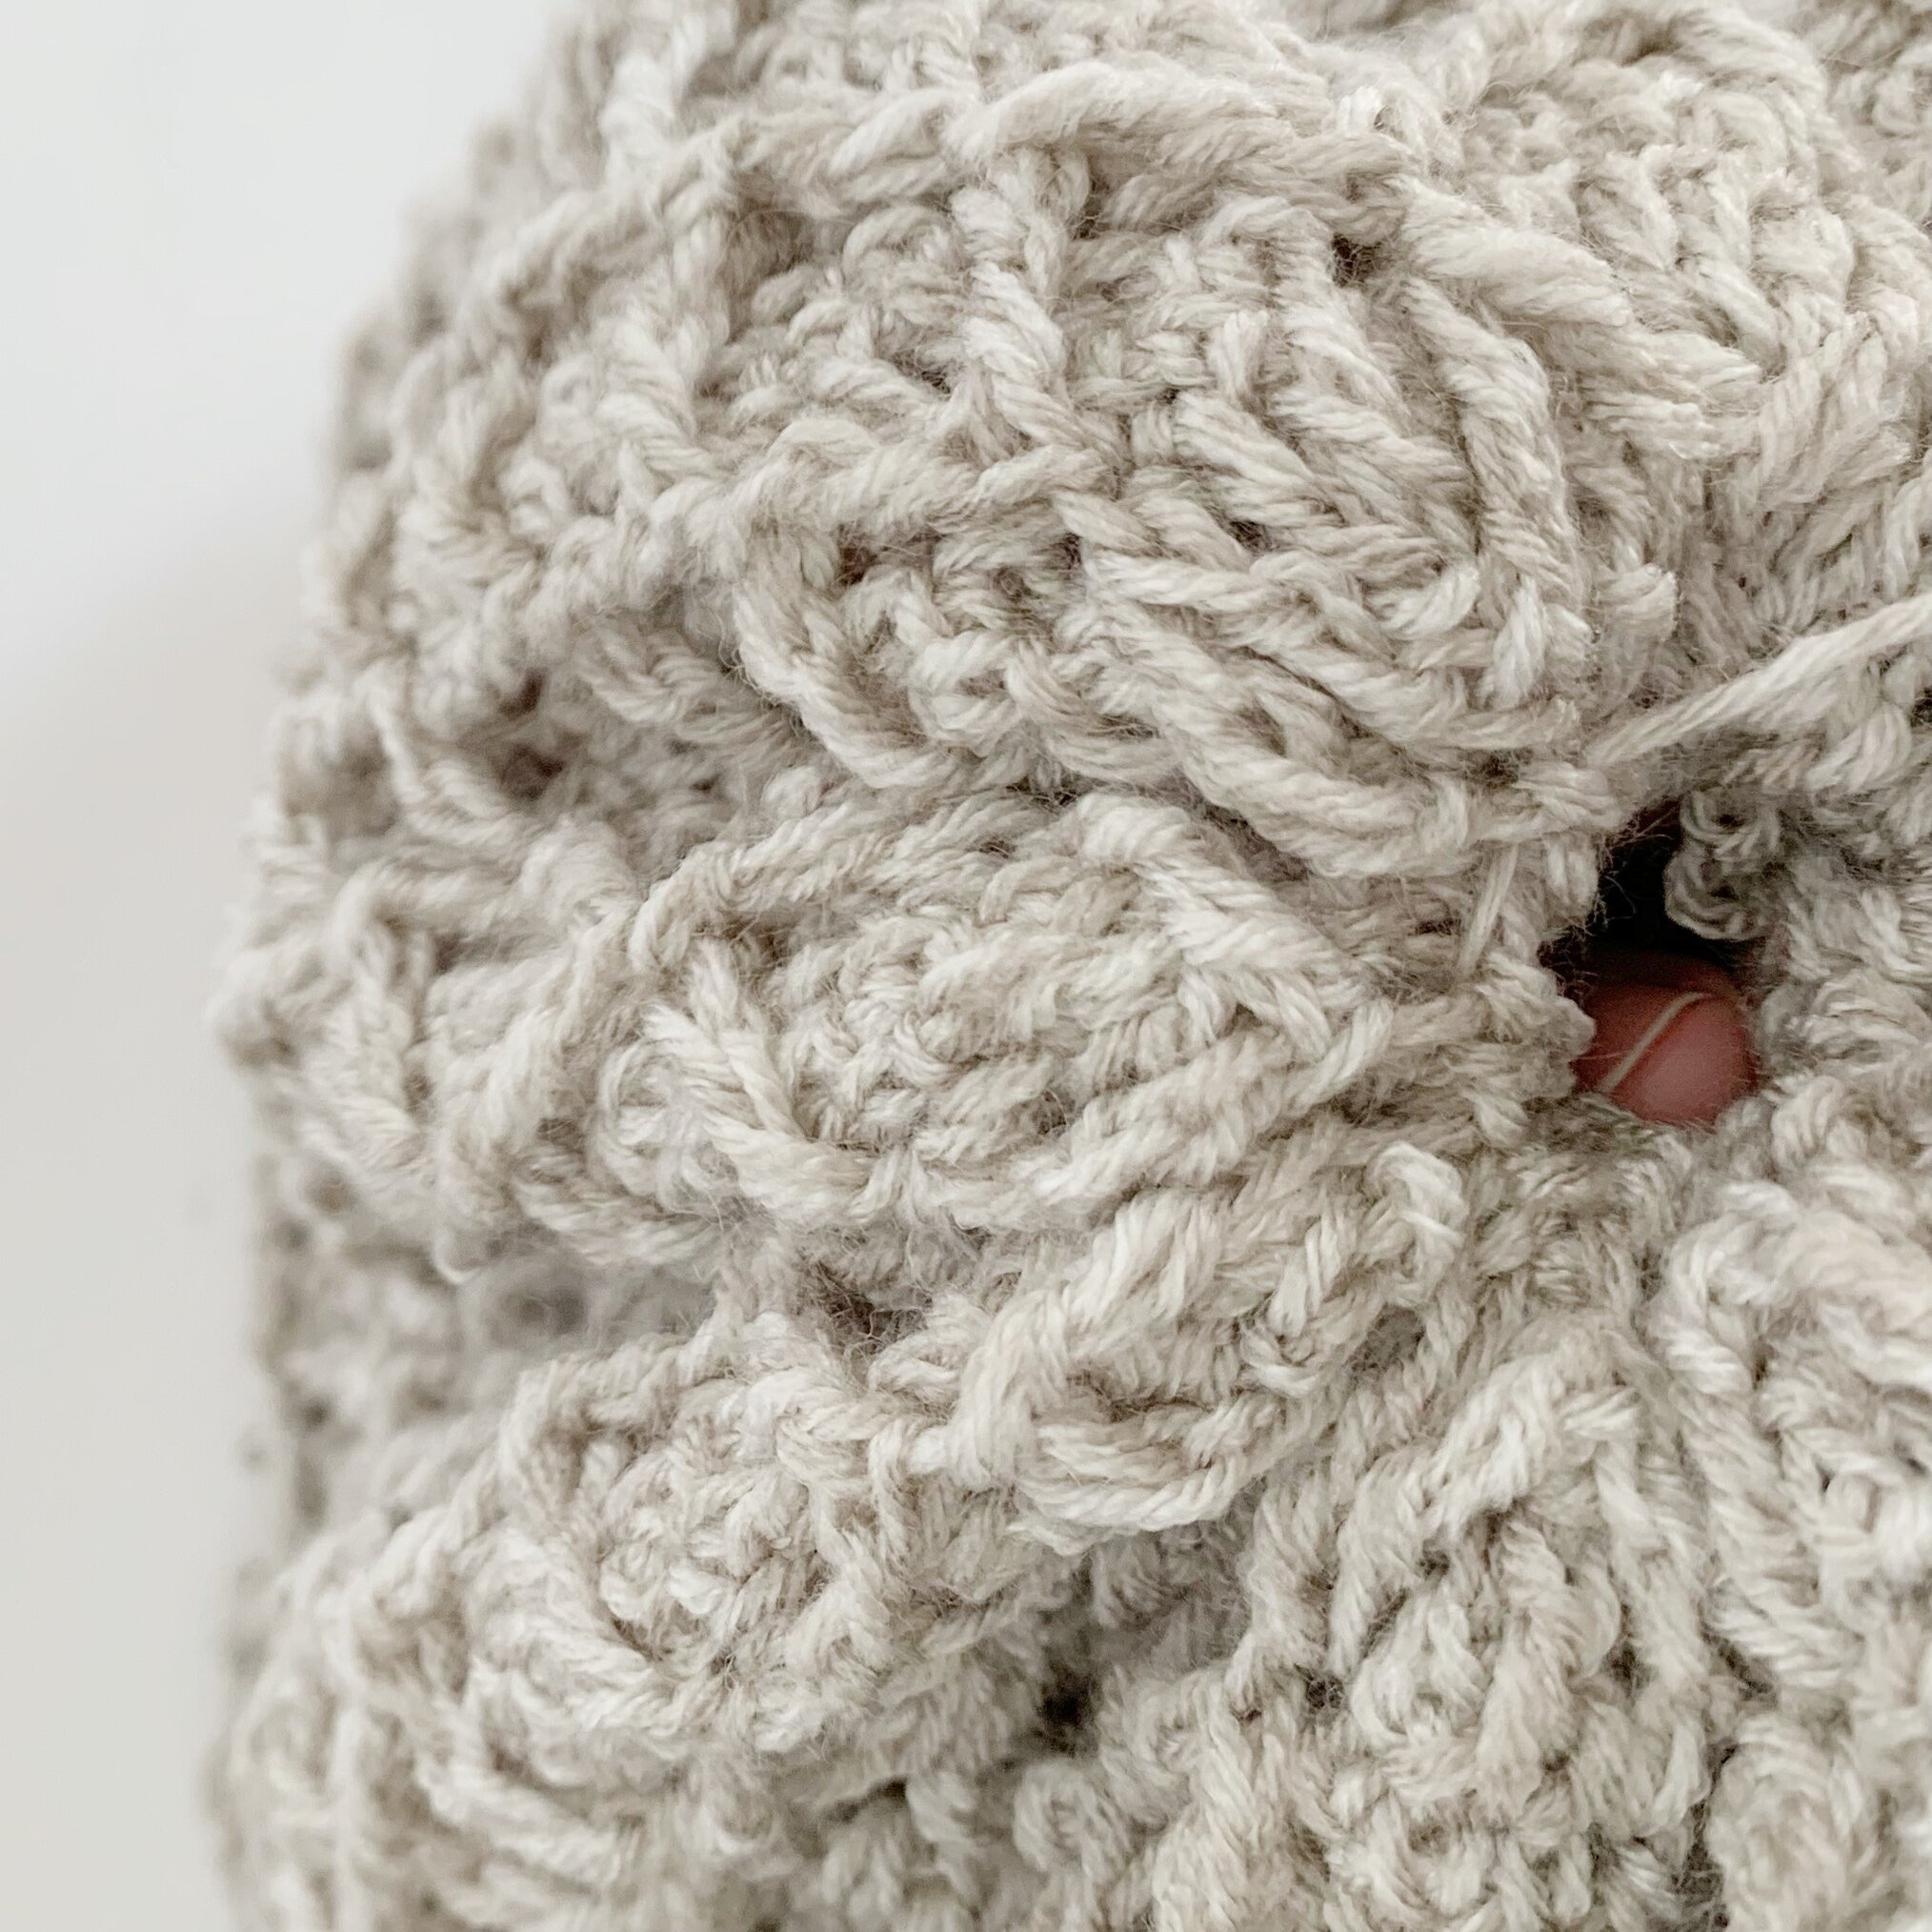
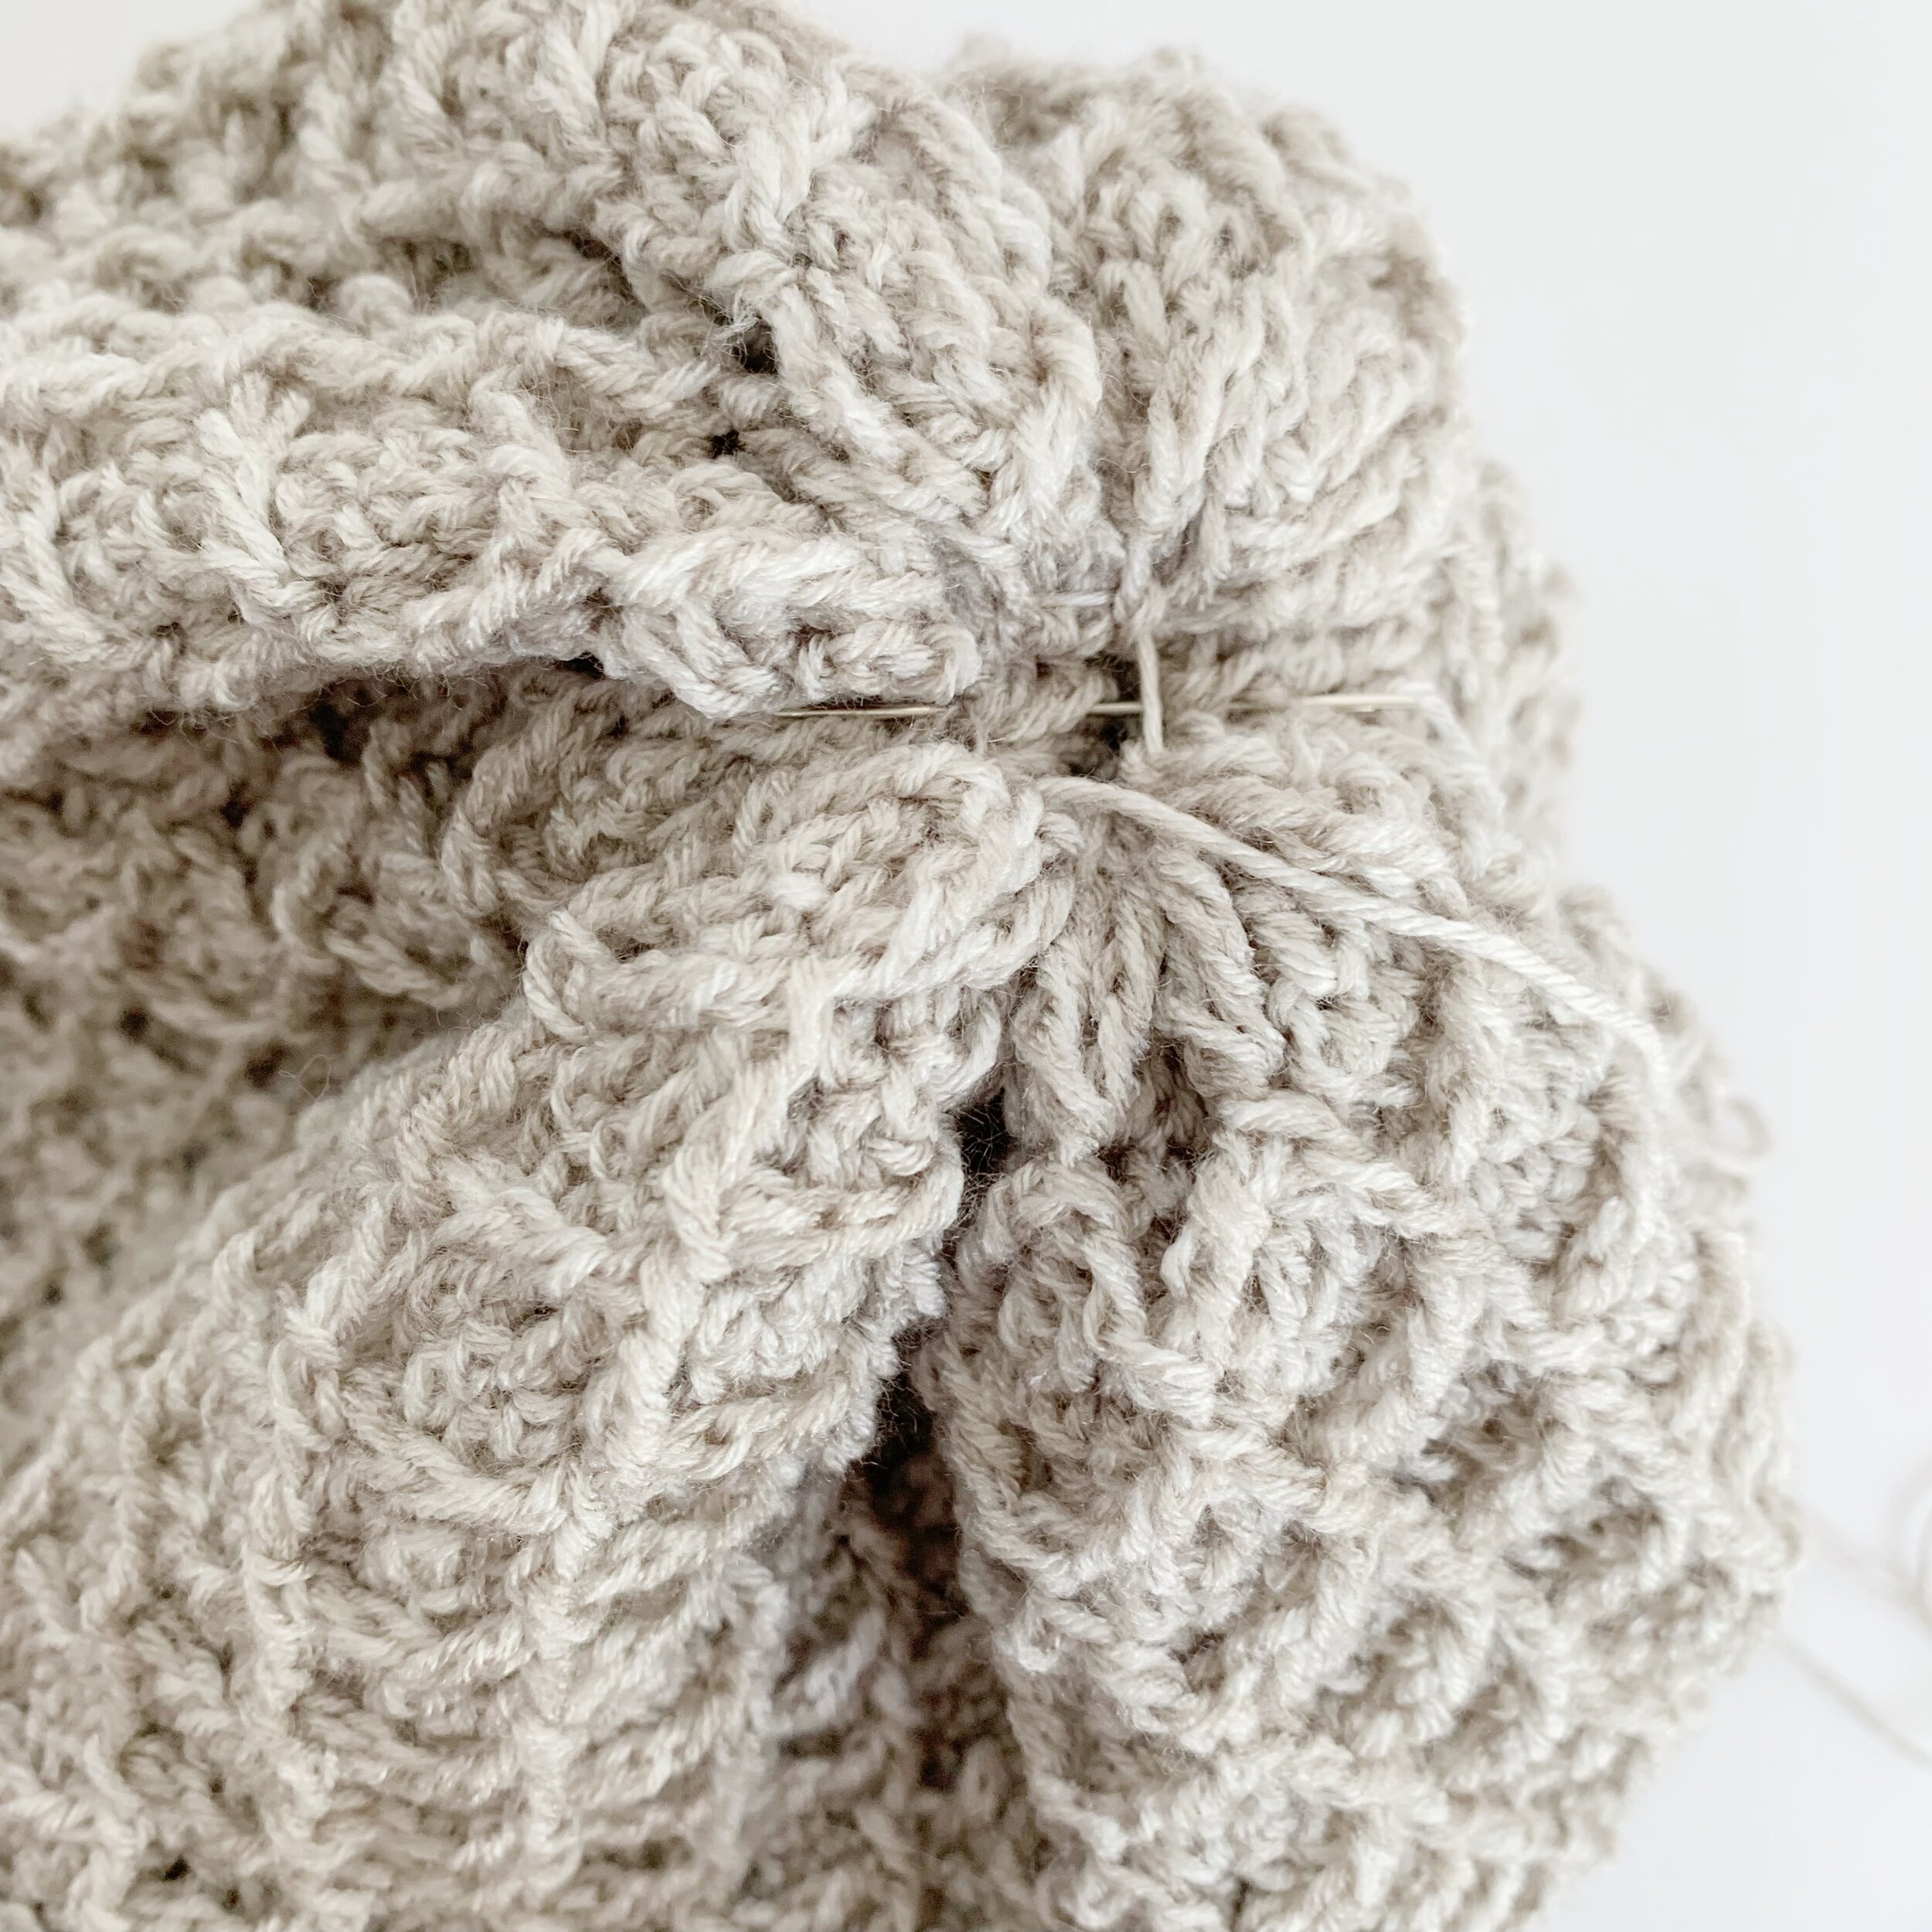
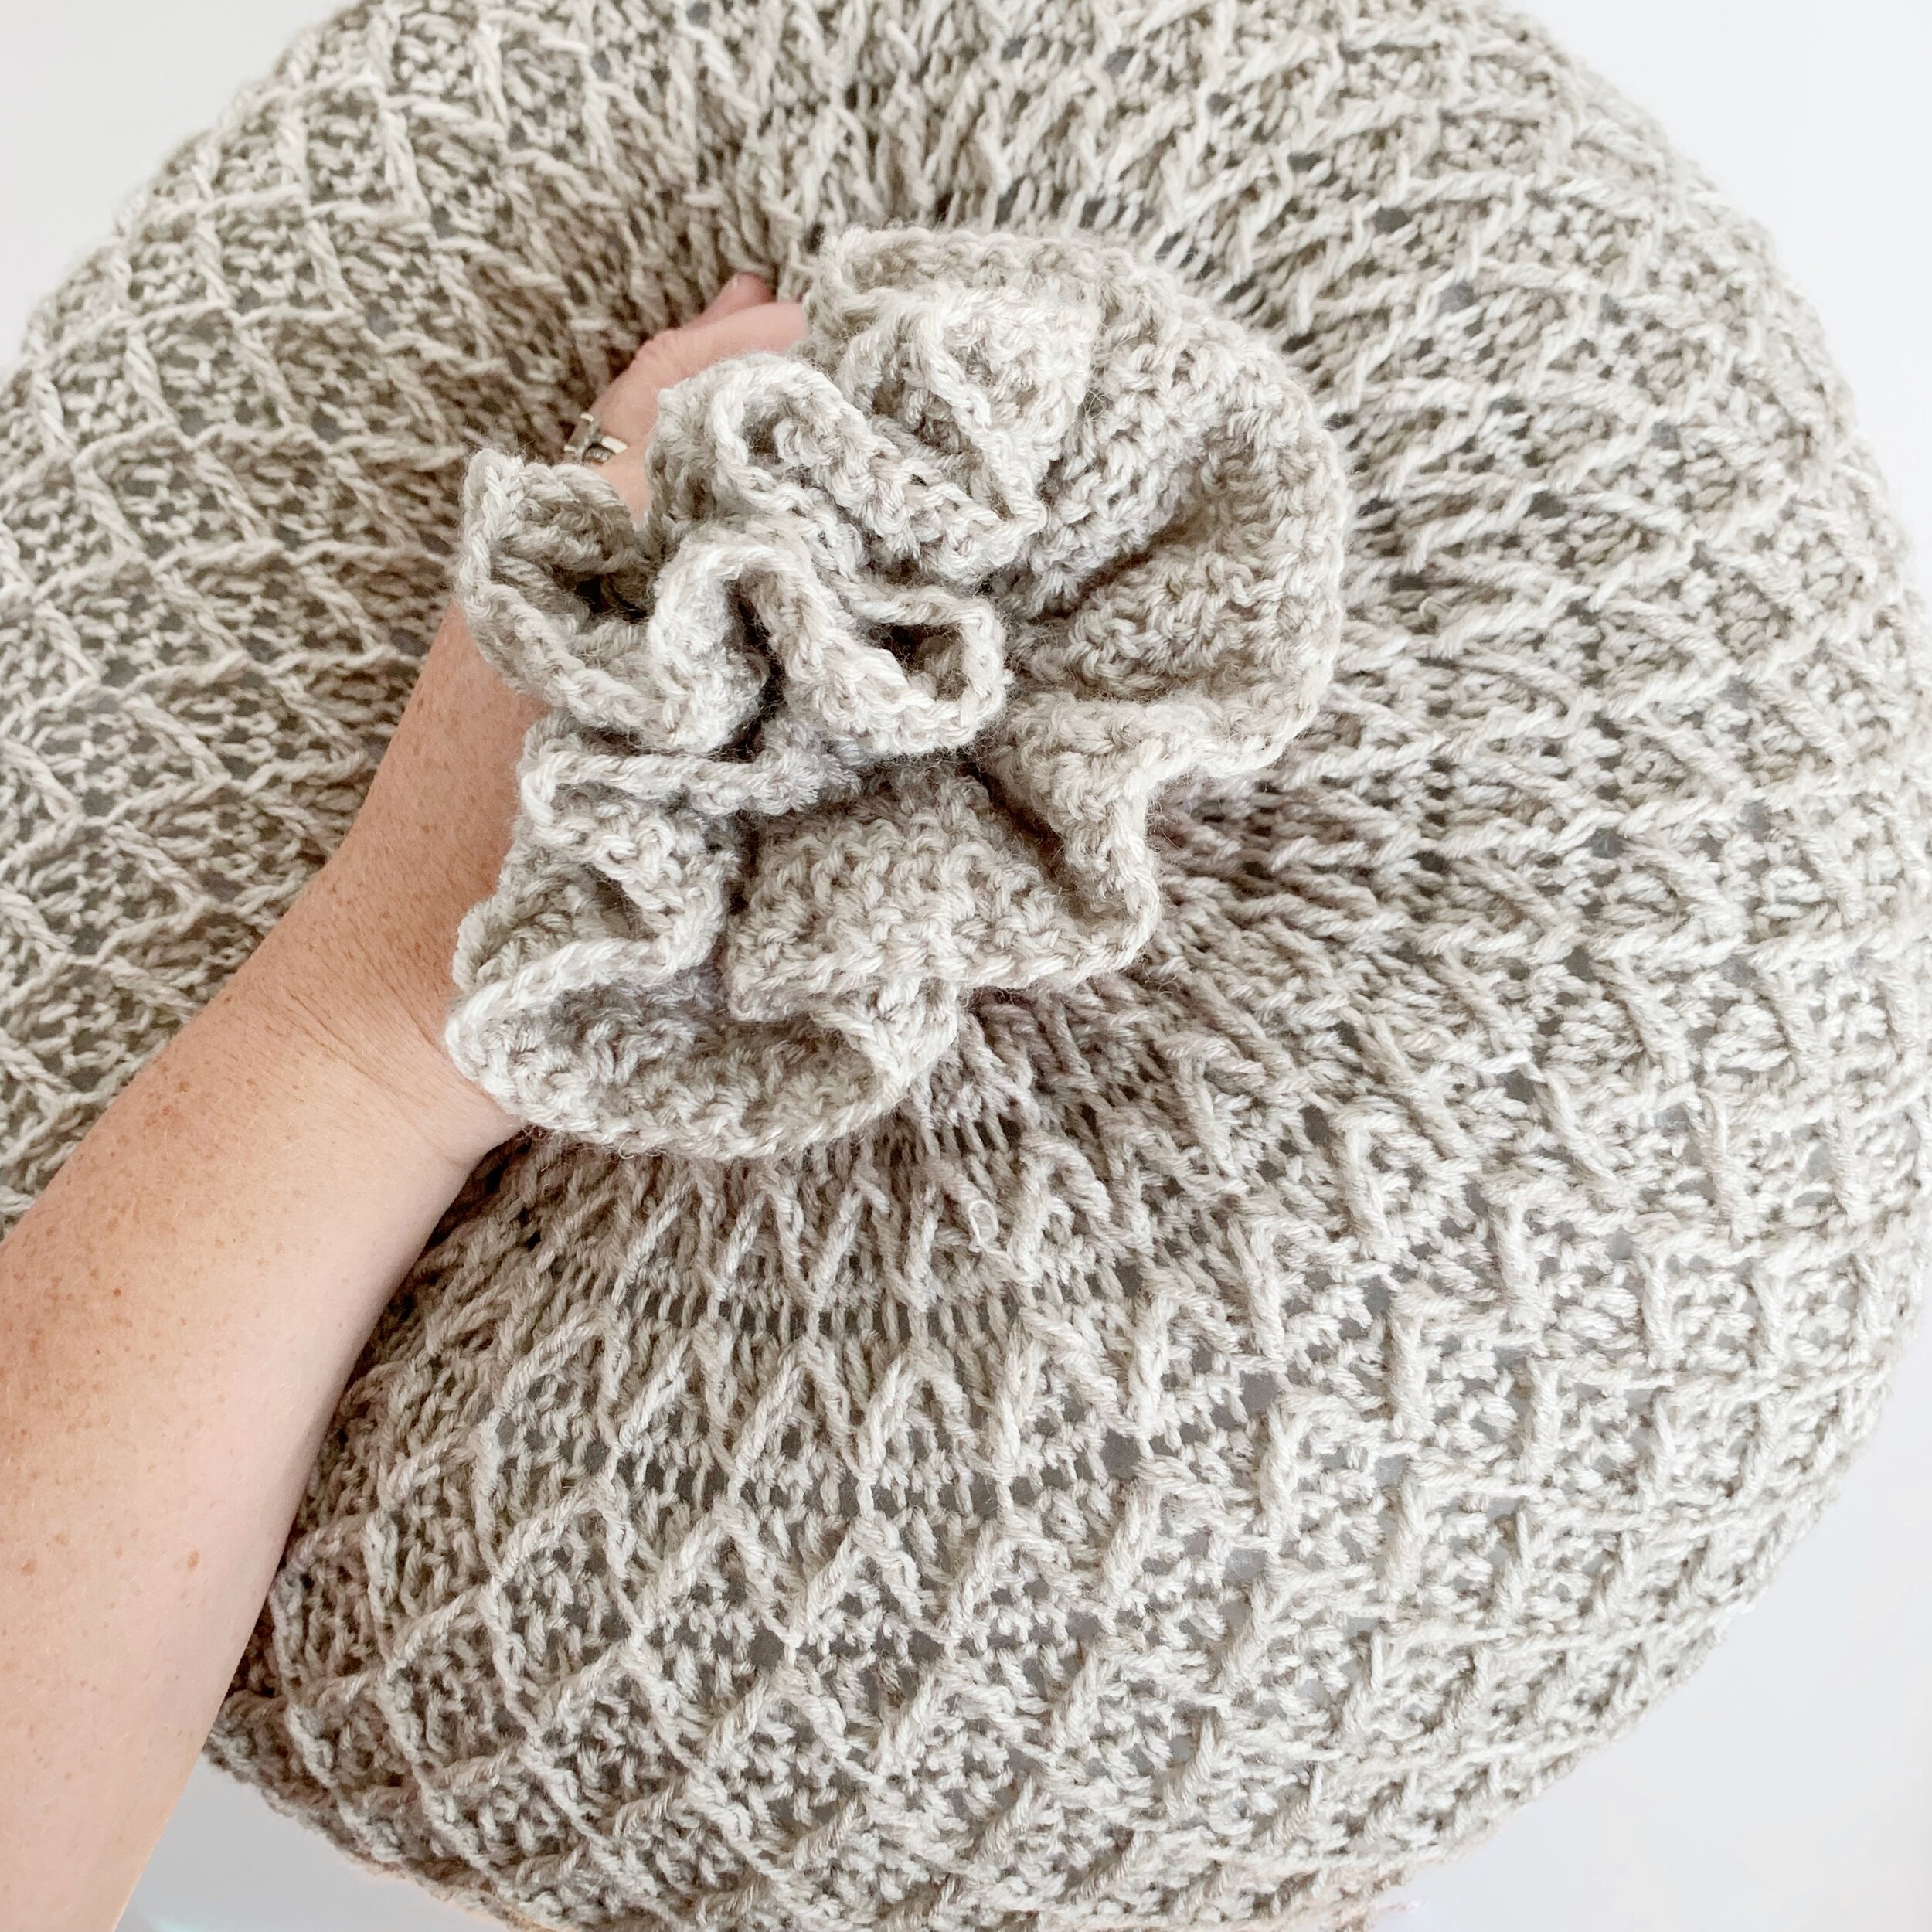
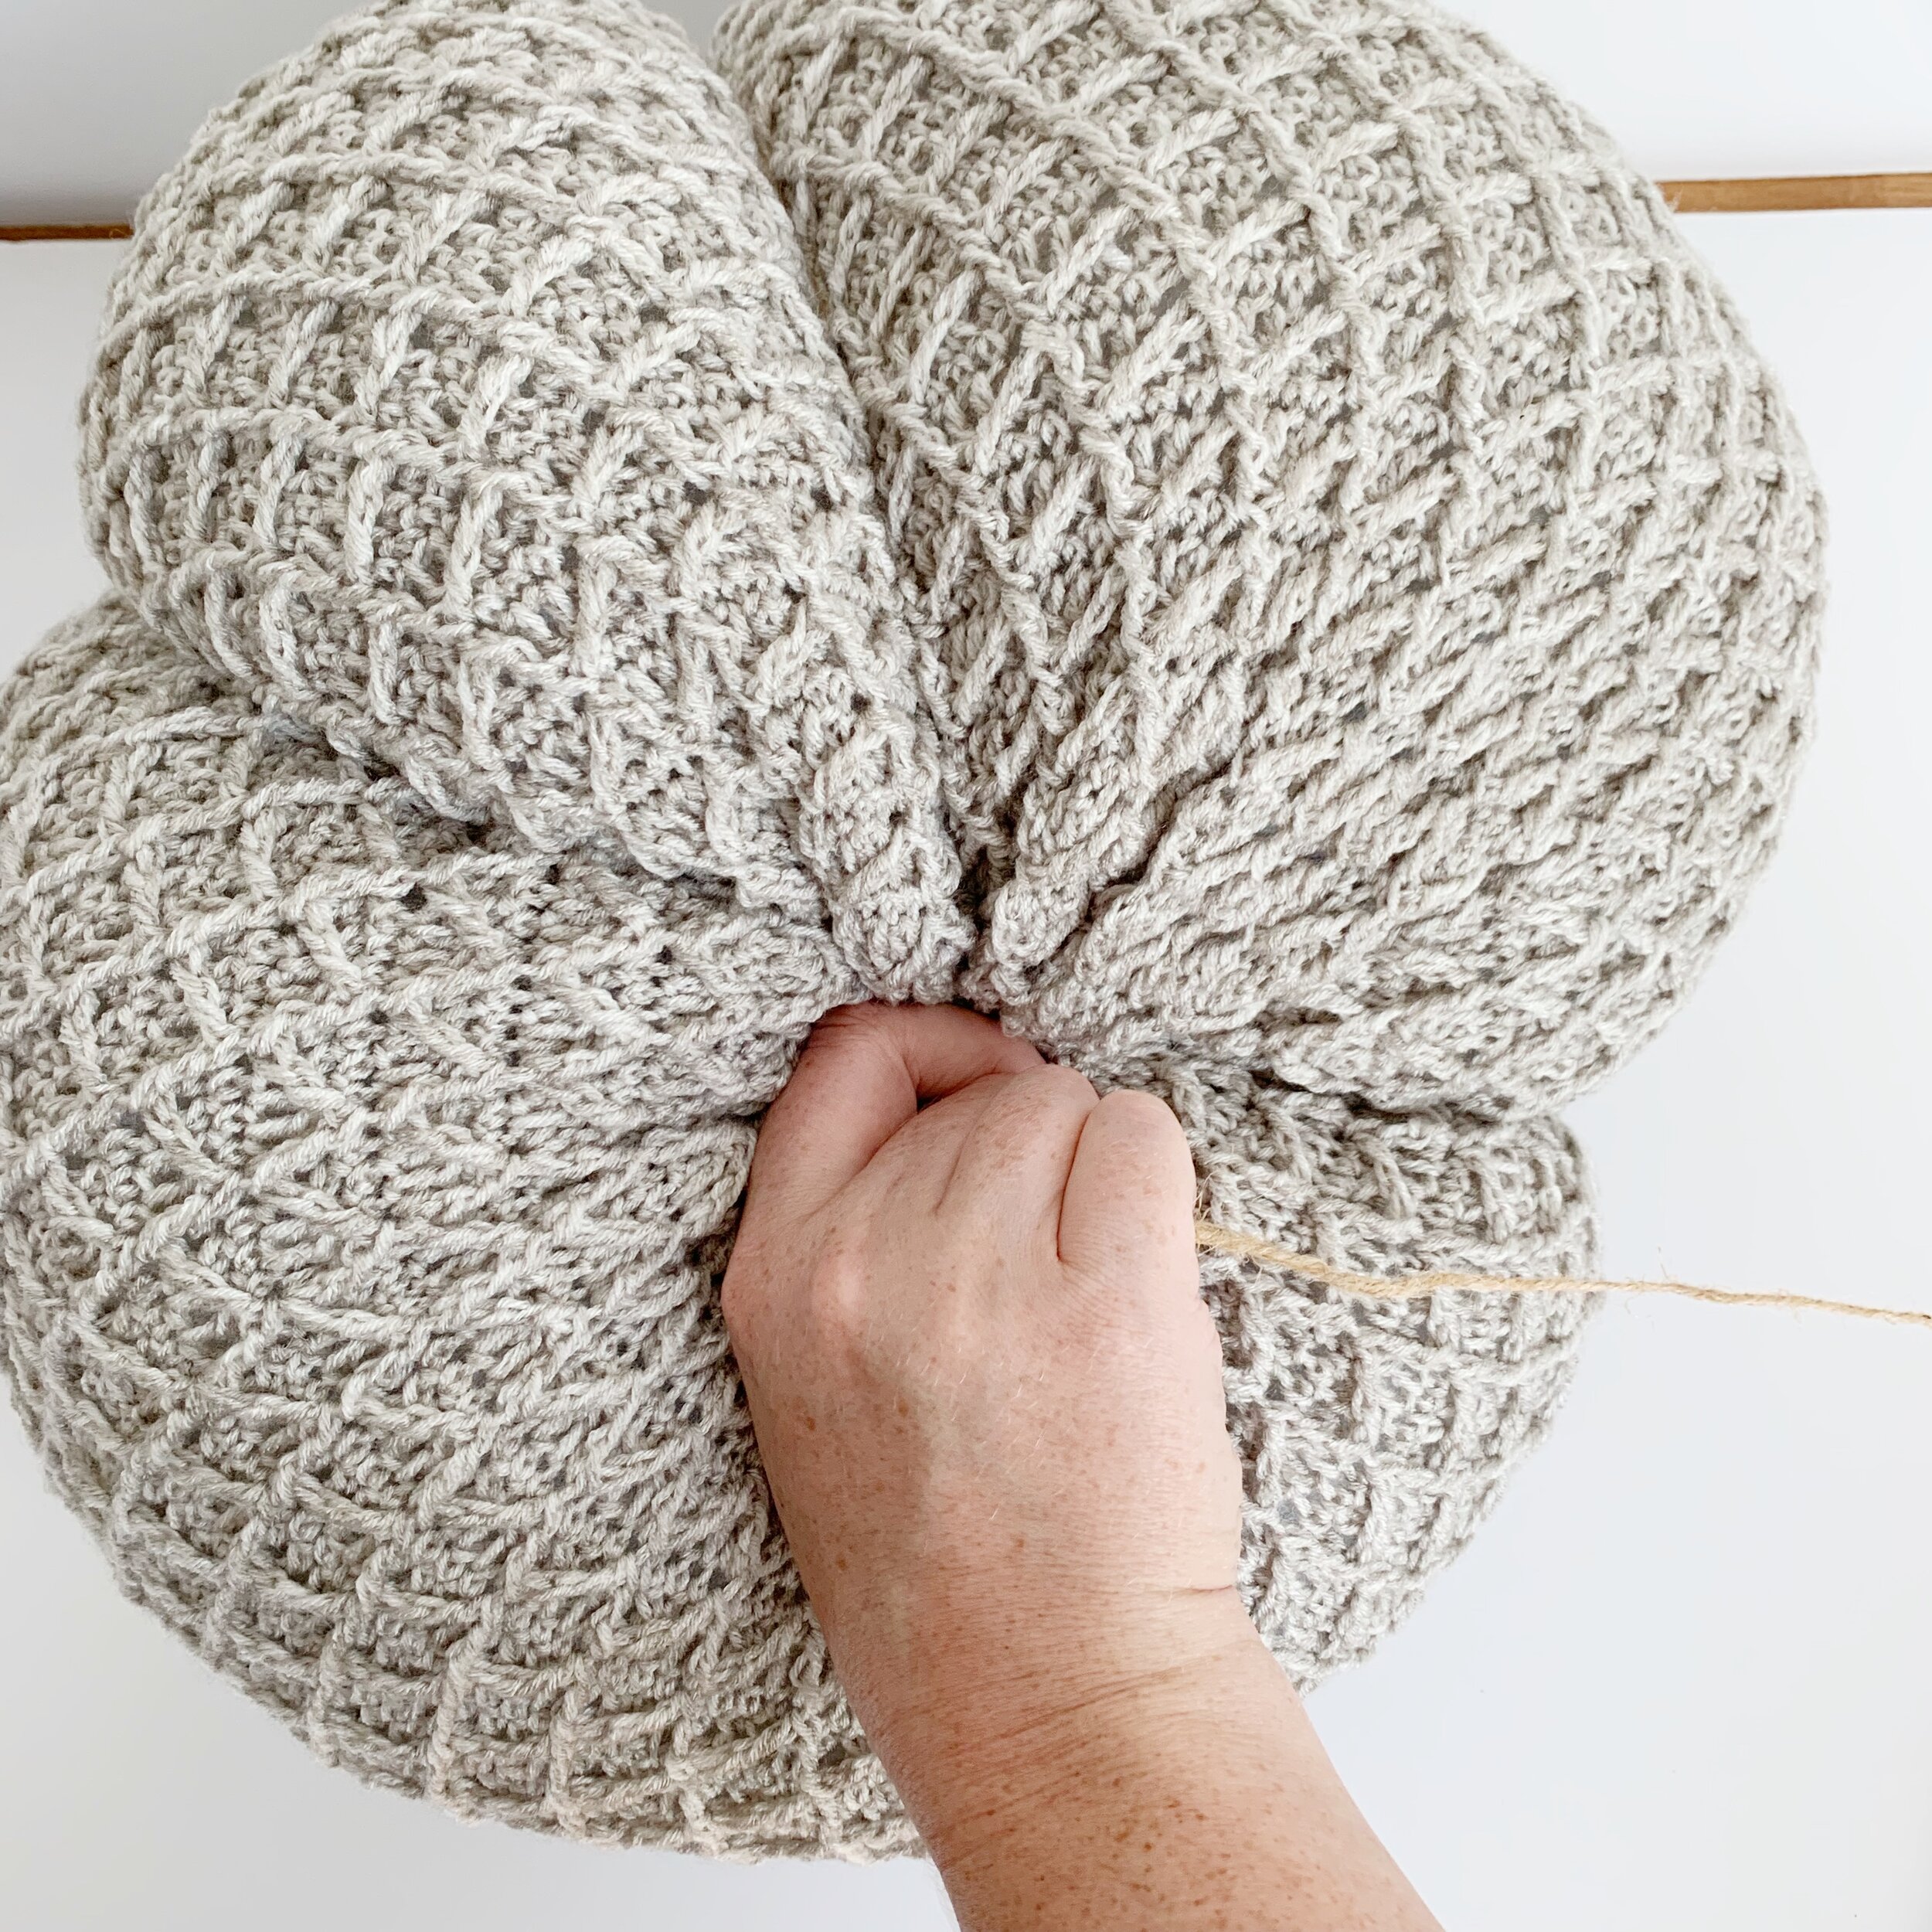
Thread the long tail onto a tapestry needle and weave in and out around the top end going behind the fptrc2tog stitches. Pull tight to gather. Thread yarn back and forth across the opening to close the end completely. Tie and knot and weave in end. Stuff with poly fill. Then gather top to close. You will have 2-3” of crochet at the top.
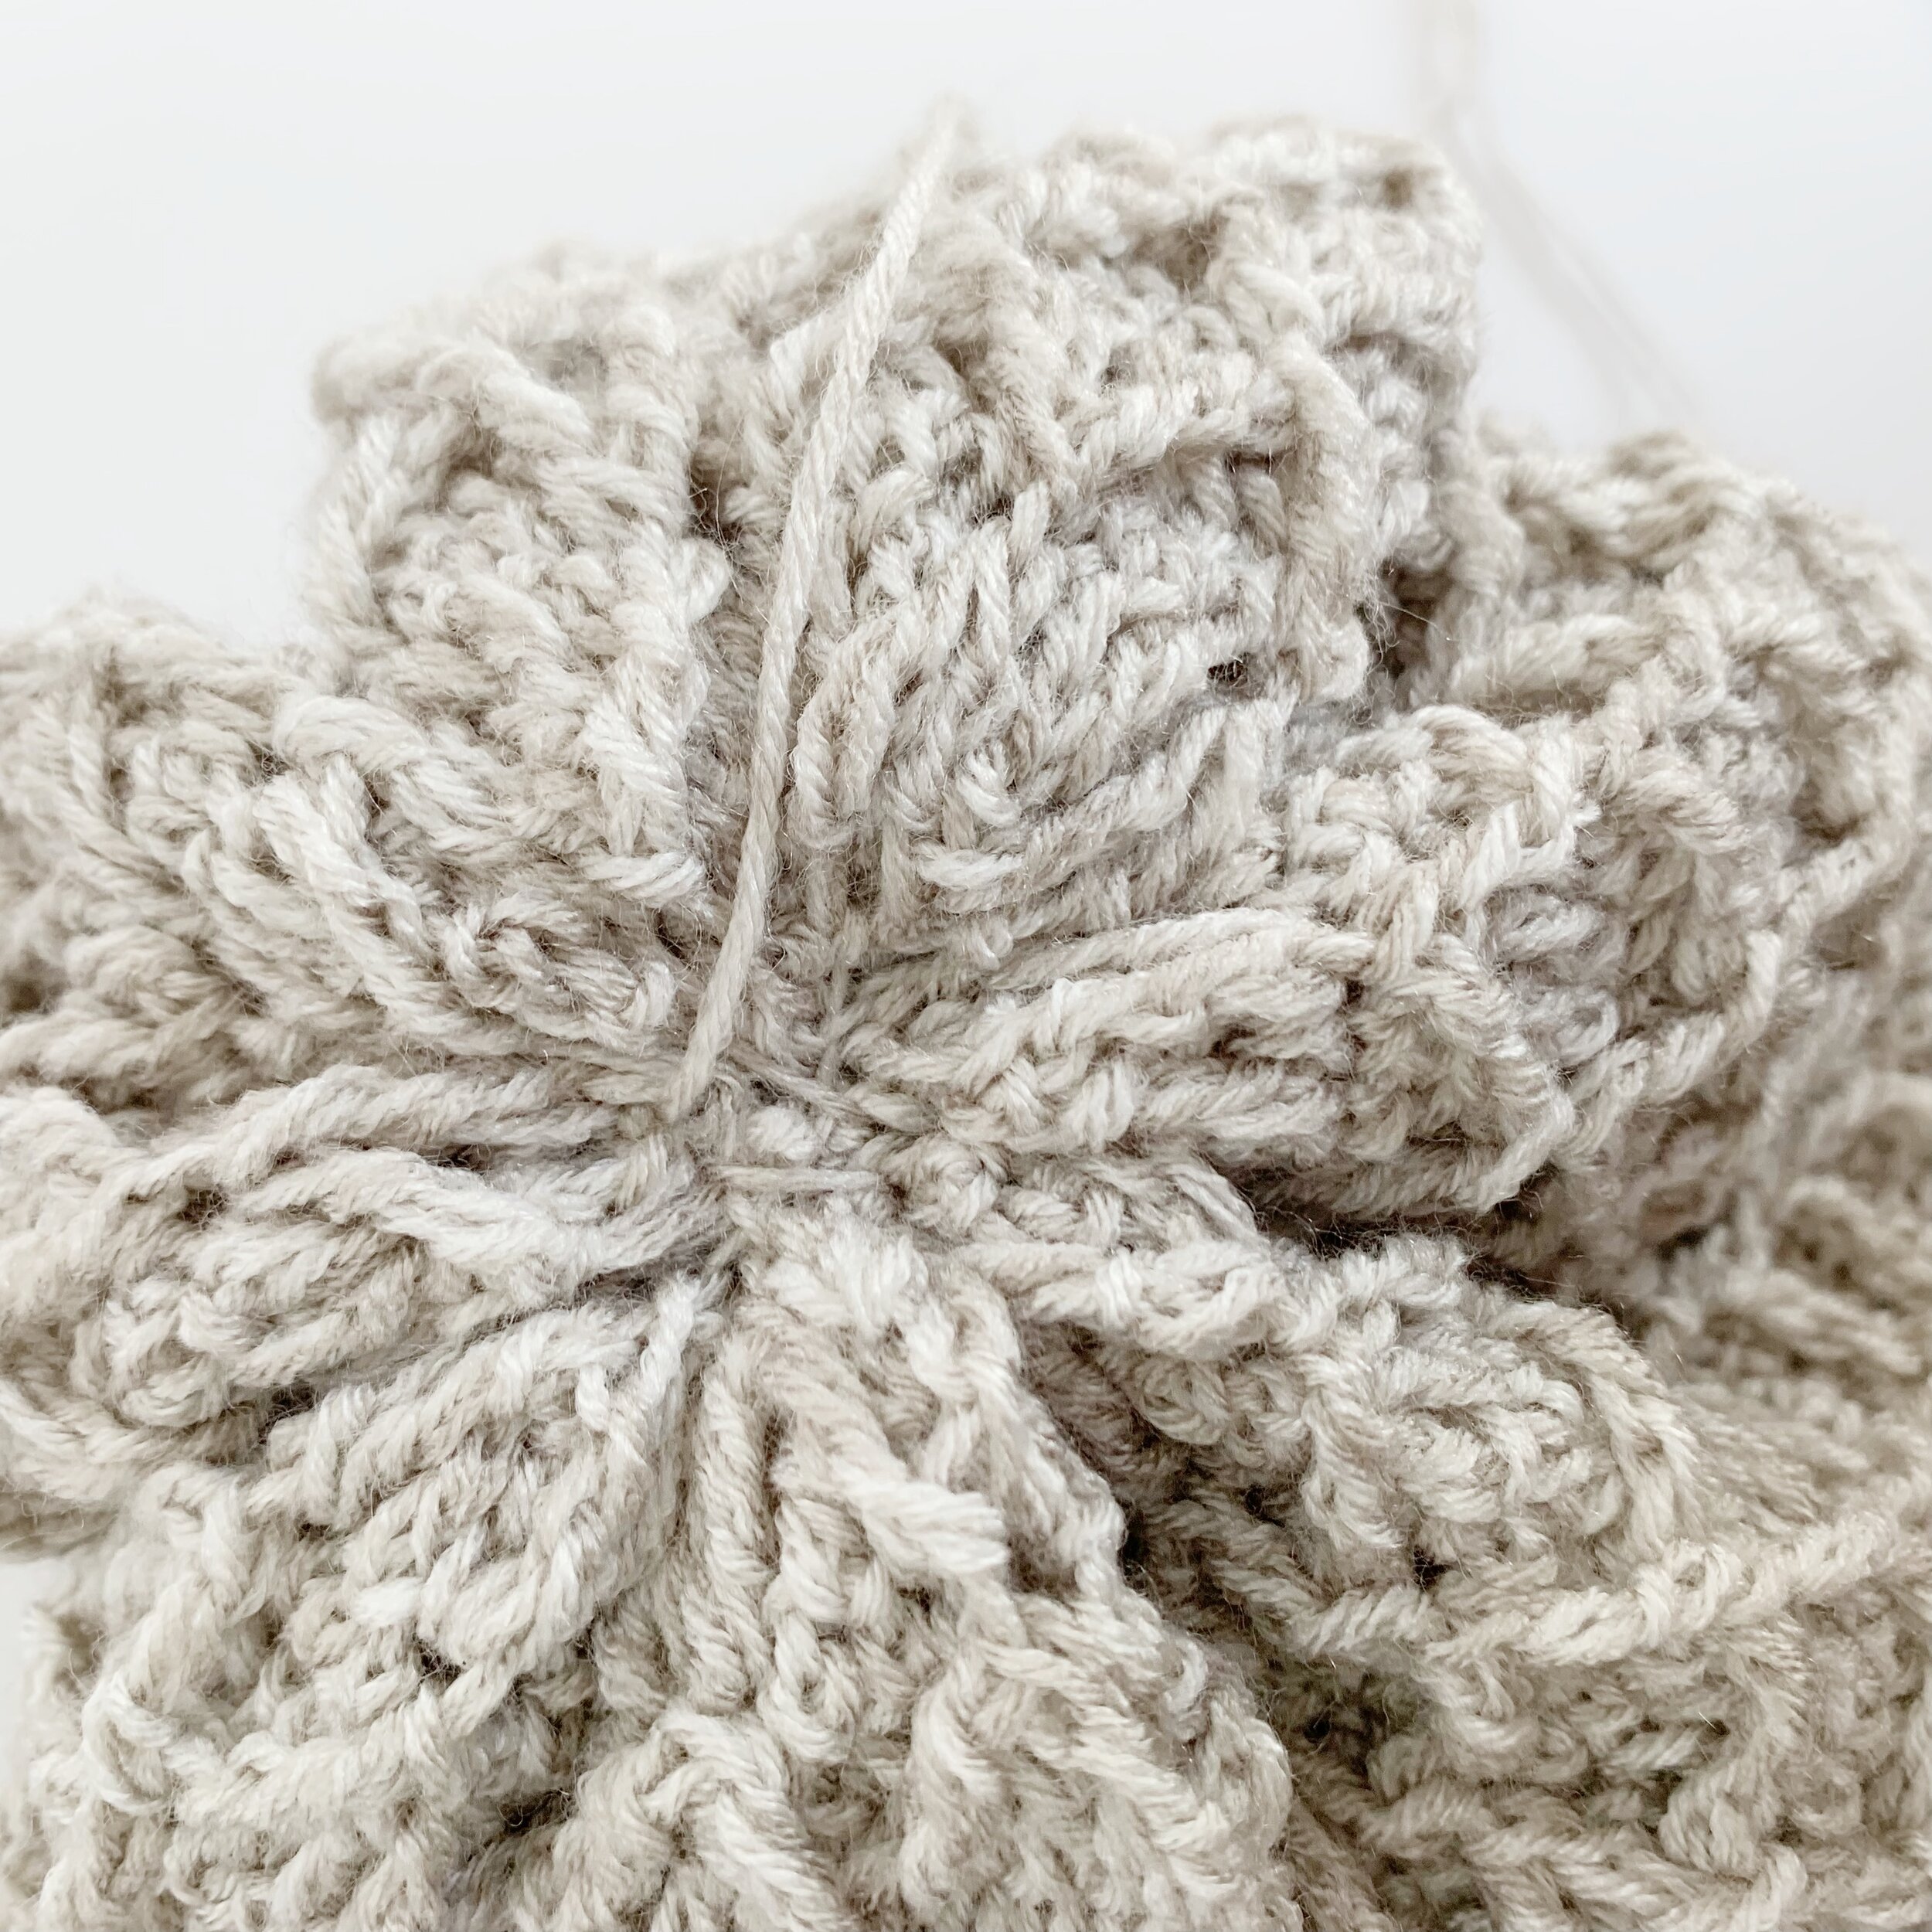
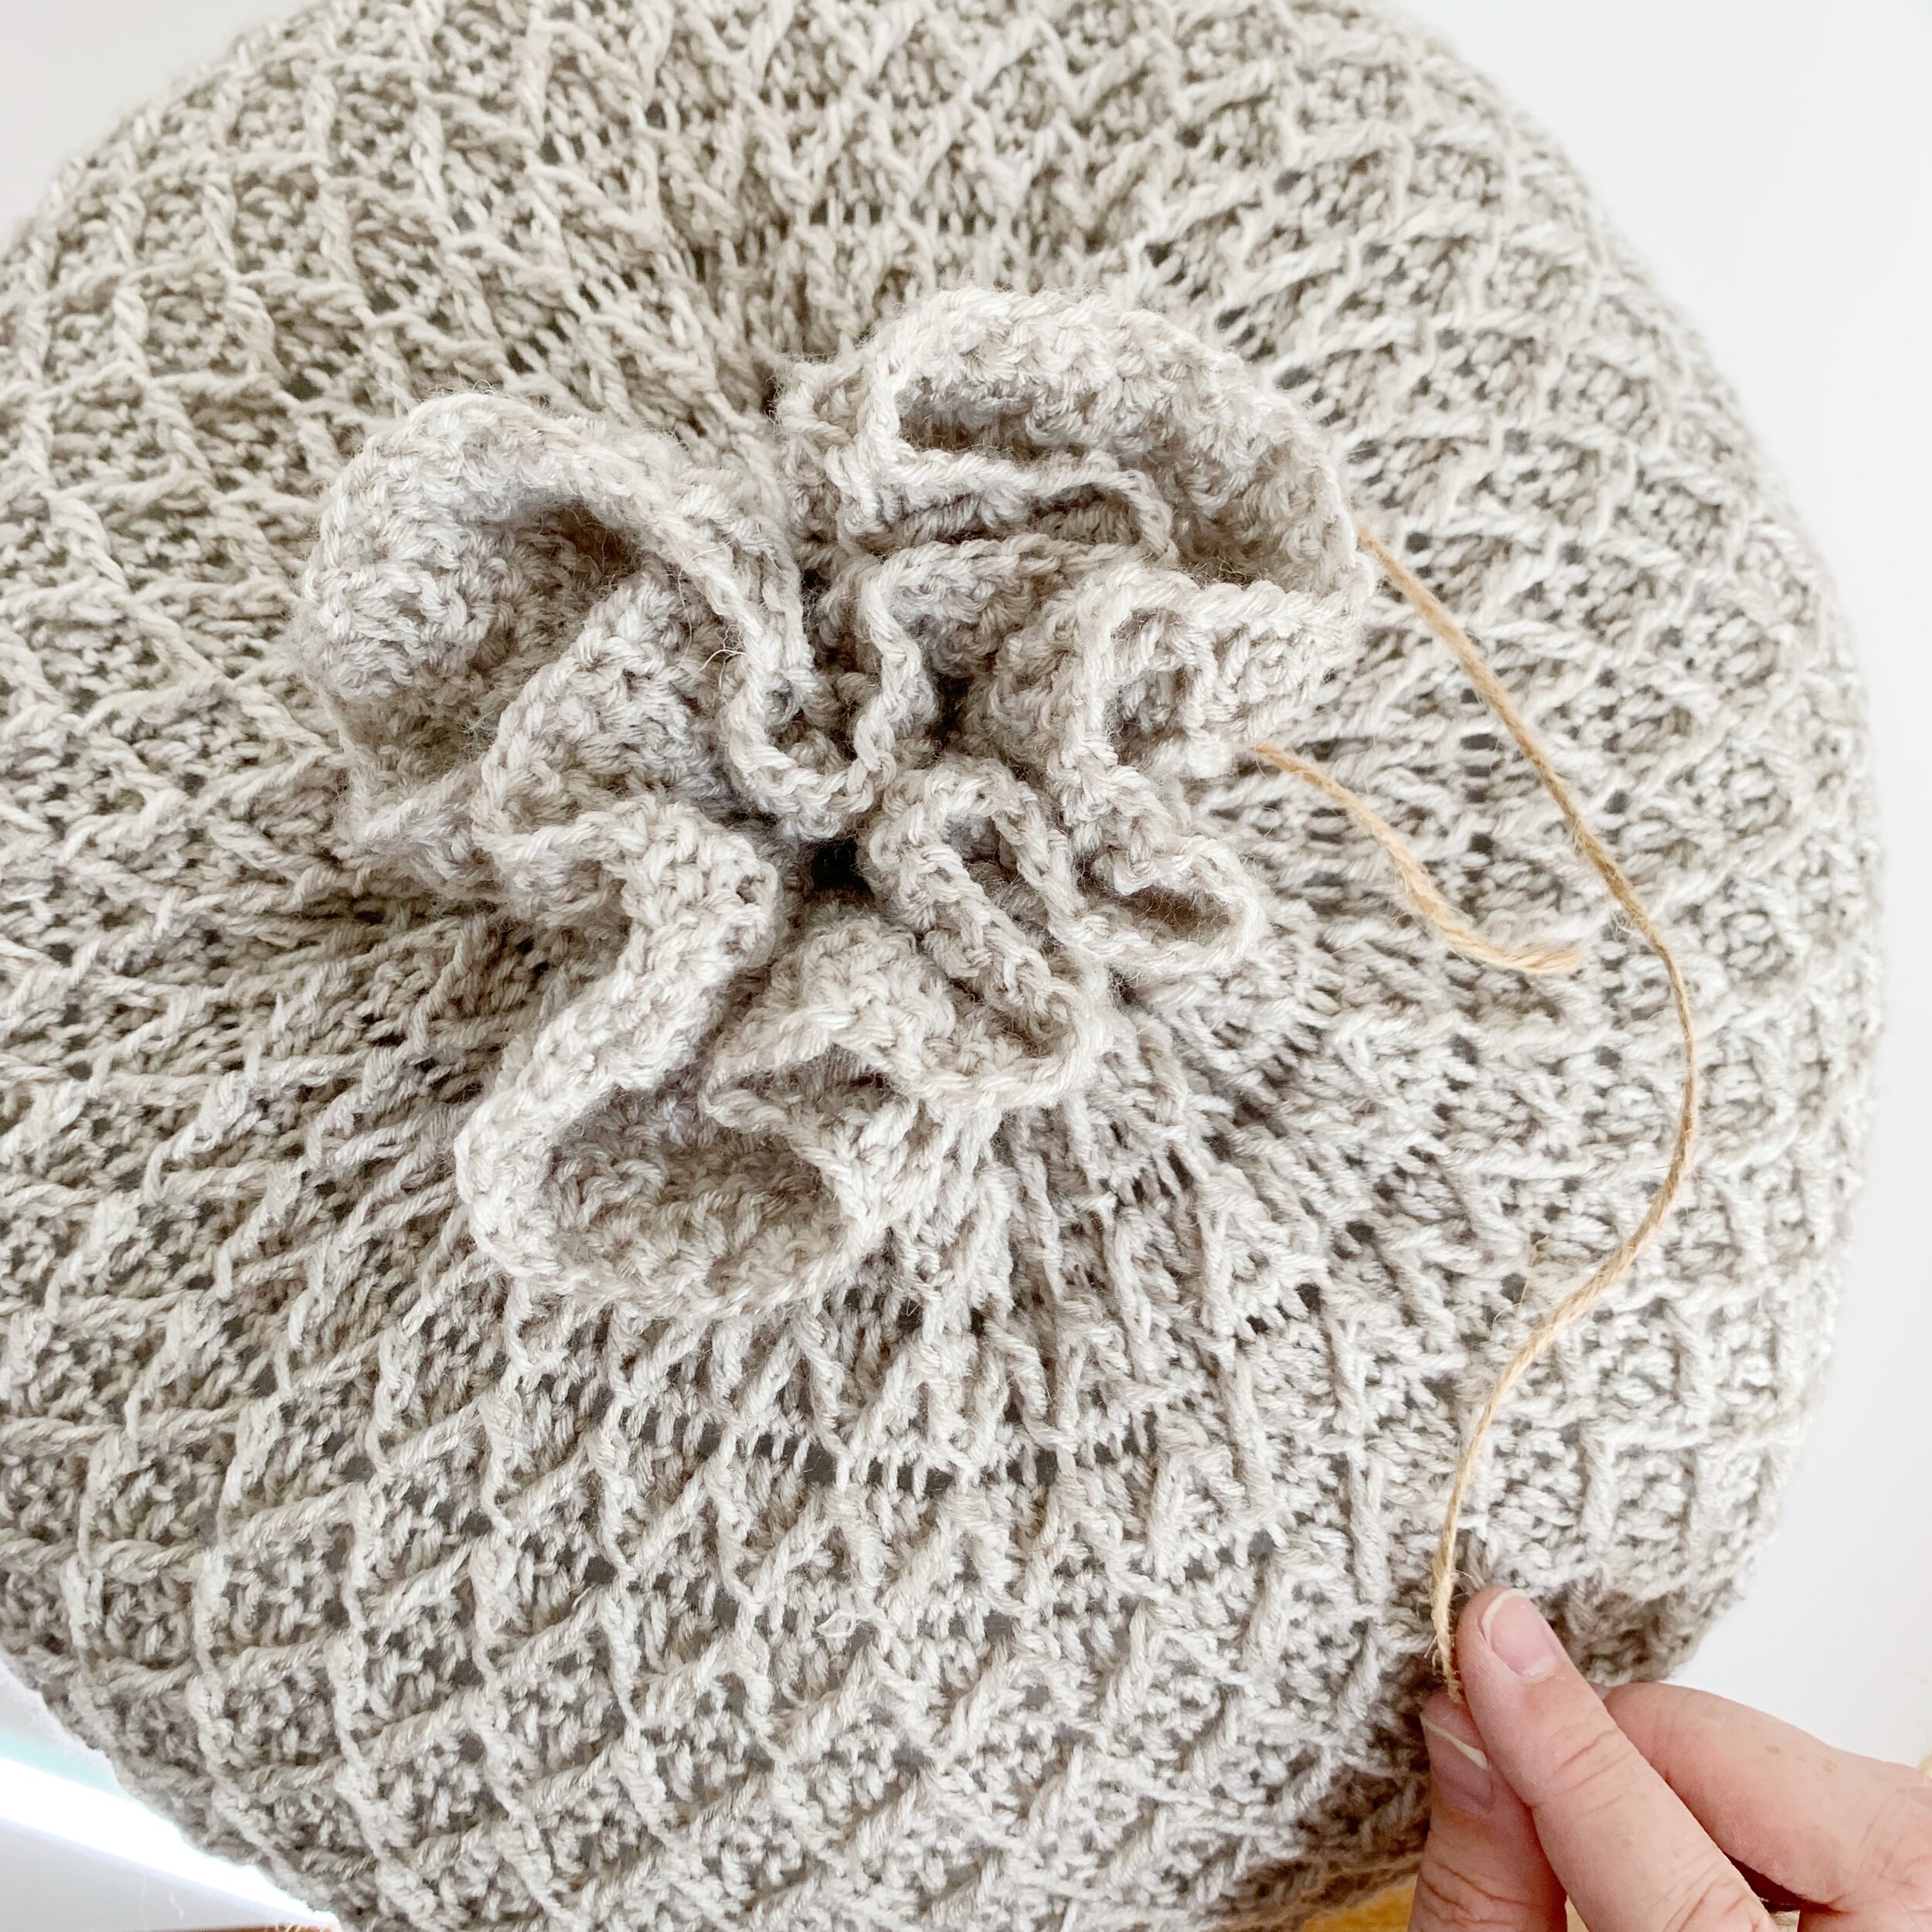
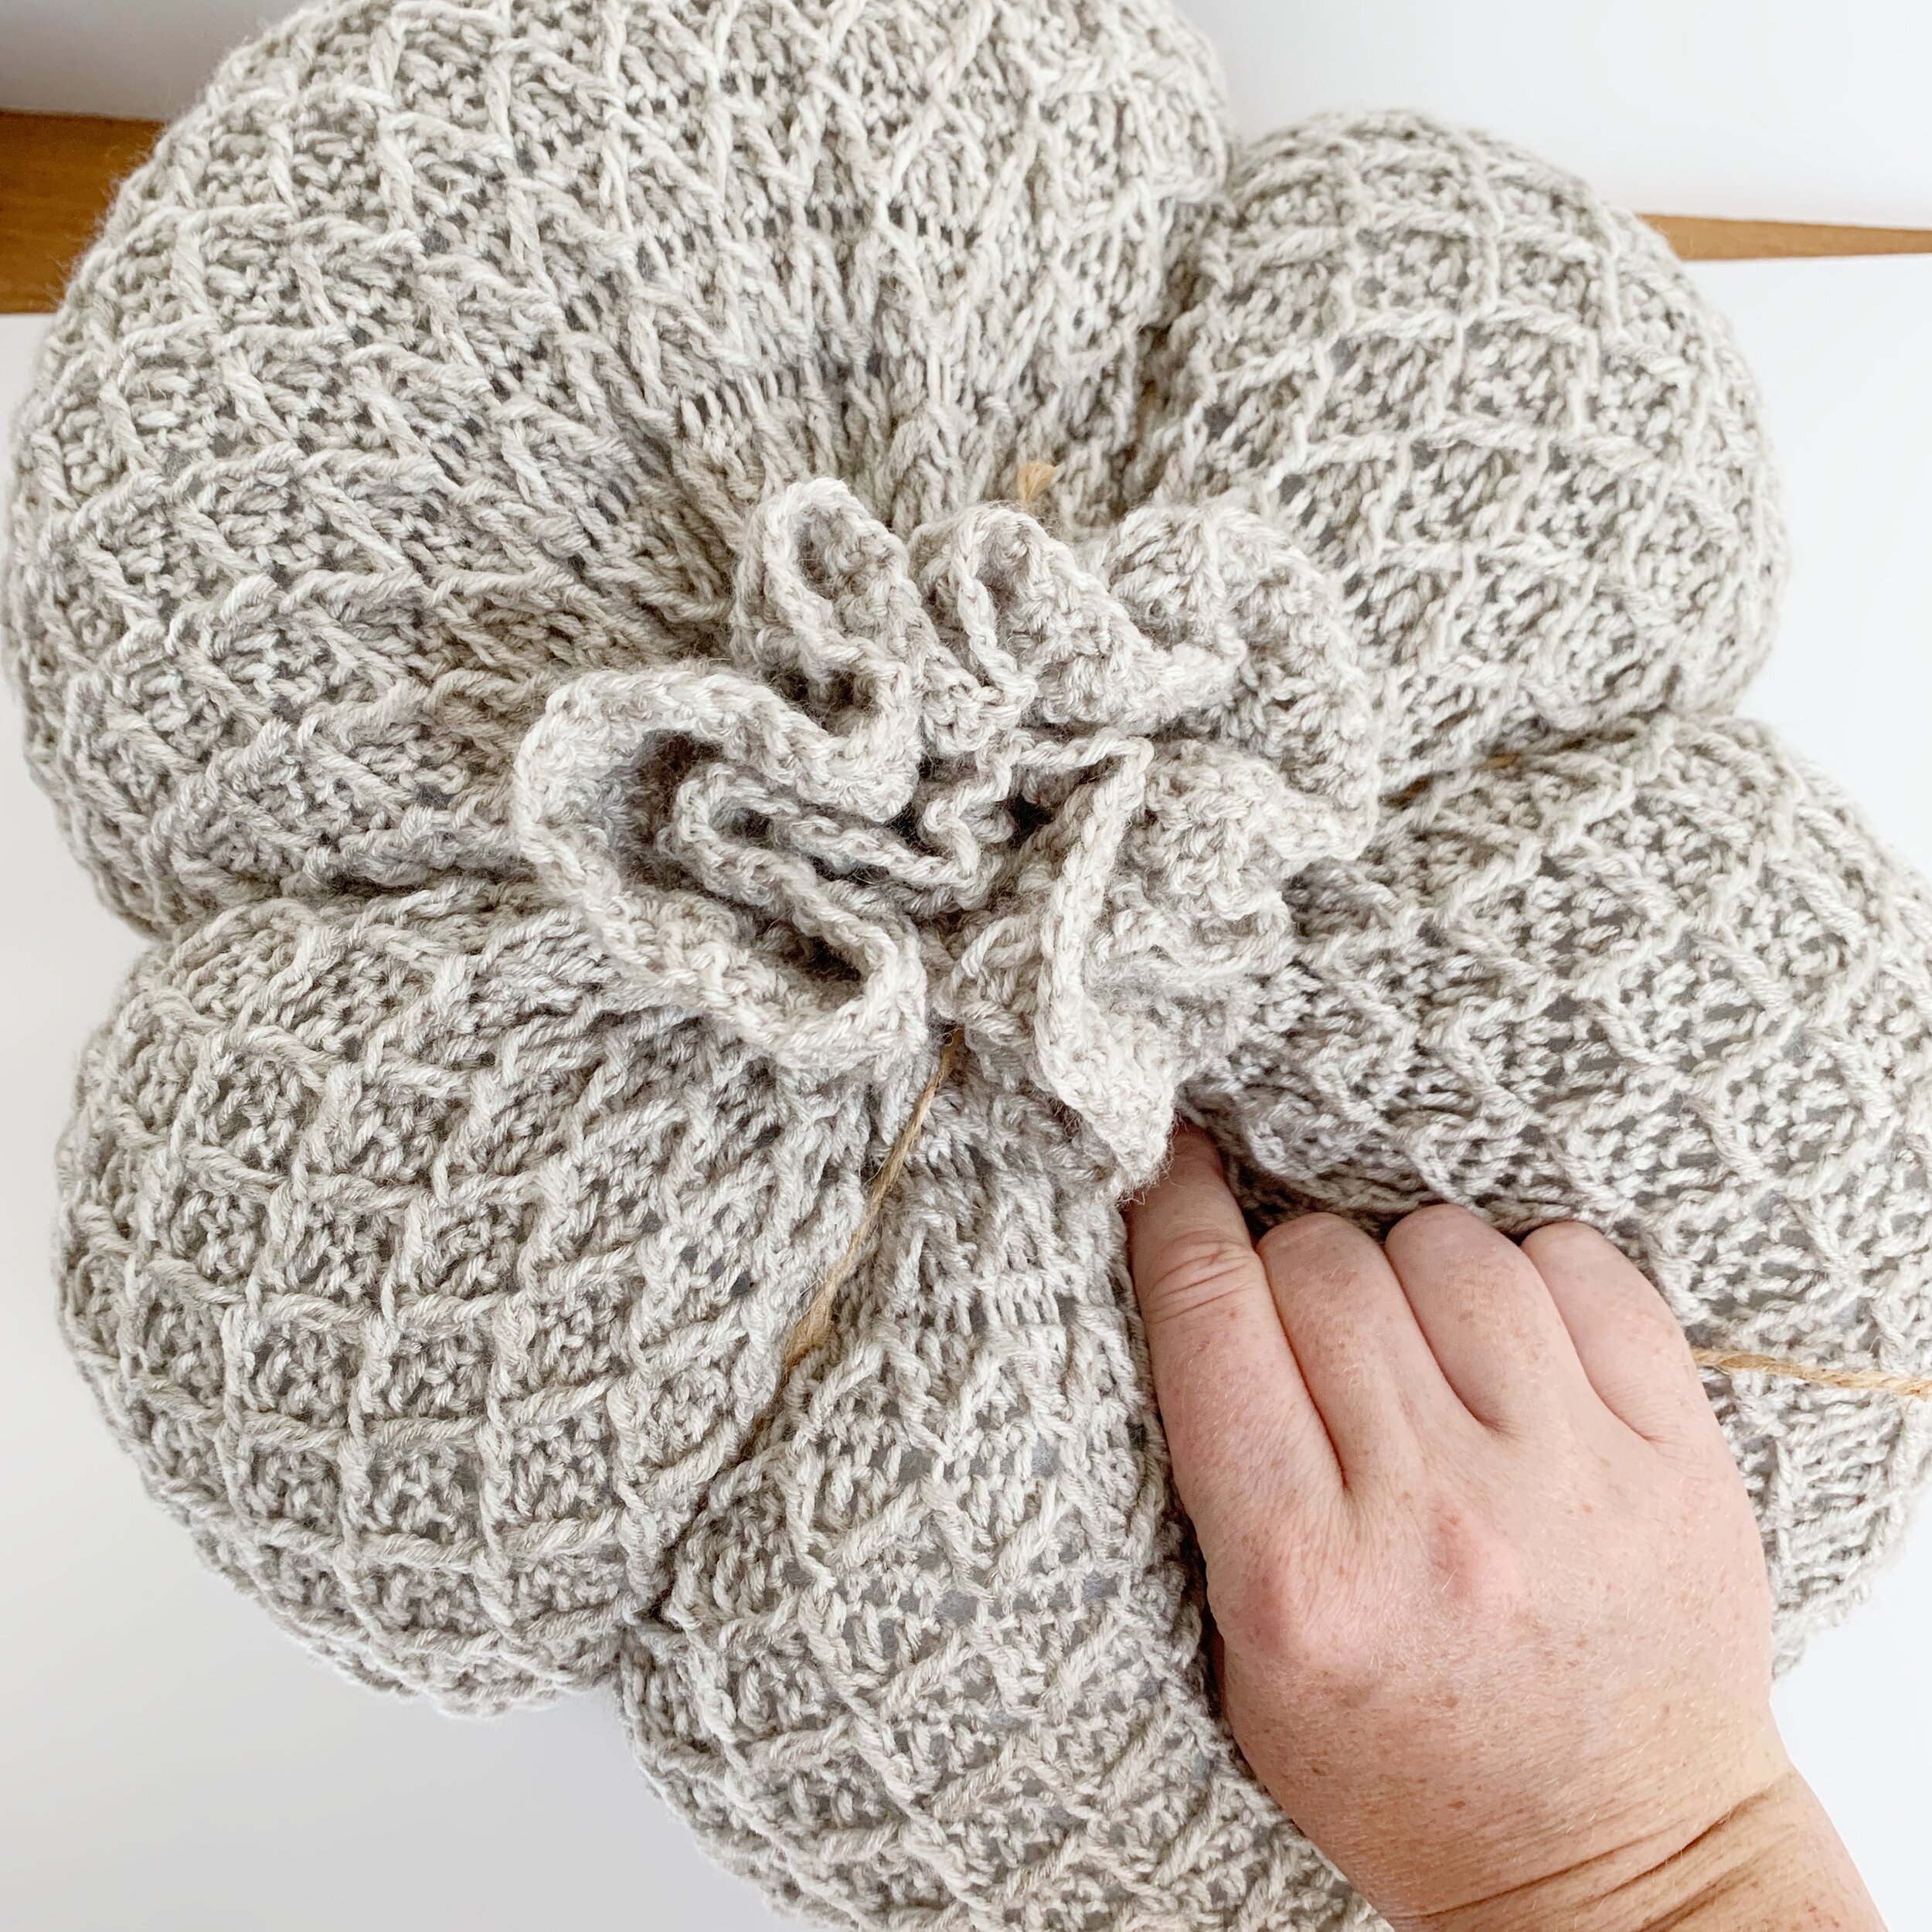
Tie a long piece of twine around the gathered section to secure, leaving one short end and one long end. Using the long end, wrap it tightly around the pumpkin and then around the gathered top to secure. Then repeat two more times evenly around the pumpkin to create six sections. Make sure to wrap around the gathered top after each wrap.
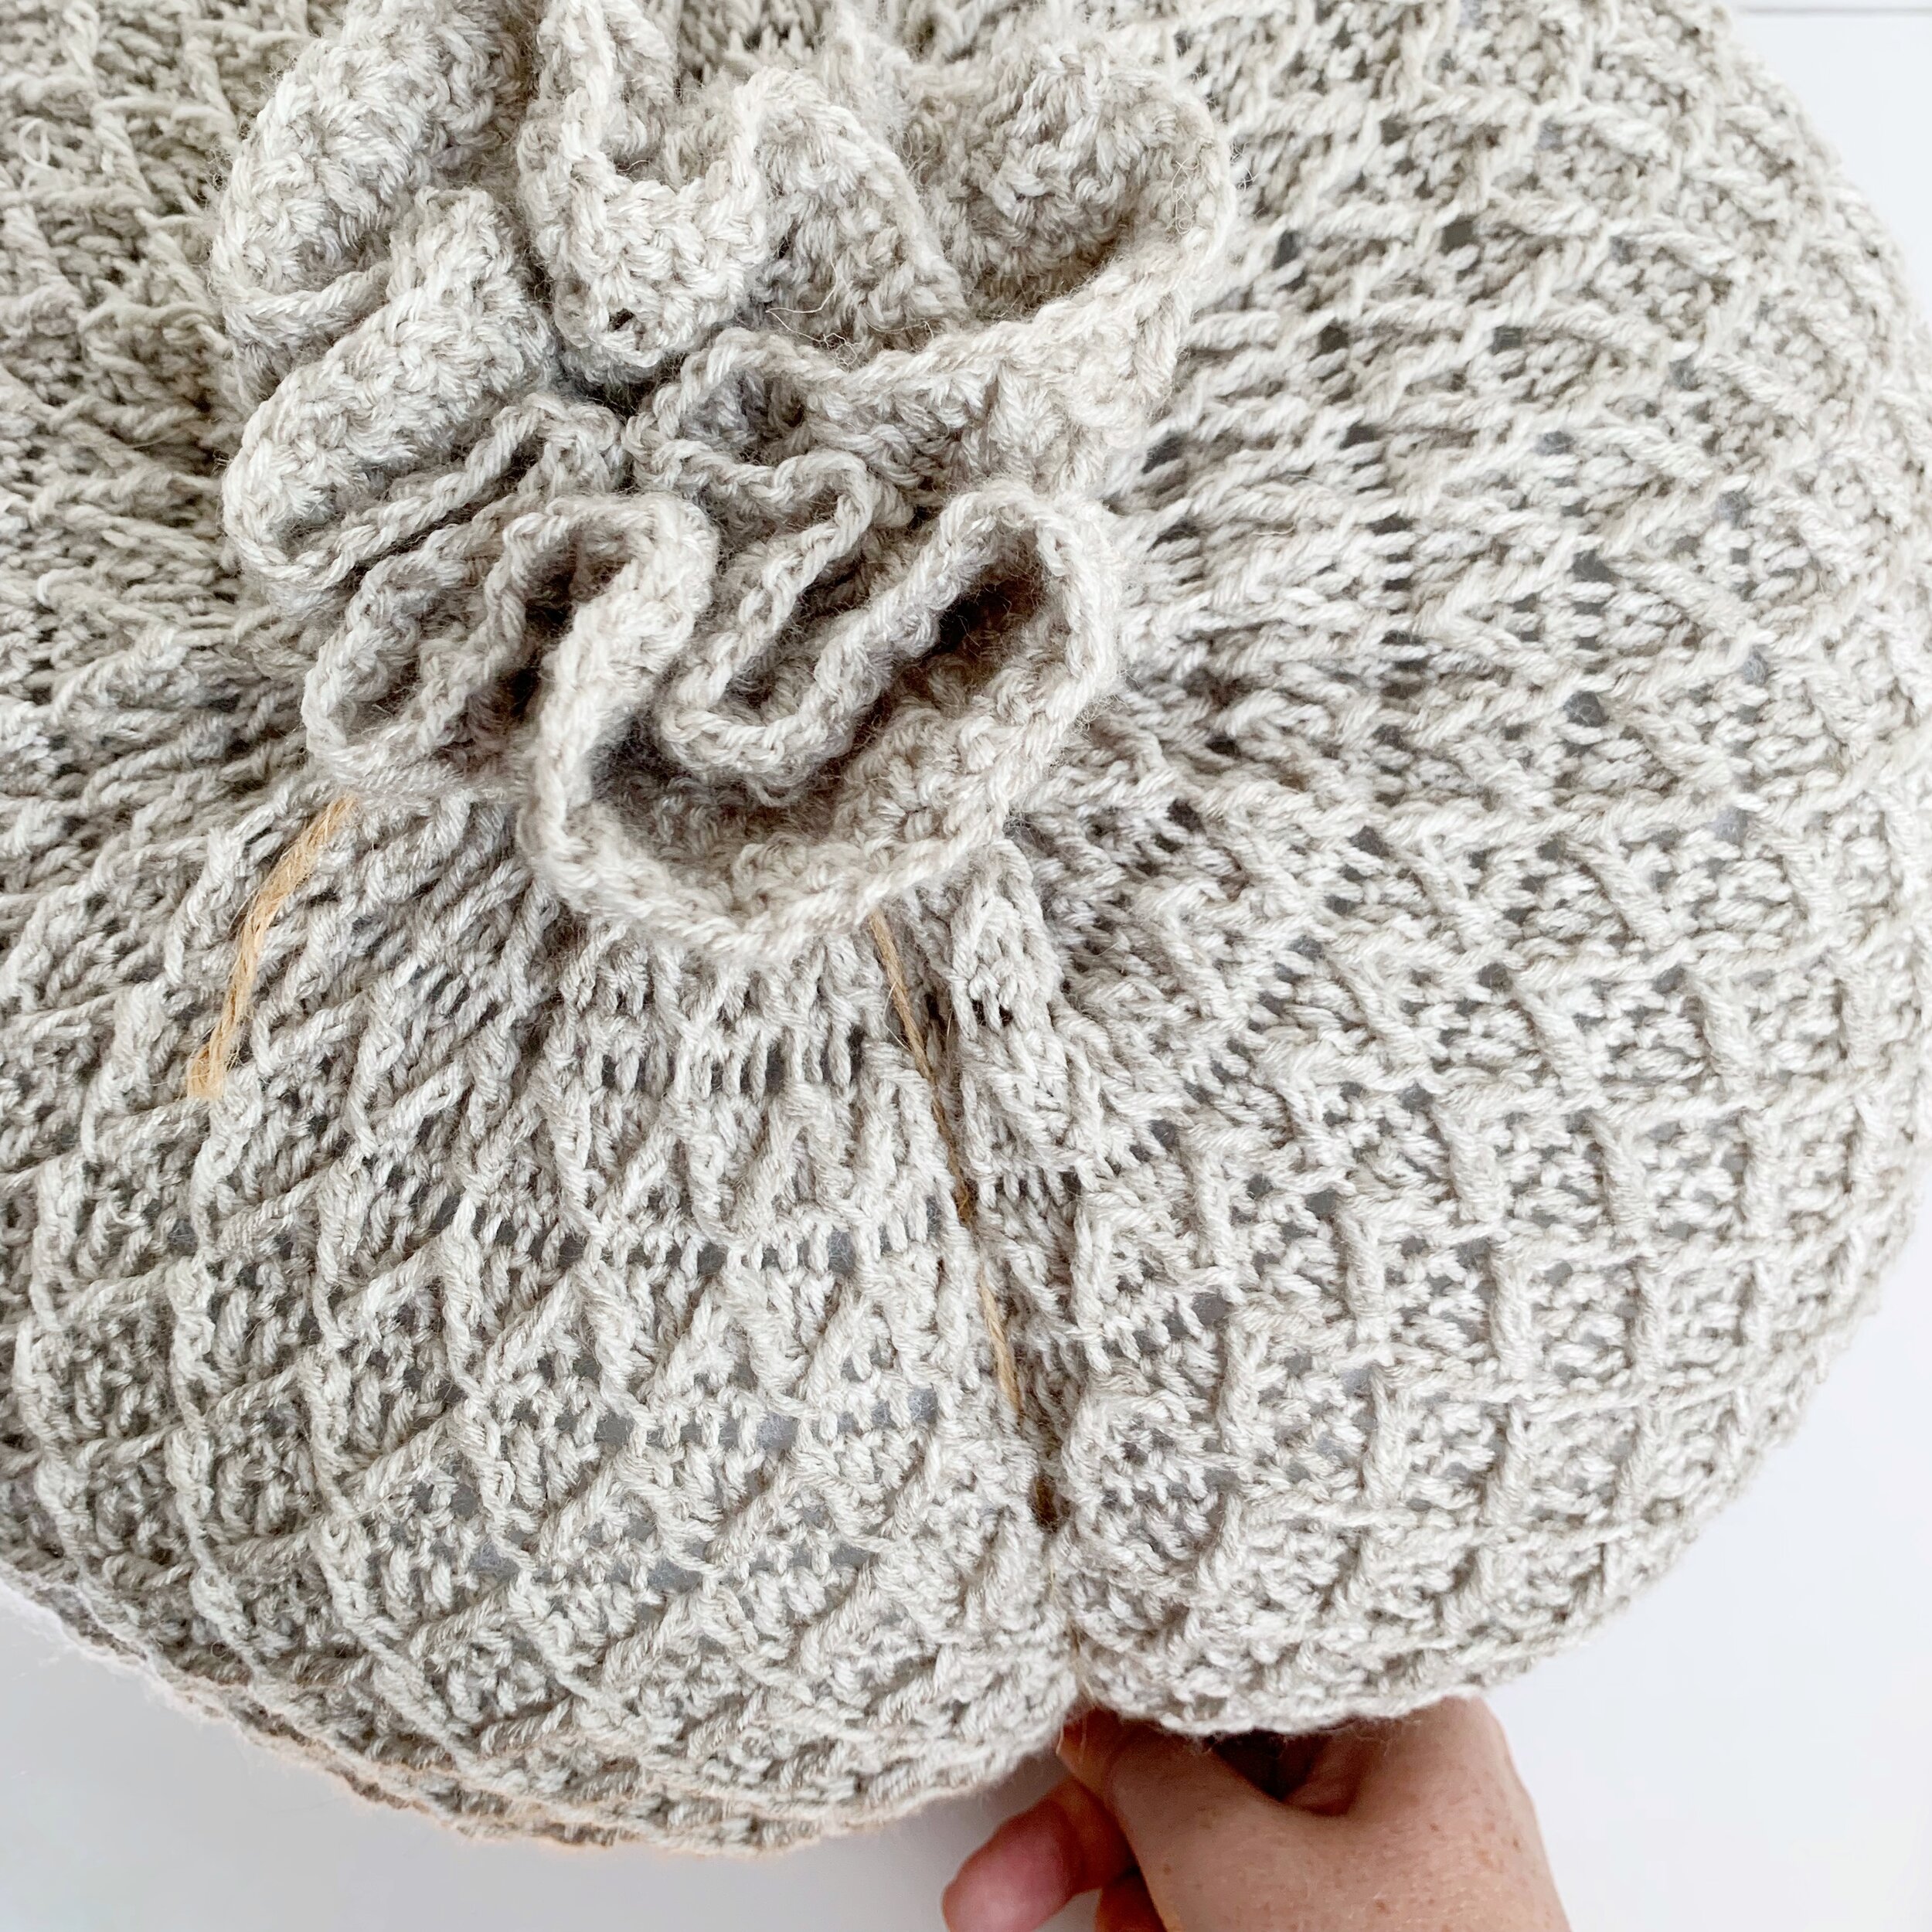
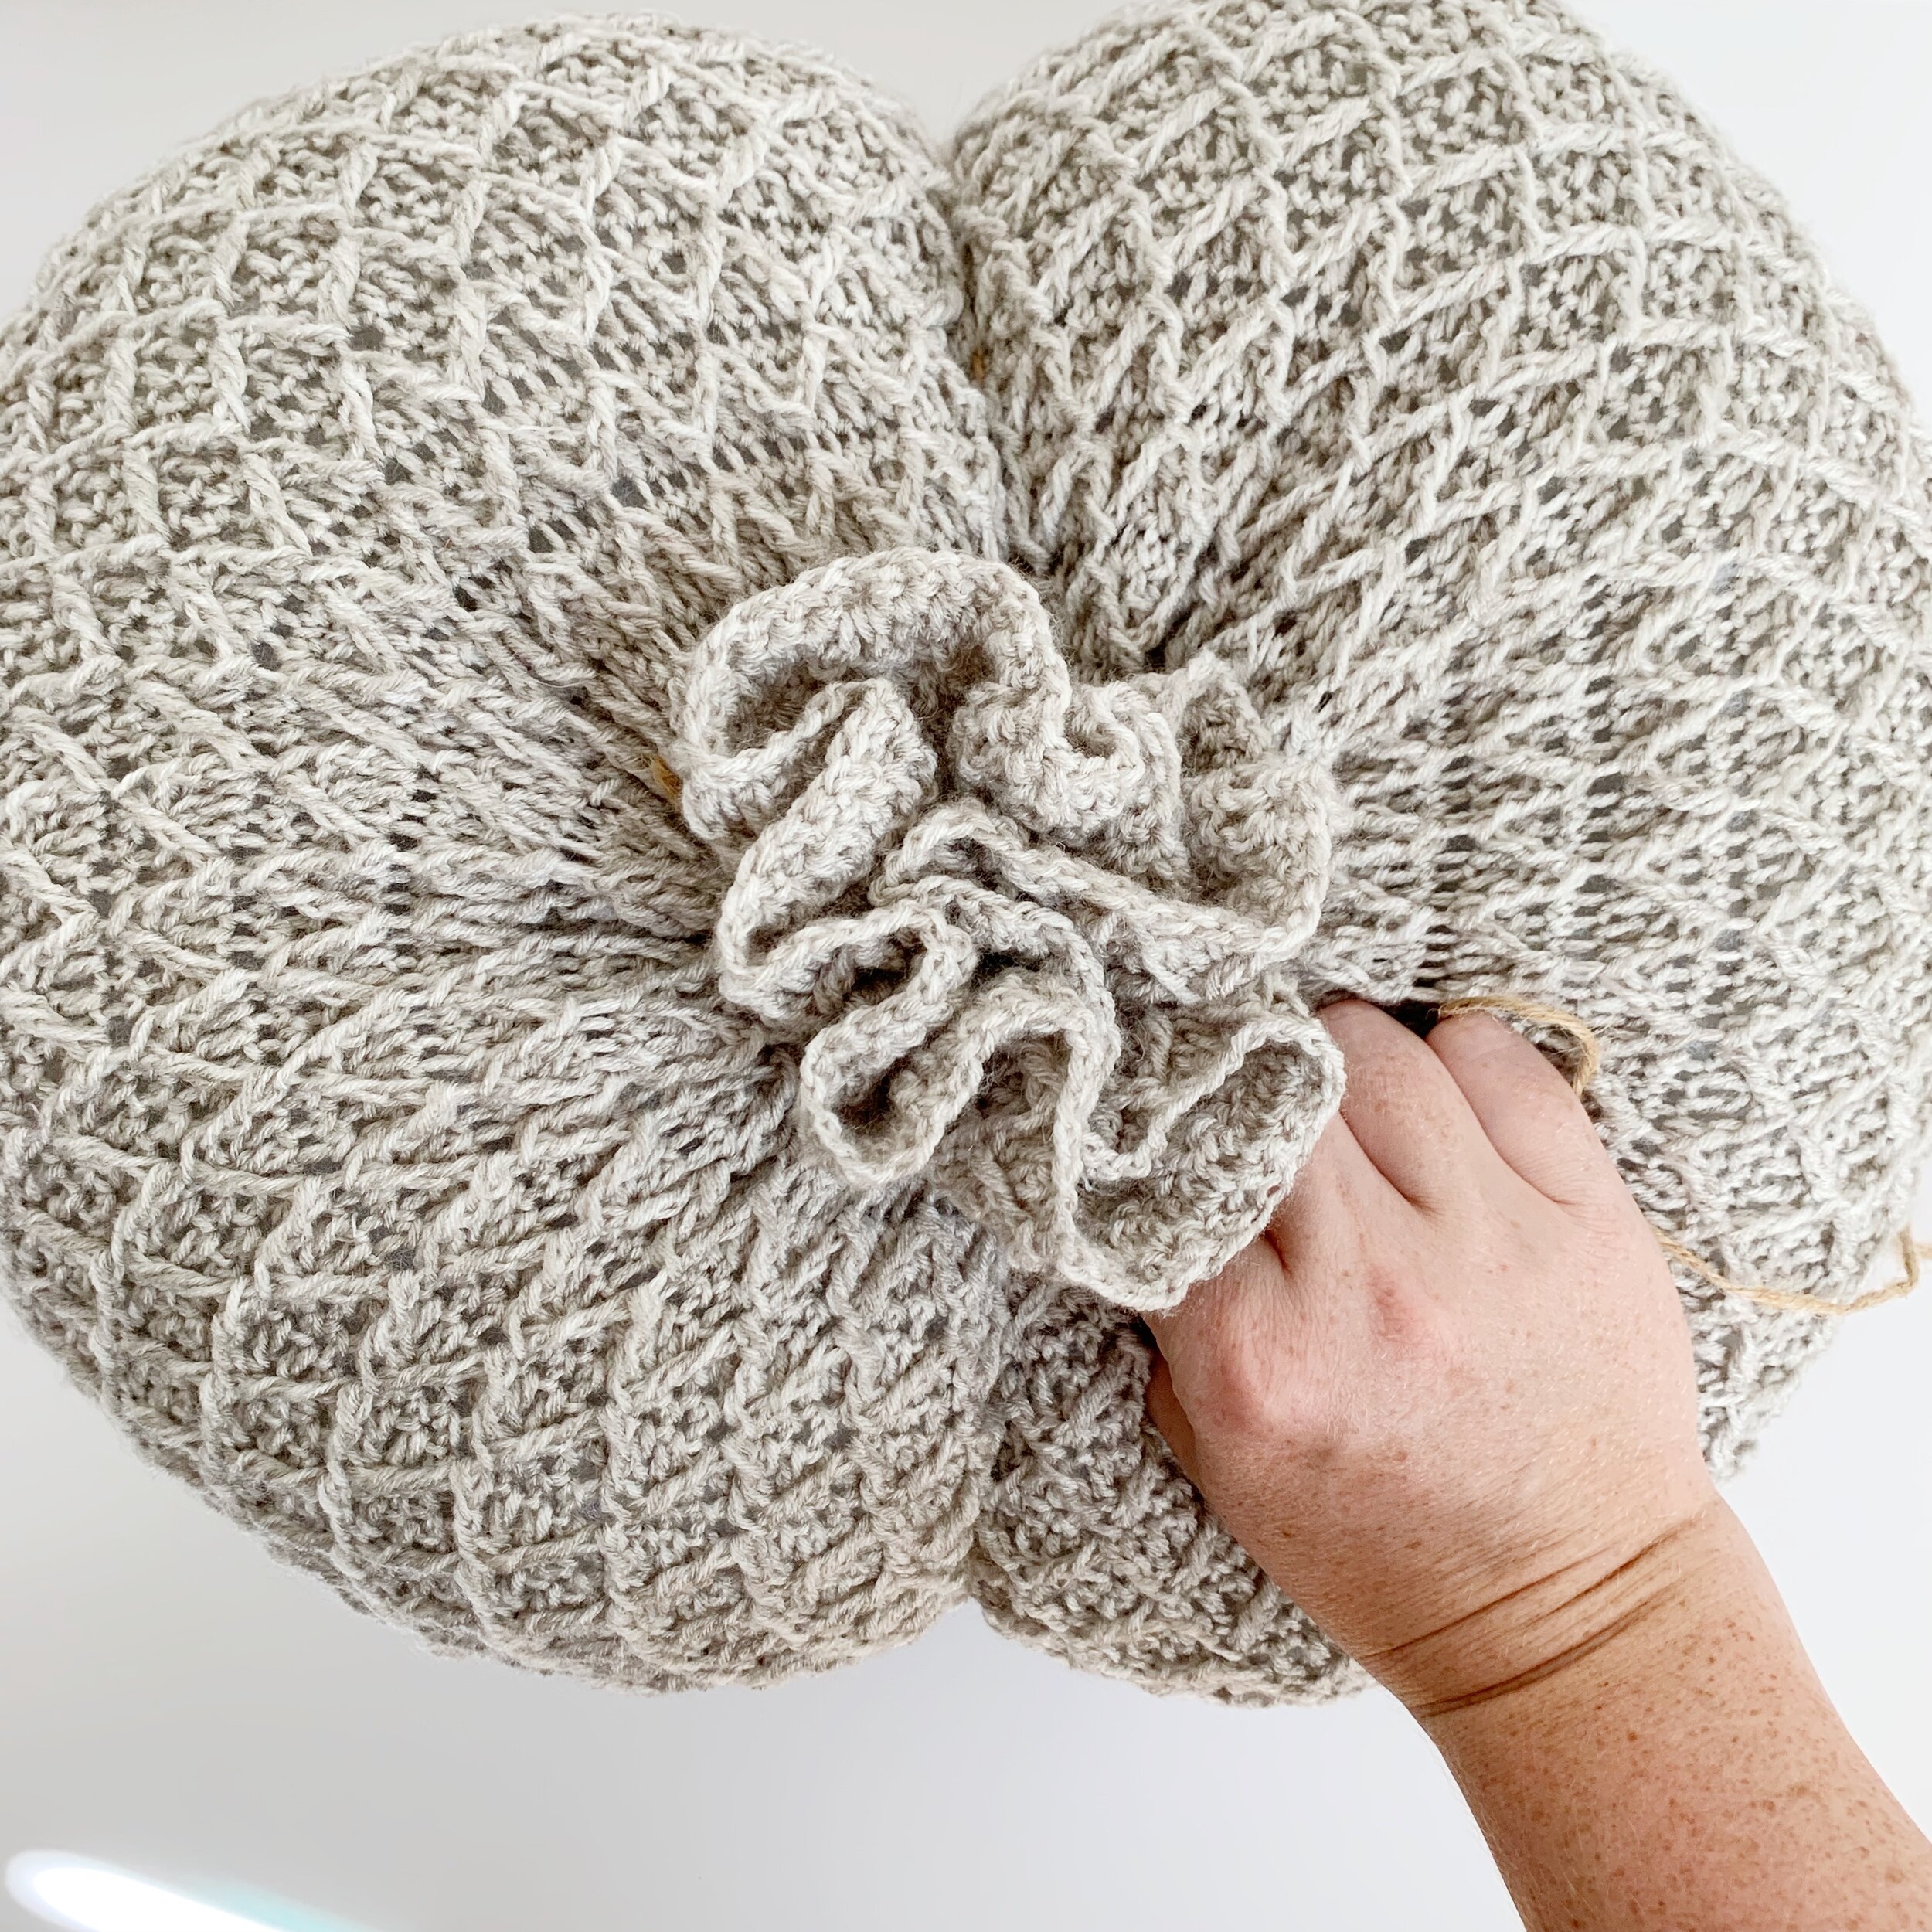
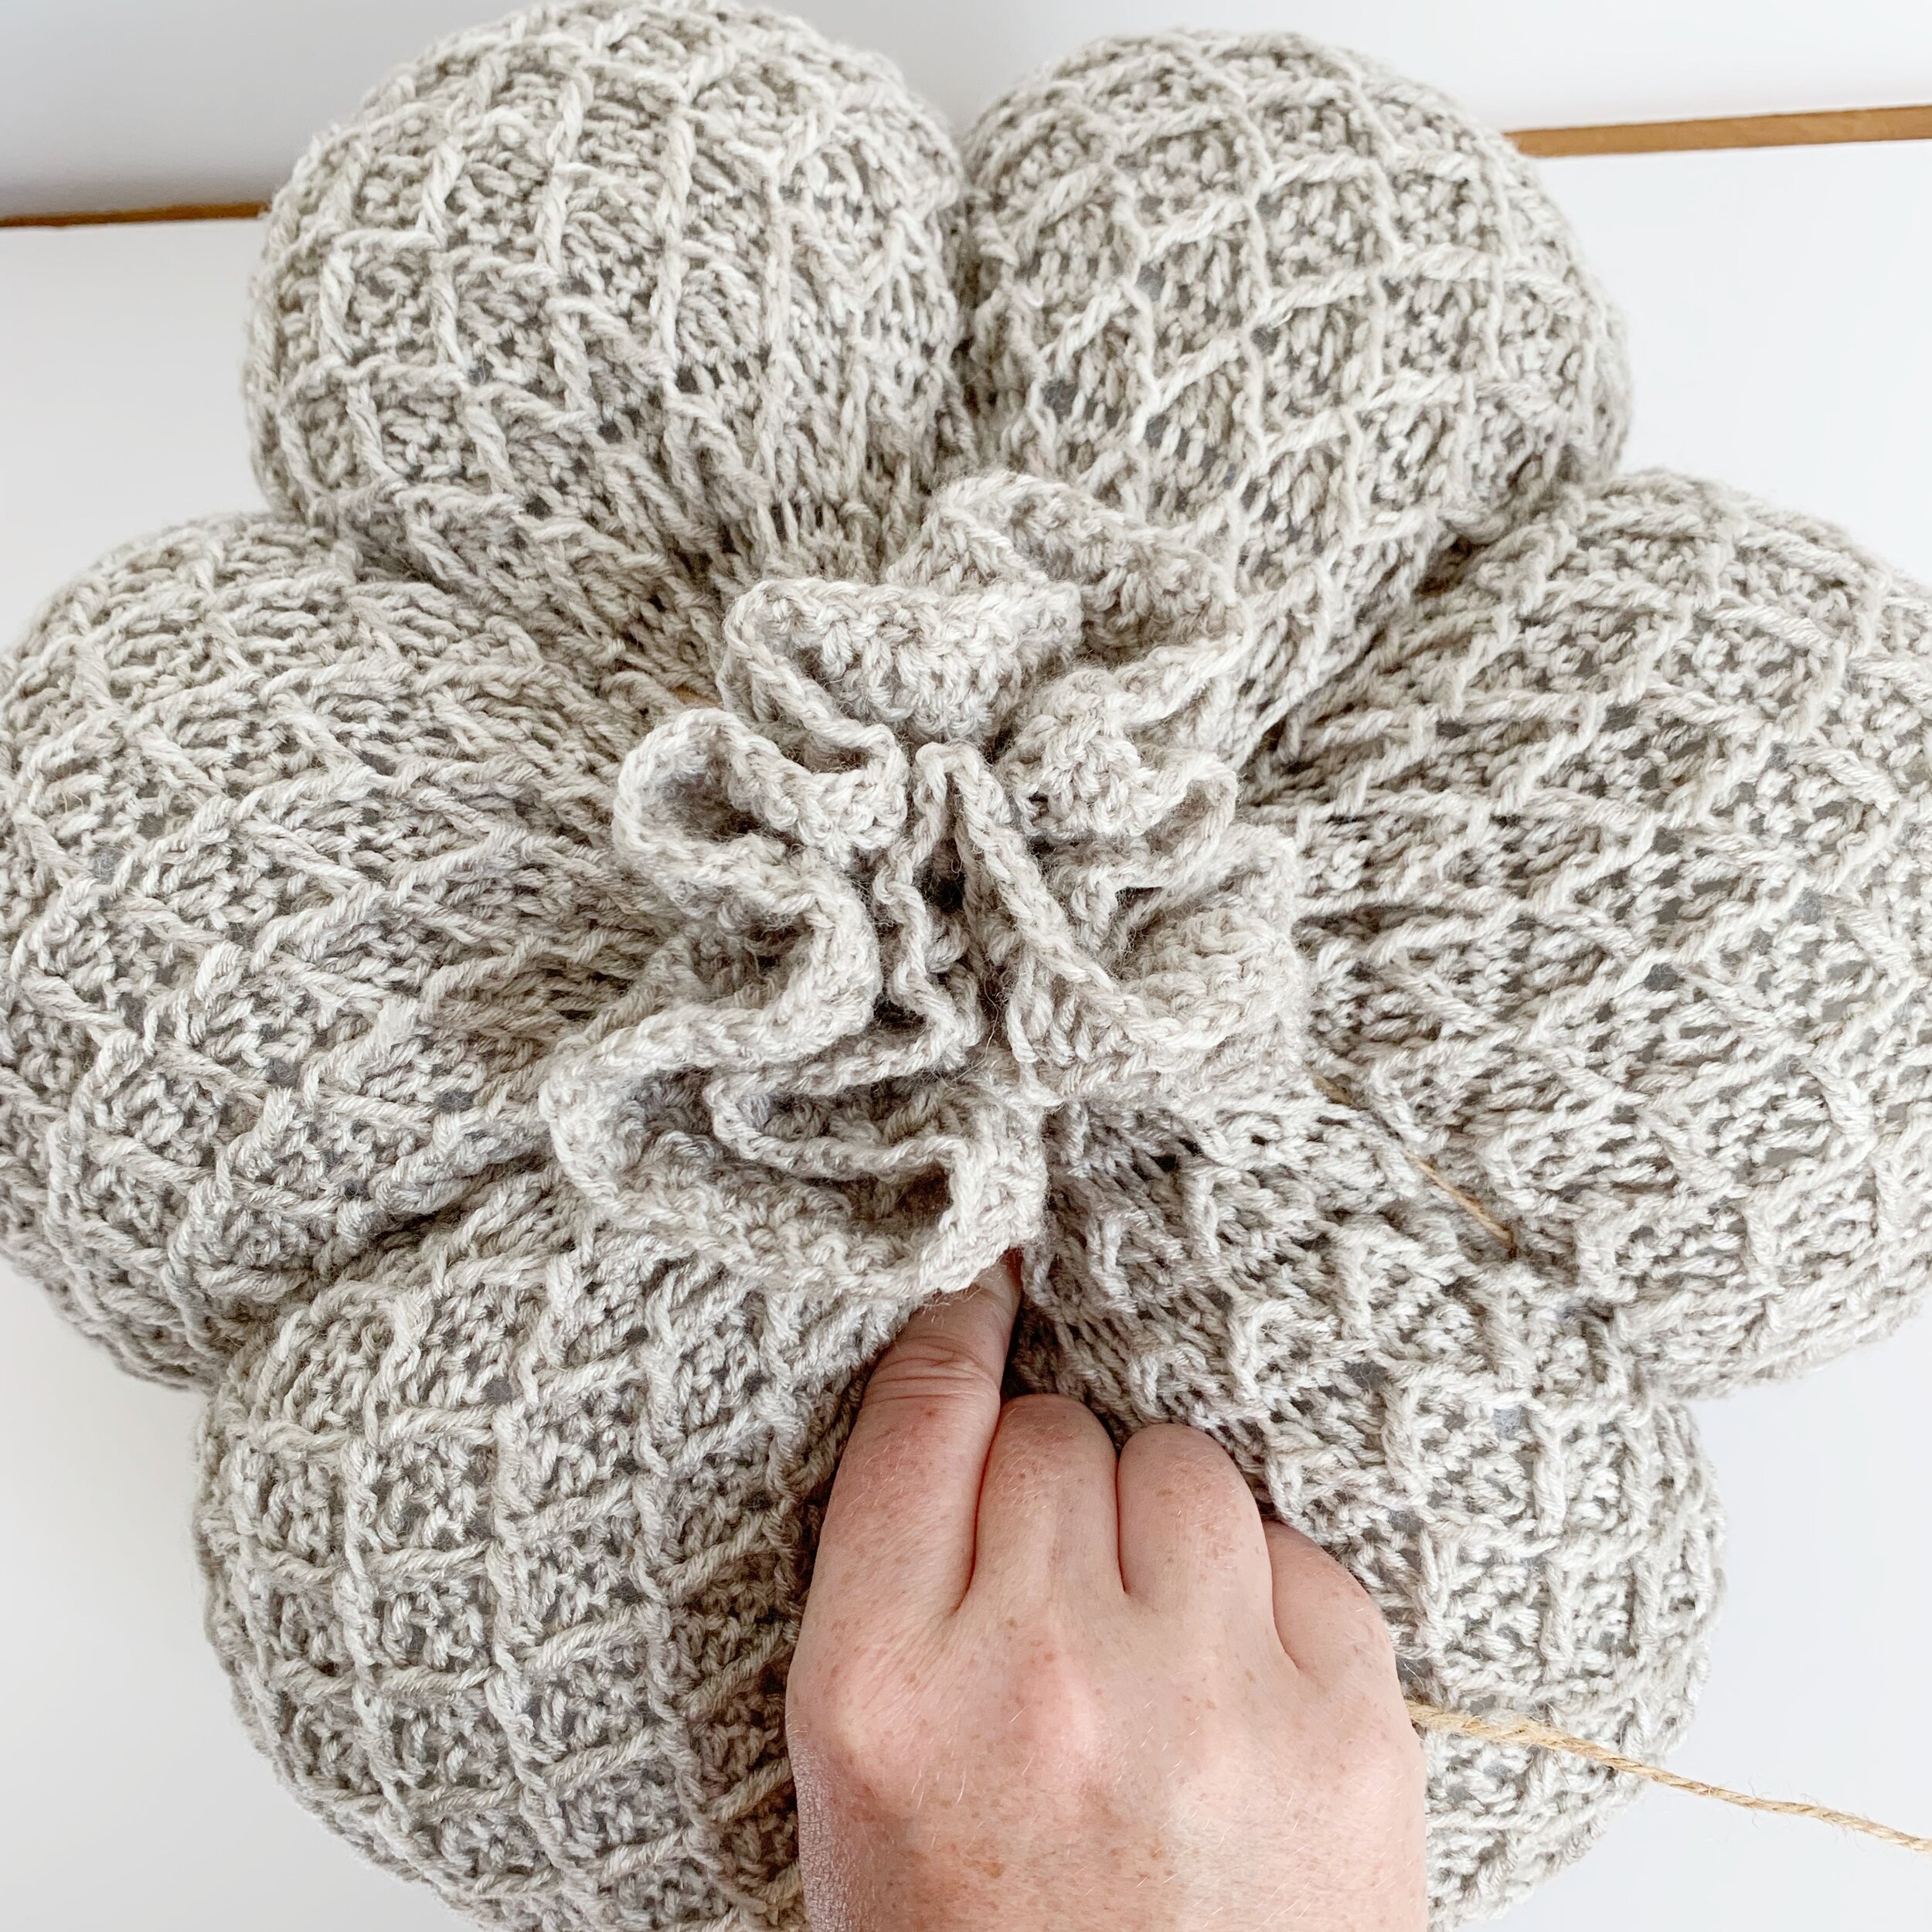
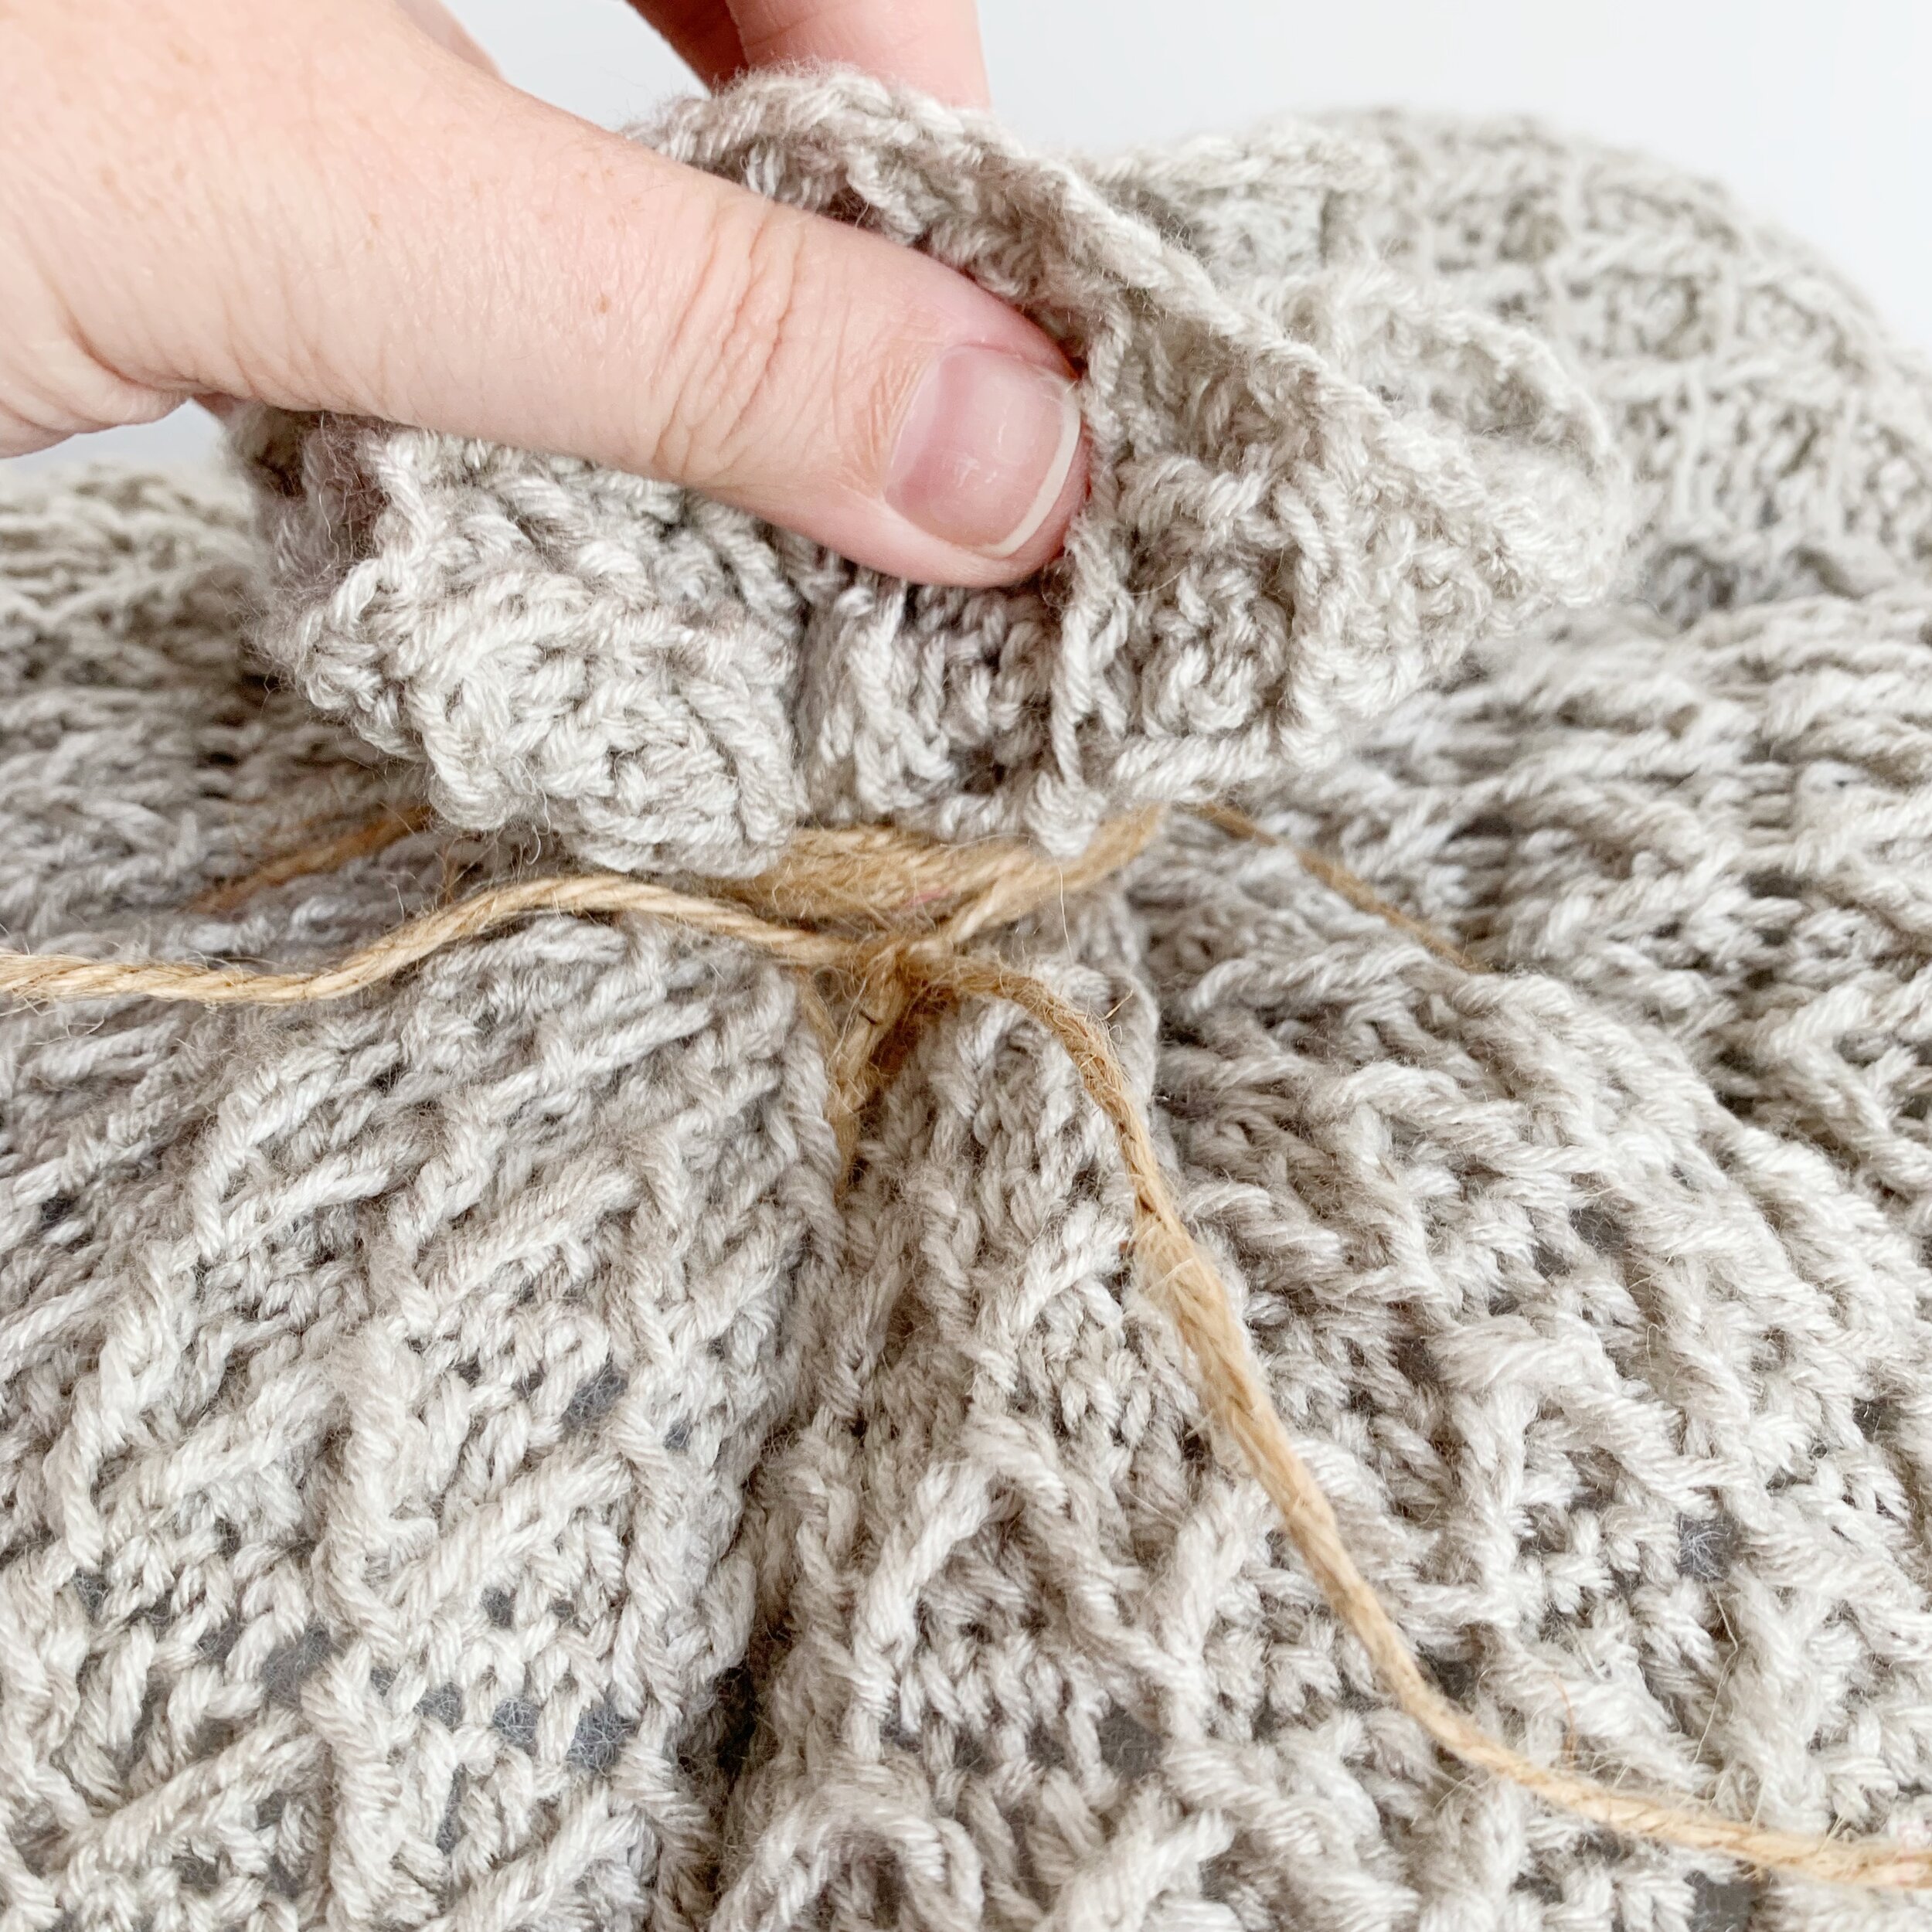
Once all six sections are created, wrap the long end of the twine around the top gathered section multiple times and tie a knot. Adjust the twine if needed to make even sections around the pumpkin. Enjoy!

I hope you liked this free crochet pattern for The Beryl Pumpkin. If you make one, I’d love to see it! Use #meghanmakesdo or #theberylpumpkin and tag me @meghanmakesdo on social media. Don’t forget you can find an ad-free PDF version of this pattern in my shop, on Etsy and Ravelry.
Happy Crocheting!
Meghan