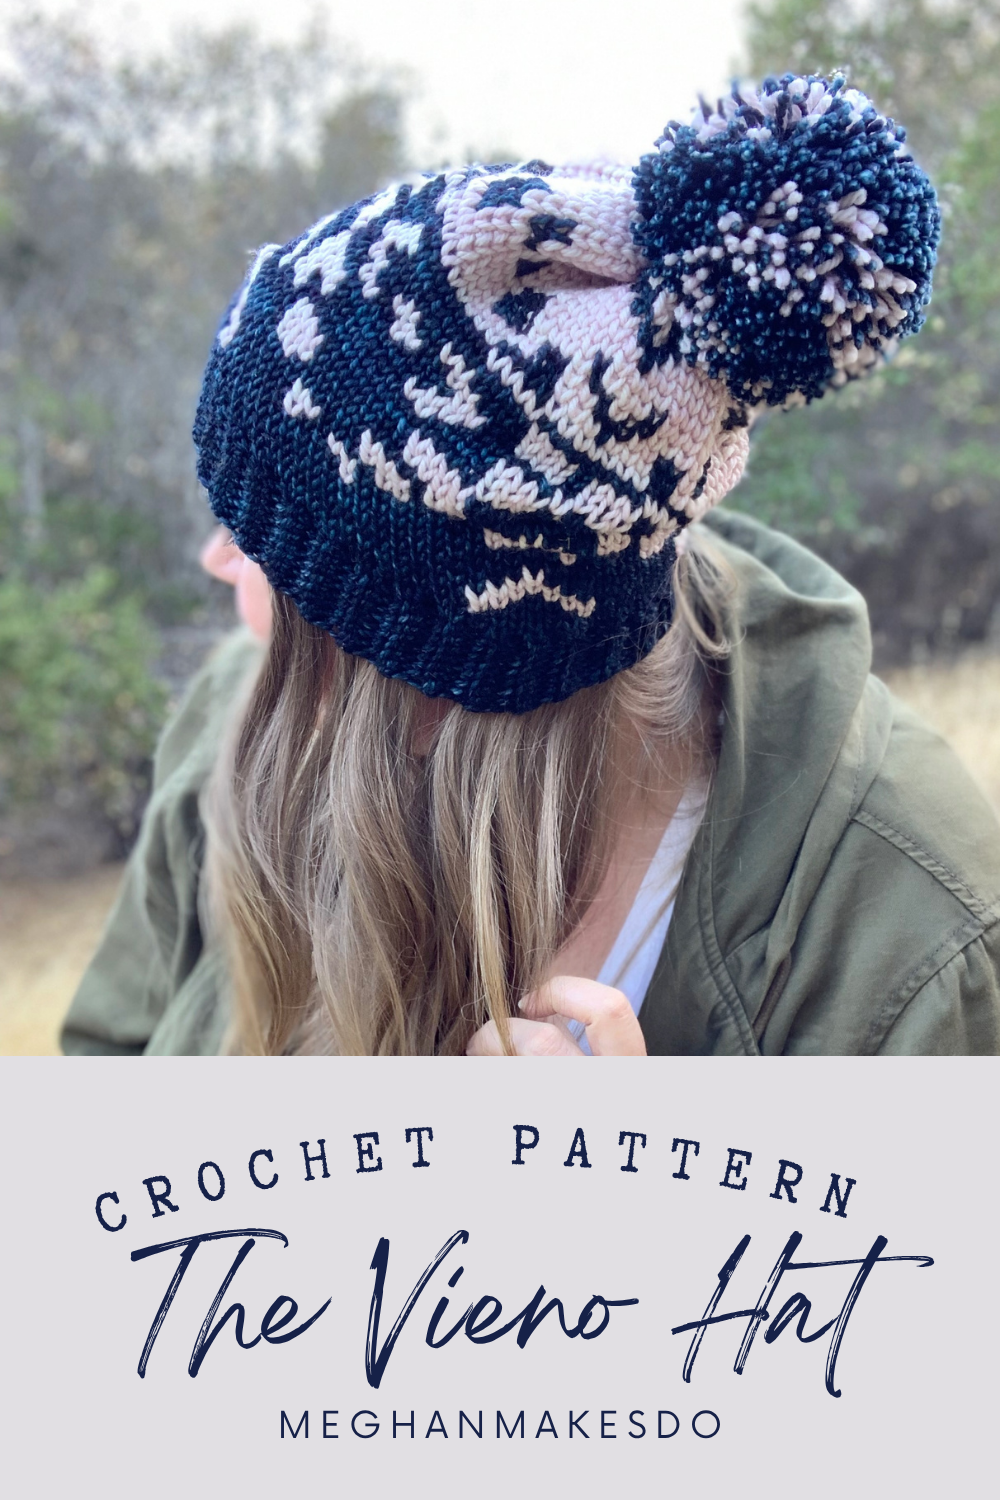
The Vieno Hat Crochet Pattern
The Vieno Hat crochet pattern combines classic stranded colorwork crochet with a modern snowflake motif for a fun, contemporary look. Worked using two colors of worsted to bulky weight yarn combined with simple crochet stitches lets the design really pop. The hat is worked from the brim up and is finished with a full pom-pom for cozy, wearable style.
Keep scrolling for the free version or grab a printable PDF in the shop.
This design has been sitting in my “to publish” pile since 2021! 🫣
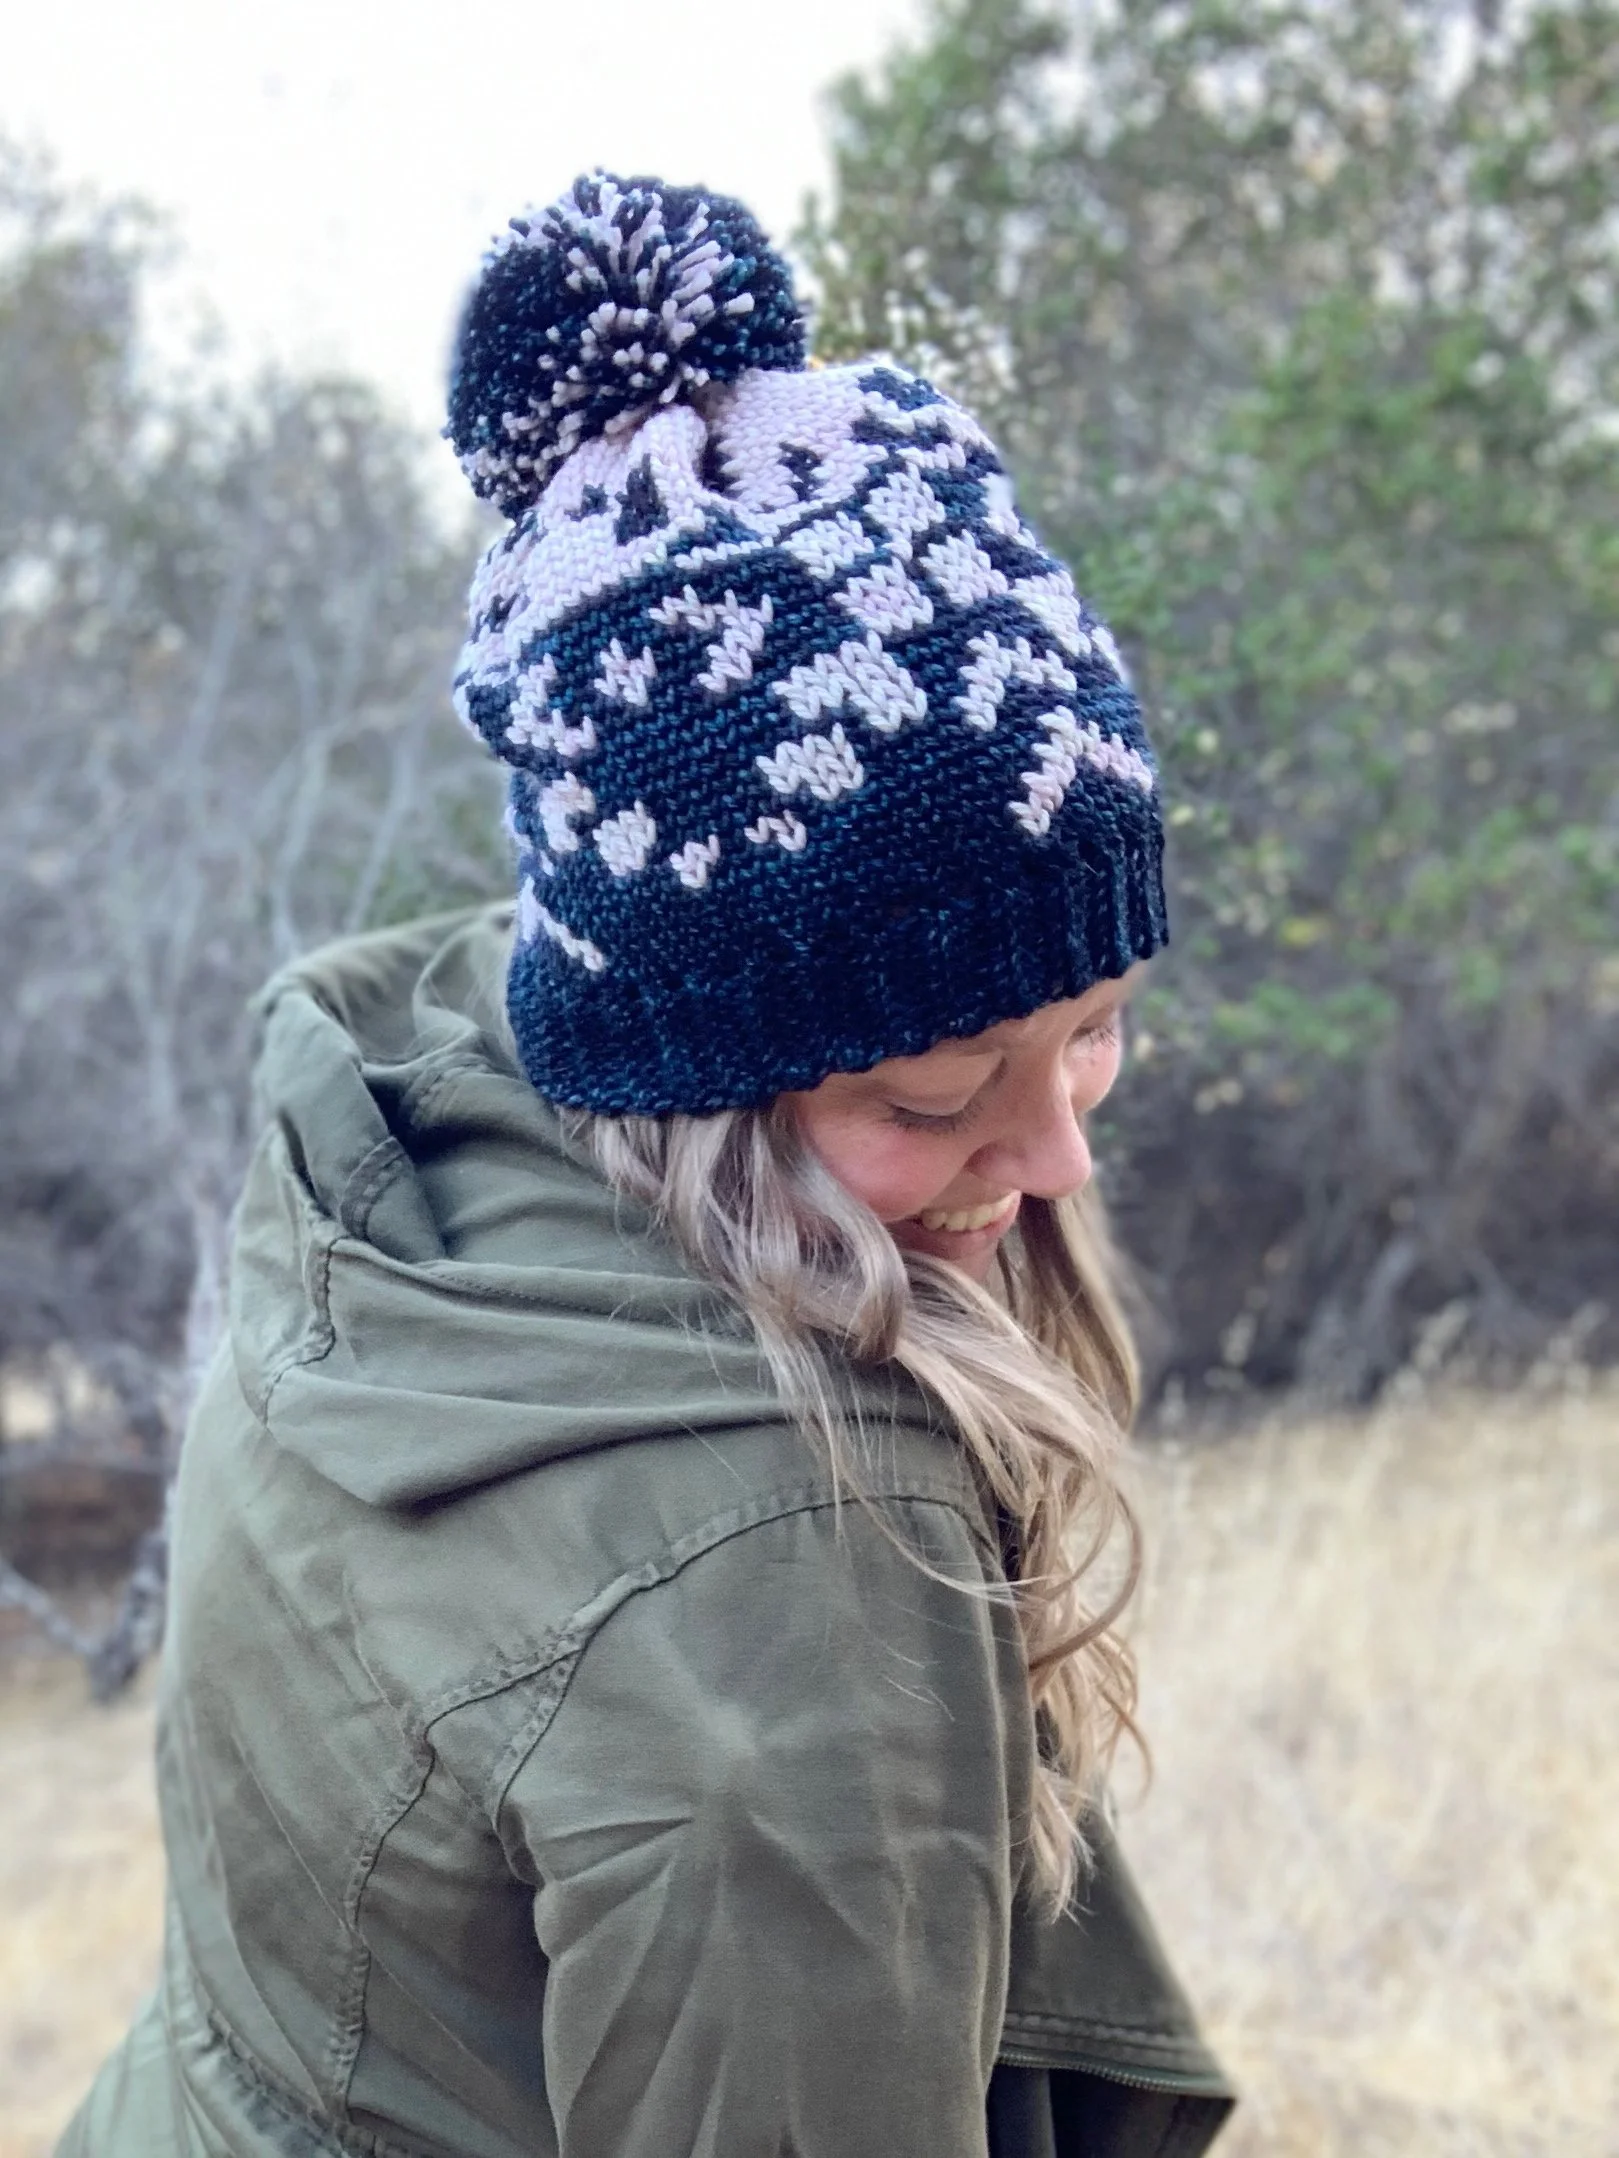
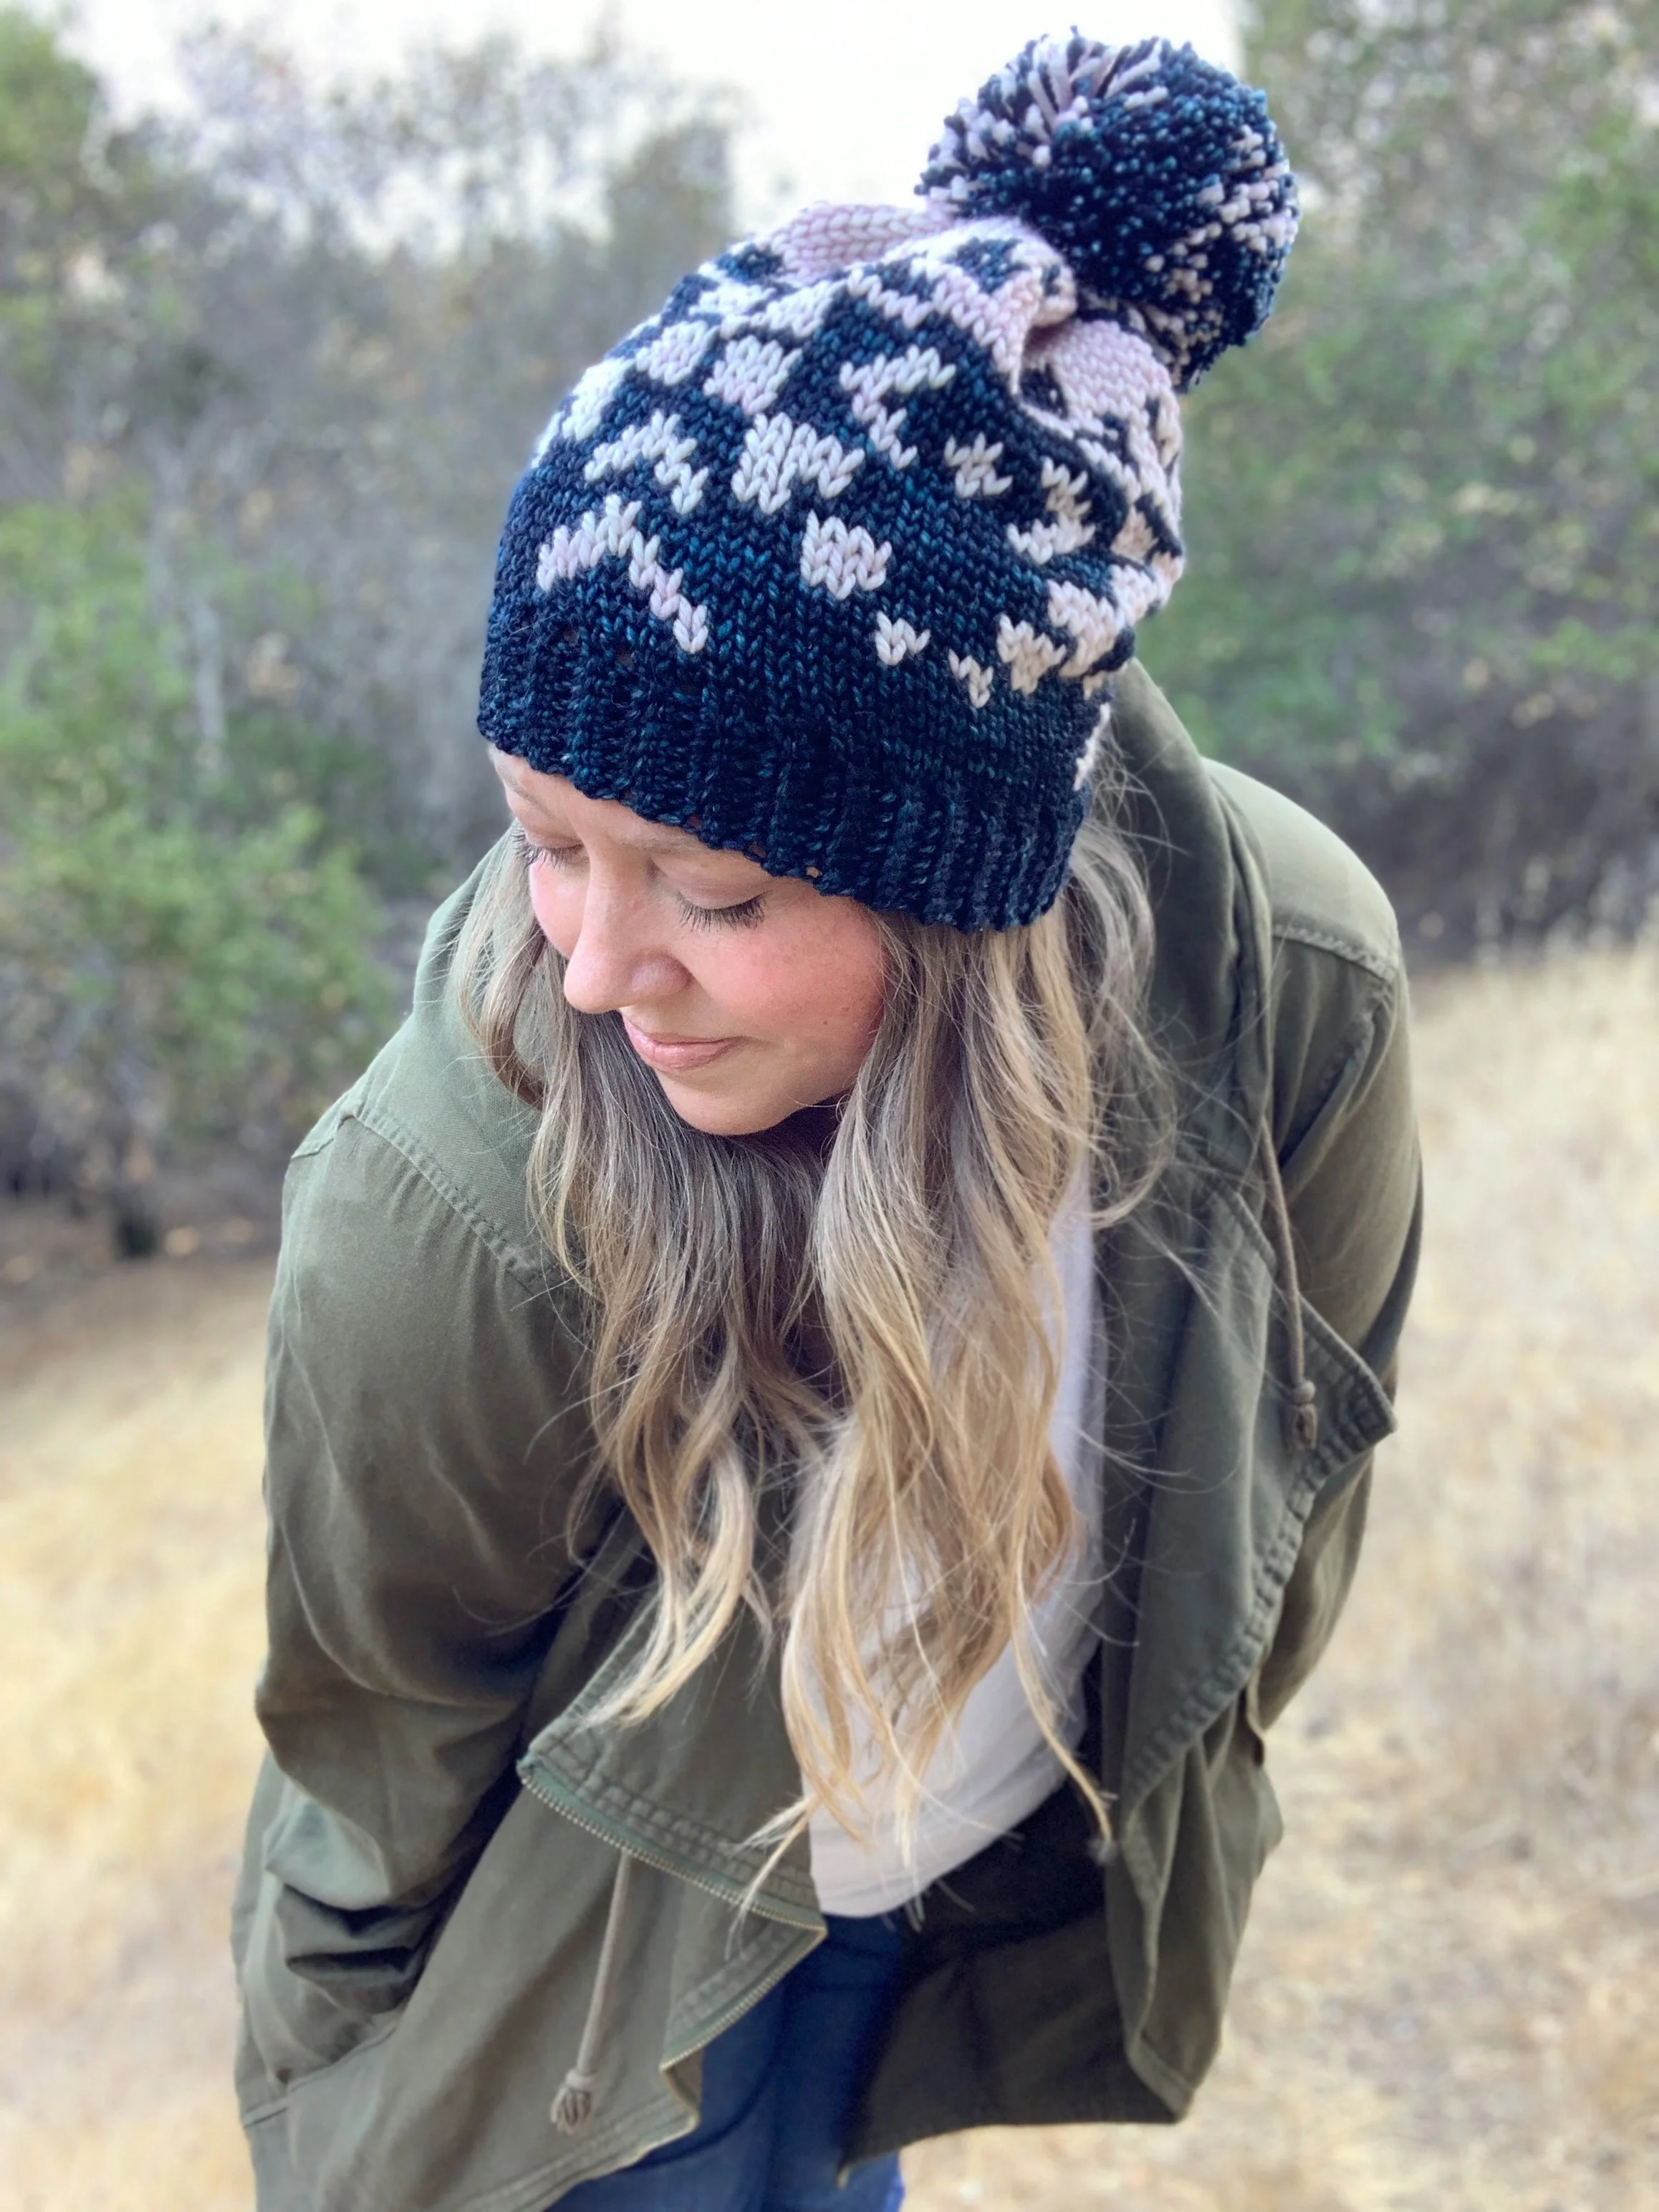
I know right?! Why has it taken me so long to get this pattern out to you? Well, originally I designed the hat for Madeline Tosh using their Tosh Twist yarn. You can see it in the pretty blue and light pink version below.
It was a part of their Holiday collection back in 2021. I loved creating this hat design and when it was time to me to share it here, life happened and it quickly got put on the back burner.
It’s one of those things that I always have in the back of my mind though, nagging at me to just put it on the blog and in my shop. So, while I was traveling abroad in Iceland last Spring I thought it would be the perfect time to find some new yarn and remake it for when I finally released it here.
Fast forward to this year when I started my Stitching Through The Stash series on YouTube and Instagram. The first project picked was the Vieno Hat!
I was so excited that I would finally be able to get this pattern out and that I was using up the yarn in my stash. Since it was a hat and a pattern that I’d already created I thought for sure it would be a quick project…boy was I wrong.
I wound up the yarn and started crocheting and then quickly realized I wasn’t going to have enough yarn to finish. It made me question how I was able to make the original hat using just two skeins of similar weight yarn. Did I have more and don’t remember? Was my gauge way off this time? It was frustrating and disappointing that it wasn’t working out as I planned.
I decided to pivot and knit the hat instead. That too came with it’s own set of issues which you can read more about here. Eventually I did get the Vieno Knit hat finished and it turned out super cute, but there was still a problem… I hadn’t released the crochet pattern! And now I also wanted to release the knit pattern as well.
So being me and being extra, I set to work to recreate the crochet version and the knit version so I could make video tutorials and get both patterns released into the world. It took me several weeks, but I'm finally ready to share them with you.
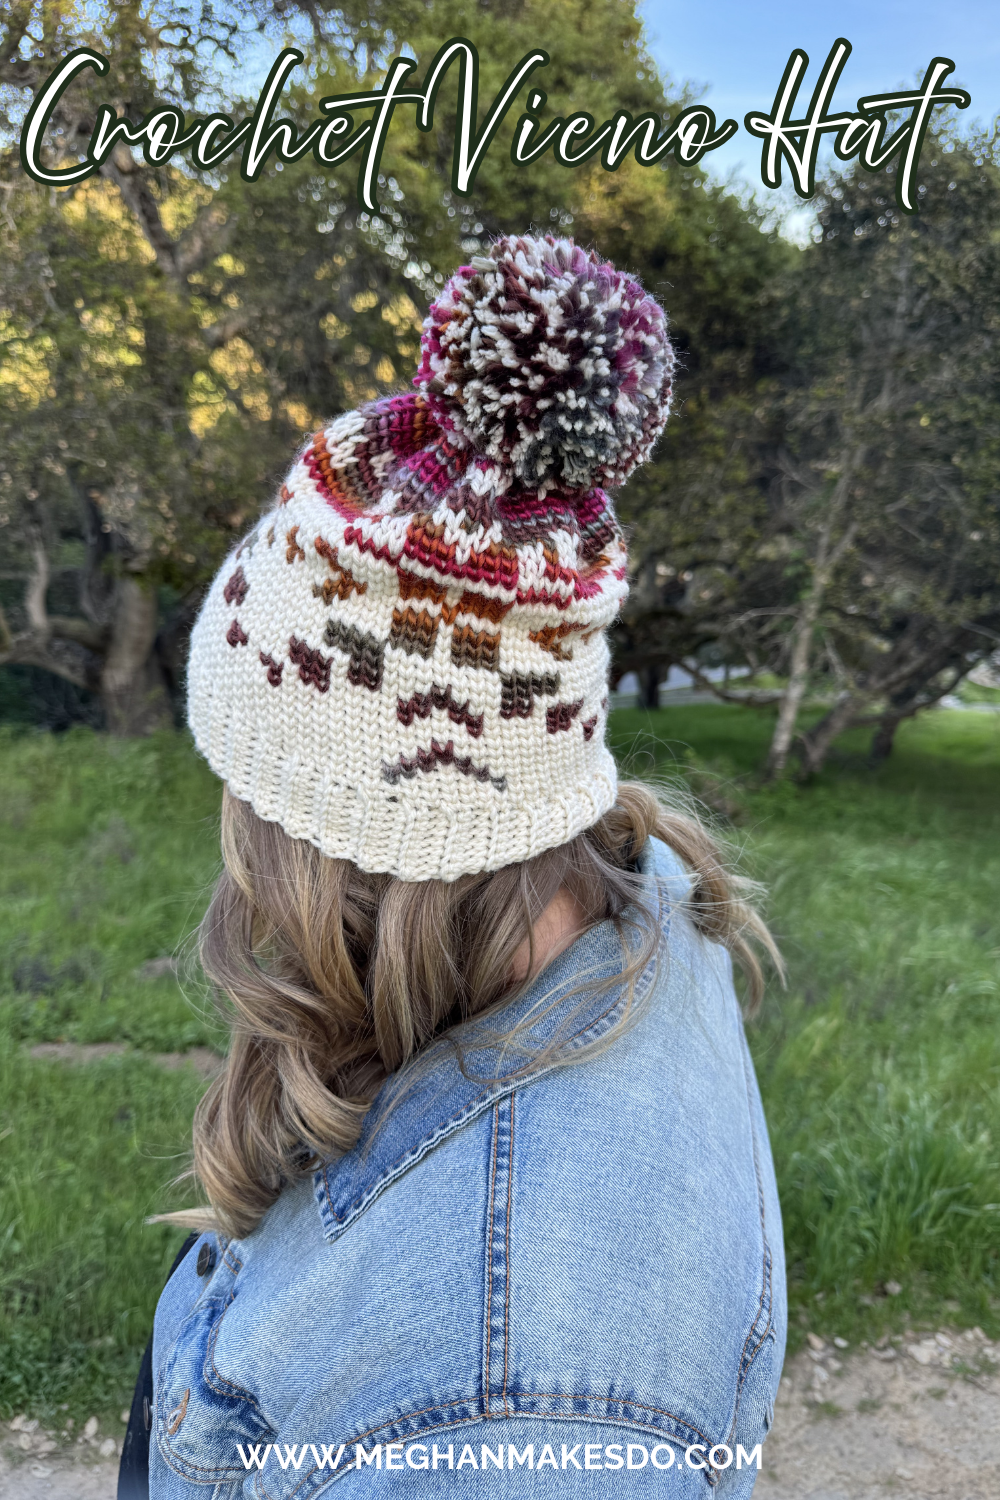
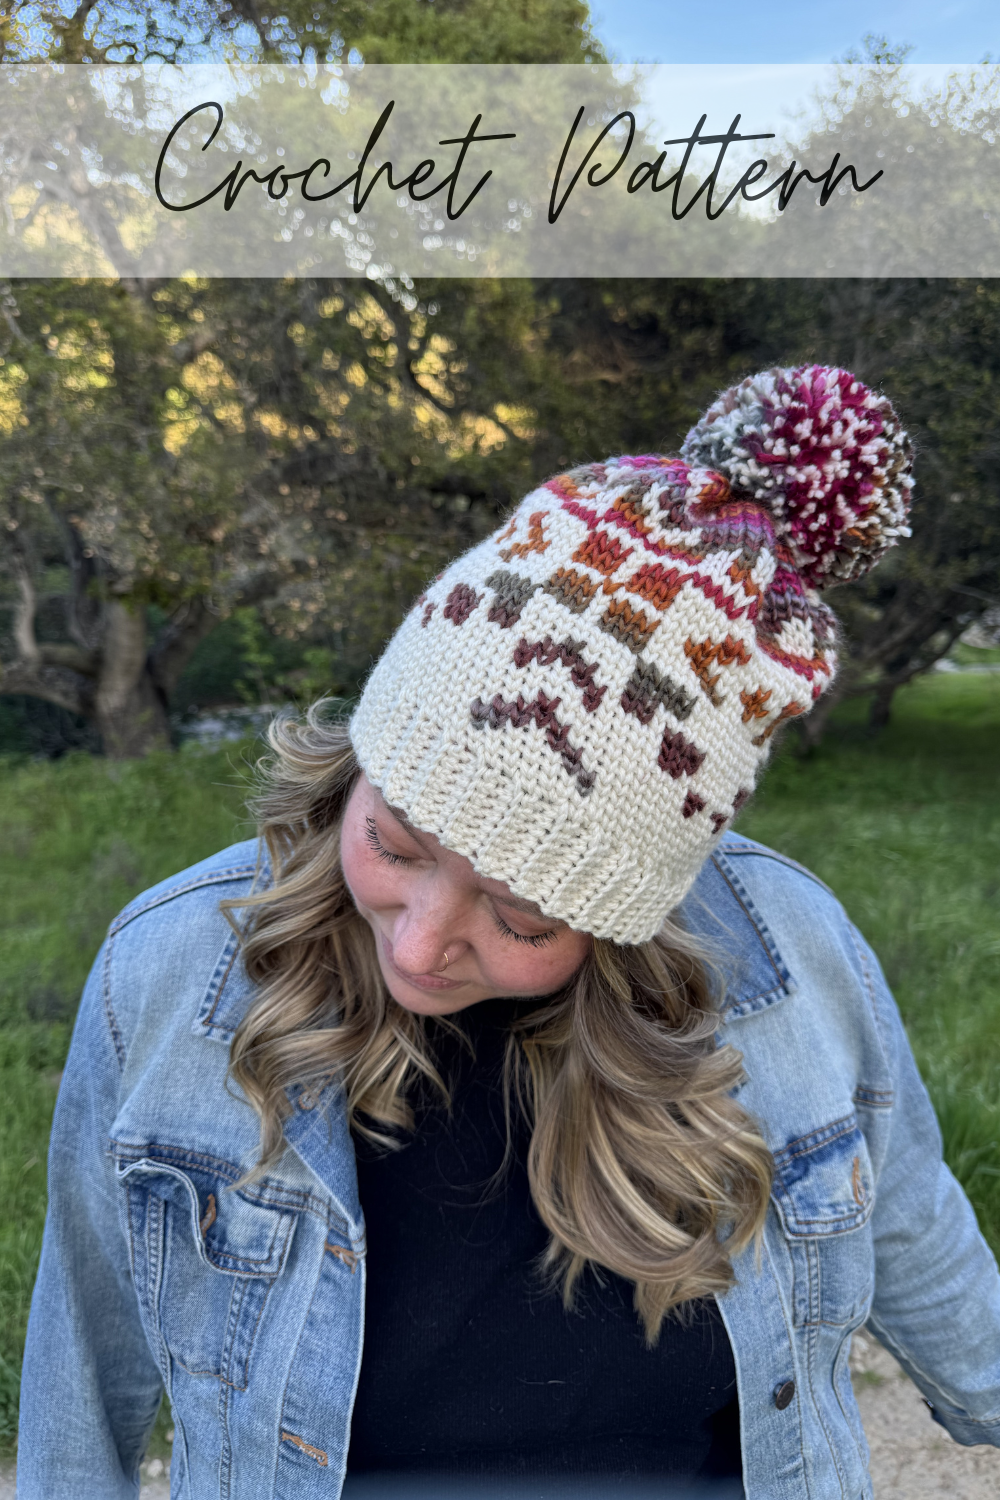
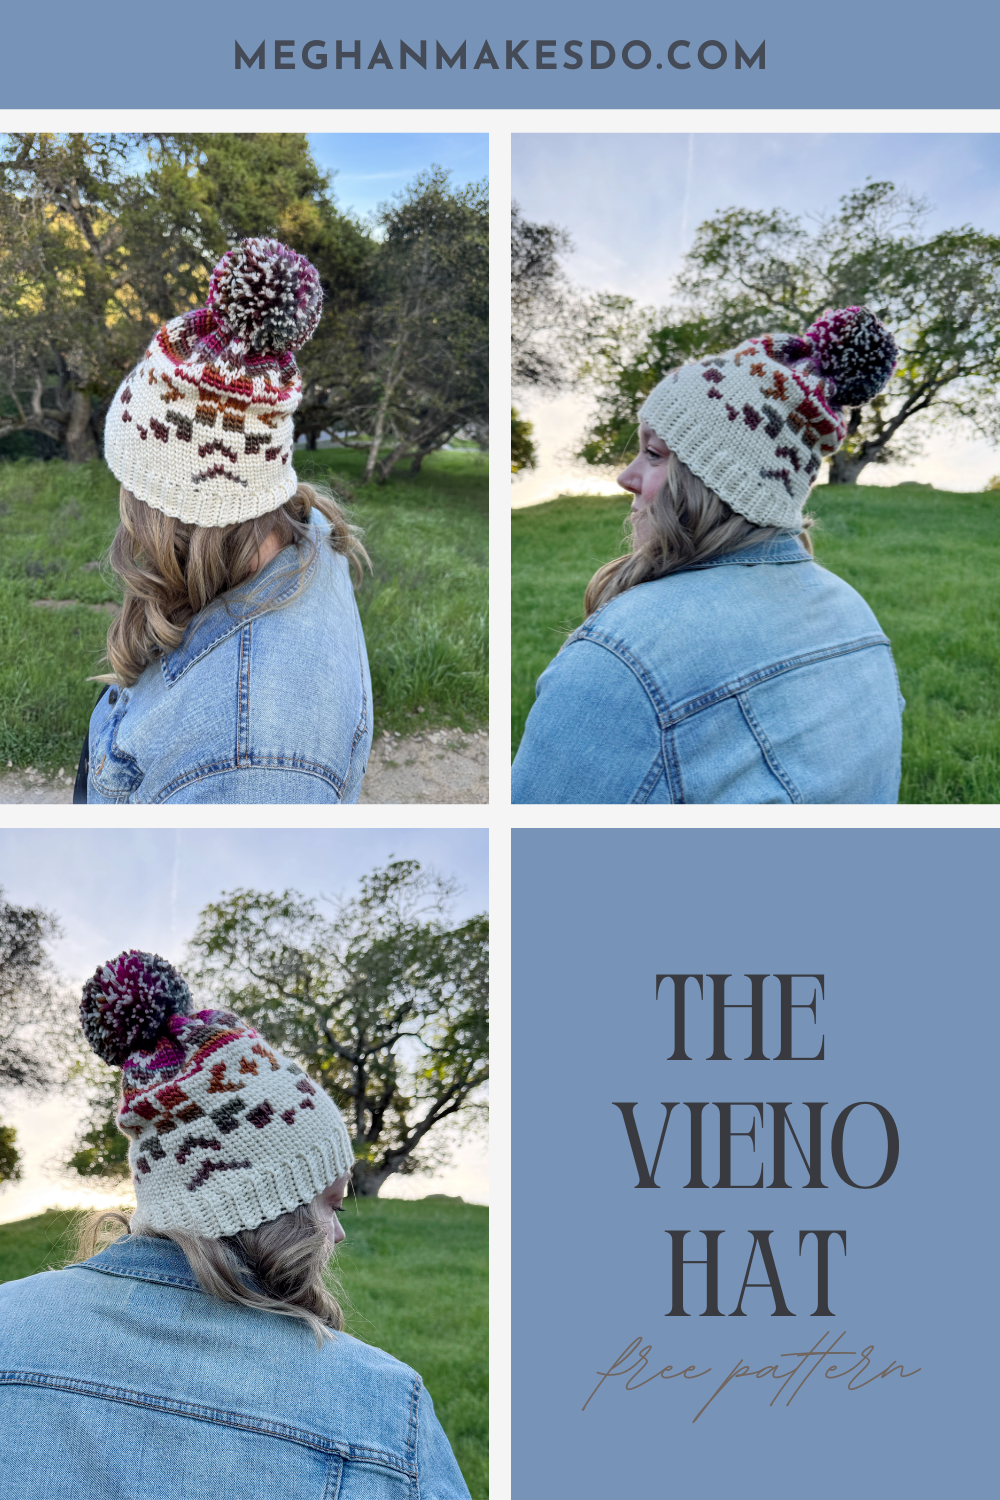
I ended up using more yarn from my stash which makes me really happy. This time I used Lion Brand’s Wool-Ease and Landscapes which I had left over from my Magnus Pullover. I just love this color combo and I think it really makes the pattern pop.
You can find the free version below and you can purchase a printable PDF in my shop, Etsy or Ravelry.
If you are new to stranded color work or using the center single crochet, make sure to check out the video tutorial so I can walk you through it step by step.
The Vieno Hat Crochet Pattern
Materials:
150 yards (1 skein) of a weight 4 yarn for Color A (shown in Lion Brand Wool-Ease)
120 yards (1 skein) of a weight 4 yarn for Color B (shown in Lion Brand Landscapes)
5mm crochet hook
Tapestry needle, scissors, tape measure
pom-pom maker (optional)
Notes:
1.Pattern is made bottom up starting with a ribbed band worked in rows which is then joined to create a loop. The main body of the hat is then worked in continuous rounds directly into the edges of the ribbing. Place a stitch marker in the first stitch of each round to keep track of where to end each round.
2.To keep tension loose and even it is recommended to work with the WS facing out.
3.ch 1 at the beginning of rows does not count as a stitch.
Abbreviations:
Ch-chain
Sc-single crochet
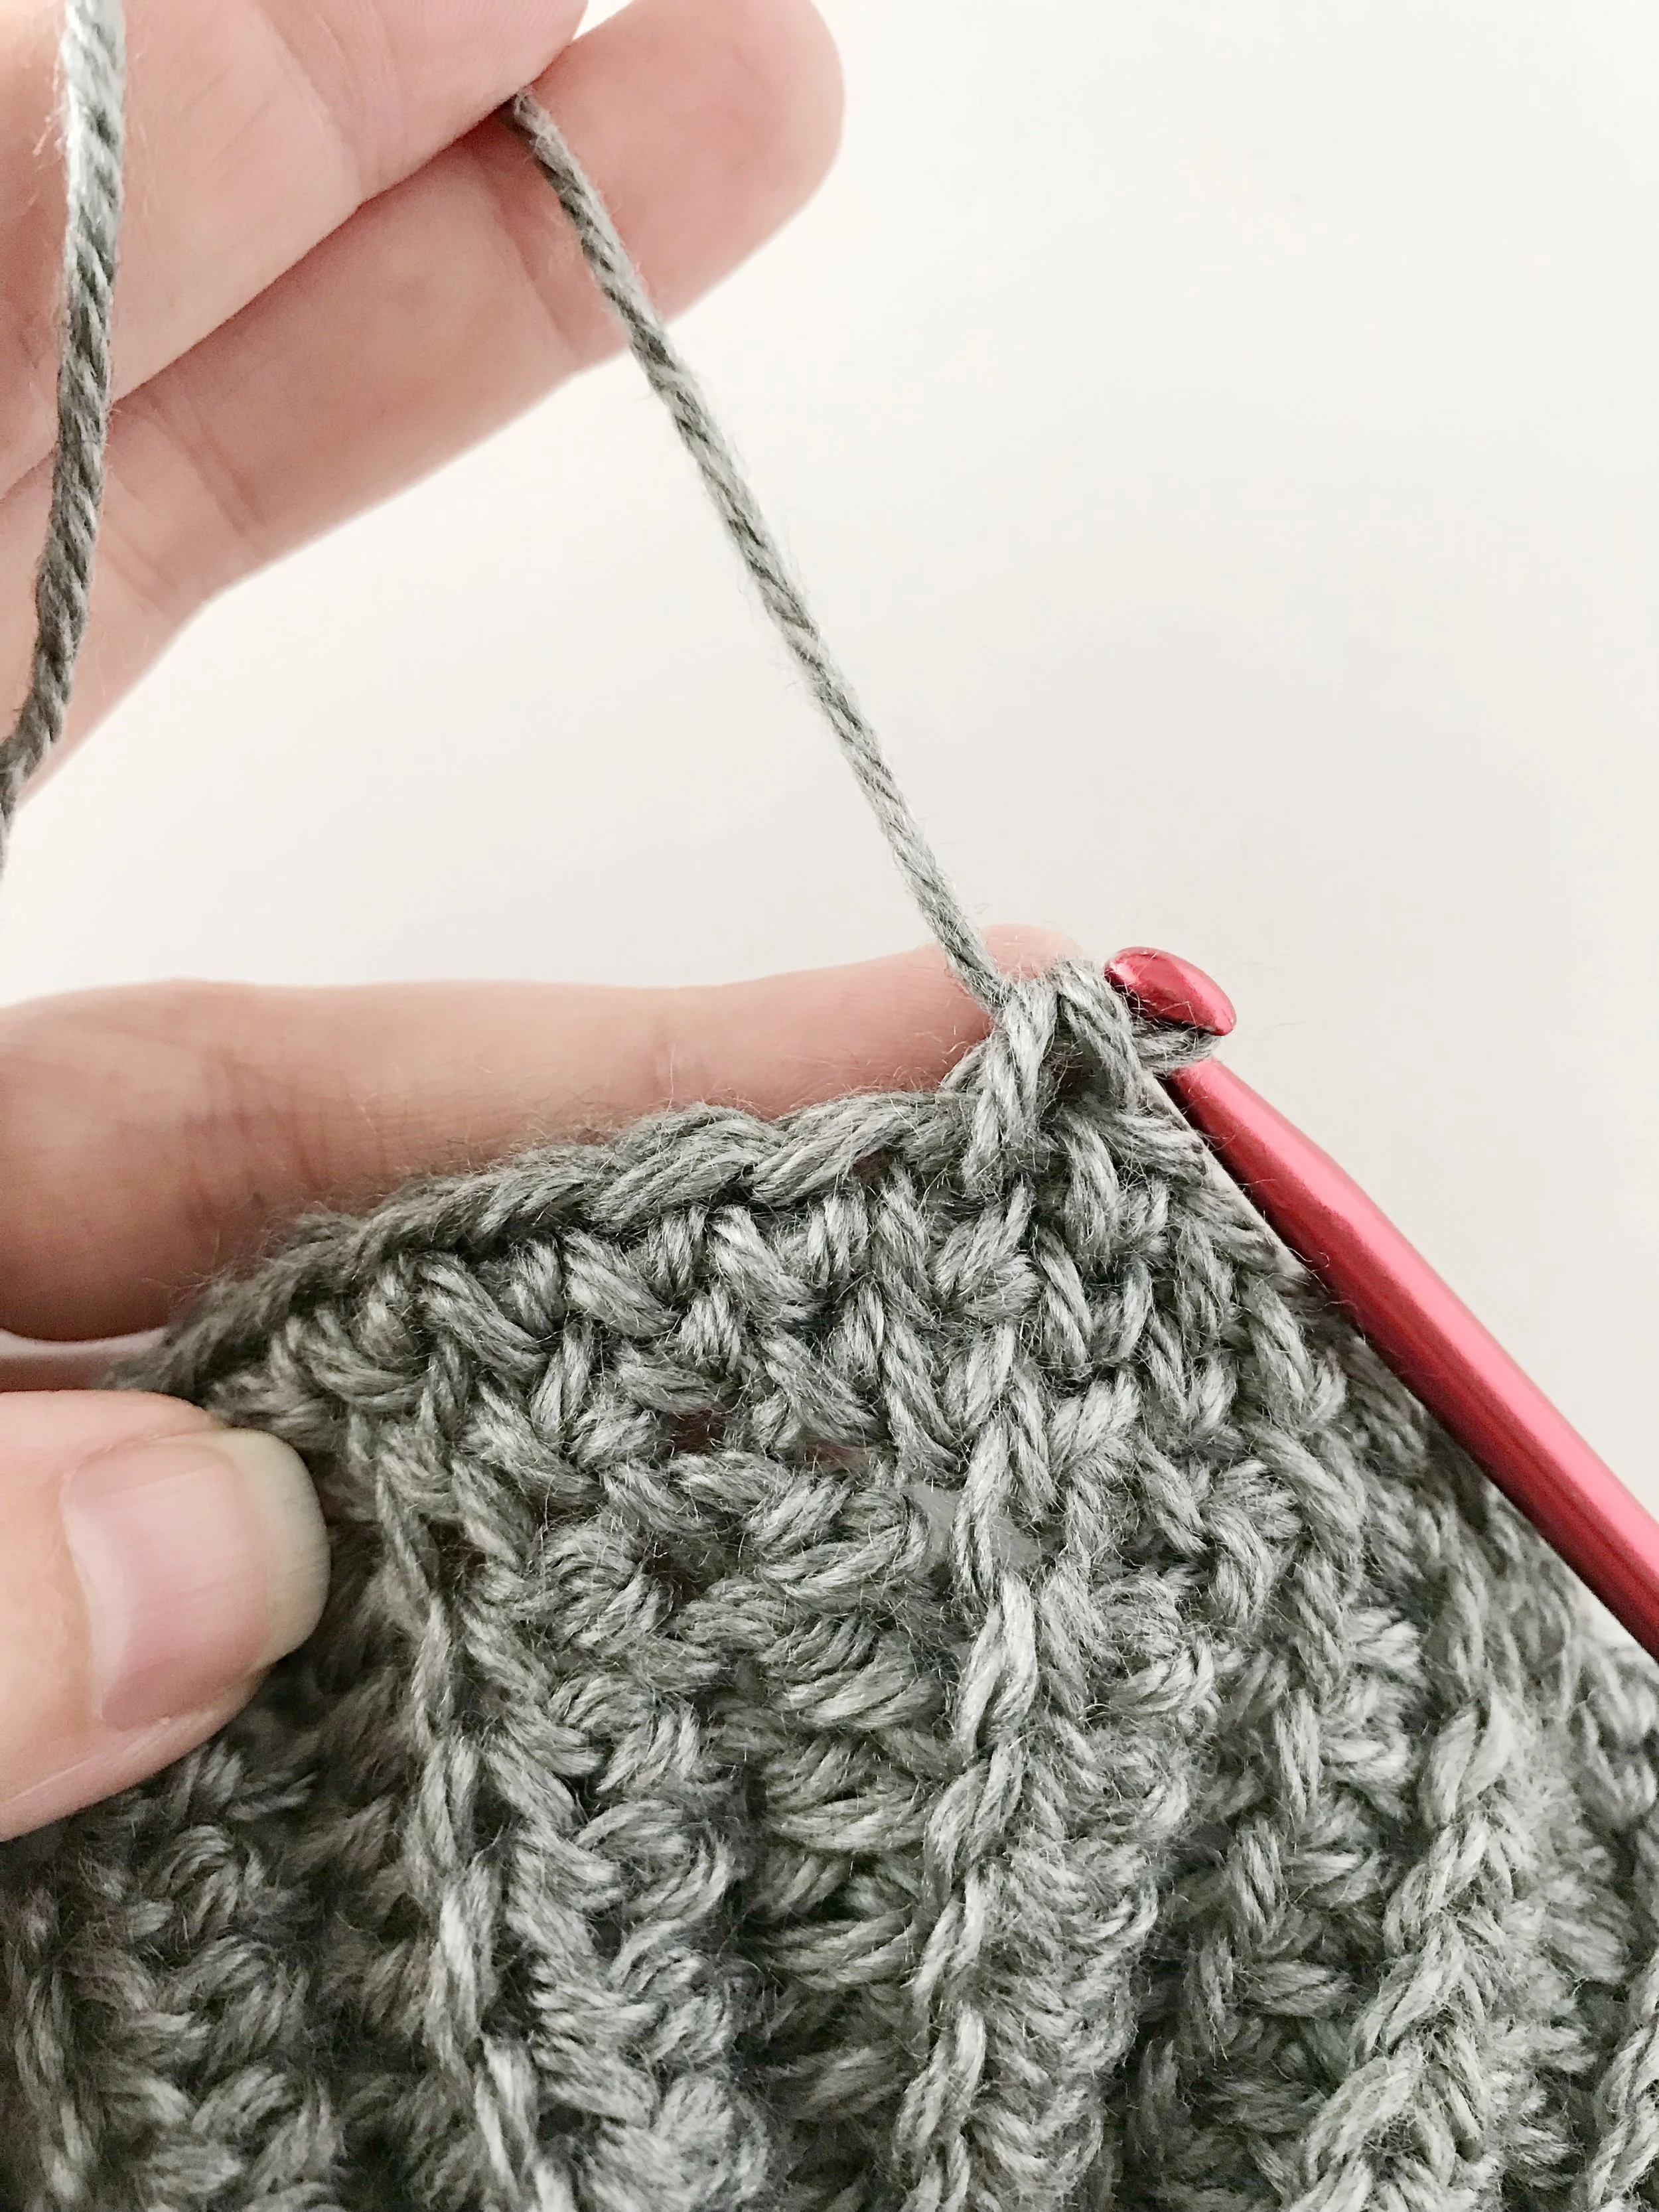
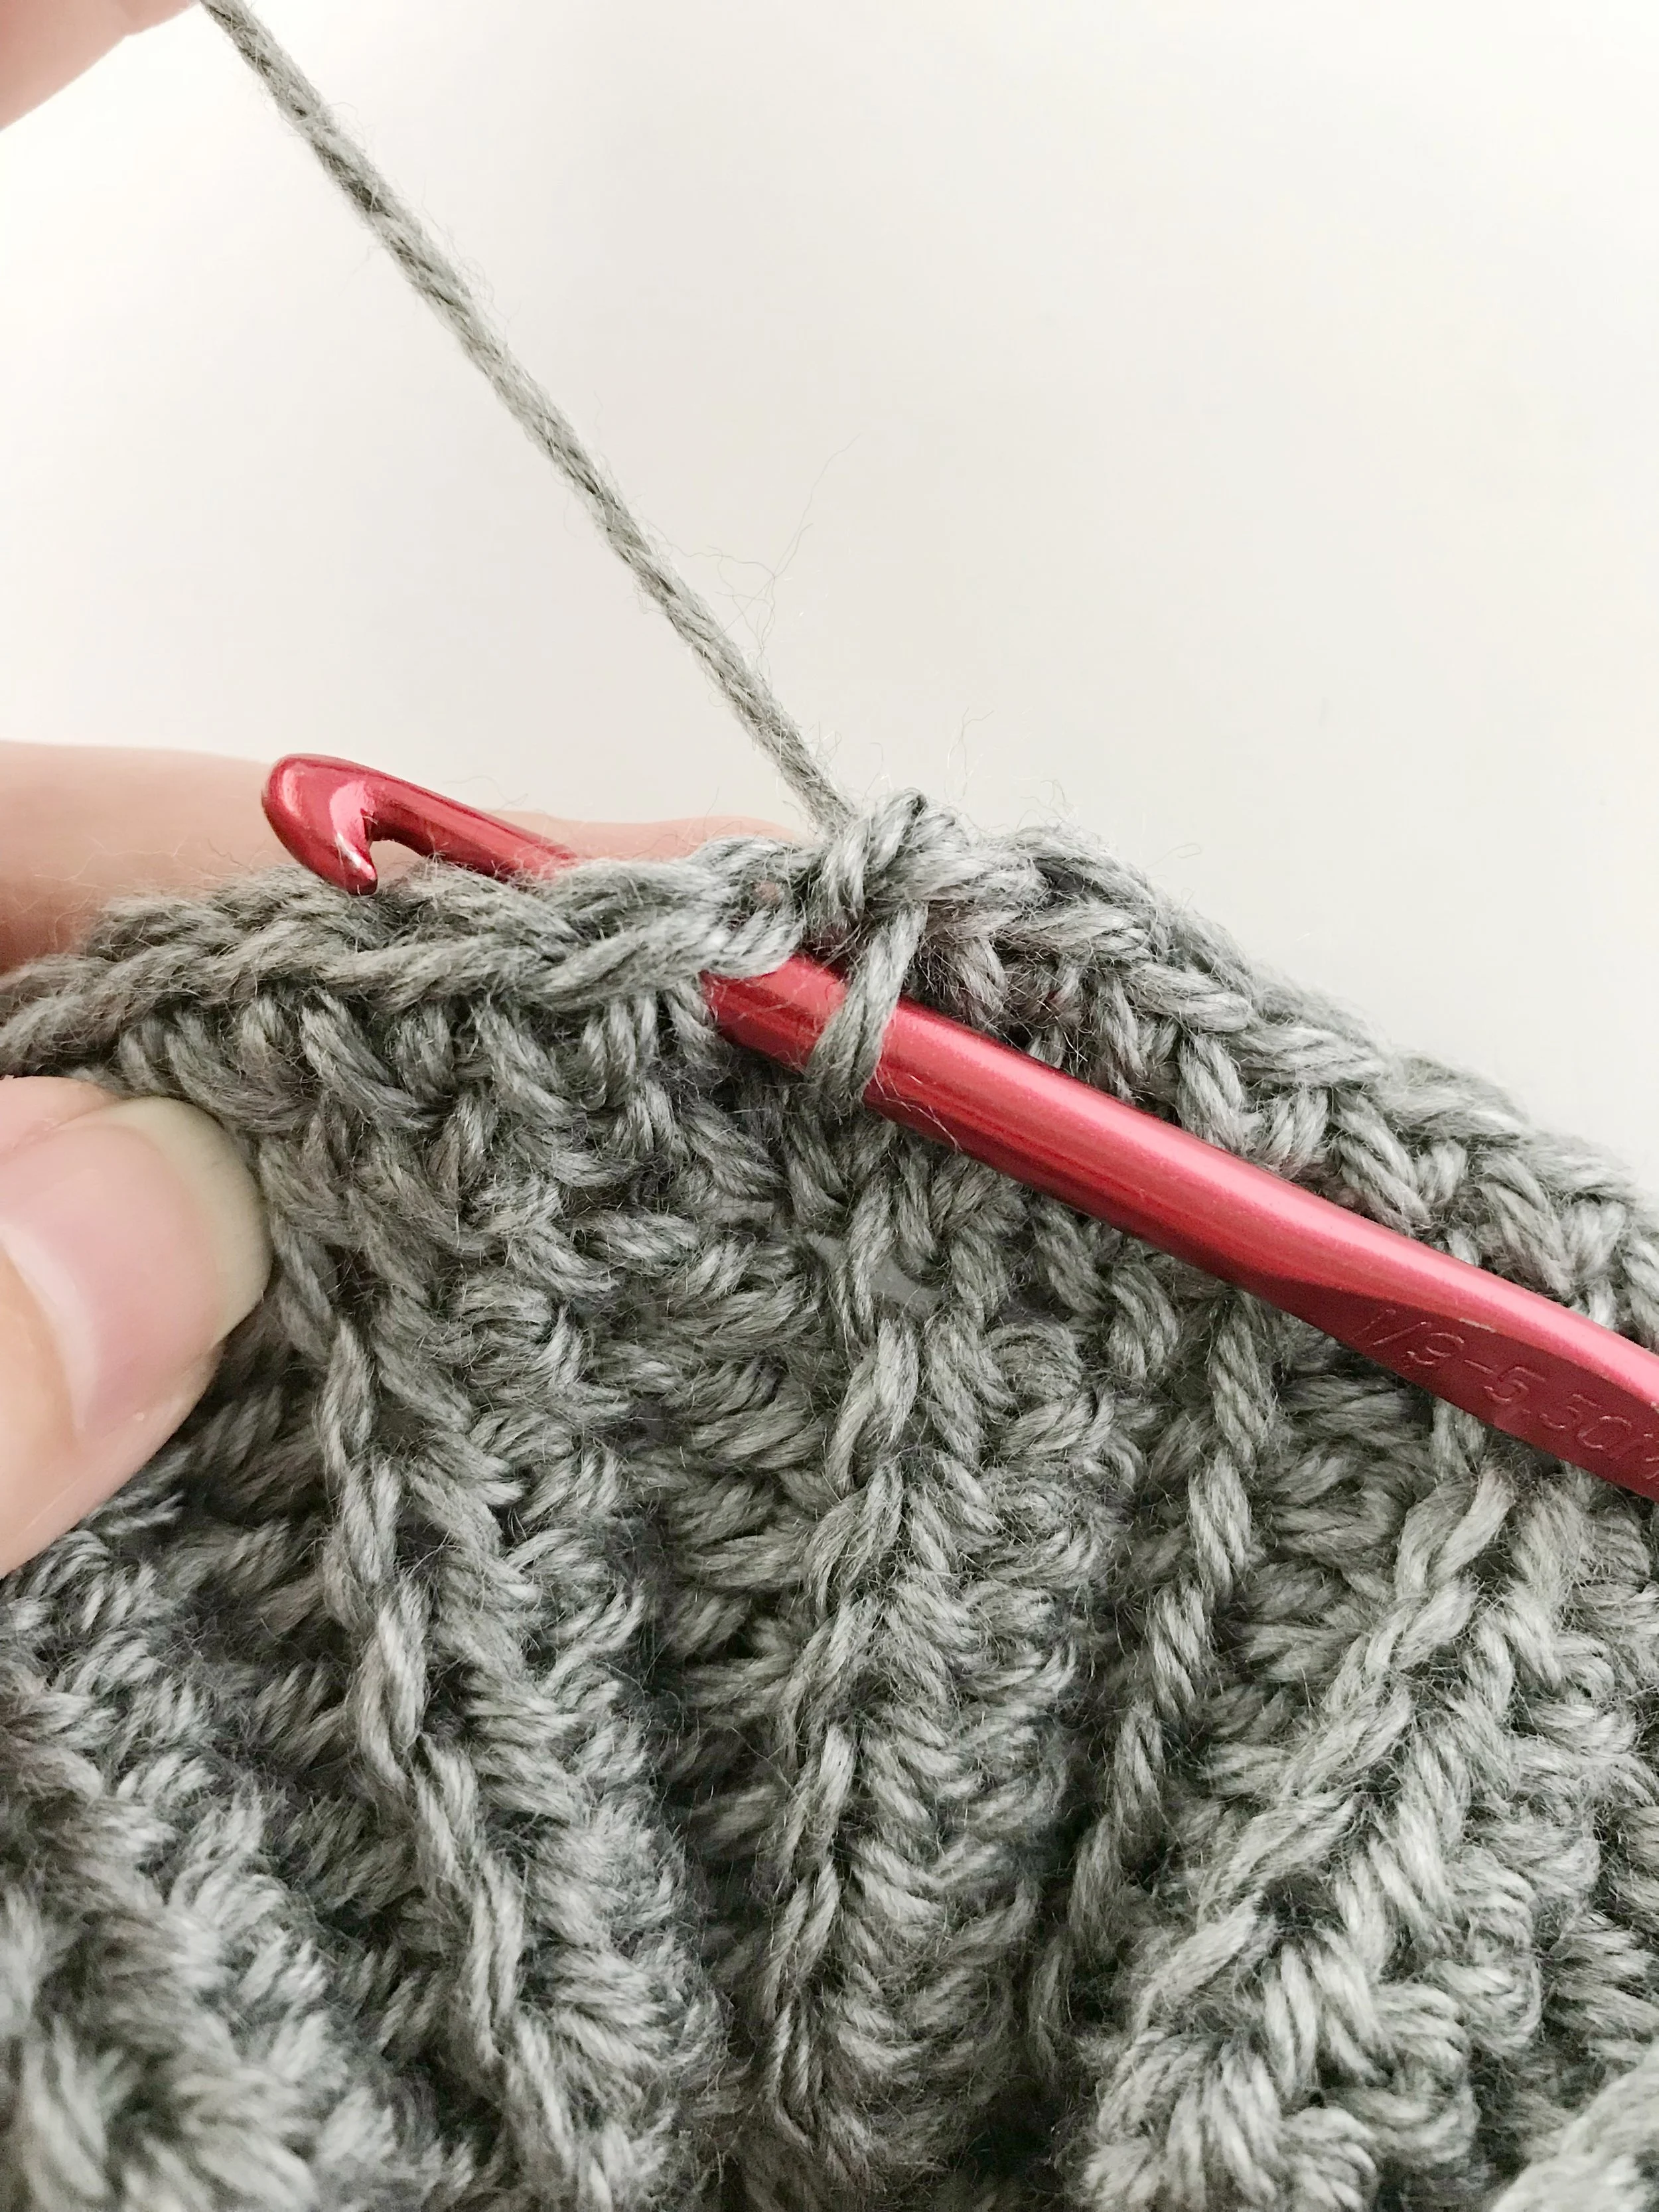
Csc- center single crochet
csc2tog- center single crochet two stitches together
Sl st- slip stitch
BLO- back loop only
Gauge:
15 stitches X 18 rows = 4” square in center single crochet using 5mm hook
Size:
one size fits most adults and teens
19” circumference X 9” high
Video Tutorial:
This is an intermediate pattern that uses the stranded color work technique. It can take some practice and patience to get the hang of it so to help, let’s go over some of the stitches and techniques used.
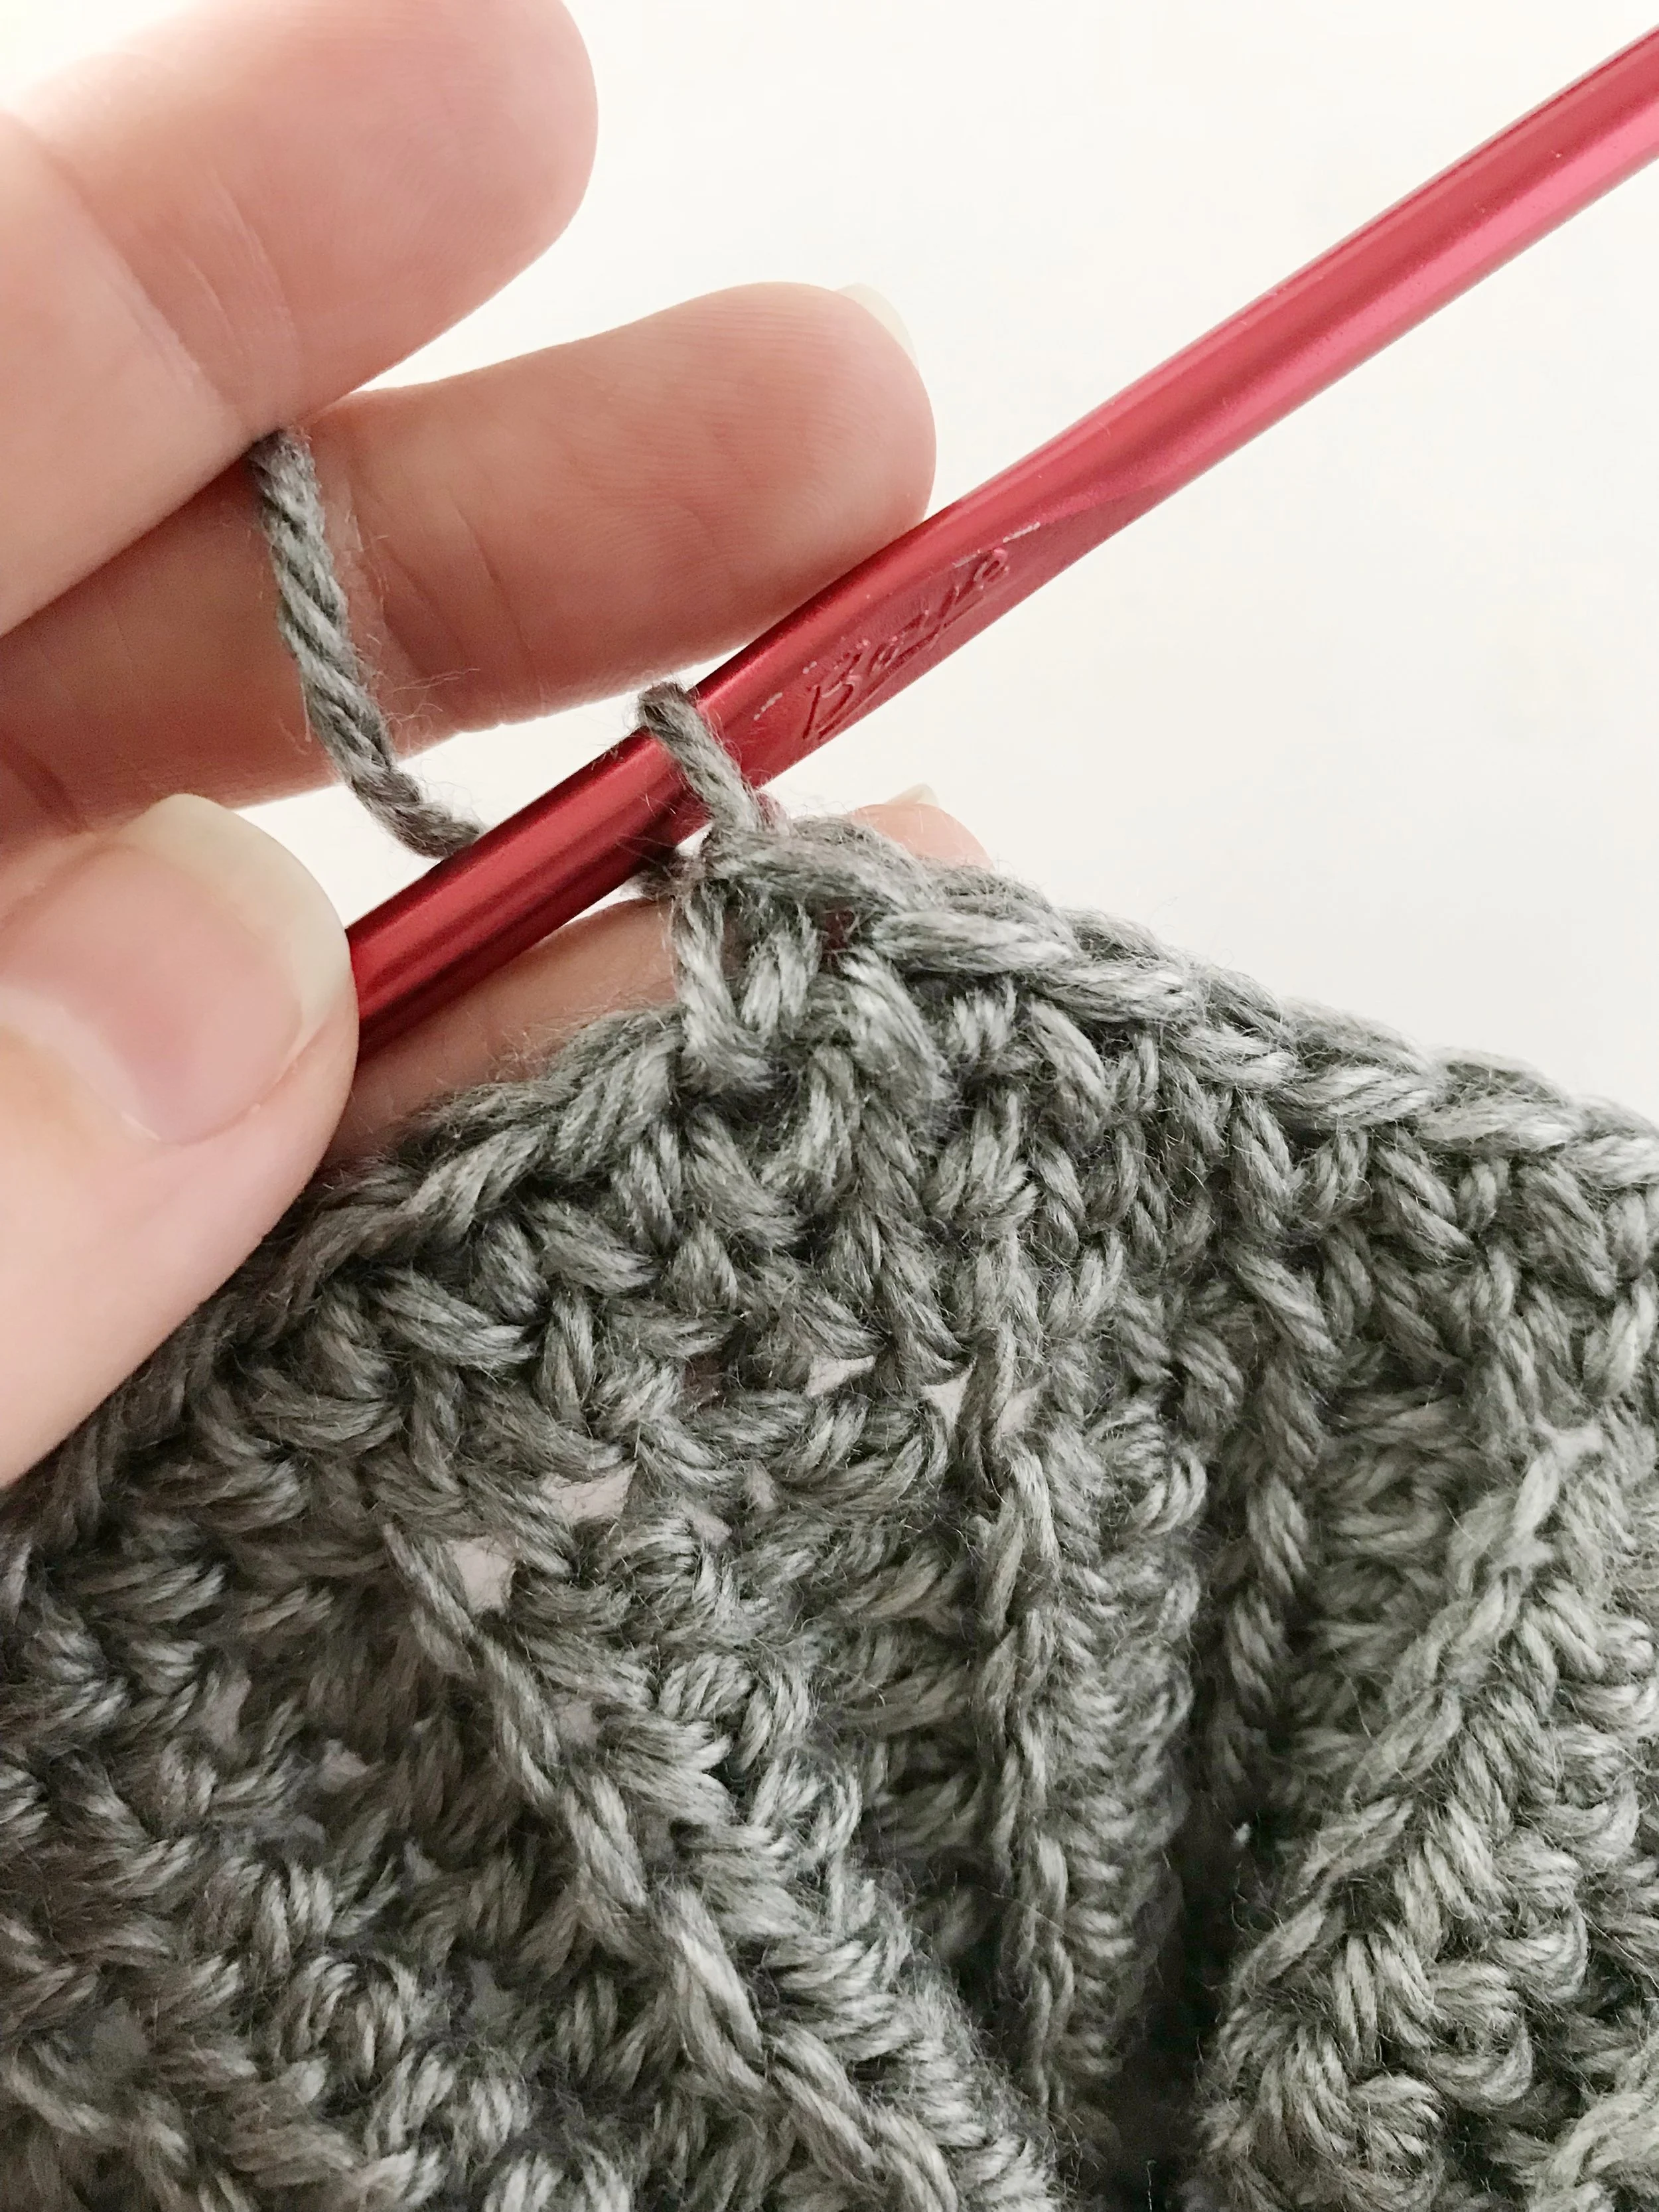
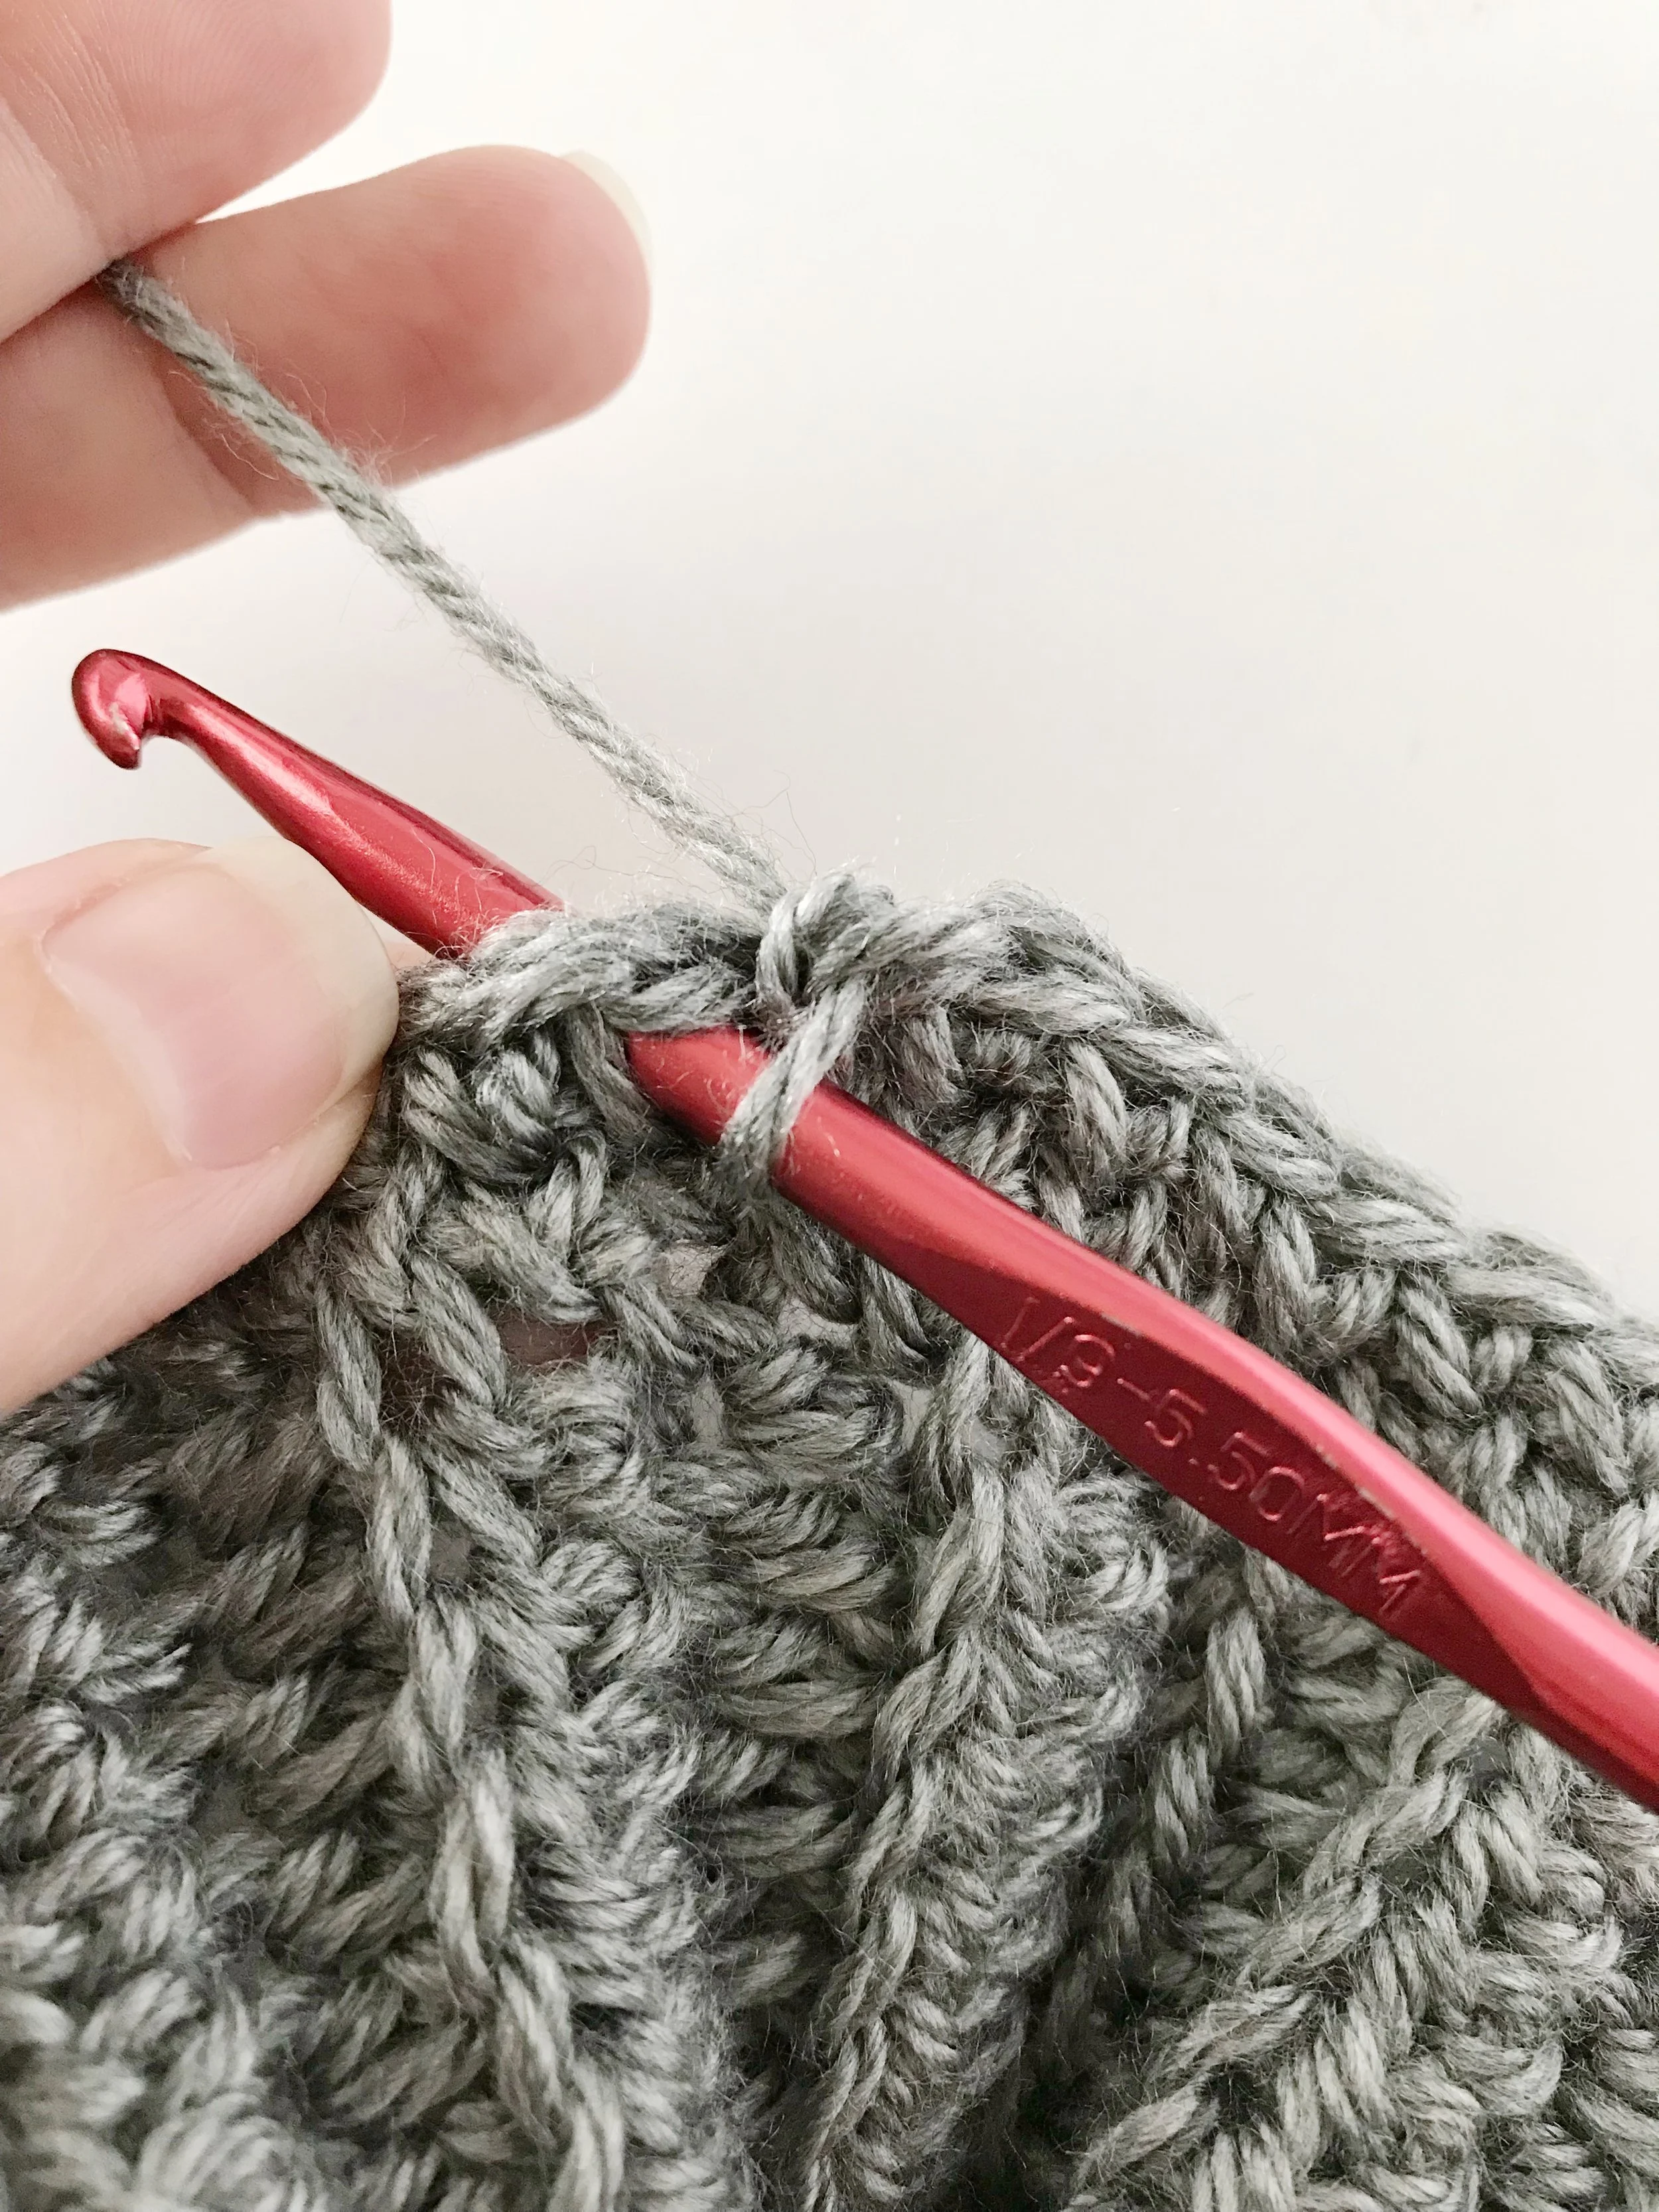
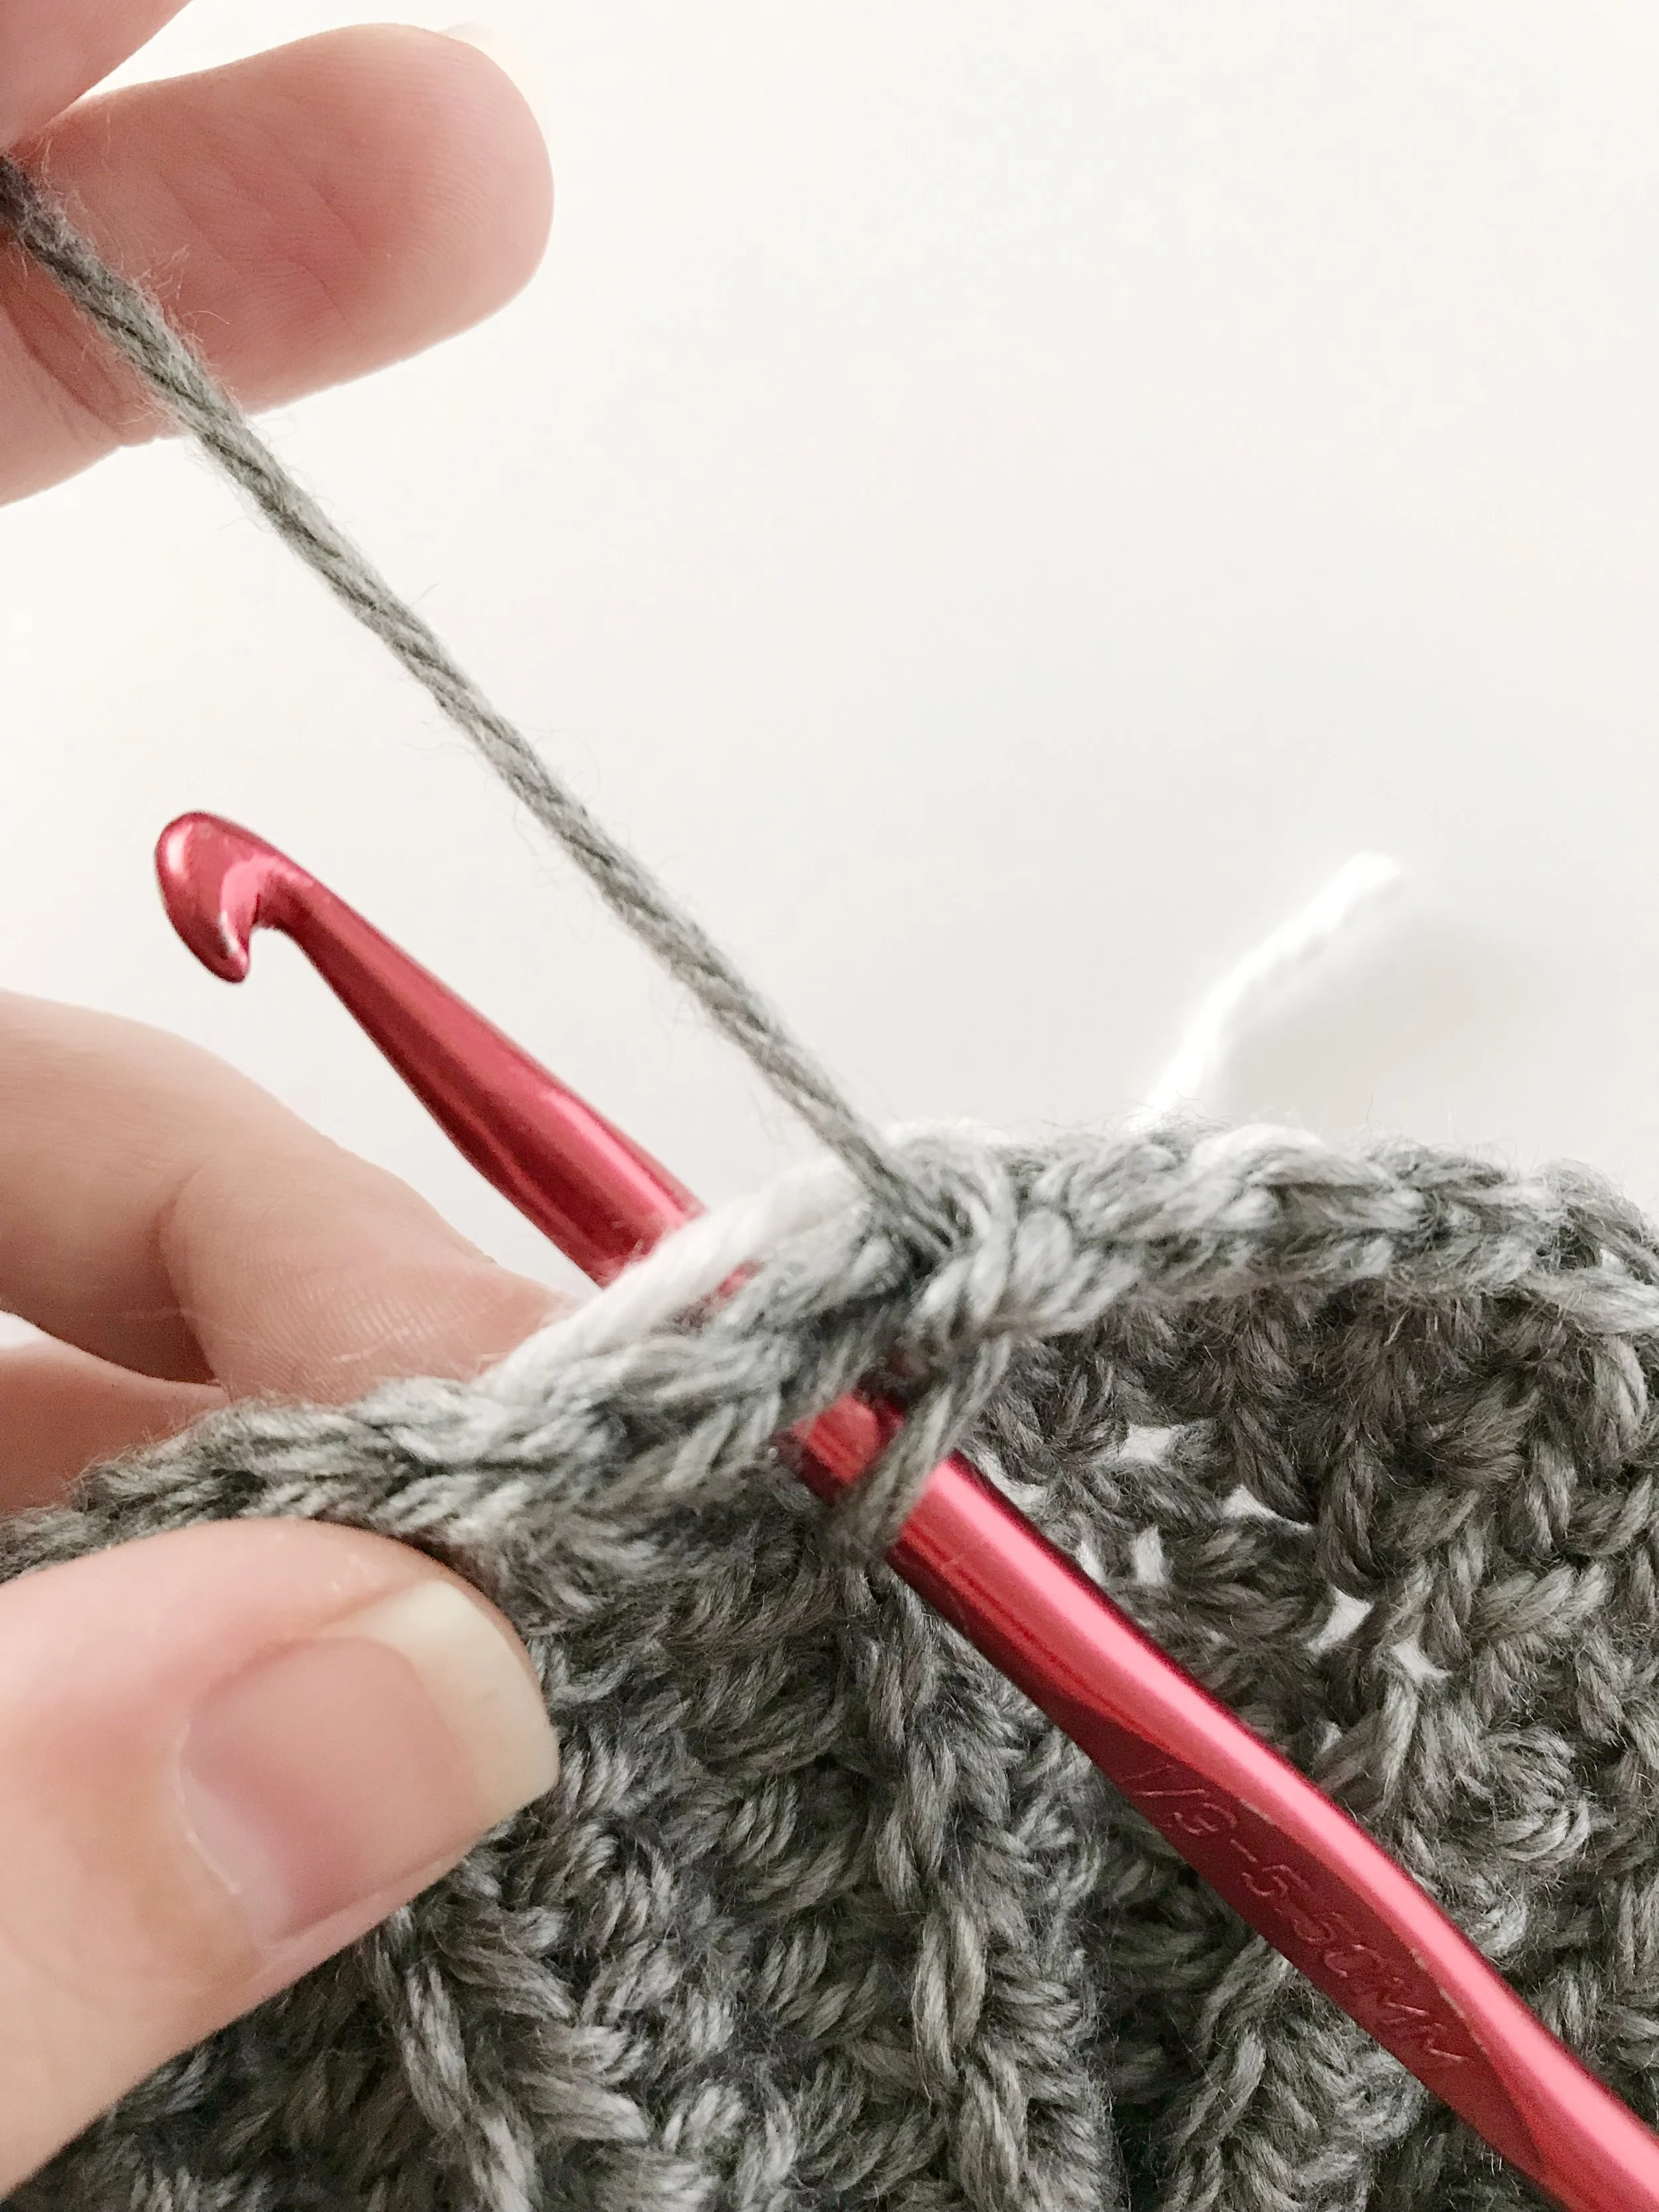
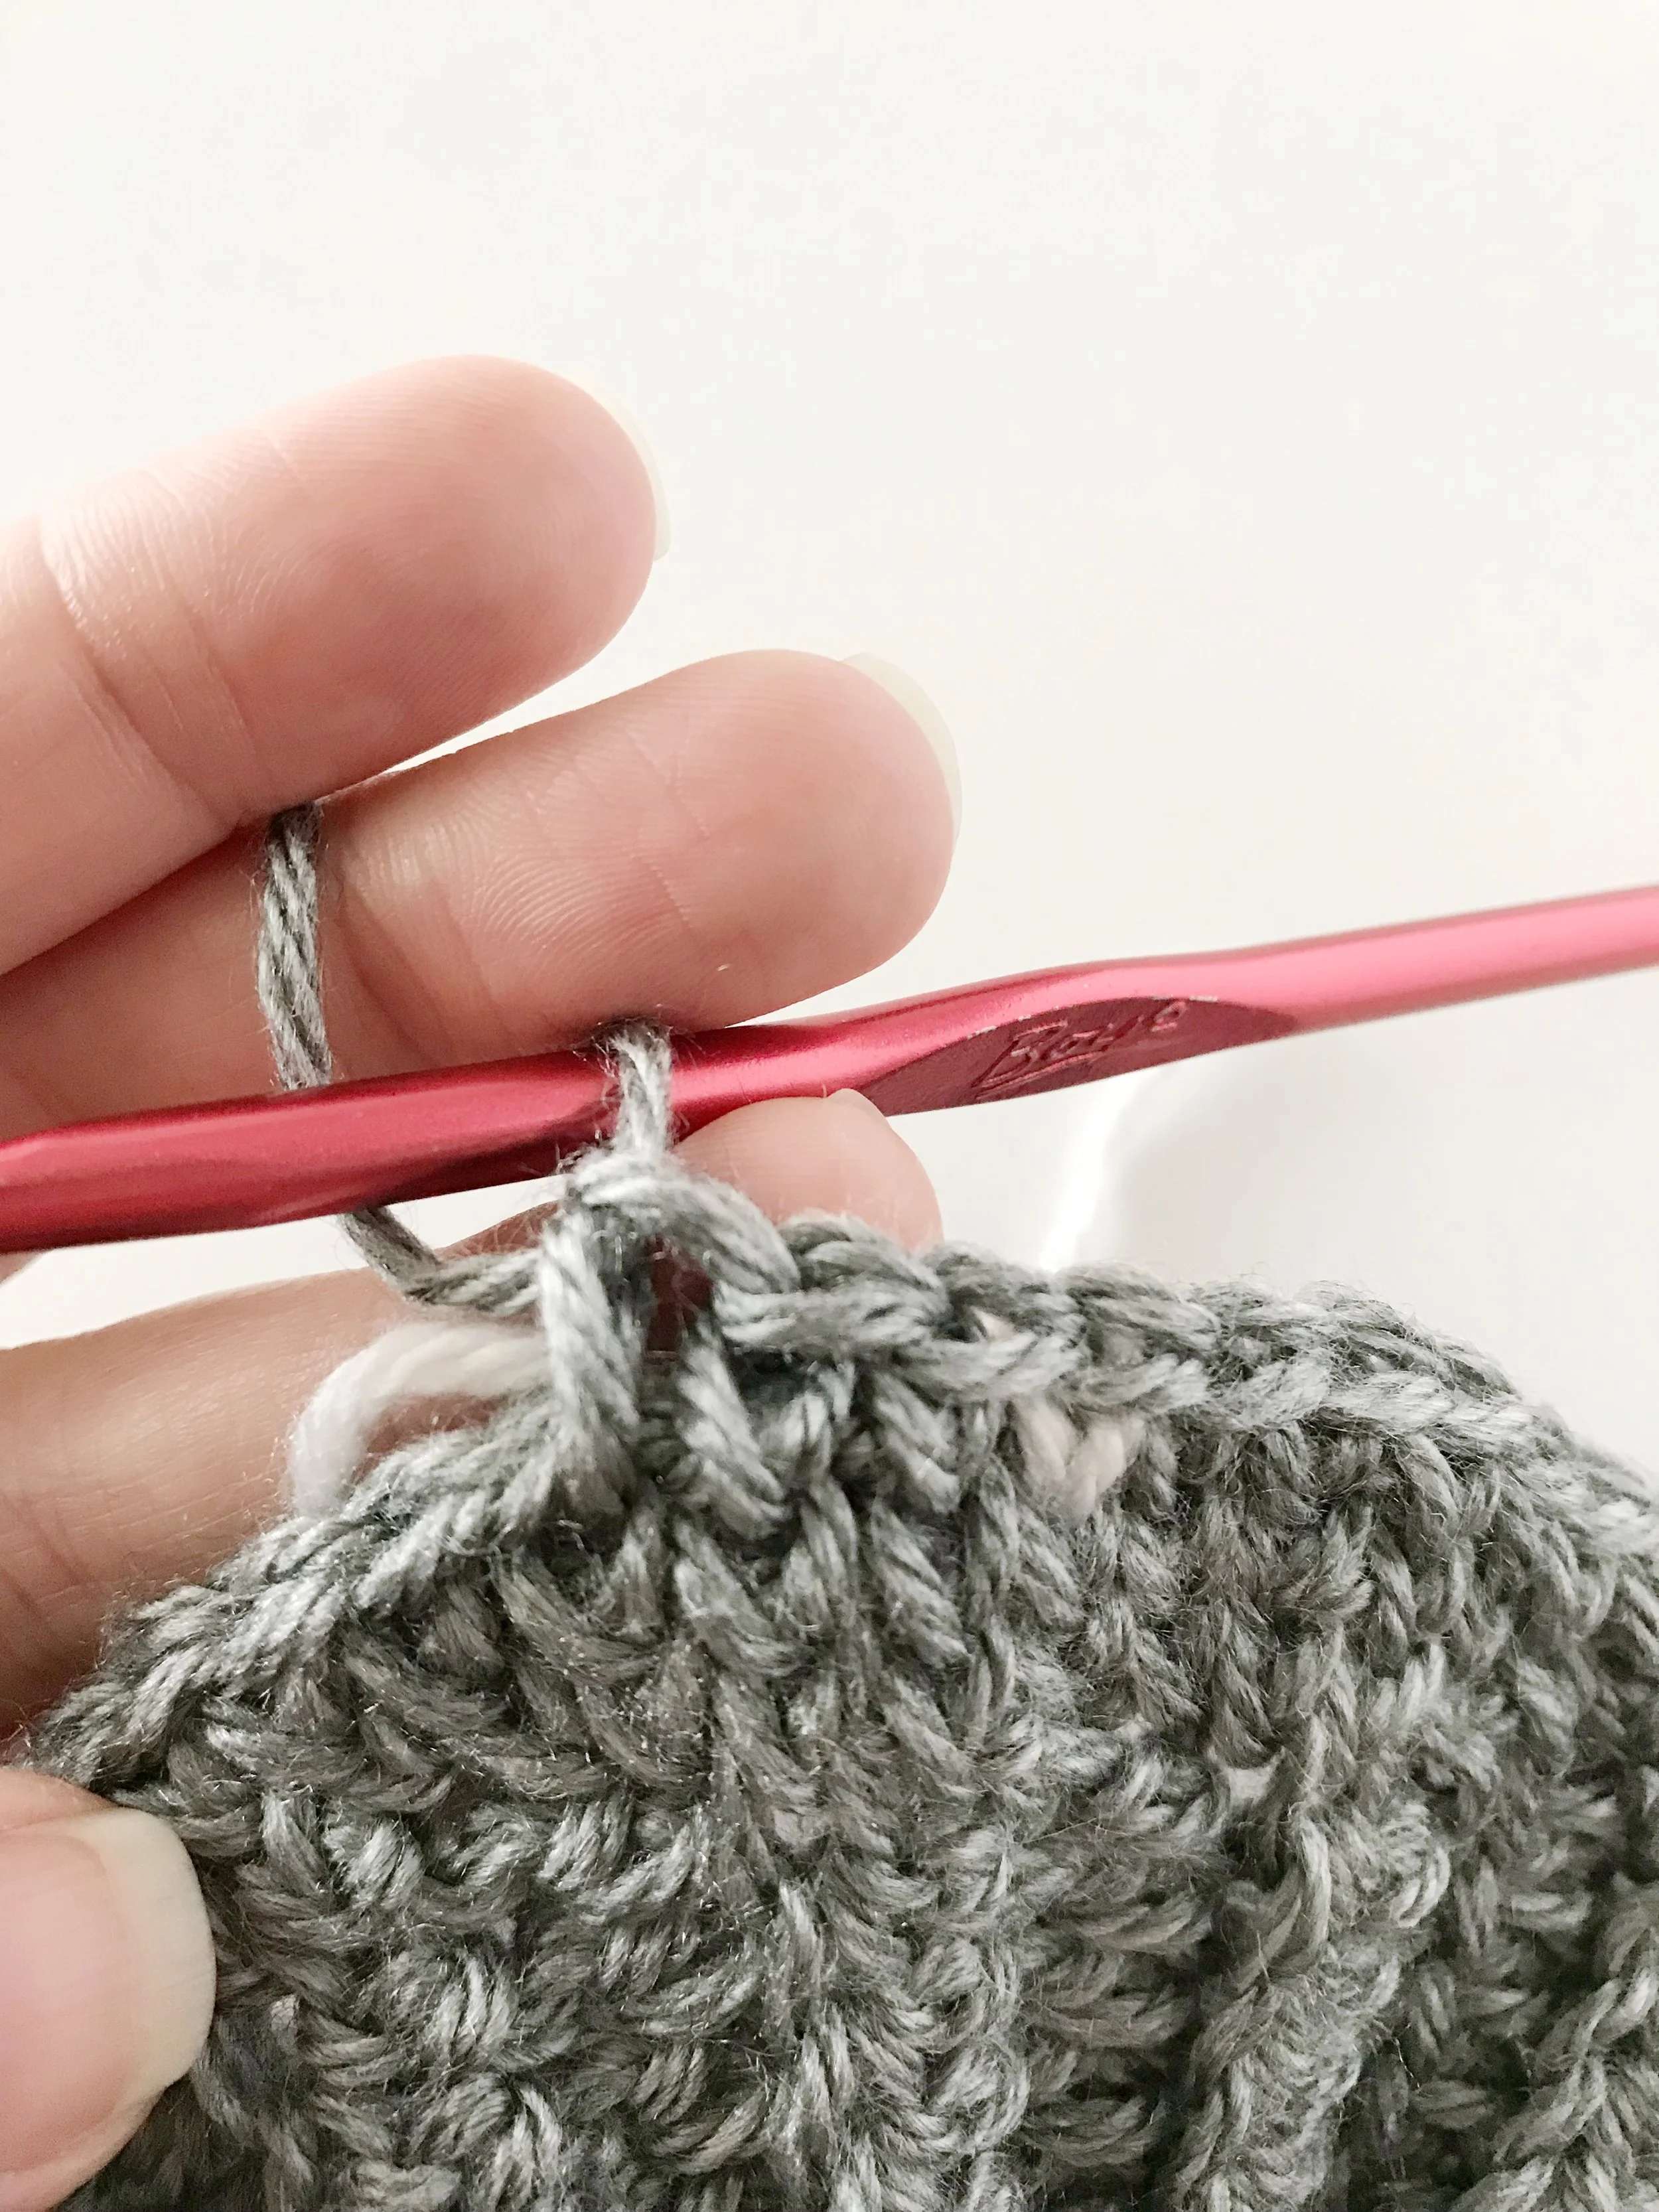
Center single crochet (csc):
Center single crochet is worked just like single crochet, but the hook is inserted in between the front two posts.
Stranded Crochet:
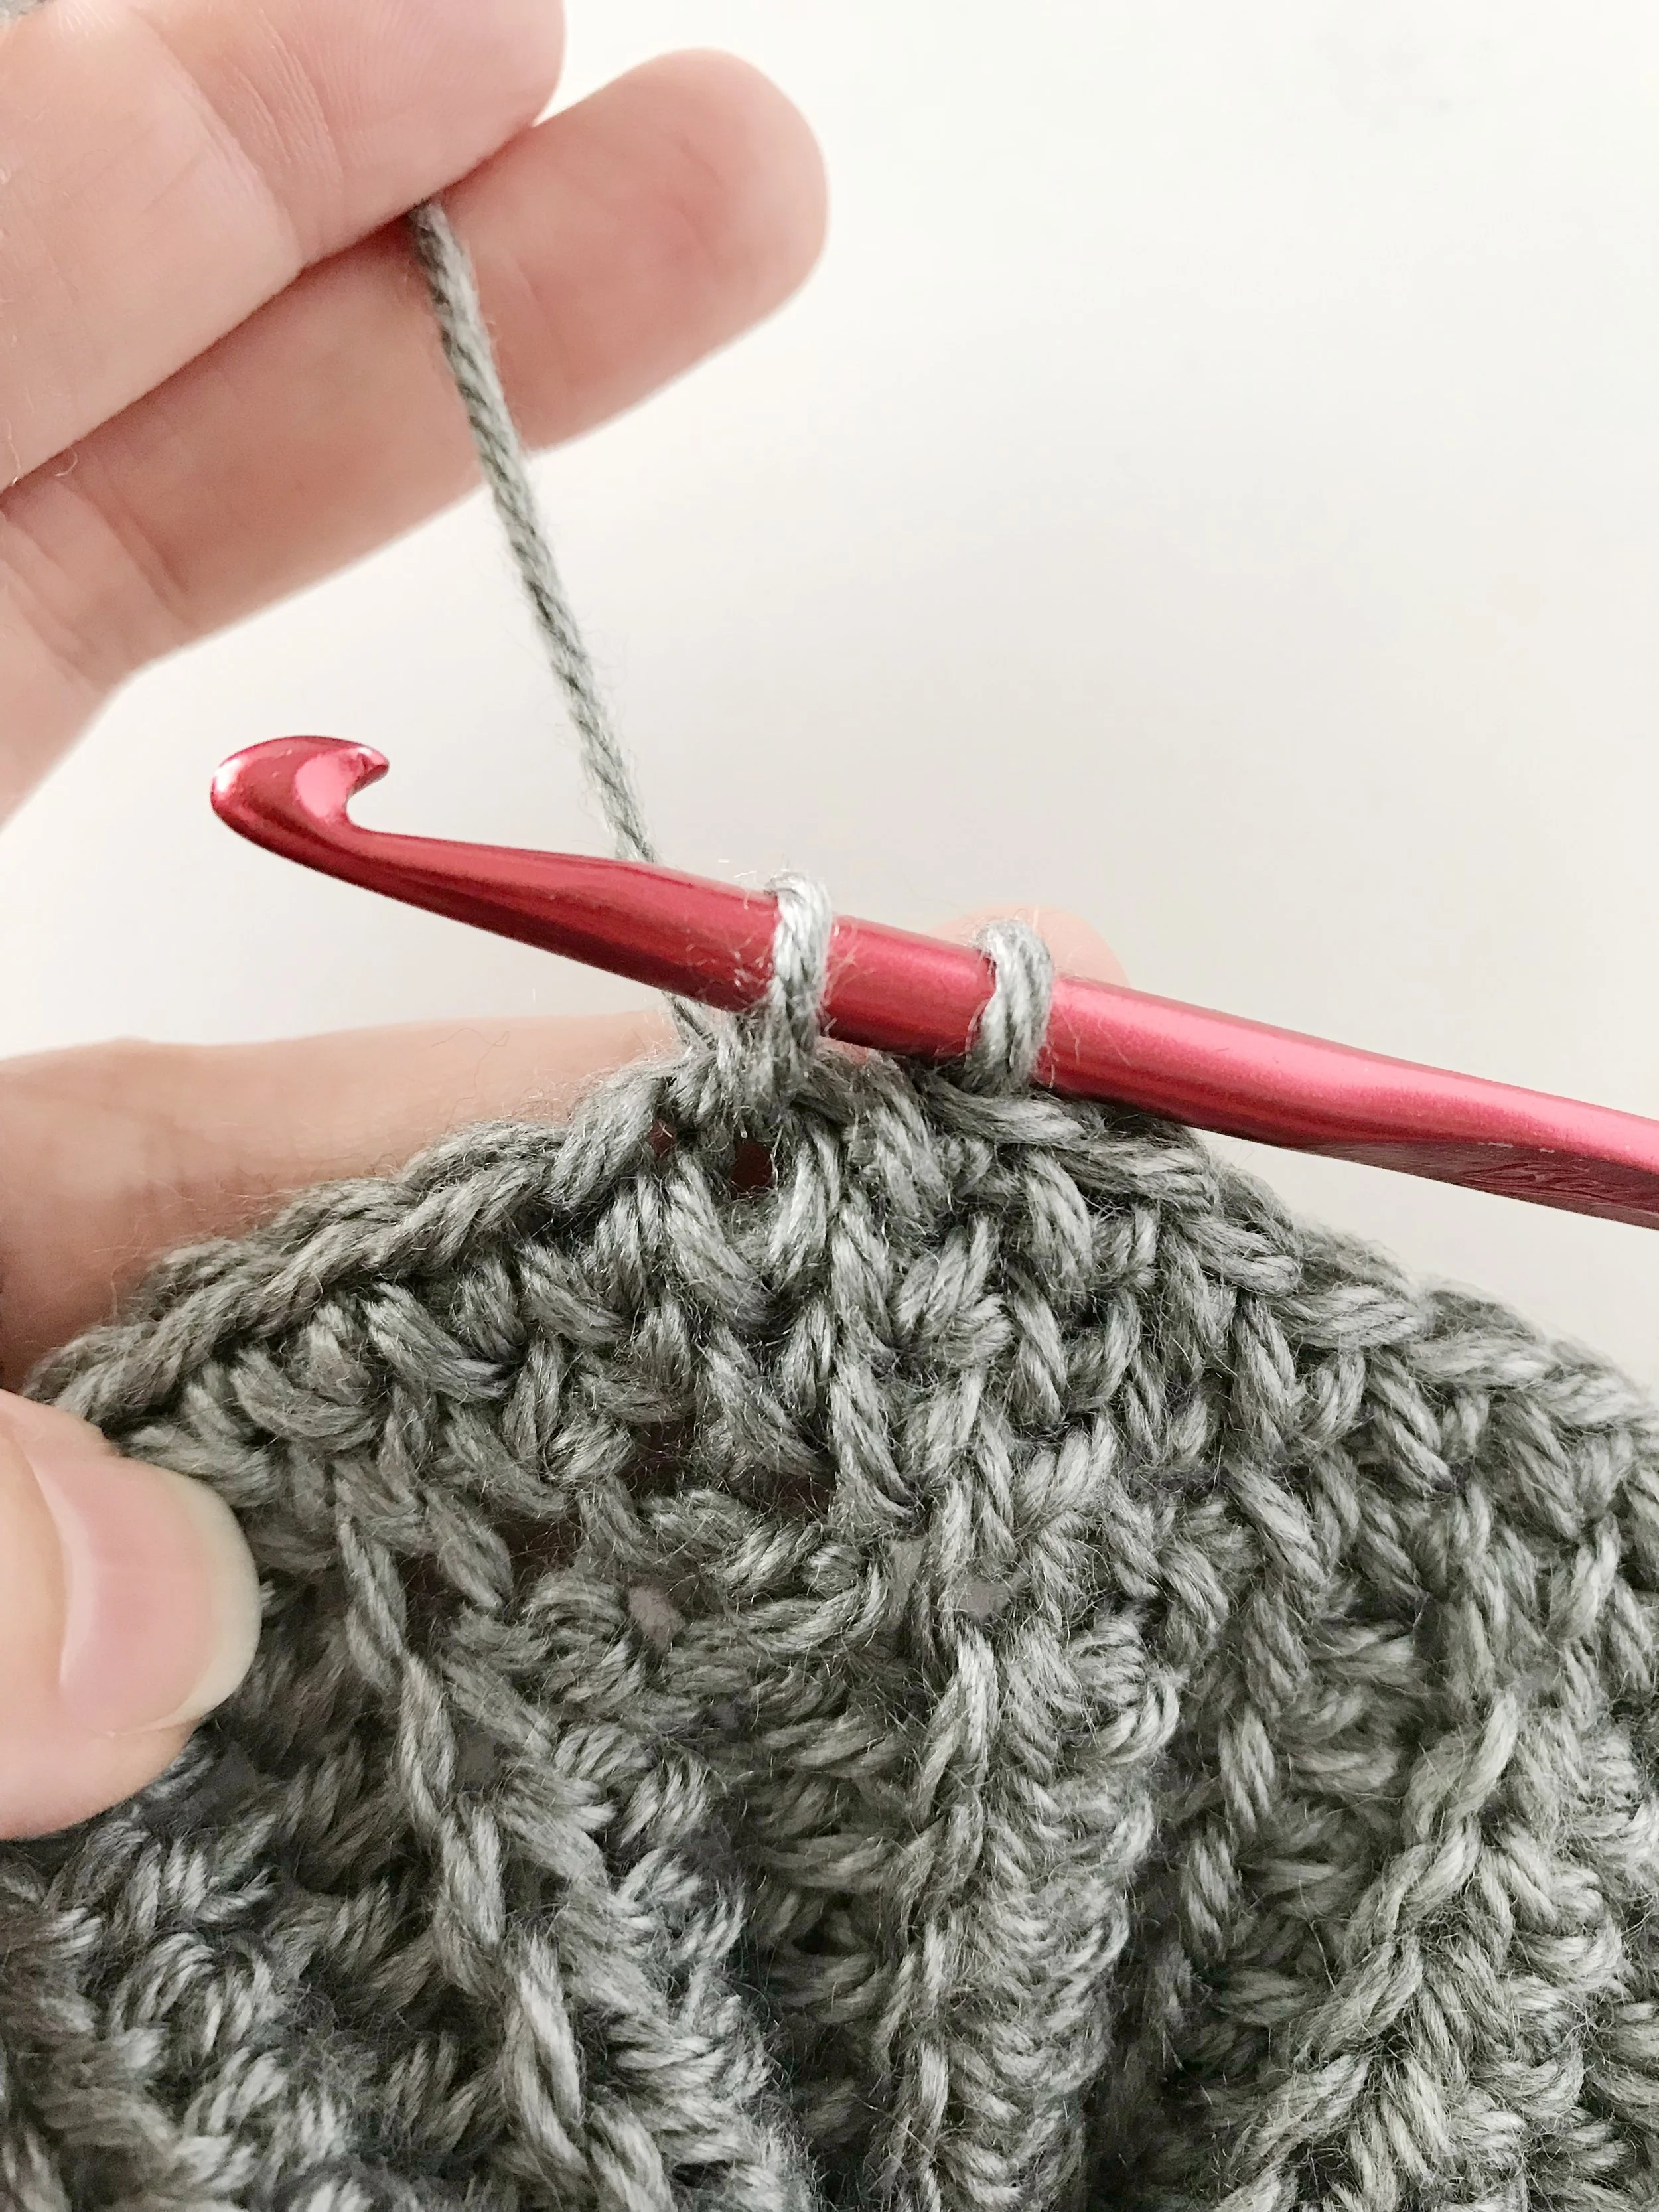
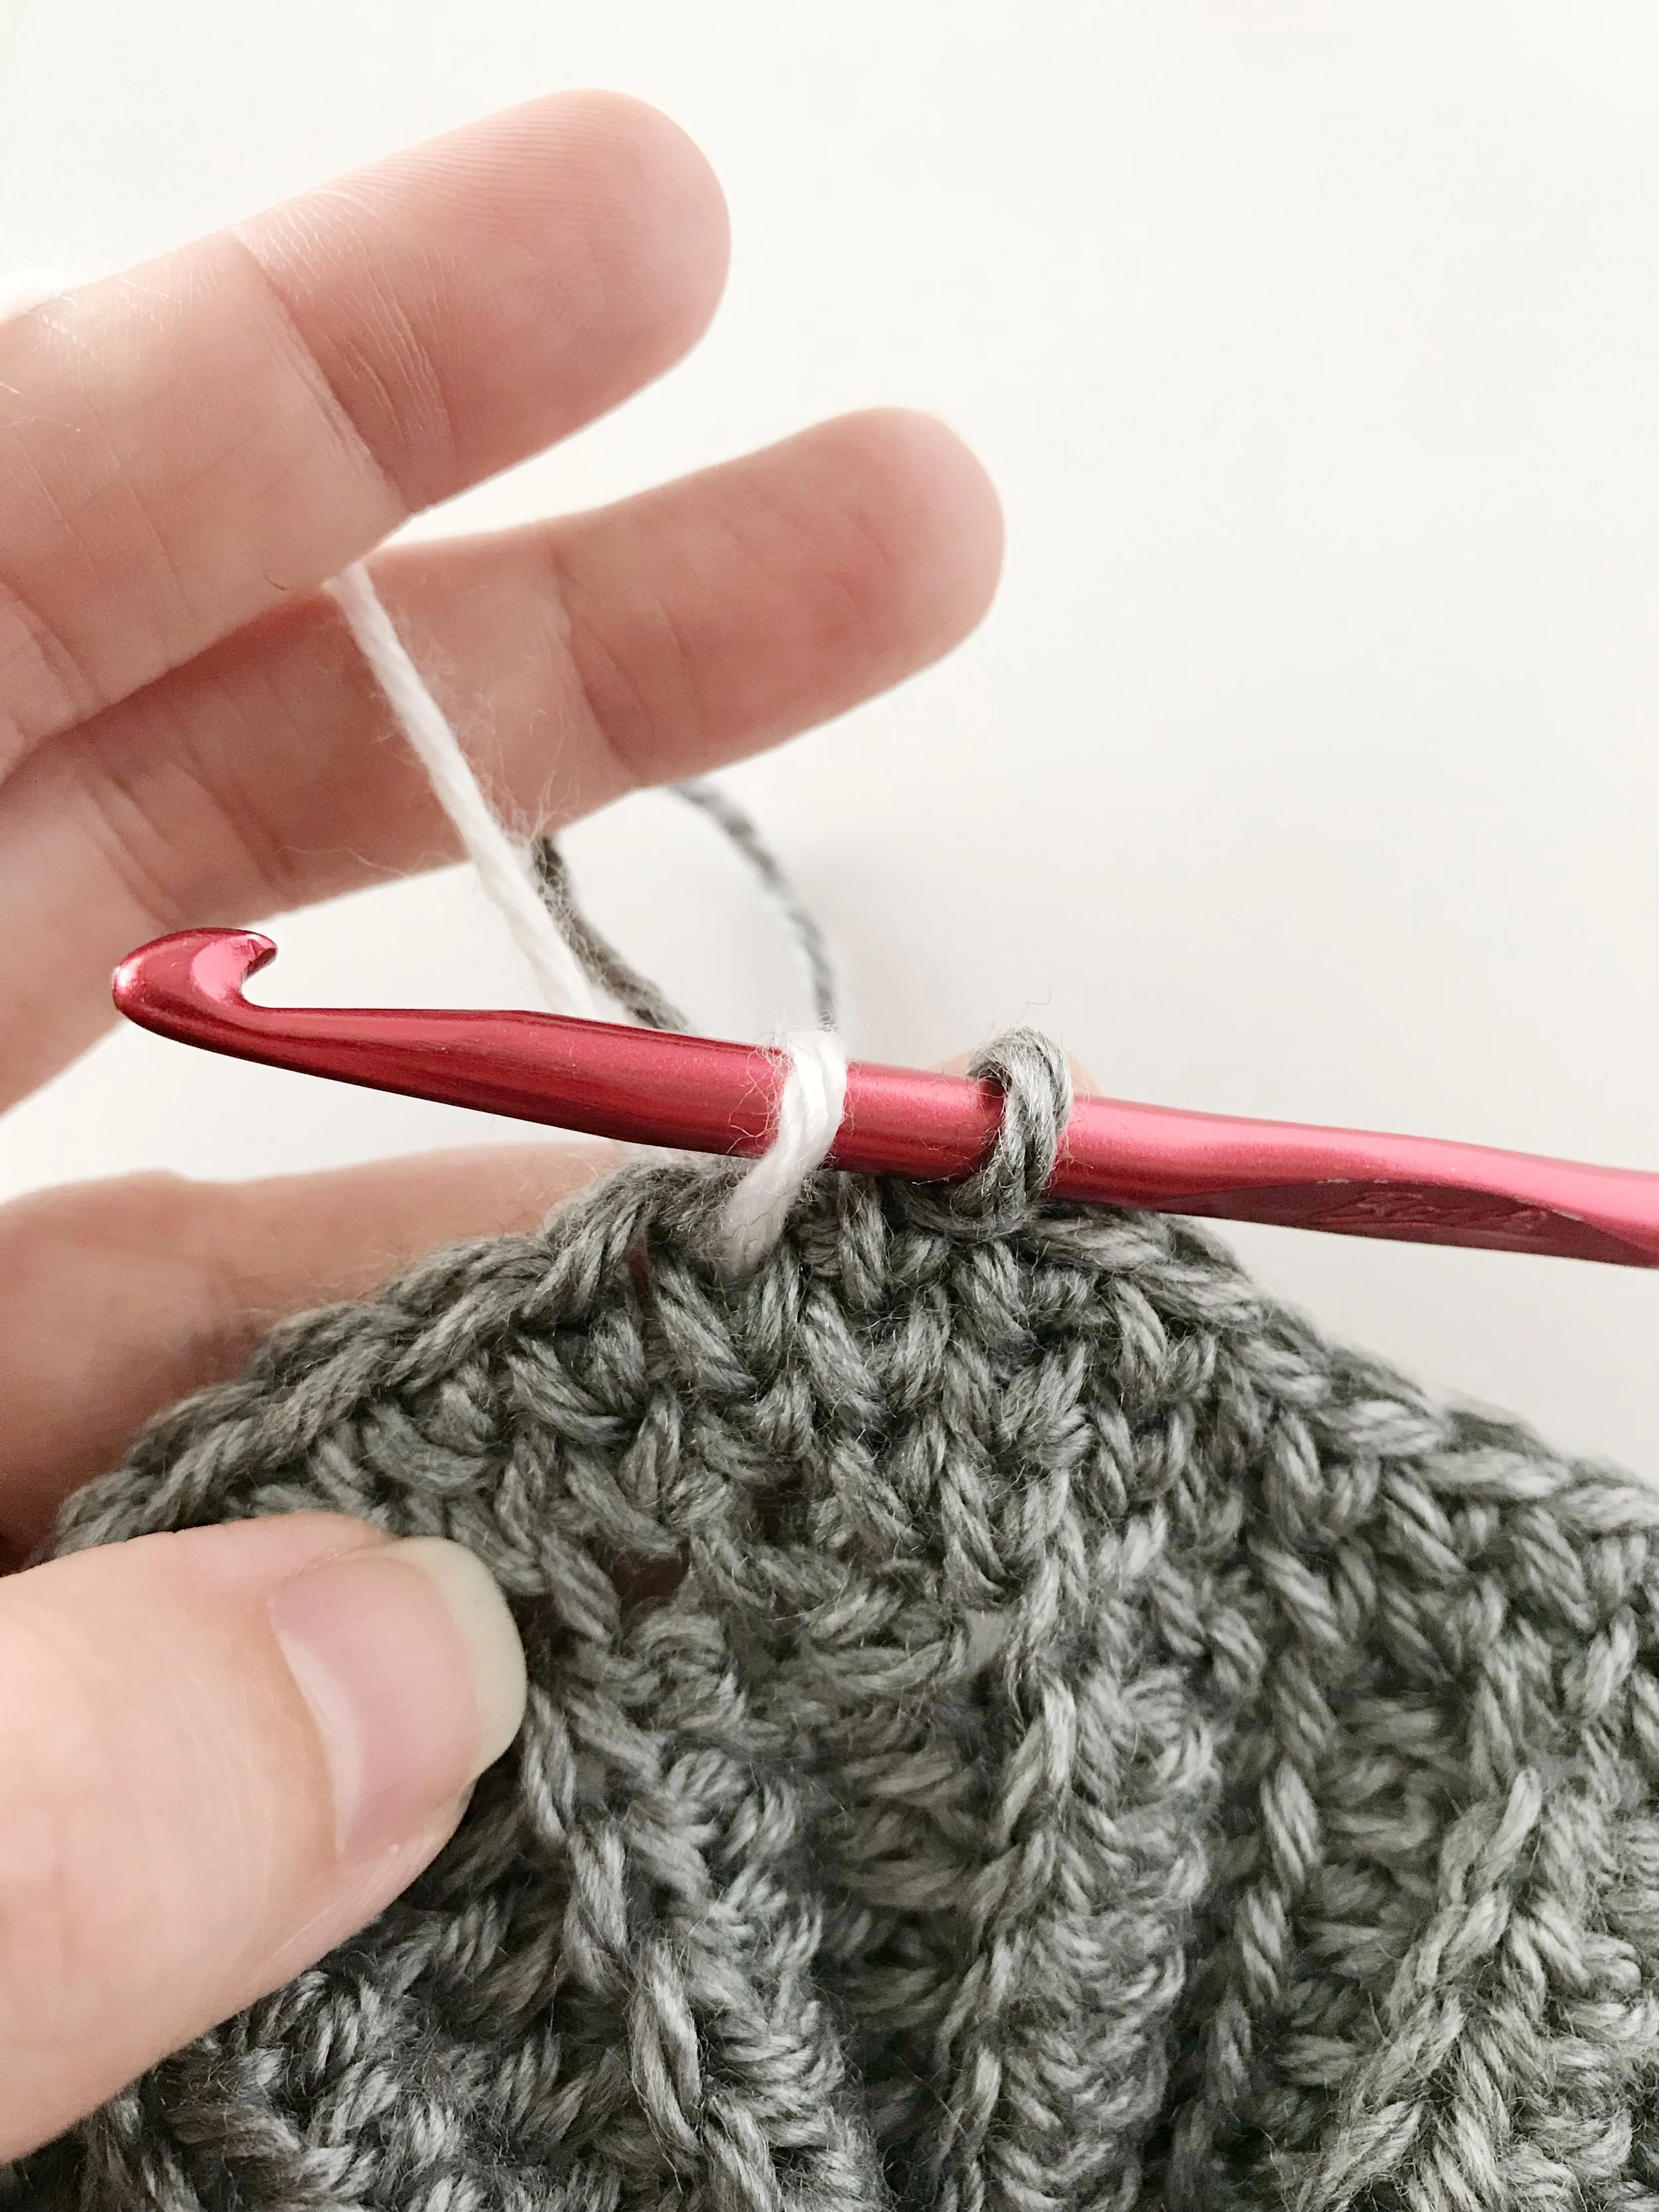
Stranded crochet is a technique used for color work. For all secondary colored stitches, use the stranded technique and center single crochet. Insert hook into stitch, yo and draw up a loop with secondary color, yo and finish stitch with primary color.
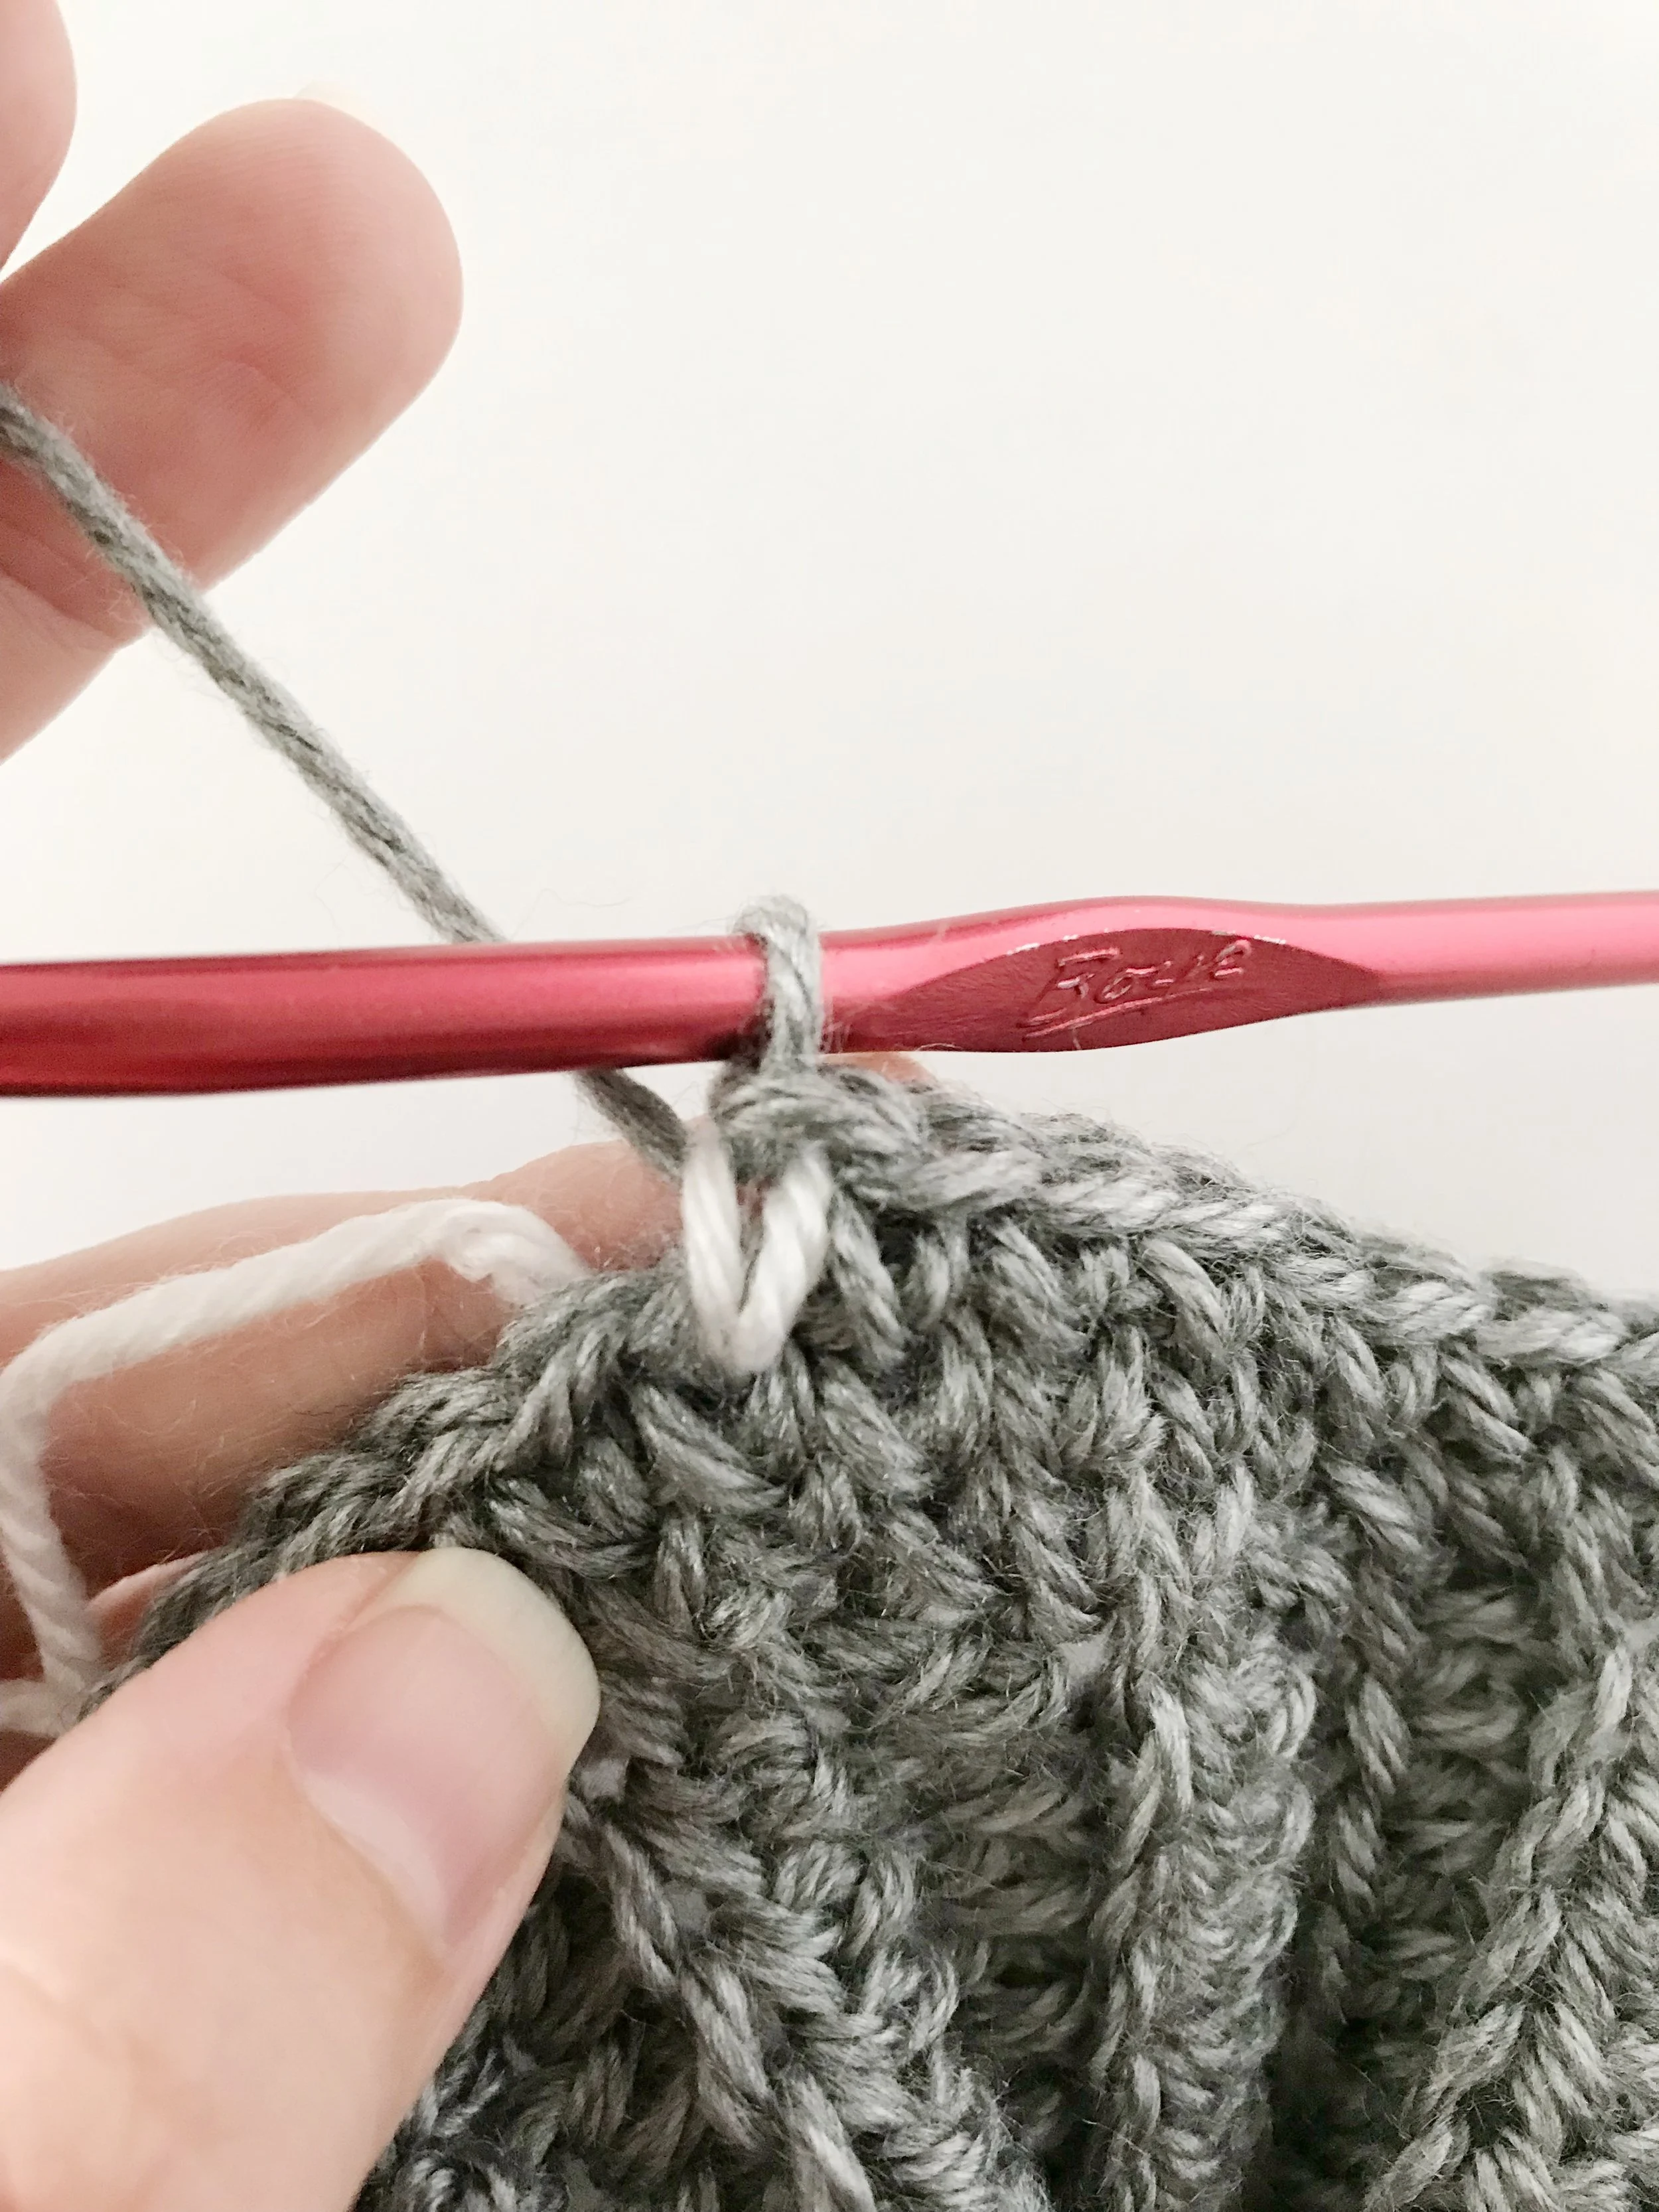
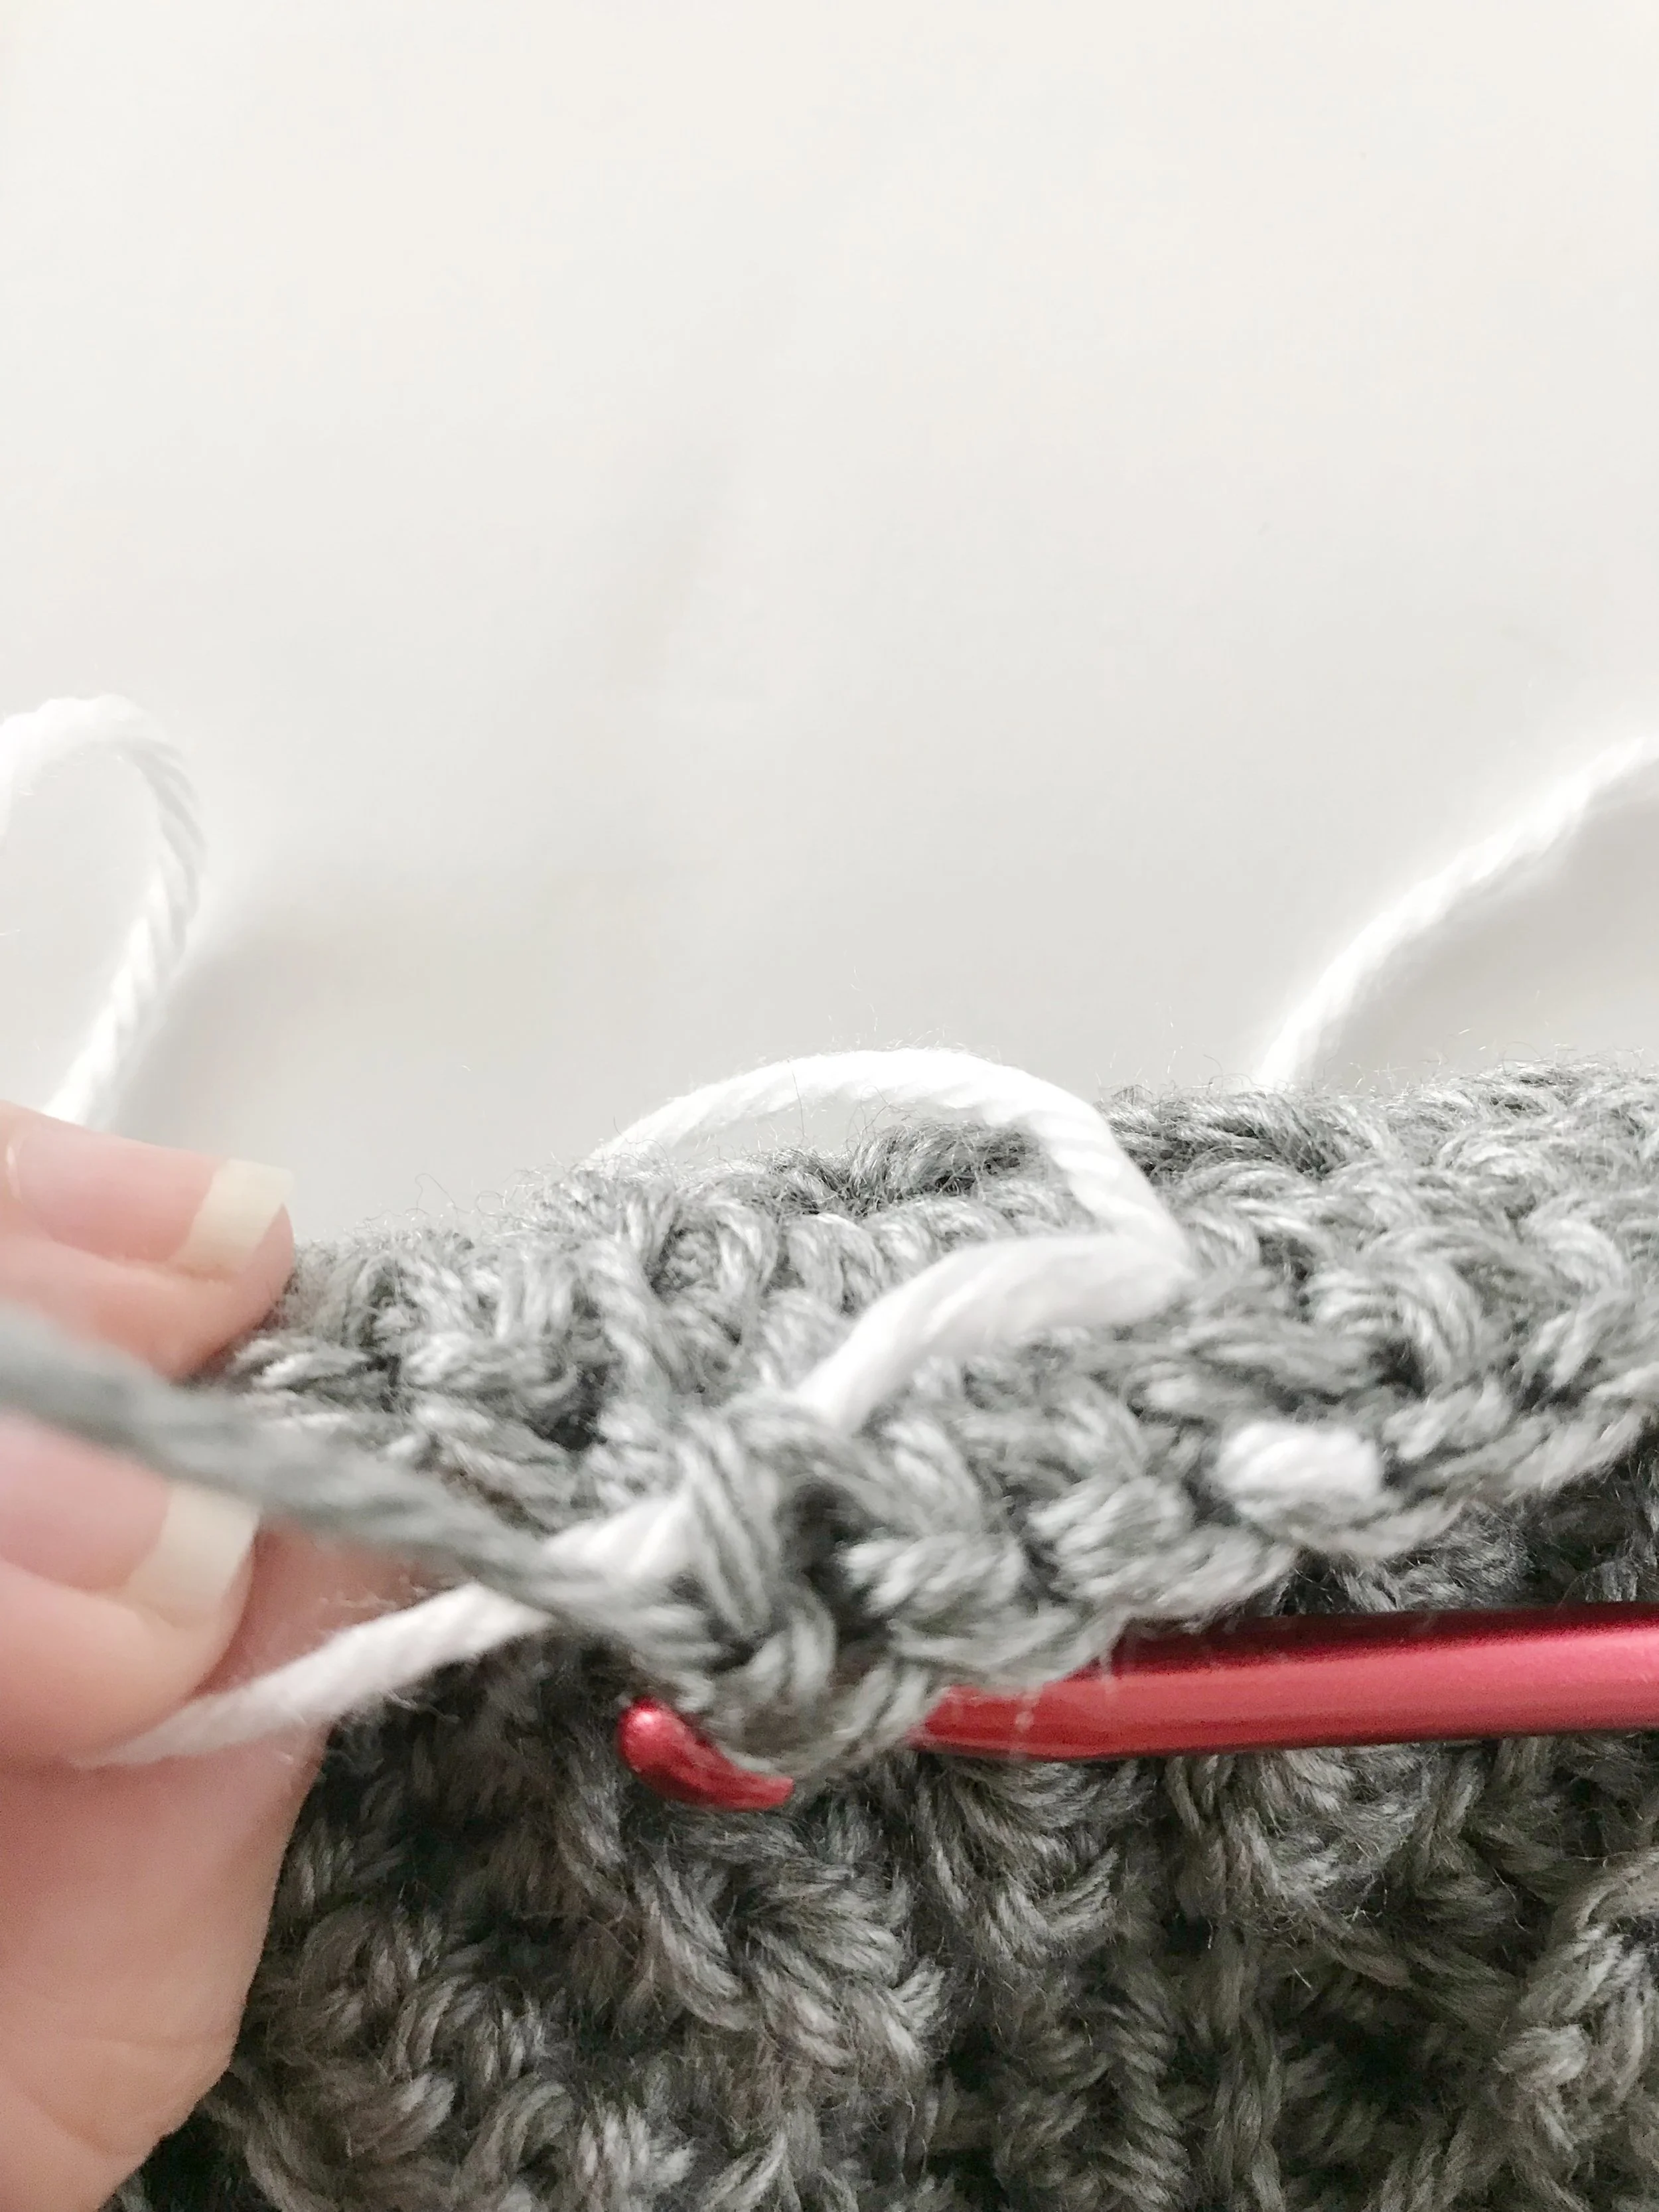
Floating Yarn:
For stranded color work in crochet, float your secondary yarn along the wrong side of hat. Catch the yarn every 2-3 stitches. To catch yarn, lay it over top of the hook before the first yo.
Pattern:
Band:
With Color A yarn and H hook, ch 9
Row 1: sc in 2nd ch from hook and in each ch across, ch 1, turn. (8)
Row 2: sc in BLO in each stitch across, ch 1, turn. (8)
Rows 3-66: Repeat Row 2
Ch 1, slip stitch ends together to form band. Turn right side out. Do not cut yarn.
Main Body:
Round 1: continuing to use Color A yarn, ch 1, sc 72 sts evenly around the top of band, (work 2sc in the end of every 11th row), placing a stitch marker in the first st. Do not join. (72)
Round 2: working directly into the first st of Round 1, csc in each st around. (72)
Continue to work in continuous rounds, replacing the st marker into the first st of each round as you go.
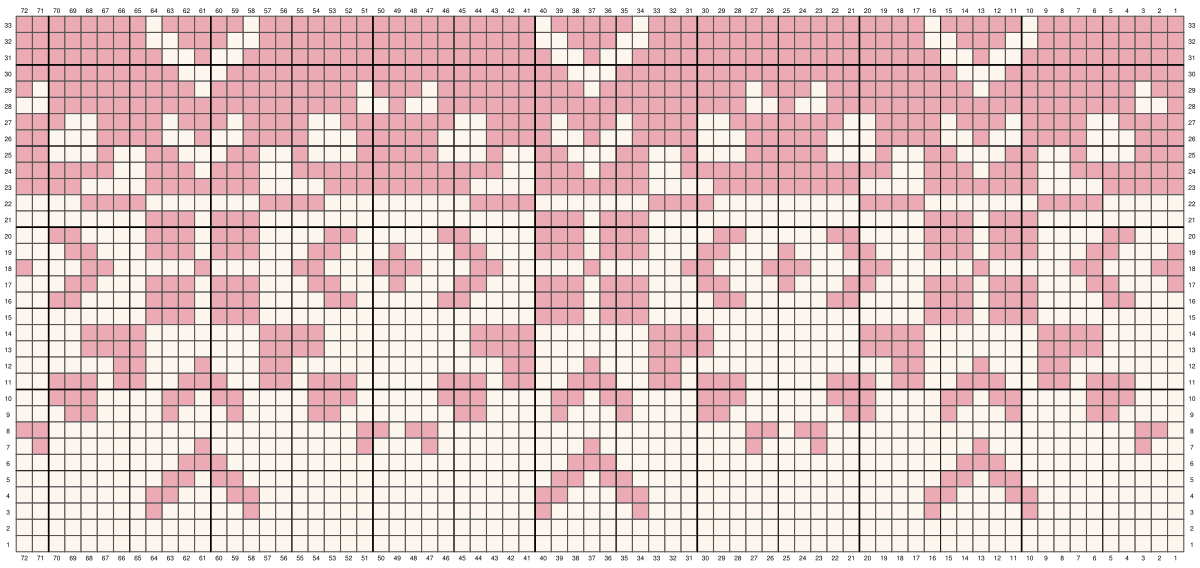
Color Work Section: continue to follow the instructions below or use the chart provided.
A=Wool Ease, B=Landscapes.
Use the stranded technique for all Color B sts until Round 23, then use the stranded technique for all Color A sts.
Round 3: (A) x 9, (B) x 1, (A) x 5, (B) x 1, (A) x 17, (B) x 1, (A) x 5, (B) x 1, (A) x 17, (B) x 1, (A) x 5, (B) x 1, (A) x 8
Round 4: (A) x 9, (B) x 2, (A) x 3, (B) x 2, (A) x 17, (B) x 2, (A) x 3, (B) x 2, (A) x 17, (B) x 2, (A) x 3, (B) x 2, (A) x 8
Round 5: (A) x 10, (B) x 2, (A), (B) x 2, (A) x 19, (B) x 2, (A), (B) x 2, (A) x 19, (B) x 2, (A), (B) x 2, (A) x 9
Round 6: (A) x 11, (B) x 3, (A) x 21, (B) x 3, (A) x 21, (B) x 3, (A) x 10
Round 7: (A) x 2, (B) x 1, (A) x 9, (B) x 1, (A) x 9, (B) x 1, (A) x 3, (B) x 1, (A) x 9, (B) x 1, (A) x 9, (B) x 1, (A) x 3, (B) x 1, (A) x 9, (B) x 1, (A) x 9, (B) x 1, (A) x 1
Round 8: (A) x 1, (B) x 2, (A) x 19, (B) x 2, (A) x 1, (B) x 2, (A) x 19, (B) x 2, (A) x 1, (B) x 2, (A) x 19, (B) x 2
Round 9: (A) x 4, (B) x 2, (A) x 4, (B) x 1, (A) x 3, (B) x 1, (A) x 4, (B) x 2, (A) x 7, (B) x 2, (A) x 4, (B) x 1, (A) x 3, (B) x 1, (A) x 4, (B) x 2, (A) x 7, (B) x 2, (A) x 4, (B) x 1, (A) x 3, (B) x 1, (A) x 4, (B) x 2, (A) x 3
Round 10: (A) x 3, (B) x 3, (A) x 4, (B) x 2, (A) x 1, (B) x 2, (A) x 4, (B) x 3, (A) x 5, (B) x 3, (A) x 4, (B) x 2, (A) x 1, (B) x 2, (A) x 4, (B) x 3, (A) x 5, (B) x 3, (A) x 4, (B) x 2, (A) x 1, (B) x 2, (A) x 4, (B) x 3, (A) x 2
Round 11: (A) x 3, (B) x 3, (A) x 1, (B) x 2, (A) x 2, (B) x 3, (A) x 2, (B) x 2, (A) x 1, (B) x 3, (A) x 5, (B) x 3, (A) x 1, (B) x 2, (A) x 2, (B) x 3, (A) x 2, (B) x 2, (A) x 1, (B) x 3, (A) x 5, (B) x 3, (A) x 1, (B) x 2, (A) x 2, (B) x 3, (A) x 2, (B) x 2, (A) x 1, (B) x 3, (A) x 2
Round 12: (A) x 7, (B) x 2, (A) x 3, (B) x 1, (A) x 3, (B) x 2, (A) x 13, (B) x 2, (A) x 3, (B) x 1, (A) x 3, (B) x 2, (A) x 13, (B) x 2, (A) x 3, (B) x 1, (A) x 3, (B) x 2, (A) x 6
Round 13: (A) x 5, (B) x 4, (A) x 7, (B) x 4, (A) x 9, (B) x 4, (A) x 7, (B) x 4, (A) x 9, (B) x 4, (A) x 7, (B) x 4, (A) x 4
Round 14: (A) x 5, (B) x 4, (A) x 7, (B) x 4, (A) x 9, (B) x 4, (A) x 7, (B) x 4, (A) x 9, (B) x 4, (A) x 7, (B) x 4, (A) x 4
Round 15: (A) x 9, (B) x 3, (A) x 1, (B) x 3, (A) x 17, (B) x 3, (A) x 1, (B) x 3, (A) x 17, (B) x 3, (A) x 1, (B) x 3, (A) x 8
Round 16: (A) x 3, (B) x 2, (A) x 4, (B) x 3, (A) x 1, (B) x 3, (A) x 4, (B) x 2, (A) x 5, (B) x 2, (A) x 4, (B) x 3, (A), (B) x 3, (A) x 4, (B) x 2, (A) x 5, (B) x 2, (A) x 4, (B) x 3, (A) x 1, (B) x 3, (A) x 4, (B) x 2, (A) x 2
Round 17: (B) x 1, (A) x 3, (B) x 2, (A) x 3, (B) x 3, (A) x 1, (B) x 3, (A) x 3, (B) x 2, (A) x 3, (B) x 1, (A) x 3, (B) x 2, (A) x 3, (B) x 3, (A) x 1, (B) x 3, (A) x 3, (B) x 2, (A) x 3, (B) x 1, (A) x 3, (B) x 2, (A) x 3, (B) x 3, (A) x 1, (B) x 3, (A) x 3, (B) x 2, (A) x 3
Round 18: (B) x 2, (A) x 3, (B) x 2, (A) x 5, (B) x 1, (A) x 5, (B) x 2, (A) x 3, (B) x 3, (A) x 3, (B) x 2, (A) x 5, (B) x 1, (A) x 5, (B) x 2, (A) x 3, (B) x 3, (A) x 3, (B) x 2, (A) x 5, (B) x 1, (A) x 5, (B) x 2, (A) x 3, (B) x 1
Round 19: (B) x 1, (A) x 3, (B) x 2, (A) x 3, (B) x 3, (A) x 1, (B) x 3, (A) x 3, (B) x 2, (A) x 3, (B) x 1, (A) x 3, (B) x 2, (A) x 3, (B) x 3, (A) x 1, (B) x 3, (A) x 3, (B) x 2, (A) x 3, (B) x 1, (A) x 3, (B) x 2, (A) x 3, (B) x 3, (A) x 1, (B) x 3, (A) x 3, (B) x 2, (A) x 3
Round 20: (A) x 3, (B) x 2, (A) x 4, (B) x 3, (A) x 1, (B) x 3, (A) x 4, (B) x 2, (A) x 5, (B) x 2, (A) x 4, (B) x 3, (A) x 1, (B) x 3, (A) x 4, (B) x 2, (A) x 5, (B) x 2, (A) x 4, (B) x 3, (A) x 1, (B) x 3, (A) x 4, (B) x 2, (A) x 2
Round 21: (A) x 9, (B) x 3, (A) x 1, (B) x 3, (A) x 17, (B) x 3, (A) x 1, (B) x 3, (A) x 17, (B) x 3, (A) x 1, (B) x 3, (A) x 8
Round 22: (A) x 5, (B) x 4, (A) x 7, (B) x 4, (A) x 9, (B) x 4, (A) x 7, (B) x 4, (A) x 9, (B) x 4, (A) x 7, (B) x 4, (A) x 4
Round 23: (B) x 5, (A) x 4, (B) x 7, (A) x 4, (B) x 9, (A) x 4, (B) x 7, (A) x 4, (B) x 9, (A) x 4, (B) x 7, (A) x 4, (B) x 4
Round 24: (B) x 7, (A) x 2, (B) x 3, (A) x 1, (B) x 3, (A) x 2, (B) x 13, (A) x 2, (B) x 3, (A) x 1, (B) x 3, (A) x 2, (B) x 13, (A) x 2, (B) x 3, (A) x 1, (B) x 3, (A) x 2, (B) x 6
Round 25: (B) x 3, (A) x 3, (B) x 1, (A) x 2, (B) x 2, (A) x 3, (B) x 2, (A) x 2, (B) x 1, (A) x 3, (B) x 5, (A) x 3, (B) x 1, (A) x 2, (B) x 2, (A) x 3, (B) x 2, (A) x 2, (B) x 1, (A) x 3, (B) x 5, (A) x 3, (B) x 1, (A) x 2, (B) x 2, (A) x 3, (B) x 2, (A) x 2, (B) x 1, (A) x 3, (B) x 2
Round 26: (B) x 3, (A) x 3, (B) x 4, (A) x 2, (B) x 1, (A) x 2, (B) x 4, (A) x 3, (B) x 5, (A) x 3, (B) x 4, (A) x 2, (B) x 1, (A) x 2, (B) x 4, (A) x 3, (B) x 5, (A) x 3, (B) x 4, (A) x 2, (B) x 1, (A) x 2, (B) x 4, (A) x 3, (B) x 2
Round 27: (B) x 4, (A) x 2, (B) x 4, (A) x 1, (B) x 3, (A) x 1, (B) x 4, (A) x 2, (B) x 7, (A) x 2, (B) x 4, (A) x 1, (B) x 3, (A) x 1, (B) x 4, (A) x 2, (B) x 7, (A) x 2, (B) x 4, (A) x 1, (B) x 3, (A) x 1, (B) x 4, (A) x 2, (B) x 3
Round 28: (B) x 1, (A) x 2, (B) x 19, (A) x 2, (B) x 1, (A) x 2, (B) x 19, (A) x 2, (B) x 1, (A) x 2, (B) x 19, (A) x 2
Round 29: (B) x 2, (A) x 1, (B) x 9, (A) x 1, (B) x 9, (A) x 1, (B) x 3, (A) x 1, (B) x 9, (A) x 1, (B) x 9, (A) x 1, (B) x 3, (A) x 1, (B) x 9, (A) x 1, (B) x 9, (A) x 1, (B) x 1
Round 30: (B) x 11, (A) x 3, (B) x 21, (A) x 3, (B) x 21, (A) x 3, (B) x 10
Round 31: (B) x 10, (A) x 2, (B) x 1, (A) x 2, (B) x 19, (A) x 2, (B) x 1, (A) x 2, (B) x 19, (A) x 2, (B) x 1, (A) x 2, (B) x 9
Round 32: (B) x 9, (A) x 2, (B) x 3, (A) x 2, (B) x 17, (A) x 2, (B) x 3, (A) x 2, (B) x 17, (A) x 2, (B) x 3, (A) x 2, (B) x 8
Round 33: (B) x 9, (A) x 1, (B) x 5, (A) x 1, (B) x 17, (A) x 1, (B) x 5, (A) x 1, (B) x 17, (A) x 1, (B) x 5, (A) x 1, (B) x 8
Chart
Chart is read right to left for all rounds. The white squares represent Color A and the pink squares represent Color B.
The next three rounds will be decrease rounds in order to shape the top of the hat. Fasten off Color A and continue with Color B.
Row 34: (B) *csc 10, csc2tog, repeat from * around. (66)
Row 35: (B) *csc 4, csc2tog, repeat from * around. (55)
Row 36: (B) *csc 3, csc2tog, repeat from * around. (44)
Fasten off leaving a long tail for sewing.
Weave in all other ends.
Finishing:
To close the top of the hat fold in half so join is in the center, sew through both sides at the top. You will have two open loops at the top your hat, bring the center of each loop into the middle and sew through both sides.
Now you will have four open loops, bring the center of each loop into the middle and stitch closed. You will have eight open loops. One at a time bring the center of each loop into the middle and stitch closed. Fasten off and weave in ends. Make a large pom-pom with remaining yarn and attach to the top of the hat (optional).
See Video Tutorial for a more detailed look at how to finish your hat.
I am so happy to finally have this hat pattern out in the world. I hope you love making it too. If you make one, I’d love to see it. Make sure to tag me @meghanmakesdo on socials and use #thevienohat so I can share.
Don’t forget you can also get a PDF version of this hat in my shop, Etsy or Ravelry.
Happy Crocheting,
Meghan